display BMW X5 2016 F15 Owner's Manual
[x] Cancel search | Manufacturer: BMW, Model Year: 2016, Model line: X5, Model: BMW X5 2016 F15Pages: 275, PDF Size: 6.46 MB
Page 170 of 275
Switching on1.Switch off the ignition.2. Press the right side of the button
on the driver's side.
The symbol appears on the automatic cli‐
mate Control Display.
The interior temperature, air volume and air
distribution can be adjusted with the ignition
switched on.
Switch off
At the lowest fan speed, press the left side of
the button on the driver's side.
The symbol on the display of the automatic
climate control flashes.
Defrosts windows and removes
condensation
Press button.
Ice and condensation are quickly re‐
moved from the windshield and the front side
windows.
For this purpose, point the side vents onto the
side windows as needed.
Adjust air flow with the program active.
If the windows are fogged over, you can also
switch on the cooling function or press the AUTO button to utilize the condensation sen‐
sor.
Rear window defroster Press button.
The rear window defroster switches
off automatically after a certain period of time.
Microfilter/activated-charcoal filter
The microfilter removes dust and pollen from
the incoming air.
The activated-charcoal filter removes gaseous
pollutants from the outside air that enters the
vehicle.
This combined filter should be replaced during
scheduled maintenance, refer to page 238, of
your vehicle.
Ventilation
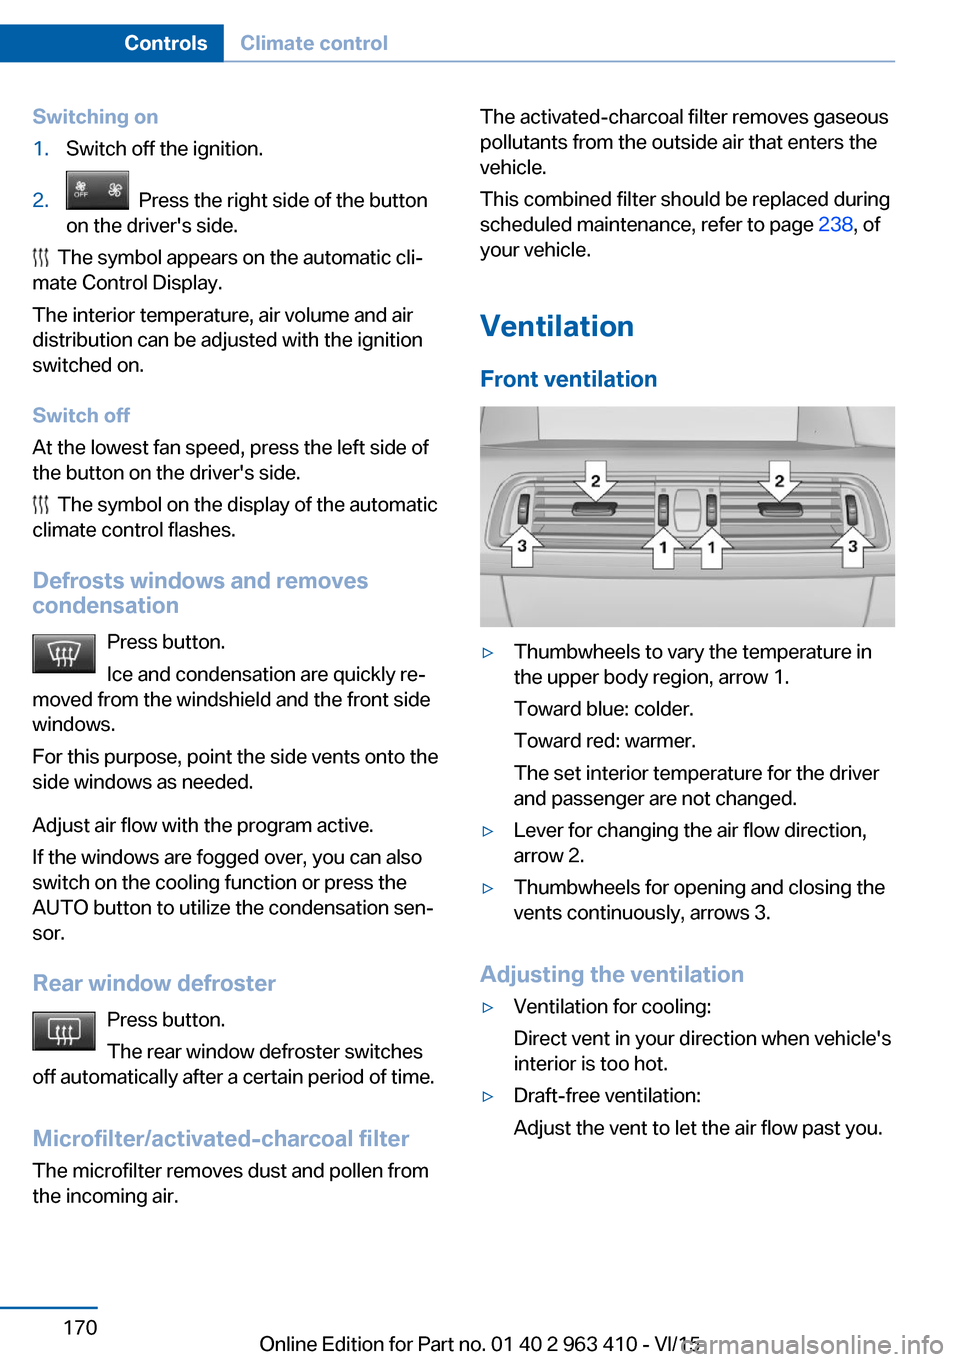
Front ventilation▷Thumbwheels to vary the temperature in
the upper body region, arrow 1.
Toward blue: colder.
Toward red: warmer.
The set interior temperature for the driver
and passenger are not changed.▷Lever for changing the air flow direction,
arrow 2.▷Thumbwheels for opening and closing the
vents continuously, arrows 3.
Adjusting the ventilation
▷Ventilation for cooling:
Direct vent in your direction when vehicle's
interior is too hot.▷Draft-free ventilation:
Adjust the vent to let the air flow past you.Seite 170ControlsClimate control170
Online Edition for Part no. 01 40 2 963 410 - VI/15
Page 172 of 275
5Display6Maximum cooling7Seat heating 56
Switching the rear automatic climate
control on/off
1."Settings"2."Climate"3."Rear climate"
The rear automatic climate control is not op‐
erational if the automatic climate control is
switched off or if the function for defrosting or
defogging the windows is active.
Switching the system on/off
Switching on Press any button except:
▷Left side of Air volume button.▷Seat heating.
Switch off
Press and hold the left button.
Temperature Turn the ring to set the desired
temperature.
The automatic climate control achieves this
temperature as quickly as possible, if needed
by using the maximum cooling or heating ca‐
pacity, and then keeps it constant.
Do not rapidly switch between different tem‐
perature settings. The automatic climate con‐
trol will not have sufficient time to adjust the
set temperature.
Maximum cooling
Press button.
The system is set to the lowest tem‐
perature, maximum air flow and air circulation
mode.
Air flows out of the vents to the upper body re‐
gion. The vents need to be open for this.
Air is cooled as quickly as possible:▷At an external temperature of approx.
32 ℉/0 ℃.▷When the engine is running.
AUTO program
Press button.
Air flow, air distribution, and tempera‐
ture are controlled automatically:
Depending on the selected temperature, the
AUTO intensity, and outside influences, the air
is directed to the upper body and into the foot‐
well.
The cooling function is switched on automati‐
cally with the AUTO program.
Intensity of the AUTO programWith the AUTO program activated, the auto‐
matic intensity control can be changed:
Press the left or right side of the but‐
ton: decrease or increase the inten‐
sity.
The selected intensity is shown on the display
of the automatic climate control.
Air flow, manual
To manually adjust air flow turn off AUTO pro‐
gram first.
Press the left or right side of the but‐
ton: decrease or increase air flow.
The selected air flow is shown on the display of
the automatic climate control.
Seite 172ControlsClimate control172
Online Edition for Part no. 01 40 2 963 410 - VI/15
Page 173 of 275
Manual air distribution
The air distribution can be adjusted to individ‐
ual needs.
Press button repeatedly to select a
program:▷Upper body region.▷Upper body region and footwell.▷Footwell.
Parked-car ventilation
The concept The parked-car ventilation ventilates the vehi‐
cle interior and lowers its temperature, if
needed.
The system can be switched on and off di‐
rectly or by using two preset departure times.
The reel-on time is automatically determined
based on the temperature. The system
promptly switches on before the selected de‐
parture time.
Operation can be performed via iDrive.
Functional requirements
Parked-car ventilation
▷When the departure time is preselected:
depends on internal, external and set tem‐
perature.▷Direct operation: any external temperature.
Open the vents to allow air to flow out.
Switching on/off directly
On the Control Display:
1."Settings"2."Climate"3."Activate now"
The symbol on the automatic climate con‐
trol flashes if the system is switched on.
The system continues to run for some time af‐
ter being switched off.
Setting departure time
On the Control Display:1."Settings"2."Climate"3.Select the departure time.
Turn the controller until the desired depar‐
ture time field has been selected and press
Controller.4.Set the time.
Turn the controller until the desired time is
set and press the controller.
Activating the departure time
On the Control Display:
1."Settings"2."Climate"3.Activating the desired departure time:
"for departure at"
The symbol on the automatic climate con‐
trol lights up when the departure time is acti‐
vated.
The symbol on the automatic climate con‐
trol flashes when the system has been
switched on.
The system will only be switched on within the
next 24 hours. After that, it needs to be reacti‐
vated.
Seite 173Climate controlControls173
Online Edition for Part no. 01 40 2 963 410 - VI/15
Page 200 of 275
Avoid high engine speeds
As a rule: driving at low engine speeds lowers
fuel consumption and reduces wear.
If necessary, observe the gear shift indicator of
the vehicle, refer to page 96.
Use coasting
When approaching a red light, take your foot
off the accelerator and let the vehicle coast to
a halt.
For going downhill take your foot off the accel‐
erator and let the vehicle roll.
The flow of fuel is interrupted while coasting.
Switch off the engine during longer stops
Switch off the engine during longer stops, e.g.,
at traffic lights, railroad crossings or in traffic
congestion.
Auto Start/Stop function The Auto Start/Stop function of your vehicle
automatically switches off the engine during a
stop.
If the engine is switched off and then restarted
rather than leaving the engine running con‐
stantly, fuel consumption and emissions are
reduced. Savings can begin within a few sec‐
onds of switching off the engine.
In addition, fuel consumption is also deter‐
mined by other factors, such as driving style,
road conditions, maintenance or environmental
factors.
Switch off any functions that
are not currently needed
Functions such as seat heating and the rear
window defroster require a lot of energy andreduce the range, especially in city and stop-
and-go traffic.
Switch off these functions if they are not needed.
The ECO PRO driving program supports the
energy conserving use of comfort features.
These functions are automatically deactivated
partially or completely.
Have maintenance carriedout
Have vehicles maintained regularly to achieve
optimal vehicle efficiency and service life.
BMW recommends that maintenance work be
performed by a BMW dealer’s service center.
For information on the BMW Maintenance
System, refer to page 238.
ECO PRO
The concept ECO PRO supports a driving style that saves
on fuel consumption. For this purpose, the en‐
gine control and comfort features, e. g. the cli‐
mate control output, are adjusted.
Under certain conditions the engine is auto‐
matically decoupled from the transmission in
the D selector lever position. The vehicle con‐
tinues traveling with the engine idling to re‐
duce fuel consumption. Selector lever position
D remains engaged.
In addition, context-sensitive instructions are
displayed to assist with an optimized fuel con‐
sumption driving style.
The achieved extended range is displayed in
the instrument cluster as bonus range.
Overview The system includes the following
EfficientDynamics functions and displays:▷ECO PRO bonus range, refer to page 201.Seite 200Driving tipsSaving fuel200
Online Edition for Part no. 01 40 2 963 410 - VI/15
Page 201 of 275
▷ECO PRO tips driving instruction, refer to
page 202▷ECO PRO climate control, refer to
page 201.▷ECO PRO coasting driving status, refer to
page 203.
Activate ECO PRO
Press button repeatedly until ECO
PRO is displayed in the instrument
cluster.
Configuring ECO PRO
Via the Driving Dynamics Control
1.Activate ECO PRO.2."Configure ECO PRO"3.Configure the program.
Via the iDrive
1."Settings"2."ECO PRO mode"
or
1."Settings"2."Driving mode"3."Configure ECO PRO"
Configure the program.
ECO PRO Tip
▷"Tip at:":
Adjust the ECO PRO speed.▷"ECO PRO speed warning":
The output is reduced once the set ECO
PRO speed is reached.
Coasting
Fuel-efficiency can be optimized by disengag‐
ing the engine and Coasting, refer to
page 203, with the engine idling.
This function is only available in ECO PRO
mode.
ECO PRO climate control
"ECO PRO climate control"
Climate control is set to be fuel-efficient.
By making a slight change to the set tempera‐
ture, or slowly adjusting the rate of heating or
cooling of the car's interior, fuel consumption
can be economized.
The mirror heating is made available when out‐
side temperatures are very cold.
ECO PRO potential Shows potential savings with the current set‐
tings in percentages.
Display in the instrument cluster
Display in the instrument display
When ECO PRO mode is activated, the display
switches to a special configuration.
Some of the displays may differ from the dis‐
play in the instrument cluster.
Blue bar segments symbolize the gained bo‐
nus range in stages.
In addition, the bonus range is highlighted in
blue in the total range display.
ECO PRO bonus range An adjusted driving style helps
you extend your driving range.
This may be displayed as the
bonus range in the instrument
cluster.
The bonus range is shown in the range display.
The bonus range is automatically reset every
time the vehicle is refueled.Seite 201Saving fuelDriving tips201
Online Edition for Part no. 01 40 2 963 410 - VI/15
Page 202 of 275
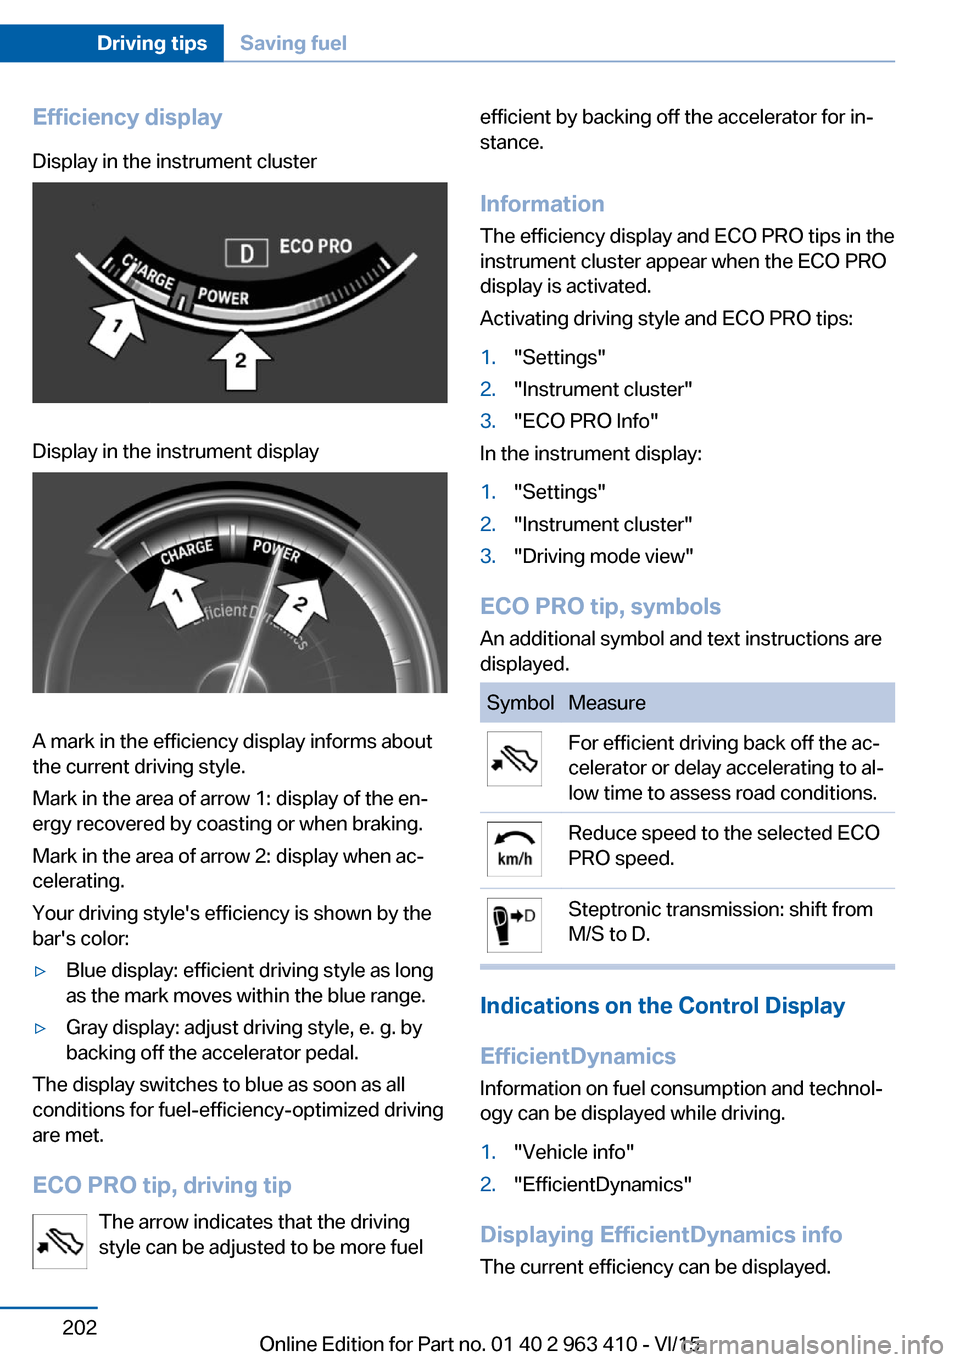
Efficiency displayDisplay in the instrument clusterDisplay in the instrument display
A mark in the efficiency display informs about
the current driving style.
Mark in the area of arrow 1: display of the en‐
ergy recovered by coasting or when braking.
Mark in the area of arrow 2: display when ac‐
celerating.
Your driving style's efficiency is shown by the
bar's color:
▷Blue display: efficient driving style as long
as the mark moves within the blue range.▷Gray display: adjust driving style, e. g. by
backing off the accelerator pedal.
The display switches to blue as soon as all
conditions for fuel-efficiency-optimized driving
are met.
ECO PRO tip, driving tip The arrow indicates that the driving
style can be adjusted to be more fuel
efficient by backing off the accelerator for in‐
stance.
Information The efficiency display and ECO PRO tips in the
instrument cluster appear when the ECO PRO
display is activated.
Activating driving style and ECO PRO tips:1."Settings"2."Instrument cluster"3."ECO PRO Info"
In the instrument display:
1."Settings"2."Instrument cluster"3."Driving mode view"
ECO PRO tip, symbols
An additional symbol and text instructions are
displayed.
SymbolMeasureFor efficient driving back off the ac‐
celerator or delay accelerating to al‐
low time to assess road conditions.Reduce speed to the selected ECO
PRO speed.Steptronic transmission: shift from
M/S to D.
Indications on the Control Display
EfficientDynamics Information on fuel consumption and technol‐
ogy can be displayed while driving.
1."Vehicle info"2."EfficientDynamics"
Displaying EfficientDynamics info
The current efficiency can be displayed.
Seite 202Driving tipsSaving fuel202
Online Edition for Part no. 01 40 2 963 410 - VI/15
Page 203 of 275
"EfficientDynamics info"
The following systems are displayed:▷Auto Start/Stop function.▷Energy recovery.▷Climate control output.▷Coasting.
Display ECO PRO tips
"ECO PRO tips"
Settings are stored for the profile currently
used.
Coasting
The concept The system helps to conserve fuel.
To do this, under certain conditions the engine
is automatically decoupled from the transmis‐
sion when selector lever position D is set. The
vehicle continues traveling with the engine
idling to reduce fuel consumption. Selector
lever position D remains engaged.
This driving condition is referred to as coast‐
ing.
As soon as you step on the brake or accelera‐
tor pedal, the engine is automatically coupled
again.
Information Coasting is a component of the ECO PRO, re‐
fer to page 200, driving mode.
Coasting is automatically activated when ECO
PRO mode is called via the Driving Dynamics
Control.
The function is available in a certain speed
range.
A proactively driving style helps the driver to
use the function as often as possible and sup‐
ports the fuel-conserving effect of coasting.
Safety mode
The function is not available under one of the
following conditions.▷DSC OFF or TRACTION activated.▷Driving in the dynamic limit range and on
steep uphill or downhill grades.▷Battery charge status temporarily too low
or vehicle electrical system drawing exces‐
sive current.▷Cruise control activated.
Functional requirements
In ECO PRO mode, this function is available in
a speed range from approximately 30 mph, ap‐
prox. 50 km/h to 100 mph, approx. 160 km/h, if
the following conditions are met:
▷Accelerator pedal and brake pedal are not
operated.▷The selector lever is in selector lever posi‐
tion D.▷Engine and transmission are at operating
temperature.
The driving status Coast can be influenced
with the shift paddles.
Display Display in the instrument cluster The mark in the efficiency dis‐
play below the tachometer is
backlit in blue and is located at
the zero point. The tachometer
approximately indicates idle
speed.
The coasting point indicator is illuminated at
the zero point during coasting.
Display in the instrument display The mark in the efficiency dis‐
play is backlit in blue and is lo‐
cated at the zero point.
Seite 203Saving fuelDriving tips203
Online Edition for Part no. 01 40 2 963 410 - VI/15
Page 204 of 275
The coasting point indicator is illuminated at
the zero point during coasting.
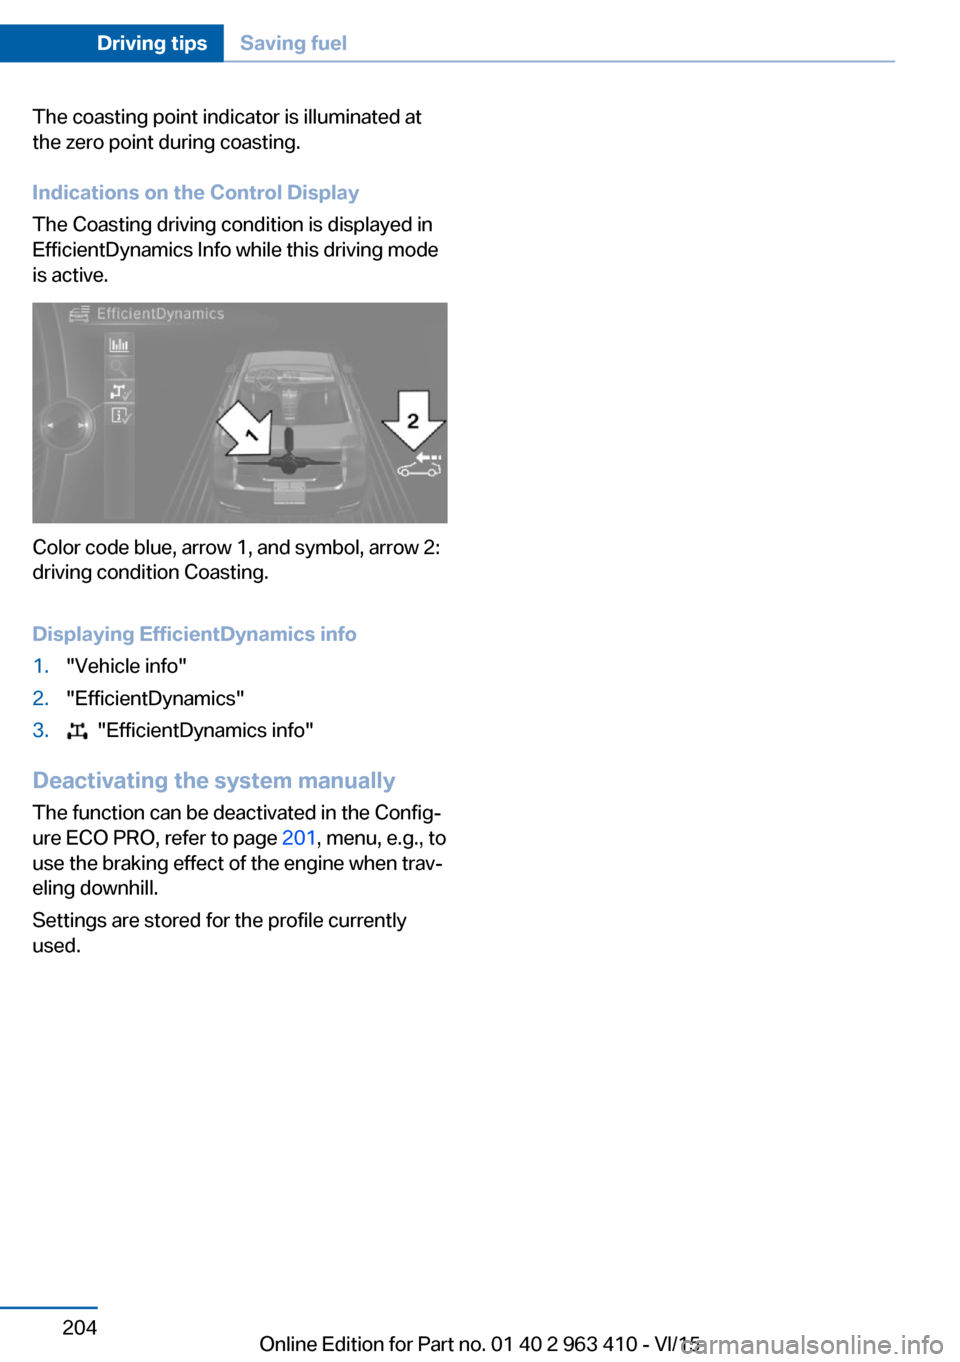
Indications on the Control Display
The Coasting driving condition is displayed in
EfficientDynamics Info while this driving mode
is active.
Color code blue, arrow 1, and symbol, arrow 2:
driving condition Coasting.
Displaying EfficientDynamics info
1."Vehicle info"2."EfficientDynamics"3. "EfficientDynamics info"
Deactivating the system manually The function can be deactivated in the Config‐
ure ECO PRO, refer to page 201, menu, e.g., to
use the braking effect of the engine when trav‐
eling downhill.
Settings are stored for the profile currently
used.
Seite 204Driving tipsSaving fuel204
Online Edition for Part no. 01 40 2 963 410 - VI/15
Page 212 of 275
To be able to start the engine as usual, there
must be an adequate Diesel exhaust fluid.
Warming up the system In order to warm the engine up to its operating
temperature after a cold start, the Steptronic
transmission may subsequently shift up to the
next higher gear.
Displays in the instrument cluster
Reserve indication
This display in the instrument cluster provides
information about the distance that can still be
driven with the current reserve level.
Do not continue driving to the limit of the re‐
maining travel distance. It is not possible to re‐
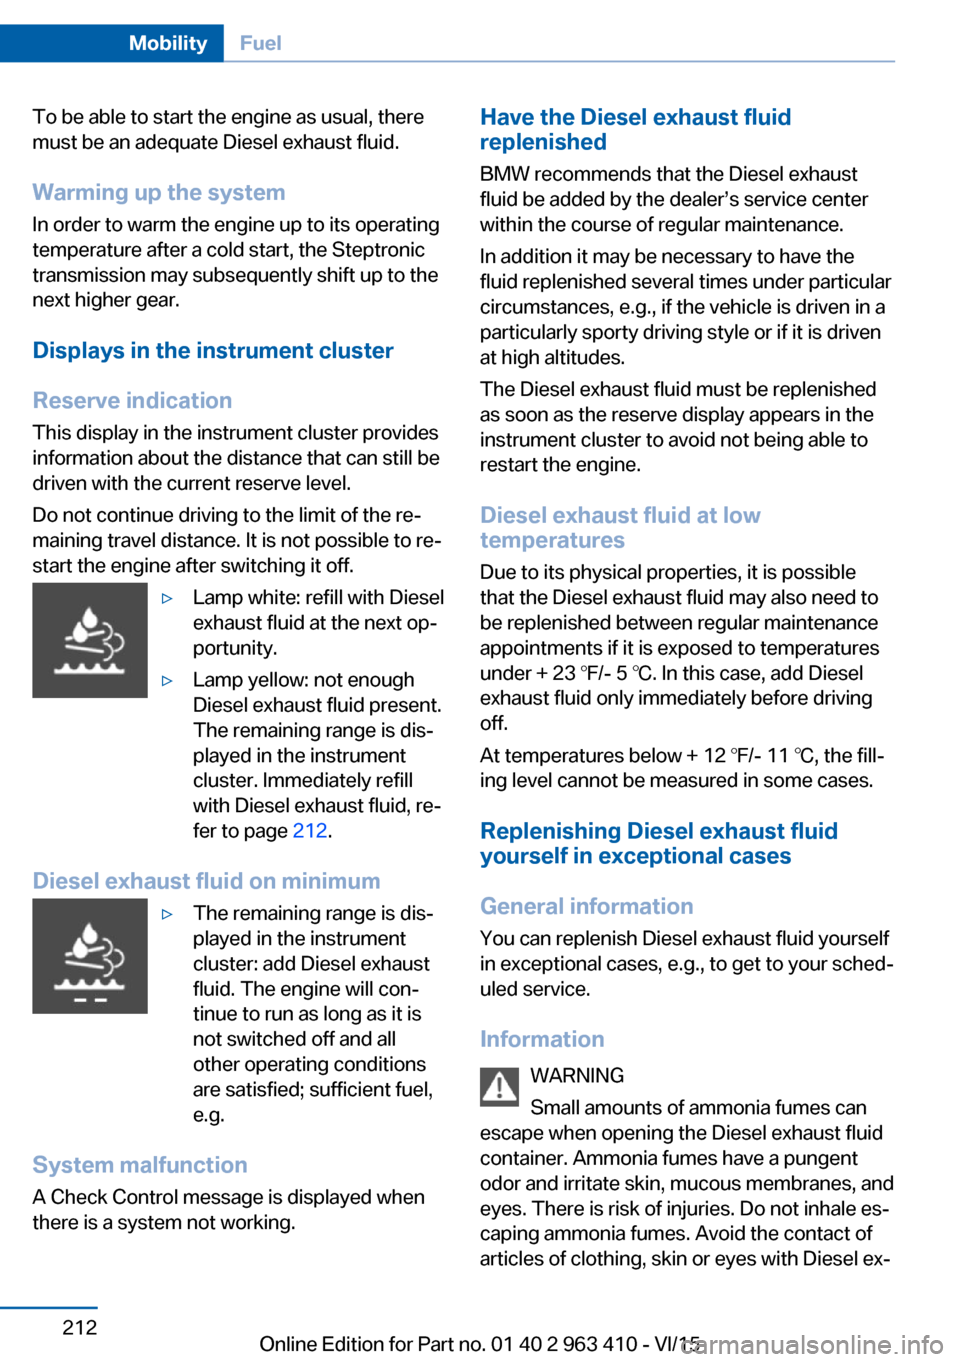
start the engine after switching it off.▷Lamp white: refill with Diesel
exhaust fluid at the next op‐
portunity.▷Lamp yellow: not enough
Diesel exhaust fluid present.
The remaining range is dis‐
played in the instrument
cluster. Immediately refill
with Diesel exhaust fluid, re‐
fer to page 212.
Diesel exhaust fluid on minimum
▷The remaining range is dis‐
played in the instrument
cluster: add Diesel exhaust
fluid. The engine will con‐
tinue to run as long as it is
not switched off and all
other operating conditions
are satisfied; sufficient fuel,
e.g.
System malfunction
A Check Control message is displayed when
there is a system not working.
Have the Diesel exhaust fluid
replenished
BMW recommends that the Diesel exhaust
fluid be added by the dealer’s service center
within the course of regular maintenance.
In addition it may be necessary to have the
fluid replenished several times under particular
circumstances, e.g., if the vehicle is driven in a
particularly sporty driving style or if it is driven
at high altitudes.
The Diesel exhaust fluid must be replenished
as soon as the reserve display appears in the
instrument cluster to avoid not being able to
restart the engine.
Diesel exhaust fluid at low
temperatures
Due to its physical properties, it is possible
that the Diesel exhaust fluid may also need to
be replenished between regular maintenance
appointments if it is exposed to temperatures
under + 23 ℉/- 5 ℃. In this case, add Diesel
exhaust fluid only immediately before driving
off.
At temperatures below + 12 ℉/- 11 ℃, the fill‐
ing level cannot be measured in some cases.
Replenishing Diesel exhaust fluid
yourself in exceptional cases
General information
You can replenish Diesel exhaust fluid yourself
in exceptional cases, e.g., to get to your sched‐
uled service.
Information WARNING
Small amounts of ammonia fumes can
escape when opening the Diesel exhaust fluid
container. Ammonia fumes have a pungent
odor and irritate skin, mucous membranes, and
eyes. There is risk of injuries. Do not inhale es‐
caping ammonia fumes. Avoid the contact of
articles of clothing, skin or eyes with Diesel ex‐Seite 212MobilityFuel212
Online Edition for Part no. 01 40 2 963 410 - VI/15
Page 213 of 275
haust fluid. Do not swallow any Diesel exhaust
fluid. Keep children away from Diesel exhaust
fluids.◀
WARNING
Operating materials, e.g. oils, greases,
coolants, fuels, can contain harmful ingredi‐
ents. There is risk of injuries or danger to life.
Observe the instructions on the containers.
Avoid the contact of articles of clothing, skin or
eyes with operating materials. Do not refill op‐
erating materials into different bottles. Store
operating materials out of reach of children.◀
CAUTION
The Diesel exhaust fluid ingredients are
very aggressive. There is risk of property dam‐
age. Avoid contact of Diesel exhaust fluid with
surfaces of the vehicle.◀
Suitable Diesel exhaust fluid▷Recommended: BMW Diesel Exhaust
Fluid. With this bottle and its special
adapter, Diesel exhaust fluid can be replen‐
ished simply and safely.▷Alternatively recommended: NOx Diesel
exhaust fluid AUS 32.
Diesel exhaust fluid can be purchased at a
dealer’s service center or another qualified
service center or repair shop.
Refill quantity
When the Reserve display starts, add at least
3 bottles of Diesel exhaust fluid.
This corresponds to approx. 1.5 US gal/6 liters.
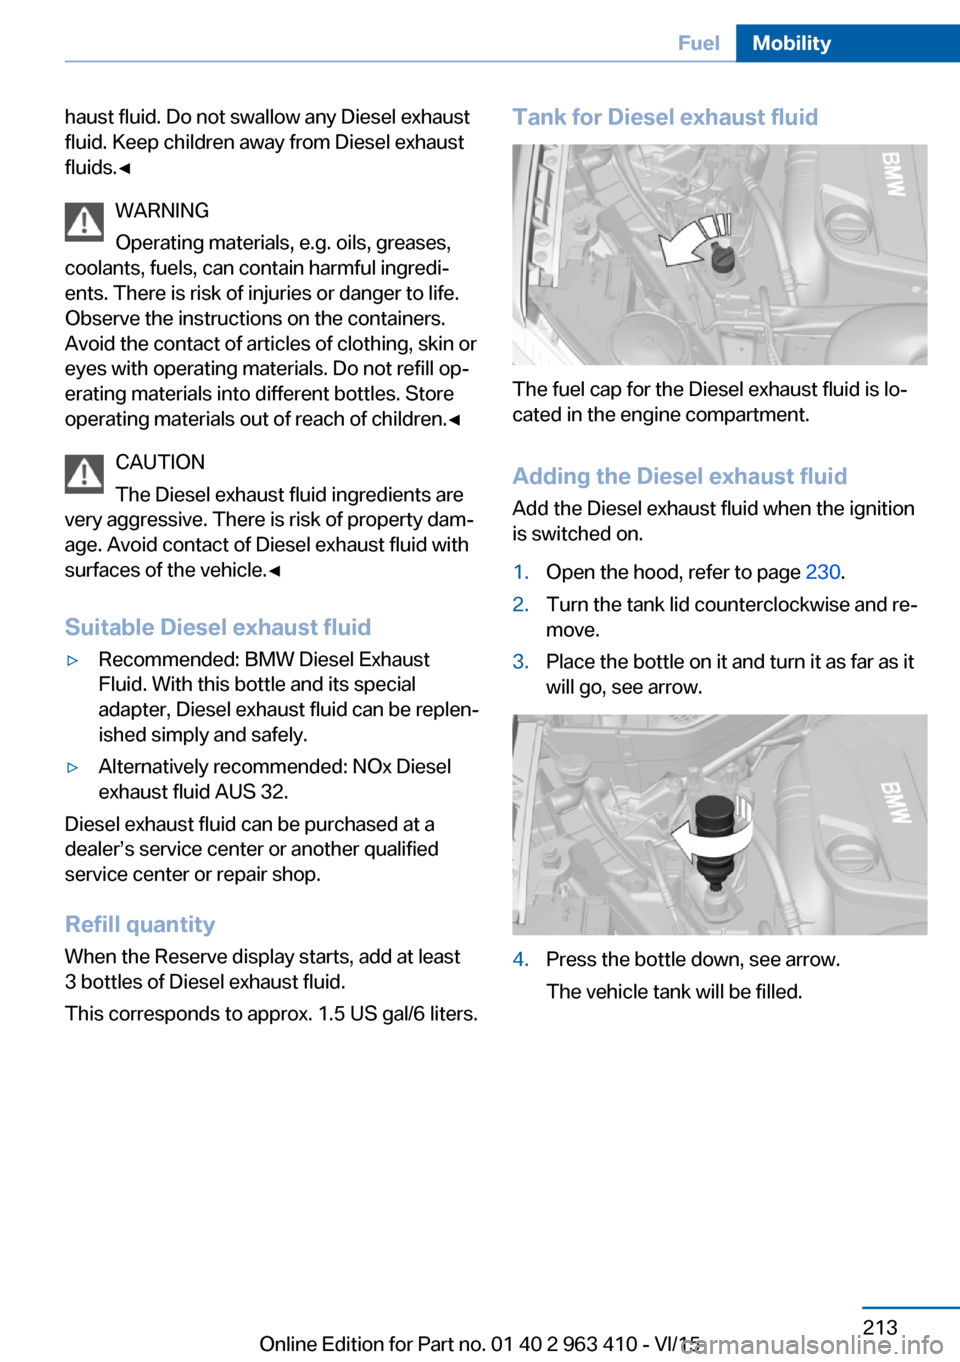
Tank for Diesel exhaust fluid
The fuel cap for the Diesel exhaust fluid is lo‐
cated in the engine compartment.
Adding the Diesel exhaust fluid
Add the Diesel exhaust fluid when the ignition
is switched on.
1.Open the hood, refer to page 230.2.Turn the tank lid counterclockwise and re‐
move.3.Place the bottle on it and turn it as far as it
will go, see arrow.4.Press the bottle down, see arrow.
The vehicle tank will be filled.Seite 213FuelMobility213
Online Edition for Part no. 01 40 2 963 410 - VI/15