fan BMW X5 2016 F15 Owner's Manual
[x] Cancel search | Manufacturer: BMW, Model Year: 2016, Model line: X5, Model: BMW X5 2016 F15Pages: 275, PDF Size: 6.46 MB
Page 54 of 275
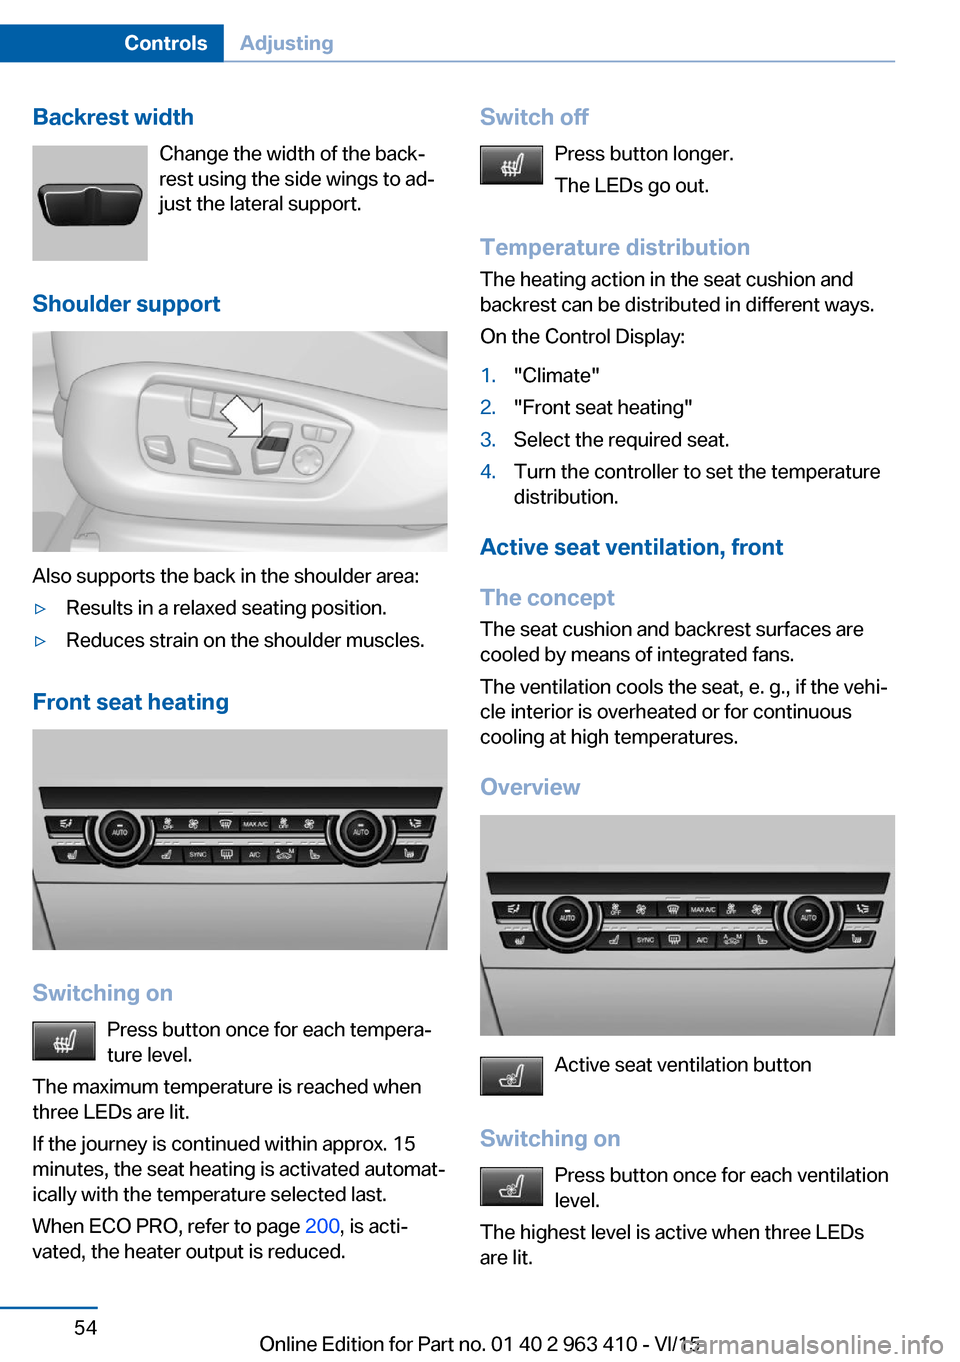
Backrest widthChange the width of the back‐
rest using the side wings to ad‐
just the lateral support.
Shoulder support
Also supports the back in the shoulder area:
▷Results in a relaxed seating position.▷Reduces strain on the shoulder muscles.
Front seat heating
Switching on Press button once for each tempera‐
ture level.
The maximum temperature is reached when
three LEDs are lit.
If the journey is continued within approx. 15
minutes, the seat heating is activated automat‐
ically with the temperature selected last.
When ECO PRO, refer to page 200, is acti‐
vated, the heater output is reduced.
Switch off
Press button longer.
The LEDs go out.
Temperature distribution
The heating action in the seat cushion and
backrest can be distributed in different ways.
On the Control Display:1."Climate"2."Front seat heating"3.Select the required seat.4.Turn the controller to set the temperature
distribution.
Active seat ventilation, front
The concept The seat cushion and backrest surfaces are
cooled by means of integrated fans.
The ventilation cools the seat, e. g., if the vehi‐
cle interior is overheated or for continuous
cooling at high temperatures.
Overview
Active seat ventilation button
Switching on Press button once for each ventilation
level.
The highest level is active when three LEDs
are lit.
Seite 54ControlsAdjusting54
Online Edition for Part no. 01 40 2 963 410 - VI/15
Page 57 of 275
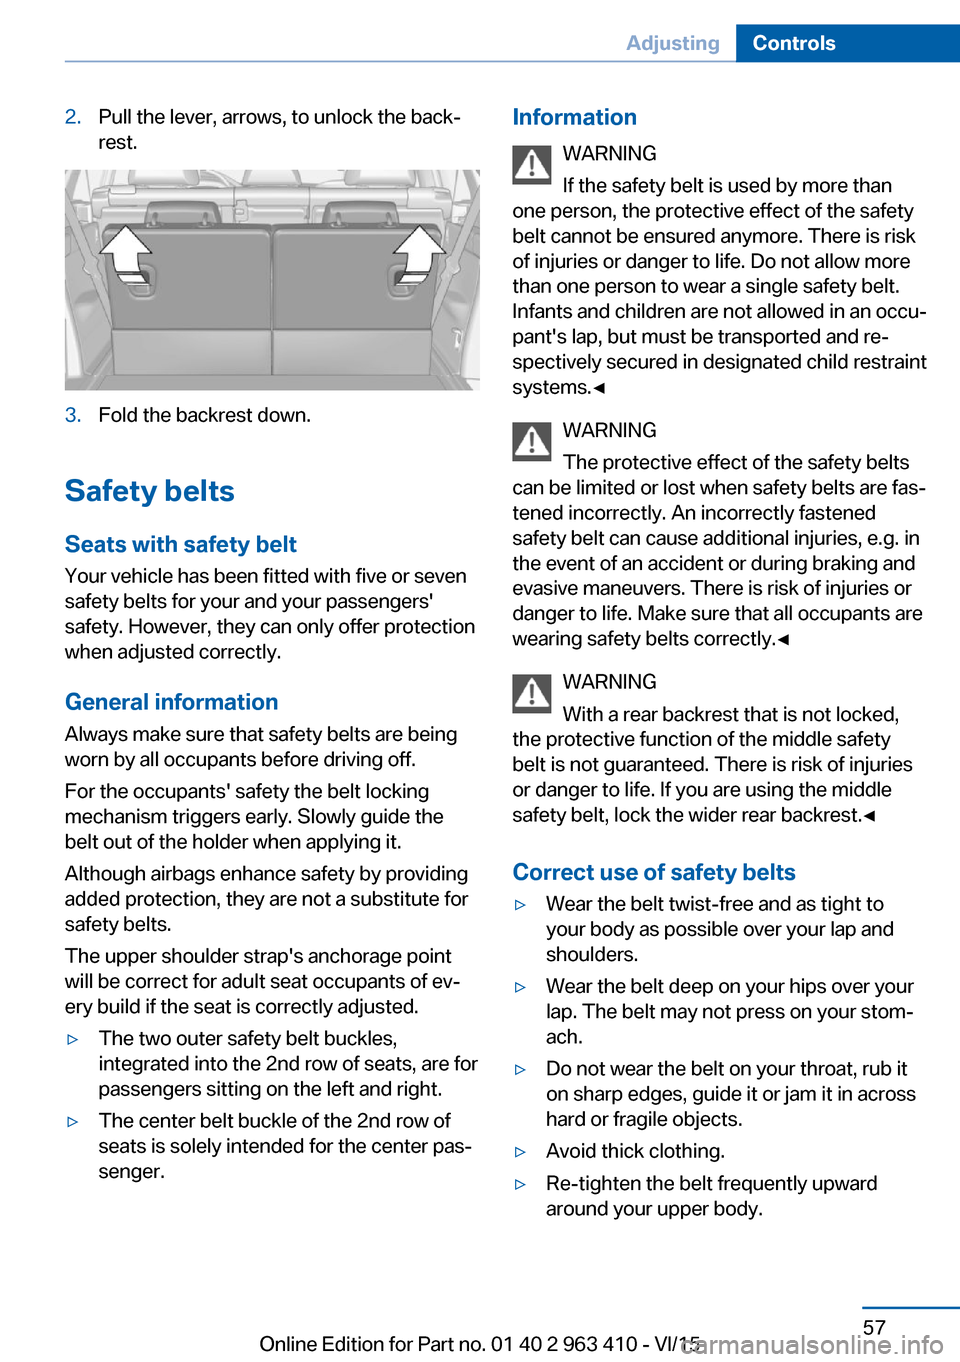
2.Pull the lever, arrows, to unlock the back‐
rest.3.Fold the backrest down.
Safety belts
Seats with safety belt
Your vehicle has been fitted with five or seven
safety belts for your and your passengers'
safety. However, they can only offer protection
when adjusted correctly.
General information Always make sure that safety belts are being
worn by all occupants before driving off.
For the occupants' safety the belt locking
mechanism triggers early. Slowly guide the
belt out of the holder when applying it.
Although airbags enhance safety by providing
added protection, they are not a substitute for
safety belts.
The upper shoulder strap's anchorage point
will be correct for adult seat occupants of ev‐
ery build if the seat is correctly adjusted.
▷The two outer safety belt buckles,
integrated into the 2nd row of seats, are for
passengers sitting on the left and right.▷The center belt buckle of the 2nd row of
seats is solely intended for the center pas‐
senger.Information
WARNING
If the safety belt is used by more than
one person, the protective effect of the safety
belt cannot be ensured anymore. There is risk
of injuries or danger to life. Do not allow more
than one person to wear a single safety belt.
Infants and children are not allowed in an occu‐
pant's lap, but must be transported and re‐
spectively secured in designated child restraint
systems.◀
WARNING
The protective effect of the safety belts
can be limited or lost when safety belts are fas‐
tened incorrectly. An incorrectly fastened
safety belt can cause additional injuries, e.g. in
the event of an accident or during braking and
evasive maneuvers. There is risk of injuries or
danger to life. Make sure that all occupants are
wearing safety belts correctly.◀
WARNING
With a rear backrest that is not locked,
the protective function of the middle safety
belt is not guaranteed. There is risk of injuries
or danger to life. If you are using the middle
safety belt, lock the wider rear backrest.◀
Correct use of safety belts▷Wear the belt twist-free and as tight to
your body as possible over your lap and
shoulders.▷Wear the belt deep on your hips over your
lap. The belt may not press on your stom‐
ach.▷Do not wear the belt on your throat, rub it
on sharp edges, guide it or jam it in across
hard or fragile objects.▷Avoid thick clothing.▷Re-tighten the belt frequently upward
around your upper body.Seite 57AdjustingControls57
Online Edition for Part no. 01 40 2 963 410 - VI/15
Page 170 of 275
Switching on1.Switch off the ignition.2. Press the right side of the button
on the driver's side.
The symbol appears on the automatic cli‐
mate Control Display.
The interior temperature, air volume and air
distribution can be adjusted with the ignition
switched on.
Switch off
At the lowest fan speed, press the left side of
the button on the driver's side.
The symbol on the display of the automatic
climate control flashes.
Defrosts windows and removes
condensation
Press button.
Ice and condensation are quickly re‐
moved from the windshield and the front side
windows.
For this purpose, point the side vents onto the
side windows as needed.
Adjust air flow with the program active.
If the windows are fogged over, you can also
switch on the cooling function or press the AUTO button to utilize the condensation sen‐
sor.
Rear window defroster Press button.
The rear window defroster switches
off automatically after a certain period of time.
Microfilter/activated-charcoal filter
The microfilter removes dust and pollen from
the incoming air.
The activated-charcoal filter removes gaseous
pollutants from the outside air that enters the
vehicle.
This combined filter should be replaced during
scheduled maintenance, refer to page 238, of
your vehicle.
Ventilation
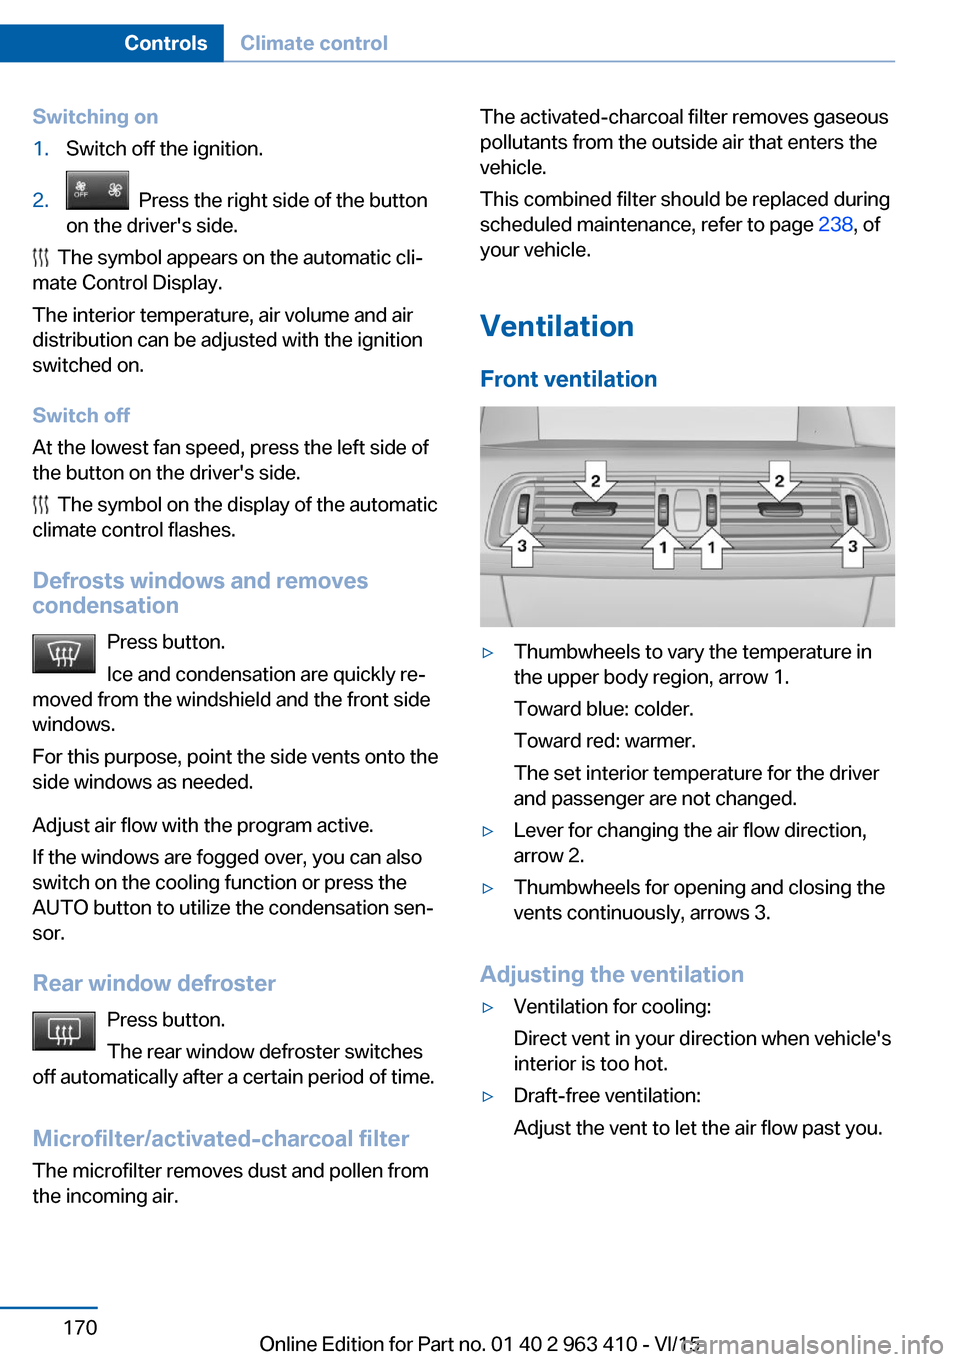
Front ventilation▷Thumbwheels to vary the temperature in
the upper body region, arrow 1.
Toward blue: colder.
Toward red: warmer.
The set interior temperature for the driver
and passenger are not changed.▷Lever for changing the air flow direction,
arrow 2.▷Thumbwheels for opening and closing the
vents continuously, arrows 3.
Adjusting the ventilation
▷Ventilation for cooling:
Direct vent in your direction when vehicle's
interior is too hot.▷Draft-free ventilation:
Adjust the vent to let the air flow past you.Seite 170ControlsClimate control170
Online Edition for Part no. 01 40 2 963 410 - VI/15
Page 171 of 275
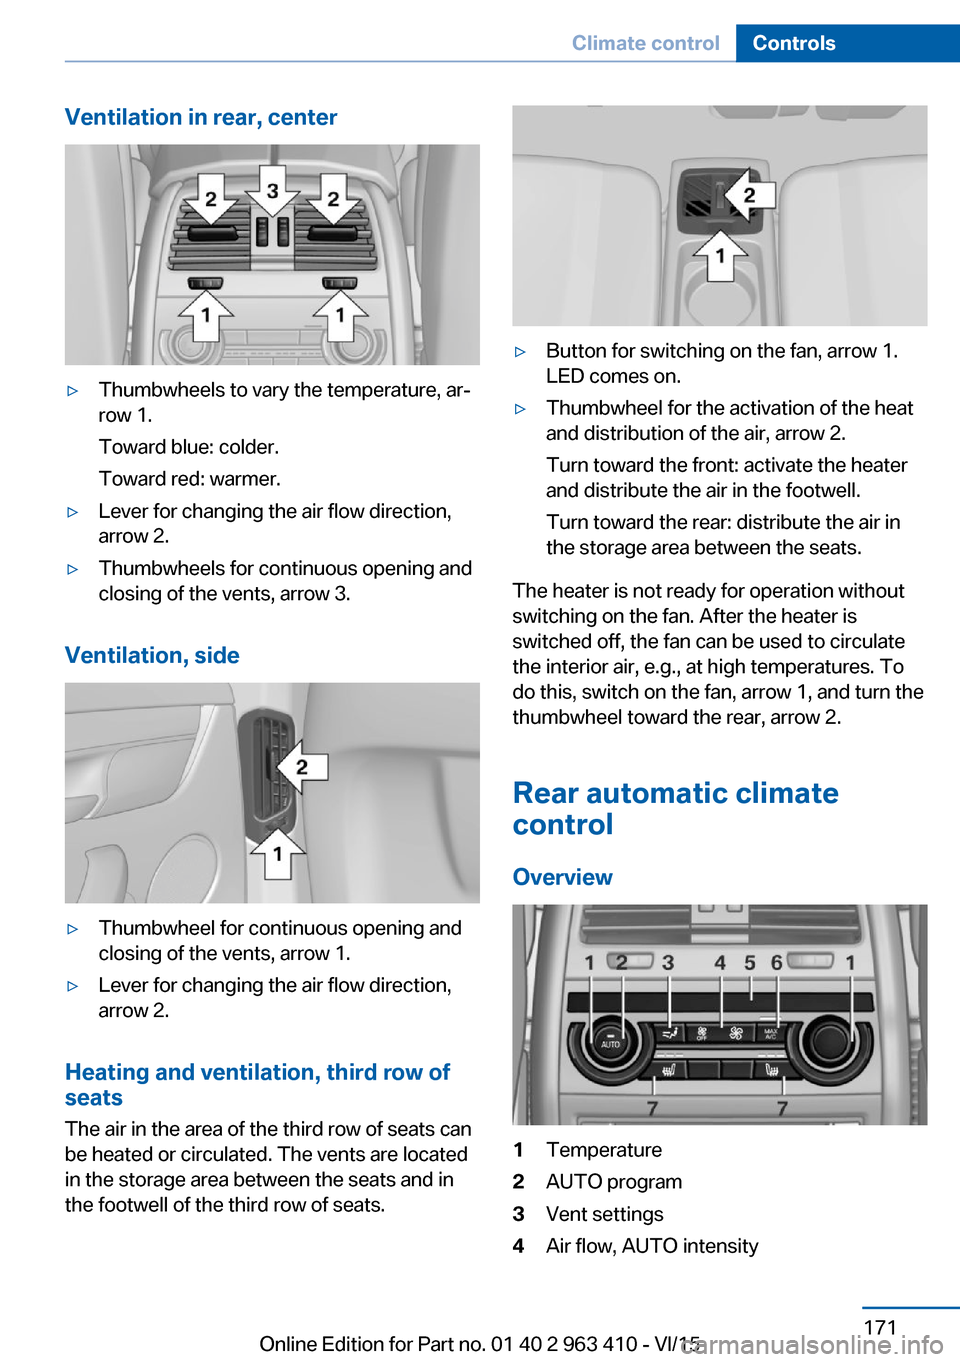
Ventilation in rear, center▷Thumbwheels to vary the temperature, ar‐
row 1.
Toward blue: colder.
Toward red: warmer.▷Lever for changing the air flow direction,
arrow 2.▷Thumbwheels for continuous opening and
closing of the vents, arrow 3.
Ventilation, side
▷Thumbwheel for continuous opening and
closing of the vents, arrow 1.▷Lever for changing the air flow direction,
arrow 2.
Heating and ventilation, third row of
seats
The air in the area of the third row of seats can
be heated or circulated. The vents are located
in the storage area between the seats and in
the footwell of the third row of seats.
▷Button for switching on the fan, arrow 1.
LED comes on.▷Thumbwheel for the activation of the heat
and distribution of the air, arrow 2.
Turn toward the front: activate the heater
and distribute the air in the footwell.
Turn toward the rear: distribute the air in
the storage area between the seats.
The heater is not ready for operation without
switching on the fan. After the heater is
switched off, the fan can be used to circulate
the interior air, e.g., at high temperatures. To
do this, switch on the fan, arrow 1, and turn the
thumbwheel toward the rear, arrow 2.
Rear automatic climate
control
Overview
1Temperature2AUTO program3Vent settings4Air flow, AUTO intensitySeite 171Climate controlControls171
Online Edition for Part no. 01 40 2 963 410 - VI/15
Page 179 of 275
USB interface for data
transfer
The concept Connection for importing and exporting data
on USB devices, e.g.:▷Personal Profile settings, refer to page 35.▷Music collection, see user's manual for
Navigation, Entertainment and Communi‐
cation.
Information
Observe the following when connecting:
▷Do not use force when plugging the con‐
nector into the USB interface.▷Do not connect devices such as fans or
lights to the USB interface.▷Do not connect USB hard drives.▷Do not use the USB interface for recharg‐
ing external devices.
With navigation system Professional
or TV: at a glance
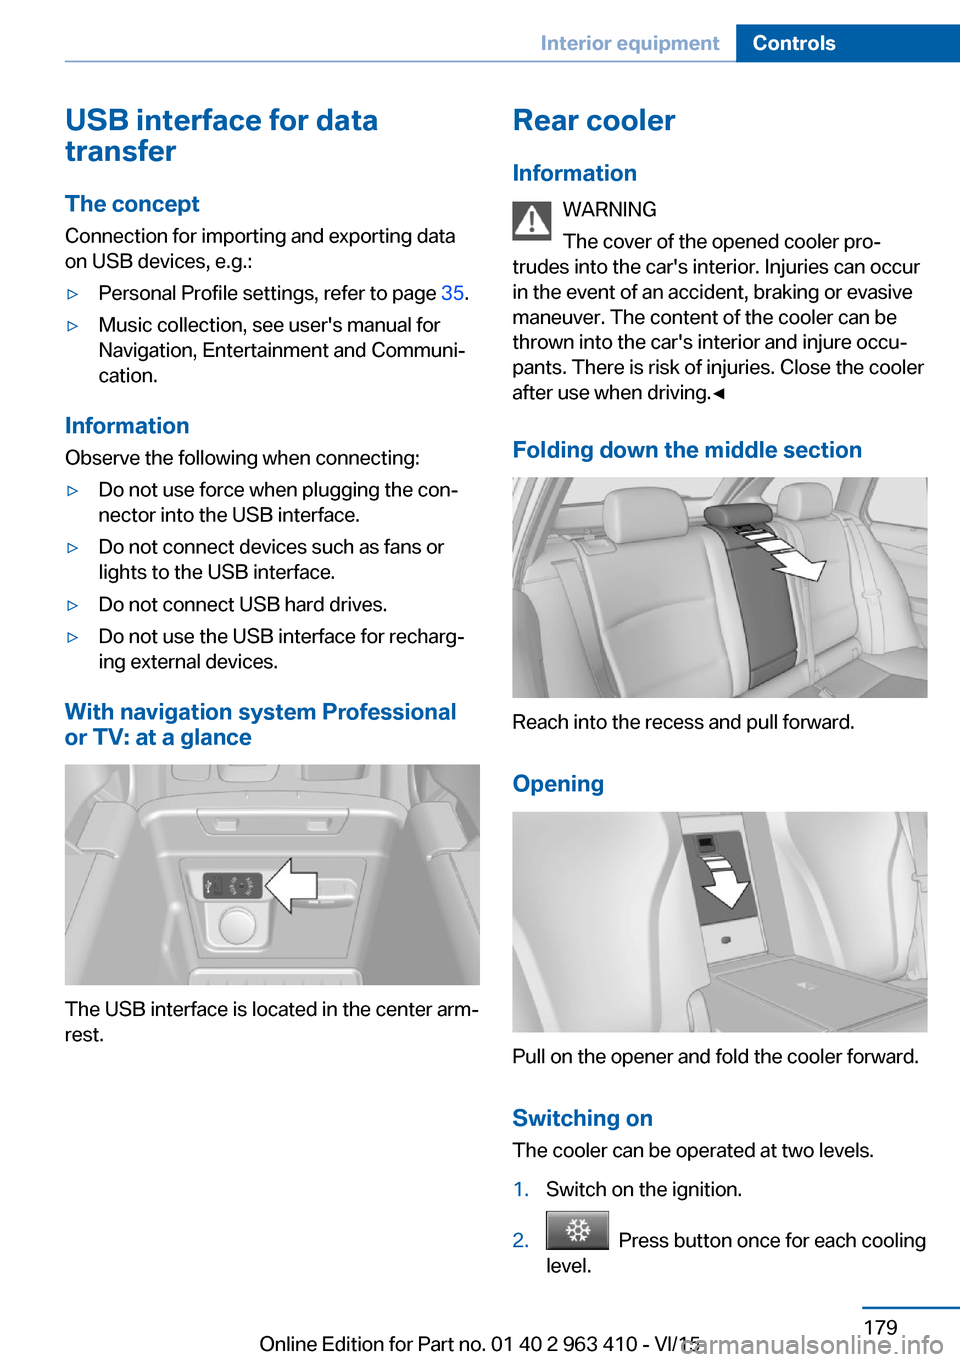
The USB interface is located in the center arm‐
rest.
Rear cooler
Information WARNING
The cover of the opened cooler pro‐
trudes into the car's interior. Injuries can occur
in the event of an accident, braking or evasive
maneuver. The content of the cooler can be
thrown into the car's interior and injure occu‐
pants. There is risk of injuries. Close the cooler
after use when driving.◀
Folding down the middle section
Reach into the recess and pull forward.
Opening
Pull on the opener and fold the cooler forward. Switching onThe cooler can be operated at two levels.
1.Switch on the ignition.2. Press button once for each cooling
level.
Seite 179Interior equipmentControls179
Online Edition for Part no. 01 40 2 963 410 - VI/15
Page 230 of 275
Hood
Information WARNING
Improperly executed work in the engine
compartment can damage components and
lead to a safety risk. There is risk of accidents
or risk of property damage.◀
WARNING
The engine compartment accommo‐
dates moving components. Certain compo‐
nents can move in the engine compartment
with the vehicle switched off, e.g. the cooler
fan. There is risk of injuries. Do not reach into
the area of moving parts. Keep articles of
clothing and hair away from moving parts.◀
CAUTION
Folded-away wipers can be jammed
when the hood is opened. There is risk of
property damage. Make sure that the wipers
with the wiper blades mounted are folded
down onto the windshield before opening the
hood.◀
WARNING
There are protruding parts, e.g. lock
hook, on the inside of the hood. There is risk of
injuries. If the hood is open, pay attention to
protruding parts and keep these areas clear.◀
WARNING
An incorrectly locked hood can open
while driving and restrict visibility. There is risk
of an accident. Stop immediately and correctly
close the hood.◀
WARNING
Body parts can be jammed on opening
and closing the hood. There is risk of injuries.
Make sure that the area of movement of the
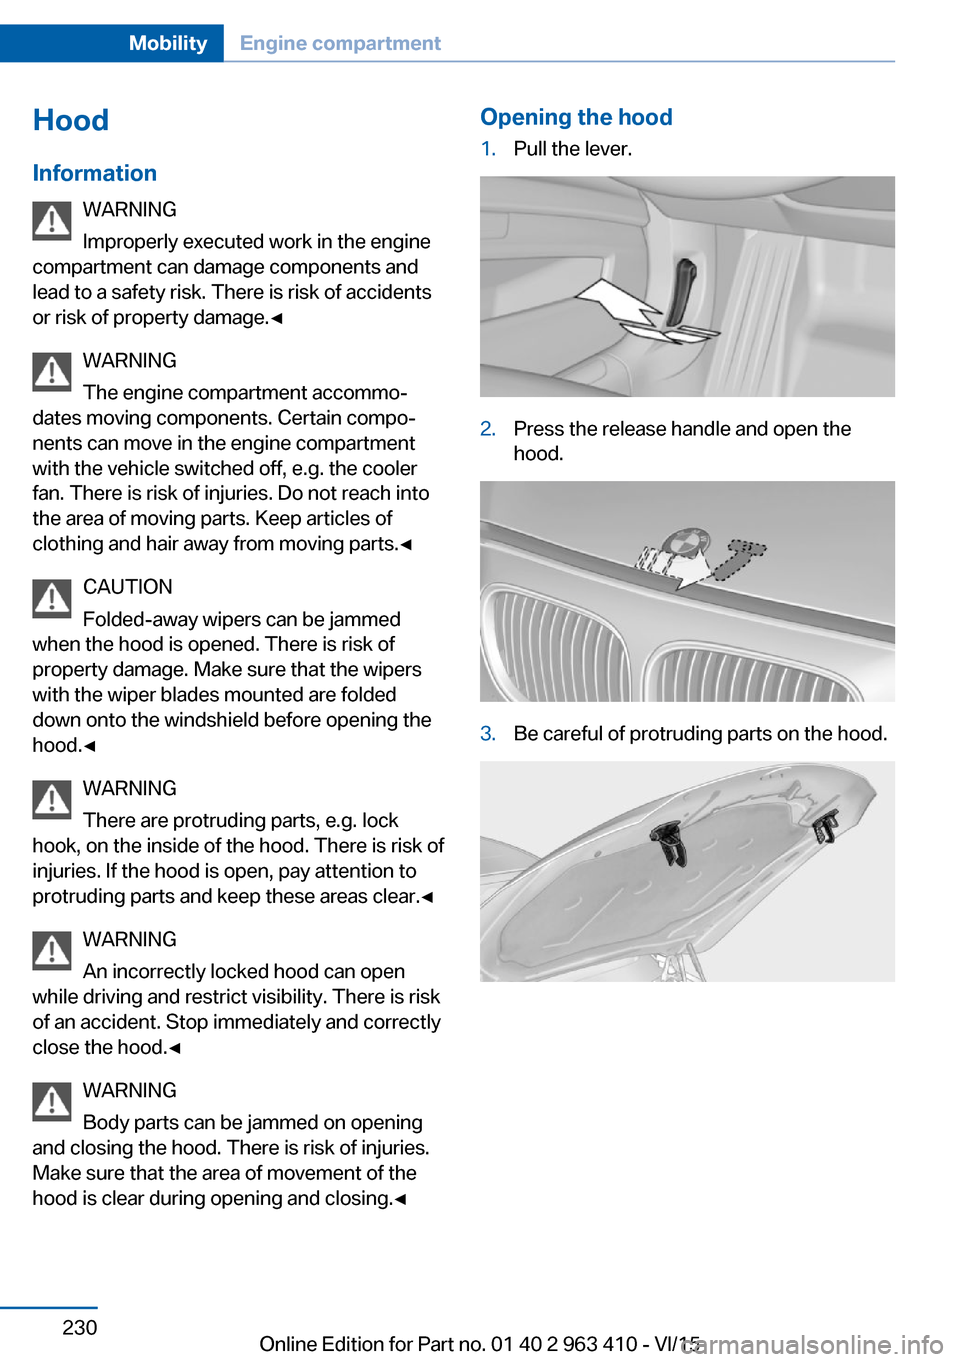
hood is clear during opening and closing.◀Opening the hood1.Pull the lever.2.Press the release handle and open the
hood.3.Be careful of protruding parts on the hood.Seite 230MobilityEngine compartment230
Online Edition for Part no. 01 40 2 963 410 - VI/15
Page 267 of 275
ECO PRO Tip - driving in‐struction 202
EfficientDynamics 202
Electronic displays, instru‐ ment cluster 85
Electronic oil measure‐ ment 232
Electronic Stability Program ESP, see DSC 138
Emergency detection, remote control 35
Emergency release, fuel filler flap 209
Emergency release, parking brake 75
Emergency Request 248
Emergency start function, en‐ gine start 35
Emergency unlocking, trans‐ mission lock 83
Emergency wheel 244
Energy Control 94
Energy recovery 95
Engine, automatic Start/Stop function 71
Engine, automatic switch- off 71
Engine compartment 229
Engine compartment, work‐ ing in 230
Engine coolant 236
Engine idling when driving, coasting 203
Engine oil 232
Engine oil, adding 233
Engine oil additives 234
Engine oil change 234
Engine oil filler neck 233
Engine oil temperature 93
Engine oil types, alterna‐ tive 234
Engine oil types, suitable 234
Engine start during malfunc‐ tion 35
Engine start, jump-start‐ ing 249 Engine start, refer to Starting
the engine 70
Engine stop 70
Engine temperature 93
Entering a car wash 254
Equipment, interior 174
Error displays, see Check Control 89
ESP Electronic Stability Pro‐ gram, see DSC 138
Exchanging wheels/tires 223
Exhaust system 193
Exterior mirror, automatic dimming feature 62
Exterior mirrors 61
External start 249
External temperature dis‐ play 93
External temperature warn‐ ing 93
Eyes for securing cargo 197
F
Failure message, see Check Control 89
False alarm, see Unintentional alarm 47
Fan, see Air flow 169
Filler neck for engine oil 233
Fine wood, care 256
First-aid kit 249
Fitting for towing, see Tow fit‐ ting 252
Flat tire, changing wheels 244
Flat Tire Monitor FTM 116
Flat tire, Tire Pressure Moni‐ tor TPM 112
Flat tire, warning lamp 113, 117
Flooding 193
Floor carpet, care 257
Floor mats, care 257
Folding back rear seat back‐ rests 181 Fold-out position, wiper 79
Foot brake 193
Front airbags 109
Front center armrest 185
Front cupholder 186
Front-end collision warning with braking function 122
Front-end collision warning with City Braking func‐
tion 119
Front fog lamps, , LED, bulb replacement 244
Front fog lights 107
Front fog lights/cornering lights, bulb replace‐
ment 243
Front lights 242
Front-seat passenger airbags, automatic deactivation 111
Front-seat passenger airbags, indicator lamp 111
Front seats 52
FTM Flat Tire Monitor 116
Fuel 210
Fuel consumption, see Aver‐ age fuel consumption 98
Fuel filler flap 208
Fuel gauge 93
Fuel lid 208
Fuel quality 210
Fuel recommendation 210
Fuel, tank capacity 262
Fuse 247
G
Garage door opener, see Uni‐ versal Integrated Remote
Control 174
Gasoline 210
Gear change, Steptronic transmission 81
Gear shift indicator 96
General driving notes 192
Glare shield 176
Glasses compartment 186 Seite 267Everything from A to ZReference267
Online Edition for Part no. 01 40 2 963 410 - VI/15