turn signal BMW X5 3.0I 2002 Owners Manual
[x] Cancel search | Manufacturer: BMW, Model Year: 2002, Model line: X5 3.0I, Model: BMW X5 3.0I 2002Pages: 185, PDF Size: 2.7 MB
Page 14 of 185
14n
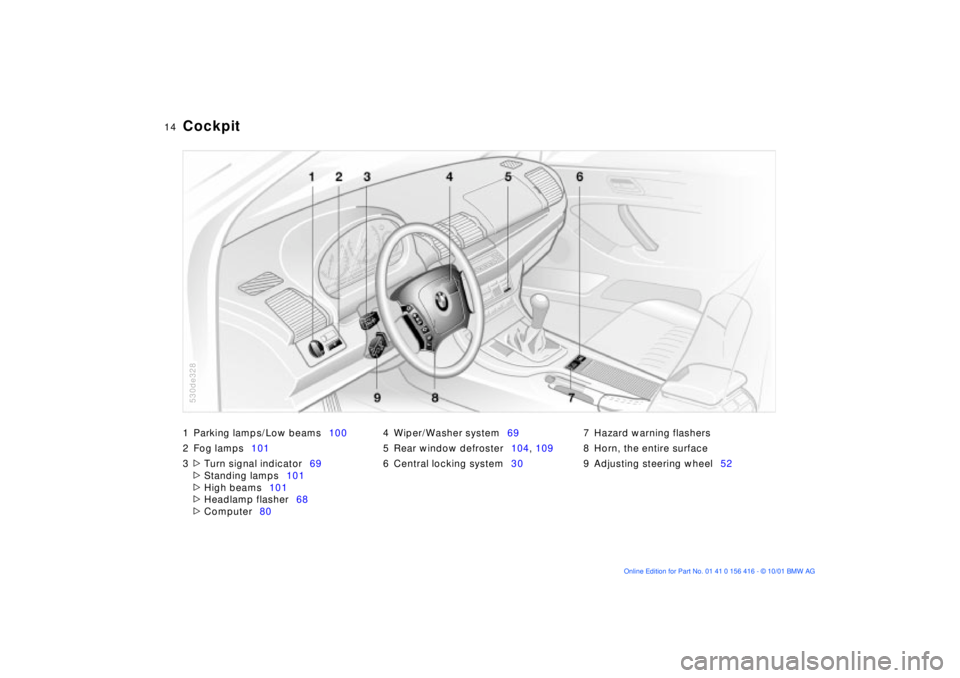
1 Parking lamps/Low beams100
2 Fog lamps101
3
>
Turn signal indicator69
>
Standing lamps101
>
High beams101
>
Headlamp flasher68
>
Computer804 Wiper/Washer system69
5 Rear window defroster104, 109
6 Central locking system307 Hazard warning flashers
8 Horn, the entire surface
9 Adjusting steering wheel52
Cockpit
530de328
Page 15 of 185
15n
OverviewControlsMaintenanceRepairsDataIndex
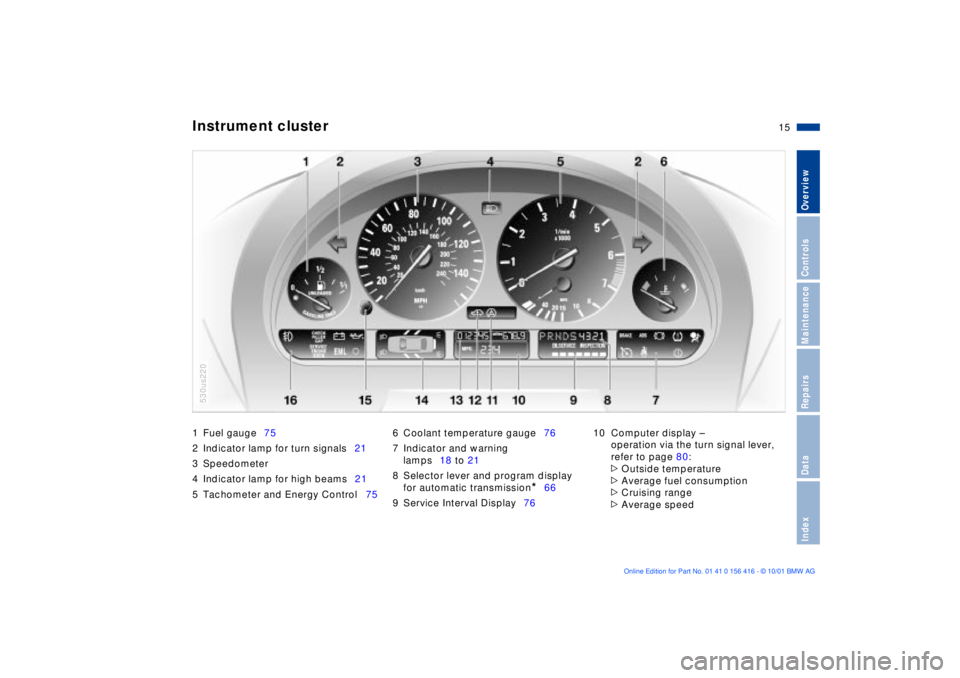
1 Fuel gauge75
2 Indicator lamp for turn signals21
3 Speedometer
4 Indicator lamp for high beams21
5 Tachometer and Energy Control756 Coolant temperature gauge76
7 Indicator and warning
lamps18 to 21
8 Selector lever and program display
for automatic transmission
*
66
9 Service Interval Display7610 Computer display Ð
operation via the turn signal lever,
refer to page 80:
>
Outside temperature
>
Average fuel consumption
>
Cruising range
>
Average speed
Instrument cluster
530us220
Page 17 of 185
17n
OverviewControlsMaintenanceRepairsDataIndex
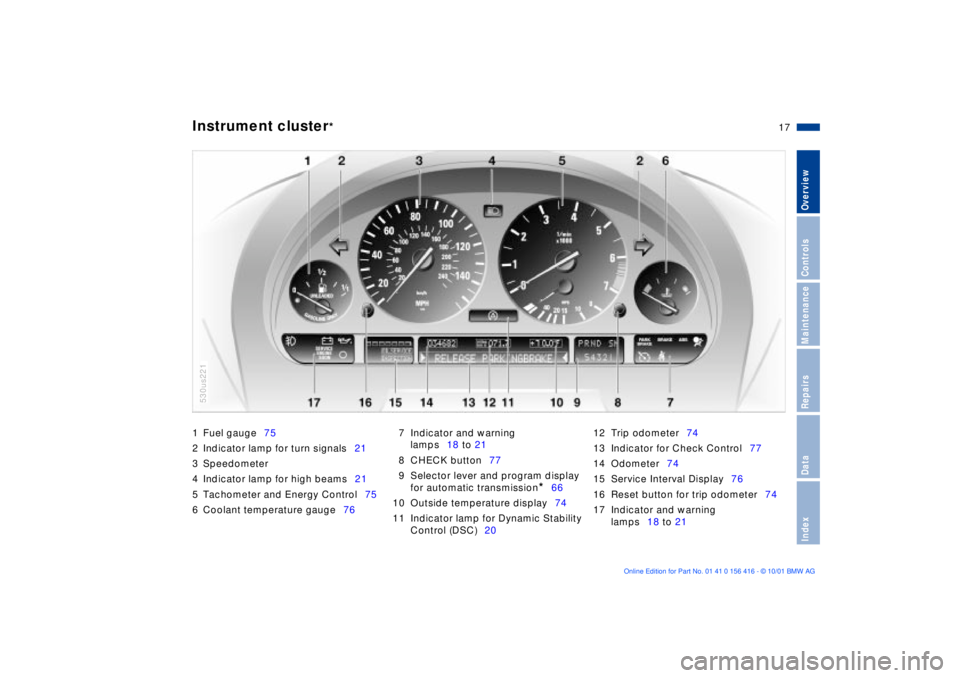
Instrument cluster
*
1 Fuel gauge75
2 Indicator lamp for turn signals21
3 Speedometer
4 Indicator lamp for high beams21
5 Tachometer and Energy Control75
6 Coolant temperature gauge767 Indicator and warning
lamps18 to 21
8 CHECK button77
9 Selector lever and program display
for automatic transmission
*
66
10 Outside temperature display74
11 Indicator lamp for Dynamic Stability
Control (DSC)2012 Trip odometer74
13 Indicator for Check Control77
14 Odometer74
15 Service Interval Display76
16 Reset button for trip odometer74
17 Indicator and warning
lamps18 to 21
530us221
Page 18 of 185
18n
Indicator and warning lamps
Technology that monitors itself
Indicator and warning lamps that are
identified by "
l
" are tested for proper
functioning whenever the ignition key is
turned. They each light up once for
different periods of time.
If a fault should occur in one of these
systems, the corresponding lamp does
not go out after the engine is started or
it lights up while the vehicle is moving.
You will see how to react to this in the
following section.
Red: stop immediately
Battery charge current
l
The battery is no longer being
charged. There is a malfunction
of the alternator drive belt or in the
charging circuit of the alternator. Please
contact the nearest BMW Sports
Activity Vehicle center.
If the drive belt is defective, do not
continue driving. The engine could
be damaged due to overheating. If the
drive belt is defective, increased
steering effort is also required.
<
Engine oil pressure
l
Stop the vehicle immediately
and switch off the engine.
Check the engine oil level; top off as
required. If the oil level is correct:
please contact the nearest BMW Sports
Activity Vehicle center.
Do not continue driving. The
engine could be damaged
because of inadequate lubrication.
<
Parking brake
* /
Brake hydraulic system
l
Comes on when you engage the
parking brake. For additional informa-
tion: refer to page 64.
Comes on although the parking brake
is released: have the brake fluid level
checked. Before continuing your
journey, be sure to read the notes on
pages 135 and 146.
Also comes on in the Check Control
with the message "CHECK BRAKE
LININGS".
Parking brake warning lamp
*
/
Brake hydraulic system warning
lamp for Canadian models.
Tire Pressure Monitor (RDC)
*
l
In addition, an acoustic signal is
sounded: a flat tire has
occurred. Reduce vehicle speed imme-
diately and stop the vehicle. Avoid hard
brake applications. As you steer the
vehicle, use caution and avoid overcor-
recting.
For additional information: refer to
page 98
Page 21 of 185
21n
OverviewControlsMaintenanceRepairsDataIndex
Indicator and warning lamps
Green: for your information
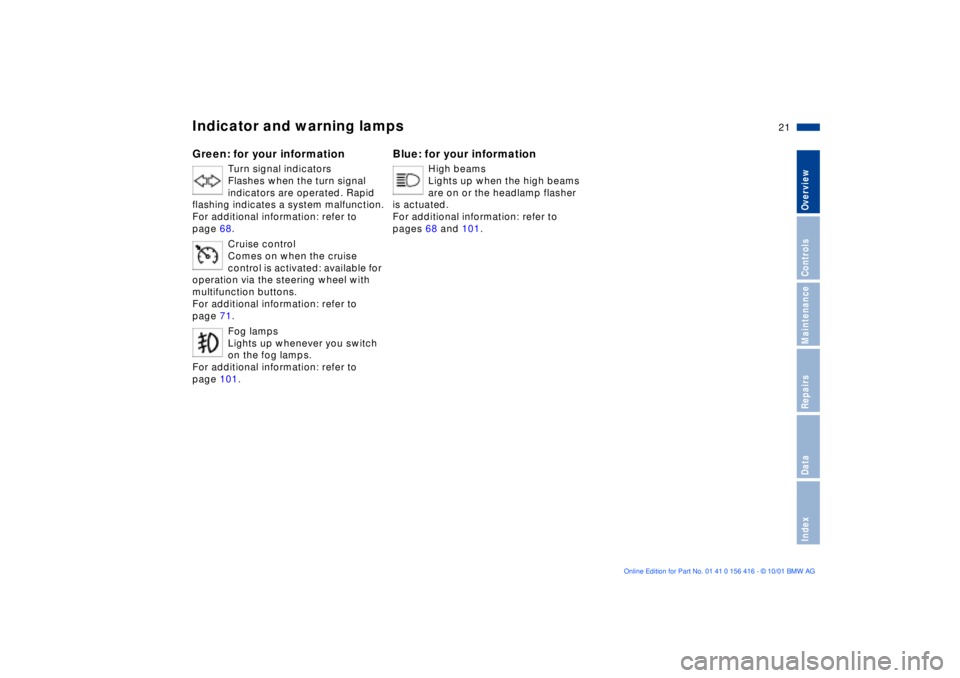
Turn signal indicators
Flashes when the turn signal
indicators are operated. Rapid
flashing indicates a system malfunction.
For additional information: refer to
page 68.
Cruise control
Comes on when the cruise
control is activated: available for
operation via the steering wheel with
multifunction buttons.
For additional information: refer to
page 71.
Fog lamps
Lights up whenever you switch
on the fog lamps.
For additional information: refer to
page 101.
Blue: for your information
High beams
Lights up when the high beams
are on or the headlamp flasher
is actuated.
For additional information: refer to
pages 68 and 101.
Page 31 of 185
31n
OverviewControlsMaintenanceRepairsDataIndex
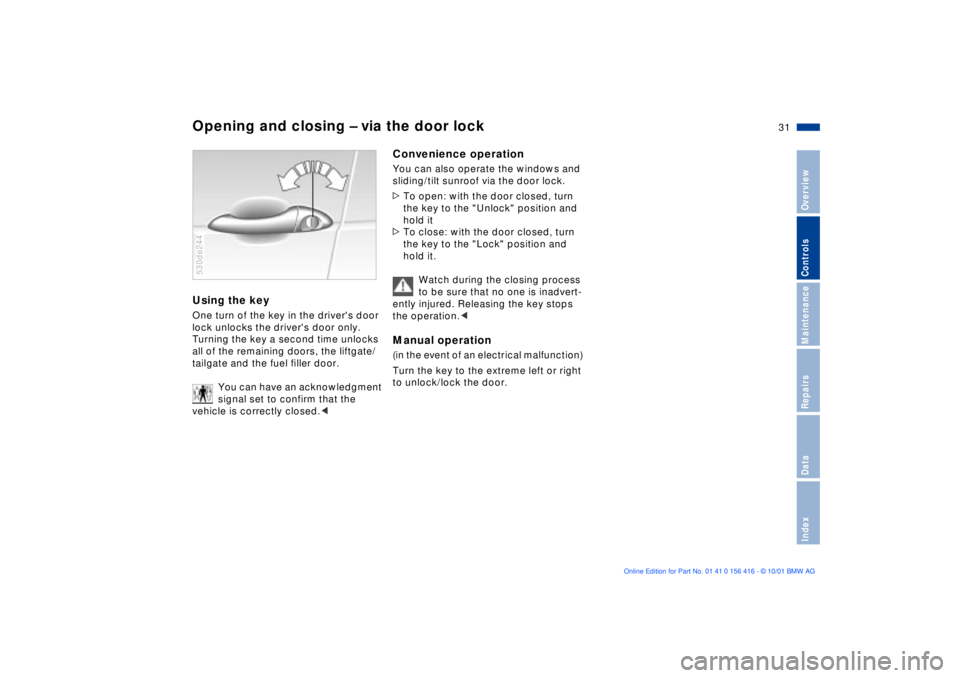
Opening and closing Ð via the door lockUsing the key One turn of the key in the driver's door
lock unlocks the driver's door only.
Turning the key a second time unlocks
all of the remaining doors, the liftgate/
tailgate and the fuel filler door.
You can have an acknowledgment
signal set to confirm that the
vehicle is correctly closed.< 530de244
Convenience operationYou can also operate the windows and
sliding/tilt sunroof via the door lock.
>To open: with the door closed, turn
the key to the "Unlock" position and
hold it
>To close: with the door closed, turn
the key to the "Lock" position and
hold it.
Watch during the closing process
to be sure that no one is inadvert-
ently injured. Releasing the key stops
the operation.< Manual operation (in the event of an electrical malfunction)
Turn the key to the extreme left or right
to unlock/lock the door.
Page 64 of 185
64n
Switching off the engine Parking brakeTurn the ignition key to position 1 or 0.
Do not remove the ignition key
while the vehicle is still moving. If
you do so, the steering will lock.
Always remove the ignition key and
engage the steering lock before leaving
the vehicle.
Vehicles with manual transmission:
Always engage the parking brake when
parking on slopes and inclined
surfaces. Even placing the gearshift
lever in 1st gear or reverse may not
provide adequate resistance to rolling.
Vehicles with automatic transmission:
Place the selector lever in "Park".<
Vehicles with automatic transmission:
The vehicle must be stationary and the
selector lever in "Park" before you can
remove the ignition key.
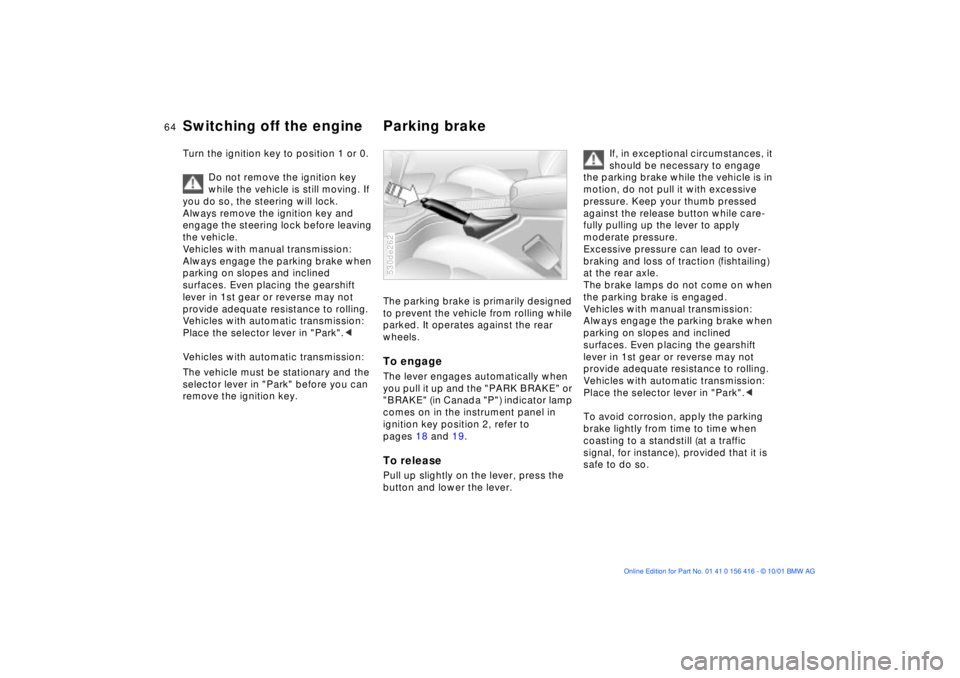
The parking brake is primarily designed
to prevent the vehicle from rolling while
parked. It operates against the rear
wheels.To engage The lever engages automatically when
you pull it up and the "PARK BRAKE" or
"BRAKE" (in Canada "P") indicator lamp
comes on in the instrument panel in
ignition key position 2, refer to
pages 18 and 19.To releasePull up slightly on the lever, press the
button and lower the lever. 530de262
If, in exceptional circumstances, it
should be necessary to engage
the parking brake while the vehicle is in
motion, do not pull it with excessive
pressure. Keep your thumb pressed
against the release button while care-
fully pulling up the lever to apply
moderate pressure.
Excessive pressure can lead to over-
braking and loss of traction (fishtailing)
at the rear axle.
The brake lamps do not come on when
the parking brake is engaged.
Vehicles with manual transmission:
Always engage the parking brake when
parking on slopes and inclined
surfaces. Even placing the gearshift
lever in 1st gear or reverse may not
provide adequate resistance to rolling.
Vehicles with automatic transmission:
Place the selector lever in "Park".<
To avoid corrosion, apply the parking
brake lightly from time to time when
coasting to a standstill (at a traffic
signal, for instance), provided that it is
safe to do so.
Page 69 of 185
69n
OverviewControlsMaintenanceRepairsDataIndex
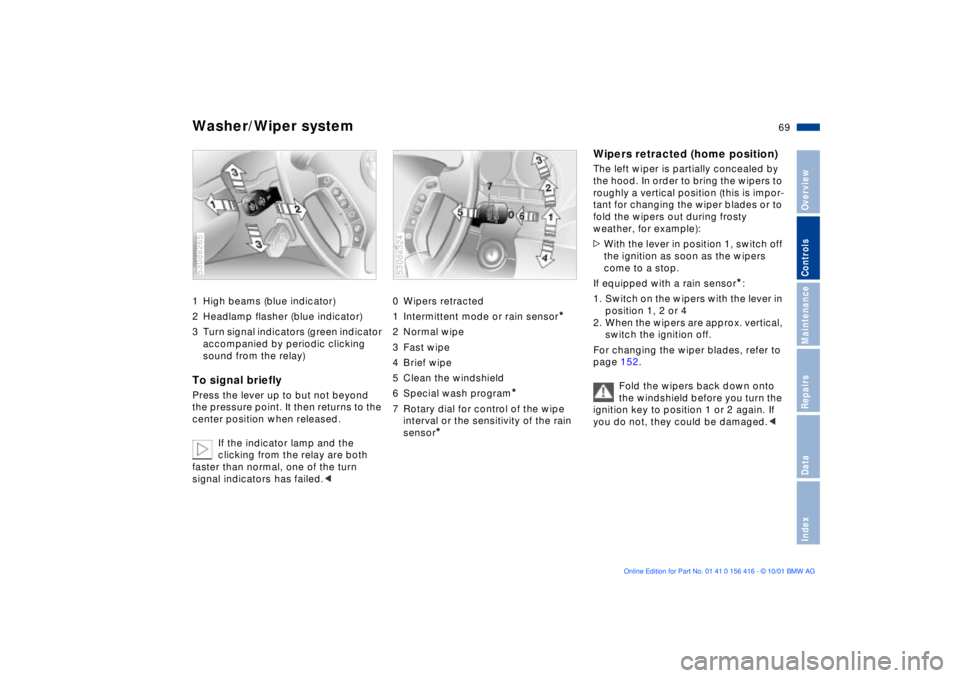
Washer/Wiper system 1 High beams (blue indicator)
2 Headlamp flasher (blue indicator)
3 Turn signal indicators (green indicator
accompanied by periodic clicking
sound from the relay)To signal brieflyPress the lever up to but not beyond
the pressure point. It then returns to the
center position when released.
If the indicator lamp and the
clicking from the relay are both
faster than normal, one of the turn
signal indicators has failed.< 530de265
0 Wipers retracted
1 Intermittent mode or rain sensor
*
2 Normal wipe
3 Fast wipe
4 Brief wipe
5 Clean the windshield
6 Special wash program
*
7 Rotary dial for control of the wipe
interval or the sensitivity of the rain
sensor
*
530de324
Wipers retracted (home position)The left wiper is partially concealed by
the hood. In order to bring the wipers to
roughly a vertical position (this is impor-
tant for changing the wiper blades or to
fold the wipers out during frosty
weather, for example):
>With the lever in position 1, switch off
the ignition as soon as the wipers
come to a stop.
If equipped with a rain sensor
*:
1. Switch on the wipers with the lever in
position 1, 2 or 4
2. When the wipers are approx. vertical,
switch the ignition off.
For changing the wiper blades, refer to
page 152.
Fold the wipers back down onto
the windshield before you turn the
ignition key to position 1 or 2 again. If
you do not, they could be damaged.<
Page 74 of 185
74n
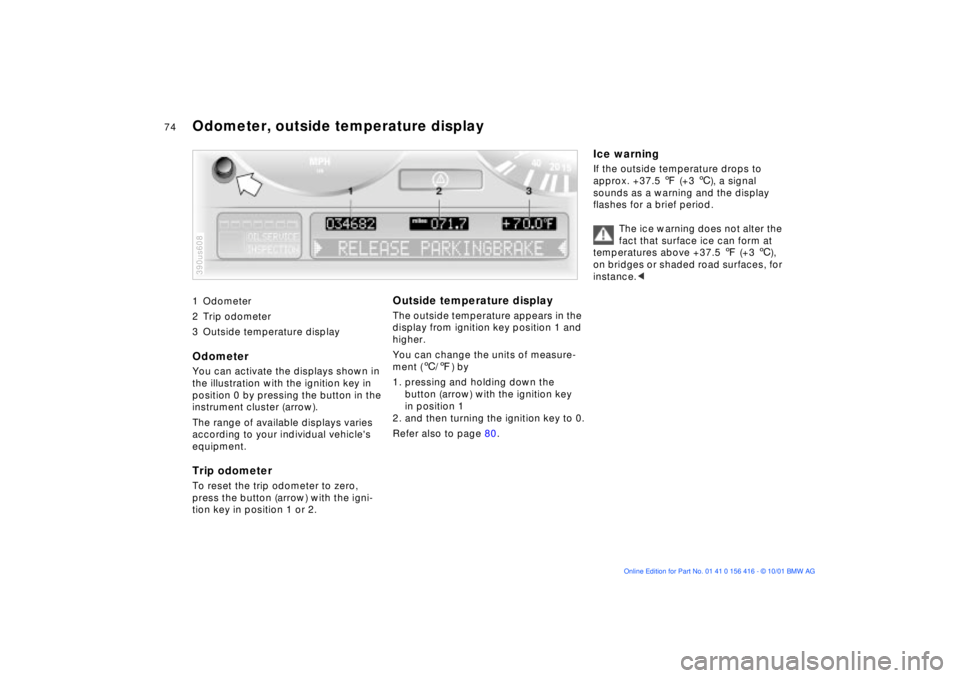
1 Odometer
2 Trip odometer
3 Outside temperature display
OdometerYou can activate the displays shown in
the illustration with the ignition key in
position 0 by pressing the button in the
instrument cluster (arrow).
The range of available displays varies
according to your individual vehicle's
equipment.Trip odometer To reset the trip odometer to zero,
press the button (arrow) with the igni-
tion key in position 1 or 2. 390us608
Outside temperature display The outside temperature appears in the
display from ignition key position 1 and
higher.
You can change the units of measure-
ment (6/7) by
1. pressing and holding down the
button (arrow) with the ignition key
in position 1
2. and then turning the ignition key to 0.
Refer also to page 80.
Ice warning If the outside temperature drops to
approx. +37.5 7 (+3 6), a signal
sounds as a warning and the display
flashes for a brief period.
The ice warning does not alter the
fact that surface ice can form at
temperatures above +37.5 7 (+3 6),
on bridges or shaded road surfaces, for
instance.<
Odometer, outside temperature display
Page 77 of 185
77n
OverviewControlsMaintenanceRepairsDataIndex
Check Control Graphic display
*
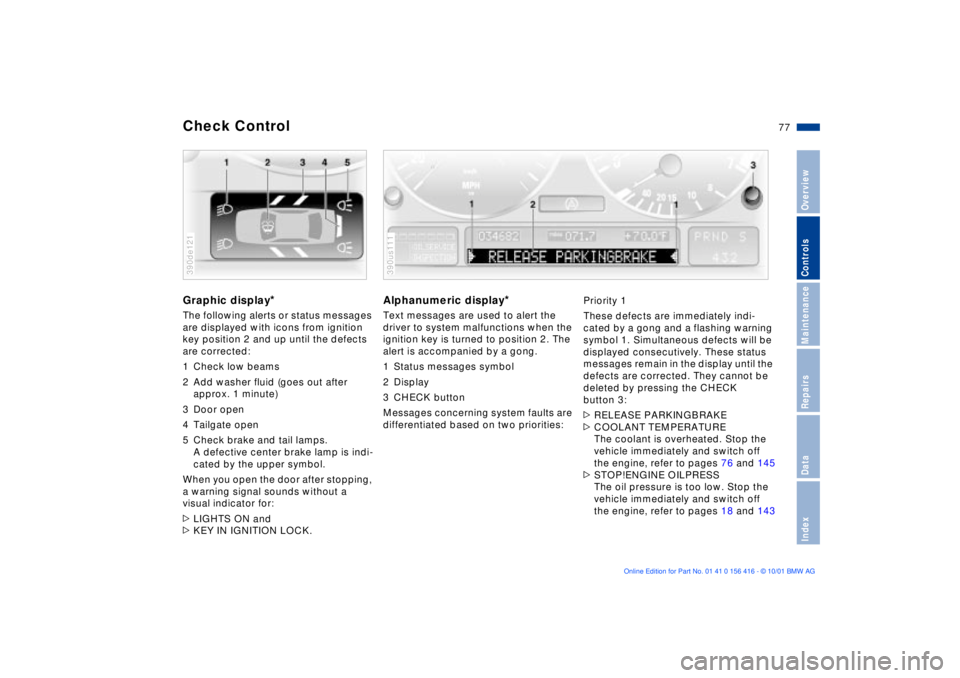
The following alerts or status messages
are displayed with icons from ignition
key position 2 and up until the defects
are corrected:
1 Check low beams
2 Add washer fluid (goes out after
approx. 1 minute)
3 Door open
4 Tailgate open
5 Check brake and tail lamps.
A defective center brake lamp is indi-
cated by the upper symbol.
When you open the door after stopping,
a warning signal sounds without a
visual indicator for:
>LIGHTS ON and
>KEY IN IGNITION LOCK. 390de121
Alphanumeric display
*
Text messages are used to alert the
driver to system malfunctions when the
ignition key is turned to position 2. The
alert is accompanied by a gong.
1 Status messages symbol
2 Display
3 CHECK button
Messages concerning system faults are
differentiated based on two priorities: 390us111
Priority 1
These defects are immediately indi-
cated by a gong and a flashing warning
symbol 1. Simultaneous defects will be
displayed consecutively. These status
messages remain in the display until the
defects are corrected. They cannot be
deleted by pressing the CHECK
button 3:
>RELEASE PARKINGBRAKE
>COOLANT TEMPERATURE
The coolant is overheated. Stop the
vehicle immediately and switch off
the engine, refer to pages 76 and 145
>STOP!ENGINE OILPRESS
The oil pressure is too low. Stop the
vehicle immediately and switch off
the engine, refer to pages 18 and 143