tow BMW X5 3.0I 2007 E70 Owner's Manual
[x] Cancel search | Manufacturer: BMW, Model Year: 2007, Model line: X5 3.0I, Model: BMW X5 3.0I 2007 E70Pages: 272, PDF Size: 9.03 MB
Page 9 of 272
7Reference
At a glance
Controls
Driving tips
Communications
Navigation
Entertainment
Mobility
Service and warranty
We recommend that you read this publication
thoroughly.
Your BMW is covered by the following warran-
ties:
>New Vehicle Limited Warranty
>Rust Perforation Limited Warranty
>Federal Emissions System Defect Warranty
>Federal Emissions Performance Warranty
>California Emission Control System Limited
Warranty
Detailed information about these warranties is
listed in the Service and Warranty Information
Booklet for US models or in the Warranty and
Service Guide Booklet for Canadian models.
Reporting safety defects
For US customers
The following applies only to vehicles owned
and operated in the US.
If you believe that your vehicle has a defect
which could cause a crash or could cause injury
or death, you should immediately inform the
National Highway Traffic Safety Administration,
NHTSA, in addition to notifying BMW of North
America, LLC, P.O. Box 1227, Westwood, New
Jersey 07675-1227, Telephone 1-800-831-
1117.
If NHTSA receives similar complaints, it may
open an investigation, and if it finds that a safety
defect exists in a group of vehicles, it may order
a recall and remedy campaign. However,
NHTSA cannot become involved in individual
problems between you, your dealer, or BMW of
North America, LLC.
To contact NHTSA, you may call the Vehicle
Safety Hotline toll-free at 1-888-327-4236
(TTY: 1-800-424-9153); go to
http://www.safercar.gov; or write to: Adminis-
trator, NHTSA, 400 Seventh Street, SW.,
Washington, DC 20590. You can also obtain
other information about motor vehicle safety
from http://www.safercar.gov
For Canadian customers
Canadian customers who wish to report a
safety-related defect to Transport Canada,
Defect Investigations and Recalls, may call
1-800-333-0510 toll-free from anywhere in
Canada or 1-613-993-9851 from the Ottawa
region and from other countries, or contact
Transport Canada by mail at: Transport
Canada, ASFAD, Place de Ville, Tower C,
330 Sparks Street, Ottawa, ON, K1A 0N5.
You can also obtain other information about
motor vehicle safety from http://www.tc.gc.ca
Page 36 of 272
Opening and closing
34
Tailgate
Opening
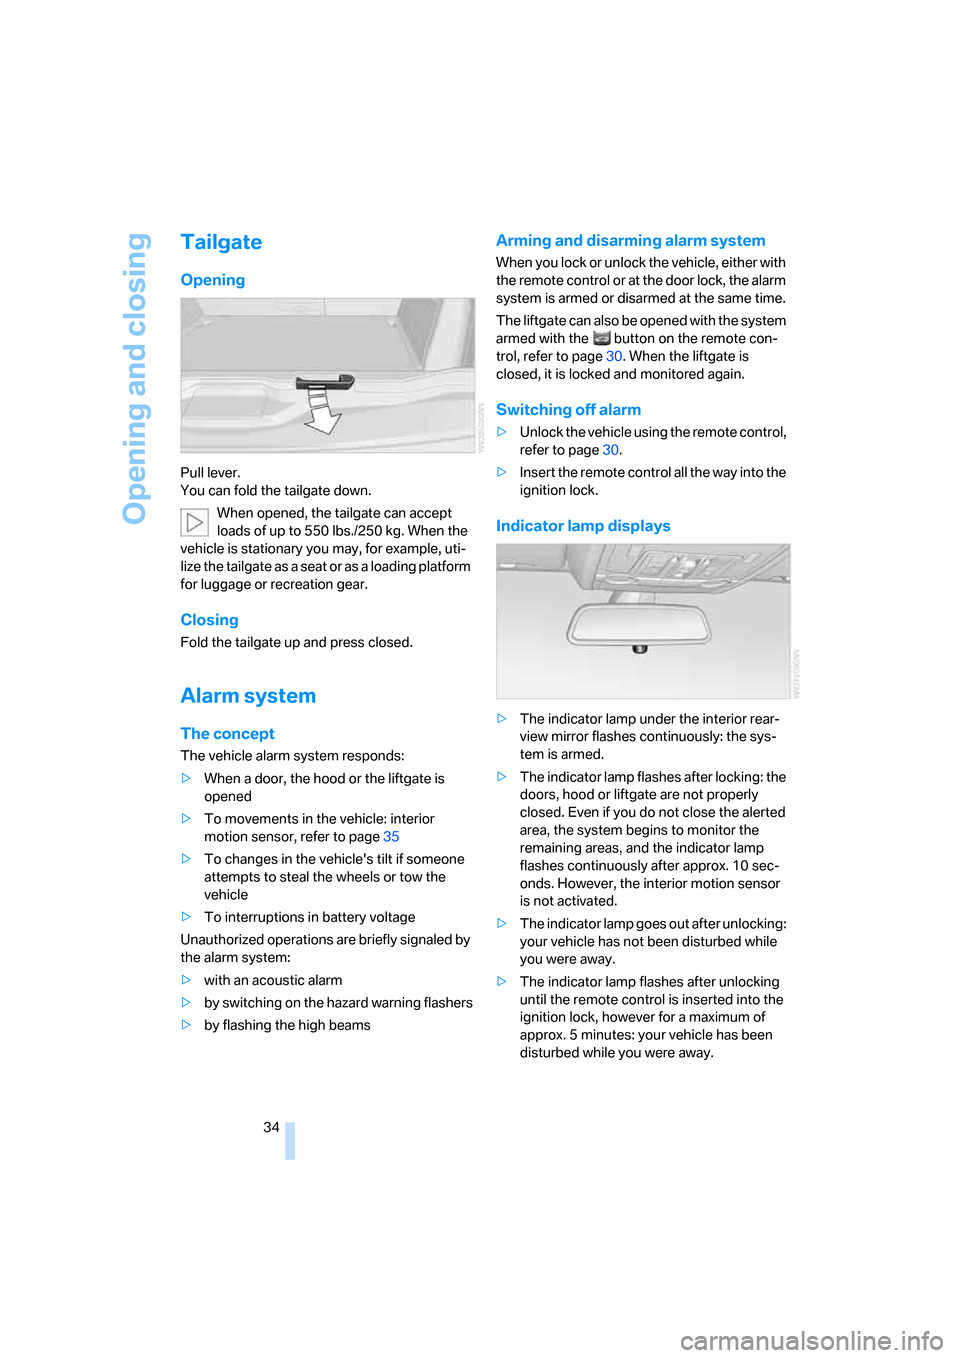
Pull lever.
You can fold the tailgate down.
When opened, the tailgate can accept
loads of up to 550lbs./250kg. When the
vehicle is stationary you may, for example, uti-
lize the tailgate as a seat or as a loading platform
for luggage or recreation gear.
Closing
Fold the tailgate up and press closed.
Alarm system
The concept
The vehicle alarm system responds:
>When a door, the hood or the liftgate is
opened
>To movements in the vehicle: interior
motion sensor, refer to page35
>To changes in the vehicle's tilt if someone
attempts to steal the wheels or tow the
vehicle
>To interruptions in battery voltage
Unauthorized operations are briefly signaled by
the alarm system:
>with an acoustic alarm
>by switching on
the hazard warning flashers
>by flashing the high beams
Arming and disarming alarm system
When you lock or unlock the vehicle, either with
the remote control or at the door lock, the alarm
system is armed or disarmed at the same time.
The liftgate can also be opened with the system
armed with the button on the remote con-
trol, refer to page30. When the liftgate is
closed, it is locked and monitored again.
Switching off alarm
>Unlock the vehicle using the remote control,
refer to page30.
>Insert the remote control all the way into the
ignition lock.
Indicator lamp displays
>The indicator lamp under the interior rear-
view mirror flashes continuously: the sys-
tem is armed.
>The indicator lamp flashes after locking: the
doors, hood or liftgate are not properly
closed. Even if you do not close the alerted
area, the system begins to monitor the
remaining areas, and the indicator lamp
flashes continuously after approx. 10 sec-
onds. However, the interior motion sensor
is not activated.
>The indicator lamp goes out after unlocking:
your vehicle has not been disturbed while
you were away.
>The indicator lamp flashes after unlocking
until the remote control is inserted into the
ignition lock, however for a maximum of
approx. 5 minutes: your vehicle has been
disturbed while you were away.
Page 37 of 272
Controls
35Reference
At a glance
Driving tips
Communications
Navigation
Entertainment
Mobility
Tilt alarm sensor
The tilt of the vehicle is monitored. The alarm
system reacts, e.g. in case of an attempted
wheel theft or towing.
Interior motion sensor
In order for the interior motion sensor to func-
tion properly, the windows and panorama glass
sunroof
* must be completely closed.
Avoiding unintentional alarms
The tilt alarm sensor and interior motion sensor
may be switched off at the same time. This pre-
vents unintentional alarms, e.g. in the following
situations:
>In stacking garages
>When transporting on car-carrying trains,
by sea or on a trailer
>When animals are to remain in the vehicle
Switching off tilt alarm sensor and
interior motion sensor
Press the button on the remote control
again as soon as the vehicle is locked.
The indicator lamp lights up briefly and then
flashes continuously. The tilt alarm sensor and
the interior motion sensor are switched off until
the next time the vehicle is unlocked and subse-
quently locked again.
Comfort access*
Comfort access enables you to access your
vehicle without having to hold the remote con-
trol in your hand. It is sufficient to carry the
remote control with you, e.g. in your hand or
jacket pocket. The vehicle automatically
detects the related remote control in the imme-
diate vicinity or in the interior.
Comfort access supports the following func-
tions:
>Unlocking/locking vehicle
>Comfort closing
>Opening liftgate
>Starting engine
Functional requirement
>The vehicle can only be unlocked if the
vehicle detects that the remote control car-
ried is not located in the vehicle interior.
>The next unlocking and locking cycle is not
possible until after approx. 2 seconds.
>The engine can only be started if the vehicle
detects that the remote control is located in
the vehicle interior.
Comparison with ordinary remote
control
You can control the functions mentioned previ-
ously with the comfort access or by pressing
the buttons on the remote control. Therefore,
please familiarize yourself with the information
on opening and closing beginning on page28
beforehand.
The special features when using comfort
access are described in the following.
Should a short delay occur when opening
or closing the windows or the panorama
glass sunroof
*, the system is checking whether
a remote control is located in the vehicle. Please
repeat opening or closing if necessary.<
Unlocking
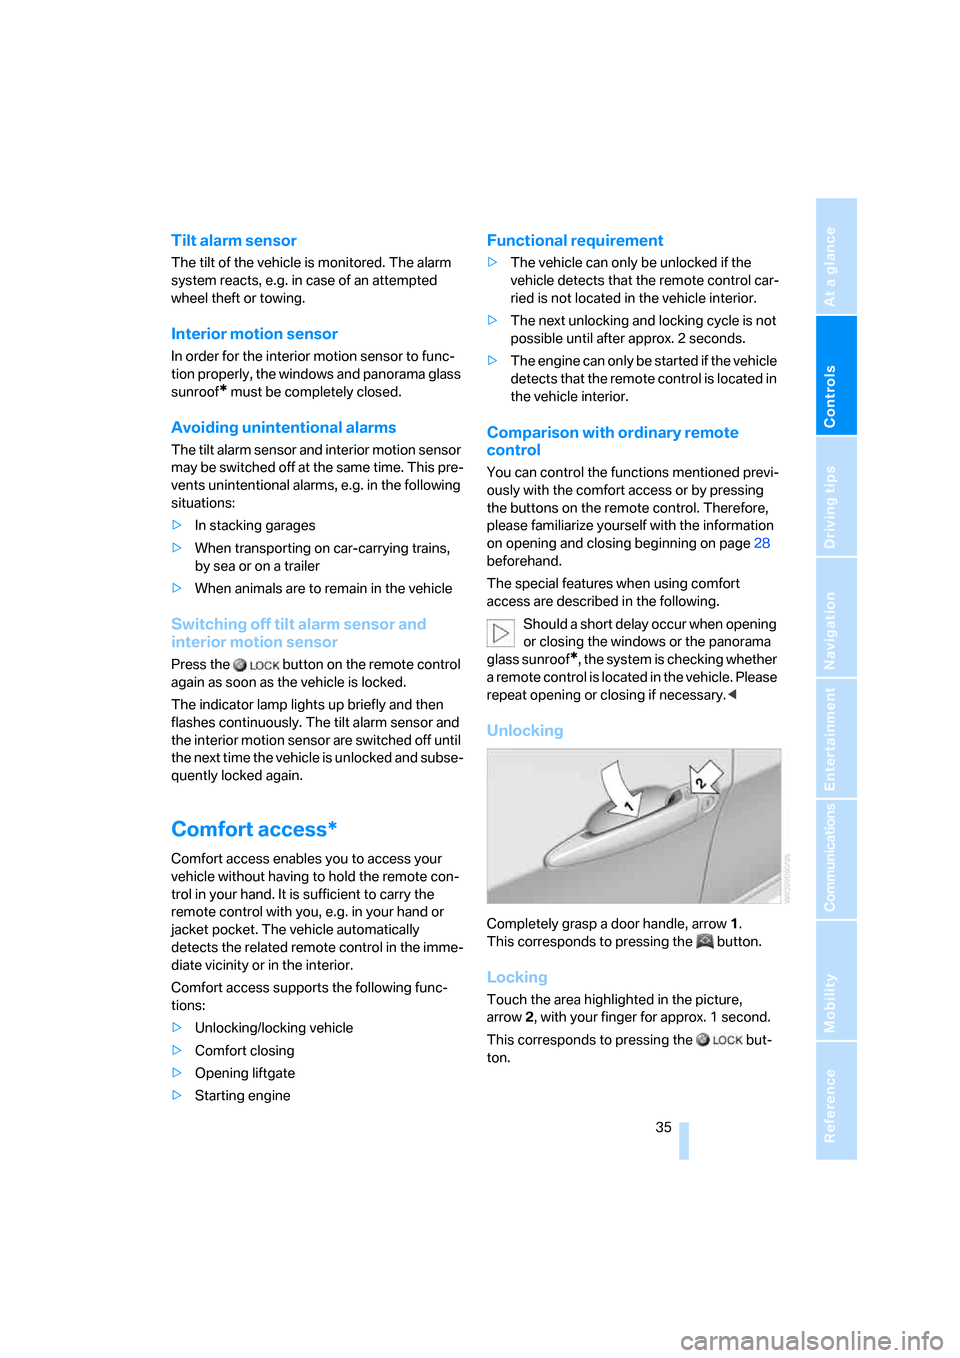
Completely grasp a door handle, arrow1.
This corresponds to pressing the button.
Locking
Touch the area highlighted in the picture,
arrow2, with your finger for approx. 1 second.
This corresponds to pressing the but-
ton.
Page 45 of 272
Controls
43Reference
At a glance
Driving tips
Communications
Navigation
Entertainment
Mobility
6.Select "Central locking" and press the con-
troller.
7.Select "Last seat pos." and press the con-
troller.
8.Select "After unlocking" or "After door
opened".
9.Press the controller.
Deactivating calling up automatically
Select "Deactivated" and press the controller.
Calling up manually
Do not call up a position from the memory
while the vehicle is moving. There is a risk
of accident from unexpected movement of the
seat or steering wheel.<
Comfort mode
1.Open the driver's door after unlocking or
switch on radio readiness.
2.Briefly press the desired memory button1
or2.
The system cancels the adjustment procedure
when you briefly press one of the seat adjust-
ment switches or one of the memory buttons.
Safety feature
1.Close the driver's door and switch the igni-
tion on or off.
2.Press the desired memory button1 or2
and maintain pressure until the adjustment
process has been completed.
If the button was pressed inadvertently:
press the button again; the LED goes out.
Head restraints
A correctly adjusted head restraint reduces the
risk of spinal injury in the event of an accident.
Adjust the head restraint so that its center
is approx. at ear level. Otherwise there is
increased danger of injury in the event of an
accident. Only remove the head restraints if the
respective seat is not occupied. Reinstall the
head restraints before transporting passen-
gers, as otherwise the head restraint cannot
provide its protective function.<
Front seats: setting the height of the
head restraint
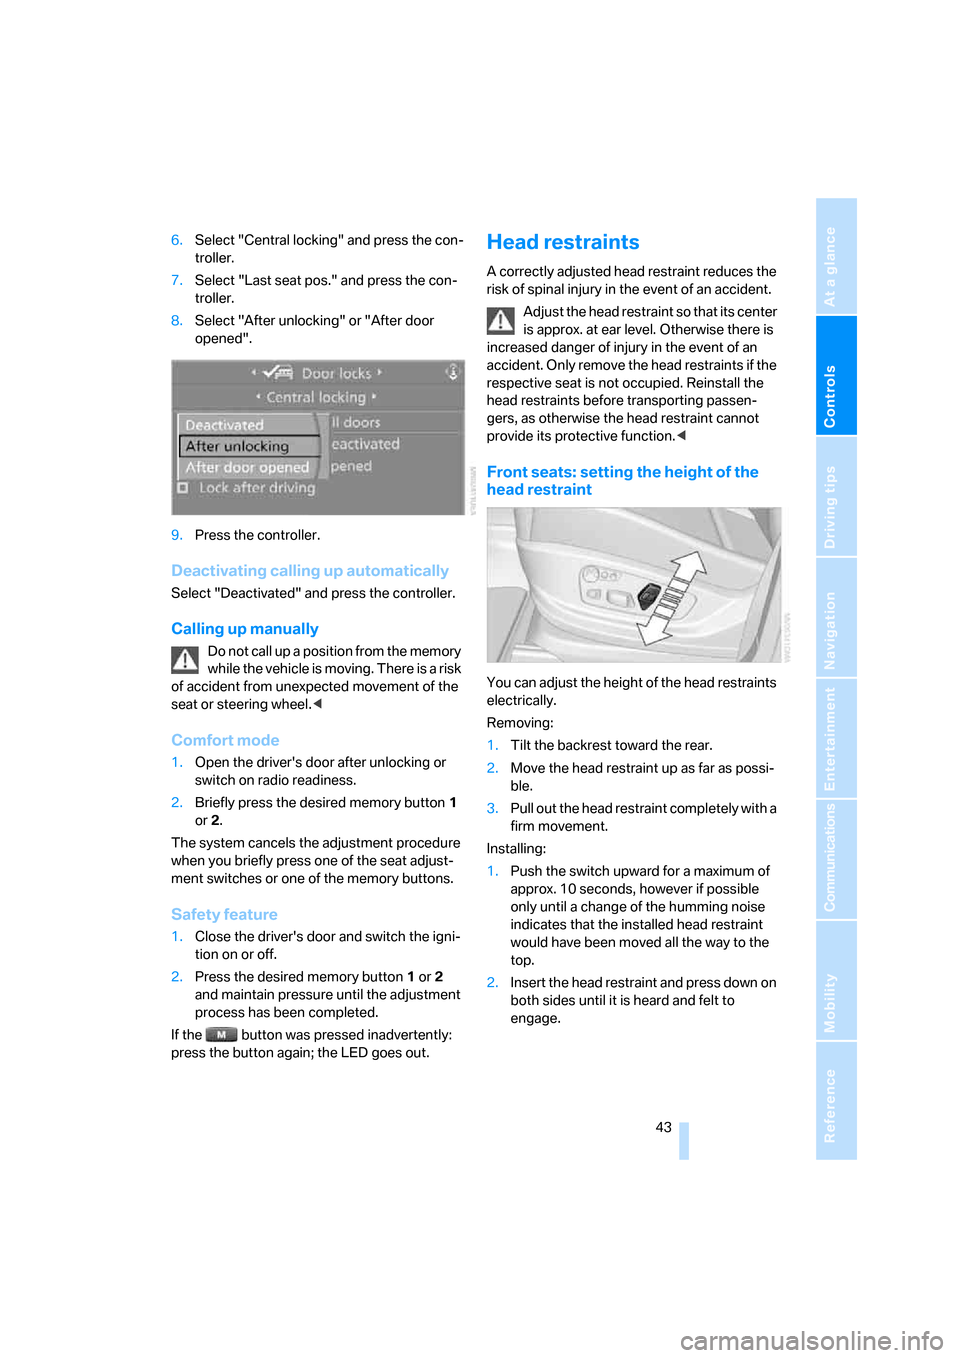
You can adjust the height of the head restraints
electrically.
Removing:
1.Tilt the backrest toward the rear.
2.Move the head restraint up as far as possi-
ble.
3.Pull out the head restraint completely with a
firm movement.
Installing:
1.Push the switch upward for a maximum of
approx. 10 seconds, however if possible
only until a change of the humming noise
indicates that the installed head restraint
would have been moved all the way to the
top.
2.Insert the head restraint and press down on
both sides until it is heard and felt to
engage.
Page 48 of 272
Adjusting
46 tional safety device, but they do not represent a
substitute.
n
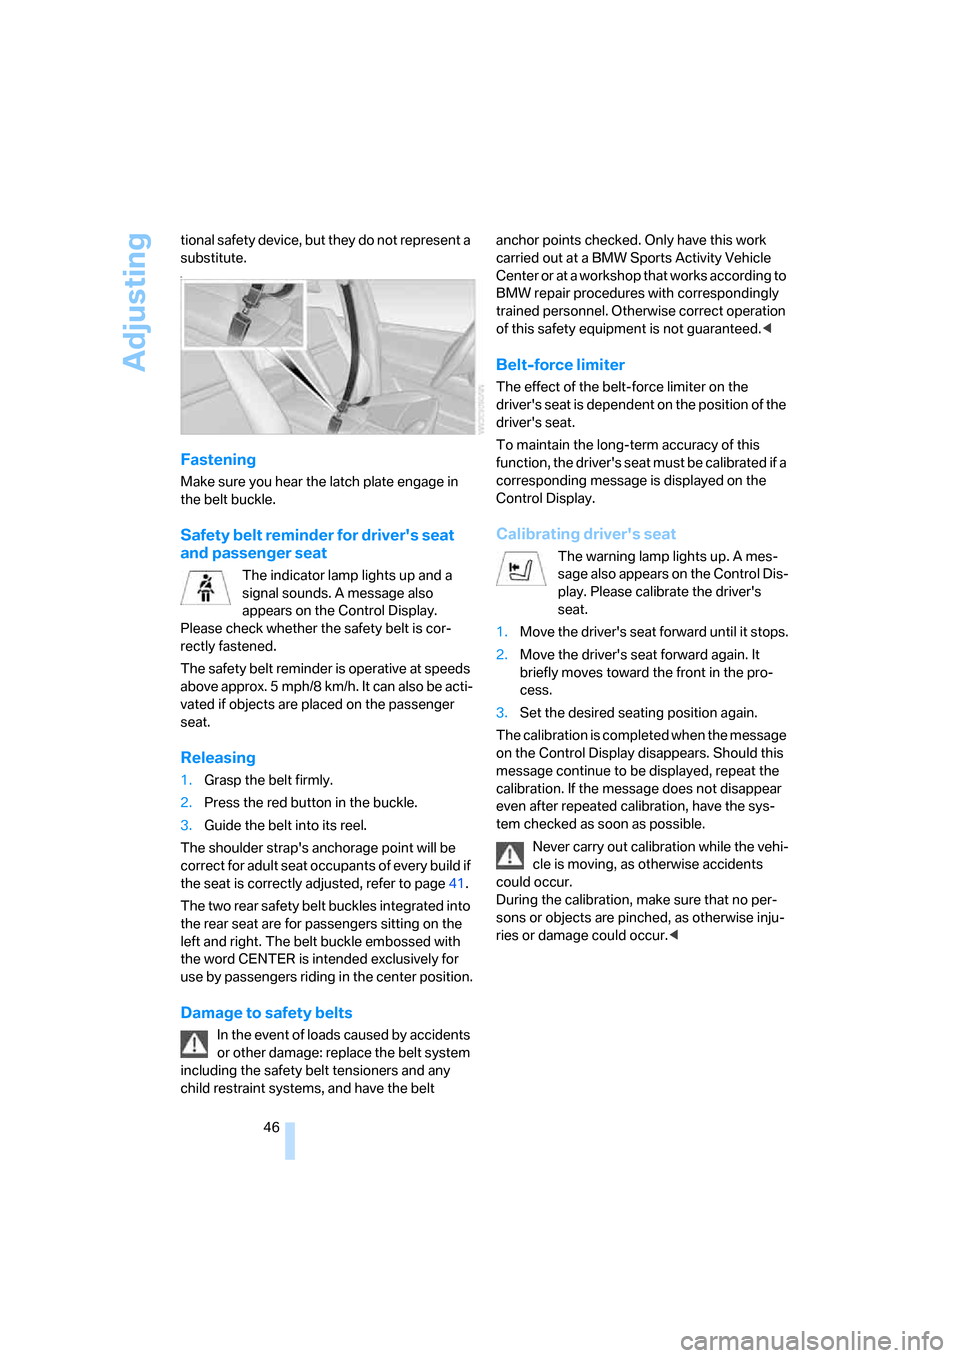
Fastening
Make sure you hear the latch plate engage in
the belt buckle.
Safety belt reminder for driver's seat
and passenger seat
The indicator lamp lights up and a
signal sounds. A message also
appears on the Control Display.
Please check whether the safety belt is cor-
rectly fastened.
The safety belt reminder is operative at speeds
above approx. 5 mph/8 km/h. It can also be acti-
vated if objects are placed on the passenger
seat.
Releasing
1.Grasp the belt firmly.
2.Press the red button in the buckle.
3.Guide the belt into its reel.
The shoulder strap's anchorage point will be
correct for adult seat occupants of every build if
the seat is correctly adjusted, refer to page41.
The two rear safety belt buckles integrated into
the rear seat are for passengers sitting on the
left and right. The belt buckle embossed with
the word CENTER is intended exclusively for
use by passengers riding in the center position.
Damage to safety belts
In the event of loads caused by accidents
or other damage: replace the belt system
including the safety belt tensioners and any
child restraint systems, and have the belt anchor points checked. Only have this work
carried out at a BMW Sports Activity Vehicle
Center or at a workshop that works according to
BMW repair procedures with correspondingly
trained personnel. Otherwise correct operation
of this safety equipment is not guaranteed.<
Belt-force limiter
The effect of the belt-force limiter on the
driver's seat is dependent on the position of the
driver's seat.
To maintain the long-term accuracy of this
function, the driver's seat must be calibrated if a
corresponding message is displayed on the
Control Display.
Calibrating driver's seat
The warning lamp lights up. A mes-
sage also appears on the Control Dis-
play. Please calibrate the driver's
seat.
1.Move the driver's seat forward until it stops.
2.Move the driver's seat forward again. It
briefly moves toward the front in the pro-
cess.
3.Set the desired seating position again.
The calibration is completed when the message
on the Control Display disappears. Should this
message continue to be displayed, repeat the
calibration. If the message does not disappear
even after repeated calibration, have the sys-
tem checked as soon as possible.
Never carry out calibration while the vehi-
cle is moving, as otherwise accidents
could occur.
During the calibration, make sure that no per-
sons or objects are pinched, as otherwise inju-
ries or damage could occur.<
Page 56 of 272
Transporting children safely
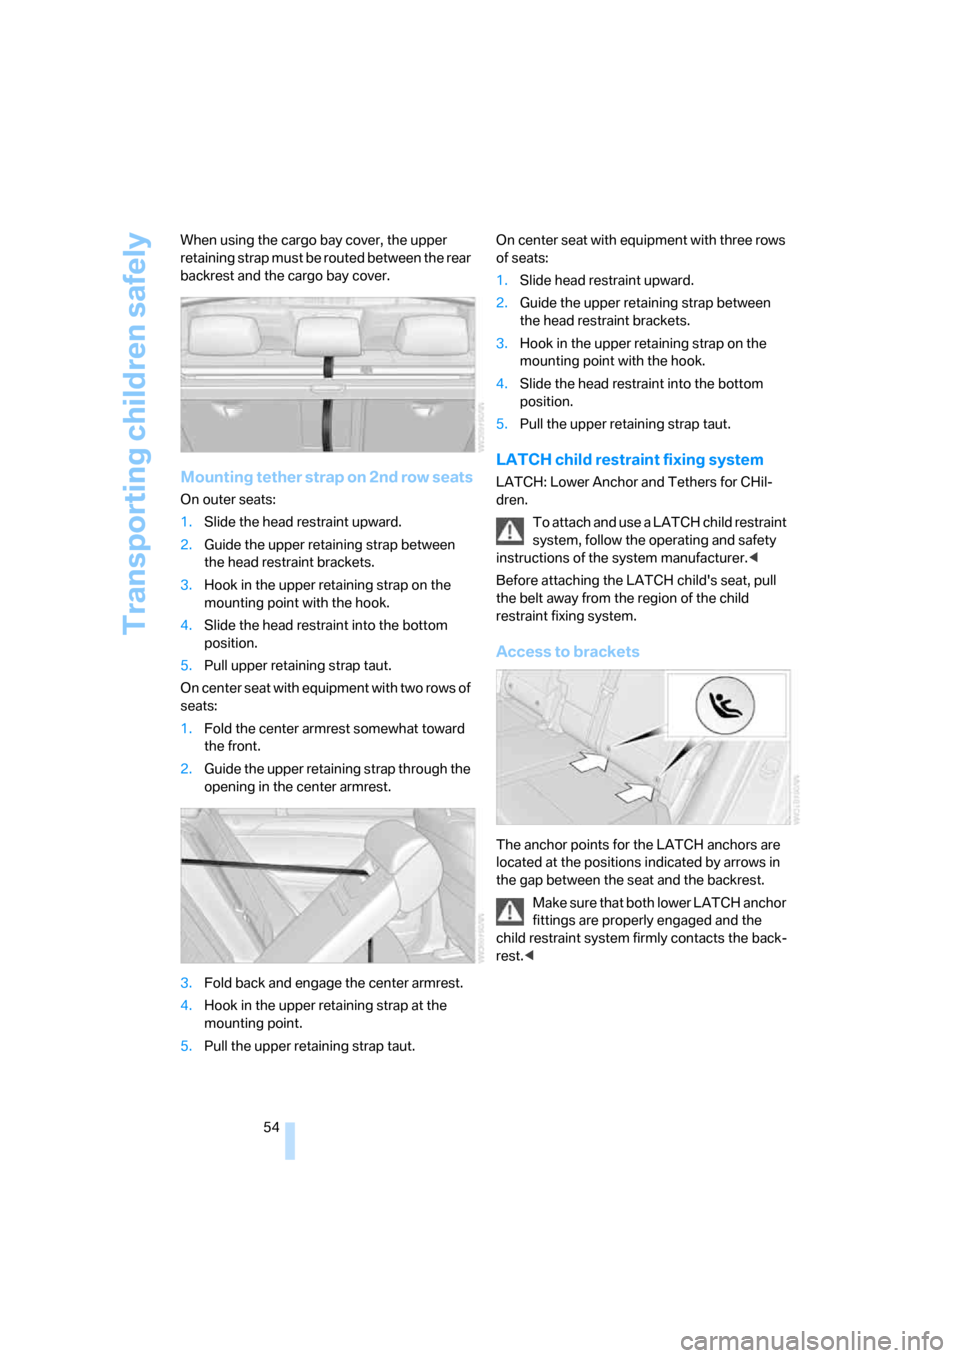
54 When using the cargo bay cover, the upper
retaining strap must be routed between the rear
backrest and the cargo bay cover.
Mounting tether strap on 2nd row seats
On outer seats:
1.Slide the head restraint upward.
2.Guide the upper retaining strap between
the head restraint brackets.
3.Hook in the upper retaining strap on the
mounting point with the hook.
4.Slide the head restraint into the bottom
position.
5.Pull upper retaining strap taut.
On center seat with equipment with two rows of
seats:
1.Fold the center armrest somewhat toward
the front.
2.Guide the upper retaining strap through the
opening in the center armrest.
3.Fold back and engage the center armrest.
4.Hook in the upper retaining strap at the
mounting point.
5.Pull the upper retaining strap taut.On center seat with equipment with three rows
of seats:
1.Slide head restraint upward.
2.Guide the upper retaining strap between
the head restraint brackets.
3.Hook in the upper retaining strap on the
mounting point with the hook.
4.Slide the head restraint into the bottom
position.
5.Pull the upper retaining strap taut.
LATCH child restraint fixing system
LATCH: Lower Anchor and Tethers for CHil-
dren.
To attach and use a LATCH child restraint
system, follow the operating and safety
instructions of the system manufacturer.<
Before attaching the LATCH child's seat, pull
the belt away from the region of the child
restraint fixing system.
Access to brackets
The anchor points for the LATCH anchors are
located at the positions indicated by arrows in
the gap between the seat and the backrest.
Make sure that both lower LATCH anchor
fittings are properly engaged and the
child restraint system firmly contacts the back-
rest.<
Page 57 of 272
Controls
55Reference
At a glance
Driving tips
Communications
Navigation
Entertainment
Mobility
On trips
If the vehicle is equipped with rear side
airbags, make sure that children do not
lean out of the child's seat towards the door
panels. Otherwise injuries can be caused if the
side airbags are triggered.<
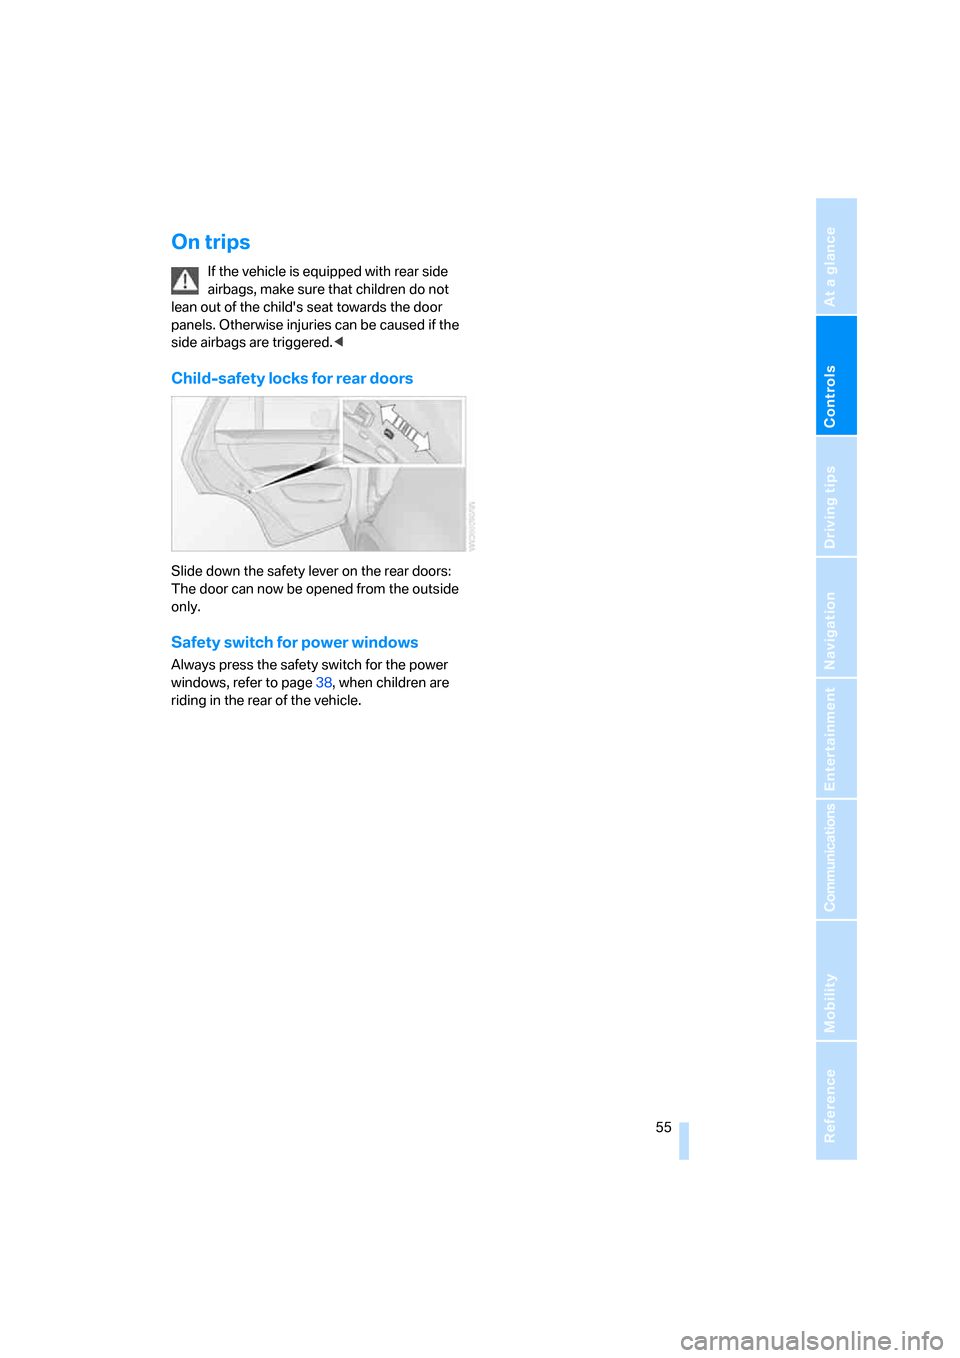
Child-safety locks for rear doors
Slide down the safety lever on the rear doors:
The door can now be opened from the outside
only.
Safety switch for power windows
Always press the safety switch for the power
windows, refer to page38, when children are
riding in the rear of the vehicle.
Page 61 of 272
Controls
59Reference
At a glance
Driving tips
Communications
Navigation
Entertainment
Mobility
that the vehicle could roll if parked on a steep
slope.<
If it becomes necessary to also release the
transmission lock of the automatic transmission
manually, follow this sequence:
1.If necessary, start by releasing the parking
brake manually.
2.Then release the automatic transmission's
transmission lock manually, refer to
page61.
Information on jump starting and towing from
page237.
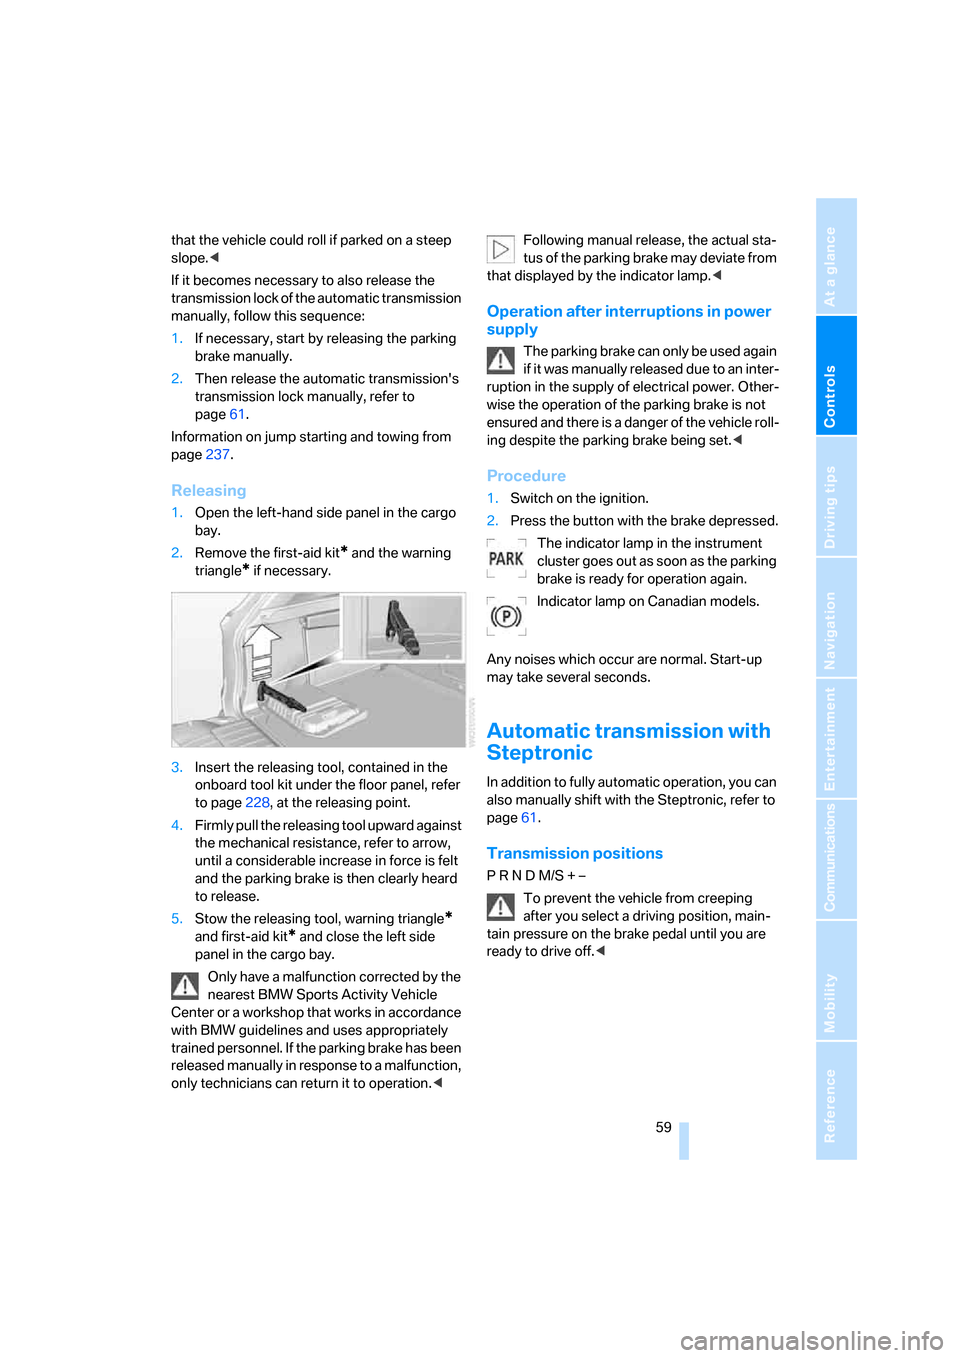
Releasing
1.Open the left-hand side panel in the cargo
bay.
2.Remove the first-aid kit
* and the warning
triangle
* if necessary.
3.Insert the releasing tool, contained in the
onboard tool kit under the floor panel, refer
to page228, at the releasing point.
4.Firmly pull the releasing tool upward against
the mechanical resistance, refer to arrow,
until a considerable increase in force is felt
and the parking brake is then clearly heard
to release.
5.Stow the releasing tool, warning triangle
*
and first-aid kit* and close the left side
panel in the cargo bay.
Only have a malfunction corrected by the
nearest BMW Sports Activity Vehicle
Center or a workshop that works in accordance
with BMW guidelines and uses appropriately
trained personnel. If the parking brake has been
released manually in response to a malfunction,
only technicians can return it to operation.
that displayed by the indicator lamp.<
Operation after interruptions in power
supply
The parking brake can only be used again
if it was manually released due to an inter-
ruption in the supply of electrical power. Other-
wise the operation of the parking brake is not
ensured and there is a danger of the vehicle roll-
ing despite the parking brake being set.<
Procedure
1.Switch on the ignition.
2.Press the button with the brake depressed.
The indicator lamp in the instrument
cluster goes out as soon as the parking
brake is ready for operation again.
Indicator lamp on Canadian models.
Any noises which occur are normal. Start-up
may take several seconds.
Automatic transmission with
Steptronic
In addition to fully automatic operation, you can
also manually shift with the Steptronic, refer to
page61.
Transmission positions
P R N D M/S + –
To prevent the vehicle from creeping
after you select a driving position, main-
tain pressure on the brake pedal until you are
ready to drive off.<
Page 63 of 272
Controls
61Reference
At a glance
Driving tips
Communications
Navigation
Entertainment
Mobility
D Drive, automatic position
Position for normal vehicle operation. All for-
ward gears are available.
Under normal operating conditions, the fuel
consumption is lowest when driving in posi-
tion D.
Kick-down
The kick-down mode provides maximum accel-
eration.
Depress the accelerator pedal past the
increased resistance point at the full-throttle
position.
Sport program and manual mode M/S
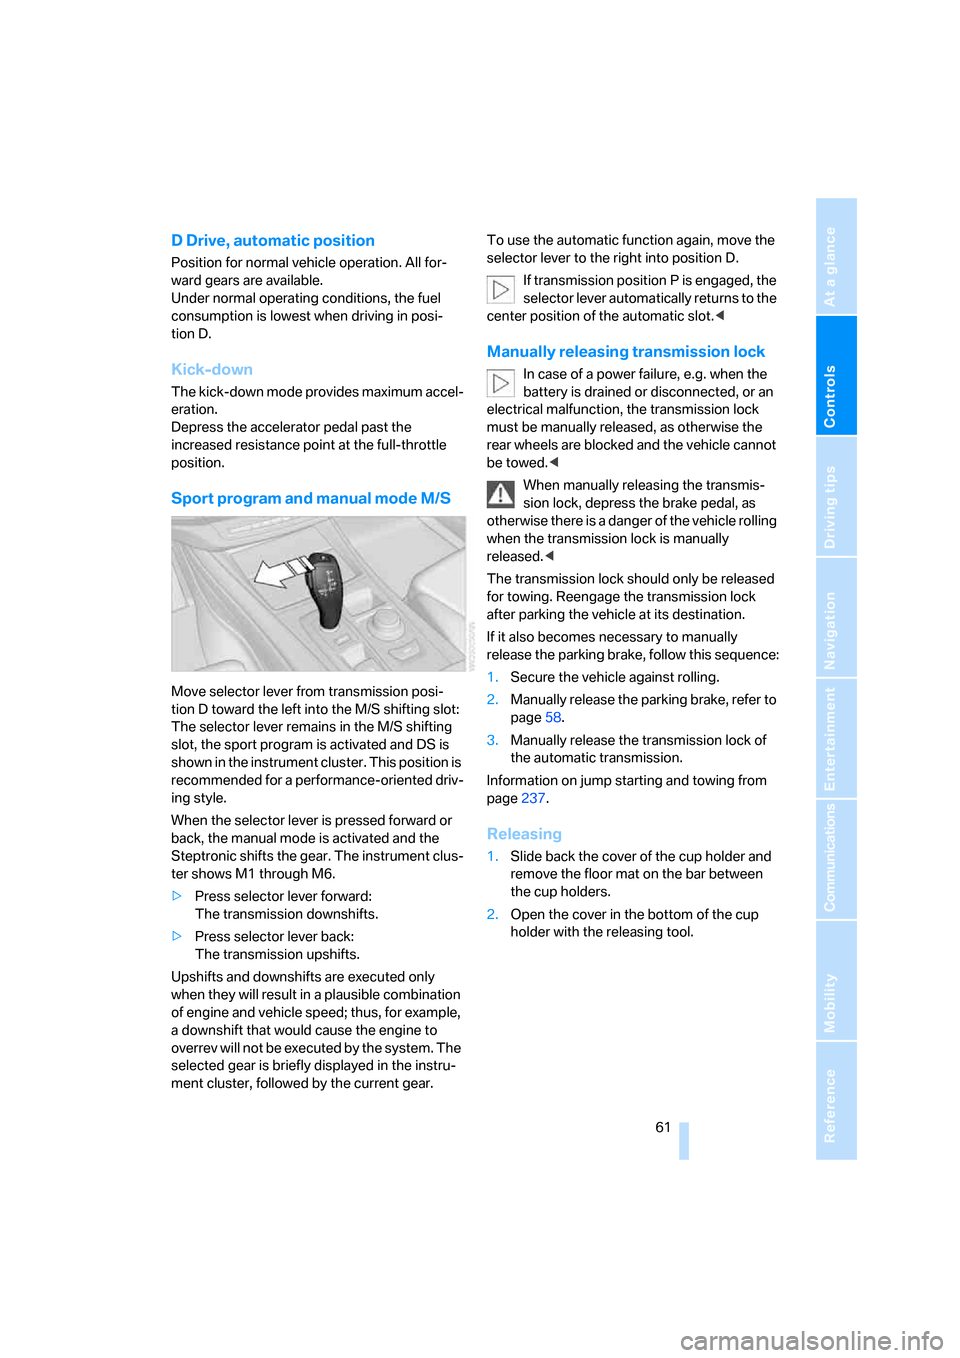
Move selector lever from transmission posi-
tion D toward the left into the M/S shifting slot:
The selector lever remains in the M/S shifting
slot, the sport program is activated and DS is
shown in the instrument cluster. This position is
recommended for a performance-oriented driv-
ing style.
When the selector lever is pressed forward or
back, the manual mode is activated and the
Steptronic shifts the gear. The instrument clus-
ter shows M1 through M6.
>Press selector lever forward:
The transmission downshifts.
>Press selector lever back:
The transmission upshifts.
Upshifts and downshifts are executed only
when they will result in a plausible combination
of engine and vehicle speed; thus, for example,
a downshift that would cause the engine to
overrev will not be executed by the system. The
selected gear is briefly displayed in the instru-
ment cluster, followed by the current gear.To use the automatic function again, move the
selector lever to the right into position D.
If transmission position P is engaged, the
selector lever automatically returns to the
center position of the automatic slot.<
Manually releasing transmission lock
In case of a power failure, e.g. when the
battery is drained or disconnected, or an
electrical malfunction, the transmission lock
must be manually released, as otherwise the
rear wheels are blocked and the vehicle cannot
be towed.<
When manually releasing the transmis-
sion lock, depress the brake pedal, as
otherwise there is a danger of the vehicle rolling
when the transmission lock is manually
released.<
The transmission lock should only be released
for towing. Reengage the transmission lock
after parking the vehicle at its destination.
If it also becomes necessary to manually
release the parking brake, follow this sequence:
1.Secure the vehicle against rolling.
2.Manually release the parking brake, refer to
page58.
3.Manually release the transmission lock of
the automatic transmission.
Information on jump starting and towing from
page237.
Releasing
1.Slide back the cover of the cup holder and
remove the floor mat on the bar between
the cup holders.
2.Open the cover in the bottom of the cup
holder with the releasing tool.
Page 64 of 272
Driving
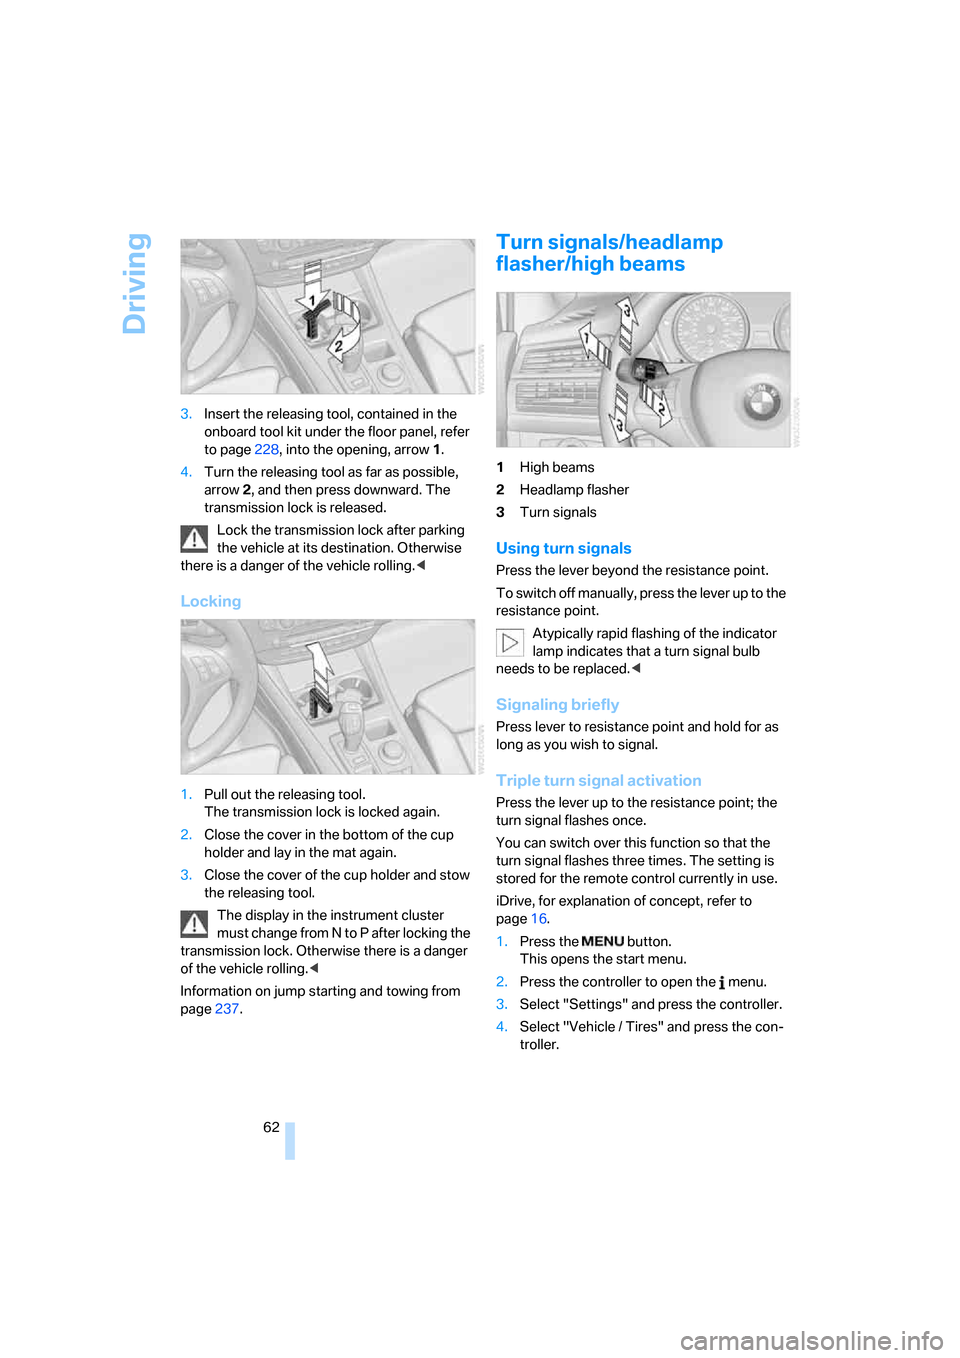
62 3.Insert the releasing tool, contained in the
onboard tool kit under the floor panel, refer
to page228, into the opening, arrow1.
4.Turn the releasing tool as far as possible,
arrow2, and then press downward. The
transmission lock is released.
Lock the transmission lock after parking
the vehicle at its destination. Otherwise
there is a danger of the vehicle rolling.<
Locking
1.Pull out the releasing tool.
The transmission lock is locked again.
2.Close the cover in the bottom of the cup
holder and lay in the mat again.
3.Close the cover of the cup holder and stow
the releasing tool.
The display in the instrument cluster
must change from N to P after locking the
transmission lock. Otherwise there is a danger
of the vehicle rolling.<
Information on jump starting and towing from
page237.
Turn signals/headlamp
flasher/high beams
1High beams
2Headlamp flasher
3Turn signals
Using turn signals
Press the lever beyond the resistance point.
To switch off manually, press the lever up to the
resistance point.
Atypically rapid flashing of the indicator
lamp indicates that a turn signal bulb
needs to be replaced.<
Signaling briefly
Press lever to resistance point and hold for as
long as you wish to signal.
Triple turn signal activation
Press the lever up to the resistance point; the
turn signal flashes once.
You can switch over this function so that the
turn signal flashes three times. The setting is
stored for the remote control currently in use.
iDrive, for explanation of concept, refer to
page16.
1.Press the button.
This opens the start menu.
2.Press the controller to open the menu.
3.Select "Settings" and press the controller.
4.Select "Vehicle / Tires" and press the con-
troller.