Manual BMW X5 3.0Si 2008 E70 Owner's Manual
[x] Cancel search | Manufacturer: BMW, Model Year: 2008, Model line: X5 3.0Si, Model: BMW X5 3.0Si 2008 E70Pages: 292, PDF Size: 9.32 MB
Page 1 of 292
The Ultimate
Driving Machine
Owner's Manual
for Vehicle
Page 3 of 292
X5 3.0si
X5 4.8iOwner's Manual for Vehicle
Congratulations, and thank you for choosing a BMW.
Thorough familiarity with your vehicle will provide you with
enhanced control and security when you drive it. We therefore
have this request:
Please take the time to read this Owner's Manual and familiarize
yourself with the information that we have compiled for you
before starting off in your new vehicle. It contains important data
and instructions intended to assist you in gaining maximum use
and satisfaction from your BMW's unique range of technical fea-
tures. The manual also contains information on maintenance
designed to enhance operating safety and contribute to main-
taining the value of your BMW throughout an extended service
life.
This manual is supplemented by a Service and Warranty Informa-
tion Booklet for US models or a Warranty and Service Guide
Booklet for Canadian models.
We wish you an enjoyable driving experience.
BMW AG
Page 5 of 292
Reference
At a glance
Controls
Driving tips
Communications
Navigation
Entertainment
Mobility
Contents
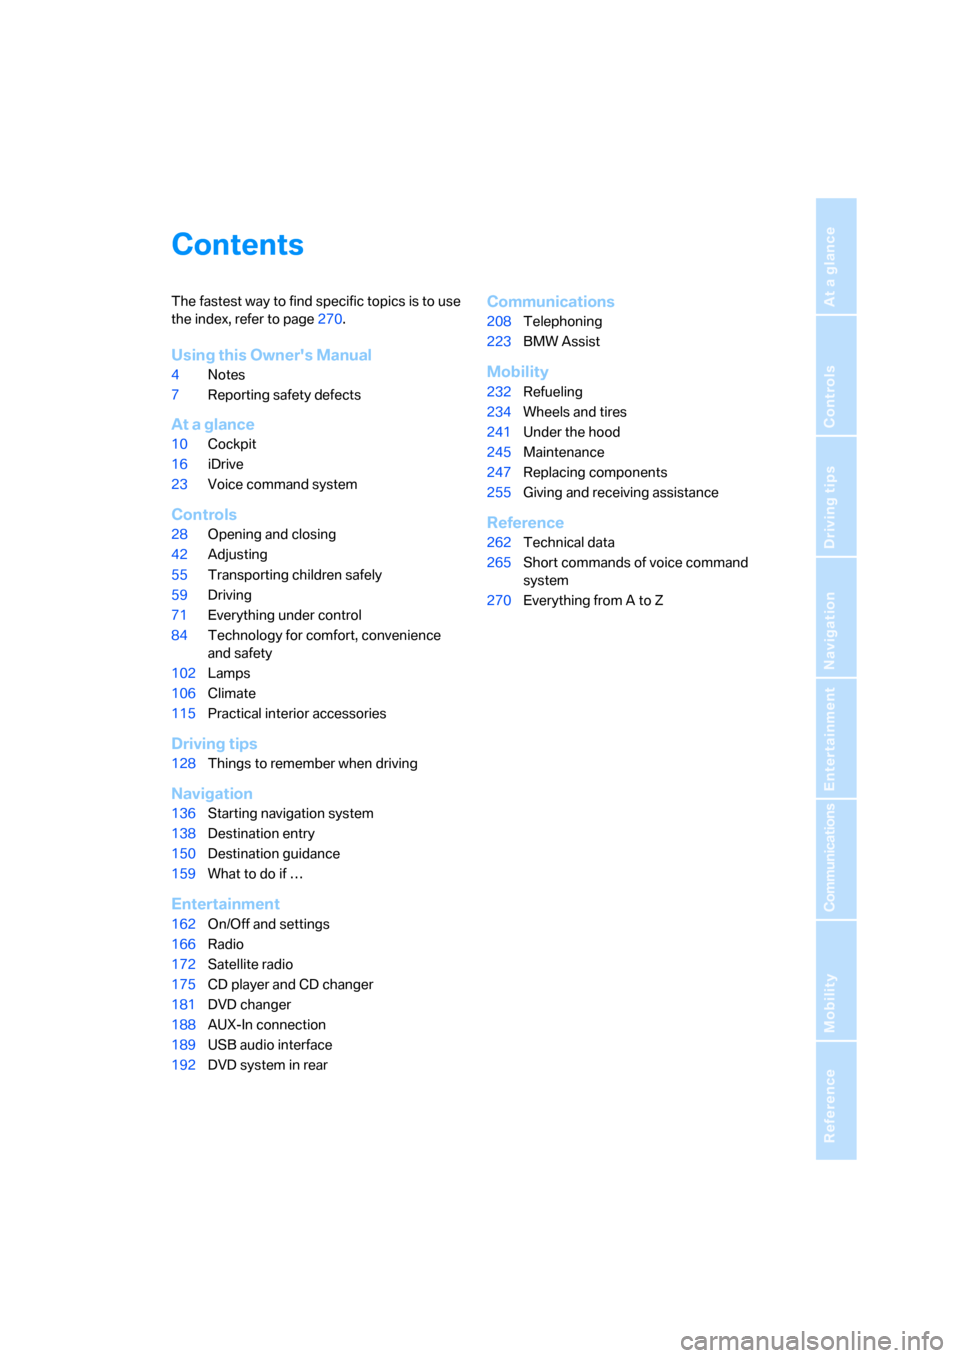
The fastest way to find specific topics is to use
the index, refer to page270.
Using this Owner's Manual
4Notes
7Reporting safety defects
At a glance
10Cockpit
16iDrive
23Voice command system
Controls
28Opening and closing
42Adjusting
55Transporting children safely
59Driving
71Everything under control
84Technology for comfort, convenience
and safety
102Lamps
106Climate
115Practical interior accessories
Driving tips
128Things to remember when driving
Navigation
136Starting navigation system
138Destination entry
150Destination guidance
159What to do if …
Entertainment
162On/Off and settings
166Radio
172Satellite radio
175CD player and CD changer
181DVD changer
188AUX-In connection
189USB audio interface
192DVD system in rear
Communications
208Telephoning
223BMW Assist
Mobility
232Refueling
234Wheels and tires
241Under the hood
245Maintenance
247Replacing components
255Giving and receiving assistance
Reference
262Technical data
265Short commands of voice command
system
270Everything from A to Z
Page 6 of 292
Notes
4
Notes
Using this Owner's Manual
We have made every effort to ensure that you
are able to find what you need in this Owner's
Manual as quickly as possible. The fastest way
to find specific topics is to refer to the detailed
index at the back of the manual. If you wish to
gain an initial overview of your vehicle, you will
find this in the first chapter.
Should you sell your BMW some day, please
remember to hand over the Owner's Manual
as well; it is an important component of your
vehicle.
Additional sources of information
If you have additional questions, your BMW
Sports Activity Vehicle Center is always happy
to advise you.
You can find information on BMW, e.g. on tech-
nology, on the Internet at www.bmwusa.com.
Symbols used
Indicates precautions that must be fol-
lowed precisely in order to avoid the pos-
sibility of personal injury and serious damage to
the vehicle.<
Indicates information that will assist you
in gaining the optimum benefit from your
vehicle and enable you to care more effectively
for your vehicle.<
Refers to measures that can be taken to
help protect the environment.<
*Indicates special equipment, country-spe-
cific equipment and optional extras, as well as
equipment and functions not yet available at the
time of printing.
"..." Identifies Control Display texts used to
select individual functions.
{...} Verbal instructions to use with the voice
command system.
{{...}} Identifies the answers generated by the
voice command system.
Symbols on vehicle components
Indicates that you should consult the rel-
evant section of this Owner's Manual for
information on a particular part or assembly.
Page 7 of 292
5Reference
At a glance
Controls
Driving tips
Communications
Navigation
Entertainment
Mobility
The individual vehicle
When purchasing your BMW, you have decided
in favor of a model with individualized equip-
ment and features. This Owner's Manual
describes the entire array of options and equip-
ment available with a specific BMW model.
Please bear in mind that the manual may con-
tain information on accessories and equipment
that you have not specified for your own vehicle.
Sections describing options and special equip-
ment are marked by asterisks
* to assist you in
identifying possible differences between the
descriptions in this manual and your own vehi-
cle's equipment.
If equipment in your BMW is not described in
this Owner's Manual, please refer to the accom-
panying Supplementary Owner's Manuals.
Editorial notice
BMW pursues a policy of continuous, ongoing
development that is conceived to ensure that
our vehicles continue to embody the highest
quality and safety standards combined with
advanced, state-of-the-art technology. For this
r e a s o n , i t i s p o s s i b l e t h a t t h e f e a t u r e s d e s c r i b e d
in this Owner's Manual could differ from those
on your vehicle.
For your own safety
Maintenance and repairs
Advanced technology, e.g. the use of
modern materials and high-performance
electronics, requires specially adapted mainte-
nance and repair methods. Therefore, have cor-
responding work on your BMW performed only
by your BMW Sports Activity Vehicle Center or
a workshop that works according to BMW
repair procedures with correspondingly trained
personnel. If this work is not carried out prop-
erly, there is a danger of subsequent damage
and related safety hazards.<
Page 17 of 292
At a glance
15Reference
Controls
Driving tips
Communications
Navigation
Entertainment
Mobility
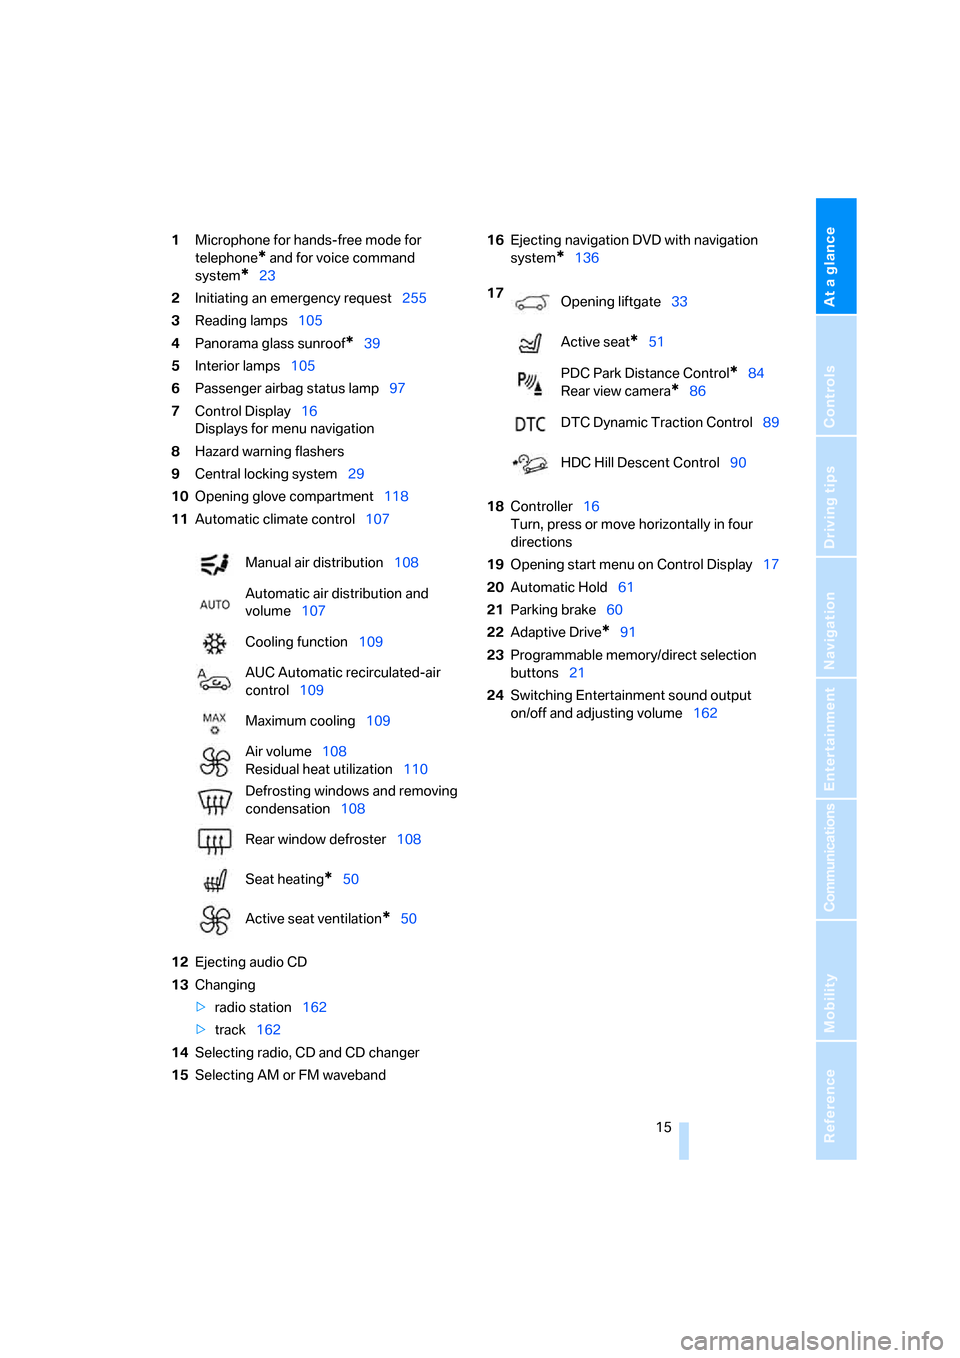
1Microphone for hands-free mode for
telephone
* and for voice command
system
*23
2Initiating
an emergency request255
3Reading lamps105
4Panorama glass sunroof
*39
5Interior lamps105
6Passenger airbag status lamp97
7Control Display16
Displays for menu navigation
8Hazard warning flashers
9Central locking system29
10Opening glove compartment118
11Automatic climate control107
12Ejecting audio CD
13Changing
>radio station162
>track162
14Selecting radio, CD and CD changer
15Selecting AM or FM waveband16Ejecting navigation DVD with navigation
system
*136
18Controller16
Turn, press or move horizontally in four
directions
19Opening start menu on Control Display17
20Automatic Hold61
21Parking brake60
22Adaptive Drive
*91
23Programmable memory/direct selection
buttons21
24Switching Entertainment sound output
on/off and adjusting volume162 Manual air distribution108
Automatic air distribution and
volume107
Cooling function109
AUC Automatic recirculated-air
control109
Maximum cooling109
Air volume108
Residual heat utilization110
Defrosting windows and removing
condensation108
Rear window defroster108
Seat heating
*50
Active seat ventilation
*50
17
Opening liftgate33
Active seat
*51
PDC Park Distance Control
*84
Rear view camera
*86
DTC Dynamic Traction Control89
HDC Hill Descent Control90
Page 25 of 292
At a glance
23Reference
Controls
Driving tips
Communications
Navigation
Entertainment
Mobility
Voice command system
The concept
The voice command system allows you to con-
trol operation of various vehicle systems with-
out ever removing your hands from the steering
wheel.
Individual menu items on the Control Display
can be spoken as commands. This frees you of
having to use the controller.
The voice command system transforms your
oral commands into control signals for the
selected systems and provides support in the
form of instructions or questions.
The voice command system uses a special
microphone located in the area of the interior
rearview mirror, refer to page14.
Precondition
Via iDrive, set the language that applies for the
voice command system in order to enable iden-
tification of the spoken commands. To set the
language of iDrive, refer to page83.
Symbols in Owner's Manual
Voice commands
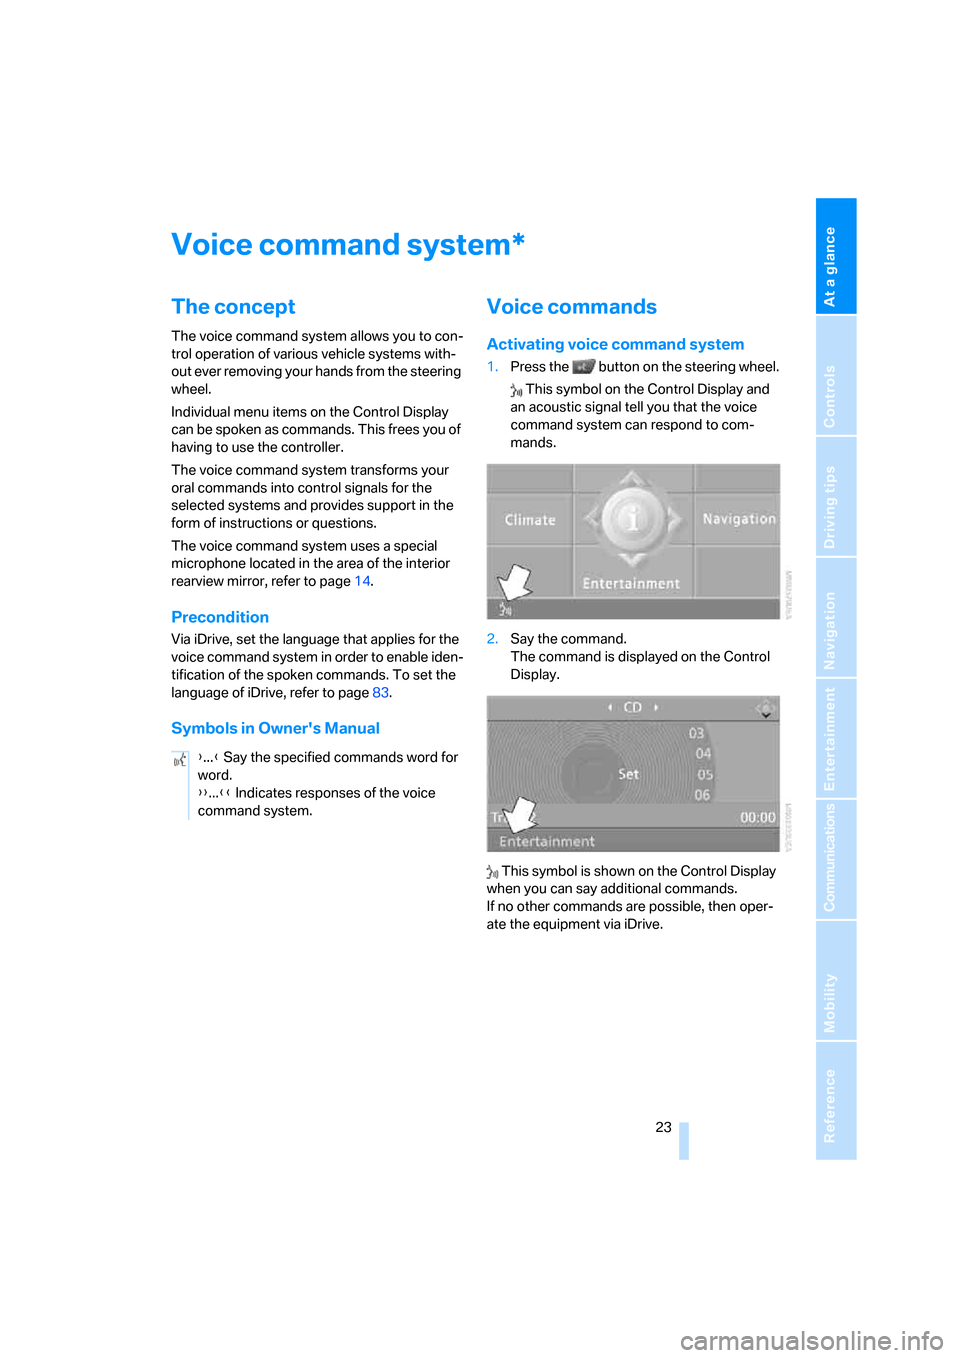
Activating voice command system
1.Press the button on the steering wheel.
This symbol on the Control Display and
an acoustic signal tell you that the voice
command system can respond to com-
mands.
2.Say the command.
The command is displayed on the Control
Display.
This symbol is shown on the Control Display
when you can say additional commands.
If no other commands are possible, then oper-
ate the equipment via iDrive.
*
{...} Say the specified commands word for
word.
{{...}} Indicates responses of the voice
command system.
Page 34 of 292
Opening and closing
32
Convenient operation
You also operate the windows and the pan-
orama glass sunroof
* from the driver's door
lock.
Turn and hold the key in the positions for
unlocking or locking.
Watch during the closing process to be
sure that no one is injured. Rotating the
key back into the initial position stops the
movement.<
Manual operation
In the event of an electrical malfunction, you can
turn a key all the way to the right or left in the
door lock to lock or unlock the driver's door.
Opening and closing:
From inside
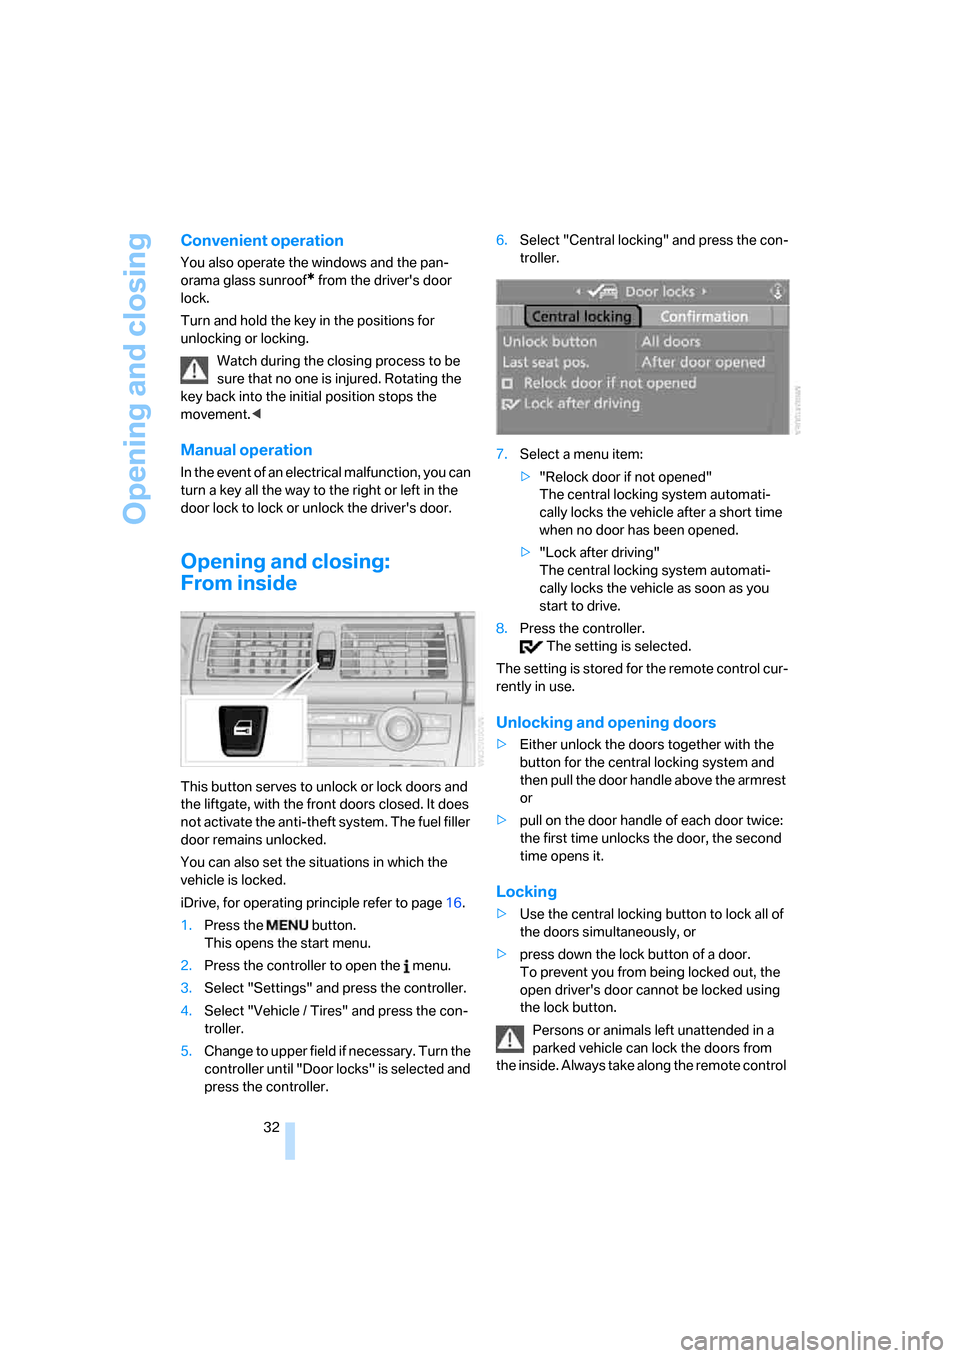
This button serves to unlock or lock doors and
the liftgate, with the front doors closed. It does
not activate the anti-theft system. The fuel filler
door remains unlocked.
You can also set the situations in which the
vehicle is locked.
iDrive, for operating principle refer to page16.
1.Press the button.
This opens the start menu.
2.Press the controller to open the menu.
3.Select "Settings" and press the controller.
4.Select "Vehicle / Tires" and press the con-
troller.
5.Change to upper field if necessary. Turn the
controller until "Door locks" is selected and
press the controller.6.Select "Central locking" and press the con-
troller.
7.Select a menu item:
>"Relock door if not opened"
The central locking system automati-
cally locks the vehicle after a short time
when no door has been opened.
>"Lock after driving"
The central locking system automati-
cally locks the vehicle as soon as you
start to drive.
8.Press the controller.
The setting is selected.
The setting is stored for the remote control cur-
rently in use.
Unlocking and opening doors
>Either unlock the doors together with the
button for the central locking system and
then pull the door handle above the armrest
or
>pull on the door handle of each door twice:
the first time unlocks the door, the second
time opens it.
Locking
>Use the central locking button to lock all of
the doors simultaneously, or
>press down the lock button of a door.
To prevent you from being locked out, the
open driver's door cannot be locked using
the lock button.
Persons or animals left unattended in a
parked vehicle can lock the doors from
the inside. Always take along the remote control
Page 35 of 292
Controls
33Reference
At a glance
Driving tips
Communications
Navigation
Entertainment
Mobility
when leaving the vehicle so that the vehicle can
then be opened from the outside.<
Doors
Automatic soft closing*
To close the doors, merely push them gently.
The closing process will then be carried out
automatically.
Make sure that the closing path of the
doors is clear; otherwise injuries may
result.<
Liftgate
During opening, the liftgate pivots back
and up. Ensure that adequate clearance is
available before opening.<
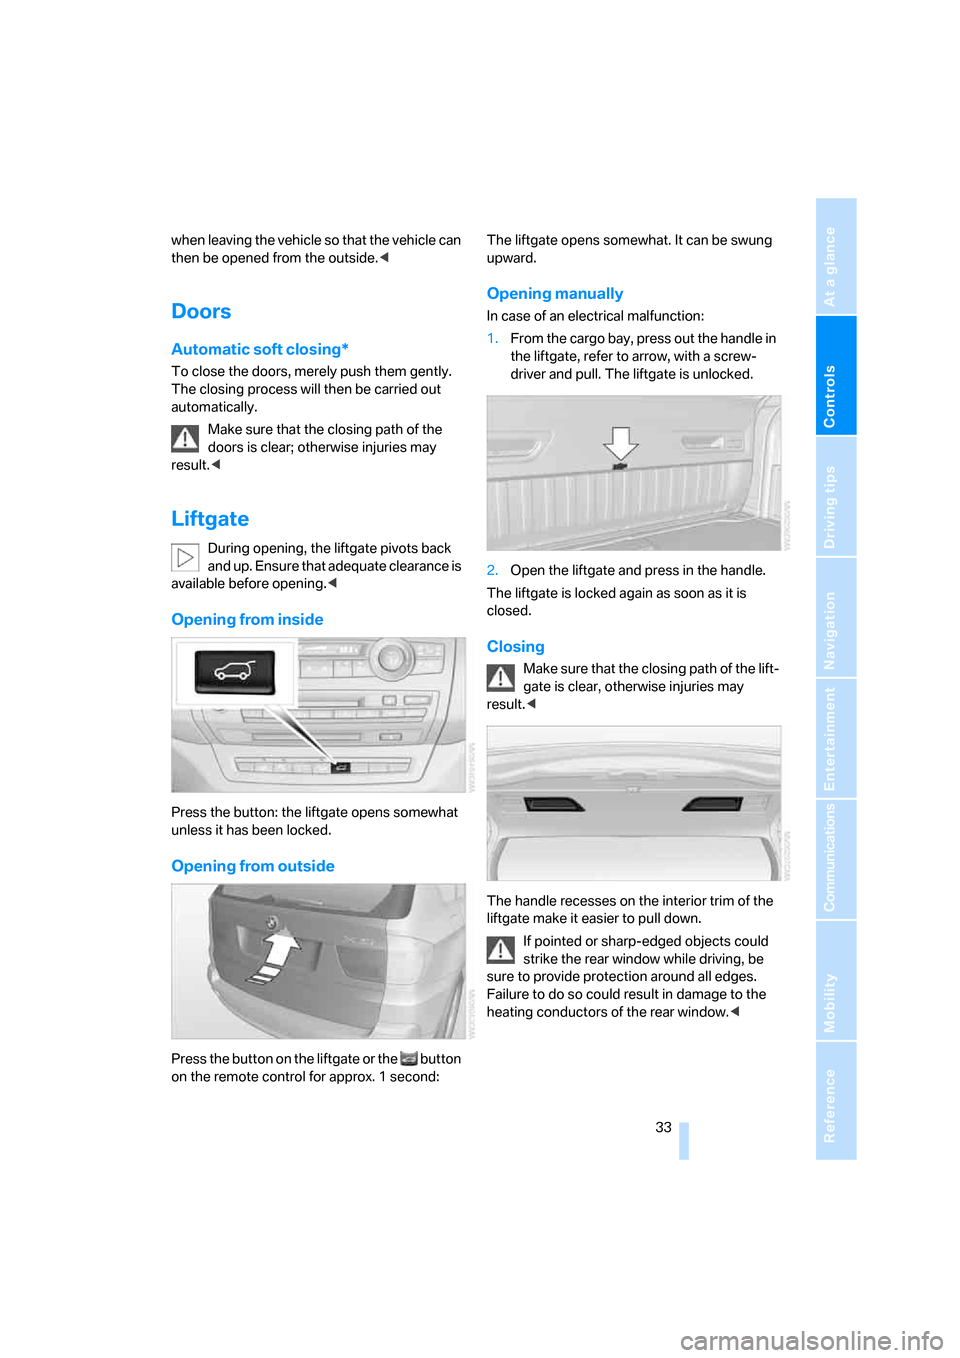
Opening from inside
Press the button: the liftgate opens somewhat
unless it has been locked.
Opening from outside
Press the button on the liftgate or the button
on the remote control for approx. 1 second: The liftgate opens somewhat. It can be swung
upward.
Opening manually
In case of an electrical malfunction:
1.From the cargo bay, press out the handle in
the liftgate, refer to arrow, with a screw-
driver and pull. The liftgate is unlocked.
2.Open the liftgate and press in the handle.
The liftgate is locked again as soon as it is
closed.
Closing
Make sure that the closing path of the lift-
gate is clear, otherwise injuries may
result.<
The handle recesses on the interior trim of the
liftgate make it easier to pull down.
If pointed or sharp-edged objects could
strike the rear window while driving, be
sure to provide protection around all edges.
Failure to do so could result in damage to the
heating conductors of the rear window.<
Page 42 of 292
Opening and closing
40 >When the sunroof is raised, briefly press the
switch twice in the opening direction:
The sunroof is opened all the way.
Comfort position
In the comfort position, the sunroof is not com-
pletely open; this reduces wind noise in the
passenger compartment.
Each time the panorama glass sunroof is com-
pletely opened or closed, it stops in the comfort
position. If desired, continue the motion follow-
ing this with the switch.
After switching off ignition
You can still operate the roof for approx.
1 minute, as long as no door has been opened.
Pinch protection system
If the panorama glass sunroof or sliding visor
encounter resistance when closing from
roughly one third of the sunroof opening or
when closing from the raised position, the clos-
ing action is interrupted and the panorama
glass sunroof and sliding visor reopen a little.
Despite the pinch protection system,
inspect the sunroof's travel path prior to
closing it, as the safety system might fail to
detect certain kinds of obstructions, such as
very thin objects, and the sunroof would con-
tinue closing.<
Closing without pinch protection
system
In case of danger from outside, slide the switch
forward beyond the resistance point and hold.
The roof closes without the pinch protection
system.
Following interruptions in electrical
power supply
After a power loss, the sunroof may only
respond to the raise command. Then have the
system initialized. BMW recommends having
this work carried out by your BMW Sports
Activity Vehicle Center.
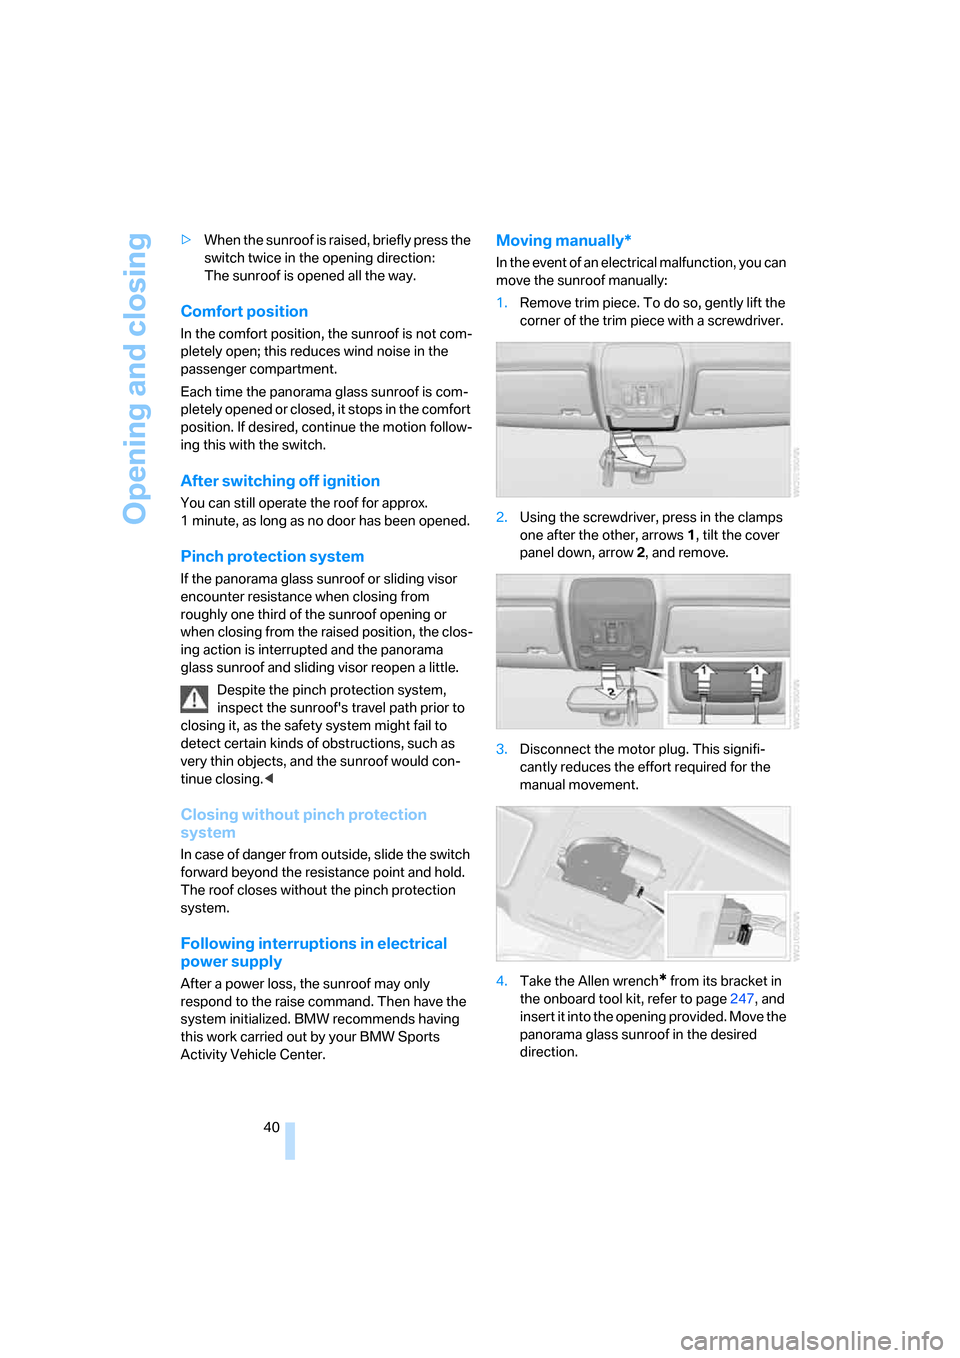
Moving manually*
In the event of an electrical malfunction, you can
move the sunroof manually:
1.Remove trim piece. To do so, gently lift the
corner of the trim piece with a screwdriver.
2.Using the screwdriver, press in the clamps
one after the other, arrows 1, tilt the cover
panel down, arrow 2, and remove.
3.Disconnect the motor plug. This signifi-
cantly reduces the effort required for the
manual movement.
4.Take the Allen wrench
* from its bracket in
the onboard tool kit, refer to page247, and
insert it into the opening provided. Move the
panorama glass sunroof in the desired
direction.