BMW X5 4.4I 2004 E53 Service Manual
Manufacturer: BMW, Model Year: 2004, Model line: X5 4.4I, Model: BMW X5 4.4I 2004 E53Pages: 200, PDF Size: 3.91 MB
Page 41 of 200
39n
OverviewControlsMaintenanceRepairsDataIndex
Alarm system Windows>The indicator lamp flashes for
10 seconds after the vehicle is
unlocked: an attempted entry has
been detected in the period since the
system was armed.
Following triggering of an alarm, the
indicator lamp will flash continuously. Tilt alarm sensor and
interior motion sensor Tilt alarm sensor:
The tilt of the vehicle is monitored. The
alarm system reacts, for example, if
someone attempts to steal the wheels
or tow the vehicle.
Interior motion sensor:
In order for the interior motion sensor to
function properly, the windows and
panorama glass roof ‹must be com-
pletely closed.
Avoiding unintentional alarms The tilt alarm sensor and interior motion
sensor may be switched off at the same
time. This prevents unintentional
alarms, e.g. in the following situations:
>In duplex garages
>When transporting on car-carrying
trains
>If animals are to remain in the vehicle.
Switching off the tilt alarm sensor and
interior motion sensor:
Press the button on the remote control
twice consecutively.
The indicator lamp lights up briefly and
then flashes continuously. The tilt alarm
sensor and the interior motion sensor
are switched off up to the next unlock-
ing and locking actions.
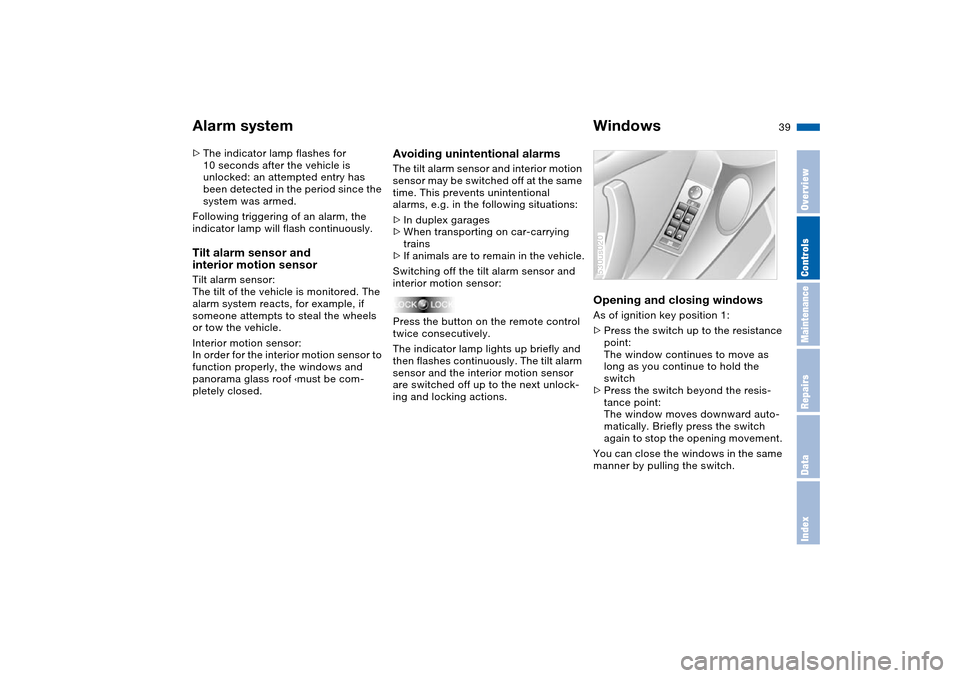
Opening and closing windows As of ignition key position 1:
>Press the switch up to the resistance
point:
The window continues to move as
long as you continue to hold the
switch
>Press the switch beyond the resis-
tance point:
The window moves downward auto-
matically. Briefly press the switch
again to stop the opening movement.
You can close the windows in the same
manner by pulling the switch.530us020
Page 42 of 200
40n
Windows After the ignition has been switched off:
>You can still operate the windows as
long as neither of the front doors has
been opened. To open the windows,
press the switch beyond the resis-
tance point.
When leaving the vehicle, always
remove the ignition key and close
the doors, as otherwise children could
operate the windows and injure them-
selves etc.<
For the convenience operation via the
remote control or the door lock, refer to
pages 31, 33. Anti-trapping mechanism A contact strip is integrated into the
inner side of each of the upper window
frame sections. If pressure is exerted
against this contact strip while a win-
dow is being raised, the system will
respond by stopping the window and
then retracting it a small distance.
Despite the anti-trapping mecha-
nism, be extremely careful that the
closing path of the window is not
obstructed whenever it is closed.
Otherwise, an object might not touch
the contact strip in some situations,
with very thin objects, for instance.
You can disable the anti-trapping
mechanism by pulling the switch
beyond the resistance point and hold-
ing it.
Because the power windows are sealed
at high pressure to prevent wind noise
when closed, a powerful motor is
required for efficient closing. When
closing the windows, always ensure
that they are not obstructed in any way.
Unsupervised use of these systems can
result in serious personal injury.
Remove the ignition key to deactivate
the power windows whenever you
leave the vehicle. Never leave the keys
in the vehicle with unsupervised chil-
dren. Never place anything that could
obstruct the driver's vision on or next to
the windows.<
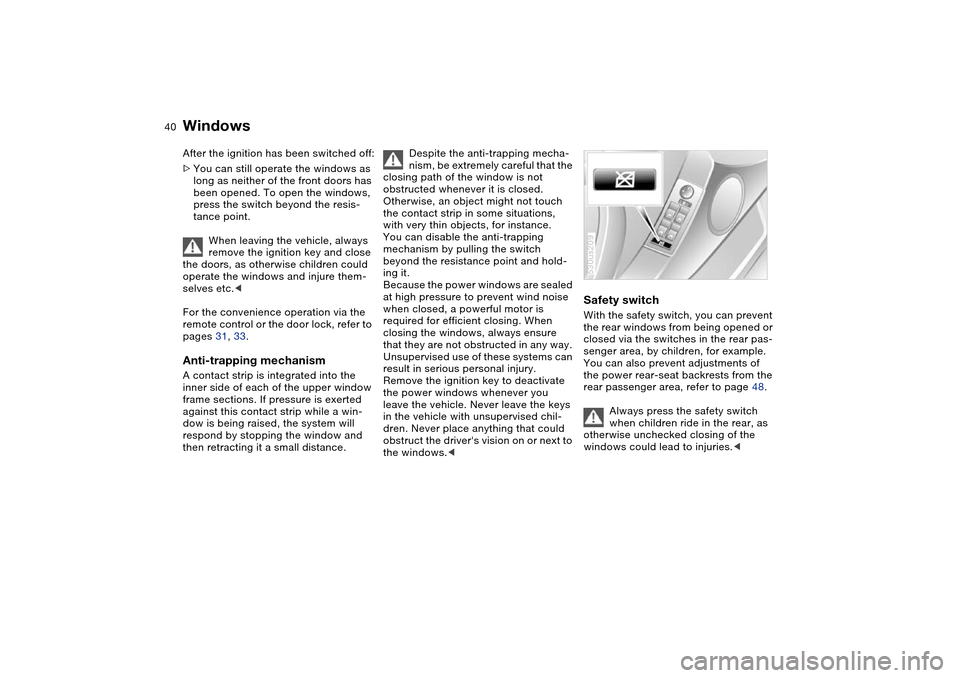
Safety switch With the safety switch, you can prevent
the rear windows from being opened or
closed via the switches in the rear pas-
senger area, by children, for example.
You can also prevent adjustments of
the power rear-seat backrests from the
rear passenger area, refer to page 48.
Always press the safety switch
when children ride in the rear, as
otherwise unchecked closing of the
windows could lead to injuries.<530us209
Page 43 of 200
41n
OverviewControlsMaintenanceRepairsDataIndex
Panorama glass roof
*
When leaving the vehicle, always
remove the ignition key and close
the doors, as otherwise children could
operate the roof and injure themselves
etc.<
The panorama glass roof is operational
from ignition key position 1.
After the ignition has been switched off:
You can operate the panorama glass
roof for up to 1 minute as long as nei-
ther of the doors has been opened.
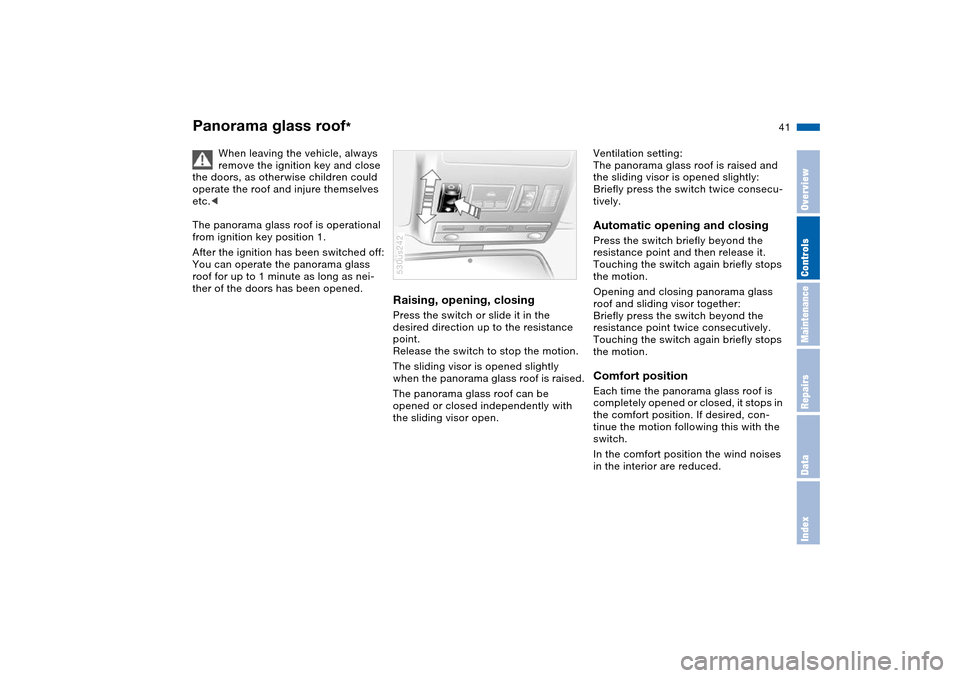
Raising, opening, closingPress the switch or slide it in the
desired direction up to the resistance
point.
Release the switch to stop the motion.
The sliding visor is opened slightly
when the panorama glass roof is raised.
The panorama glass roof can be
opened or closed independently with
the sliding visor open.530us242
Ventilation setting:
The panorama glass roof is raised and
the sliding visor is opened slightly:
Briefly press the switch twice consecu-
tively.Automatic opening and closing Press the switch briefly beyond the
resistance point and then release it.
Touching the switch again briefly stops
the motion.
Opening and closing panorama glass
roof and sliding visor together:
Briefly press the switch beyond the
resistance point twice consecutively.
Touching the switch again briefly stops
the motion.Comfort position Each time the panorama glass roof is
completely opened or closed, it stops in
the comfort position. If desired, con-
tinue the motion following this with the
switch.
In the comfort position the wind noises
in the interior are reduced.
Page 44 of 200
42n
Panorama glass roof
*
Anti-trapping mechanism If the panorama glass roof or sliding
visor encounter resistance when clos-
ing from roughly one third of the roof
opening or when closing from the
raised position, the closing action is
interrupted and the panorama glass
roof and sliding visor reopen a little.
Despite the anti-trapping mecha-
nism inspect the roof's travel path
prior to closing it, as the safety system
might fail to detect certain kinds of
obstructions, such as very thin objects,
and the roof would continue closing.
The anti-trapping mechanism for clos-
ing the panorama glass roof is deacti-
vated if the switch is pressed beyond
the resistance point and held there. The
closing action is interrupted when you
release the switch.<
Following a power failure Following interruptions in electrical
power, for instance, when the battery is
disconnected, it is possible that the
panorama glass roof will extend to its
tilt-up position, but fail to respond to
other commands. The system must be
initialized. BMW recommends having
this work carried out by your BMW
Sport Activity Vehicle center.
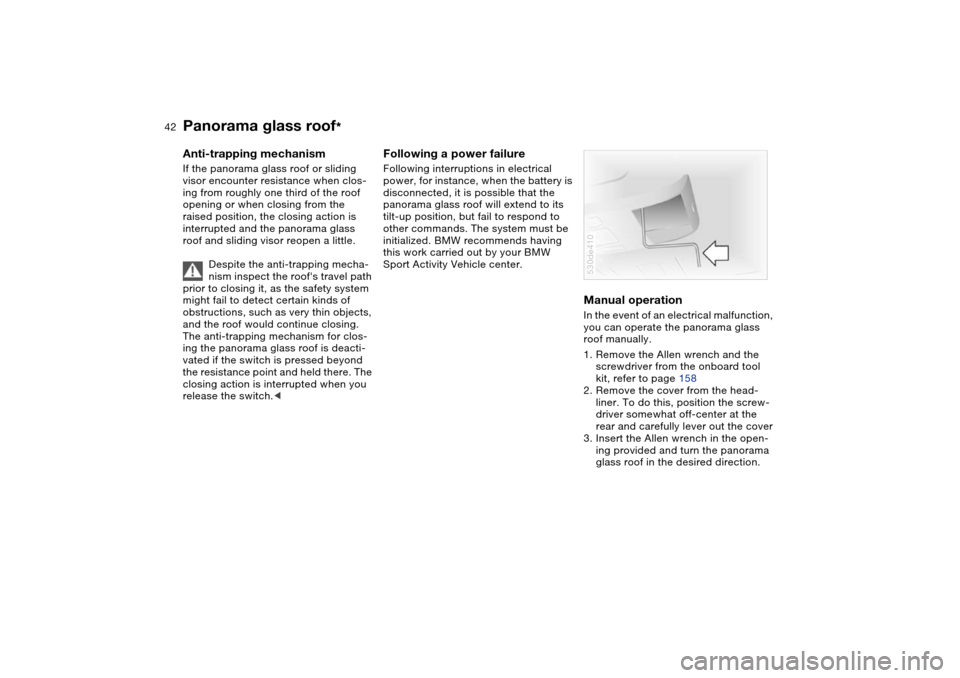
Manual operation In the event of an electrical malfunction,
you can operate the panorama glass
roof manually.
1. Remove the Allen wrench and the
screwdriver from the onboard tool
kit, refer to page 158
2. Remove the cover from the head-
liner. To do this, position the screw-
driver somewhat off-center at the
rear and carefully lever out the cover
3. Insert the Allen wrench in the open-
ing provided and turn the panorama
glass roof in the desired direction.530de410
Page 45 of 200
43n
OverviewControlsMaintenanceRepairsDataIndex
The ideal sitting position can make a
vital contribution to relaxed driving that
is as fatigue-free as possible. The sit-
ting position also plays an important
role together with the safety belts and
airbags in providing occupants with
maximum levels of passive safety in an
accident. To ensure that the safety sys-
tems operate with optimized efficiency,
we strongly urge you to observe the
instructions contained in the following
section.
For additional information on transport-
ing children safely, refer to page 59.Sitting safely with airbags
Always maintain an adequate dis-
tance between yourself and the
airbags. Always hold the steering wheel
by its rim with hands at the 9 o'clock
and 3 o'clock positions to minimize the
risk of injuries to your hands and arms
in the event of airbag deployment.
No one and nothing is to come between
the airbags and the seat occupant. Do
not use the cover of the front airbag on
the front passenger side as a storage
area. Make sure that the front passen-
ger is correctly seated and does not
rest feet or legs on the instrument clus-
ter, otherwise leg injuries can occur if
the knee and front airbag are triggered.
Never let an occupant's head rest near
or on a side airbag because the inflating
airbag could cause a serious or fatal
injury.<
Even if you adhere to all the instructions
injuries resulting from contact with air-
bags cannot be fully excluded, depend-
ing on the circumstances. The ignition
and inflation noise may provoke a mild –
usually temporary – hearing loss in
extremely sensitive individuals.
For airbag locations and additional
information on airbags, refer to
page 57.Sitting safely with safety belts Fasten your safety belt before starting
any trip. Airbags complement the safety
belt as an additional safety device, but
they do not represent a substitute.
Your vehicle has five seats that are all
equipped with a safety belt.
At all times, occupants should sit
upright and be properly restrained
– infants and small children in appropri-
ate child-restraint systems; larger chil-
dren and adults using the safety belts.
Even pregnant women should also
always wear the safety belt and espe-
cially ensure that the lap belt is posi-
tioned low on the hip and does not
press on the lower body.
Only one person should ever wear a
safety belt, and infants and children
may not be seated on the lap of another
passenger.
Do not route the belt across your neck,
or run it across sharp edges. Be sure
that the belt does not become caught
or jammed. Avoid twisting the belt while
routing it firmly across the hips and
shoulder. Do not allow the belt to rest
against hard or fragile objects. Other-
wise, in the event of a frontal impact, a
loose lap belt could slide over your
hips, leading to abdominal injury. Avoid
wearing clothing that prevents the belt
from fitting properly and pull the lap belt
periodically to readjust the tension
across your shoulder in order to avoid a
reduction in the retention effect of the
safety belt.<
For instructions on operating the safety
belt, refer to page 49.
Sitting safely
Page 46 of 200
44n
SeatsNote before adjusting
Never try to adjust your seat while
operating the vehicle. The seat
could respond with unexpected move-
ment, and the ensuing loss of vehicle
control could lead to an accident. On
the front passenger side as well, do not
tilt the backrest too far toward the rear
while driving. Failure to observe this
precaution can prevent the belt from
providing effective protection against
injury, as the passenger could slide
under the belt in an accident.<
Seat adjustment>Mechanical seat adjustment, refer to
following columns
>Power seat adjustment, refer to
page 46
>Head restraints, refer to page 47
>Power rear-seat backrest adjustment,
refer to page 48.
Page 47 of 200
45n
OverviewControlsMaintenanceRepairsDataIndex
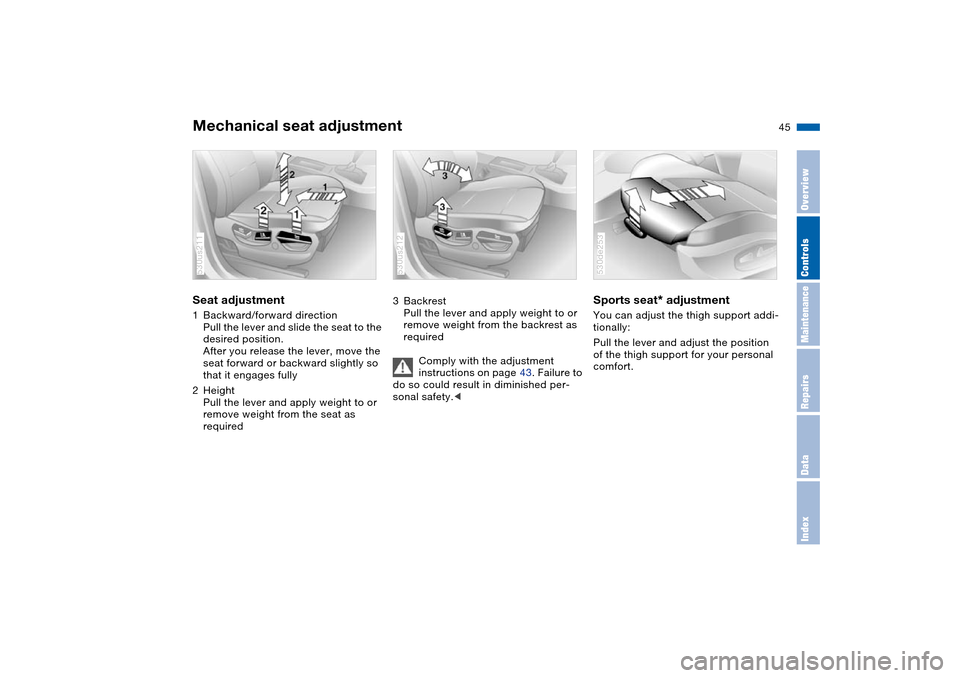
Mechanical seat adjustment Seat adjustment 1Backward/forward direction
Pull the lever and slide the seat to the
desired position.
After you release the lever, move the
seat forward or backward slightly so
that it engages fully
2Height
Pull the lever and apply weight to or
remove weight from the seat as
required 530us211
3Backrest
Pull the lever and apply weight to or
remove weight from the backrest as
required
Comply with the adjustment
instructions on page 43. Failure to
do so could result in diminished per-
sonal safety.< 530us212
Sports seat
* adjustment
You can adjust the thigh support addi-
tionally:
Pull the lever and adjust the position
of the thigh support for your personal
comfort. 530de253
Page 48 of 200
46n
Power seat adjustment
*
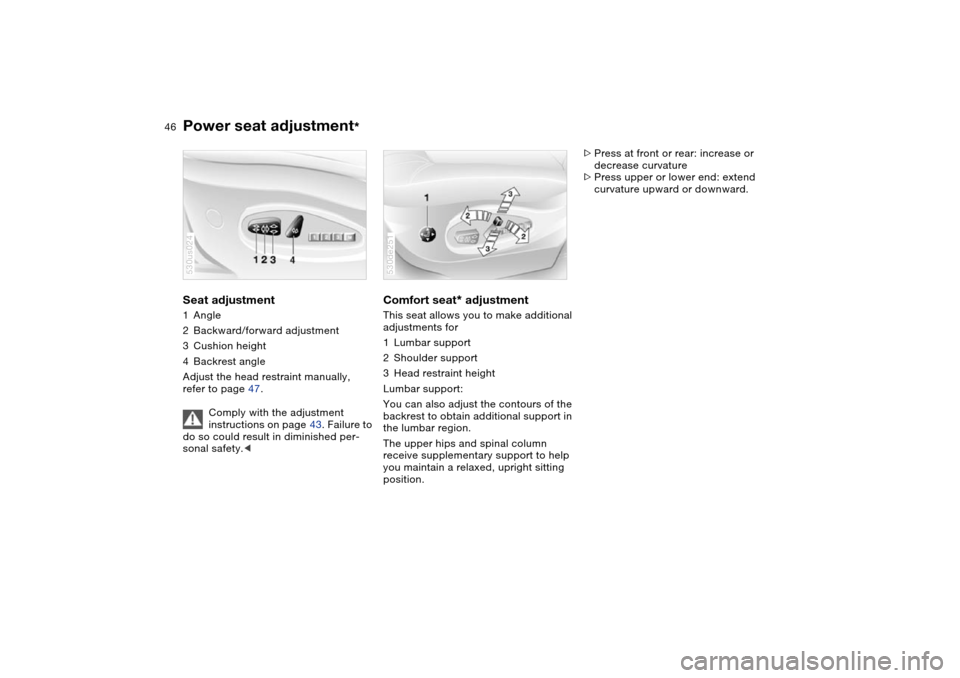
Seat adjustment 1Angle
2Backward/forward adjustment
3Cushion height
4Backrest angle
Adjust the head restraint manually,
refer to page 47.
Comply with the adjustment
instructions on page 43. Failure to
do so could result in diminished per-
sonal safety.< 530us024
Comfort seat
* adjustment
This seat allows you to make additional
adjustments for
1Lumbar support
2Shoulder support
3Head restraint height
Lumbar support:
You can also adjust the contours of the
backrest to obtain additional support in
the lumbar region.
The upper hips and spinal column
receive supplementary support to help
you maintain a relaxed, upright sitting
position.530de251
>Press at front or rear: increase or
decrease curvature
>Press upper or lower end: extend
curvature upward or downward.
Page 49 of 200
47n
OverviewControlsMaintenanceRepairsDataIndex
Power seat adjustment
*
Head restraints
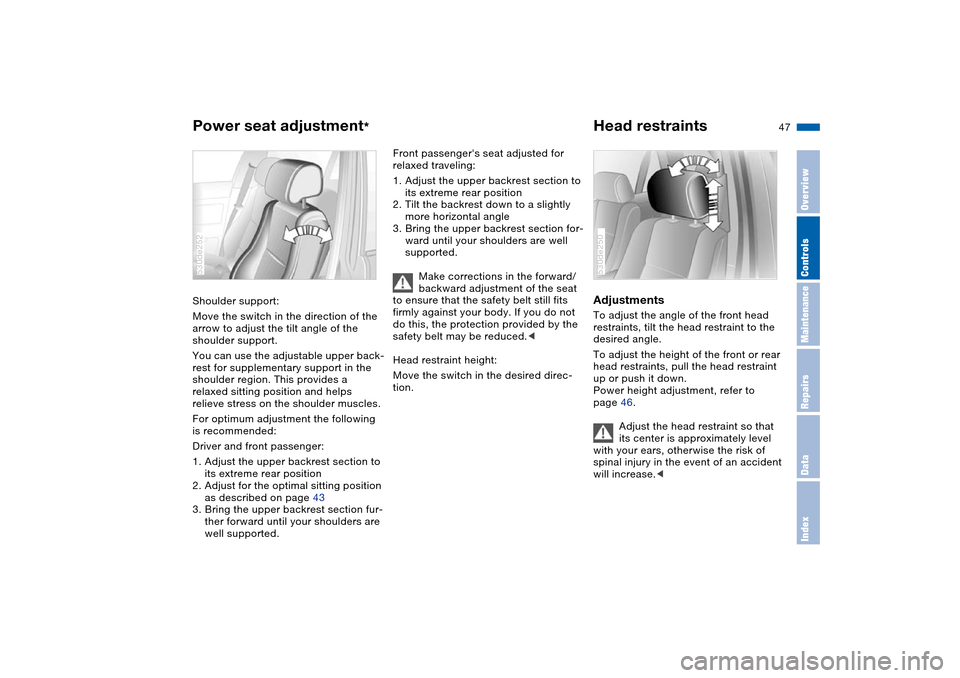
Shoulder support:
Move the switch in the direction of the
arrow to adjust the tilt angle of the
shoulder support.
You can use the adjustable upper back-
rest for supplementary support in the
shoulder region. This provides a
relaxed sitting position and helps
relieve stress on the shoulder muscles.
For optimum adjustment the following
is recommended:
Driver and front passenger:
1. Adjust the upper backrest section to
its extreme rear position
2. Adjust for the optimal sitting position
as described on page 43
3. Bring the upper backrest section fur-
ther forward until your shoulders are
well supported.530de252
Front passenger's seat adjusted for
relaxed traveling:
1. Adjust the upper backrest section to
its extreme rear position
2. Tilt the backrest down to a slightly
more horizontal angle
3. Bring the upper backrest section for-
ward until your shoulders are well
supported.
Make corrections in the forward/
backward adjustment of the seat
to ensure that the safety belt still fits
firmly against your body. If you do not
do this, the protection provided by the
safety belt may be reduced.<
Head restraint height:
Move the switch in the desired direc-
tion.
Adjustments To adjust the angle of the front head
restraints, tilt the head restraint to the
desired angle.
To adjust the height of the front or rear
head restraints, pull the head restraint
up or push it down.
Power height adjustment, refer to
page 46.
Adjust the head restraint so that
its center is approximately level
with your ears, otherwise the risk of
spinal injury in the event of an accident
will increase.<530de250
Page 50 of 200
48n
Head restraints Power rear-seat backrest adjustment
*
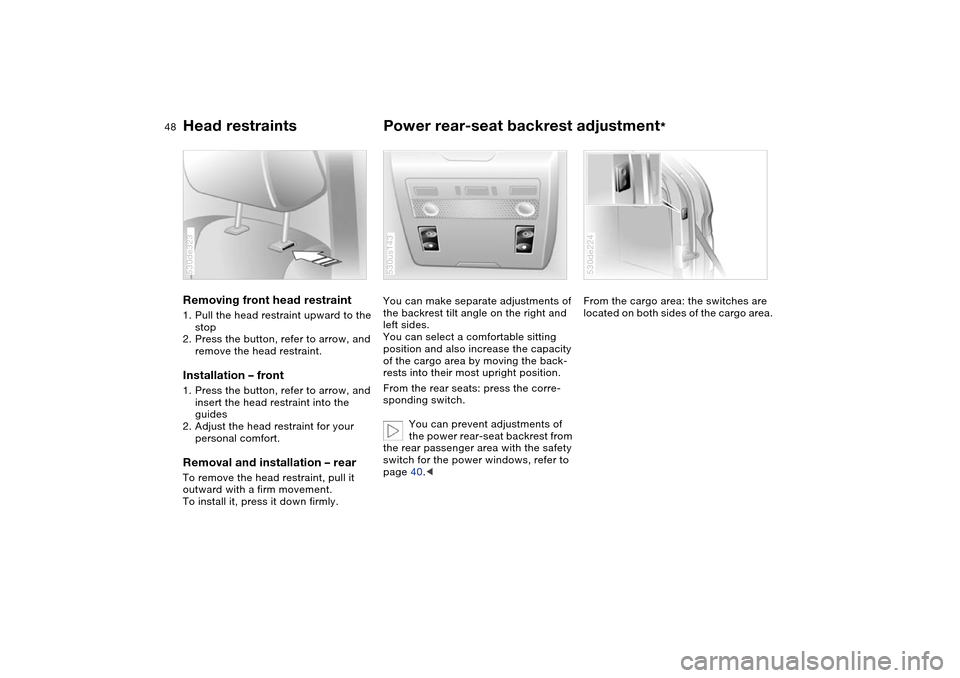
Removing front head restraint 1. Pull the head restraint upward to the
stop
2. Press the button, refer to arrow, and
remove the head restraint.Installation – front 1. Press the button, refer to arrow, and
insert the head restraint into the
guides
2. Adjust the head restraint for your
personal comfort.Removal and installation – rearTo remove the head restraint, pull it
outward with a firm movement.
To install it, press it down firmly. 530de323
You can make separate adjustments of
the backrest tilt angle on the right and
left sides.
You can select a comfortable sitting
position and also increase the capacity
of the cargo area by moving the back-
rests into their most upright position.
From the rear seats: press the corre-
sponding switch.
You can prevent adjustments of
the power rear-seat backrest from
the rear passenger area with the safety
switch for the power windows, refer to
page 40.< 530us143
From the cargo area: the switches are
located on both sides of the cargo area. 530de224