navigation BMW X5 4.8I 2008 E70 Owner's Manual
[x] Cancel search | Manufacturer: BMW, Model Year: 2008, Model line: X5 4.8I, Model: BMW X5 4.8I 2008 E70Pages: 292, PDF Size: 9.32 MB
Page 177 of 292
Navigation
Entertainment
Driving tips
175Reference
At a glance
Controls
Communications
Mobility
CD player and CD changer
Listening to CDs
When equipped with two drives:
The upper drive is for audio CDs.
Compressed audio files
CDs with compressed audio files, i.e. MP3, can
be played by the CD player and CD changer.
Starting CD player
Inserting CD
Insert the CD into the drive with the labeled side
up.
The CD is automatically pulled in. Playback
starts automatically if the sound output is on.
For CDs with compressed audio files, it can take
up to approx. 1 minute to read in the data
depending on the directory structure.
Via iDrive
Starting playback when there is already a CD in
the drive:
iDrive, for operating principle refer to page16.
1.Press the button.
This opens the start menu.
2.Move the controller backwards to open
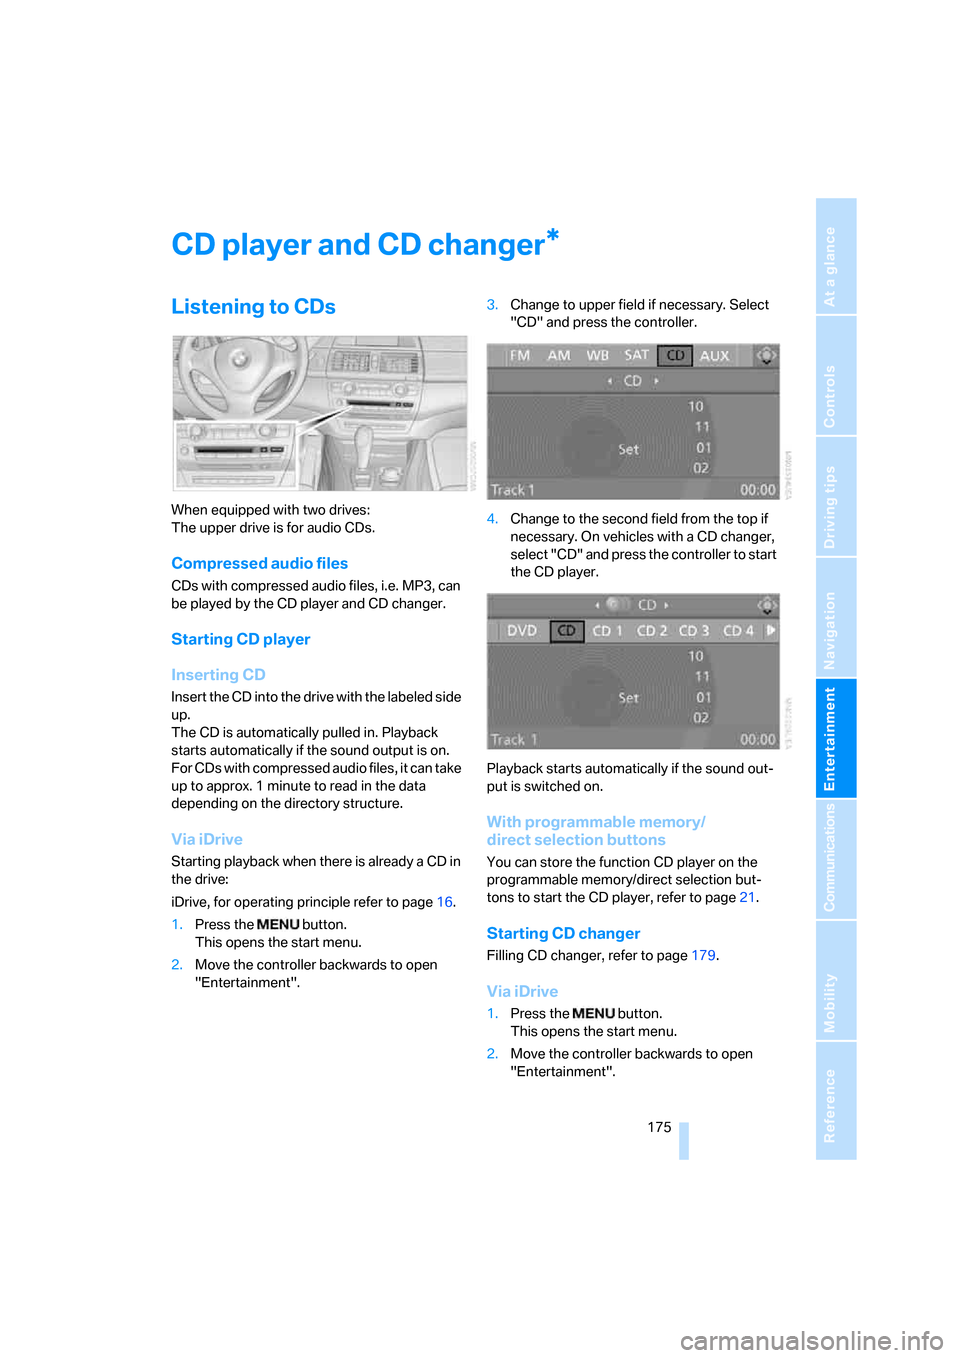
"Entertainment".3.Change to upper field if necessary. Select
"CD" and press the controller.
4.Change to the second field from the top if
necessary. On vehicles with a CD changer,
select "CD" and press the controller to start
the CD player.
Playback starts automatically if the sound out-
put is switched on.
With programmable memory/
direct selection buttons
You can store the function CD player on the
programmable memory/direct selection but-
tons to start the CD player, refer to page21.
Starting CD changer
Filling CD changer, refer to page179.
Via iDrive
1.Press the button.
This opens the start menu.
2.Move the controller backwards to open
"Entertainment".
*
Page 179 of 292
Navigation
Entertainment
Driving tips
177Reference
At a glance
Controls
Communications
Mobility
Displaying information on track
With compressed audio files, you can display
any information stored on the current track, e.g.
the name of the artist.
1.Press the controller.
2.Select "Details" and press the controller.
The information for the current track are dis-
played.
The setting is stored for the remote control cur-
rently in use.
Sampling tracks, scan
The system automatically plays a brief sample
from each of the tracks on the current CD.
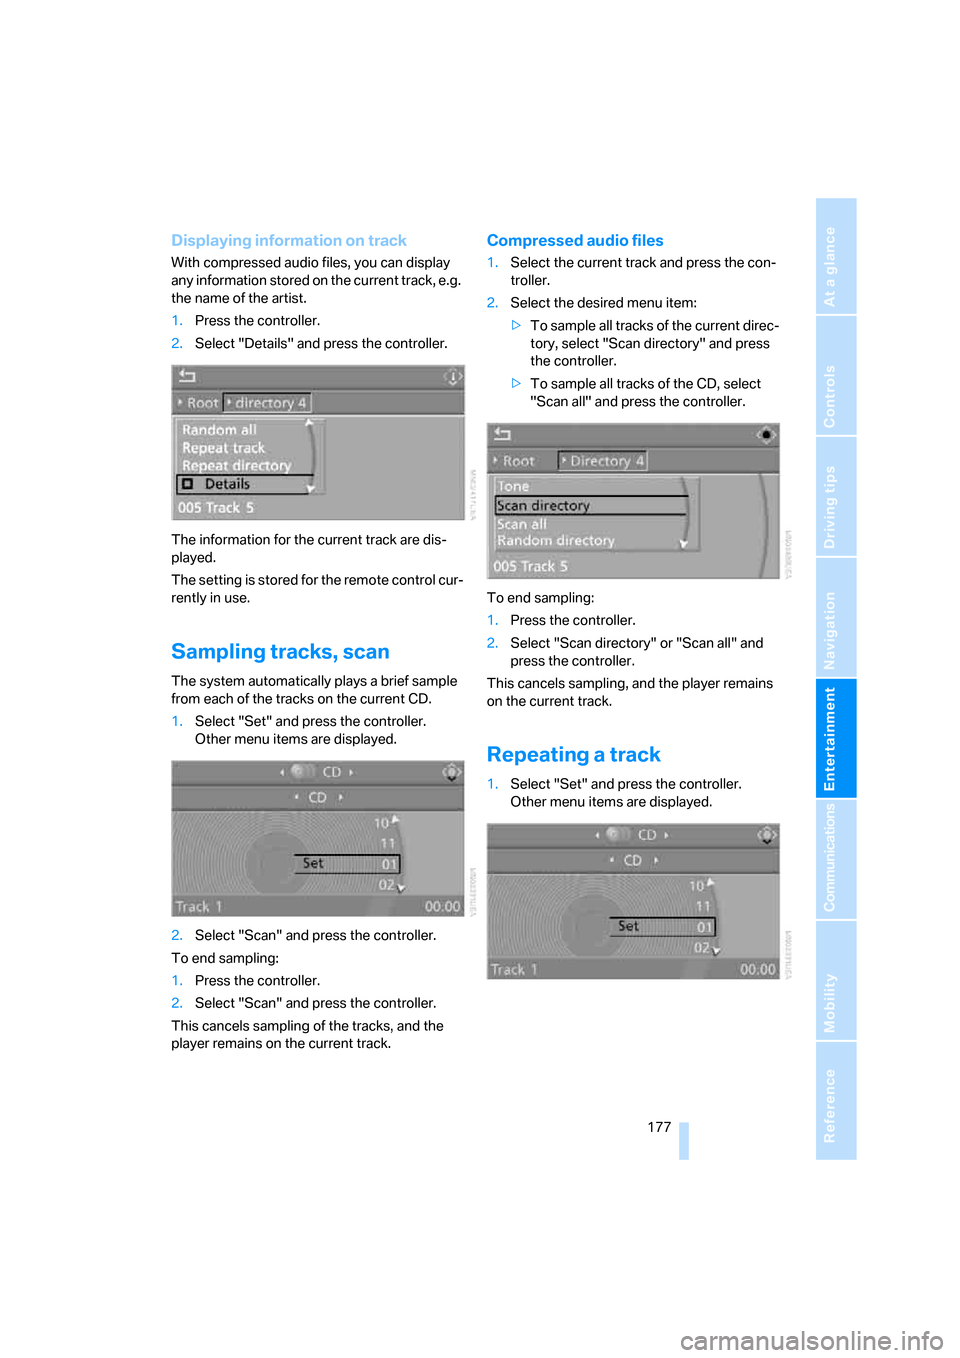
1.Select "Set" and press the controller.
Other menu items are displayed.
2.Select "Scan" and press the controller.
To end sampling:
1.Press the controller.
2.Select "Scan" and press the controller.
This cancels sampling of the tracks, and the
player remains on the current track.
Compressed audio files
1.Select the current track and press the con-
troller.
2.Select the desired menu item:
>To sample all tracks of the current direc-
tory, select "Scan directory" and press
the controller.
>To sample all tracks of the CD, select
"Scan all" and press the controller.
To end sampling:
1.Press the controller.
2.Select "Scan directory" or "Scan all" and
press the controller.
This cancels sampling, and the player remains
on the current track.
Repeating a track
1.Select "Set" and press the controller.
Other menu items are displayed.
Page 181 of 292
Navigation
Entertainment
Driving tips
179Reference
At a glance
Controls
Communications
Mobility
CD changer
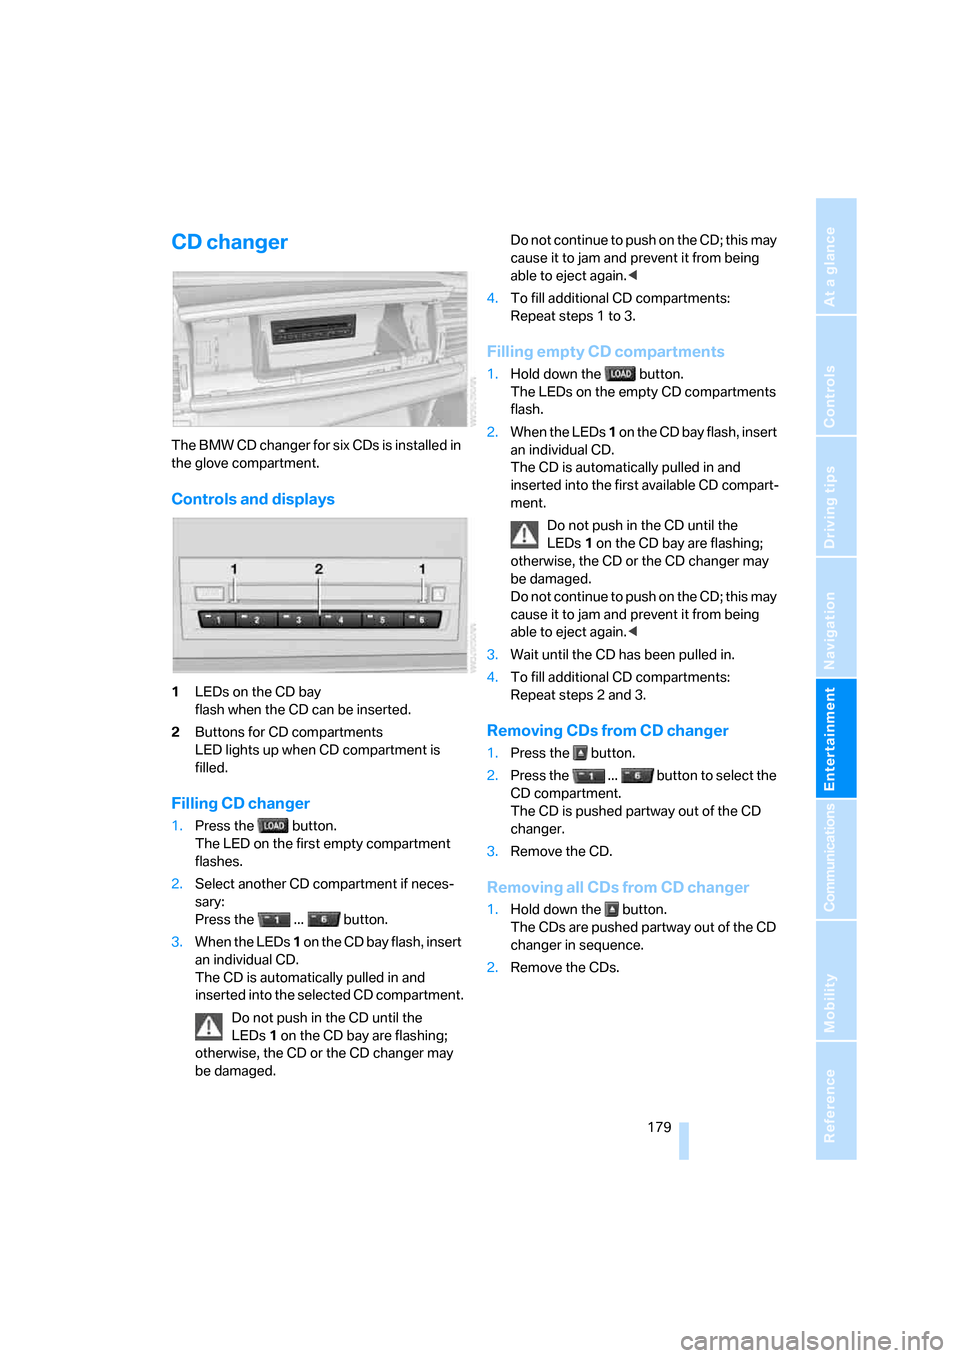
The BMW CD changer for six CDs is installed in
the glove compartment.
Controls and displays
1LEDs on the CD bay
flash when the CD can be inserted.
2Buttons for CD compartments
LED lights up when CD compartment is
filled.
Filling CD changer
1.Press the button.
The LED on the first empty compartment
flashes.
2.Select another CD compartment if neces-
sary:
Press the ... button.
3.When the LEDs 1 o n t h e C D b a y f l a s h , i n s e r t
an individual CD.
The CD is automatically pulled in and
inserted into the selected CD compartment.
Do not push in the CD until the
LEDs1 on the CD bay are flashing;
otherwise, the CD or the CD changer may
be damaged. Do not continue to push on the CD; this may
cause it to jam and prevent it from being
able to eject again.<
4.To fill additional CD compartments:
Repeat steps 1 to 3.
Filling empty CD compartments
1.Hold down the button.
The LEDs on the empty CD compartments
flash.
2.When the LEDs 1 o n t h e C D b a y f l a s h , i n s e r t
an individual CD.
The CD is automatically pulled in and
inserted into the first available CD compart-
ment.
Do not push in the CD until the
LEDs1 on the CD bay are flashing;
otherwise, the CD or the CD changer may
be damaged.
Do not continue to push on the CD; this may
cause it to jam and prevent it from being
able to eject again.<
3.Wait until the CD has been pulled in.
4.To fill additional CD compartments:
Repeat steps 2 and 3.
Removing CDs from CD changer
1.Press the button.
2.Press the ... button to select the
CD compartment.
The CD is pushed partway out of the CD
changer.
3.Remove the CD.
Removing all CDs from CD changer
1.Hold down the button.
The CDs are pushed partway out of the CD
changer in sequence.
2.Remove the CDs.
Page 183 of 292
Navigation
Entertainment
Driving tips
181Reference
At a glance
Controls
Communications
Mobility
DVD changer
Installation position
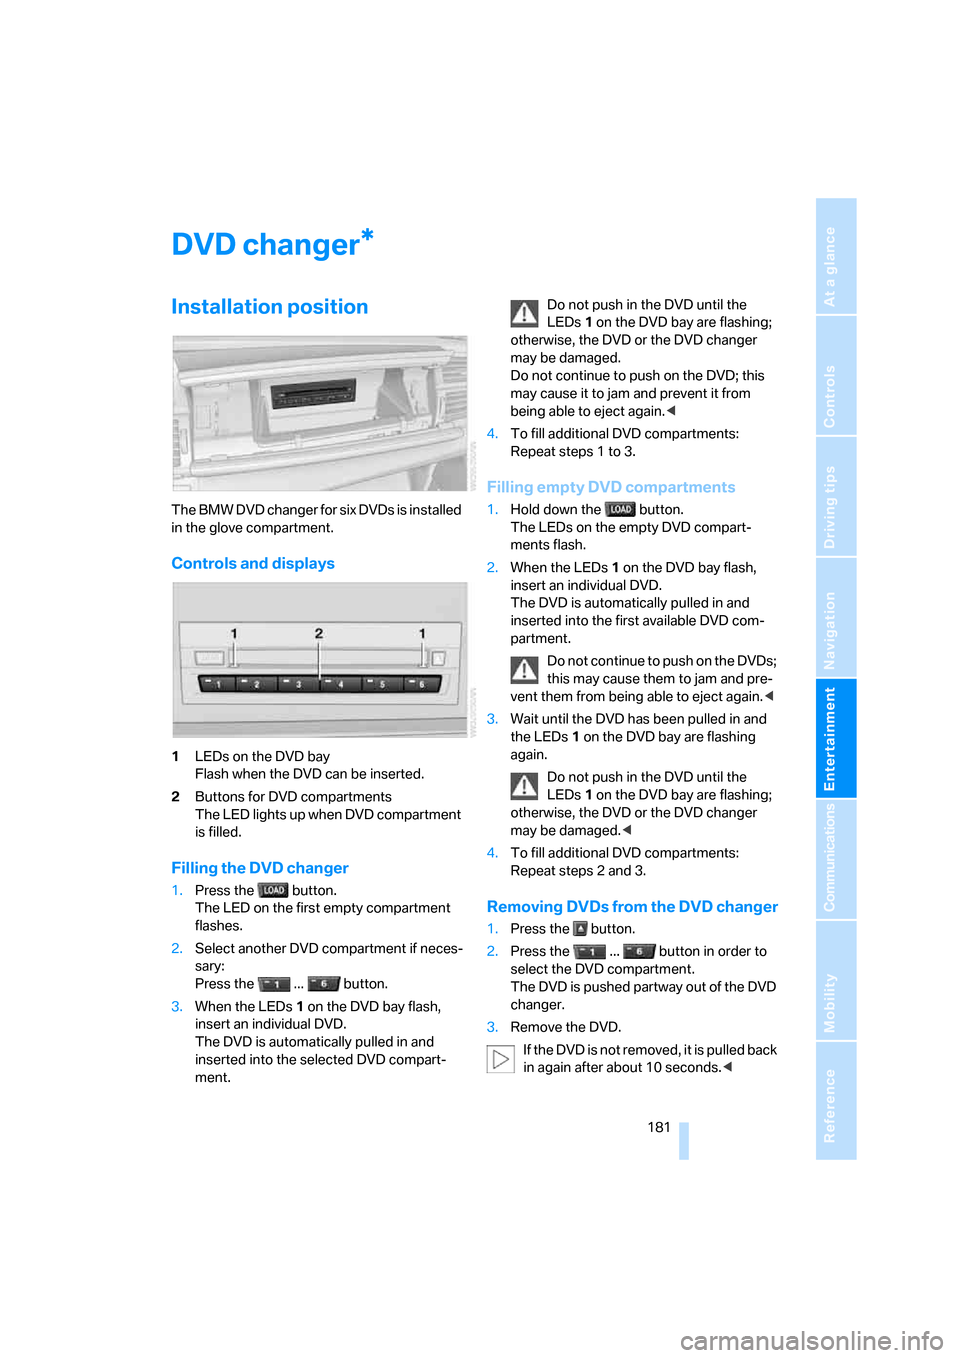
The BMW DVD changer for six DVDs is installed
in the glove compartment.
Controls and displays
1LEDs on the DVD bay
Flash when the DVD can be inserted.
2Buttons for DVD compartments
The LED lights up when DVD compartment
is filled.
Filling the DVD changer
1.Press the button.
The LED on the first empty compartment
flashes.
2.Select another DVD compartment if neces-
sary:
Press the ... button.
3.When the LEDs 1 on the DVD bay flash,
insert an individual DVD.
The DVD is automatically pulled in and
inserted into the selected DVD compart-
ment.Do not push in the DVD until the
LEDs1 on the DVD bay are flashing;
otherwise, the DVD or the DVD changer
may be damaged.
Do not continue to push on the DVD; this
may cause it to jam and prevent it from
being able to eject again.<
4.To fill additional DVD compartments:
Repeat steps 1 to 3.
Filling empty DVD compartments
1.Hold down the button.
The LEDs on the empty DVD compart-
ments flash.
2.When the LEDs 1 on the DVD bay flash,
insert an individual DVD.
The DVD is automatically pulled in and
inserted into the first available DVD com-
partment.
Do not continue to push on the DVDs;
this may cause them to jam and pre-
vent them from being able to eject again.<
3.Wait until the DVD has been pulled in and
the LEDs1 on the DVD bay are flashing
again.
Do not push in the DVD until the
LEDs1 on the DVD bay are flashing;
otherwise, the DVD or the DVD changer
may be damaged.<
4.To fill additional DVD compartments:
Repeat steps 2 and 3.
Removing DVDs from the DVD changer
1.Press the button.
2.Press the ... button in order to
select the DVD compartment.
The DVD is pushed partway out of the DVD
changer.
3.Remove the DVD.
I f t h e D V D i s n o t r e m o v e d , i t i s p u l l e d b a c k
in again after about 10 seconds.<
*
Page 185 of 292
Navigation
Entertainment
Driving tips
183Reference
At a glance
Controls
Communications
Mobility
DVD control
Using the DVD control, you can select the title
and chapter, open the DVD-specific menu and
operate functions such as language, fast for-
ward and reverse, or freeze frame.
A DVD can briefly deactivate functions of the
DVD control, under certain circumstances even
while the entire DVD is being played. It is not
possible to operate the DVD control under
these circumstances. In this case, try to make
the selection using the DVD-specific menu.
During playback:
1.Press the controller.
2.Select "DVD control bar" if needed and
press the controller.
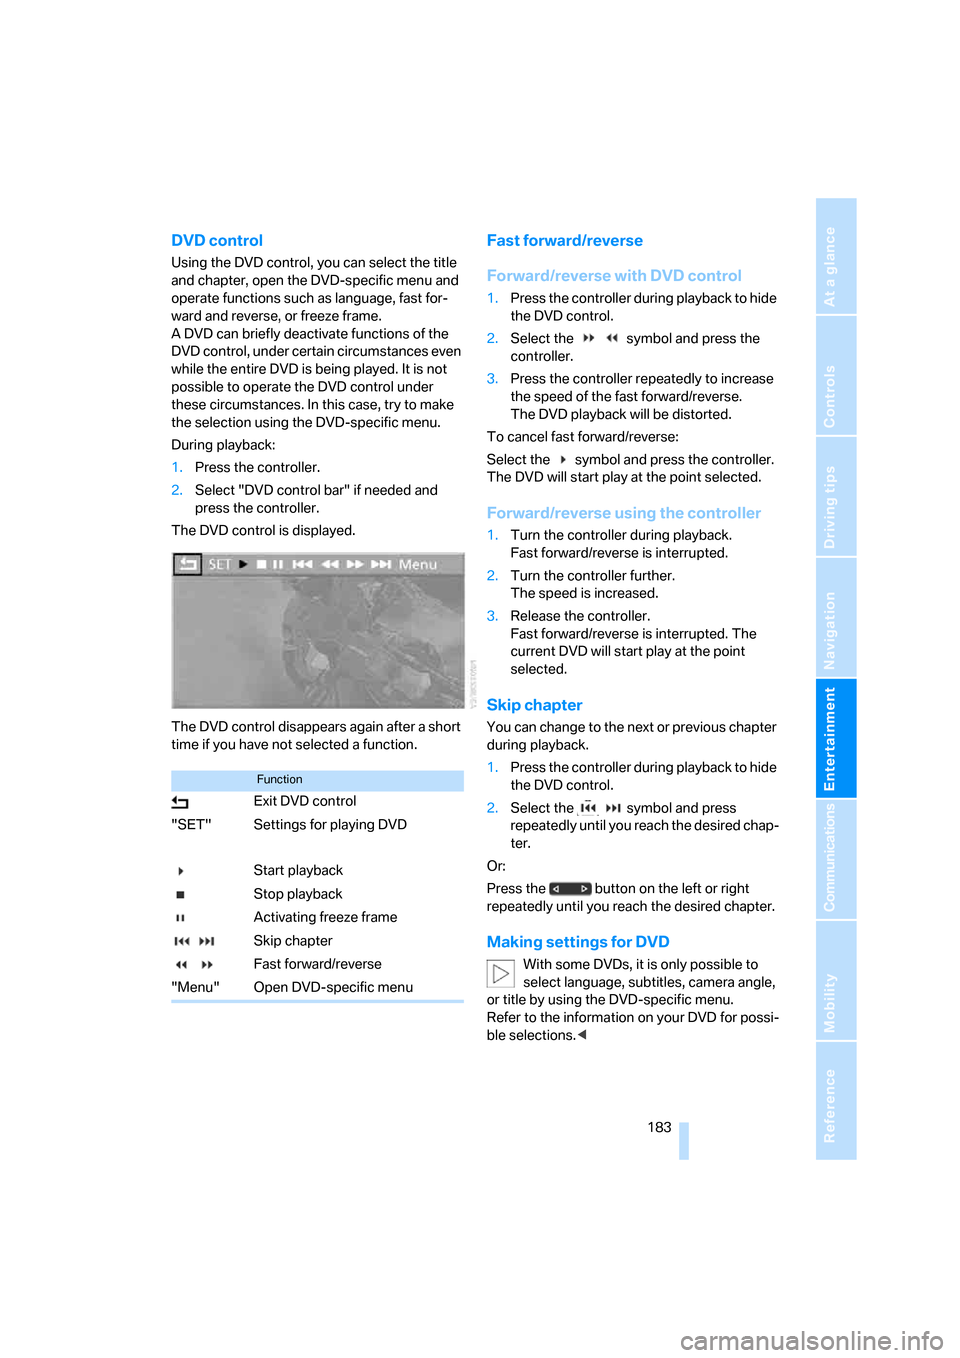
The DVD control is displayed.
The DVD control disappears again after a short
time if you have not selected a function.
Fast forward/reverse
Forward/reverse with DVD control
1.Press the controller during playback to hide
the DVD control.
2.Select the symbol and press the
controller.
3.Press the controller repeatedly to increase
the speed of the fast forward/reverse.
The DVD playback will be distorted.
To cancel fast forward/reverse:
Select the symbol and press the controller.
The DVD will start play at the point selected.
Forward/reverse using the controller
1.Turn the controller during playback.
Fast forward/reverse is interrupted.
2.Turn the controller further.
The speed is increased.
3.Release the controller.
Fast forward/reverse is interrupted. The
current DVD will start play at the point
selected.
Skip chapter
You can change to the next or previous chapter
during playback.
1.Press the controller during playback to hide
the DVD control.
2.Select the symbol and press
repeatedly until you reach the desired chap-
ter.
Or:
Press the button on the left or right
repeatedly until you reach the desired chapter.
Making settings for DVD
With some DVDs, it is only possible to
select language, subtitles, camera angle,
or title by using the DVD-specific menu.
Refer to the information on your DVD for possi-
ble selections.<
Function
Exit DVD control
"SET" Settings for playing DVD
Start playback
Stop playback
Activating freeze frame
Skip chapter
Fast forward/reverse
"Menu" Open DVD-specific menu
Page 187 of 292
Navigation
Entertainment
Driving tips
185Reference
At a glance
Controls
Communications
Mobility
The languages and audio tracks are generally
accompanied by an indication of how may
channels are included. 5.1 means multichannel.
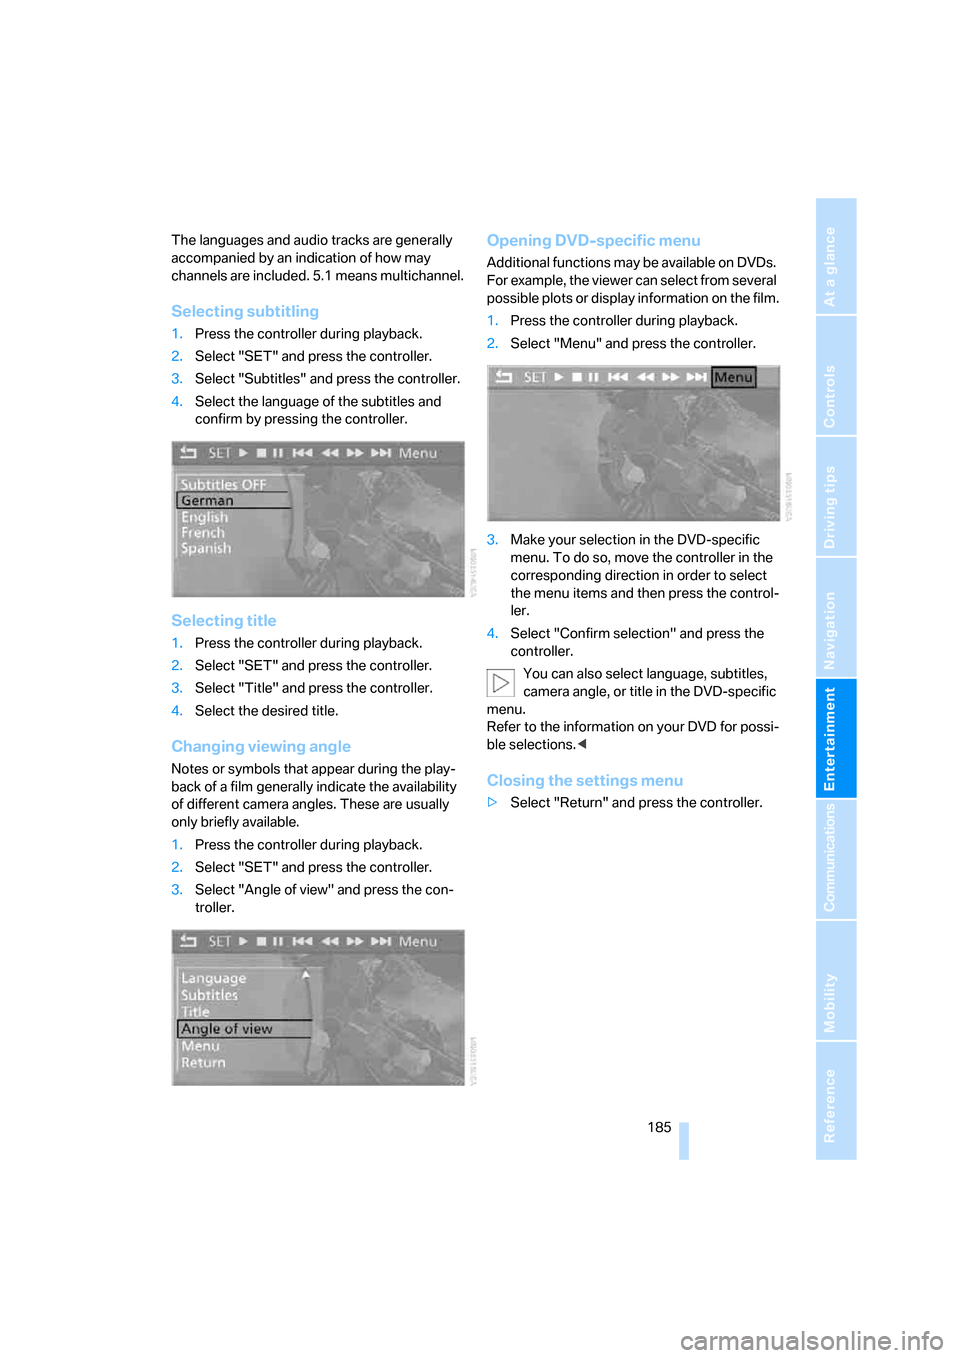
Selecting subtitling
1.Press the controller during playback.
2.Select "SET" and press the controller.
3.Select "Subtitles" and press the controller.
4.Select the language of the subtitles and
confirm by pressing the controller.
Selecting title
1.Press the controller during playback.
2.Select "SET" and press the controller.
3.Select "Title" and press the controller.
4.Select the desired title.
Changing viewing angle
Notes or symbols that appear during the play-
back of a film generally indicate the availability
of different camera angles. These are usually
only briefly available.
1.Press the controller during playback.
2.Select "SET" and press the controller.
3.Select "Angle of view" and press the con-
troller.
Opening DVD-specific menu
Additional functions may be available on DVDs.
For example, the viewer can select from several
possible plots or display information on the film.
1.Press the controller during playback.
2.Select "Menu" and press the controller.
3.Make your selection in the DVD-specific
menu. To do so, move the controller in the
corresponding direction in order to select
the menu items and then press the control-
ler.
4.Select "Confirm selection" and press the
controller.
You can also select language, subtitles,
camera angle, or title in the DVD-specific
menu.
Refer to the information on your DVD for possi-
ble selections.<
Closing the settings menu
>Select "Return" and press the controller.
Page 189 of 292
Navigation
Entertainment
Driving tips
187Reference
At a glance
Controls
Communications
Mobility
Tone control
In DVDs with multichannel or surround sound,
for optimum playback, select an audio track
with multichannel sound, refer to Selecting
audio language, and set the tone settings to
Surround, refer to Professional HiFi System* on
page165.
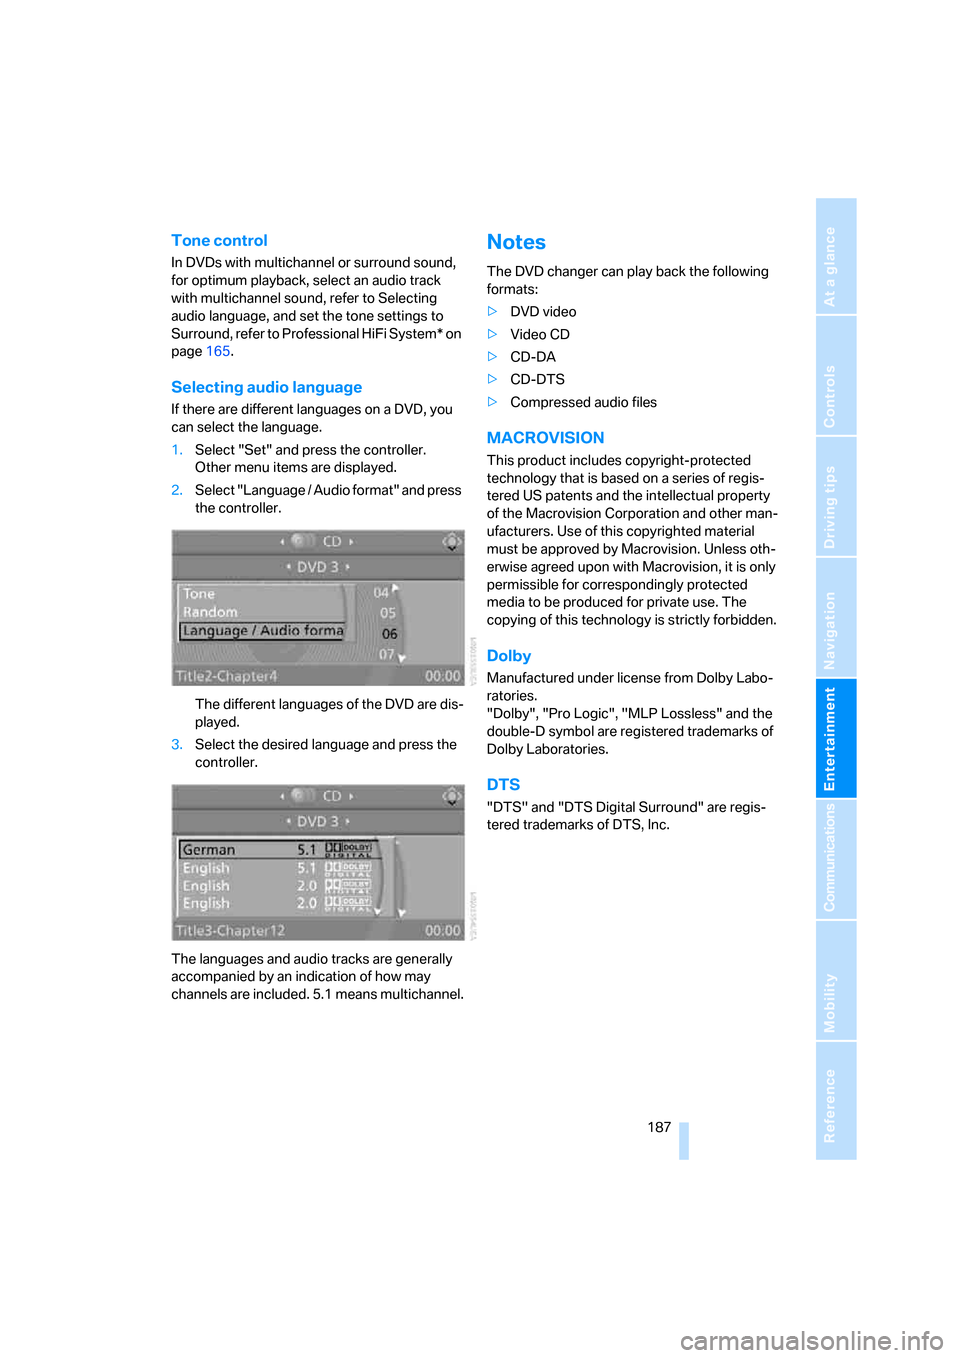
Selecting audio language
If there are different languages on a DVD, you
can select the language.
1.Select "Set" and press the controller.
Other menu items are displayed.
2.Select "Language / Audio format" and press
the controller.
The different languages of the DVD are dis-
played.
3.Select the desired language and press the
controller.
The languages and audio tracks are generally
accompanied by an indication of how may
channels are included. 5.1 means multichannel.
Notes
The DVD changer can play back the following
formats:
>DVD video
>Video CD
>CD-DA
>CD-DTS
>Compressed audio files
MACROVISION
This product includes copyright-protected
technology that is based on a series of regis-
tered US patents and the intellectual property
of the Macrovision Corporation and other man-
ufacturers. Use of this copyrighted material
must be approved by Macrovision. Unless oth-
erwise agreed upon with Macrovision, it is only
permissible for correspondingly protected
media to be produced for private use. The
copying of this technology is strictly forbidden.
Dolby
Manufactured under license from Dolby Labo-
ratories.
"Dolby", "Pro Logic", "MLP Lossless" and the
double-D symbol are registered trademarks of
Dolby Laboratories.
DTS
"DTS" and "DTS Digital Surround" are regis-
tered trademarks of DTS, Inc.
Page 191 of 292
Navigation
Entertainment
Driving tips
189Reference
At a glance
Controls
Communications
Mobility
USB audio interface
You can connect audio devices to the USB
audio interface, e.g. an iPod or a USB device
(MP3 player, USB memory stick). You can then
operate these with iDrive.
The common audio files, e.g. MP3, WMA, WAV
(PCM) and AAC, as well as playback lists in the
M3U format can be played back.
Due to the large number of audio devices avail-
able on the market, operation via the vehicle
cannot be ensured for every audio device.
Ask your BMW Sports Activity Vehicle Center
which audio devices are suitable.
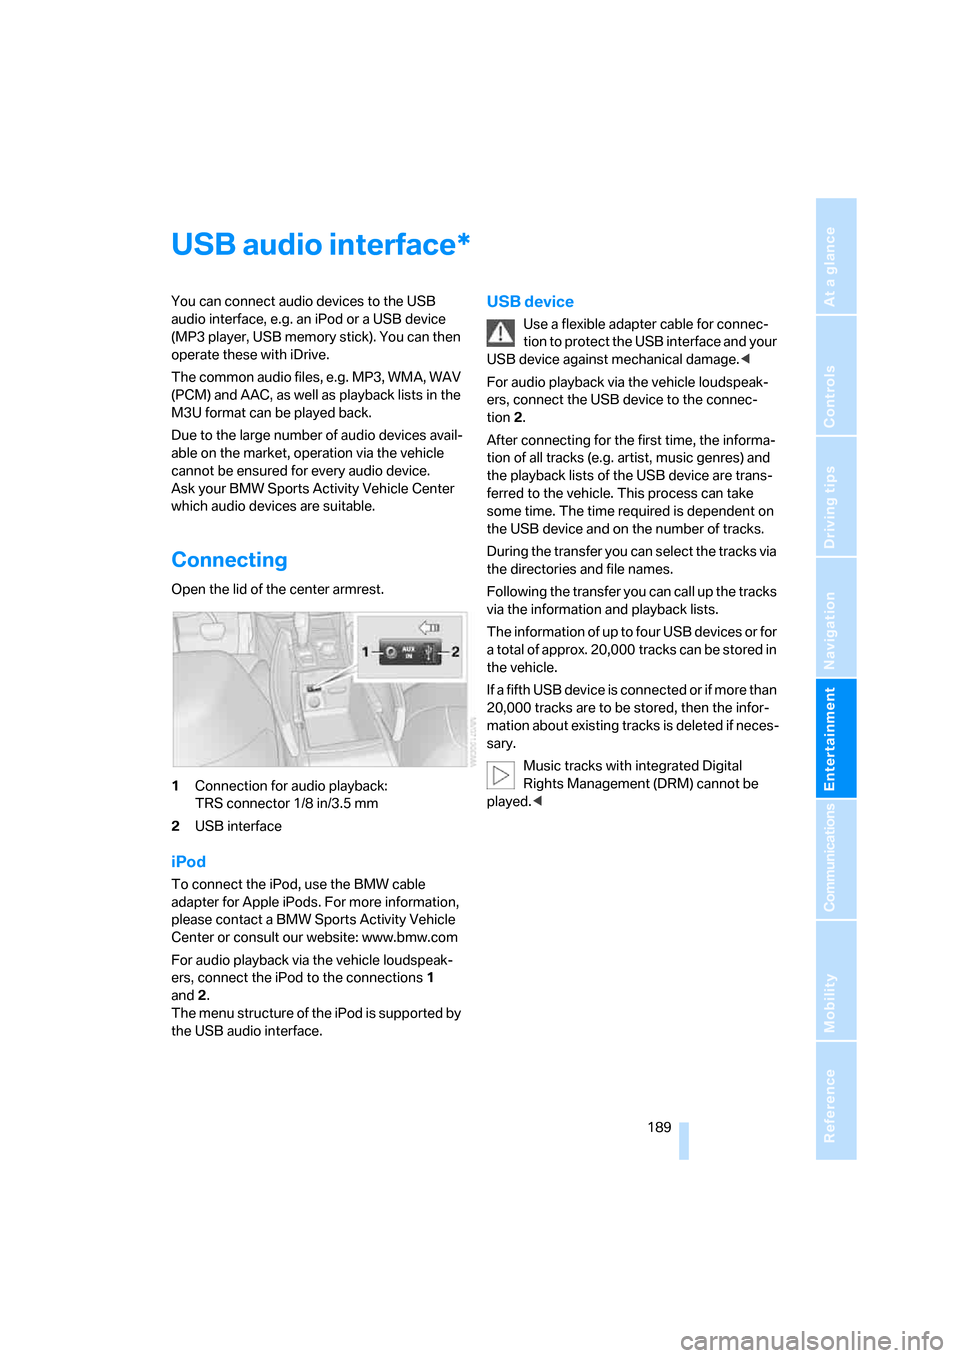
Connecting
Open the lid of the center armrest.
1Connection for audio playback:
TRS connector 1/8 in/3.5 mm
2USB interface
iPod
To connect the iPod, use the BMW cable
adapter for Apple iPods. For more information,
please contact a BMW Sports Activity Vehicle
Center or consult our website: www.bmw.com
For audio playback via the vehicle loudspeak-
ers, connect the iPod to the connections1
and2.
The menu structure of the iPod is supported by
the USB audio interface.
USB device
Use a flexible adapter cable for connec-
tion to protect the USB interface and your
USB device against mechanical damage.<
For audio playback via the vehicle loudspeak-
ers, connect the USB device to the connec-
tion2.
After connecting for the first time, the informa-
tion of all tracks (e.g. artist, music genres) and
the playback lists of the USB device are trans-
ferred to the vehicle. This process can take
some time. The time required is dependent on
the USB device and on the number of tracks.
During the transfer you can select the tracks via
the directories and file names.
Following the transfer you can call up the tracks
via the information and playback lists.
The information of up to four USB devices or for
a total of approx. 20,000 tracks can be stored in
the vehicle.
If a fifth USB device is connected or if more than
20,000 tracks are to be stored, then the infor-
mation about existing tracks is deleted if neces-
sary.
Music tracks with integrated Digital
Rights Management (DRM) cannot be
played.<
*
Page 193 of 292
Navigation
Entertainment
Driving tips
191Reference
At a glance
Controls
Communications
Mobility
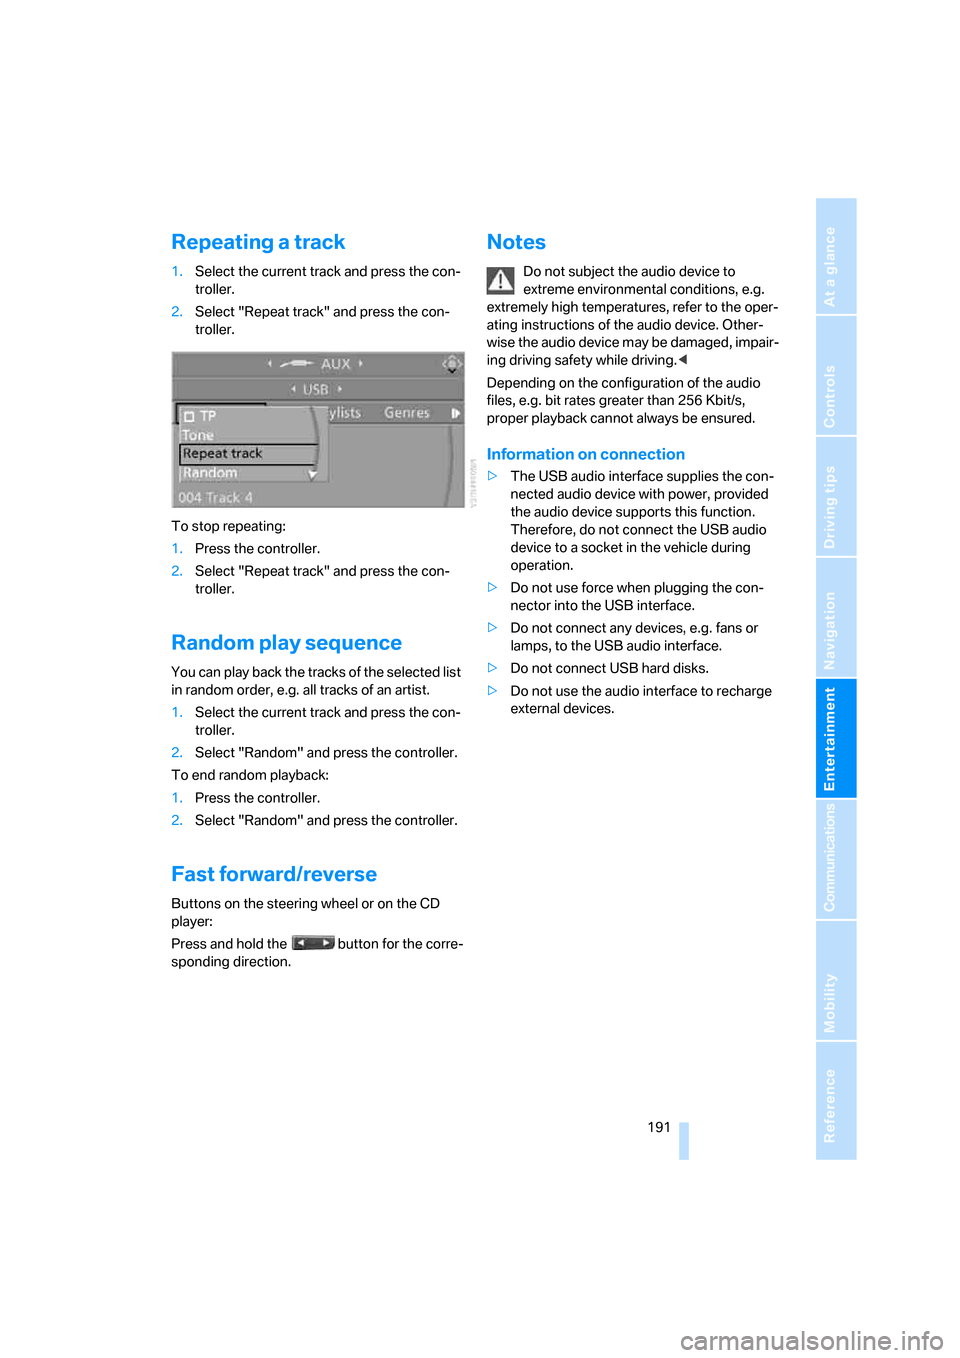
Repeating a track
1.Select the current track and press the con-
troller.
2.Select "Repeat track" and press the con-
troller.
To stop repeating:
1.Press the controller.
2.Select "Repeat track" and press the con-
troller.
Random play sequence
You can play back the tracks of the selected list
in random order, e.g. all tracks of an artist.
1.Select the current track and press the con-
troller.
2.Select "Random" and press the controller.
To end random playback:
1.Press the controller.
2.Select "Random" and press the controller.
Fast forward/reverse
Buttons on the steering wheel or on the CD
player:
Press and hold the button for the corre-
sponding direction.
Notes
Do not subject the audio device to
extreme environmental conditions, e.g.
extremely high temperatures, refer to the oper-
ating instructions of the audio device. Other-
wise the audio device may be damaged, impair-
ing driving safety while driving.<
Depending on the configuration of the audio
files, e.g. bit rates greater than 256 Kbit/s,
proper playback cannot always be ensured.
Information on connection
>The USB audio interface supplies the con-
nected audio device with power, provided
the audio device supports this function.
Therefore, do not connect the USB audio
device to a socket in the vehicle during
operation.
>Do not use force when plugging the con-
nector into the USB interface.
>Do not connect any devices, e.g. fans or
lamps, to the USB audio interface.
>Do not connect USB hard disks.
>Do not use the audio interface to recharge
external devices.
Page 195 of 292
Navigation
Entertainment
Driving tips
193Reference
At a glance
Controls
Communications
Mobility
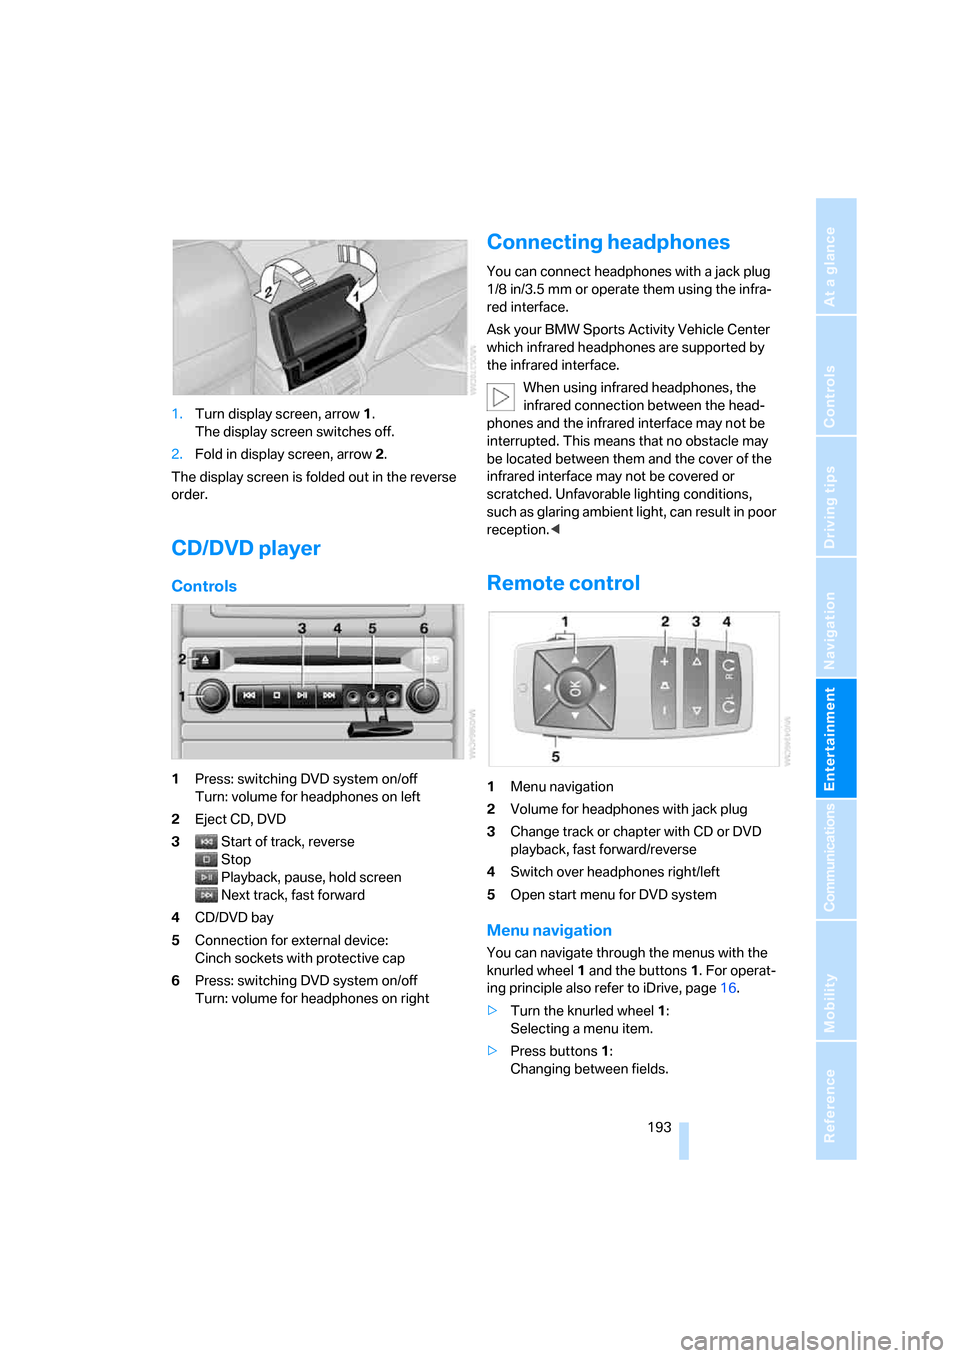
1.Turn display screen, arrow1.
The display screen switches off.
2.Fold in display screen, arrow2.
The display screen is folded out in the reverse
order.
CD/DVD player
Controls
1Press: switching DVD system on/off
Turn: volume for headphones on left
2Eject CD, DVD
3Start of track, reverse
Stop
Playback, pause, hold screen
Next track, fast forward
4CD/DVD bay
5Connection for external device:
Cinch sockets with protective cap
6Press: switching DVD system on/off
Turn: volume for headphones on right
Connecting headphones
You can connect headphones with a jack plug
1/8 in/3.5 mm or operate them using the infra-
red interface.
Ask your BMW Sports Activity Vehicle Center
which infrared headphones are supported by
the infrared interface.
When using infrared headphones, the
infrared connection between the head-
phones and the infrared interface may not be
interrupted. This means that no obstacle may
be located between them and the cover of the
infrared interface may not be covered or
scratched. Unfavorable lighting conditions,
such as glaring ambient light, can result in poor
reception.<
Remote control
1Menu navigation
2Volume for headphones with jack plug
3Change track or chapter with CD or DVD
playback, fast forward/reverse
4Switch over headphones right/left
5Open start menu for DVD system
Menu navigation
You can navigate through the menus with the
knurled wheel1 and the buttons1. For operat-
ing principle also refer to iDrive, page16.
>Turn the knurled wheel1:
Selecting a menu item.
>Press buttons1:
Changing between fields.