BMW X5 4.8IS 2004 E53 Owner's Manual
Manufacturer: BMW, Model Year: 2004, Model line: X5 4.8IS, Model: BMW X5 4.8IS 2004 E53Pages: 200, PDF Size: 3.91 MB
Page 101 of 200
99n
OverviewControlsMaintenanceRepairsDataIndex
2-axle self-leveling suspension
*
Brake Force Display
Lowering Available with ignition key in position 2.
From Standard to Access:
1. Press button 2 while traveling at less
than approx. 50 mph/80 km/h. The
system enters its preselection mode.
The preselection mode is canceled
>by pressing button 1
>automatically once the vehicle
exceeds a speed of approx.
50 mph/80 km/h or approx.
60 seconds after button 2 is
pressed
2. Reduce speed to below approx.
15 mph/25 km/h within approx.
60 seconds after pressing button 2.
When you press button 2 at
speeds below approx. 15 mph/
25 km/h the system automatically low-
ers the vehicle to the Access level.<
From Off-Road to Standard:
>Press button 2 or
>automatically once you exceed a
speed of approx. 30 mph/50 km/h.
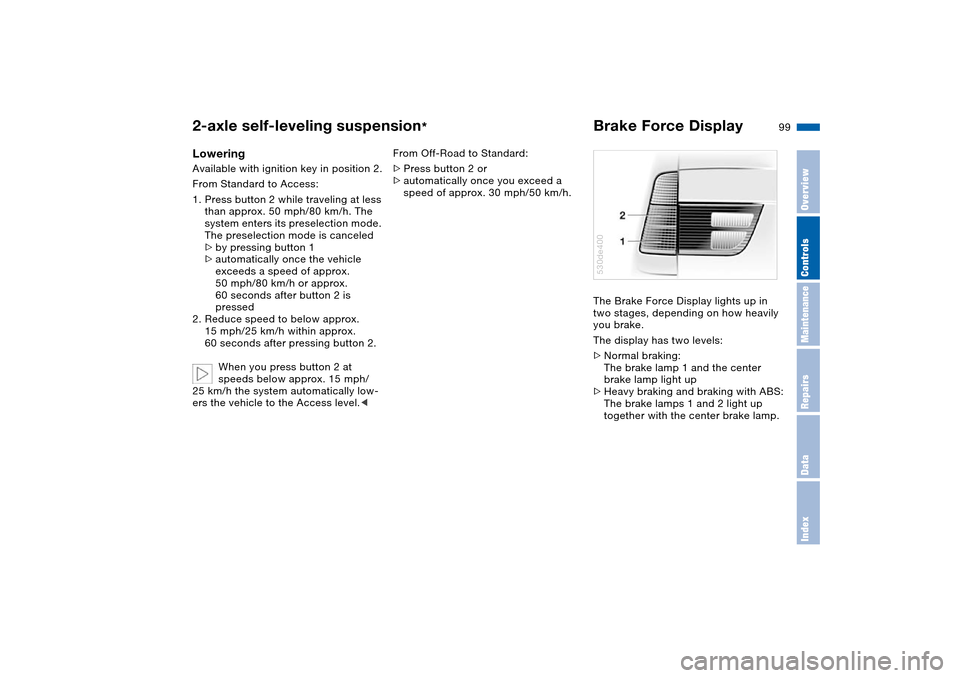
The Brake Force Display lights up in
two stages, depending on how heavily
you brake.
The display has two levels:
>Normal braking:
The brake lamp 1 and the center
brake lamp light up
>Heavy braking and braking with ABS:
The brake lamps 1 and 2 light up
together with the center brake lamp.
530de400
Page 102 of 200
100n
Flat Tire MonitorThe concept The Flat Tire Monitor keeps track of the
inflation pressures in the four fitted tires
as you drive. The system provides an
alert whenever the inflation pressure
drops significantly in relation to the
pressure another tire.
The check of the tire inflation pressure
is based on monitoring the relative
speeds of the wheels. A flat is detected
and reported on the basis of a deviation
in certain speed ratios.Functional requirementTo ensure reliable operation, the sys-
tem should have been initialized with
the correct tire inflation pressure.
System limits
The Flat Tire Monitor cannot indi-
cate sudden severe tire damage
caused by outside factors and does not
detect a natural, even pressure drop in
all four tires.<
In the following situations, the system
could be delayed or malfunction:
>When driving on snow-covered or
slippery road surfaces
>In the case of performance-oriented
driving: slip on the drive wheels, high
lateral acceleration
>False alarms and undetected loss of
pressure may occur when you are
driving with snow chains fitted.
Initializing system
Perform the initialization immedi-
ately every time you correct the
inflation pressure, change a tire or
change a wheel or all wheels. A drive
is required for this purpose.<
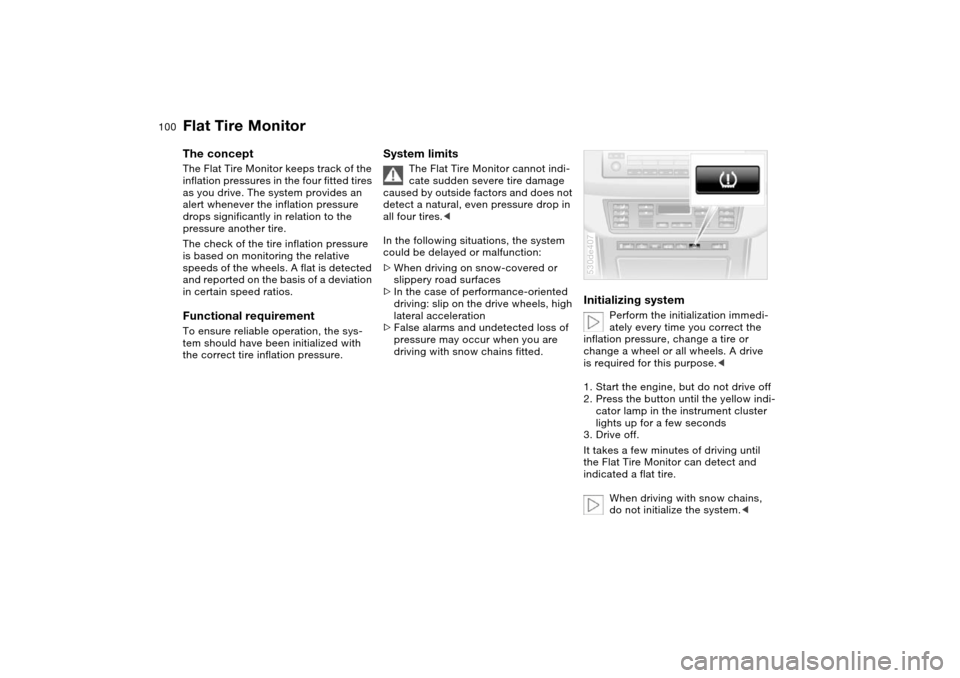
1. Start the engine, but do not drive off
2. Press the button until the yellow indi-
cator lamp in the instrument cluster
lights up for a few seconds
3. Drive off.
It takes a few minutes of driving until
the Flat Tire Monitor can detect and
indicated a flat tire.
When driving with snow chains,
do not initialize the system.<
530de407
Page 103 of 200
101n
OverviewControlsMaintenanceRepairsDataIndex
Flat Tire MonitorIndication of a flat tire
The warning lamp lights up yel-
low. There is a flat tire or exten-
sive inflation pressure loss.
1. Reduce speed and stop the vehicle
carefully. Avoid sudden braking and
steering maneuvers
2. Identify damaged tire
If identification is not possible,
contact your BMW Sports
Activity Vehicle center.<
3. Replace the damaged wheel, refer to
Changing a tire on page 163.
Page 104 of 200
102n
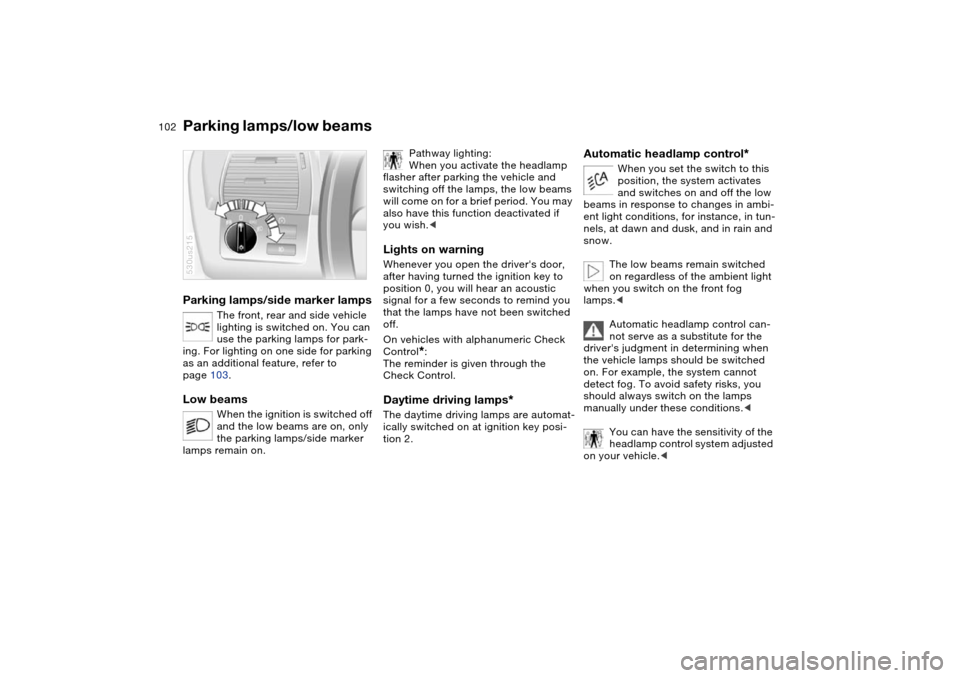
Parking lamps/side marker lamps
The front, rear and side vehicle
lighting is switched on. You can
use the parking lamps for park-
ing. For lighting on one side for parking
as an additional feature, refer to
page 103.
Low beams
When the ignition is switched off
and the low beams are on, only
the parking lamps/side marker
lamps remain on.
530us215
Pathway lighting:
When you activate the headlamp
flasher after parking the vehicle and
switching off the lamps, the low beams
will come on for a brief period. You may
also have this function deactivated if
you wish.<
Lights on warning Whenever you open the driver's door,
after having turned the ignition key to
position 0, you will hear an acoustic
signal for a few seconds to remind you
that the lamps have not been switched
off.
On vehicles with alphanumeric Check
Control
*:
The reminder is given through the
Check Control.
Daytime driving lamps
*
The daytime driving lamps are automat-
ically switched on at ignition key posi-
tion 2.
Automatic headlamp control
*
When you set the switch to this
position, the system activates
and switches on and off the low
beams in response to changes in ambi-
ent light conditions, for instance, in tun-
nels, at dawn and dusk, and in rain and
snow.
The low beams remain switched
on regardless of the ambient light
when you switch on the front fog
lamps.<
Automatic headlamp control can-
not serve as a substitute for the
driver's judgment in determining when
the vehicle lamps should be switched
on. For example, the system cannot
detect fog. To avoid safety risks, you
should always switch on the lamps
manually under these conditions.<
You can have the sensitivity of the
headlamp control system adjusted
on your vehicle.<
Parking lamps/low beams
Page 105 of 200
103n
OverviewControlsMaintenanceRepairsDataIndex
Adaptive Head Light
*
High beams/roadside parking lamps
The concept Adaptive Head Light is a variable head-
lamp control system that enables better
illumination of the road surface.
Depending on the steering angle and
other assumptions, the light from the
headlamp follows the course of the
road.Activating Adaptive Head Light
In ignition key position 2, turn
the light switch to the position
Automatic headlamp control,
refer to page 102.
To avoid blinding oncoming traffic, the
Adaptive Head Light
>is not active when driving in reverse
>when stopped only active toward
passenger's side.
MalfunctionThe LED next to the symbol for auto-
matic headlamp control flashes. Adap-
tive Head Light is faulty or has failed.
Have the system checked as soon as
possible.
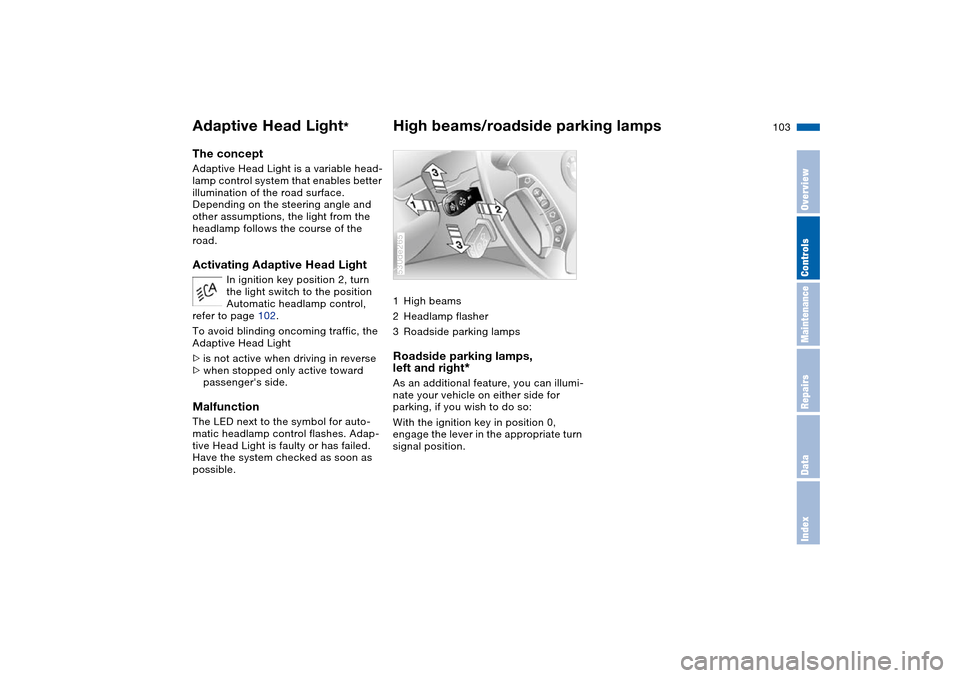
1High beams
2Headlamp flasher
3Roadside parking lamps Roadside parking lamps,
left and right
*
As an additional feature, you can illumi-
nate your vehicle on either side for
parking, if you wish to do so:
With the ignition key in position 0,
engage the lever in the appropriate turn
signal position. 530de265
Page 106 of 200
104n
Front fog lamps
Instrument lighting
Interior lamps
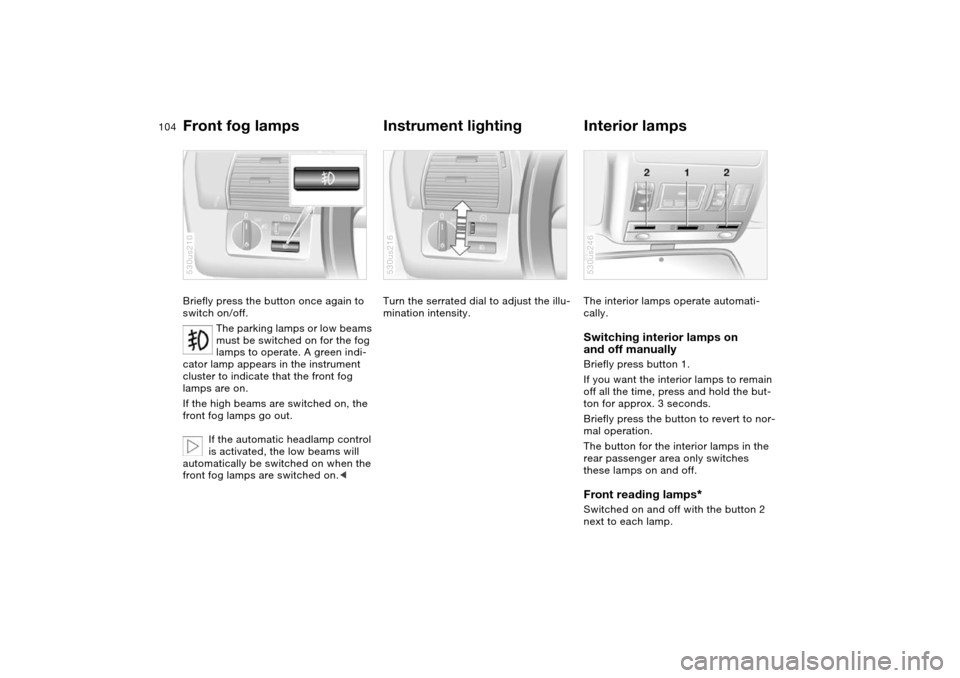
Briefly press the button once again to
switch on/off.
The parking lamps or low beams
must be switched on for the fog
lamps to operate. A green indi-
cator lamp appears in the instrument
cluster to indicate that the front fog
lamps are on.
If the high beams are switched on, the
front fog lamps go out.
If the automatic headlamp control
is activated, the low beams will
automatically be switched on when the
front fog lamps are switched on.<530us210
Turn the serrated dial to adjust the illu-
mination intensity.530us216
The interior lamps operate automati-
cally. Switching interior lamps on
and off manually Briefly press button 1.
If you want the interior lamps to remain
off all the time, press and hold the but-
ton for approx. 3 seconds.
Briefly press the button to revert to nor-
mal operation.
The button for the interior lamps in the
rear passenger area only switches
these lamps on and off. Front reading lamps
*
Switched on and off with the button 2
next to each lamp.530us246
Page 107 of 200
105n
OverviewControlsMaintenanceRepairsDataIndex
Interior lampsRear reading lamps
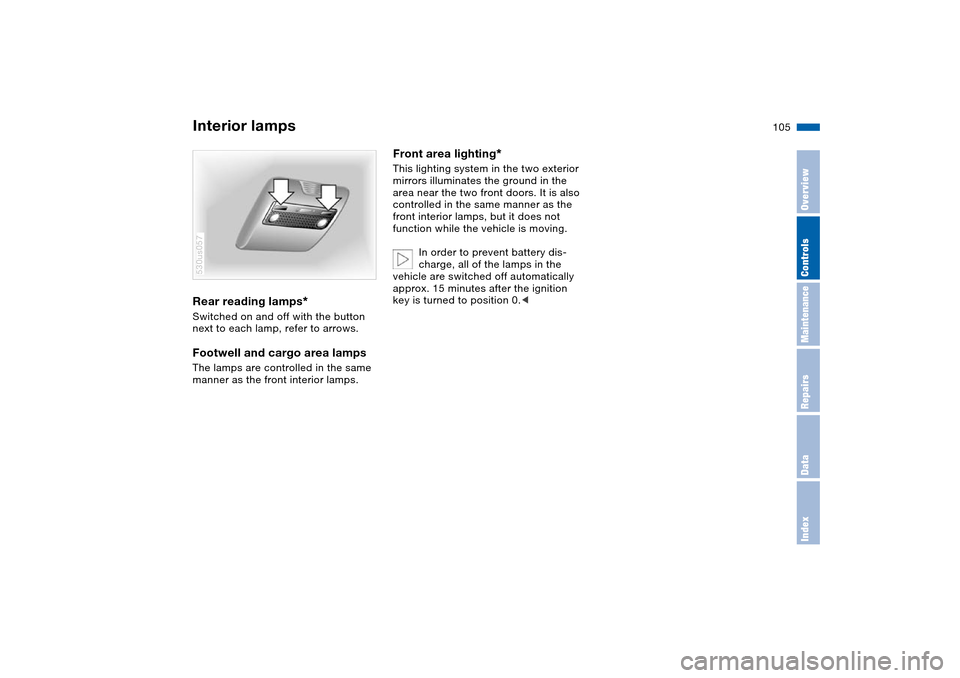
*
Switched on and off with the button
next to each lamp, refer to arrows.Footwell and cargo area lamps The lamps are controlled in the same
manner as the front interior lamps.530us057
Front area lighting
*
This lighting system in the two exterior
mirrors illuminates the ground in the
area near the two front doors. It is also
controlled in the same manner as the
front interior lamps, but it does not
function while the vehicle is moving.
In order to prevent battery dis-
charge, all of the lamps in the
vehicle are switched off automatically
approx. 15 minutes after the ignition
key is turned to position 0.<
Page 108 of 200
106n
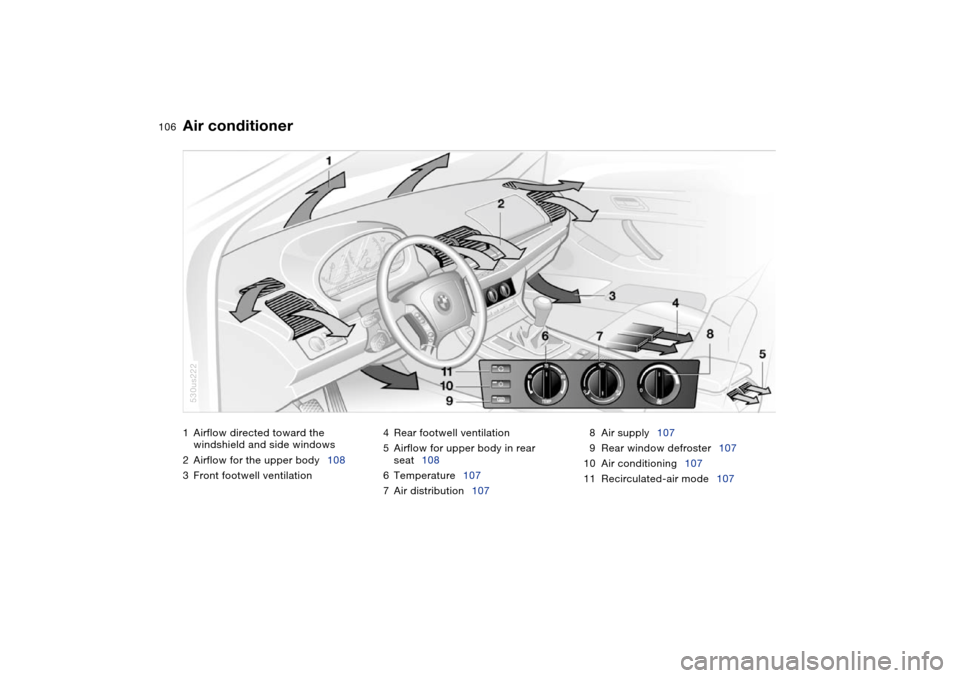
1Airflow directed toward the
windshield and side windows
2Airflow for the upper body108
3Front footwell ventilation 4Rear footwell ventilation
5Airflow for upper body in rear
seat108
6Temperature107
7Air distribution1078Air supply107
9Rear window defroster107
10 Air conditioning107
11 Recirculated-air mode107
Air conditioner
530us222
Page 109 of 200
107n
OverviewControlsMaintenanceRepairsDataIndex
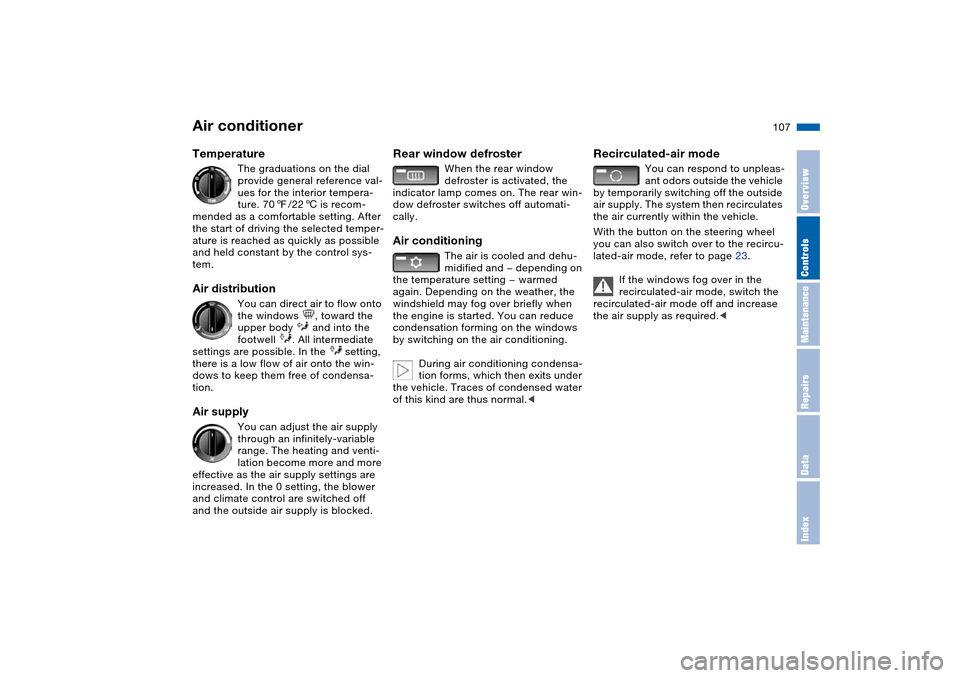
Air conditioner Temperature
The graduations on the dial
provide general reference val-
ues for the interior tempera-
ture. 707/226 is recom-
mended as a comfortable setting. After
the start of driving the selected temper-
ature is reached as quickly as possible
and held constant by the control sys-
tem.
Air distribution
You can direct air to flow onto
the windows , toward the
upper body and into the
footwell . All intermediate
settings are possible. In the setting,
there is a low flow of air onto the win-
dows to keep them free of condensa-
tion.
Air supply
You can adjust the air supply
through an infinitely-variable
range. The heating and venti-
lation become more and more
effective as the air supply settings are
increased. In the 0 setting, the blower
and climate control are switched off
and the outside air supply is blocked.
Rear window defroster
When the rear window
defroster is activated, the
indicator lamp comes on. The rear win-
dow defroster switches off automati-
cally.
Air conditioning
The air is cooled and dehu-
midified and — depending on
the temperature setting — warmed
again. Depending on the weather, the
windshield may fog over briefly when
the engine is started. You can reduce
condensation forming on the windows
by switching on the air conditioning.
During air conditioning condensa-
tion forms, which then exits under
the vehicle. Traces of condensed water
of this kind are thus normal.<
Recirculated-air mode
You can respond to unpleas-
ant odors outside the vehicle
by temporarily switching off the outside
air supply. The system then recirculates
the air currently within the vehicle.
With the button on the steering wheel
you can also switch over to the recircu-
lated-air mode, refer to page 23.
If the windows fog over in the
recirculated-air mode, switch the
recirculated-air mode off and increase
the air supply as required.<
Page 110 of 200
108n
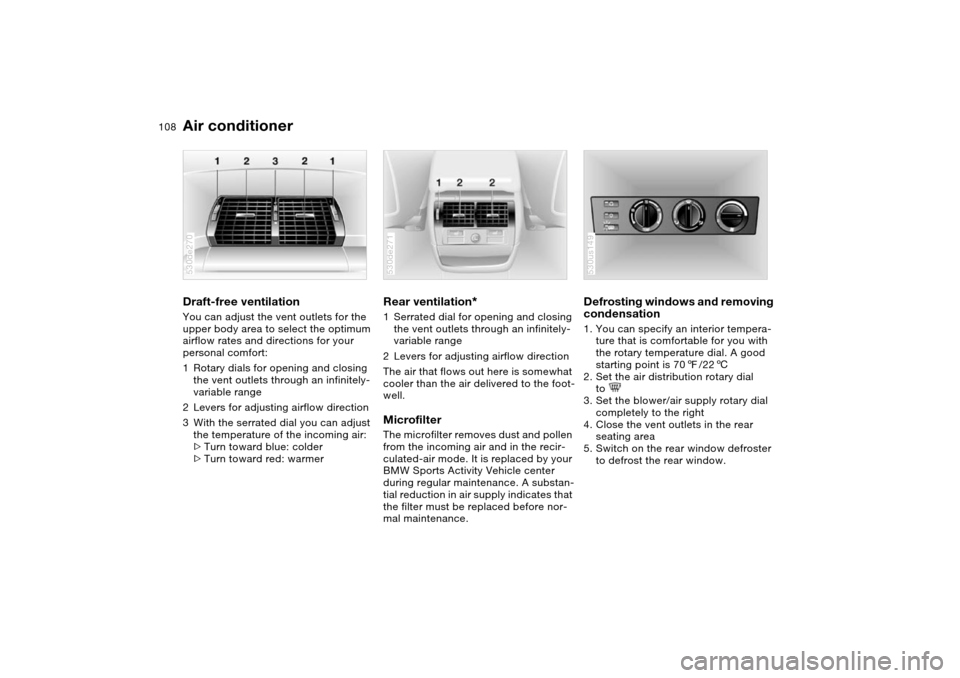
Air conditionerDraft-free ventilation You can adjust the vent outlets for the
upper body area to select the optimum
airflow rates and directions for your
personal comfort:
1Rotary dials for opening and closing
the vent outlets through an infinitely-
variable range
2Levers for adjusting airflow direction
3With the serrated dial you can adjust
the temperature of the incoming air:
>Turn toward blue: colder
>Turn toward red: warmer 530de270
Rear ventilation
*
1Serrated dial for opening and closing
the vent outlets through an infinitely-
variable range
2Levers for adjusting airflow direction
The air that flows out here is somewhat
cooler than the air delivered to the foot-
well. Microfilter The microfilter removes dust and pollen
from the incoming air and in the recir-
culated-air mode. It is replaced by your
BMW Sports Activity Vehicle center
during regular maintenance. A substan-
tial reduction in air supply indicates that
the filter must be replaced before nor-
mal maintenance.530de271
Defrosting windows and removing
condensation 1. You can specify an interior tempera-
ture that is comfortable for you with
the rotary temperature dial. A good
starting point is 707/226
2. Set the air distribution rotary dial
to
3. Set the blower/air supply rotary dial
completely to the right
4. Close the vent outlets in the rear
seating area
5. Switch on the rear window defroster
to defrost the rear window. 530us149