Stop BMW X5 4.8IS 2006 E53 Owner's Guide
[x] Cancel search | Manufacturer: BMW, Model Year: 2006, Model line: X5 4.8IS, Model: BMW X5 4.8IS 2006 E53Pages: 202, PDF Size: 4.13 MB
Page 128 of 202
128n
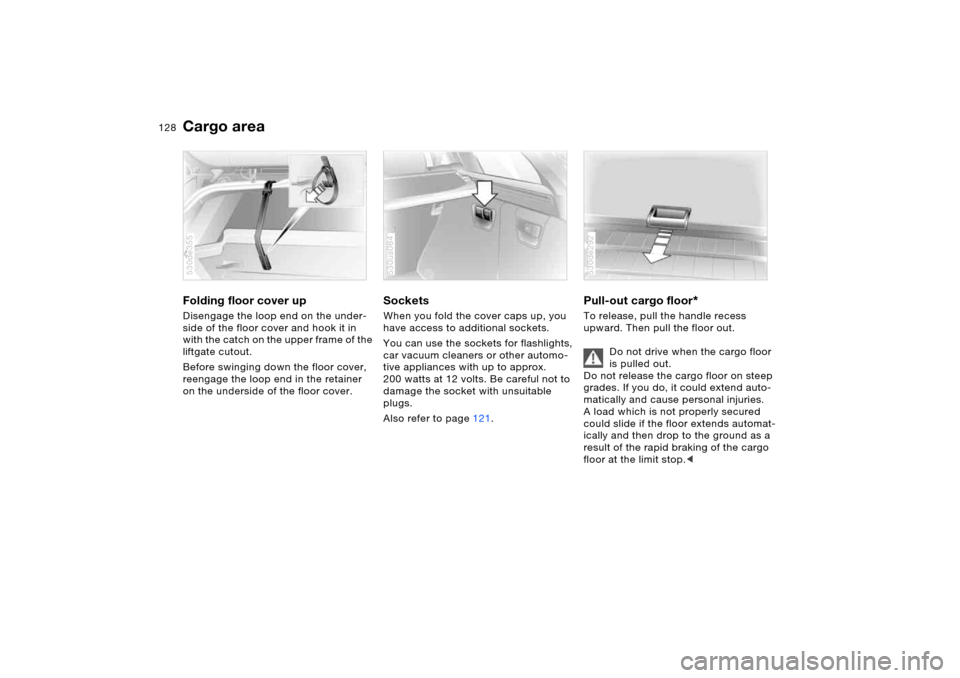
Cargo area Folding floor cover upDisengage the loop end on the under-
side of the floor cover and hook it in
with the catch on the upper frame of the
liftgate cutout.
Before swinging down the floor cover,
reengage the loop end in the retainer
on the underside of the floor cover.530de355
Sockets When you fold the cover caps up, you
have access to additional sockets.
You can use the sockets for flashlights,
car vacuum cleaners or other automo-
tive appliances with up to approx.
200 watts at 12 volts. Be careful not to
damage the socket with unsuitable
plugs.
Also refer to page121. 530us084
Pull-out cargo floor
*
To release, pull the handle recess
upward. Then pull the floor out.
Do not drive when the cargo floor
is pulled out.
Do not release the cargo floor on steep
grades. If you do, it could extend auto-
matically and cause personal injuries.
A load which is not properly secured
could slide if the floor extends automat-
ically and then drop to the ground as a
result of the rapid braking of the cargo
floor at the limit stop.< 530de292
Page 139 of 202
139n
OverviewControlsMaintenanceRepairsDataIndex
Driving your X5>Please note that it is possible for the
undercarriage to touch the ground,
for example on crests and bumpy
roads. The ground clearance of the
vehicle is:
– without self-leveling suspension
X5 3.0i, 4.4i: 8 in/20 cm
X5 3.0d: 7 in/17.5 cm
– with 2-axle self-leveling suspen-
sion
*
6.5-9 in/16.5-22 cm, depending on
the level selected.
>Only drive through water up to a max-
imum depth of 20 in/50 cm and only
at walking speed, making sure not to
stop in the process. When equipped
with 2-axle self leveling suspension
*,
switch the vehicle to the Off-Road
setting before driving through, refer
to page97.
After leaving the water, apply the
footbrake lightly several times while
driving at low speeds so as to dry the
brakes by braking and to prevent
decreased braking action due to wet-
ness.
Back onto paved road Our recommendation that you observe
the following points after driving on
adverse road surfaces is not intended
as a beauty treatment for your BMW.
Instead, it is intended to maintain driv-
ing safety:
>Clean the worst of the dirt from the
body and inspect the undercarriage
for damage.
>Clean mud, snow, ice etc. from the
wheels and tires and check the
wheels for damage.
>Check to determine whether rocks,
gravel or accumulations of dirt on the
brake rotors and calipers could influ-
ence braking performance. Remove
all such foreign objects.
>In order to clean the brake rotors,
apply the footbrake gently several
times while driving at a low speed.
Be sure that following traffic is not
endangered by this.
>For cleaning the handbrake, apply the
lever slightly at approx. 25 mph/
40 km/h and continue to drive for
approx. 200 yards/200 meters, pro-
vided that traffic conditions allow you
to do so.
Page 140 of 202
140n
Safe braking Emergency stops You brake most effectively when you
apply maximum pedal pressure in situa-
tions requiring it: emergency stops.
Since the vehicle maintains steering
responsiveness, you can nevertheless
avoid possible obstacles with a mini-
mum of steering effort.
Pulsation at the brake pedal combined
with sounds from the hydraulic circuits
indicates to the driver that ABS is in its
active mode.Brake fluid level If the brake fluid level is too low and
brake pedal travel has become longer,
there may be a malfunction in one of
the two brake system's hydraulic cir-
cuits.
Proceed to the nearest BMW
Sports Activity Vehicle center.
In so doing, increased pressure on the
brake pedal may be required, and slight
pulling to the side and longer braking
distances may result. Please remember
to adapt your driving style accord-
ingly.<
Disk brakes When the vehicle is driven only occa-
sionally, during extended periods when
the vehicle is not used at all, and in
operating conditions where brake appli-
cations are less frequent, there is an
increased tendency for corrosion to
form on rotors, while contaminants
accumulate on the brake pads. This
occurs because the minimal pressure
that the pads must exert to clean the
rotors during brake applications is not
reached.
If the brake rotors are corroded, they
will tend to respond to braking with a
pulsating effect that even extended
application will fail to cure.
When driving in wet conditions and in
heavy rain, it is advisable to apply light
pressure to the brake pedal from time
to time. Monitor traffic conditions to
ensure that this maneuver does not
endanger other road users. The heat
generated in this process helps dry the
pads and rotors to ensure that the brak-
ing force is then immediately available
when required.
Extended or steep mountain descents
should be driven in the gear in which
only minimal periodic brake application
is required. This avoids excessive strain on the brakes and possible impairment
of braking action.
Do not drive with the clutch pedal
depressed, at idle or with the
engine switched off, as otherwise there
will be no engine braking effect or
power assistance for braking and steer-
ing.
BMW recommends having brake
inspections performed at a BMW
Sports Activity Vehicle center only. If
you do not, parts of the 4-wheel drive
system could be damaged.
No floor mats, carpets or other objects
may lie in the area of pedal travel, as
otherwise pedal operation may be
impaired.<
Brake pads
For your own safety: use only
brake pads that BMW has
approved for your particular vehicle
model. BMW cannot evaluate non-
approved brake pads to determine if
they are suited for use, and therefore
cannot ensure the operating safety of
the vehicle if they are installed.<
Page 146 of 202
146n
Tire identification marks Wheel/tire condition Traction The traction grades, from highest to
lowest, are AA, A, B, and C.
Those grades represent the tire's ability
to stop on wet pavement as measured
under controlled conditions on speci-
fied government test surfaces of
asphalt and concrete. A tire marked C
may have poor traction performance.
The traction grade assigned to
this tire is based on straight-ahead
braking traction tests, and does not
include acceleration, cornering, hydro-
planing, or peak traction characteris-
tics.< TemperatureThe temperature grades are A, the
highest, B, and C, representing the
tire's resistance to the generation of
heat and its ability to dissipate heat
when tested under controlled condi-
tions on a specified indoor laboratory
test wheel.
Sustained high temperature can cause
the material of the tire to degenerate
and reduce tire life, and excessive tem-
perature can lead to a sudden flat tire.
The grade C corresponds to a level of
performance which all passenger car
tires must meet under the Federal
Motor Vehicle Safety Standard No. 109.
Grades B and A represent higher levels
of performance on the laboratory test
wheel than the minimum required by
law.
The temperature grade for this tire
is established for a tire that is
properly inflated and not overloaded.
Excessive speed, underinflation, or
excessive loading, either separately or
in combination, can cause heat buildup
and possible a tire failure.< M+SWinter and all-season tires.
These have better winter properties
than summer tires.
Wheel/tire damage Inspect your wheels and tires frequently
for tread wear, signs of damage and for
foreign objects lodged in the tread.
Check the tread pattern depth.
Please note that low-profile tires
make your wheels, tires and sus-
pension parts more susceptible to road
hazard and consequential damages.
Unusual vibrations encountered during
normal vehicle operation can indicate
tire failure or some other vehicle mal-
function. This can, for example, be
caused by driving over curbs. This is
also true for irregularities in the vehi-
cle's handling characteristics, such as a
pronounced tendency to pull to the left
or right. Should this occur, respond by
immediately reducing your speed.
Carefully proceed – or have your vehicle
towed – to the nearest BMW Sports
Activity Vehicle center or tire dealer to
have the wheels or tires inspected.
Tire damage, extending to sudden and
complete loss of pressure in extreme
cases, can pose a potentially lethal
safety hazard for the vehicle's occu-
pants and other road users alike.<
Page 150 of 202
150n
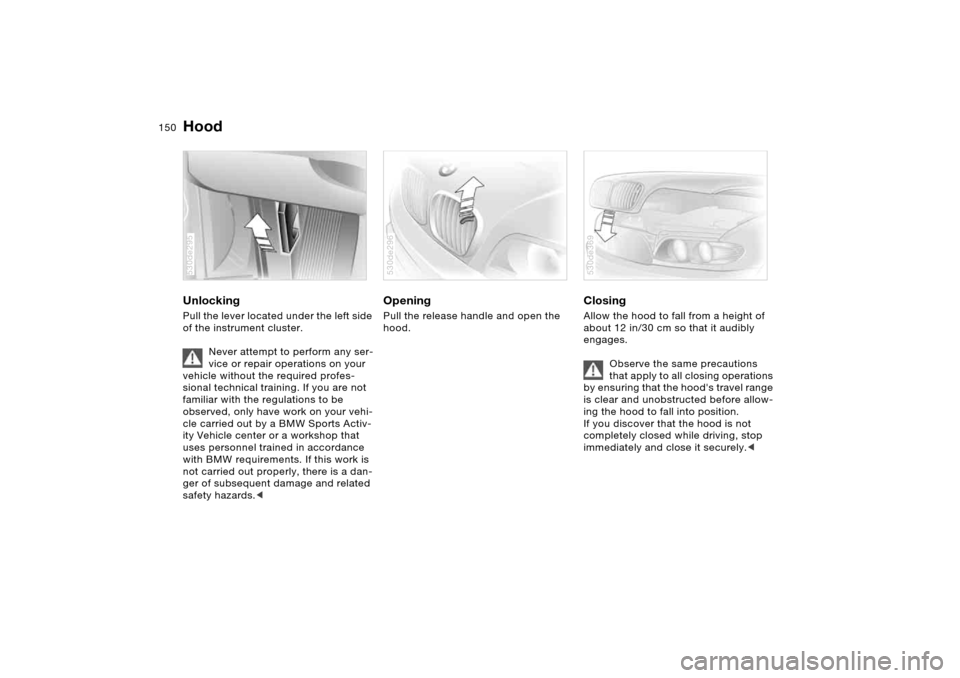
Hood Unlocking Pull the lever located under the left side
of the instrument cluster.
Never attempt to perform any ser-
vice or repair operations on your
vehicle without the required profes-
sional technical training. If you are not
familiar with the regulations to be
observed, only have work on your vehi-
cle carried out by a BMW Sports Activ-
ity Vehicle center or a workshop that
uses personnel trained in accordance
with BMW requirements. If this work is
not carried out properly, there is a dan-
ger of subsequent damage and related
safety hazards.< 530de295
Opening Pull the release handle and open the
hood. 530de296
Closing Allow the hood to fall from a height of
about 12 in/30 cm so that it audibly
engages.
Observe the same precautions
that apply to all closing operations
by ensuring that the hood's travel range
is clear and unobstructed before allow-
ing the hood to fall into position.
If you discover that the hood is not
completely closed while driving, stop
immediately and close it securely.< 530de369
Page 155 of 202
155n
OverviewControlsMaintenanceRepairsDataIndex
Coolant Brake fluid4. When necessary, slowly add coolant
until the correct level is reached; do
not overfill.
5. Close the cap and tighten snugly.
6. Have the cause of the coolant loss
corrected as soon as possible.
Brake fluid level
If the warning lamp lights up
or
the message CHECK BRAKE
FLUID appears in the Check
Control: stop immediately. The
brake fluid in the reservoir has
fallen to below the minimum
level.
Add brake fluid The brake fluid reservoir is located
under the microfilter housing trim panel
on the driver's side of the vehicle. For
adding brake fluid or for determining
and correcting the cause of brake fluid
loss, consult your BMW Sports Activity
Vehicle center. Your BMW Sports Activ-
ity Vehicle center is familiar with the
specifications for factory-approved
DOT 4 brake fluids.
Brake fluid loss may result in extended
brake pedal travel. For this situation,
refer to the notes on page140.
Brake fluid is hygroscopic, that is,
it absorbs moisture from the air
over time.
In order to ensure the safety and reli-
ability of the brake system, have the
brake fluid changed every two years by
a BMW Sports Activity Vehicle center.
Refer also to the Service and Warranty
Information Booklet for US models or
the Warranty and Service Guide Book-
let for Canadian models.
Brake fluid is toxic and also damages
vehicle paintwork. Always store these
agents in tightly-closed original con-
tainers kept well away from the reach of
children.
Do not spill the fluid and do not refill the
brake fluid reservoir to beyond the MAX
mark. The brake fluid could ignite upon
contact with hot engine parts and cause
serious burns.<
Always observe all applicable
environmental rules and regula-
tions when disposing of used brake
fluid.<
Page 157 of 202
157n
OverviewControlsMaintenanceRepairsDataIndex
OBD interface socketThe interface socket for the Onboard
Diagnostics is located on the left of the
driver's side at the bottom of the instru-
ment cluster and under a cover. The
cover has the letters OBD on it.
The purpose of the OBD system is to
ensure proper operation of the emission
control system for the vehicle's lifetime.
The system monitors emission-related
components and systems for deteriora-
tion and malfunction.
An illuminated indicator lamp
informs you of the need for ser-
vice, not of the need to stop the
vehicle. However, the systems should
be checked by your BMW Sports Activ-
ity Vehicle center at the earliest possi-
ble opportunity. 530us105
Display of the previously
described malfunction in Cana-
dian models.
Under certain conditions, the indicator
lamp will blink or flash. This indicates a
rather severe level of engine misfire.
When this occurs, you should reduce
speed and consult the nearest BMW
Sports Activity Vehicle center as soon
as possible. Severe engine misfire over
only a short period of time can seriously
damage emission control components,
especially the catalytic converter.
When the filler cap is not properly
tightened, the OBD system can
detect the vapor leak and the indicator
lamp will light up. If the filler cap is sub-
sequently tightened, the indicator lamp
should extinguish within a few days.<
Event Data Recorders Your vehicle may be equipped with one
or more sensing and diagnostic mod-
ules or a recording device capable of
recording or transmitting certain vehicle
data or information. In addition, if you
have a Subscription Service Agree-
ment for the BMW Assist system, cer-
tain vehicle information may be trans-
mitted or recorded in order to provide
such services.
Page 176 of 202
176n
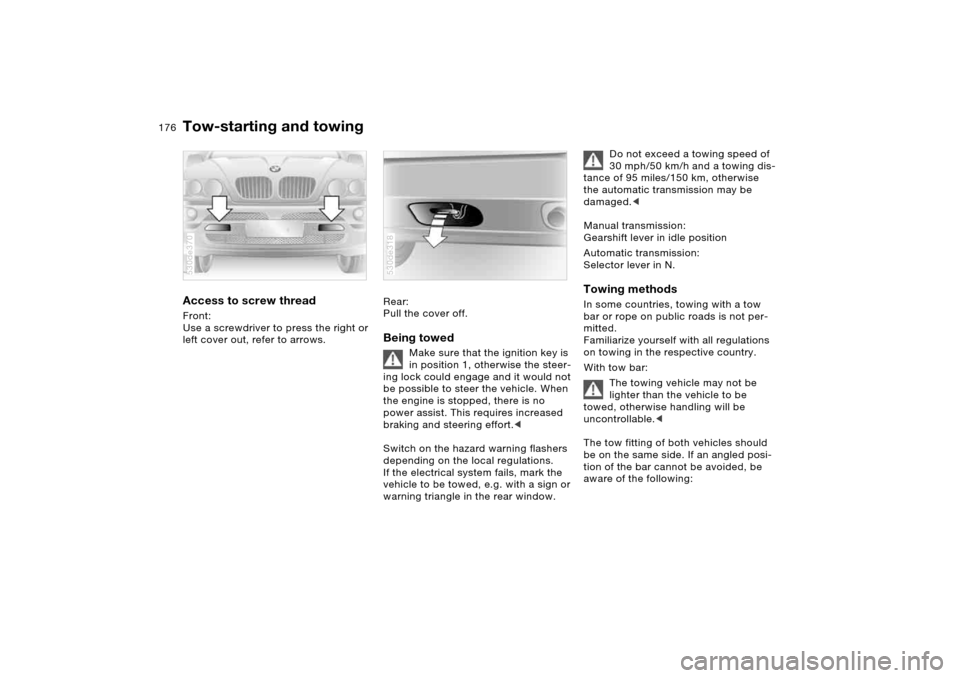
Tow-starting and towingAccess to screw thread Front:
Use a screwdriver to press the right or
left cover out, refer to arrows. 530de370
Rear:
Pull the cover off. Being towed
Make sure that the ignition key is
in position 1, otherwise the steer-
ing lock could engage and it would not
be possible to steer the vehicle. When
the engine is stopped, there is no
power assist. This requires increased
braking and steering effort.<
Switch on the hazard warning flashers
depending on the local regulations.
If the electrical system fails, mark the
vehicle to be towed, e.g. with a sign or
warning triangle in the rear window.
530de318
Do not exceed a towing speed of
30 mph/50 km/h and a towing dis-
tance of 95 miles/150 km, otherwise
the automatic transmission may be
damaged.<
Manual transmission:
Gearshift lever in idle position
Automatic transmission:
Selector lever in N.
Towing methodsIn some countries, towing with a tow
bar or rope on public roads is not per-
mitted.
Familiarize yourself with all regulations
on towing in the respective country.
With tow bar:
The towing vehicle may not be
lighter than the vehicle to be
towed, otherwise handling will be
uncontrollable.<
The tow fitting of both vehicles should
be on the same side. If an angled posi-
tion of the bar cannot be avoided, be
aware of the following:
Page 177 of 202
177n
OverviewControlsMaintenanceRepairsDataIndex
Tow-starting and towing>The freedom of movement is
restricted during cornering
>The angled position of the tow bar
creates lateral forces.
Only attach the tow bar to the tow
fittings, as attachment to other
vehicle parts can lead to damage.<
With tow-rope:
When starting off in the towing vehicle,
make sure that the tow-rope is taut.
Use nylon ropes or nylon straps
for towing, and avoid all exces-
sively sudden jerking movements. Only
attach tow ropes to the tow fittings, as
attachment to other vehicle parts can
lead to damage.<
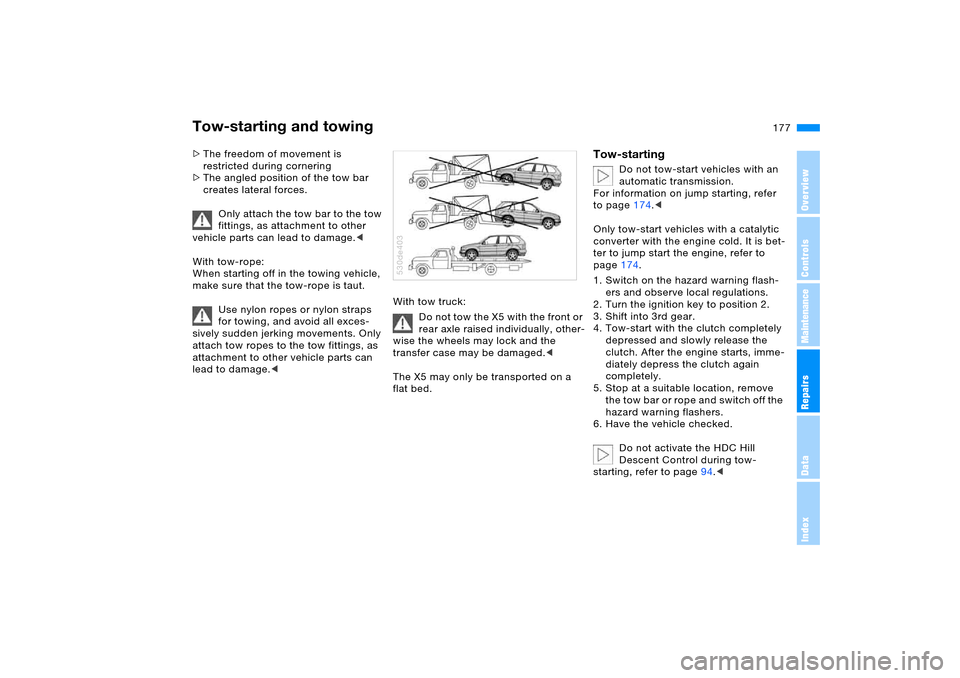
With tow truck:
Do not tow the X5 with the front or
rear axle raised individually, other-
wise the wheels may lock and the
transfer case may be damaged.<
The X5 may only be transported on a
flat bed.530de403
Tow-starting
Do not tow-start vehicles with an
automatic transmission.
For information on jump starting, refer
to page174.<
Only tow-start vehicles with a catalytic
converter with the engine cold. It is bet-
ter to jump start the engine, refer to
page174.
1. Switch on the hazard warning flash-
ers and observe local regulations.
2. Turn the ignition key to position 2.
3. Shift into 3rd gear.
4. Tow-start with the clutch completely
depressed and slowly release the
clutch. After the engine starts, imme-
diately depress the clutch again
completely.
5. Stop at a suitable location, remove
the tow bar or rope and switch off the
hazard warning flashers.
6. Have the vehicle checked.
Do not activate the HDC Hill
Descent Control during tow-
starting, refer to page94.<
Page 197 of 202
Everything from A to Z
197n
OverviewControlsMaintenanceRepairsDataIndex
Speedometer15,17,18
refer to Instrument
cluster15,17,18
Sport Program, automatic
transmission with
Steptronic67
Sports seat45
Stability control, refer to
DSC Dynamic Stability
Control92
xDrive94
Starting, refer to Starting
engine62
Starting engine62
Starting problems
at very low
temperatures63
jump starting174
Status of this Owner's
Manual at time of printing9
Steering lock62
Steering wheel
adjustment52
buttons on steering
wheel23
entry/exit aid53
heating53
lock62
memory50
Steering wheel adjustment,
automatic53
Steering wheel heater53Steering wheel memory50
Steering wheel with multi-
function buttons23
Steptronic, refer to Manual
operation67
Stopwatch83
Storage compartments119
Storage compartments in
cargo area127
Storage space, refer to
Cargo area124
Storing desired speed, refer
to Cruise control71
Storing seat adjustment50
Storing sitting position, refer
to Seat, mirror and
steering wheel memory50
Storing tires149
Supply reservoir, washer
systems152
Switches, refer to Cockpit14
Switching air conditioner
mode on and off
manually105,110
Switching off engine
63
Switching on hour signal83
Switch-on times, entering84
Symbols8
Synthetic oil153
T
Tachometer74Tailgate36
emergency operation,
refer to Unlocking
manually35,36
opening, remote control31
remote control31
unlocking manually36
Tail lamps, replacing
bulbs163
Taking time, refer to
Stopwatch83
Tank capacity, refer to Fuel
tank capacity183
Technical data180
Technical modifications9
Telephone116
refer to separate Owner’s
Manual
Telephone provisions, refer
to Hands-free telephone
operation116
Temperature
air conditioner105
automatic climate
control109
Temperature display
interior temperature109
outside temperature73,80
outside temperature
warning73
setting the units73,80Temperature of coolant,
refer to Coolant temper-
ature gauge76
Temperature warning73
Tempomat, refer to Cruise
control71
Thigh support adjustment45
Third brake lamp
refer to Center brake
lamp164
replacing bulbs164
Three-point belt49
Tightening torque of lug
bolts170
Tilt alarm sensor39
remote control31
switching off39
Tilt function, passenger-side
mirror51
Time of arrival87
Timer, refer to Stopwatch
83
Tire Identification
Number145
Tire inflation pressure141
producing141
Tire inflation pressure
monitoring, refer to Flat
Tire Monitor98
Tire Quality Grading145