BMW X5 4.8IS 2006 E53 Repair Manual
Manufacturer: BMW, Model Year: 2006, Model line: X5 4.8IS, Model: BMW X5 4.8IS 2006 E53Pages: 202, PDF Size: 4.13 MB
Page 61 of 202
61n
OverviewControlsMaintenanceRepairsDataIndex
Vehicle Memory, Key Memory How the system functions You have probably frequently wished
that you could configure individual
functions of your vehicle meet your own
personal requirements. In developing
your vehicle, BMW has included several
user-defined functions in the vehicle's
design. Your BMW Sports Activity Vehi-
cle center can make these settings for
you.
There are vehicle and person-related
adjustments: Vehicle Memory and Key
Memory. You can have up to four differ-
ent basic positions configured for four
different persons. The only requirement
is that each person uses his or her own
remote control key.
When your vehicle is unlocked with the
remote control, the vehicle recognizes
the individual user by means of a data
exchange with the key, and makes
adjustments accordingly.
In order for you to distinguish between
the master keys with remote control,
color-coded decals are supplied
together with the keys.
What the system can doYour BMW Sports Activity Vehicle cen-
ter can provide you with details on the
capabilities of the Vehicle Memory and
Key Memory systems.
You will see this symbol through-
out the Owner's Manual. It is to
remind you at appropriate places of the
settings that are available to you.<
Following configuration of the
memory functions, vehicle opera-
tion may differ from the description in
the Owner's Manual. Should you want
to sell your BMW some day, please
remember to have the memory func-
tions reset to the default state.<
Examples for Vehicle Memory:
>Various signals that can serve as
acknowledgment for locking and
unlocking the vehicle, refer to
pages31, 33
>Deactivating/activating the Pathway
lighting function, refer to page100.
Examples for Key Memory:
>Automatic adjustment of the driver's
seat, exterior mirror and steering
wheel with settings stored in the
memory for the individual driver when
the vehicle is unlocked, refer to
page51
>Calling up customized settings for
the automatic climate control when
unlocking the vehicle, refer to
page109.
Page 62 of 202
62n
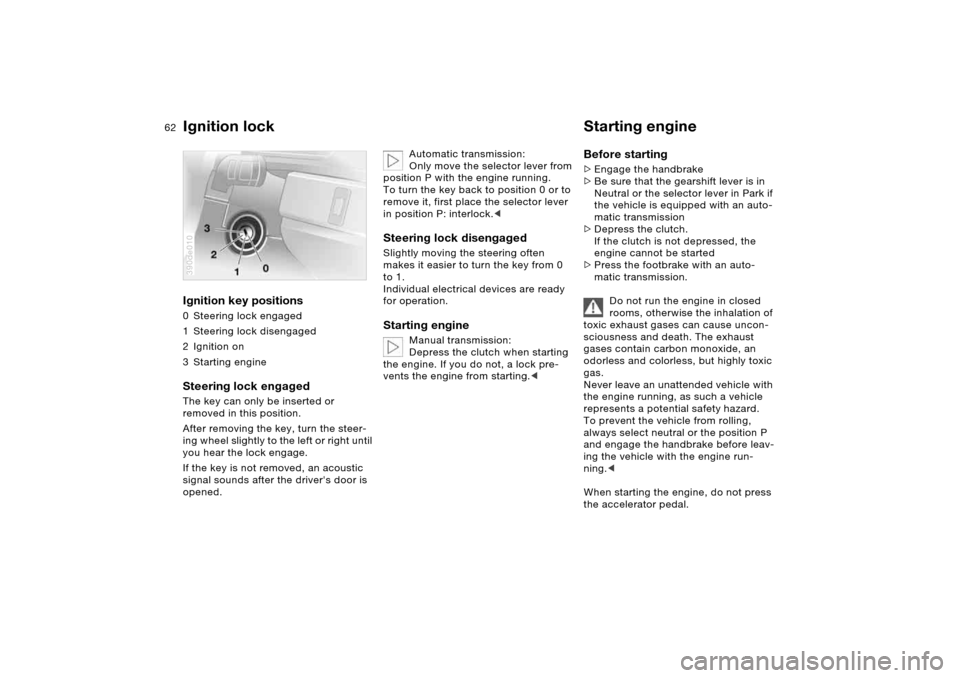
Ignition lock Starting engine Ignition key positions 0 Steering lock engaged
1Steering lock disengaged
2 Ignition on
3Starting engineSteering lock engaged The key can only be inserted or
removed in this position.
After removing the key, turn the steer-
ing wheel slightly to the left or right until
you hear the lock engage.
If the key is not removed, an acoustic
signal sounds after the driver's door is
opened.390de010
Automatic transmission:
Only move the selector lever from
position P with the engine running.
To turn the key back to position 0 or to
remove it, first place the selector lever
in position P: interlock.<
Steering lock disengaged Slightly moving the steering often
makes it easier to turn the key from 0
to 1.
Individual electrical devices are ready
for operation. Starting engine
Manual transmission:
Depress the clutch when starting
the engine. If you do not, a lock pre-
vents the engine from starting.<
Before starting >Engage the handbrake
>Be sure that the gearshift lever is in
Neutral or the selector lever in Park if
the vehicle is equipped with an auto-
matic transmission
>Depress the clutch.
If the clutch is not depressed, the
engine cannot be started
>Press the footbrake with an auto-
matic transmission.
Do not run the engine in closed
rooms, otherwise the inhalation of
toxic exhaust gases can cause uncon-
sciousness and death. The exhaust
gases contain carbon monoxide, an
odorless and colorless, but highly toxic
gas.
Never leave an unattended vehicle with
the engine running, as such a vehicle
represents a potential safety hazard.
To prevent the vehicle from rolling,
always select neutral or the position P
and engage the handbrake before leav-
ing the vehicle with the engine run-
ning.<
When starting the engine, do not press
the accelerator pedal.
Page 63 of 202
OverviewControlsMaintenanceRepairsDataIndex
63n
Starting engine Switching off engineDo not allow the engine to warm up by
leaving it running while the vehicle
remains stationary. Instead, begin to
drive immediately at a moderate engine
speed.
X5 3.0i:
Do not end the starting procedure too
soon, but do not continue for longer
than approx. 20 seconds. Release the
ignition key immediately as soon as the
engine starts.
X5 4.4i, 4.8is:
Your BMW is equipped with the conve-
nience starting feature. With this fea-
ture, it is sufficient to turn the ignition
key only briefly to position 3 'Start
engine' and to let go of it right away.
The starter actuation continues to oper-
ate automatically for a certain period of
time and is stopped automatically as
soon as the engine has started.
The automatic starting mode will not
operate or will be canceled if the bat-
tery voltage is insufficient. The engine
can be jump started, refer to page174.Should the engine fail to start on the
first attempt, if it is very hot or cold, for
instance:
>Press the accelerator pedal halfway
down while engaging the starter.
Cold starts at altitudes above 3,300 ft/
1,000 meters and at very low tempera-
tures, from approx. +57/–156:
>For the initial starting attempt, allow
the starter to remain engaged some-
what longer, approx. 10 seconds.
Engine idle speed is controlled by the
engine computer system. Increased
speeds at startup are normal and
should decrease as the engine warms
up. If engine speed does not decrease,
service is required.
To prevent the battery from being
drained, always switch off electrical
devices that are not in use. Switch the
ignition off when the vehicle is not
being driven.
Extended starting attempts, char-
acterized by excessively frequent
or long periods with the starter
engaged, can lead to damage of the
catalytic converter.<
Manual transmission:
1. Turn the ignition key to position 1
or 0
2. Shift into first gear or reverse.
Automatic transmission:
1. Shift into selector lever position P
2. Turn the ignition key to position 1
or 0.
Do not remove the ignition key
when the vehicle is moving, other-
wise, the steering could lock.
When leaving the vehicle, always
remove the ignition key and lock the
steering.
Manual transmission:
Always engage the handbrake when
parking on slopes and inclined sur-
faces. Even placing the gearshift lever
in 1st gear or reverse may not provide
adequate resistance to rolling.
Automatic transmission:
Place the selector lever in the P posi-
tion.<
Automatic transmission:
The vehicle must be stationary and the
selector lever in Park before you can
remove the ignition key.
Page 64 of 202
64n
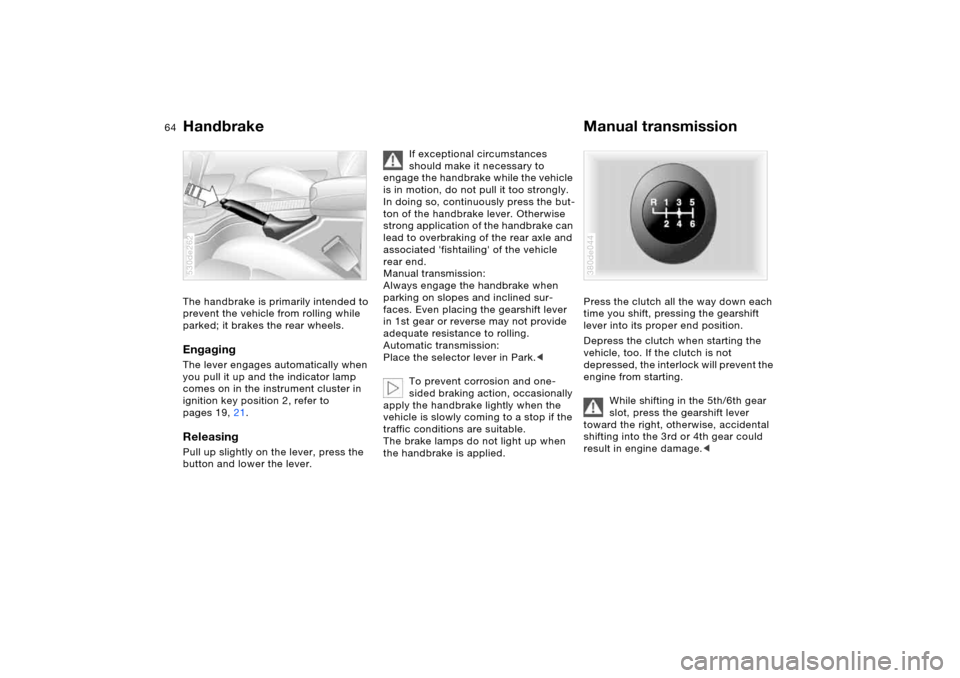
Handbrake Manual transmissionThe handbrake is primarily intended to
prevent the vehicle from rolling while
parked; it brakes the rear wheels.EngagingThe lever engages automatically when
you pull it up and the indicator lamp
comes on in the instrument cluster in
ignition key position 2, refer to
pages 19, 21.Releasing Pull up slightly on the lever, press the
button and lower the lever. 530de262
If exceptional circumstances
should make it necessary to
engage the handbrake while the vehicle
is in motion, do not pull it too strongly.
In doing so, continuously press the but-
ton of the handbrake lever. Otherwise
strong application of the handbrake can
lead to overbraking of the rear axle and
associated 'fishtailing' of the vehicle
rear end.
Manual transmission:
Always engage the handbrake when
parking on slopes and inclined sur-
faces. Even placing the gearshift lever
in 1st gear or reverse may not provide
adequate resistance to rolling.
Automatic transmission:
Place the selector lever in Park.<
To prevent corrosion and one-
sided braking action, occasionally
apply the handbrake lightly when the
vehicle is slowly coming to a stop if the
traffic conditions are suitable.
The brake lamps do not light up when
the handbrake is applied.
Press the clutch all the way down each
time you shift, pressing the gearshift
lever into its proper end position.
Depress the clutch when starting the
vehicle, too. If the clutch is not
depressed, the interlock will prevent the
engine from starting.
While shifting in the 5th/6th gear
slot, press the gearshift lever
toward the right, otherwise, accidental
shifting into the 3rd or 4th gear could
result in engine damage.< 380de044
Page 65 of 202
OverviewControlsMaintenanceRepairsDataIndex
65n
Manual transmission Automatic transmission with Steptronic
*
Reverse Select only when the vehicle is station-
ary. Press the gearshift lever to the left
to overcome the resistance.
As you do this, the backup lamps will
turn on automatically when the ignition
key is in position 2.
In addition to fully automatic operation,
you can also manually shift with the
Steptronic, refer to page67.
Under normal operating conditions, fuel
consumption is lowest when driving in
position D.
530us238
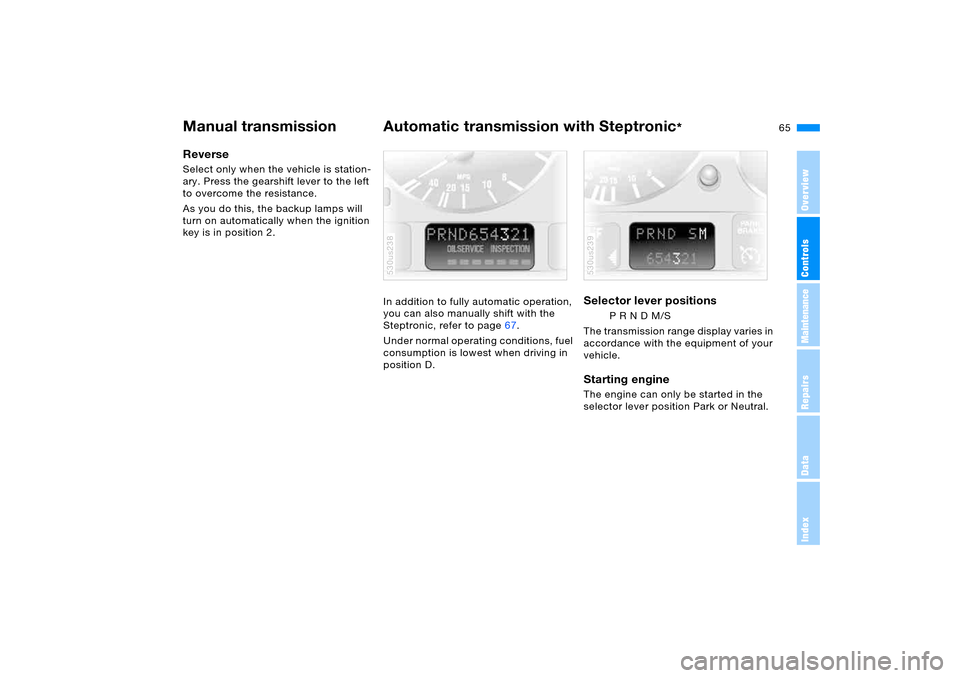
Selector lever positions
P R N D M/S
The transmission range display varies in
accordance with the equipment of your
vehicle.
Starting engine The engine can only be started in the
selector lever position Park or Neutral. 530us239
Page 66 of 202
66n
Automatic transmission with Steptronic
*
Range selection >The selector lever can be moved out
of the P position with the ignition
switched on or the engine running:
interlock
>With the vehicle stationary, press the
footbrake before shifting out of P
or N, otherwise, the selector lever is
blocked: shiftlock.
Keep the brake pedal pressed down
until you start off. The vehicle will oth-
erwise creep when a drive position is
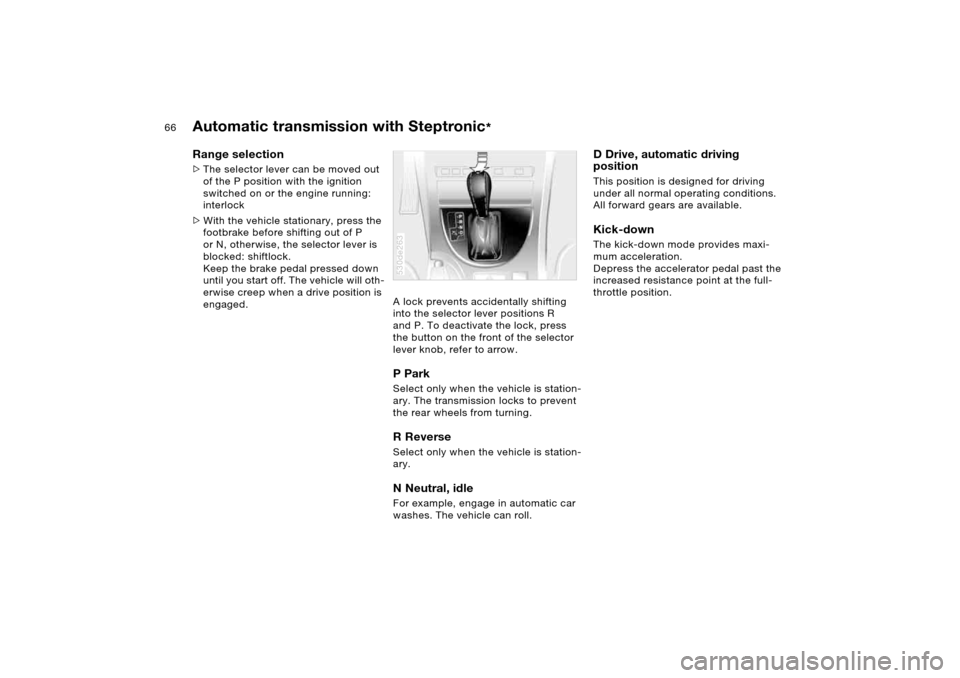
engaged.A lock prevents accidentally shifting
into the selector lever positions R
and P. To deactivate the lock, press
the button on the front of the selector
lever knob, refer to arrow.
P Park Select only when the vehicle is station-
ary. The transmission locks to prevent
the rear wheels from turning.R Reverse Select only when the vehicle is station-
ary. N Neutral, idle For example, engage in automatic car
washes. The vehicle can roll.530de263
D Drive, automatic driving
positionThis position is designed for driving
under all normal operating conditions.
All forward gears are available. Kick-down The kick-down mode provides maxi-
mum acceleration.
Depress the accelerator pedal past the
increased resistance point at the full-
throttle position.
Page 67 of 202
OverviewControlsMaintenanceRepairsDataIndex
67n
Automatic transmission with Steptronic
*
Sport Program and manual
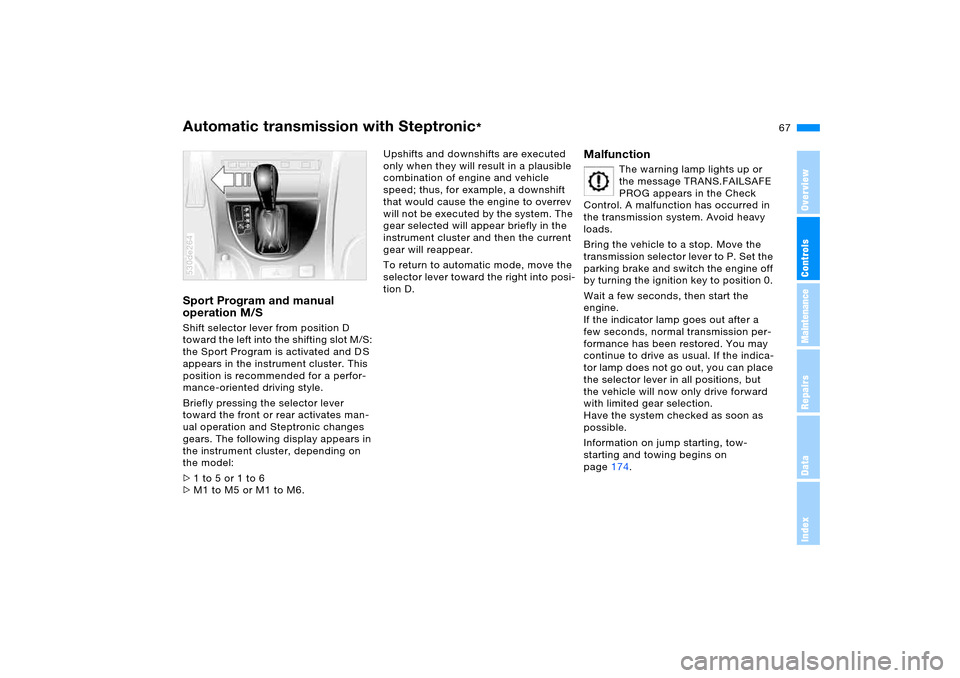
operation M/S Shift selector lever from position D
toward the left into the shifting slot M/S:
the Sport Program is activated and D S
appears in the instrument cluster. This
position is recommended for a perfor-
mance-oriented driving style.
Briefly pressing the selector lever
toward the front or rear activates man-
ual operation and Steptronic changes
gears. The following display appears in
the instrument cluster, depending on
the model:
>1 to 5 or 1 to 6
>M1 to M5 or M1 to M6. 530de264
Upshifts and downshifts are executed
only when they will result in a plausible
combination of engine and vehicle
speed; thus, for example, a downshift
that would cause the engine to overrev
will not be executed by the system. The
gear selected will appear briefly in the
instrument cluster and then the current
gear will reappear.
To return to automatic mode, move the
selector lever toward the right into posi-
tion D.
Malfunction
The warning lamp lights up or
the message TRANS.FAILSAFE
PROG appears in the Check
Control. A malfunction has occurred in
the transmission system. Avoid heavy
loads.
Bring the vehicle to a stop. Move the
transmission selector lever to P. Set the
parking brake and switch the engine off
by turning the ignition key to position 0.
Wait a few seconds, then start the
engine.
If the indicator lamp goes out after a
few seconds, normal transmission per-
formance has been restored. You may
continue to drive as usual. If the indica-
tor lamp does not go out, you can place
the selector lever in all positions, but
the vehicle will now only drive forward
with limited gear selection.
Have the system checked as soon as
possible.
Information on jump starting, tow-
starting and towing begins on
page174.
Page 68 of 202
68n
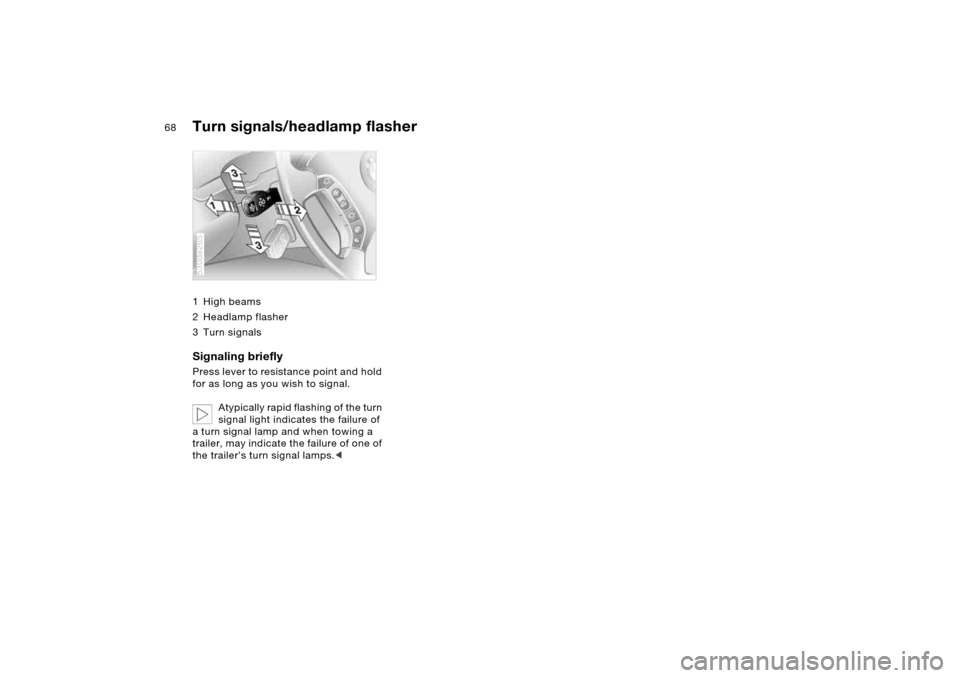
Turn signals/headlamp flasher 1High beams
2 Headlamp flasher
3Turn signalsSignaling briefly Press lever to resistance point and hold
for as long as you wish to signal.
Atypically rapid flashing of the turn
signal light indicates the failure of
a turn signal lamp and when towing a
trailer, may indicate the failure of one of
the trailer's turn signal lamps.<530de265
Page 69 of 202
OverviewControlsMaintenanceRepairsDataIndex
69n
Washer/wiper system/rain sensor
*
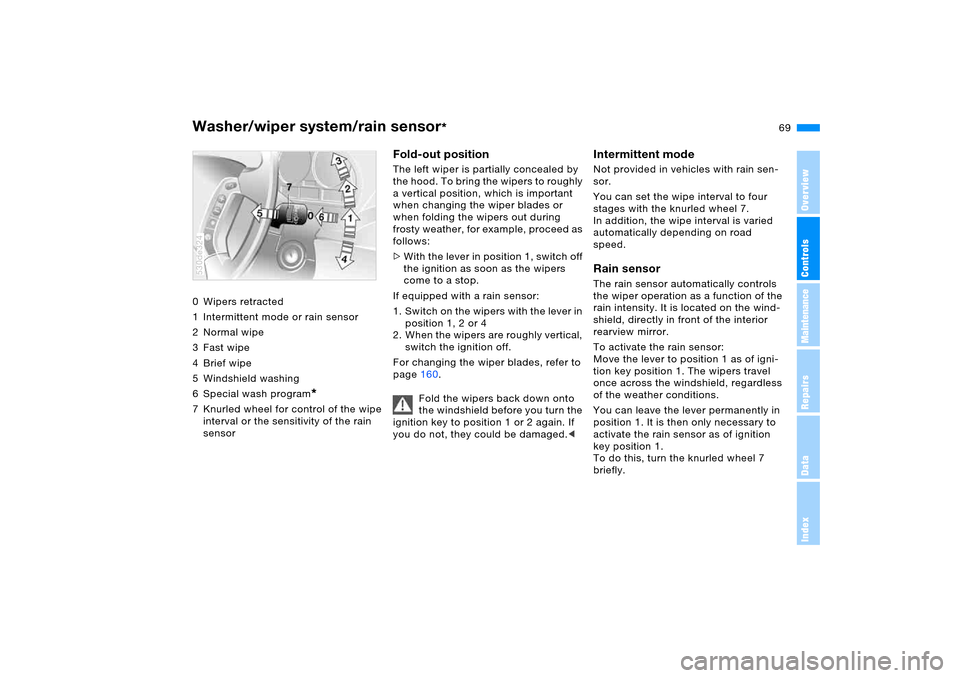
0 Wipers retracted
1 Intermittent mode or rain sensor
2Normal wipe
3Fast wipe
4Brief wipe
5 Windshield washing
6 Special wash program
*
7 Knurled wheel for control of the wipe
interval or the sensitivity of the rain
sensor530de324
Fold-out positionThe left wiper is partially concealed by
the hood. To bring the wipers to roughly
a vertical position, which is important
when changing the wiper blades or
when folding the wipers out during
frosty weather, for example, proceed as
follows:
>With the lever in position 1, switch off
the ignition as soon as the wipers
come to a stop.
If equipped with a rain sensor:
1. Switch on the wipers with the lever in
position 1, 2 or 4
2. When the wipers are roughly vertical,
switch the ignition off.
For changing the wiper blades, refer to
page160.
Fold the wipers back down onto
the windshield before you turn the
ignition key to position 1 or 2 again. If
you do not, they could be damaged.<
Intermittent mode Not provided in vehicles with rain sen-
sor.
You can set the wipe interval to four
stages with the knurled wheel 7.
In addition, the wipe interval is varied
automatically depending on road
speed. Rain sensor The rain sensor automatically controls
the wiper operation as a function of the
rain intensity. It is located on the wind-
shield, directly in front of the interior
rearview mirror.
To activate the rain sensor:
Move the lever to position 1 as of igni-
tion key position 1. The wipers travel
once across the windshield, regardless
of the weather conditions.
You can leave the lever permanently in
position 1. It is then only necessary to
activate the rain sensor as of ignition
key position 1.
To do this, turn the knurled wheel 7
briefly.
Page 70 of 202
70n
Washer/wiper system/rain sensor
*
To adjust the sensitivity of the rain
sensor:
Turn the knurled wheel 7.
To deactivate the rain sensor:
Move the lever to position 0.
Deactivate the rain sensor when
passing through an automatic car
wash. Failure to do so could result in
damage caused by undesired wiper
activation.< Normal wipe The system switches automatically to
intermittent mode when the vehicle is
stationary, not on vehicles with rain
sensor. Fast wipe The wipers operate at normal speed
when the vehicle is not moving, not on
vehicles with rain sensor. Windshield washing The system sprays washer fluid against
the windshield and activates the wipers
for a brief period.
Special wash program
*
As with 5; several additional wash
cycles are carried out and the head-
lamps are cleaned
*.
This program is recommended after you
have driven on extremely dirty roads.
Headlamp washing
*
>With the special wash program 6
>At appropriate intervals, the head-
lamps will also be cleaned upon actu-
ation of the windshield washer func-
tion 5 while the vehicle's headlamps
are switched on.
Do not use the washers if there
is any danger that the fluid will
freeze on the windshield. If you do so,
your vision could be obscured. Use
antifreeze to prevent this, refer to
page152.
Do not actuate washer systems when
the fluid reservoir is empty, otherwise,
the washer pump will be damaged.<
Windshield washer nozzles The windshield washer jets are heated
automatically when the ignition key is in
position 2.