ECO mode BMW X5 XDRIVE 30I 2010 E70 Owner's Manual
[x] Cancel search | Manufacturer: BMW, Model Year: 2010, Model line: X5 XDRIVE 30I, Model: BMW X5 XDRIVE 30I 2010 E70Pages: 300, PDF Size: 12.41 MB
Page 8 of 300
Notes
6
California Proposition 65 Warning
California laws require us to issue the following
warning:
Engine exhaust and a wide variety of
automobile components and parts,
including components found in the interior fur-
nishings in a vehicle, contain or emit chemicals
known to the State of California to cause cancer
and birth defects and reproductive harm. In
addition, certain fluids contained in vehicles and
certain products of component wear contain or
emit chemicals known to the State of California
to cause cancer and birth defects or other
reproductive harm.
Battery posts, terminals and related accesso-
ries contain lead and lead compounds. Wash
your hands after handling.
Used engine oil contains chemicals that have
caused cancer in laboratory animals. Always
protect your skin by washing thoroughly with
soap and water.<
Service and warranty
We recommend that you read this publication
thoroughly.
Your BMW is covered by the following warran-
ties:
>New Vehicle Limited Warranty
>Rust Perforation Limited Warranty
>Federal Emissions System Defect Warranty
>Federal Emissions Performance Warranty
>California Emission Control System Limited
Warranty
Detailed information about these warranties is
listed in the Service and Warranty Information
Booklet for US models or in the Warranty and
Service Guide Booklet for Canadian models.
Your vehicle has been specifically adapted and
designed to meet the particular operating con-
ditions and homologation requirements in your
country and continental region in order to
deliver the full driving pleasure while the vehicle
is operated under those conditions. If you wish
to operate your vehicle in another country or
region, you may be required to adapt your vehi-
cle to meet different prevailing operating condi-
tions and homologation requirements. You
should also be aware of any applicable warranty
limitations or exclusions for such country or
region. In such case, please contact Customer
Relations for further information.
ba8_e70ag.book Seite 6 Freitag, 5. Juni 2009 11:42 11
Page 30 of 300
Opening and closing
28
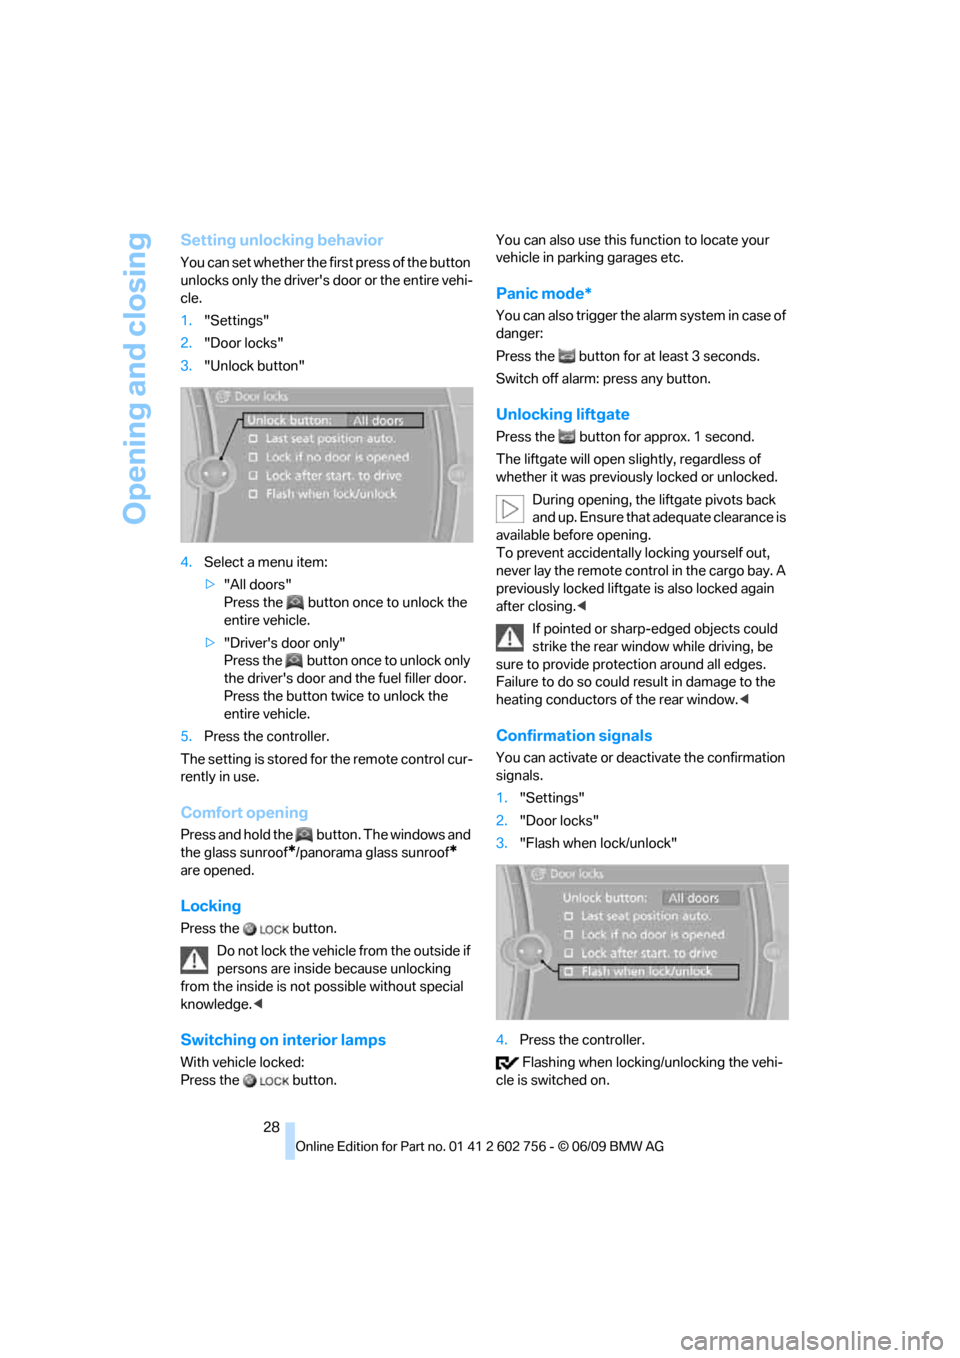
Setting unlocking behavior
You can set whether the first press of the button
unlocks only the driver's door or the entire vehi-
cle.
1."Settings"
2."Door locks"
3."Unlock button"
4.Select a menu item:
>"All doors"
Press the button once to unlock the
entire vehicle.
>"Driver's door only"
Press the button once to unlock only
the driver's door and the fuel filler door.
Press the button twice to unlock the
entire vehicle.
5.Press the controller.
The setting is stored for the remote control cur-
rently in use.
Comfort opening
Press and hold the button. The windows and
the glass sunroof
*/panorama glass sunroof*
are opened.
Locking
Press the button.
Do not lock the vehicle from the outside if
persons are inside because unlocking
from the inside is not possible without special
knowledge.<
Switching on interior lamps
With vehicle locked:
Press the button.You can also use this function to locate your
vehicle in parking garages etc.
Panic mode*
You can also trigger the alarm system in case of
danger:
Press the button for at least 3 seconds.
Switch off alarm: press any button.
Unlocking liftgate
Press the button for approx. 1 second.
The liftgate will open slightly, regardless of
whether it was previously locked or unlocked.
During opening, the liftgate pivots back
and up. Ensure that adequate clearance is
available before opening.
To prevent accidentally locking yourself out,
never lay the remote control in the cargo bay. A
previously locked liftgate is also locked again
after closing.<
If pointed or sharp-edged objects could
strike the rear window while driving, be
sure to provide protection around all edges.
Failure to do so could result in damage to the
heating conductors of the rear window.<
Confirmation signals
You can activate or deactivate the confirmation
signals.
1."Settings"
2."Door locks"
3."Flash when lock/unlock"
4.Press the controller.
Flashing when locking/unlocking the vehi-
cle is switched on.
ba8_e70ag.book Seite 28 Freitag, 5. Juni 2009 11:42 11
Page 65 of 300
Controls
63Reference
At a glance
Driving tips
Communications
Navigation
Entertainment
Mobility
>the vehicle is braked to a stop during driving
In the instrument panel, the indicator
lamp changes from green to red and
the indication AUTO H goes out.
Indicator lamp on Canadian models.
Before you start to drive, either release the
parking brake manually, refer to page61, or
reactivate Automatic Hold, refer to page62.
Before leaving the vehicle with the engine
running, shift the selector lever into posi-
tion P of the automatic transmission and make
sure that the parking brake is set. Otherwise,
the vehicle may begin to roll.<
Malfunction
If the parking brake fails or malfunctions, secure
the vehicle against rolling, e.g. with a wheel
chock, if you leave the vehicle.
Releasing parking brake manually
In the event of an electrical power loss or elec-
trical malfunction, you can release the parking
brake manually.
Before manually releasing the parking
brake and each time you park the vehicle
without setting the parking brake, make sure
that the automatic transmission is in position P,
refer to page65. Be sure to pay attention to the
information in the instrument panel.
In addition, secure the vehicle against rolling,
e.g. with a wheel chock. Otherwise there is a
danger that the vehicle could roll if parked on a
steep slope.<
If it becomes necessary to also release the
transmission lock of the automatic transmission
manually, follow this sequence:
1.If necessary, start by releasing the parking
brake manually.
2.Then release the automatic transmission's
transmission lock manually, refer to
page66.
Jump starting and towing, refer to information
starting on page262.
Releasing
1.Open the left-hand side panel in the cargo
bay.
2.Remove the first-aid kit
* and warning trian-
gle
* if necessary. Close the bracket of the
warning triangle.
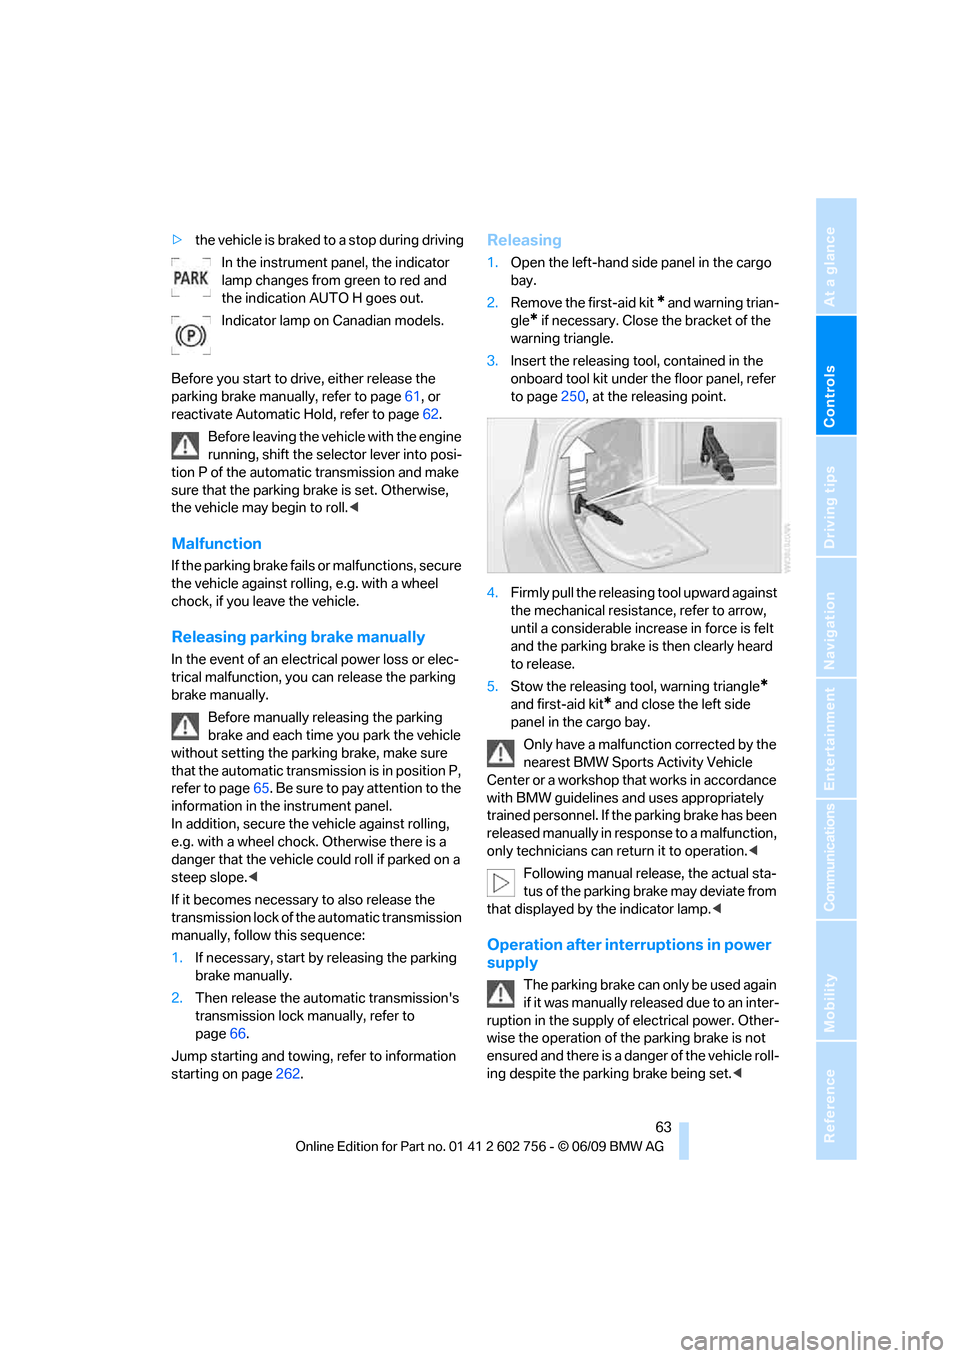
3.Insert the releasing tool, contained in the
onboard tool kit under the floor panel, refer
to page250, at the releasing point.
4.Firmly pull the releasing tool upward against
the mechanical resistance, refer to arrow,
until a considerable increase in force is felt
and the parking brake is then clearly heard
to release.
5.Stow the releasing tool, warning triangle
*
and first-aid kit* and close the left side
panel in the cargo bay.
Only have a malfunction corrected by the
nearest BMW Sports Activity Vehicle
Center or a workshop that works in accordance
with BMW guidelines and uses appropriately
trained personnel. If the parking brake has been
released manually in response to a malfunction,
only technicians can return it to operation.<
Following manual release, the actual sta-
tus of the parking brake may deviate from
that displayed by the indicator lamp.<
Operation after interruptions in power
supply
The parking brake can only be used again
if it was manually released due to an inter-
ruption in the supply of electrical power. Other-
wise the operation of the parking brake is not
ensured and there is a danger of the vehicle roll-
ing despite the parking brake being set.<
ba8_e70ag.book Seite 63 Freitag, 5. Juni 2009 11:42 11
Page 66 of 300
Driving
64
Procedure
1.Switch on the ignition.
2.Press the button with the brake depressed.
The indicator lamp in the instrument
panel goes out as soon as the parking
brake is ready for operation again.
Indicator lamp on Canadian models.
Any noises which occur are normal. Startup
may take several seconds.
Automatic transmission with
Steptronic
In addition to fully automatic operation, you can
also manually shift with the Steptronic, refer to
page65.
Transmission positions
P R N D M/S + –
To prevent the vehicle from creeping
after you select a driving position, main-
tain pressure on the brake pedal until you are
ready to start.<
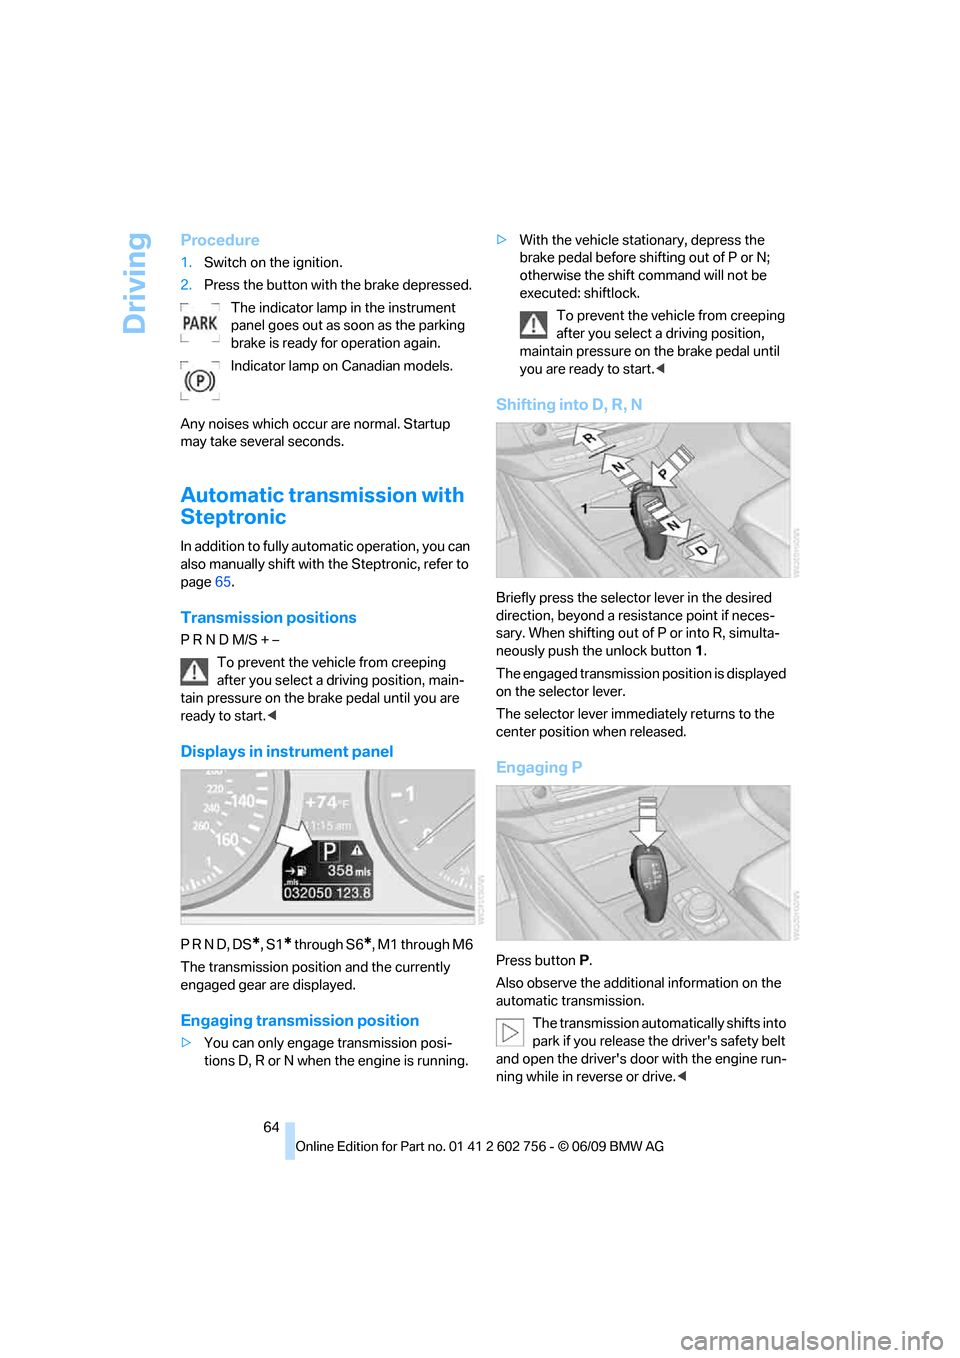
Displays in instrument panel
P R N D, DS*, S1* through S6*, M1 through M6
The transmission position and the currently
engaged gear are displayed.
Engaging transmission position
>You can only engage transmission posi-
tions D, R or N when the engine is running.>With the vehicle stationary, depress the
brake pedal before shifting out of P or N;
otherwise the shift command will not be
executed: shiftlock.
To prevent the vehicle from creeping
after you select a driving position,
maintain pressure on the brake pedal until
you are ready to start.<
Shifting into D, R, N
Briefly press the selector lever in the desired
direction, beyond a resistance point if neces-
sary. When shifting out of P or into R, simulta-
neously push the unlock button1.
The engaged transmission position is displayed
on the selector lever.
The selector lever immediately returns to the
center position when released.
Engaging P
Press buttonP.
Also observe the additional information on the
automatic transmission.
The transmission automatically shifts into
park if you release the driver's safety belt
and open the driver's door with the engine run-
ning while in reverse or drive.<
ba8_e70ag.book Seite 64 Freitag, 5. Juni 2009 11:42 11
Page 67 of 300
Controls
65Reference
At a glance
Driving tips
Communications
Navigation
Entertainment
Mobility
R Reverse
Select only with the vehicle stationary.
An interlock prevents inadvertent gearshifts
into transmission position R. To release the
lock, push the unlock button1.
P Park
Select only with the vehicle stationary. The rear
wheels are locked.
P is engaged automatically as soon as
you switch off the engine unless N is
engaged and on vehicles with comfort access
the remote control is inserted in the ignition
lock, refer to page59.<
N Neutral
Can, for example, be engaged in automatic car
washes. The vehicle can roll.
N remains engaged even after the engine
is switched off whenever you leave the
remote control in the ignition lock. This function
is used, for example, in a car wash, refer to
page60. After approx. 30 minutes P is auto-
matically engaged.<
D Drive, automatic position
Position for normal vehicle operation. All for-
ward gears are available.
Under normal operating conditions, the fuel
consumption is lowest when driving in posi-
tion D.
Kick-down
The kick-down mode provides maximum accel-
eration.
Press the accelerator pedal beyond the
increased resistance at full throttle.
Sport program and manual mode M/S
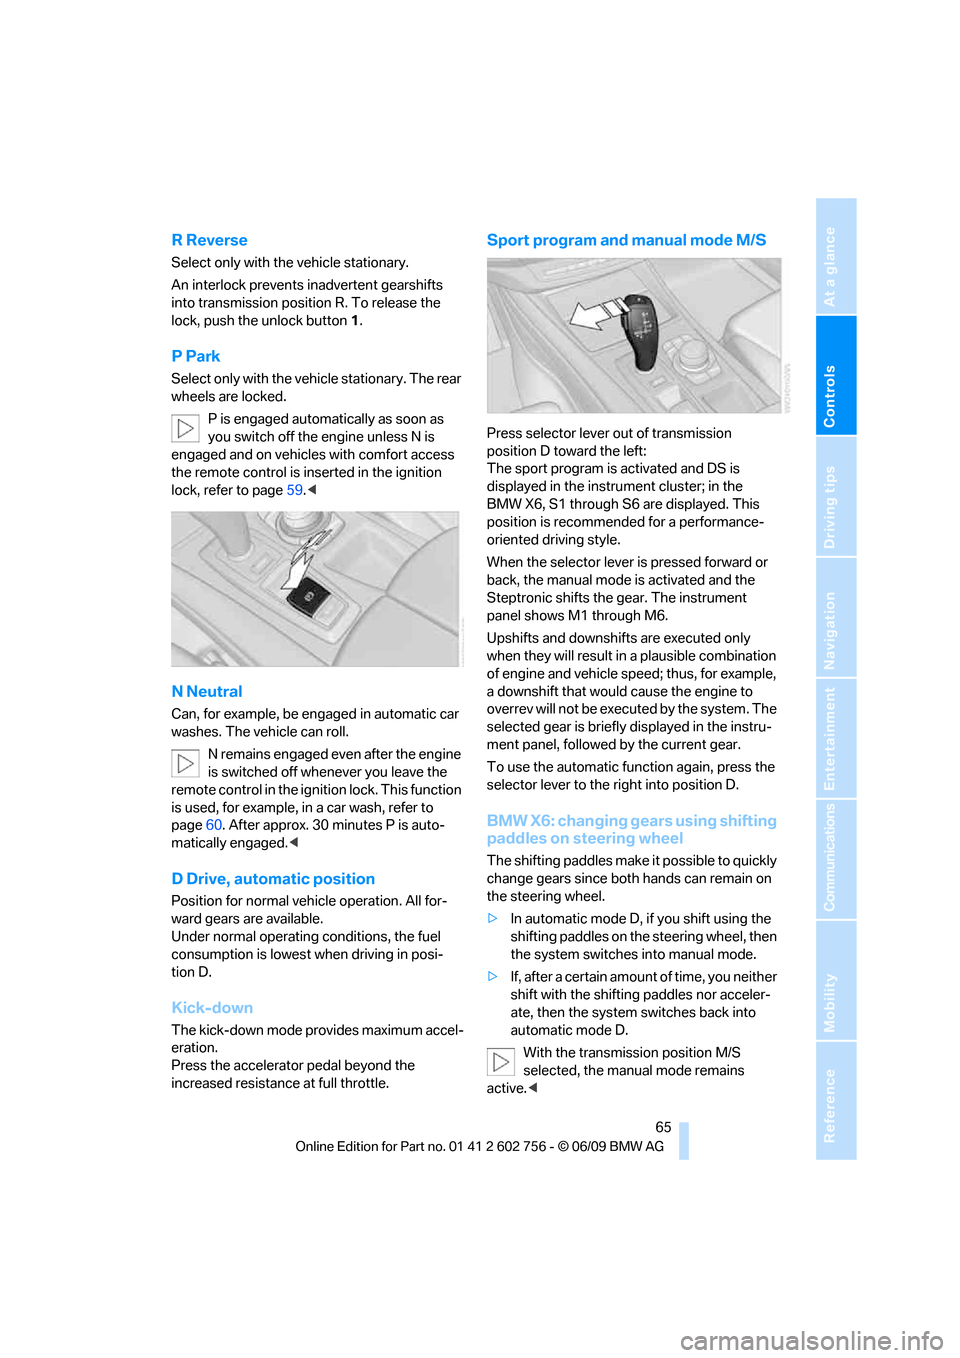
Press selector lever out of transmission
position D toward the left:
The sport program is activated and DS is
displayed in the instrument cluster; in the
BMW X6, S1 through S6 are displayed. This
position is recommended for a performance-
oriented driving style.
When the selector lever is pressed forward or
back, the manual mode is activated and the
Steptronic shifts the gear. The instrument
panel shows M1 through M6.
Upshifts and downshifts are executed only
when they will result in a plausible combination
of engine and vehicle speed; thus, for example,
a downshift that would cause the engine to
overrev will not be executed by the system. The
selected gear is briefly displayed in the instru-
ment panel, followed by the current gear.
To use the automatic function again, press the
selector lever to the right into position D.
BMW X6: changing gears using shifting
paddles on steering wheel
The shifting paddles make it possible to quickly
change gears since both hands can remain on
the steering wheel.
>In automatic mode D, if you shift using the
shifting paddles on the steering wheel, then
the system switches into manual mode.
>If, after a certain amount of time, you neither
shift with the shifting paddles nor acceler-
ate, then the system switches back into
automatic mode D.
With the transmission position M/S
selected, the manual mode remains
active.<
ba8_e70ag.book Seite 65 Freitag, 5. Juni 2009 11:42 11
Page 132 of 300
Things to remember when driving
130
Things to remember when driving
Break-in period
Moving parts need breaking-in time to adjust to
each other. To ensure that your vehicle contin-
ues to provide optimized economy of operation
throughout an extended service life, we request
that you devote careful attention to the follow-
ing section.
Engine and rear axle differential
Always obey all official speed limits.
Up to 1,200 miles/2,000 km
Drive at various engine and vehicle speeds, but
do not exceed:
>Gasoline engine
4,500 rpm or 100 mph/160 km/h
>Diesel engine
3,500 rpm or 90 mph/150 km/h
Avoid full-throttle operation and use of the
transmission's kick-down mode during these
initial miles.
From 1,200 miles/2,000 km
The engine and vehicle speed can gradually be
increased.
Tires
Due to technical factors associated with their
manufacture, tires do not achieve their full trac-
tion potential until after an initial break-in
period. Therefore, drive reservedly during the
first 200 miles/300 km.
Brake system
Brakes require an initial break-in period of
approx. 300 miles/500 km to achieve optimized
contact and wear patterns between brake pads
and rotors. Drive in a reserved manner during
this break-in period.
Following part replacement
Observe the break-in instructions again if com-
ponents mentioned above must be replaced
after subsequent driving operation.
Saving fuel
The fuel consumption of your vehicle depends
on various factors. Through a few simple steps,
your driving style, and regular maintenance, you
can have a positive influence on your fuel con-
sumption and environmental impact.
Removing unnecessary cargo
Additional weight increases fuel consumption.
Removing add-on parts after use
Remove unneeded auxiliary mirrors, roof or rear
luggage racks after use. Add-on parts attached
to the vehicle impede the aerodynamics and
increase the fuel consumption.
Closing windows and glass sunroof*/
panorama glass sunroof*
An open glass sunroof/panorama glass sunroof
or open windows likewise increase the drag
coefficient and therefore the fuel consumption.
Checking tire inflation pressures
regularly
Check and correct the tire inflation pressure as
needed at least twice a month and before long
trips.
An insufficient tire inflation pressure increases
the rolling resistance and thus increases the
fuel consumption and tire wear.
Driving off immediately
Do not allow the engine to warm up by leaving it
running while the vehicle remains stationary.
Instead, begin to drive at a moderate engine
ba8_e70ag.book Seite 130 Freitag, 5. Juni 2009 11:42 11
Page 205 of 300
203
Entertainment
Reference
At a glance
Controls
Driving tips Communications
Navigation
Mobility
>Depending on the mobile phone, certain
settings may be necessary on the mobile
phone, e.g. via the following menu items:
>Bluetooth activated
>Connection must be allowed without
requiring further confirmation
>Reconnect
>Depending on the mobile phone model, the
setting energy saving mode can, for exam-
ple, result in vehicle failing to detect the
paired mobile phone.
>For pairing purposes, define any 4 to 16-
digit number as a Bluetooth passkey,
e.g. 25081107. A long and complex number
offers the best protection against unautho-
rized access. This Bluetooth passkey is no
longer required following successful pair-
ing.
>The ignition is switched on.
Only pair the mobile phone with the vehi-
cle stationary, otherwise the passengers
and other road users can be endangered due to
a lack of attentiveness on the part of the
driver.<
Switching on ignition
1.Insert the remote control as far as possible
into the ignition lock.
2.Switch on ignition without operating the
brake or clutch or pressing the start/stop
button.
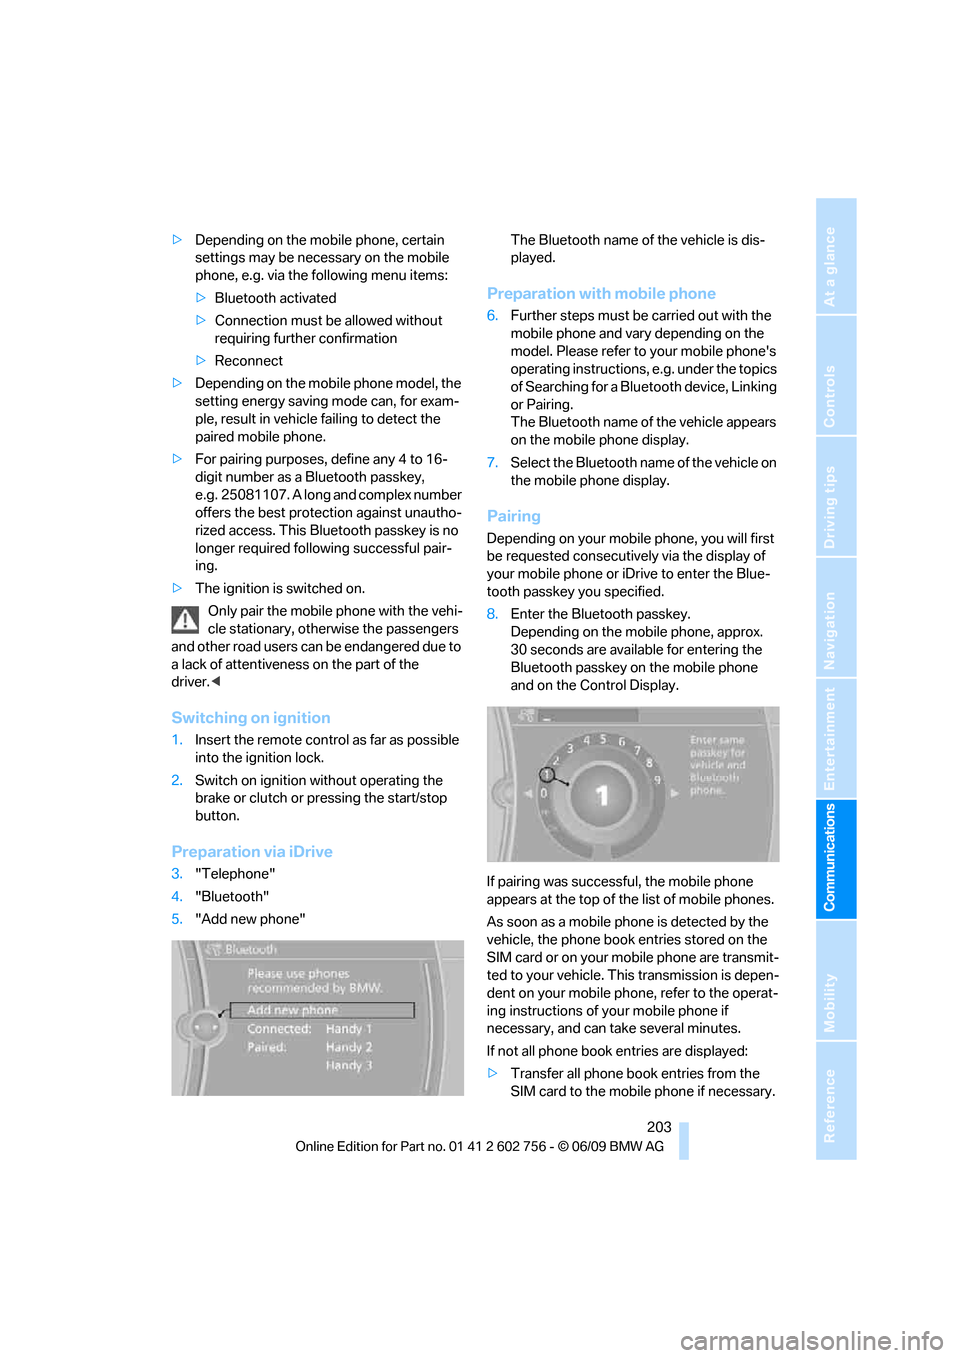
Preparation via iDrive
3."Telephone"
4."Bluetooth"
5."Add new phone"The Bluetooth name of the vehicle is dis-
played.
Preparation with mobile phone
6.Further steps must be carried out with the
mobile phone and vary depending on the
model. Please refer to your mobile phone's
operating instructions, e.g. under the topics
of Searching for a Bluetooth device, Linking
or Pairing.
The Bluetooth name of the vehicle appears
on the mobile phone display.
7.Select the Bluetooth name of the vehicle on
the mobile phone display.
Pairing
Depending on your mobile phone, you will first
be requested consecutively via the display of
your mobile phone or iDrive to enter the Blue-
tooth passkey you specified.
8.Enter the Bluetooth passkey.
Depending on the mobile phone, approx.
30 seconds are available for entering the
Bluetooth passkey on the mobile phone
and on the Control Display.
If pairing was successful, the mobile phone
appears at the top of the list of mobile phones.
As soon as a mobile phone is detected by the
vehicle, the phone book entries stored on the
SIM card or on your mobile phone are transmit-
ted to your vehicle. This transmission is depen-
dent on your mobile phone, refer to the operat-
ing instructions of your mobile phone if
necessary, and can take several minutes.
If not all phone book entries are displayed:
>Transfer all phone book entries from the
SIM card to the mobile phone if necessary.
ba8_e70ag.book Seite 203 Freitag, 5. Juni 2009 11:42 11
Page 246 of 300
Maintenance
244
Maintenance
BMW maintenance system
The BMW maintenance system supports the
preservation of the traffic and operating safety
of your BMW. The service schedule also
includes operations related to the vehicle's
comfort and convenience features, such as
replacement of the filters for the inside air.
The ultimate objective is to ensure economical
maintenance by providing the ideal service for
your vehicle.
Should the day come when you decide to sell
your BMW, a complete dealer service history
will prove to be an asset of inestimable value.
CBS Condition Based Service
Sensors and special algorithms take the differ-
ent driving conditions of your BMW into
account. Condition Based Service uses this to
determine the current and future service
requirements. By letting you define a service
and maintenance regimen that reflects your
own individual requirements, the system builds
the basis for trouble-free driving.
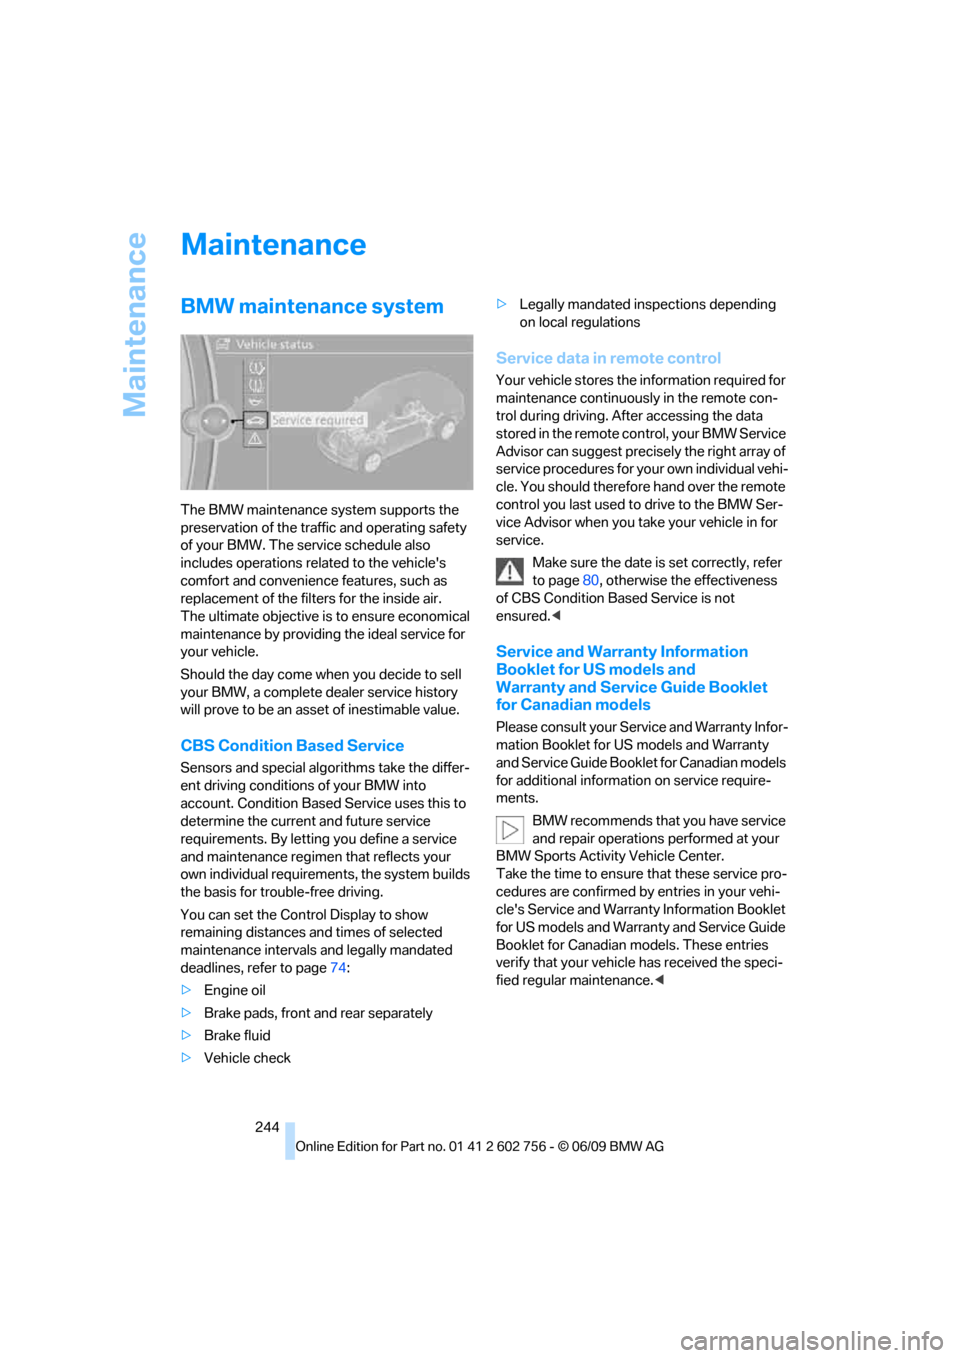
You can set the Control Display to show
remaining distances and times of selected
maintenance intervals and legally mandated
deadlines, refer to page74:
>Engine oil
>Brake pads, front and rear separately
>Brake fluid
>Vehicle check>Legally mandated inspections depending
on local regulations
Service data in remote control
Your vehicle stores the information required for
maintenance continuously in the remote con-
trol during driving. After accessing the data
stored in the remote control, your BMW Service
Advisor can suggest precisely the right array of
service procedures for your own individual vehi-
cle. You should therefore hand over the remote
control you last used to drive to the BMW Ser-
vice Advisor when you take your vehicle in for
service.
Make sure the date is set correctly, refer
to page80, otherwise the effectiveness
of CBS Condition Based Service is not
ensured.<
Service and Warranty Information
Booklet for US models and
Warranty and Service Guide Booklet
for Canadian models
Please consult your Service and Warranty Infor-
mation Booklet for US models and Warranty
and Service Guide Booklet for Canadian models
for additional information on service require-
ments.
BMW recommends that you have service
and repair operations performed at your
BMW Sports Activity Vehicle Center.
Take the time to ensure that these service pro-
cedures are confirmed by entries in your vehi-
cle's Service and Warranty Information Booklet
for US models and Warranty and Service Guide
Booklet for Canadian models. These entries
verify that your vehicle has received the speci-
fied regular maintenance.<
ba8_e70ag.book Seite 244 Freitag, 5. Juni 2009 11:42 11