rear entertainment BMW X5 XDRIVE 35I SPORT ACTIVITY 2011 User Guide
[x] Cancel search | Manufacturer: BMW, Model Year: 2011, Model line: X5 XDRIVE 35I SPORT ACTIVITY, Model: BMW X5 XDRIVE 35I SPORT ACTIVITY 2011Pages: 312, PDF Size: 8.91 MB
Page 57 of 312
Controls
55Reference
At a glance
Driving tips
Communications
Navigation
Entertainment
Mobility
Child seat security
The rear safety belts
>BMW X5: all safety belts of the 2nd and
3rd
* row seats
>BMW X6: all safety belts of the 2nd row
seats
And the safety belt for the front passenger can
be locked to prevent extension in order to per-
mit attachment of child restraint devices.
Locking safety belt
1.Secure the child restraint device with the
belt.
2.Pull out the belt webbing completely.
3.Allow the belt webbing to be pulled in and
pull taut against the child restraint device.
The safety belt is locked.
Unlocking safety belt
1.Open the belt buckle.
2.Remove the child restraint device.
3.Allow the belt webbing to be pulled in com-
pletely.
LATCH child restraint fixing
system
LATCH: Lower Anchor and Tethers for CHil-
dren.
Follow the system manufacturer's
instructions on installation and use of
LATCH child restraint devices; otherwise, their
protective function may be reduced.
system.
Make sure that the LATCH mounts have
properly clicked into place and that the
child restraint device is resting snugly against
the backrest. Otherwise, the protective action
may be reduced.<
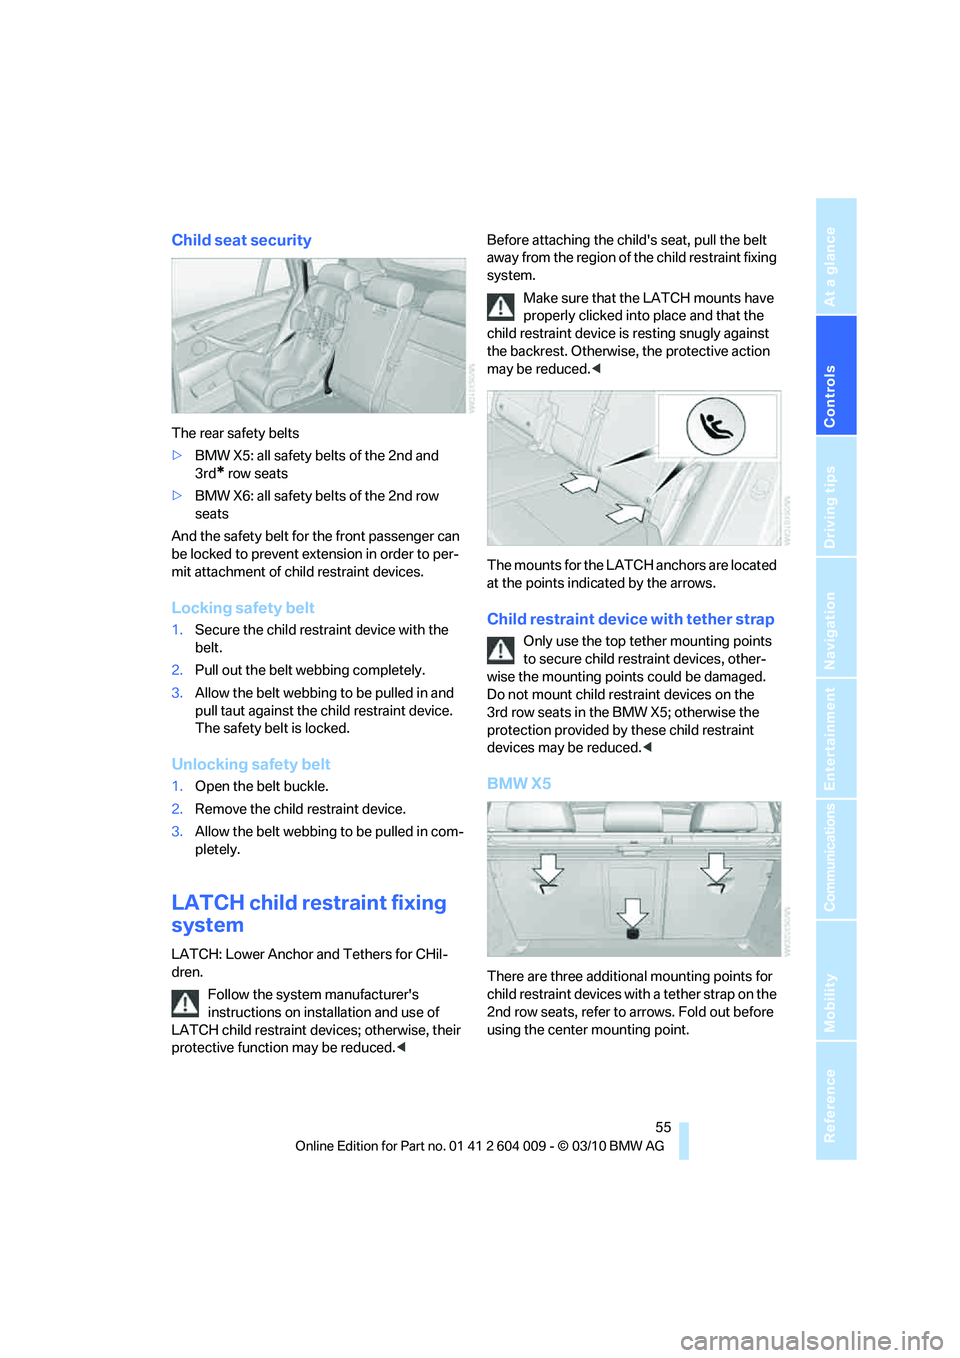
The mounts for the LATCH anchors are located
at the points indicated by the arrows.
Child restraint device with tether strap
Only use the top tether mounting points
to secure child restraint devices, other-
wise the mounting points could be damaged.
Do not mount child restraint devices on the
3rd row seats in the BMW X5; otherwise the
protection provided by these child restraint
devices may be reduced.<
BMW X5
There are three additional mounting points for
child restraint devices with a tether strap on the
2nd row seats, refer to arrows. Fold out before
using the center mounting point.
Page 59 of 312
Controls
57Reference
At a glance
Driving tips
Communications
Navigation
Entertainment
Mobility
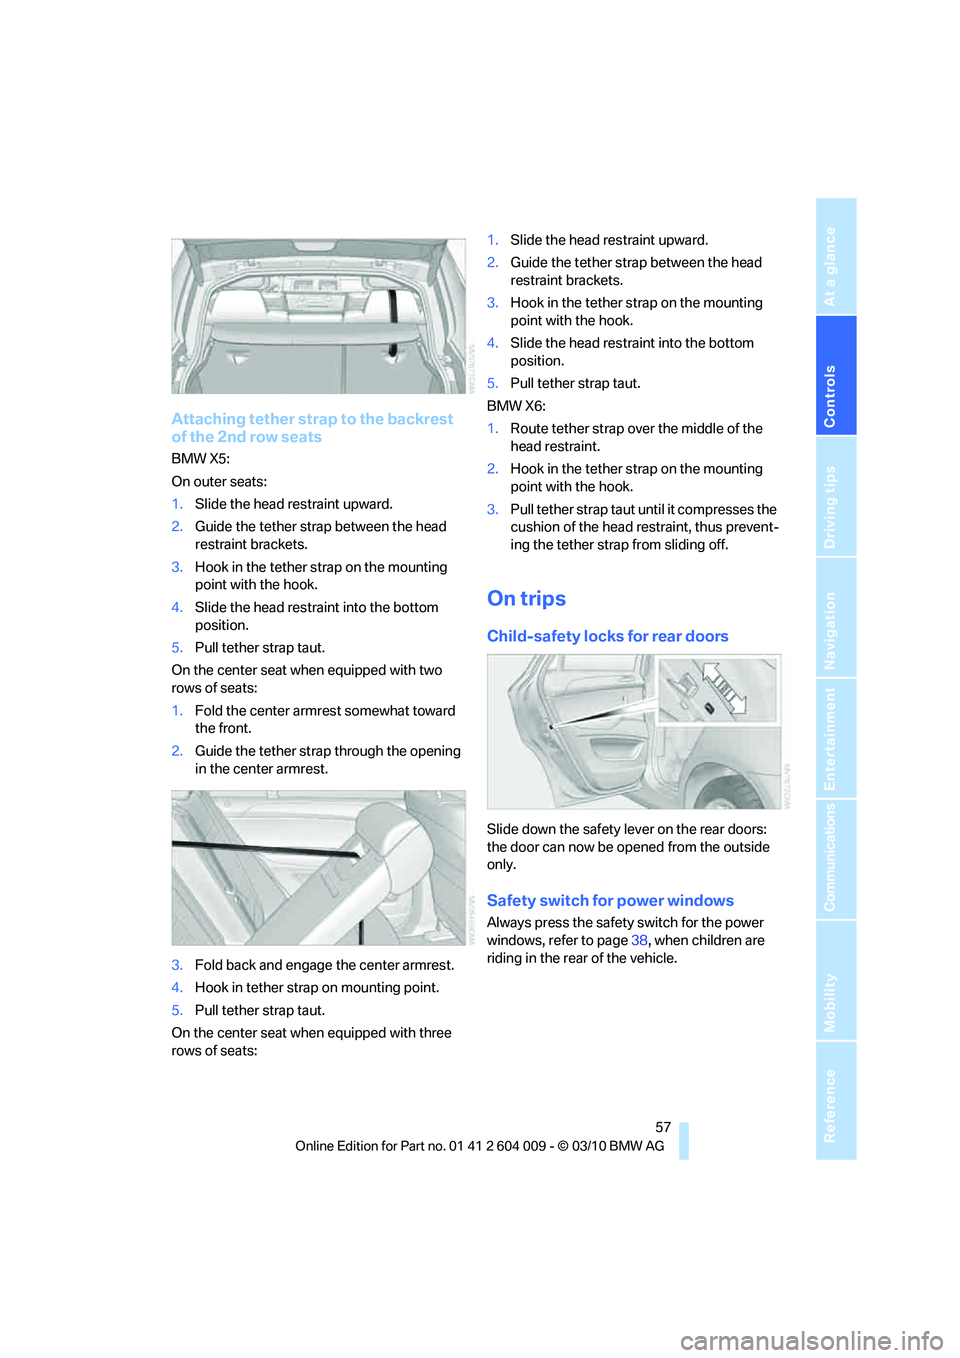
Attaching tether strap to the backrest
of the 2nd row seats
BMW X5:
On outer seats:
1.Slide the head restraint upward.
2.Guide the tether strap between the head
restraint brackets.
3.Hook in the tether strap on the mounting
point with the hook.
4.Slide the head restraint into the bottom
position.
5.Pull tether strap taut.
On the center seat when equipped with two
rows of seats:
1.Fold the center armrest somewhat toward
the front.
2.Guide the tether strap through the opening
in the center armrest.
3.Fold back and engage the center armrest.
4.Hook in tether strap on mounting point.
5.Pull tether strap taut.
On the center seat when equipped with three
rows of seats:1.Slide the head restraint upward.
2.Guide the tether strap between the head
restraint brackets.
3.Hook in the tether strap on the mounting
point with the hook.
4.Slide the head restraint into the bottom
position.
5.Pull tether strap taut.
BMW X6:
1.Route tether strap over the middle of the
head restraint.
2.Hook in the tether strap on the mounting
point with the hook.
3.Pull tether strap taut until it compresses the
cushion of the head restraint, thus prevent-
ing the tether strap from sliding off.
On trips
Child-safety locks for rear doors
Slide down the safety lever on the rear doors:
the door can now be opened from the outside
only.
Safety switch for power windows
Always press the safety switch for the power
windows, refer to page38, when children are
riding in the rear of the vehicle.
Page 83 of 312
Controls
81Reference
At a glance
Driving tips
Communications
Navigation
Entertainment
Mobility
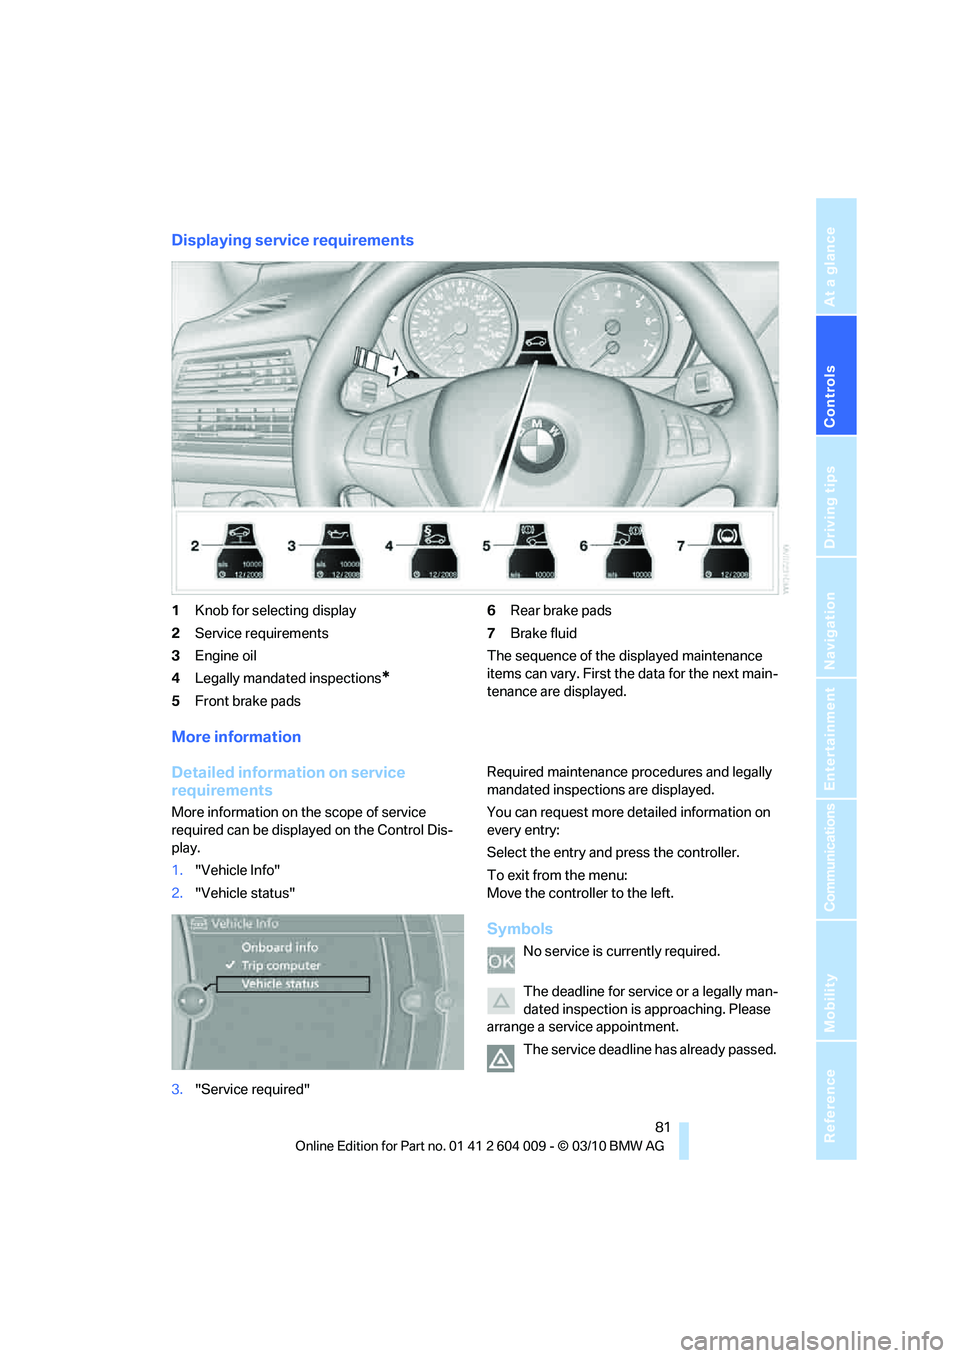
Displaying service requirements
1Knob for selecting display
2Service requirements
3Engine oil
4Legally mandated inspections
*
5Front brake pads6Rear brake pads
7Brake fluid
The sequence of the displayed maintenance
items can vary. First the data for the next main-
tenance are displayed.
More information
Detailed information on service
requirements
More information on the scope of service
required can be displayed on the Control Dis-
play.
1."Vehicle Info"
2."Vehicle status"
3."Service required"Required maintenance procedures and legally
mandated inspections are displayed.
You can request more detailed information on
every entry:
Select the entry and press the controller.
To exit from the menu:
Move the controller to the left.
Symbols
No service is currently required.
The deadline for service or a legally man-
dated inspection is approaching. Please
arrange a service appointment.
The service deadline has already passed.
Page 91 of 312
Controls
89Reference
At a glance
Driving tips
Communications
Navigation
Entertainment
Mobility
>After approx. 165 ft/50 m when driving for-
ward
>At speeds over approx. 25 mph/35 km/h
when driving forward
Switch the system back on as needed.
Switching on/off manually
Press the button.
>On: LED lights up
>Off: LED goes out
Signal tones
When nearing an object, the position is corre-
spondingly indicated by an interval tone. Thus,
an object detected to the left rear of the vehicle
will be indicated by a signal tone from the left
rear speaker, etc.
The shorter the distance to the object
becomes, the shorter the intervals become.
If the distance to the nearest object falls to
below roughly 1 ft/30 cm, then a continuous
tone sounds.
If objects are present both in front of and behind
the vehicle, then an alternating, continuous
tone sounds.
An intermittent tone is interrupted after approx.
3seconds:
>When the vehicle remains stationary in front
of an object that has only been detected by
one of the corner sensors
>When driving parallel to a wall
The signal tone is switched off:
>When the vehicle is more than approx.
4.0 in/10 cm away from an object
>When the selector lever is in the P position
Volume
You can adjust the volume of the signal tone,
refer to page87.
The setting is stored for the remote control cur-
rently in use.
Optical warning
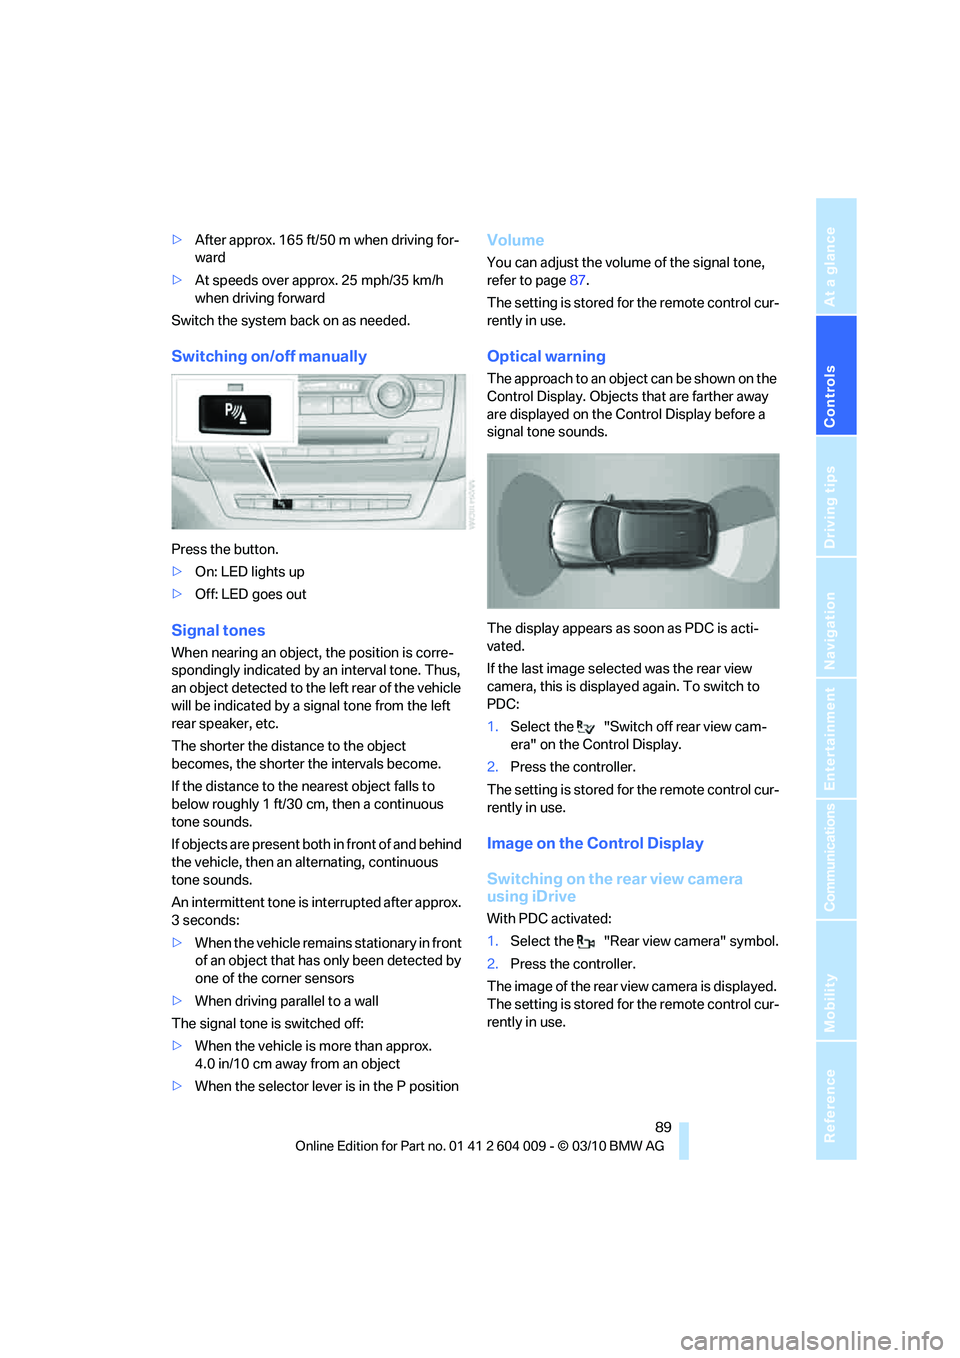
The approach to an object can be shown on the
Control Display. Objects that are farther away
are displayed on the Control Display before a
signal tone sounds.
The display appears as soon as PDC is acti-
vated.
If the last image selected was the rear view
camera, this is displayed again. To switch to
PDC:
1.Select the "Switch off rear view cam-
era" on the Control Display.
2.Press the controller.
The setting is stored for the remote control cur-
rently in use.
Image on the Control Display
Switching on the rear view camera
using iDrive
With PDC activated:
1.Select the "Rear view camera" symbol.
2.Press the controller.
The image of the rear view camera is displayed.
The setting is stored for the remote control cur-
rently in use.
Page 93 of 312
Controls
91Reference
At a glance
Driving tips
Communications
Navigation
Entertainment
Mobility
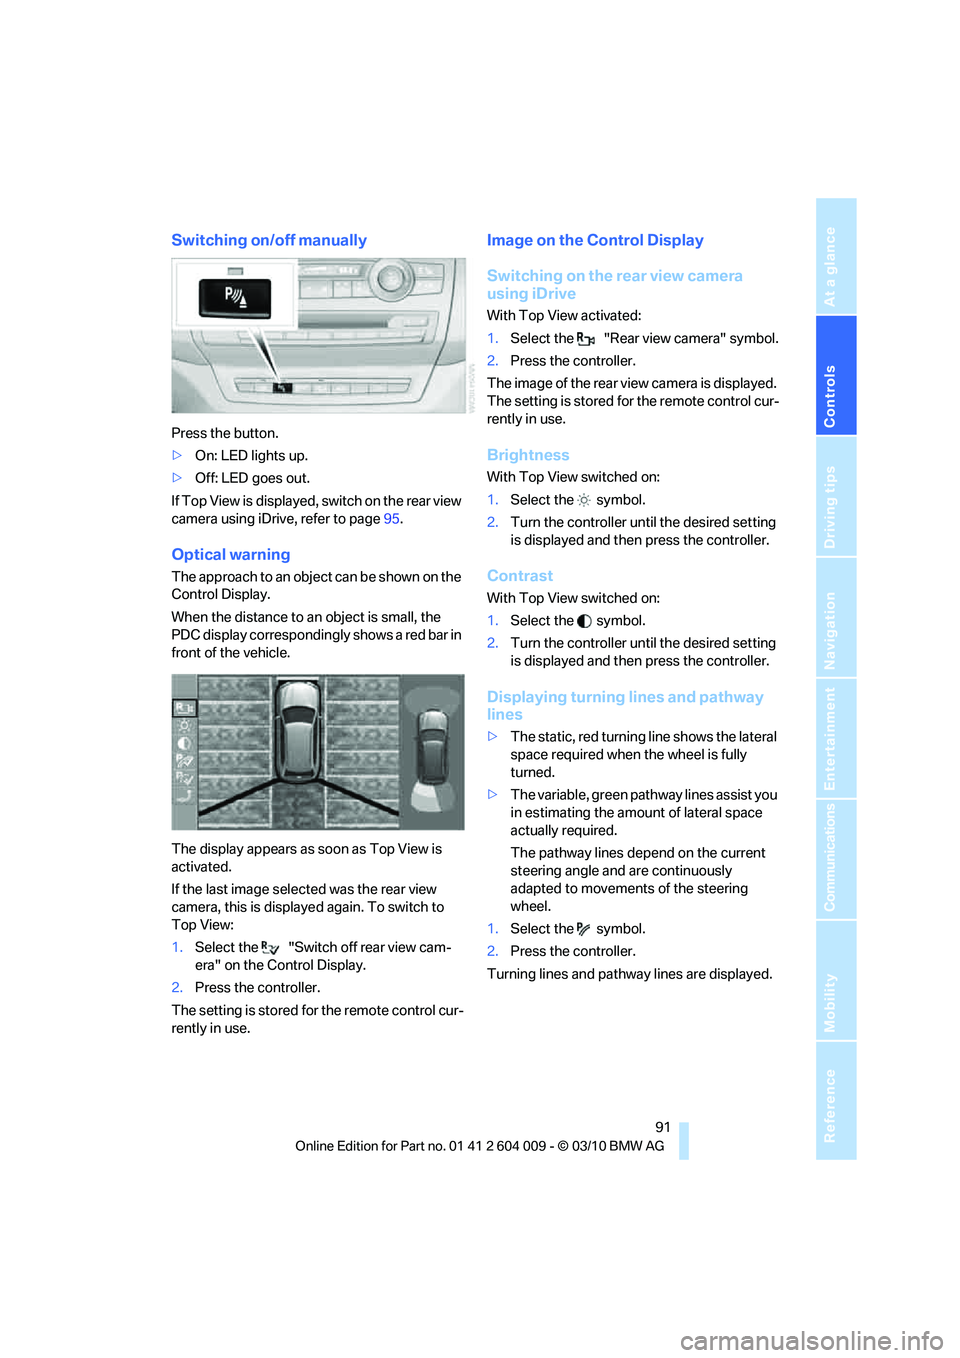
Switching on/off manually
Press the button.
>On: LED lights up.
>Off: LED goes out.
If Top View is displayed, switch o n the rea r vie w
camera using iDrive, refer to page95.
Optical warning
The approach to an object can be shown on the
Control Display.
When the distance to an object is small, the
PDC display correspondingly shows a red bar in
front of the vehicle.
The display appears as soon as Top View is
activated.
If the last image selected was the rear view
camera, this is displayed again. To switch to
Top View:
1.Select the "Switch off rear view cam-
era" on the Control Display.
2.Press the controller.
The setting is stored for the remote control cur-
rently in use.
Image on the Control Display
Switching on the rear view camera
using iDrive
With Top View activated:
1.Select the "Rear view camera" symbol.
2.Press the controller.
The image of the rear view camera is displayed.
The setting is stored for the remote control cur-
rently in use.
Brightness
With Top View switched on:
1.Select the symbol.
2.Turn the controller until the desired setting
is displayed and then press the controller.
Contrast
With Top View switched on:
1.Select the symbol.
2.Turn the controller until the desired setting
is displayed and then press the controller.
Displaying turning lines and pathway
lines
>The static, red turning line shows the lateral
space required when the wheel is fully
turned.
>The variable, green pathway lines assist you
in estimating the amount of lateral space
actually required.
The pathway lines depend on the current
steering angle and are continuously
adapted to movements of the steering
wheel.
1.Select the symbol.
2.Press the controller.
Turning lines and pathway lines are displayed.
Page 95 of 312
Controls
93Reference
At a glance
Driving tips
Communications
Navigation
Entertainment
Mobility
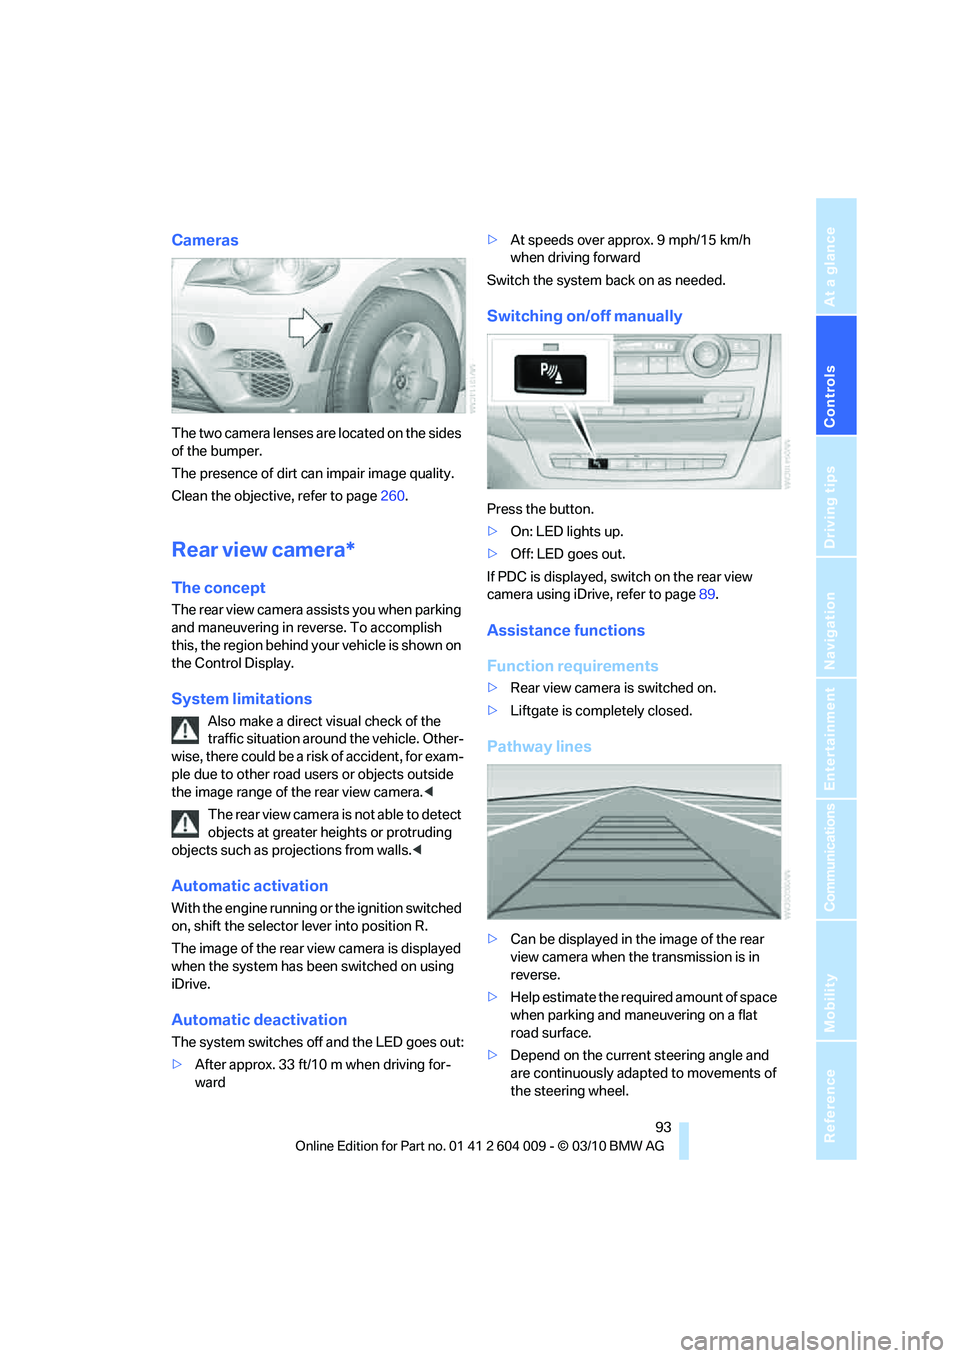
Cameras
The two camera lenses are located on the sides
of the bumper.
The presence of dirt can impair image quality.
Clean the objective, refer to page260.
Rear view camera*
The concept
The rear view camera assists you when parking
and maneuvering in reverse. To accomplish
this, the region behind your vehicle is shown on
the Control Display.
System limitations
Also make a direct visual check of the
traffic situation around the vehicle. Other-
wise, there could be a risk of accident, for exam-
ple due to other road users or objects outside
the image range of the rear view camera.<
T he r e a r v i e w c a m e r a i s n o t a b l e t o de t e c t
objects at greater heights or protruding
objects such as projections from walls.<
Automatic activation
With the engine running or the ignition switched
on, shift the selector lever into position R.
The image of the rear view camera is displayed
when the system has been switched on using
iDrive.
Automatic deactivation
The system switches off and the LED goes out:
>After approx. 33 ft/10 m when driving for-
ward>At speeds over approx. 9 mph/15 km/h
when driving forward
Switch the system back on as needed.
Switching on/off manually
Press the button.
>On: LED lights up.
>Off: LED goes out.
If PDC is displayed, switch on the rear view
camera using iDrive, refer to page89.
Assistance functions
Function requirements
>Rear view camera is switched on.
>Liftgate is completely closed.
Pathway lines
>Can be displayed in the image of the rear
view camera when the transmission is in
reverse.
>Help estimate the required amount of space
when parking and maneuvering on a flat
road surface.
>Depend on the current steering angle and
are continuously adapted to movements of
the steering wheel.
Page 97 of 312
Controls
95Reference
At a glance
Driving tips
Communications
Navigation
Entertainment
Mobility
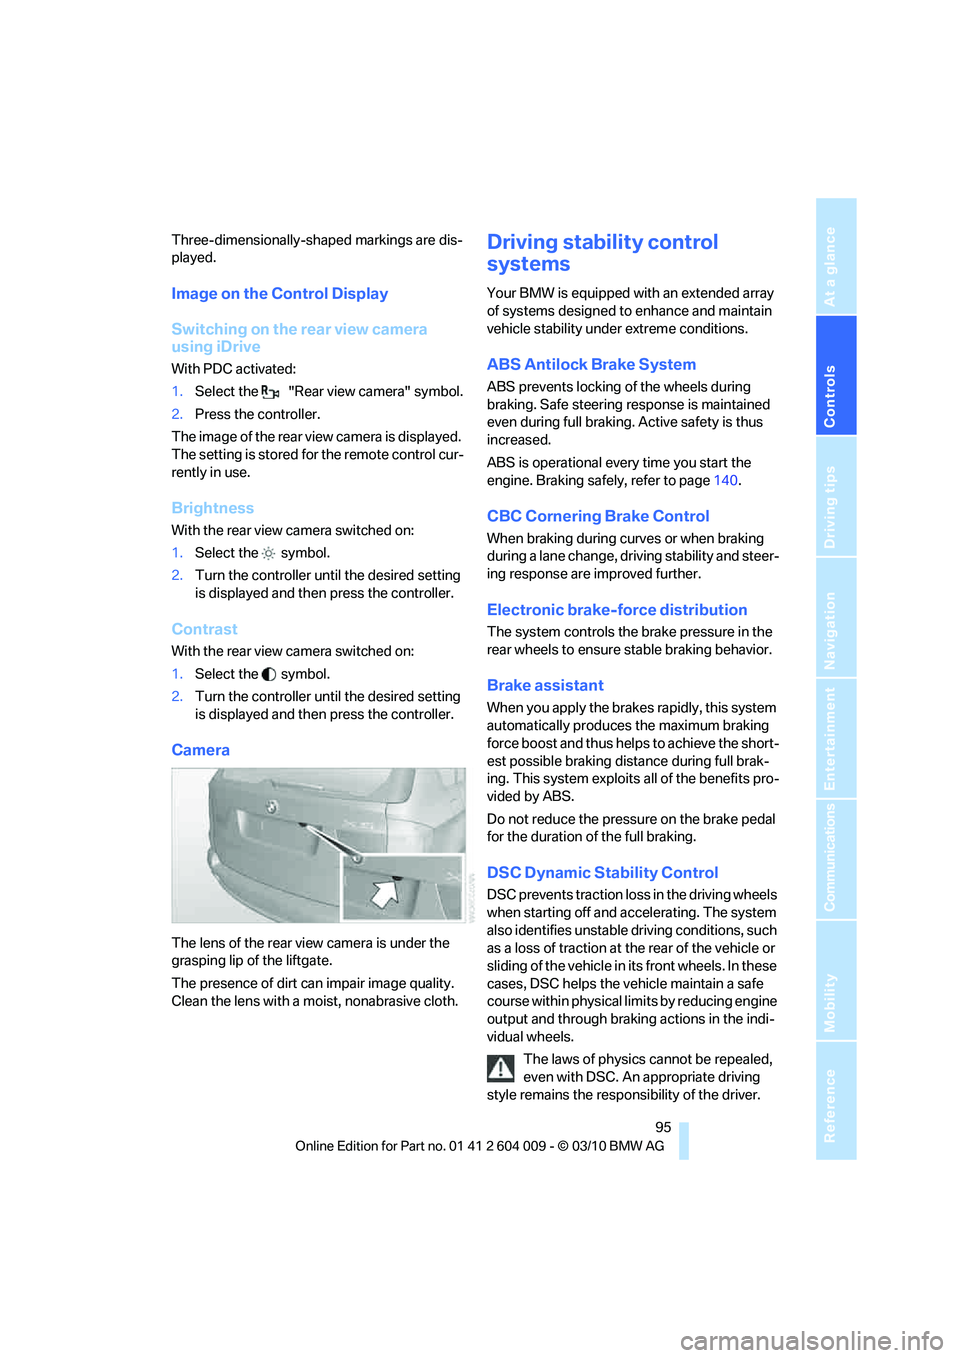
Three-dimensionally-shaped markings are dis-
played.
Image on the Control Display
Switching on the rear view camera
using iDrive
With PDC activated:
1.Select the "Rear view camera" symbol.
2.Press the controller.
The image of the rear view camera is displayed.
The setting is stored for the remote control cur-
rently in use.
Brightness
With the rear view camera switched on:
1.Select the symbol.
2.Turn the controller until the desired setting
is displayed and then press the controller.
Contrast
With the rear view camera switched on:
1.Select the symbol.
2.Turn the controller until the desired setting
is displayed and then press the controller.
Camera
The lens of the rear view camera is under the
grasping lip of the liftgate.
The presence of dirt can impair image quality.
Clean the lens with a moist, nonabrasive cloth.
Driving stability control
systems
Your BMW is equipped with an extended array
of systems designed to enhance and maintain
vehicle stability under extreme conditions.
ABS Antilock Brake System
ABS prevents locking of the wheels during
braking. Safe steering response is maintained
even during full braking. Active safety is thus
increased.
ABS is operational every time you start the
engine. Braking safely, refer to page140.
CBC Cornering Brake Control
When braking during curves or when braking
during a lane change, driving stability and steer-
ing response are improved further.
Electronic brake-force distribution
The system controls the brake pressure in the
rear wheels to ensure stable braking behavior.
Brake assistant
When you apply the brakes rapidly, this system
automatically produces the maximum braking
force boost and thus helps to achieve the short-
est possible braking distance during full brak-
ing. This system exploits all of the benefits pro-
vided by ABS.
Do not reduce the pressure on the brake pedal
for the duration of the full braking.
DSC Dynamic Stability Control
DSC prevents traction loss in the driving wheels
when starting off and accelerating. The system
also identifies unstable driving conditions, such
as a loss of traction at the rear of the vehicle or
sliding of the vehicle in its front wheels. In these
cases, DSC helps the vehicle maintain a safe
course within physical limits by reducing engine
output and through braking actions in the indi-
vidual wheels.
The laws of physics cannot be repealed,
even with DSC. An appropriate driving
style remains the responsibility of the driver.
Page 99 of 312
Controls
97Reference
At a glance
Driving tips
Communications
Navigation
Entertainment
Mobility
For better control
The indicator lamp flashes:
DTC is controlling the drive forces and
brake forces.
The indicator lamp lights up:
DSC and DTC are malfunctioning.
DTC activated:
The indicator lamp lights up and TRAC-
TION appears in the instrument panel.
DTC is activated.
Deactivating DTC
Press the button again: the indicator lamp in the
instrument panel goes out.
xDrive
xDrive is the 4-wheel drive system of your
BMW. The combined effects of xDrive and DSC
further optimize the traction and dynamic driv-
ing characteristics. The 4-wheel drive system
xDrive variably distributes the drive forces to
the front and rear axle depending on the driving
situation and prevailing road conditions.
Dynamic Performance Control*
The concept
Dynamic Performance Control optimizes the
handling characteristics of your BMW when
starting off, cornering, and during evasive
maneuvers. To achieve this, the system variably
distributes the drive torque of the rear axle to
the two rear wheels. This further increases the steering precision and tracking stability of your
vehicle.
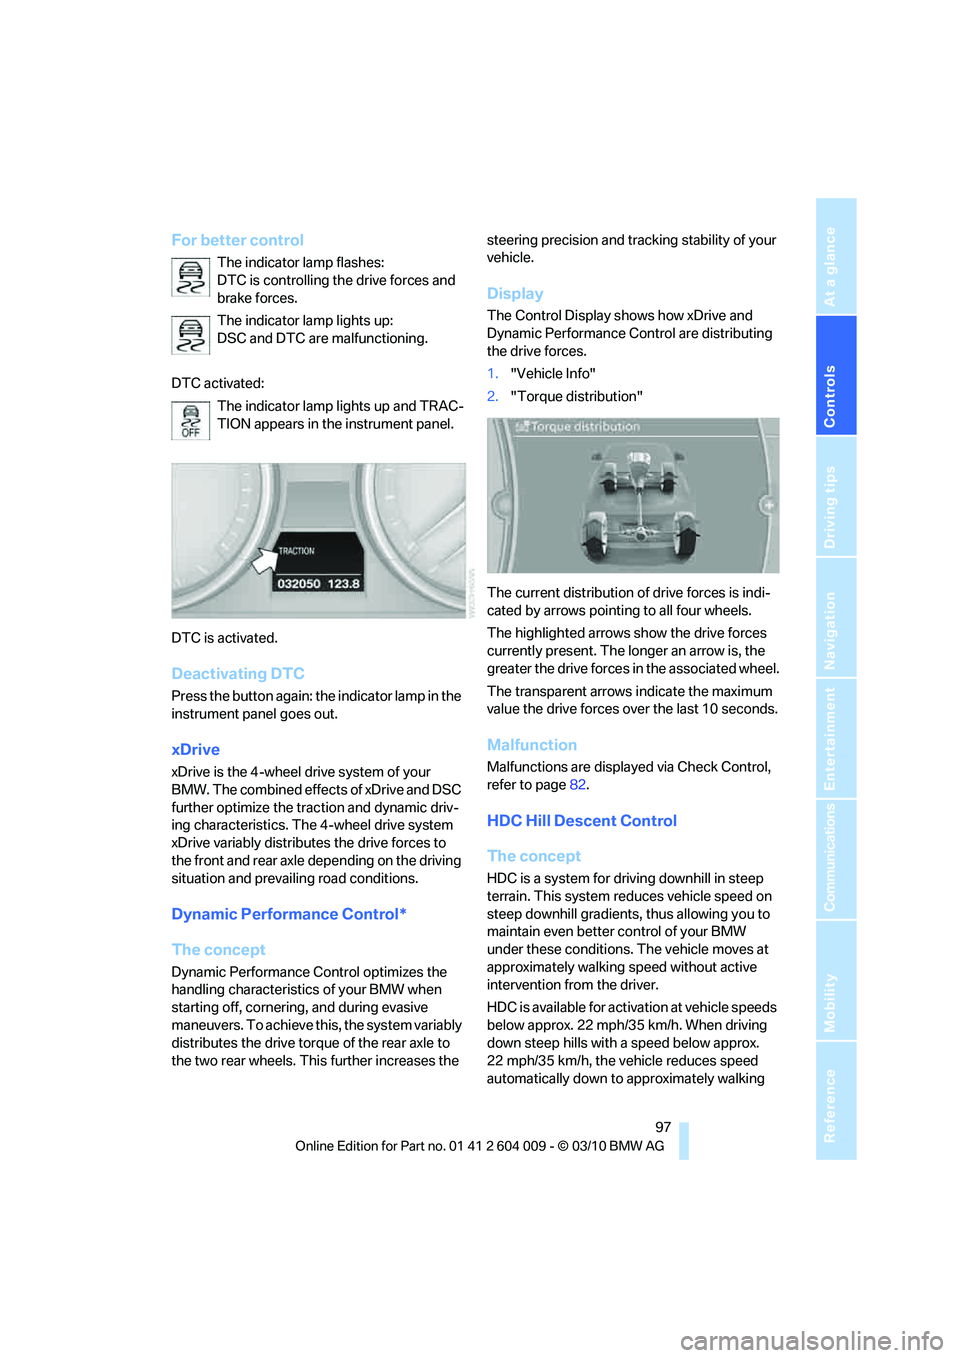
Display
The Control Display shows how xDrive and
Dynamic Performance Control are distributing
the drive forces.
1."Vehicle Info"
2."Torque distribution"
The current distribution of drive forces is indi-
cated by arrows pointing to all four wheels.
The highlighted arrows show the drive forces
currently present. The longer an arrow is, the
greater the drive forces in the associated wheel.
The transparent arrows indicate the maximum
value the drive forces over the last 10 seconds.
Malfunction
Malfunctions are displayed via Check Control,
refer to page82.
HDC Hill Descent Control
The concept
HDC is a system for driving downhill in steep
terrain. This system reduces vehicle speed on
steep downhill gradients, thus allowing you to
maintain even better control of your BMW
under these conditions. The vehicle moves at
approximately walking speed without active
intervention from the driver.
HDC is available for activation at vehicle speeds
below approx. 22 mph/35 km/h. When driving
down steep hills with a speed below approx.
22 mph/35 km/h, the vehicle reduces speed
automatically down to approximately walking
Page 101 of 312
Controls
99Reference
At a glance
Driving tips
Communications
Navigation
Entertainment
Mobility
reduces the steering angle requirement,
improves the running comfort and increases
the dynamic driving characteristics of your
BMW.
Chassis and suspension tuning
You can choose between two types of chassis
and suspension tuning.
>Normal:
The comfortable basic setting offers opti-
mum comfort when traveling.
>Sport:
The sporty basic setting offers increased
driving agility.
Selecting chassis and suspension
tuning
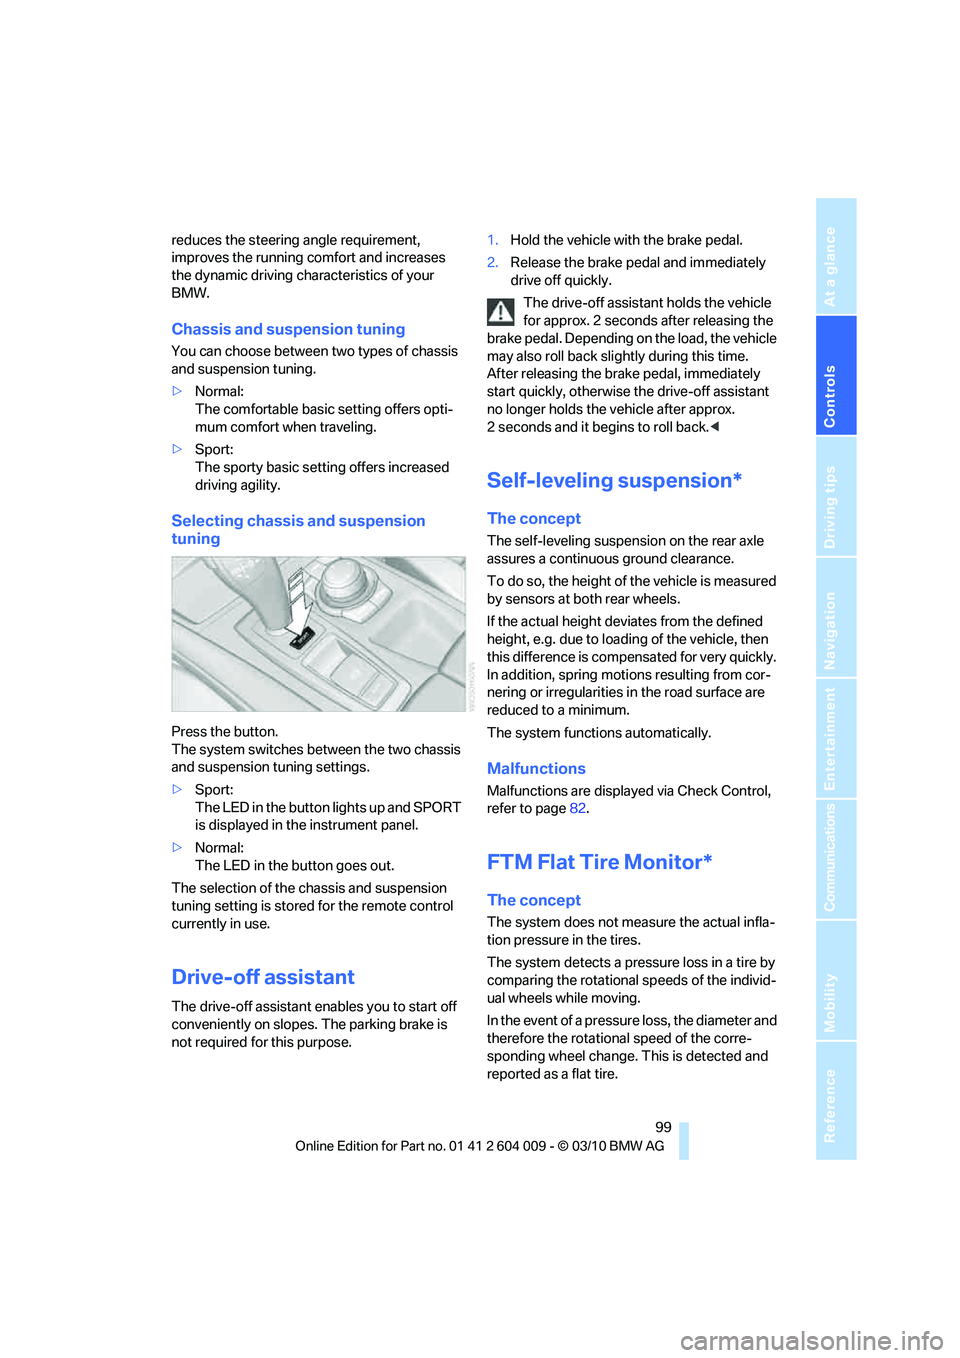
Press the button.
The system switches between the two chassis
and suspension tuning settings.
>Sport:
The LED in the button lights up and SPORT
is displayed in the instrument panel.
>Normal:
The LED in the button goes out.
The selection of the chassis and suspension
tuning setting is stored for the remote control
currently in use.
Drive-off assistant
The drive-off assistant enables you to start off
conveniently on slopes. The parking brake is
not required for this purpose.1.Hold the vehicle with the brake pedal.
2.Release the brake pedal and immediately
drive off quickly.
The drive-off assistant holds the vehicle
for approx. 2 seconds after releasing the
brake pedal. Depending on the load, the vehicle
may also roll back slightly during this time.
After releasing the brake pedal, immediately
start quickly, otherwise the drive-off assistant
no longer holds the vehicle after approx.
2 seconds and it begins to roll back.<
Self-leveling suspension*
The concept
The self-leveling suspension on the rear axle
assures a continuous ground clearance.
To do so, the height of the vehicle is measured
by sensors at both rear wheels.
If the actual height deviates from the defined
height, e.g. due to loading of the vehicle, then
this difference is compensated for very quickly.
In addition, spring motions resulting from cor-
nering or irregularities in the road surface are
reduced to a minimum.
The system functions automatically.
Malfunctions
Malfunctions are displayed via Check Control,
refer to page82.
FTM Flat Tire Monitor*
The concept
The system does not measure the actual infla-
tion pressure in the tires.
The system detects a pressure loss in a tire by
comparing the rotational speeds of the individ-
ual wheels while moving.
In the event of a pressure loss, the diameter and
therefore the rotational speed of the corre-
sponding wheel change. This is detected and
reported as a flat tire.
Page 107 of 312
Controls
105Reference
At a glance
Driving tips
Communications
Navigation
Entertainment
Mobility
>When the turn signal flashes.
System limits
The system cannot replace the driver's
personal judgment of the course of the
road and the traffic situation.
In the event of a warning, do not jerk the steer-
ing wheel; otherwise, you may lose control over
the vehicle.<
The system may not be fully functional in the
following situations:
>In heavy fog, rain or snowfall.
>When the lane markings are worn away,
poorly visible, convergent, divergent or
unclear, as in road construction areas.
>When the limit lines are covered by snow,
ice, dirt or water.
>In tight curves or on narrow lanes.
>When the limit lines are not white.
>When the limit lines are covered by objects.
>When driving very close to the vehicle in
front of you.
>When driving toward bright lights.
>When the windshield is fogged over, dirty or
covered by a sticker, etc., in front of the
interior rearview mirror.
Malfunctions
Steering wheel vibration
Frequent activation of the steering wheel vibra-
tion causes the system to overheat.
This causes the lane departure warning to
become deactivated.
Let the system cool and reactivate it by press-
ing the button.
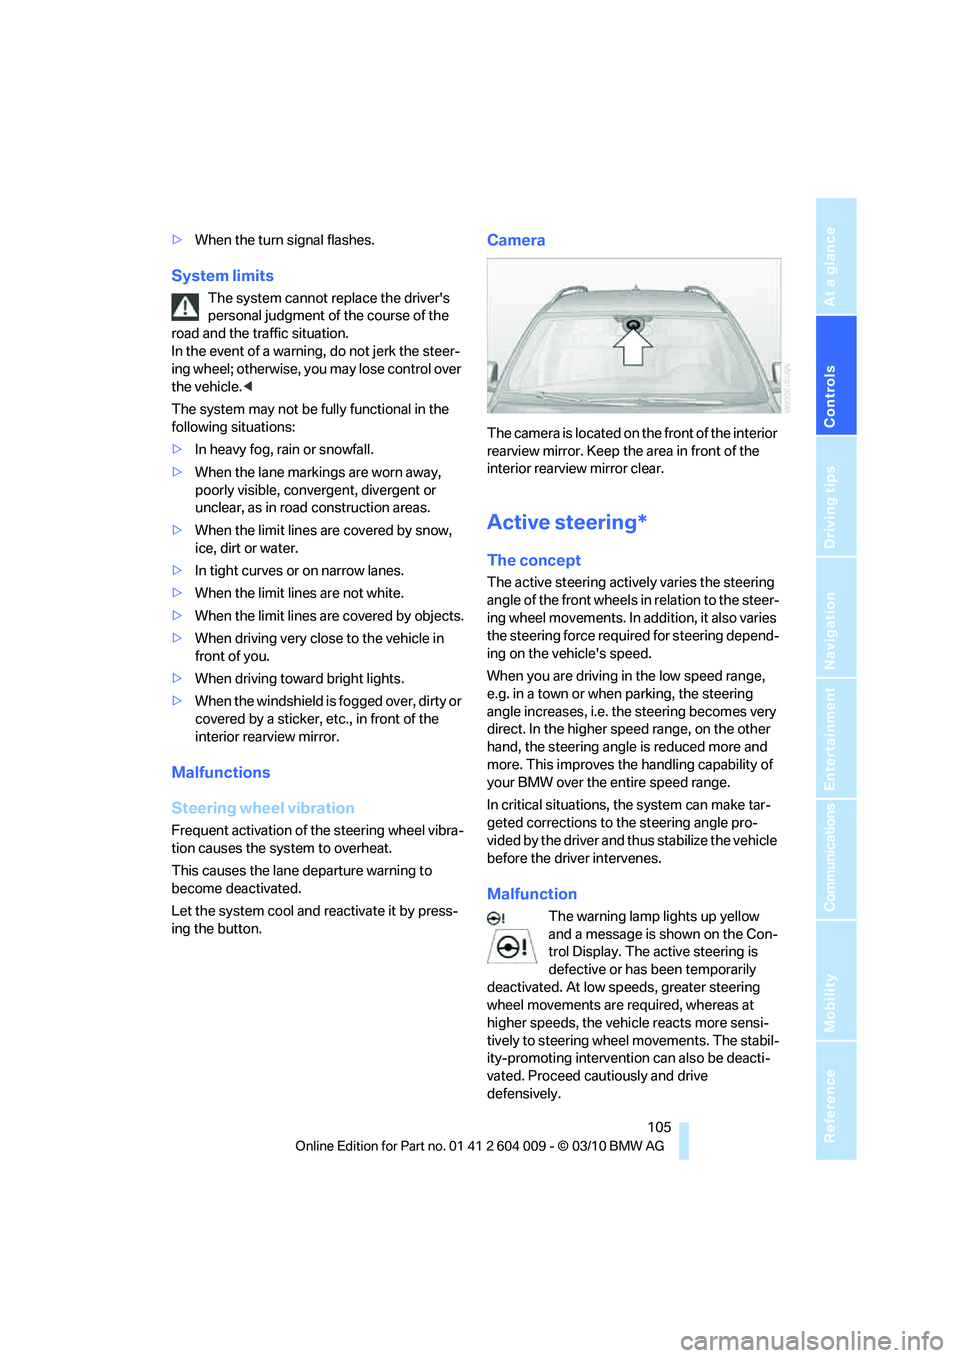
Camera
The camera is located on the front of the interior
rearview mirror. Keep the area in front of the
interior rearview mirror clear.
Active steering*
The concept
The active steering actively varies the steering
angle of the front wheels in relation to the steer-
ing wheel movements. In addition, it also varies
the steering force required for steering depend-
ing on the vehicle's speed.
When you are driving in the low speed range,
e.g. in a town or when parking, the steering
angle increases, i.e. the steering becomes very
direct. In the higher speed range, on the other
hand, the steering angle is reduced more and
more. This improves the handling capability of
your BMW over the entire speed range.
In critical situations, the system can make tar-
geted corrections to the steering angle pro-
vided by the driver and thus stabilize the vehicle
before the driver intervenes.
Malfunction
The warning lamp lights up yellow
and a message is shown on the Con-
trol Display. The active steering is
defective or has been temporarily
deactivated. At low speeds, greater steering
wheel movements are required, whereas at
higher speeds, the vehicle reacts more sensi-
tively to steering wheel movements. The stabil-
ity-promoting intervention can also be deacti-
vated. Proceed cautiously and drive
defensively.