navigation system BMW X5 XDRIVE35D 2012 Workshop Manual
[x] Cancel search | Manufacturer: BMW, Model Year: 2012, Model line: X5 XDRIVE35D, Model: BMW X5 XDRIVE35D 2012Pages: 317, PDF Size: 8.83 MB
Page 208 of 317
2. Press the button.
3. Make the settings with the remote control:
▷ "Tone":
▷"Treble / Bass" and "Balance": sepa‐
rately adjustable for the left and right
headphones and the infrared head‐
phones.
▷ "Reset": the settings are reset to the de‐
fault values.
▷ "Pause": stop and continue playback.
▷ "Scan directory": briefly sample the tracks
in the current directory.
▷ "Scan all": briefly sample all tracks.
▷ "Random directory": play the tracks in the
current directory in a random sequence.
▷ "Random
all": play all tracks in a random se‐
quence.
▷ "Repeat track": repeat the selected track.
▷ "Repeat directory": repeat the tracks in the
current directory.
▷ "Details": display any stored information on
the current track.
To exit from the menu: Press the buttons on the remote control.
Displaying images from CD/
DVD
1. Push the CD/DVD into the drive with the la‐
beled side facing upward. The CD/DVD is
automatically pulled in.
2. Open the start menu with the remote con‐
trol.
3. Select "Photo".
4. Press the button.
Displaying overview
1. Select the subdirectory if necessary. 2.
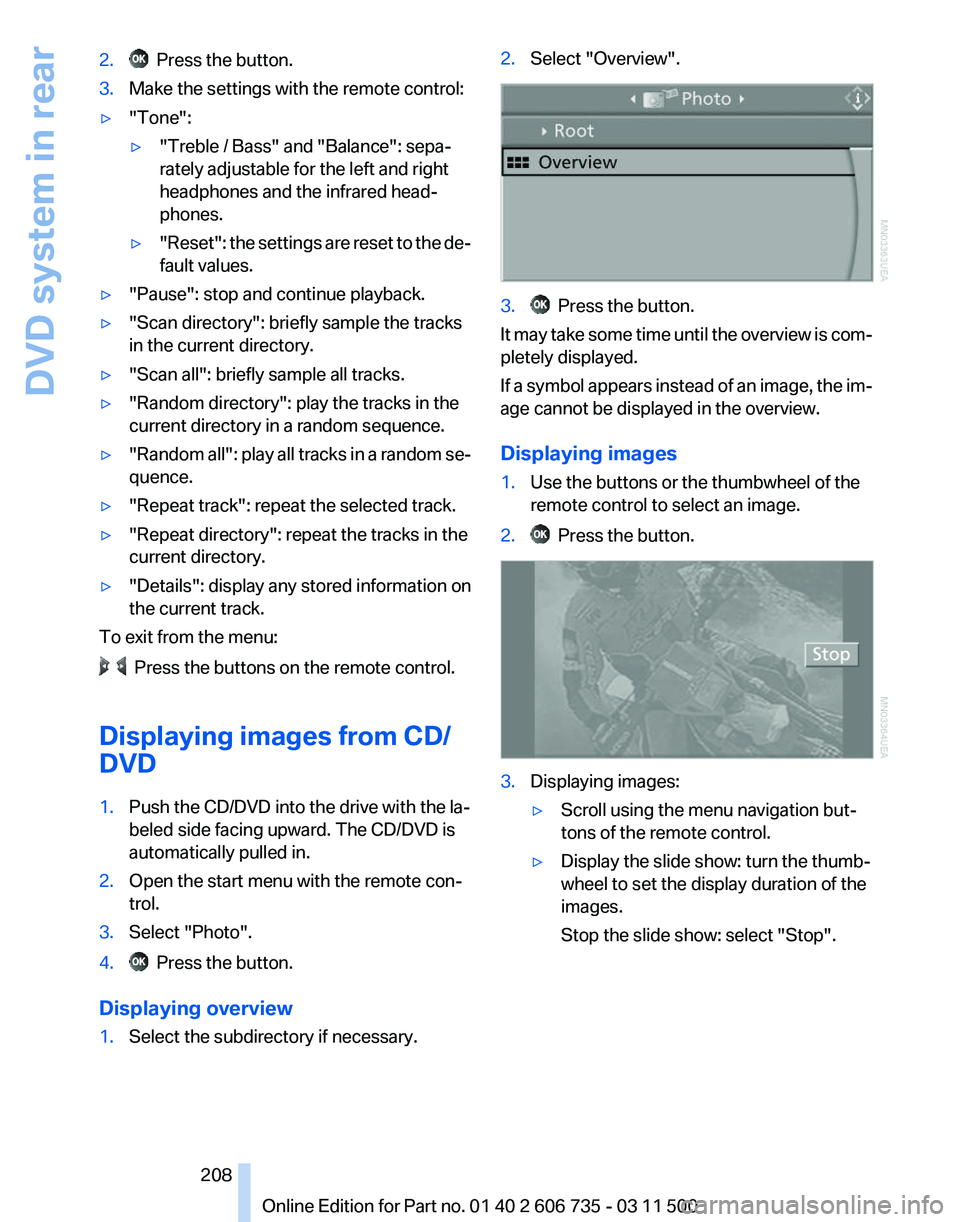
Select "Overview". 3. Press the button.
It may take some time until the overview is com‐
pletely displayed.
If
a symbol appears instead of an image, the im‐
age cannot be displayed in the overview.
Displaying images
1. Use the buttons or the thumbwheel of the
remote control to select an image.
2. Press the button.
3.
Displaying images:
▷Scroll using the menu navigation but‐
tons of the remote control.
▷ Display the slide show: turn the thumb‐
wheel to set the display duration of the
images.
Stop the slide show: select "Stop".
Seite 208
208 Online Edition for Part no. 01 40 2 606 735 - 03 11 500
DVD system in rear
Page 209 of 317
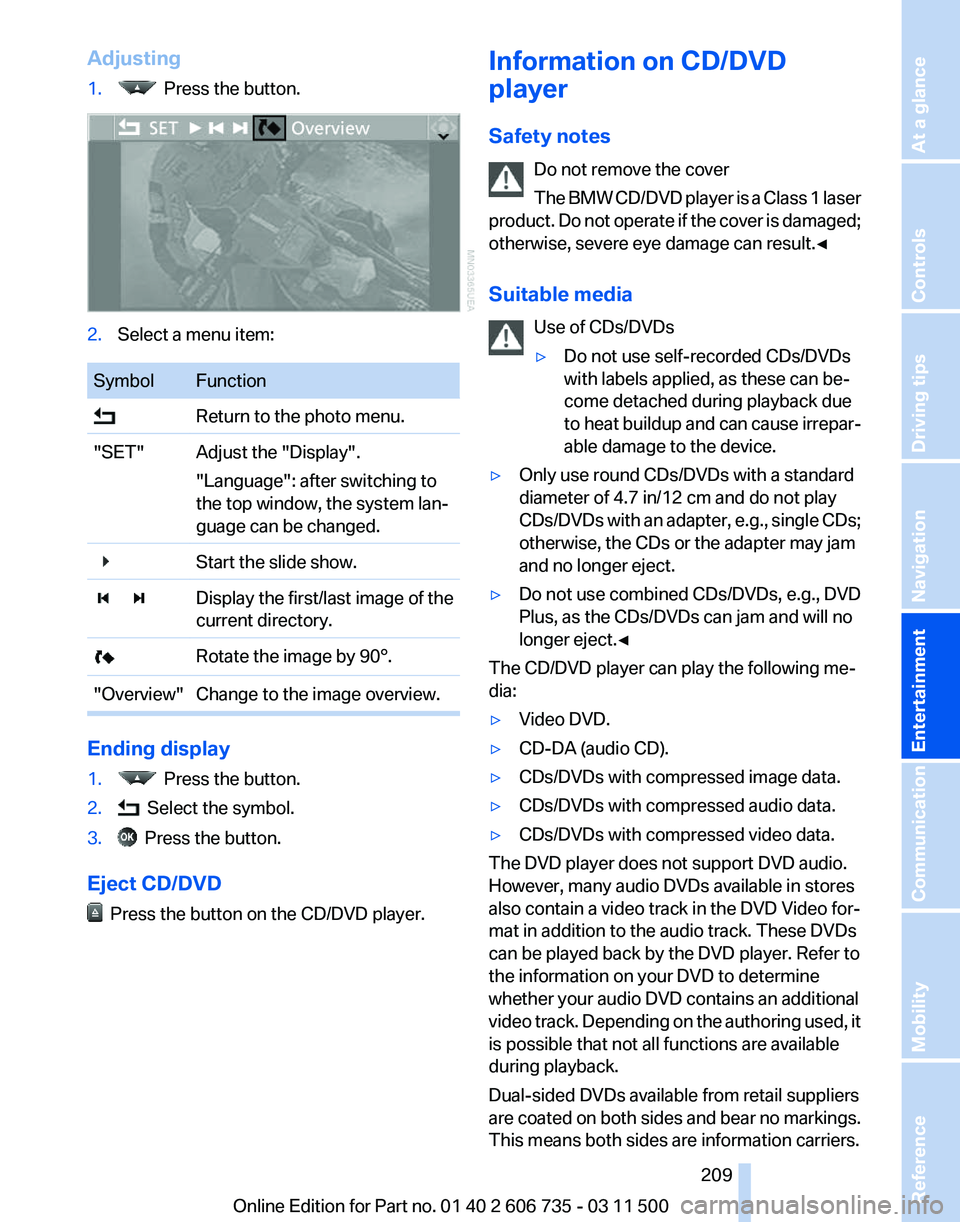
Adjusting
1.
Press the button.
2.
Select a menu item: Symbol Function
Return to the photo menu.
"SET" Adjust the "Display". "Language": after switching to
the top window, the system lan‐
guage can be changed.
Start the slide show.
Display the first/last image of the
current directory.
Rotate the image by 90°.
"Overview" Change to the image overview. Ending display
1.
Press the button.
2. Select the symbol.
3. Press the button.
Eject CD/DVD Press the button on the CD/DVD player. Information on CD/DVD
player
Safety notes
Do not remove the cover
The
BMW CD/DVD player is a Class 1 laser
product. Do not operate if the cover is damaged;
otherwise, severe eye damage can result.◀
Suitable media
Use of CDs/DVDs
▷Do not use self-recorded CDs/DVDs
with labels applied, as these can be‐
come detached during playback due
to
heat buildup and can cause irrepar‐
able damage to the device.
▷ Only use round CDs/DVDs with a standard
diameter of 4.7 in/12 cm and do not play
CDs/DVDs
with an adapter, e.g., single CDs;
otherwise, the CDs or the adapter may jam
and no longer eject.
▷ Do not use combined CDs/DVDs, e.g., DVD
Plus, as the CDs/DVDs can jam and will no
longer eject.◀
The CD/DVD player can play the following me‐
dia:
▷ Video DVD.
▷ CD-DA (audio CD).
▷ CDs/DVDs with compressed image data.
▷ CDs/DVDs with compressed audio data.
▷ CDs/DVDs with compressed video data.
The DVD player does not support DVD audio.
However, many audio DVDs available in stores
also contain a video track in the DVD Video for‐
mat in addition to the audio track. These DVDs
can be played back by the DVD player. Refer to
the information on your DVD to determine
whether your audio DVD contains an additional
video
track. Depending on the authoring used, it
is possible that not all functions are available
during playback.
Dual-sided DVDs available from retail suppliers
are coated on both sides and bear no markings.
This means both sides are information carriers. Seite 209
209Online Edition for Part no. 01 40 2 606 735 - 03 11 500
Reference Mobility Communication
Entertainment Navigation Driving tips Controls At a glance
Page 211 of 317
External device
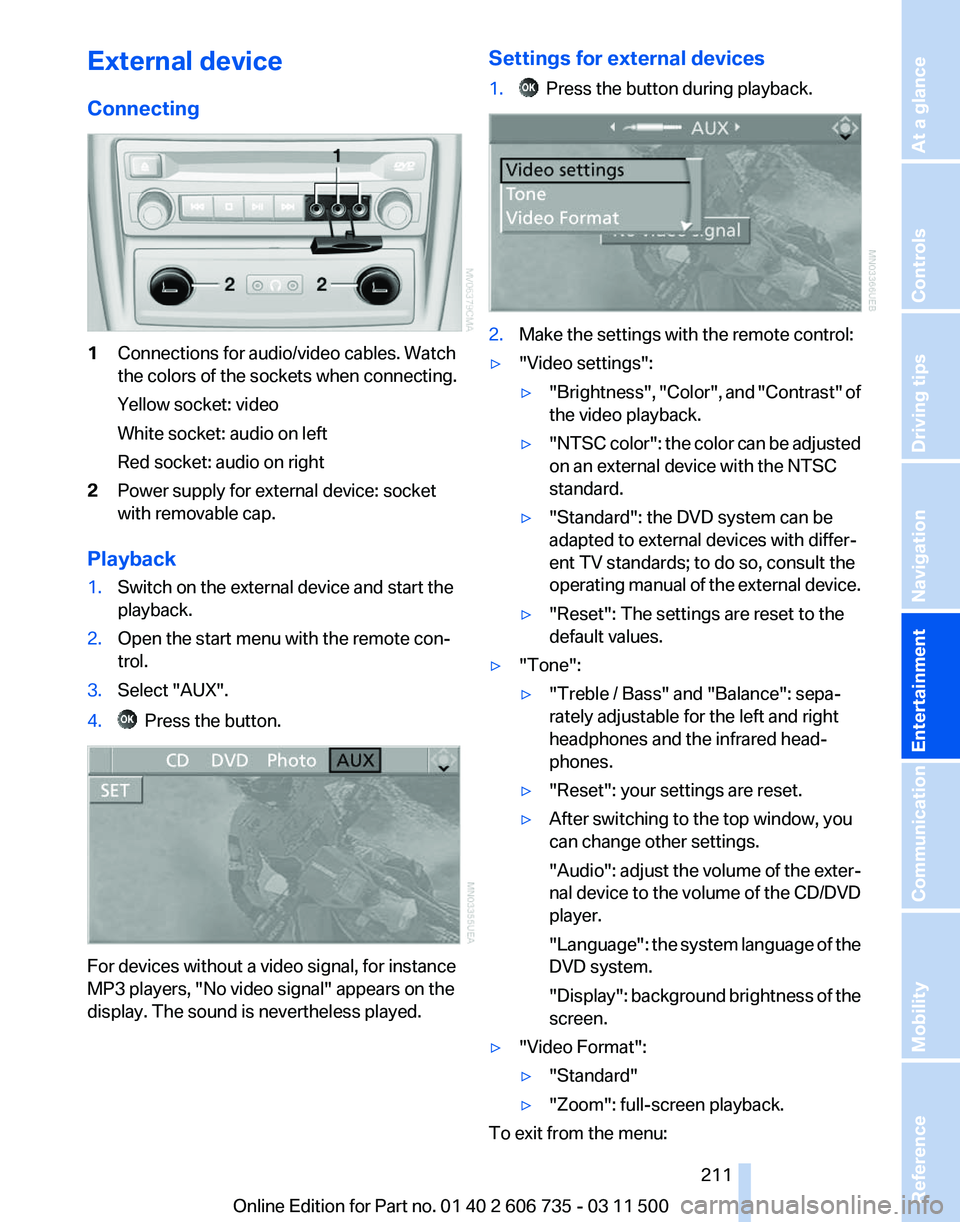
Connecting
1
Connections for audio/video cables. Watch
the colors of the sockets when connecting.
Yellow socket: video
White socket: audio on left
Red socket: audio on right
2 Power supply for external device: socket
with removable cap.
Playback
1. Switch on the external device and start the
playback.
2. Open the start menu with the remote con‐
trol.
3. Select "AUX".
4. Press the button.
For devices without a video signal, for instance
MP3 players, "No video signal"
appears on the
display. The sound is nevertheless played. Settings for external devices
1. Press the button during playback.
2.
Make the settings with the remote control:
▷ "Video settings":
▷"Brightness", "Color",
and "Contrast" of
the video playback.
▷ "NTSC
color": the color can be adjusted
on an external device with the NTSC
standard.
▷ "Standard": the DVD system can be
adapted to external devices with differ‐
ent TV standards; to do so, consult the
operating
manual of the external device.
▷ "Reset": The settings are reset to the
default values.
▷ "Tone":
▷"Treble / Bass" and "Balance": sepa‐
rately adjustable for the left and right
headphones and the infrared head‐
phones.
▷ "Reset": your settings are reset.
▷ After switching to the top window, you
can change other settings.
"Audio":
adjust the volume of the exter‐
nal device to the volume of the CD/DVD
player.
"Language": the system language of the
DVD system.
"Display": background brightness of the
screen.
▷ "Video Format":
▷"Standard"
▷ "Zoom": full-screen playback.
To exit from the menu:
Seite 211
211Online Edition for Part no. 01 40 2 606 735 - 03 11 500
Reference Mobility Communication
Entertainment Navigation Driving tips Controls At a glance
Page 223 of 317
2.
"Redial" 3.
Select the desired entry and the phone num‐
ber if necessary.
The connection is established.
Saving an entry in the contacts
1. Highlight the entry.
2. Open "Options".
3. "Store as new contact" or "Add to existing
contact"
4. Select "New phone number" or contact.
5. Select the type of number: "Home",
"Business", "Mobile", or "Other"
6. Complete the entries if necessary.
7. If necessary, "Store contact in vehicle".
Received calls
Displaying calls
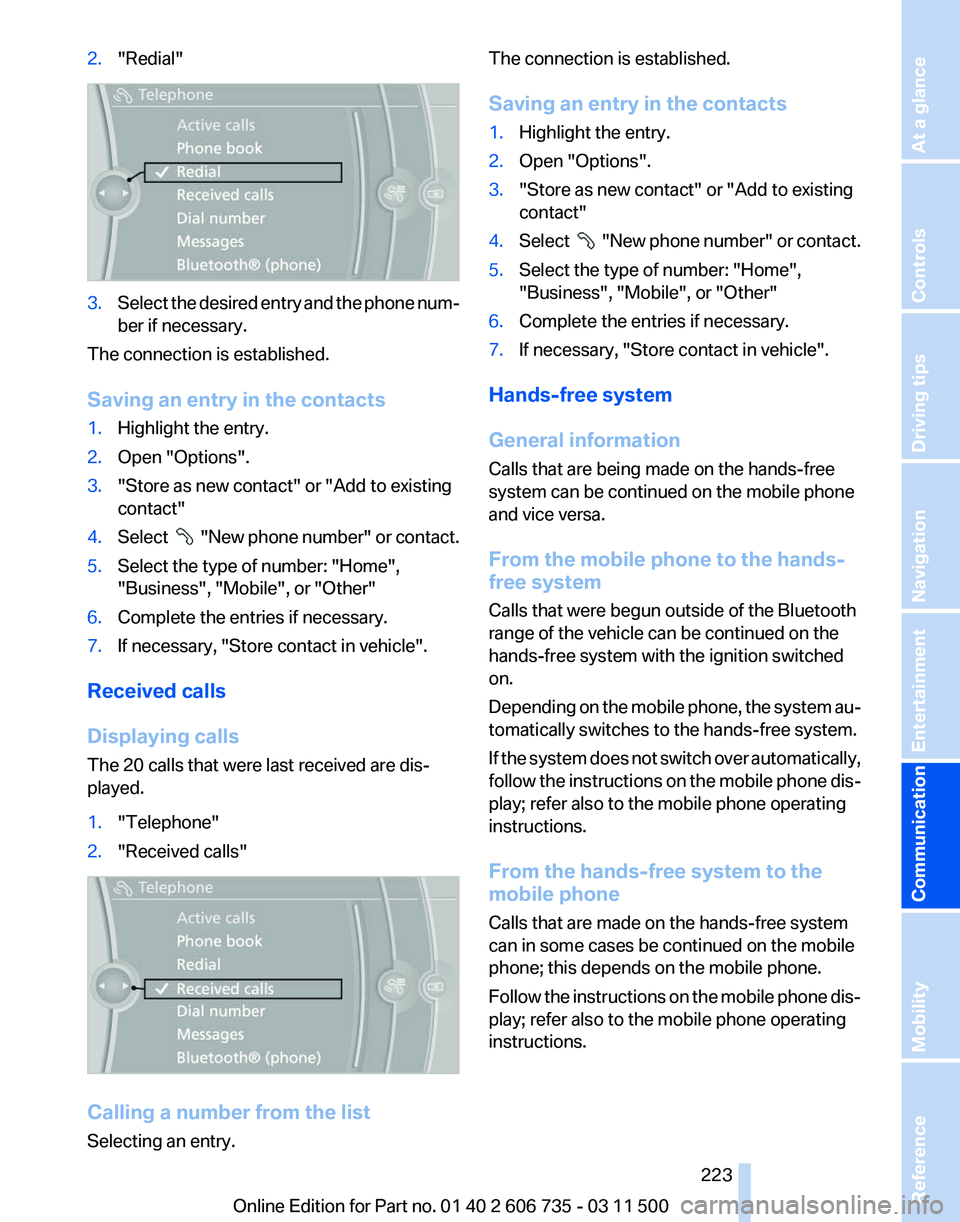
The 20 calls that were last received are dis‐
played.
1. "Telephone"
2. "Received calls" Calling a number from the list
Selecting an entry. The connection is established.
Saving an entry in the contacts
1.
Highlight the entry.
2. Open "Options".
3. "Store as new contact" or "Add to existing
contact"
4. Select
"New phone number" or contact.
5. Select the type of number: "Home",
"Business", "Mobile", or "Other"
6. Complete the entries if necessary.
7. If necessary, "Store contact in vehicle".
Hands-free system
General information
Calls that are being made on the hands-free
system can be continued on the mobile phone
and vice versa.
From the mobile phone to the hands-
free system
Calls that were begun outside of the Bluetooth
range of the vehicle can be continued on the
hands-free system with the ignition switched
on.
Depending
on the mobile phone, the system au‐
tomatically switches to the hands-free system.
If the system does not switch over automatically,
follow the instructions on the mobile phone dis‐
play; refer also to the mobile phone operating
instructions.
From the hands-free system to the
mobile phone
Calls that are made on the hands-free system
can in some cases be continued on the mobile
phone; this depends on the mobile phone.
Follow the instructions on the mobile phone dis‐
play; refer also to the mobile phone operating
instructions.
Seite 223
223Online Edition for Part no. 01 40 2 606 735 - 03 11 500
Reference Mobility
Communication Entertainment Navigation Driving tips Controls At a glance
Page 225 of 317
Saving an entry
1.
›Save name‹
2. Say the name. Do not exceed the speaking
duration of approx. 2 seconds.
3. Say the phone number after being prompted
to do so by the system.
4. ›Save‹
Deleting an entry
1. ›Delete name‹
2. Say the name after being prompted to do so.
3. Confirm the query with ›Yes‹.
Deleting all entries
1. ›Delete phone book‹
The dialog for deleting the phone book is
opened.
2. Confirm the query with ›Yes‹.
3. Confirm the query again with ›Yes‹.
Reading and selecting entries
1. ›Read phone book‹
The dialog for reading the phone book is
opened.
2. Say ›Dial number‹ when the desired entry is
read.
Selecting an entry
1. ›Dial name‹
2. Say the name after being prompted to do so.
3. Confirm the query with ›Yes‹.
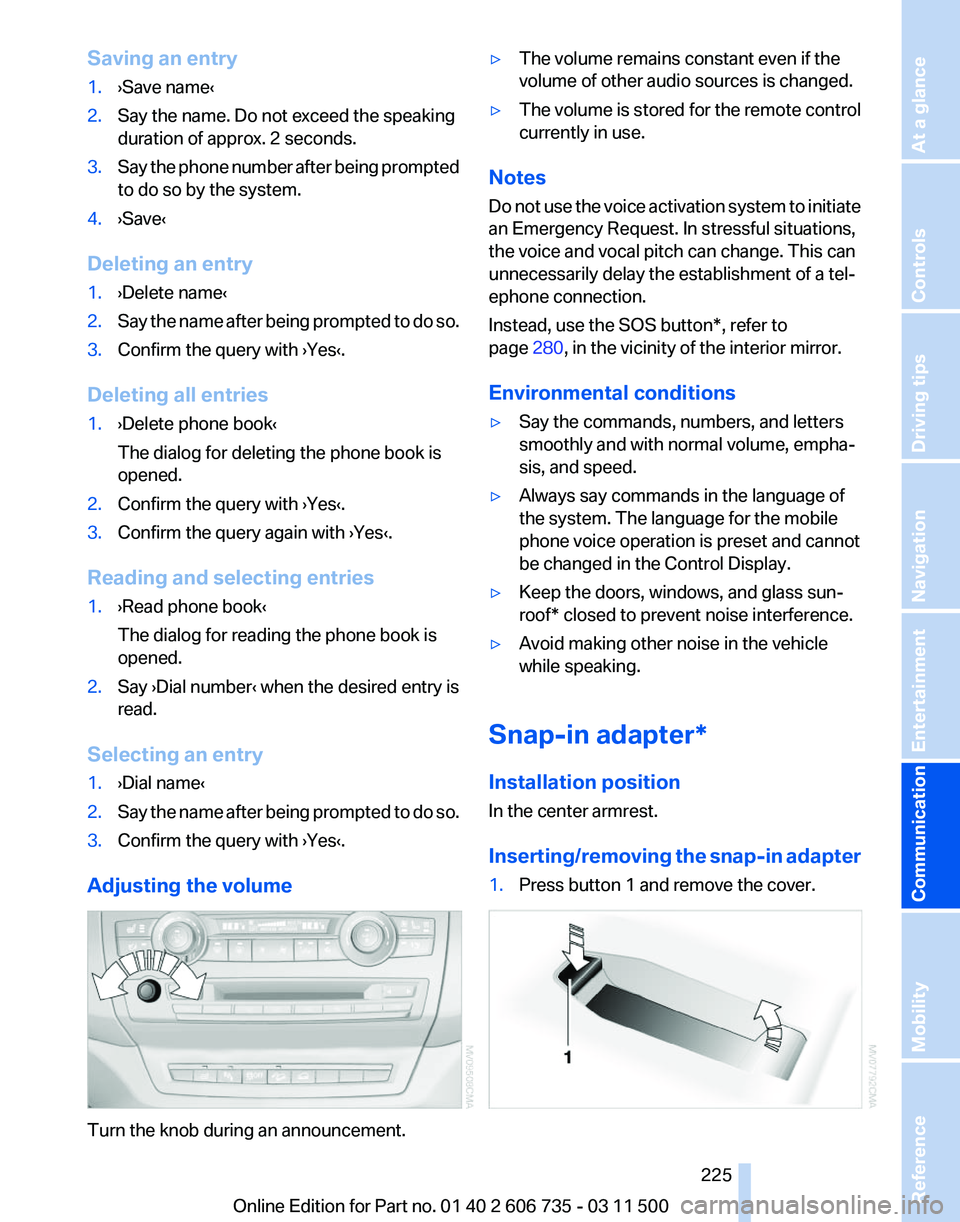
Adjusting the volume Turn the knob during an announcement. ▷
The volume remains constant even if the
volume of other audio sources is changed.
▷ The volume is stored for the remote control
currently in use.
Notes
Do not use the voice activation system to initiate
an Emergency Request. In stressful situations,
the voice and vocal pitch can change. This can
unnecessarily delay the establishment of a tel‐
ephone connection.
Instead, use the SOS button*, refer to
page 280, in the vicinity of the interior mirror.
Environmental conditions
▷ Say the commands, numbers, and letters
smoothly and with normal volume, empha‐
sis, and speed.
▷ Always say commands in the language of
the system. The language for the mobile
phone voice operation is preset and cannot
be changed in the Control Display.
▷ Keep the doors, windows, and glass sun‐
roof* closed to prevent noise interference.
▷ Avoid making other noise in the vehicle
while speaking.
Snap-in adapter*
Installation position
In the center armrest.
Inserting/removing
the snap-in adapter
1. Press button 1 and remove the cover. Seite 225
225Online Edition for Part no. 01 40 2 606 735 - 03 11 500
Reference Mobility
Communication Entertainment Navigation Driving tips Controls At a glance
Page 229 of 317
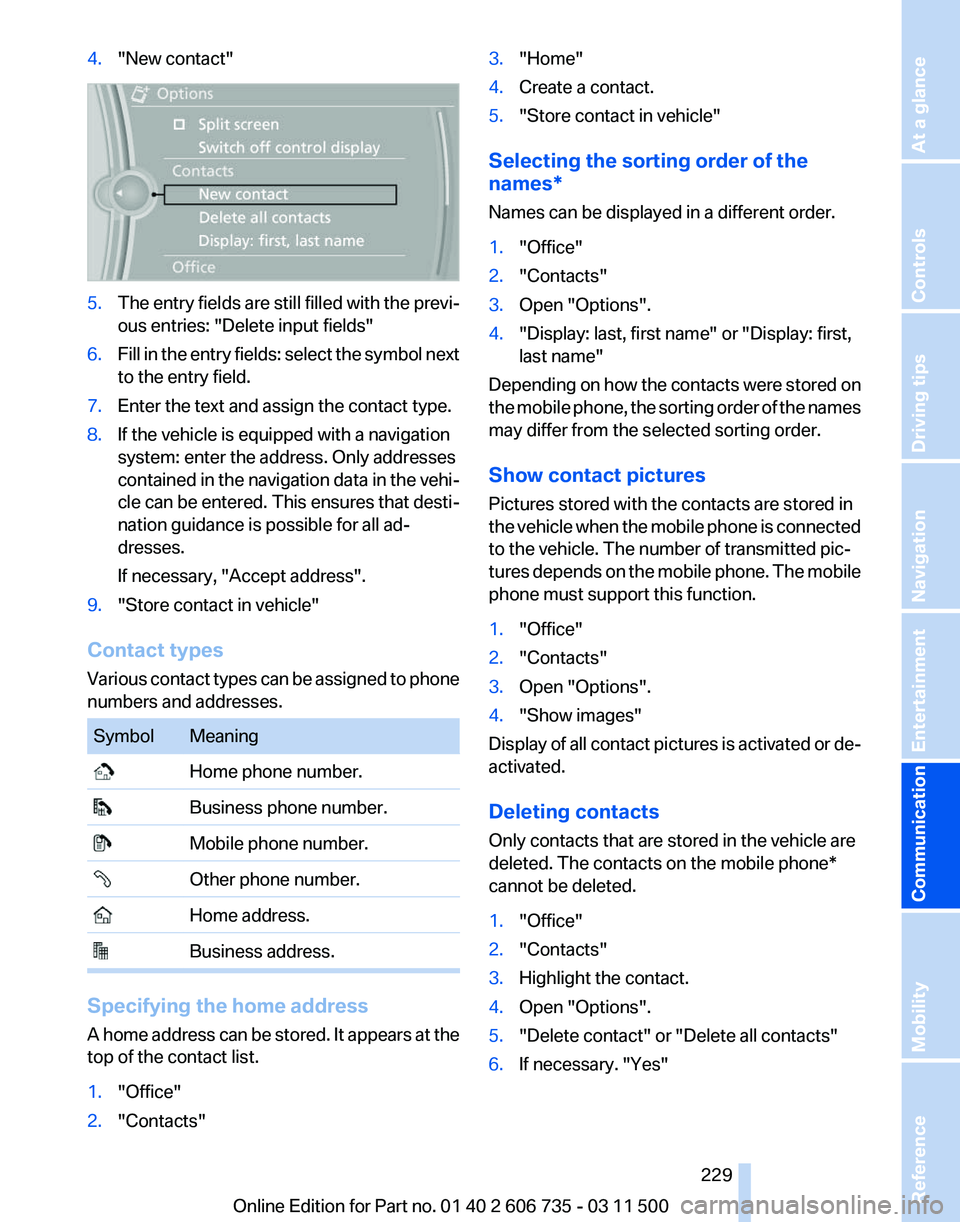
4.
"New contact" 5.
The entry fields are still filled with the previ‐
ous entries: "Delete input fields"
6. Fill in the entry fields: select the symbol next
to the entry field.
7. Enter the text and assign the contact type.
8. If the vehicle is equipped with a navigation
system: enter the address. Only addresses
contained
in the navigation data in the vehi‐
cle can be entered. This ensures that desti‐
nation guidance is possible for all ad‐
dresses.
If necessary, "Accept address".
9. "Store contact in vehicle"
Contact types
Various
contact types can be assigned to phone
numbers and addresses. Symbol Meaning
Home phone number.
Business phone number.
Mobile phone number.
Other phone number.
Home address.
Business address.
Specifying the home address
A
home address can be stored. It appears at the
top of the contact list.
1. "Office"
2. "Contacts" 3.
"Home"
4. Create a contact.
5. "Store contact in vehicle"
Selecting the sorting order of the
names*
Names can be displayed in a different order.
1. "Office"
2. "Contacts"
3. Open "Options".
4. "Display: last, first name" or "Display: first,
last name"
Depending on how the contacts were stored on
the
mobile phone, the sorting order of the names
may differ from the selected sorting order.
Show contact pictures
Pictures stored with the contacts are stored in
the vehicle when the mobile phone is connected
to the vehicle. The number of transmitted pic‐
tures depends on the mobile phone. The mobile
phone must support this function.
1. "Office"
2. "Contacts"
3. Open "Options".
4. "Show images"
Display of all contact pictures is activated or de‐
activated.
Deleting contacts
Only contacts that are stored in the vehicle are
deleted. The contacts on the mobile phone
*
cannot be deleted.
1. "Office"
2. "Contacts"
3. Highlight the contact.
4. Open "Options".
5. "Delete contact" or "Delete all contacts"
6. If necessary. "Yes"
Seite 229
229Online Edition for Part no. 01 40 2 606 735 - 03 11 500
Reference Mobility
Communication Entertainment Navigation Driving tips Controls At a glance
Page 237 of 317
ConnectedDrive*
BMW Assist*
General information
BMW
Assist provides you with certain services,
e.g., transmission of the position data of your
vehicle to the BMW Assist Response Center if
an Emergency Request* has been initiated.
Many BMW Assist services depend on the indi‐
vidually agreed upon contract.
After your contract has expired, the BMW Assist
system will be deactivated by the BMW Assist
Response Center without your having to visit a
service center. After the BMW Assist system
has been deactivated, no BMW Assist services
will be available. The BMW Assist system can be
reactivated by a service center after you sign a
new contract.
Requirements
▷ The installed BMW Assist system is logged
in to a wireless communications network.
This network must be capable of transmit‐
ting the services.
▷ To transmit position data, the vehicle must
be able to determine the current position.
▷ The BMW Assist service contract was
signed with your service center or with the
BMW Assist Response Center. Enabling
must have been completed.
▷ BMW Assist is activated.
Services offered
▷ Emergency Request: when you press the
SOS button, a connection to the BMW As‐
sist Response Center is established. The
BMW Assist Response Center then speaks
with
you and takes further steps to help you.
▷ Automatic Collision Notification: under cer‐
tain conditions, a connection is established
to
the BMW Assist Response Center after a
serious accident. If possible, the BMW As‐ sist Response Center then speaks with you
and takes further steps to help you.
▷ Enhanced Roadside Assistance: BMW
Roadside Assistance* can be contacted if
assistance
is needed in the event of a break‐
down. If possible, the vehicle and position
data are transmitted in the process.
▷ Customer Relations: connection with Cus‐
tomer Relations for information on all as‐
pects of your vehicle.
▷ TeleService: data on your vehicle's service
status or required inspections are transmit‐
ted to your service center, either automati‐
cally before a service due date or when you
request a BMW service appointment.
▷ Remote Door Unlock: the BMW Assist Re‐
sponse
Center provides assistance if, for ex‐
ample, the remote control is not available
and the vehicle needs to be opened.
▷ Stolen Vehicle Recovery: after you report
that
your vehicle was stolen to the police, the
BMW Assist Response Center can deter‐
mine its position.
▷ In addition to these services, the optional
Convenience Plan offers Concierge service
and information for route planning, traffic,
and weather. A limited number of calls can
be made via the BMW Assist Response
Center with Critical Calling if, for example,
the mobile phone is not available or dis‐
charged.
Press the SOS button to contact the BMW
Assist Response Center.
TeleService*
General information
TeleService
supports communication with your
service center.
▷ Data on the vehicle's service requirements
can
be sent directly to the service center. In
this way, the service center can plan its work
Seite 237
237Online Edition for Part no. 01 40 2 606 735 - 03 11 500
Reference Mobility
Communication Entertainment Navigation Driving tips Controls At a glance
Page 241 of 317
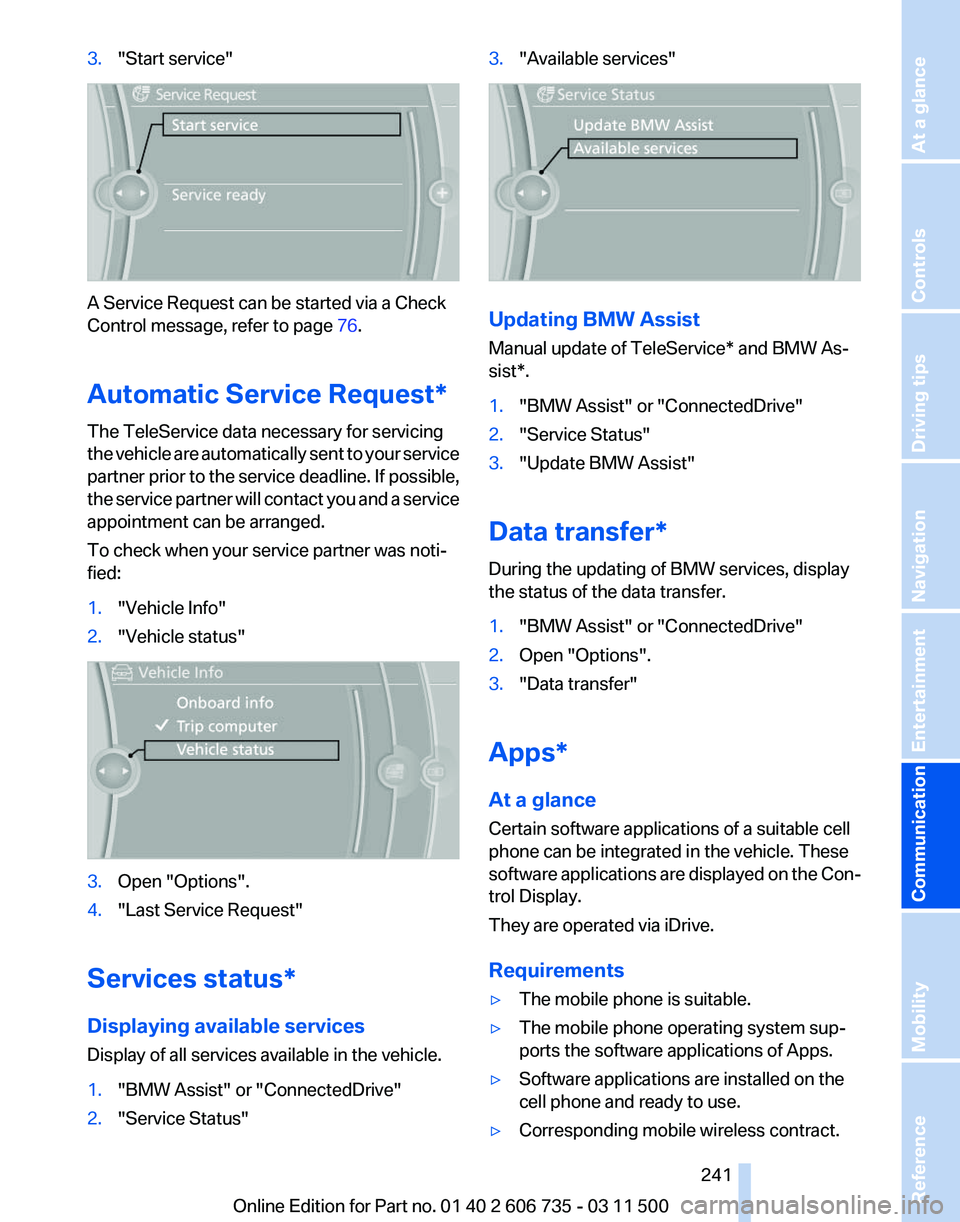
3.
"Start service" A Service Request can be started via a Check
Control message, refer to page
76.
Automatic Service Request
*
The TeleService data necessary for servicing
the vehicle are automatically sent to your service
partner prior to the service deadline. If possible,
the service partner will contact you and a service
appointment can be arranged.
To check when your service partner was noti‐
fied:
1. "Vehicle Info"
2. "Vehicle status" 3.
Open "Options".
4. "Last Service Request"
Services status*
Displaying available services
Display of all services available in the vehicle.
1. "BMW Assist" or "ConnectedDrive"
2. "Service Status" 3.
"Available services" Updating BMW Assist
Manual update of
TeleService* and BMW As‐
sist*.
1. "BMW Assist" or "ConnectedDrive"
2. "Service Status"
3. "Update BMW Assist"
Data transfer*
During the updating of BMW services, display
the status of the data transfer.
1. "BMW Assist" or "ConnectedDrive"
2. Open "Options".
3. "Data transfer"
Apps*
At a glance
Certain software applications of a suitable cell
phone can be integrated in the vehicle. These
software
applications are displayed on the Con‐
trol Display.
They are operated via iDrive.
Requirements
▷ The mobile phone is suitable.
▷ The mobile phone operating system sup‐
ports the software applications of Apps.
▷ Software applications are installed on the
cell phone and ready to use.
▷ Corresponding mobile wireless contract.
Seite 241
241Online Edition for Part no. 01 40 2 606 735 - 03 11 500
Reference Mobility
Communication Entertainment Navigation Driving tips Controls At a glance
Page 249 of 317
In the event the Ultra-Low Sulfur Diesel fuel can‐
not be fully inserted into the fuel filler neck,
please contact BMW Roadside Assistance for
instructions on how to add fuel. For more infor‐
mation on BMW Roadside Assistance, refer to
page
281.
Winter diesel
To ensure that the diesel engine remains op‐
erational in the winter, use winter diesel.
It is available at gas stations during winter
months.
The standard fuel filter heating prevents the
supply of fuel from stalling during driving. No diesel additives
Do not add additives, including gasoline;
otherwise, engine damage may occur.◀ BMW X5 with BMW Advanced
Diesel
The concept
BMW
Advanced Diesel reduces nitrogen oxides
in the diesel exhaust of your vehicle by injecting
the reducing agent diesel exhaust fluid into the
exhaust line. In the catalytic converter, a chem‐
ical reaction occurs that minimizes nitrogen ox‐
ides.
In order to be able to start the engine in the usual
way, there must be a sufficient supply of diesel
exhaust fluid in the separate reservoir.
System heating
In order to bring the system to operating tem‐
perature after a cold start of the engine, the au‐ tomatic transmission shifts into the next higher
gear at a later point.
Reserve display
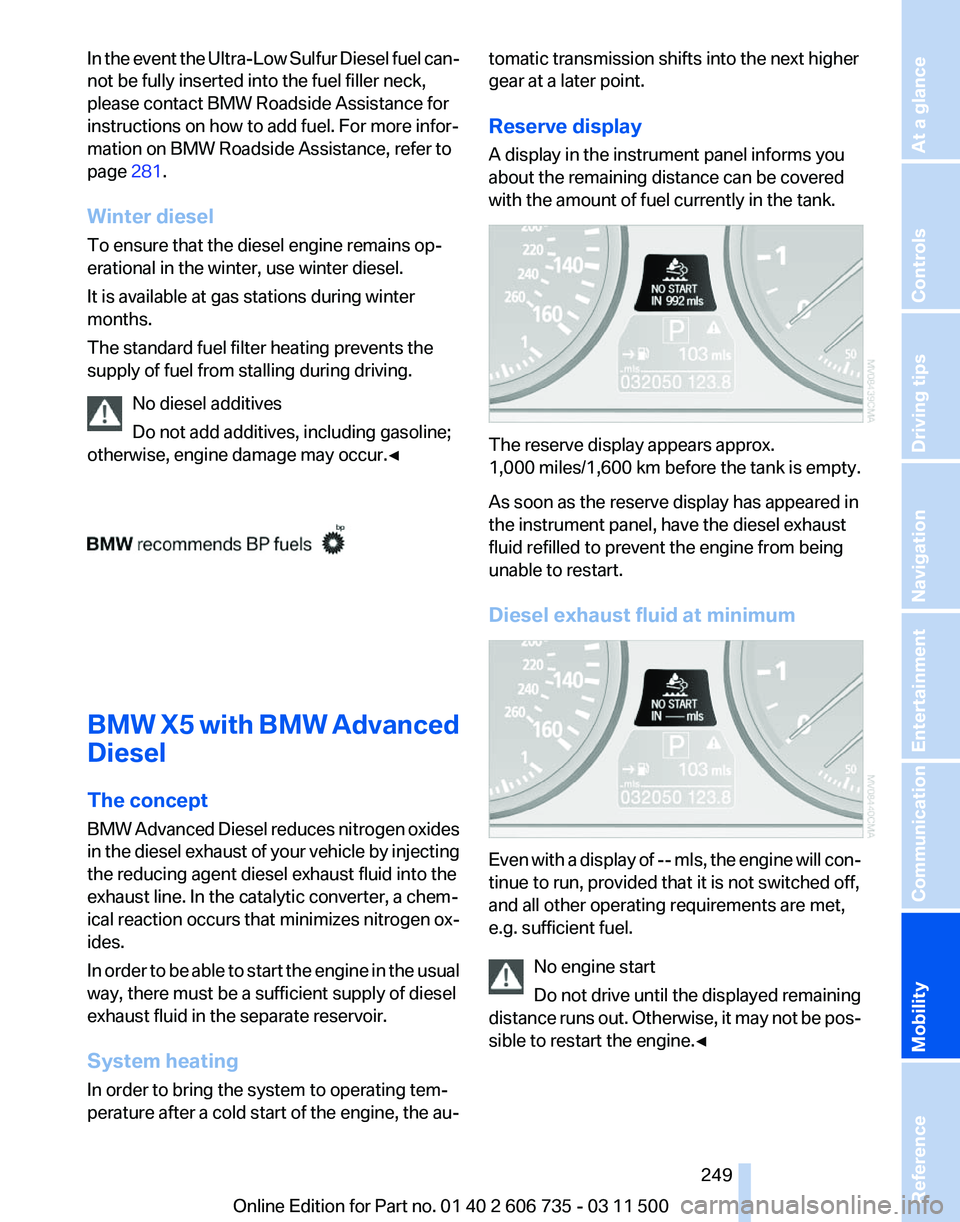
A display in the instrument panel informs you
about the remaining distance can be covered
with the amount of fuel currently in the tank.
The reserve display appears approx.
1,000 miles/1,600 km before the tank is empty.
As soon as the reserve display has appeared in
the instrument panel, have the diesel exhaust
fluid refilled to prevent the engine from being
unable to restart.
Diesel exhaust fluid at minimum
Even with a display of -- mls, the engine will con‐
tinue to run, provided that it is not switched off,
and all other operating requirements are met,
e.g. sufficient fuel.
No engine start
Do
not drive until the displayed remaining
distance runs out. Otherwise, it may not be pos‐
sible to restart the engine.◀ Seite 249
249Online Edition for Part no. 01 40 2 606 735 - 03 11 500
Reference
Mobility Communication Entertainment Navigation Driving tips Controls At a glance
Page 263 of 317
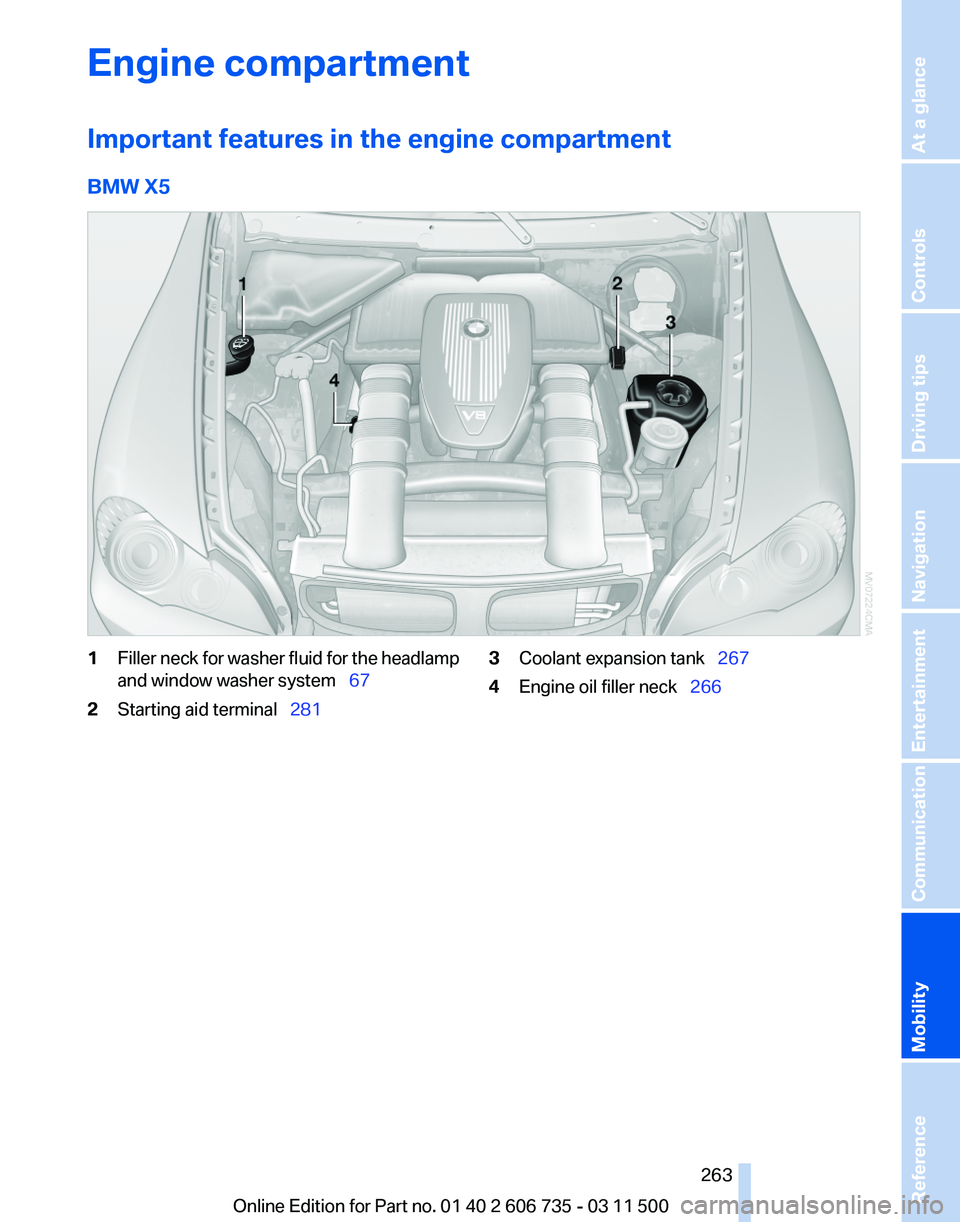
Engine compartment
Important features in the engine compartment
BMW X5
1
Filler neck for washer fluid for the headlamp
and window washer system 67
2 Starting aid terminal 281 3
Coolant expansion tank 267
4 Engine oil filler neck 266
Seite 263
263Online Edition for Part no. 01 40 2 606 735 - 03 11 500
Reference
Mobility Communication Entertainment Navigation Driving tips Controls At a glance