load capacity BMW X5 XDRIVE35I 2012 Owners Manual
[x] Cancel search | Manufacturer: BMW, Model Year: 2012, Model line: X5 XDRIVE35I, Model: BMW X5 XDRIVE35I 2012Pages: 317, PDF Size: 8.83 MB
Page 138 of 317
1.
Lay the cargo on the telescopic rail. Press
the button, arrow 1, and route the retaining
strap around the cargo, arrow 2.
2. Hook the retaining strap into the mount 3 on
the telescopic rail.
3. Press the button of the bracket, arrow 1. The
retaining strap is tensioned.
It is also possible to hook the two retaining
straps onto each other.
When the adaptive fixing system is no longer
needed,
unhook the retaining strap and guide it
back into the bracket holding the hook to pre‐
vent damage and injury.
Then slide the fastening system toward the front
in order to permit the best possible use of the
cargo area.
Removing brackets
Press down the brackets, slide them up to the
notches of the rails and remove them.
Depending on the vehicle's equipment, the
adaptive fixing system can be stored under the
cargo floor panel in the cargo area.
Ski bag*
The ski bag is designed for safe, clean transport
of up to 4 pairs of standard skis or up to 2 snow‐
boards.
Skis with a length of up to 6 ft/2.10 m can be
stowed using the ski bag. When stowing skis
with a length of 6 ft/2.10 m, the capacity of the
ski bag is reduced as the bag narrows.
Folding in display screen
Before loading the ski bag, fold in the dis‐
play screen of the DVD systems in the rear*;
otherwise, the display screen could be dam‐
aged.◀ Loading
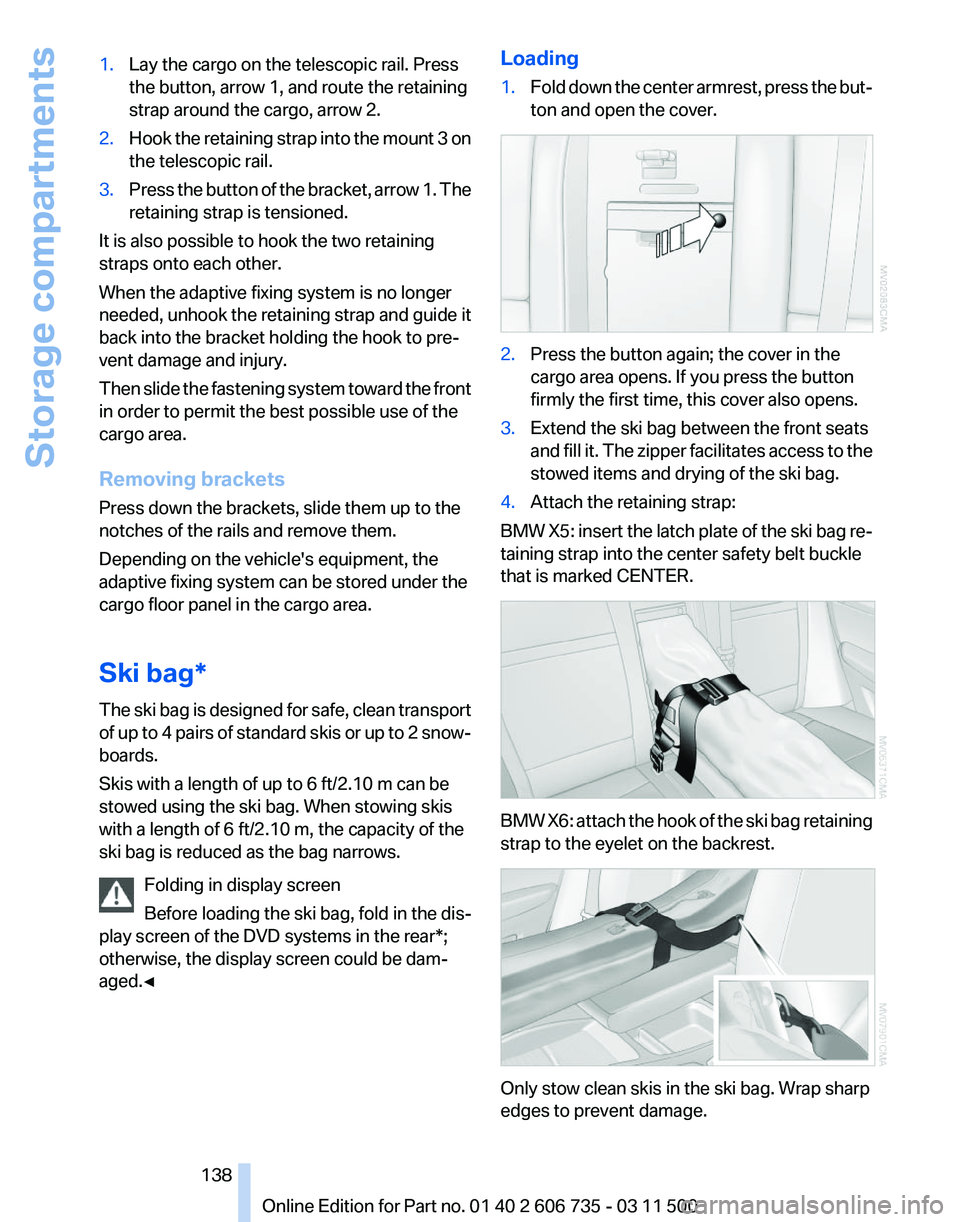
1.
Fold down the center armrest, press the but‐
ton and open the cover. 2.
Press the button again; the cover in the
cargo area opens. If you press the button
firmly the first time, this cover also opens.
3. Extend the ski bag between the front seats
and
fill it. The zipper facilitates access to the
stowed items and drying of the ski bag.
4. Attach the retaining strap:
BMW X5: insert the latch plate of the ski bag re‐
taining strap into the center safety belt buckle
that is marked CENTER. BMW X6: attach the hook of the ski bag retaining
strap to the eyelet on the backrest.
Only stow clean skis in the ski bag. Wrap sharp
edges to prevent damage.
Seite 138
138 Online Edition for Part no. 01 40 2 606 735 - 03 11 500
Storage compartments
Page 144 of 317
Driving in wet conditions
When
roads are wet or there is heavy rain, briefly
exert gentle pressure on the brake pedal every
few miles.
Ensure that this action does not endanger other
road users.
The heat generated in this process helps dry the
brake discs and pads.
In this way braking efficiency will be available
when you need it.
Hills
Drive long or steep downhill gradients in the gear
in which the least braking is required. Otherwise,
the brake system may overheat, resulting in a
reduction in the brake system efficiency.
The engine braking action can be further en‐
hanced by shifting down during manual opera‐
tion of the automatic transmission, refer to
page 69, if necessary all the way down to first
gear.
Avoid load on the brakes
Avoid placing excessive load on the brake
system. Light but consistent brake pressure can
lead to high temperatures, brake wear and pos‐
sibly even brake failure.◀
Do not drive in neutral
Do not drive in neutral or with the engine
stopped, as doing so disables engine braking. In
addition, steering and brake assist is unavailable
with the engine stopped.◀
Brake disc corrosion
Corrosion on the brake discs and contamination
on the brake pads are furthered by:
▷ Low mileage.
▷ Extended periods when the vehicle is not
used at all.
▷ Infrequent use of the brakes.
Corrosion occurs when the minimum pressure
that must be exerted by the pads during brake
applications to clean the discs is not reached. Should corrosion form on the brake discs, the
brakes will tend to respond with a pulsating ef‐
fect that generally cannot be corrected.
Condensation
under the parked vehicle
When using the automatic climate control, con‐
densation water develops that exits underneath
the vehicle.
Therefore, traces of condensed water under the
vehicle are normal.
Loading
Overloading the vehicle
To avoid exceeding the approved carrying
capacity of the tires, never overload the vehicle.
Overloading can lead to overheating and in‐
creases the rate at which damage develops in‐
side the tires. This could result in a sudden loss
of tire inflation pressure.◀
No fluids in the cargo area
Make sure that fluids do not leak into the
cargo area; otherwise, the vehicle may be dam‐
aged.◀
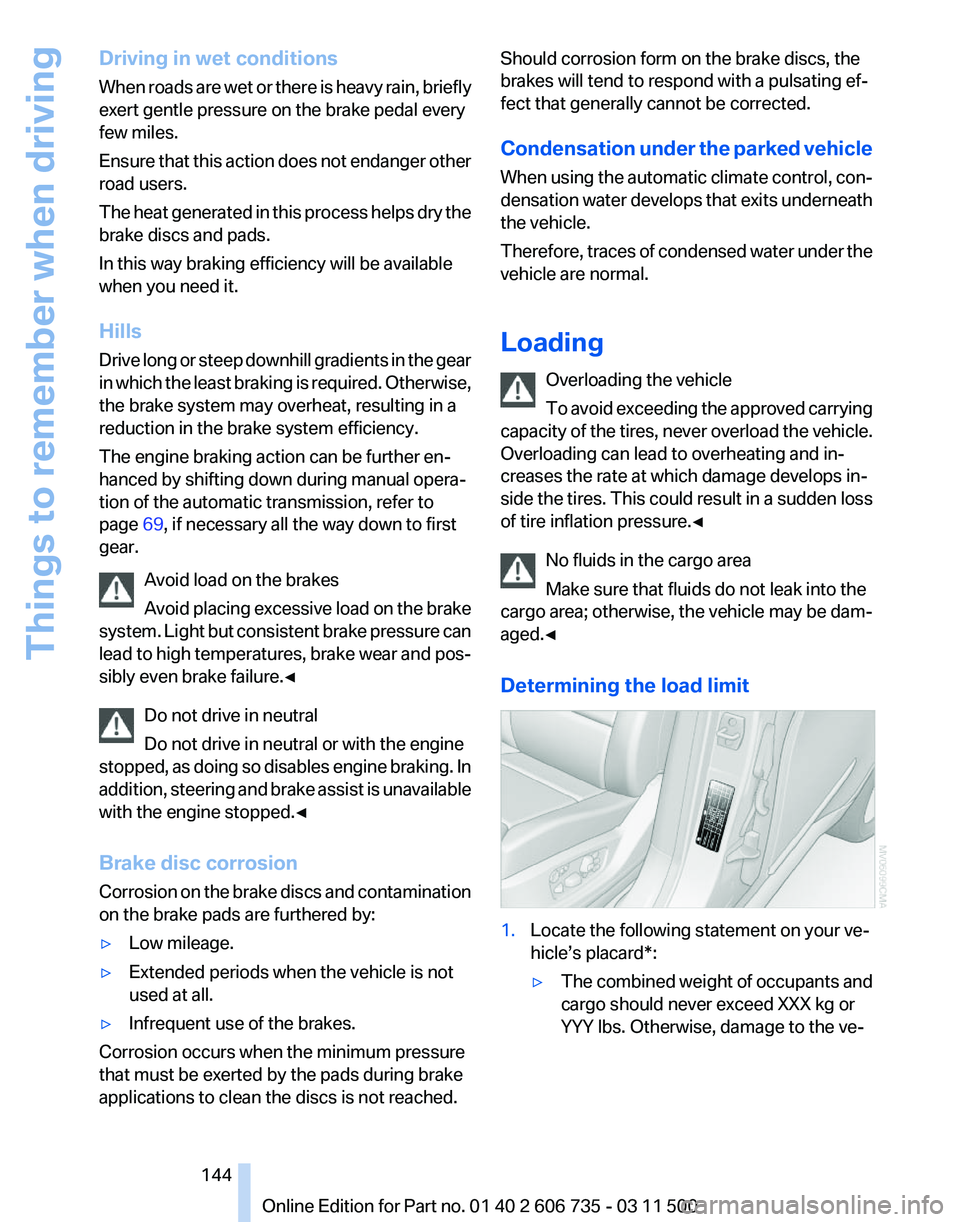
Determining the load limit 1.
Locate the following statement on your ve‐
hicle’s placard*:
▷The combined weight of occupants and
cargo should never exceed XXX kg or
YYY lbs. Otherwise, damage to the ve‐ Seite 144
144 Online Edition for Part no. 01 40 2 606 735 - 03 11 500
Things to remember when driving
Page 145 of 317
hicle and unstable driving situations may
result.
2. Determine the combined weight of the
driver and passengers that will be riding in
your vehicle.
3. Subtract the combined weight of the driver
and
passengers from XXX kilograms or YYY
pounds.
4. The resulting figure equals the available
amount
of cargo and luggage load capacity.
For example, if the YYY amount equals
1,400 lbs and there will be five 150 lbs pas‐
sengers in your vehicle, the amount of avail‐
able cargo and luggage load capacity is
650 lbs: 1,400 lbs minus 750 lbs = 650 lbs.
5. Determine the combined weight of luggage
and
cargo being loaded on the vehicle. That
weight may not safely exceed the available
cargo and luggage load capacity calculated
in Step 4.
6. If your vehicle will be towing a trailer, load
from your trailer will be transfered to your
vehicle.
Consult the manual for transporting
a trailer to determine how this may reduce
the available cargo and luggage load ca‐
pacity of your vehicle.
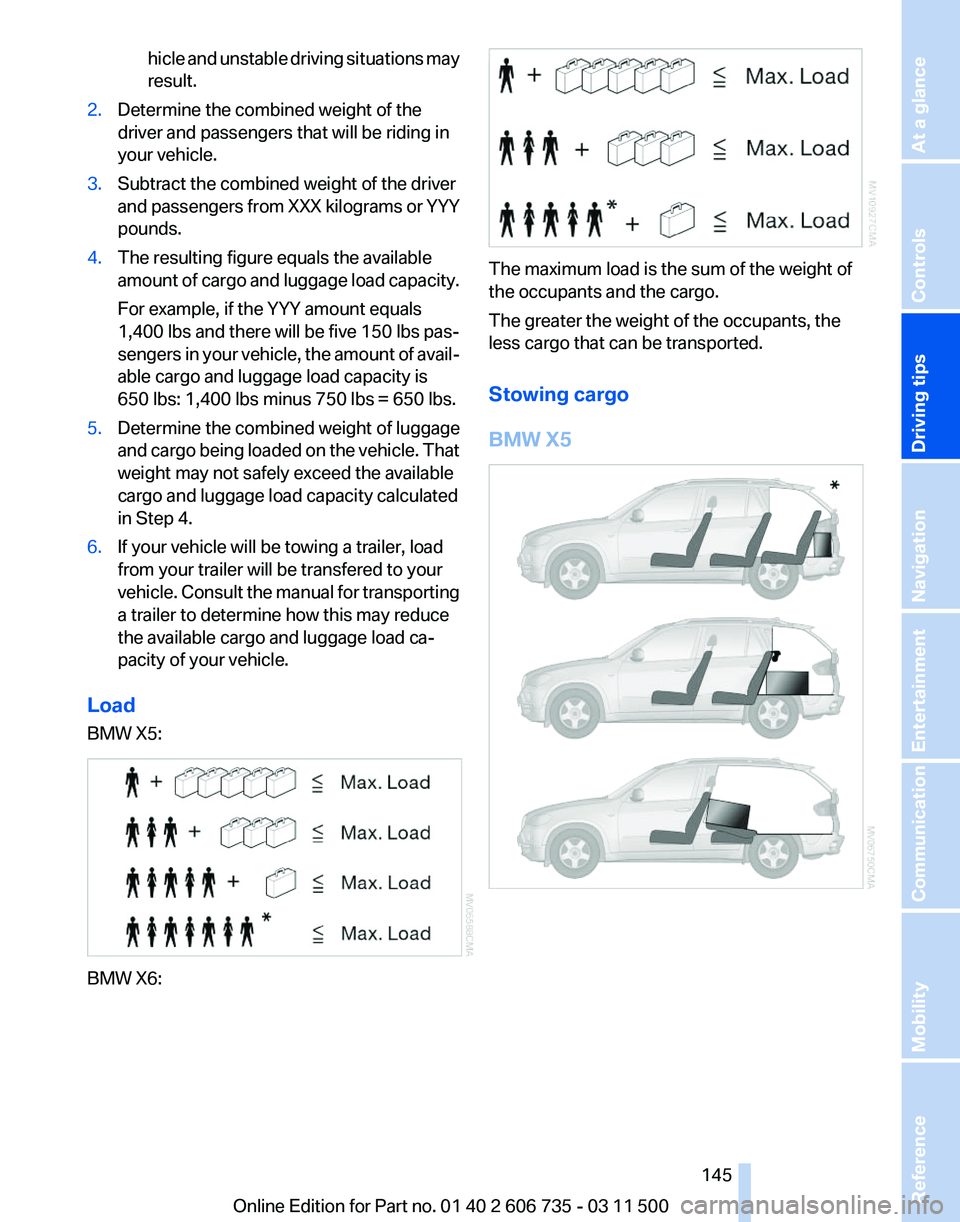
Load
BMW X5: BMW X6: The maximum load is the sum of the weight of
the occupants and the cargo.
The greater the weight of the occupants, the
less cargo that can be transported.
Stowing cargo
BMW X5 Seite 145
145Online Edition for Part no. 01 40 2 606 735 - 03 11 500
Reference Mobility Communication Entertainment Navigation
Driving tips Controls At a glance
Page 276 of 317
They do not need to be replaced immediately in
the event of a puncture.
When mounting new tires or changing from
summer
to winter tires or vice versa, use run-flat
tires for your own safety.
BMW X6: do not rotate the front wheels to the
rear or vice versa, as otherwise the handling
characteristics will be negatively affected.
The tools for changing wheels are available as
accessories from your service center.
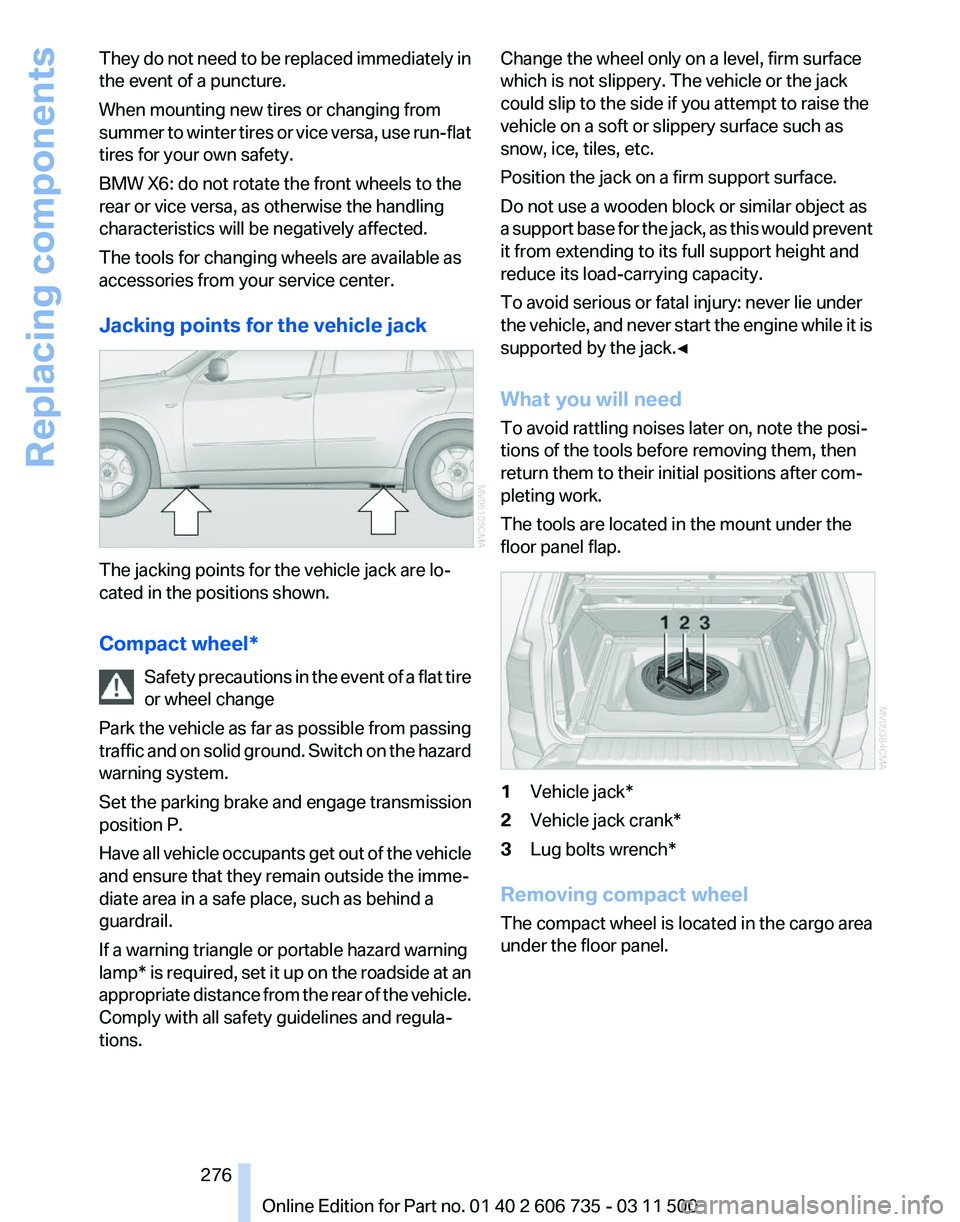
Jacking points for the vehicle jack The jacking points for the vehicle jack are lo‐
cated in the positions shown.
Compact wheel*
Safety
precautions in the event of a flat tire
or wheel change
Park the vehicle as far as possible from passing
traffic and on solid ground. Switch on the hazard
warning system.
Set the parking brake and engage transmission
position P.
Have all vehicle occupants get out of the vehicle
and ensure that they remain outside the imme‐
diate area in a safe place, such as behind a
guardrail.
If a warning triangle or portable hazard warning
lamp* is required, set it up on the roadside at an
appropriate distance from the rear of the vehicle.
Comply with all safety guidelines and regula‐
tions. Change the wheel only on a level, firm surface
which is not slippery. The vehicle or the jack
could slip to the side if you attempt to raise the
vehicle on a soft or slippery surface such as
snow, ice, tiles, etc.
Position the jack on a firm support surface.
Do not use a wooden block or similar object as
a
support base for the jack, as this would prevent
it from extending to its full support height and
reduce its load-carrying capacity.
To avoid serious or fatal injury: never lie under
the vehicle, and never start the engine while it is
supported by the jack.◀
What you will need
To avoid rattling noises later on, note the posi‐
tions of the tools before removing them, then
return them to their initial positions after com‐
pleting work.
The tools are located in the mount under the
floor panel flap. 1
Vehicle jack*
2 Vehicle jack crank*
3 Lug bolts wrench*
Removing compact wheel
The compact wheel is located in the cargo area
under the floor panel.
Seite 276
276 Online Edition for Part no. 01 40 2 606 735 - 03 11 500
Replacing components
Page 293 of 317
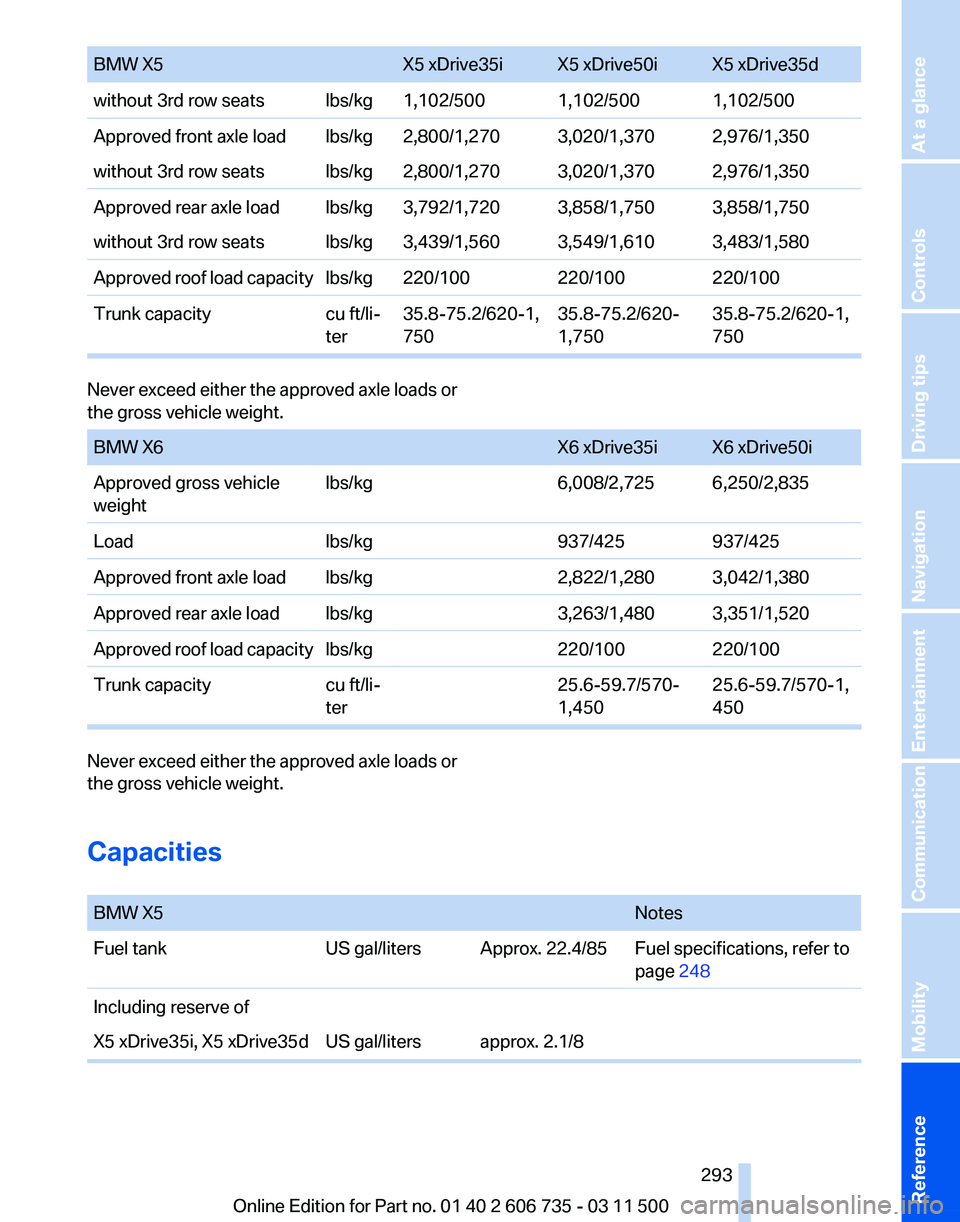
BMW X5
X5 xDrive35i X5 xDrive50i X5 xDrive35d
without 3rd row seats lbs/kg 1,102/500 1,102/500 1,102/500
Approved front axle load lbs/kg 2,800/1,270 3,020/1,370 2,976/1,350
without 3rd row seats lbs/kg 2,800/1,270 3,020/1,370 2,976/1,350
Approved rear axle load lbs/kg 3,792/1,720 3,858/1,750 3,858/1,750
without 3rd row seats lbs/kg 3,439/1,560 3,549/1,610 3,483/1,580
Approved roof load capacity lbs/kg 220/100 220/100220/100
Trunk capacity cu ft/li‐
ter35.8-75.2/620-1,
750 35.8-75.2/620‐
1,75035.8-75.2/620-1,
750Never exceed either the approved axle loads or
the gross vehicle weight.
BMW X6
X6 xDrive35i X6 xDrive50i
Approved gross vehicle
weight lbs/kg
6,008/2,725 6,250/2,835
Load lbs/kg937/425937/425
Approved front axle load lbs/kg 2,822/1,280 3,042/1,380
Approved rear axle load lbs/kg 3,263/1,480 3,351/1,520
Approved roof load capacity lbs/kg 220/100220/100
Trunk capacity cu ft/li‐
ter25.6-59.7/570‐
1,45025.6-59.7/570-1,
450Never exceed either the approved axle loads or
the gross vehicle weight.
Capacities
BMW X5
Notes
Fuel tank US gal/liters Approx. 22.4/85 Fuel specifications, refer to
page 248
Including reserve of
X5 xDrive35i, X5 xDrive35d US gal/liters approx. 2.1/8 Seite 293
293Online Edition for Part no. 01 40 2 606 735 - 03 11 500
Reference Mobility Communication Entertainment Navigation Driving tips Controls At a glance
Page 311 of 317
Protective function, refer to
Pinch protection
– Windows 41
Push-and-turn switch, refer to
Controls 18
R
Radiator fluid, refer to Cool‐ ant 267
Radio-operated key, refer to Remote control with
integrated key 28
Radio ready state 61
Radio ready state, switched off 61
Radio ready state, switched on 61
Radio setting, refer to Radio ready state 61
Rain sensor 67
Random 182
Random playback 182
Range 73
RDS 175
Reading lamps 85
Reading out loud 234
Rear entertainment, refer to DVD system in rear 200
Rear lamps, refer to Tail lamps 271, 274
Rear seat backrest, folda‐ ble 133
Rear seats, adjusting 47
Rear
seats, adjusting the head
restraints 52
Rear seats, heating 48
Rear socket 131
Rear ventilation 123
Rear ventilation, 3rd row seats 123
Rear ventilation, automatic cli‐ mate control in rear 124
Rearview mirror, refer to Mir‐ rors 53
Rear window defroster 121
Rear window, washing 68
Rear window wiper 68
Recirculated air mode 122 Recommended tire
brands 260
Redialing 222
Refueling 246
Remaining distance to desti‐ nation,
refer to Computer 74
Remaining range for service, refer to Service require‐
ments 75
Remaining range, refer to Range 73
Reminders 233
Remote control
– Battery replacement 39
– Comfort Access 37
– Malfunction 31, 38
– Tailgate 31
Remote control, garage door
opener 127
Remote
control, rear DVD sys‐
tem 201
Remote control, removing from the ignition lock 61
Remote control, service data 268
Remote control, universal 127
Remote inquiry 222
Replacement fuse 279
Replacement remote con‐ trol 28
Replacing wheels/tires 260
Reporting safety defects 8
Reserve warning, refer to Fuel gauge 73
Reservoir for washer fluid, re‐ fer to Washer fluid reser‐
voir 68
Resetting, Tire Pressure Mon‐ itor TPM 91
Residual heat 122
Restraining systems
– Refer to Safety belts 50
Restraint systems for chil‐
dren 56
Retaining straps, securing cargo 146
Retreaded tires 261
Road, avoiding 161
Road detour 161 Roadside Assistance 238
Roadside parking lamps
83
Roller sunblinds 41
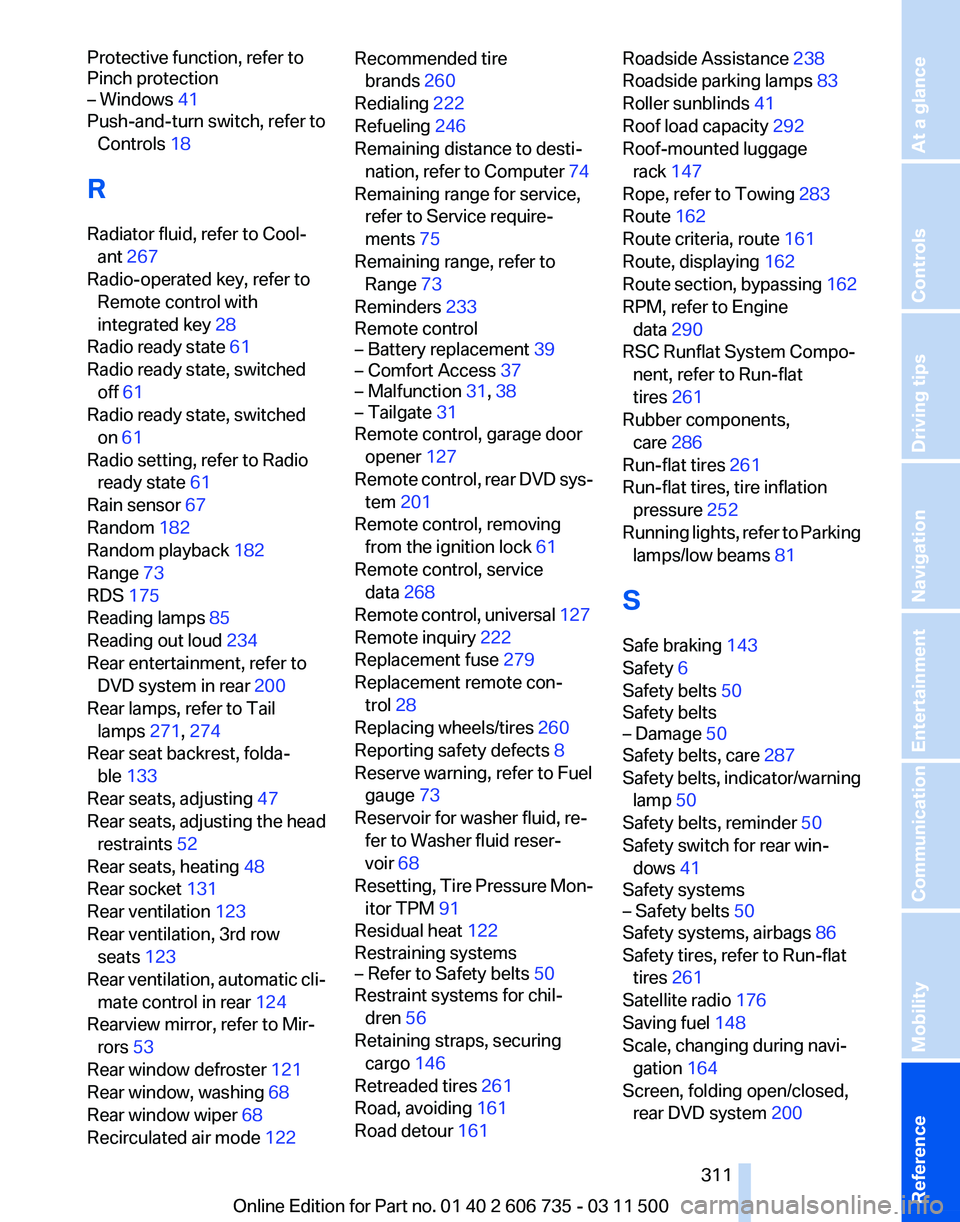
Roof load capacity 292
Roof-mounted luggage rack 147
Rope, refer to Towing 283
Route 162
Route criteria, route 161
Route, displaying 162
Route
section, bypassing 162
RPM, refer to Engine data 290
RSC Runflat System Compo‐ nent, refer to Run-flat
tires 261
Rubber components, care 286
Run-flat tires 261
Run-flat tires, tire inflation pressure 252
Running lights, refer to Parking lamps/low beams 81
S
Safe braking 143
Safety 6
Safety belts 50
Safety belts
– Damage 50
Safety belts, care 287
Safety
belts, indicator/warning
lamp 50
Safety belts, reminder 50
Safety switch for rear win‐ dows 41
Safety systems
– Safety belts 50
Safety systems, airbags 86
Safety tires, refer to Run-flat tires 261
Satellite radio 176
Saving fuel 148
Scale, changing during navi‐ gation 164
Screen, folding open/closed, rear DVD system 200
Seite 311
311Online Edition for Part no. 01 40 2 606 735 - 03 11 500
Reference Mobility Communication Entertainment Navigation Driving tips Controls At a glance