tow BMW X5M 2014 F85 Owner's Guide
[x] Cancel search | Manufacturer: BMW, Model Year: 2014, Model line: X5M, Model: BMW X5M 2014 F85Pages: 251, PDF Size: 7.35 MB
Page 170 of 251
Lowering1.Hold the rod on both side and release it
from the brackets.2.Slowly slide the cargo area partition net
into the case.
BMW X6 M: cargo area
Cargo cover
Note Do not deposit heavy objects
Do not deposit heavy or hard objects on
the cargo cover. Otherwise, they may pose a
risk to occupants, such as during braking and
evasive maneuvers.◀
General information
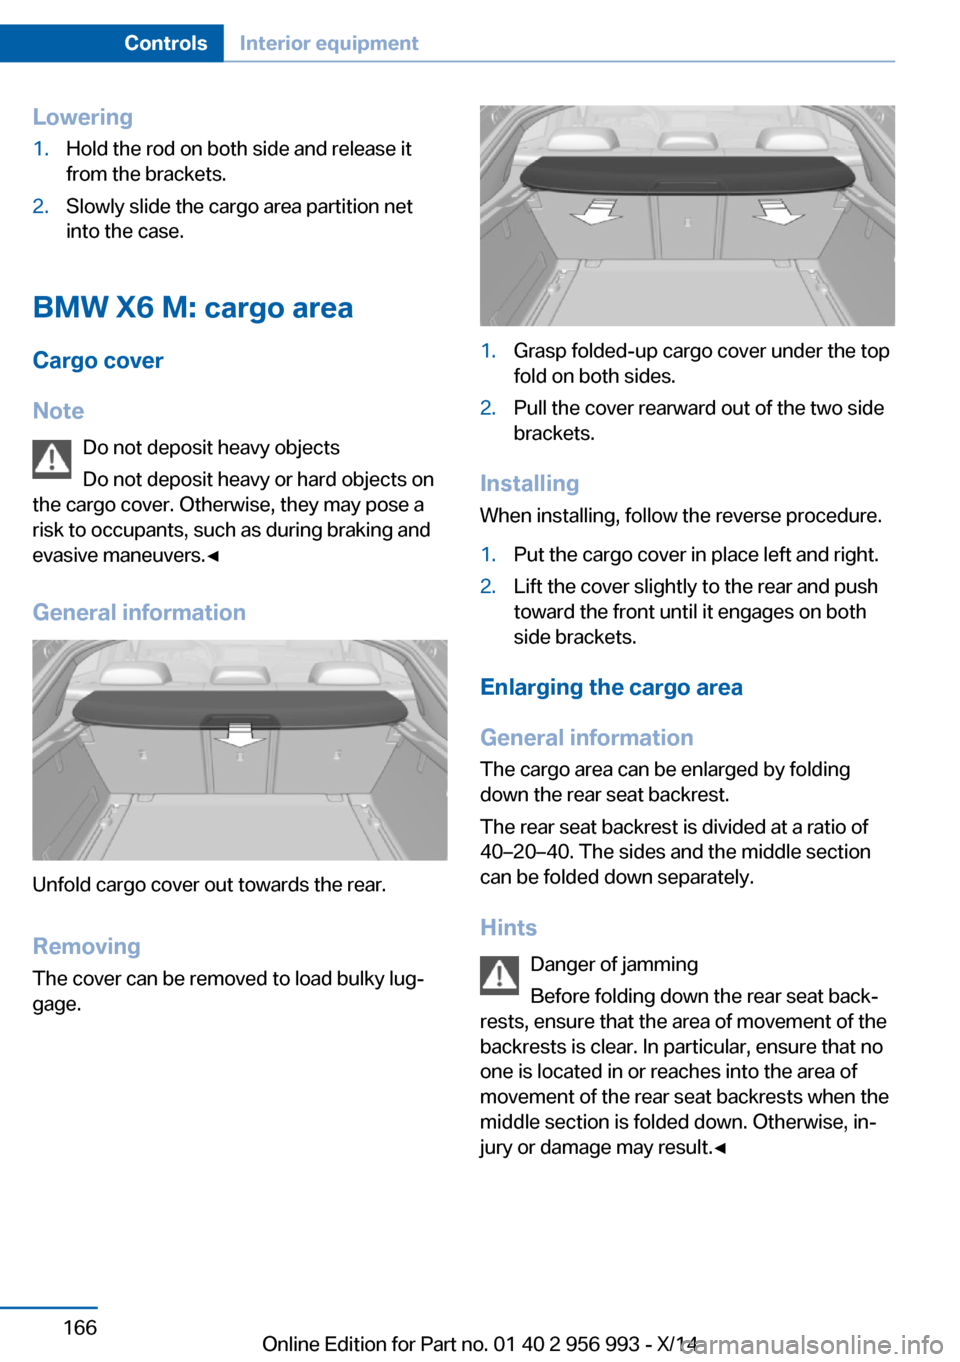
Unfold cargo cover out towards the rear.
RemovingThe cover can be removed to load bulky lug‐
gage.
1.Grasp folded-up cargo cover under the top
fold on both sides.2.Pull the cover rearward out of the two side
brackets.
Installing
When installing, follow the reverse procedure.
1.Put the cargo cover in place left and right.2.Lift the cover slightly to the rear and push
toward the front until it engages on both
side brackets.
Enlarging the cargo area
General information
The cargo area can be enlarged by folding
down the rear seat backrest.
The rear seat backrest is divided at a ratio of
40–20–40. The sides and the middle section
can be folded down separately.
Hints Danger of jamming
Before folding down the rear seat back‐
rests, ensure that the area of movement of the
backrests is clear. In particular, ensure that no
one is located in or reaches into the area of
movement of the rear seat backrests when the
middle section is folded down. Otherwise, in‐
jury or damage may result.◀
Seite 166ControlsInterior equipment166
Online Edition for Part no. 01 40 2 956 993 - X/14
Page 172 of 251
Storage compartmentsVehicle features and optionsThis chapter describes all standard, country-
specific and optional features offered with the
series. It also describes features that are not
necessarily available in your car, e. g., due to
the selected options or country versions. This
also applies to safety-related functions and
systems.
Hints No loose objects in the car's interior
Do not stow any objects in the car's inte‐
rior without securing them; otherwise, they
may present a danger to occupants e.g., during
braking and evasive maneuvers.◀
Do not place anti-slip mats on the dash‐
board
Do not place anti-slip mats on the dashboard.
The mat materials could damage the dash‐
board.◀
Storage compartments The following storage compartments are avail‐
able in the vehicle interior:▷Glove compartment on the front passenger
side, refer to page 168.▷Glove compartment on the driver's side,
refer to page 169.▷Compartments in the doors, refer to
page 169.▷Storage compartment on the center arm‐
rest, refer to page 169.▷Center armrest, refer to page 169.▷Glasses compartment, refer to page 170.Glove compartment
Front passenger side
Note Close the glove compartment again im‐
mediately
Close the glove compartment immediately af‐
ter use while driving; otherwise, injury may oc‐
cur during accidents.◀
Opening
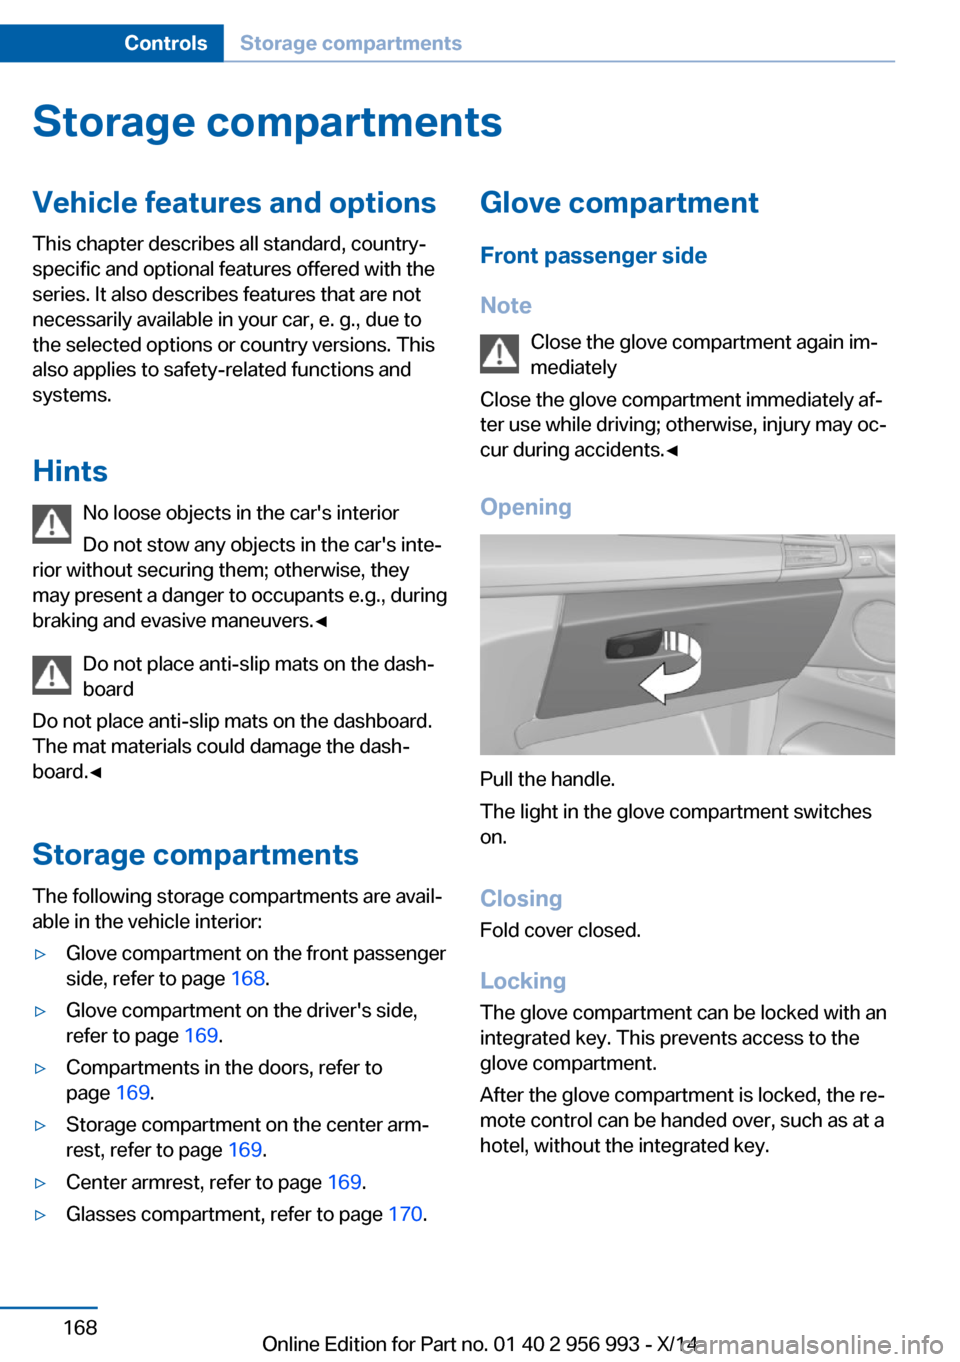
Pull the handle.
The light in the glove compartment switches
on.
ClosingFold cover closed.
Locking
The glove compartment can be locked with an
integrated key. This prevents access to the
glove compartment.
After the glove compartment is locked, the re‐
mote control can be handed over, such as at a
hotel, without the integrated key.
Seite 168ControlsStorage compartments168
Online Edition for Part no. 01 40 2 956 993 - X/14
Page 173 of 251
Driver's side
Note Close the glove compartment again im‐
mediately
Close the glove compartment immediately af‐
ter use while driving; otherwise, injury may oc‐
cur during accidents.◀
Opening
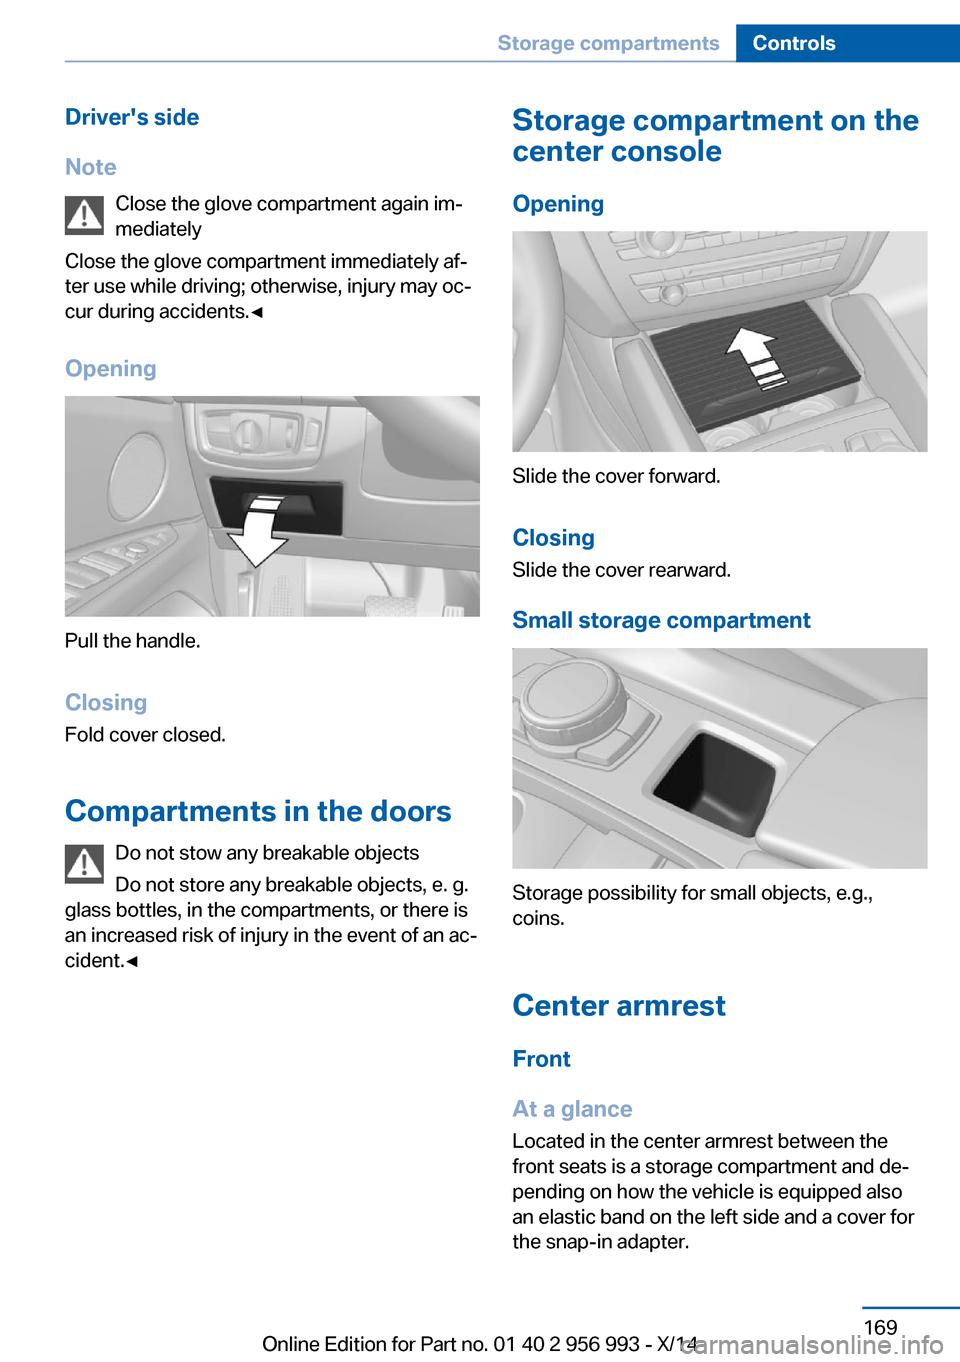
Pull the handle.
ClosingFold cover closed.
Compartments in the doors Do not stow any breakable objects
Do not store any breakable objects, e. g.
glass bottles, in the compartments, or there is
an increased risk of injury in the event of an ac‐
cident.◀
Storage compartment on the
center console
Opening
Slide the cover forward.
Closing Slide the cover rearward.
Small storage compartment
Storage possibility for small objects, e.g.,
coins.
Center armrest Front
At a glance
Located in the center armrest between the
front seats is a storage compartment and de‐ pending on how the vehicle is equipped also
an elastic band on the left side and a cover for
the snap-in adapter.
Seite 169Storage compartmentsControls169
Online Edition for Part no. 01 40 2 956 993 - X/14
Page 185 of 251
LoadingVehicle features and options
This chapter describes all standard, country-
specific and optional features offered with the
series. It also describes features that are not
necessarily available in your car, e. g., due to
the selected options or country versions. This
also applies to safety-related functions and
systems.
Hints Overloading the vehicle
To avoid exceeding the approved ca‐
pacity of the tires, never overload the vehicle.
Overloading can lead to overheating and in‐
creases the rate at which damage develops in‐
side the tires. This could result in a sudden
loss of tire inflation pressure.◀
No fluids in the cargo area
Make sure that fluids do not leak into the
cargo area; otherwise, the vehicle may be dam‐
aged.◀
Heavy and hard objects
Do not stow any heavy and hard objects
in the car's interior without securing them; oth‐
erwise, they may present a danger to occu‐
pants, e.g., during braking and evasive maneu‐
vers.◀
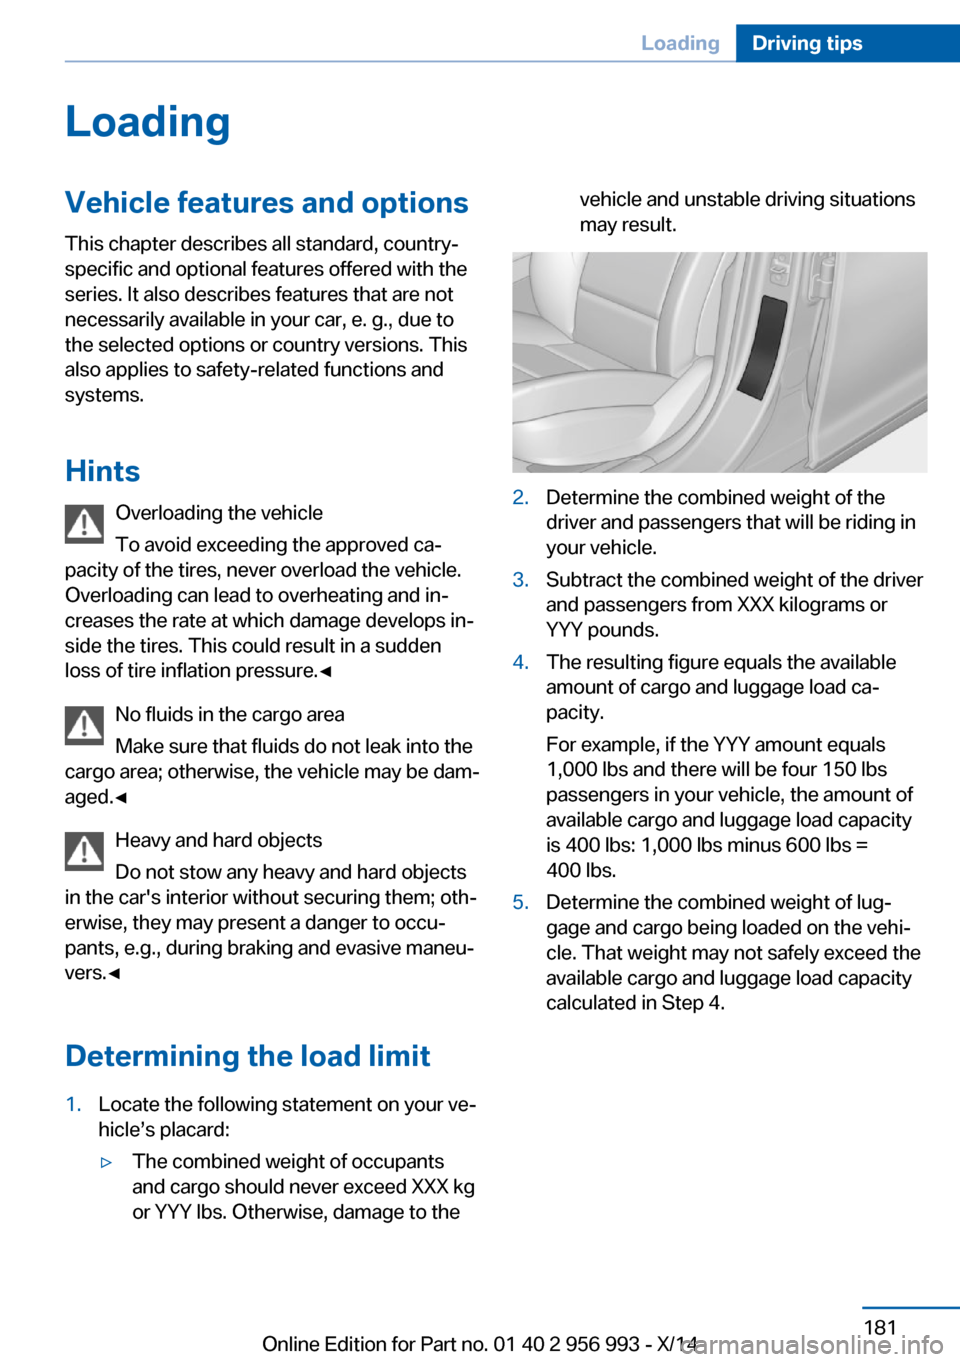
Determining the load limit1.Locate the following statement on your ve‐
hicle’s placard:▷The combined weight of occupants
and cargo should never exceed XXX kg
or YYY lbs. Otherwise, damage to thevehicle and unstable driving situations
may result.2.Determine the combined weight of the
driver and passengers that will be riding in
your vehicle.3.Subtract the combined weight of the driver
and passengers from XXX kilograms or
YYY pounds.4.The resulting figure equals the available
amount of cargo and luggage load ca‐
pacity.
For example, if the YYY amount equals
1,000 lbs and there will be four 150 lbs
passengers in your vehicle, the amount of
available cargo and luggage load capacity
is 400 lbs: 1,000 lbs minus 600 lbs =
400 lbs.5.Determine the combined weight of lug‐
gage and cargo being loaded on the vehi‐
cle. That weight may not safely exceed the
available cargo and luggage load capacity
calculated in Step 4.Seite 181LoadingDriving tips181
Online Edition for Part no. 01 40 2 956 993 - X/14
Page 186 of 251
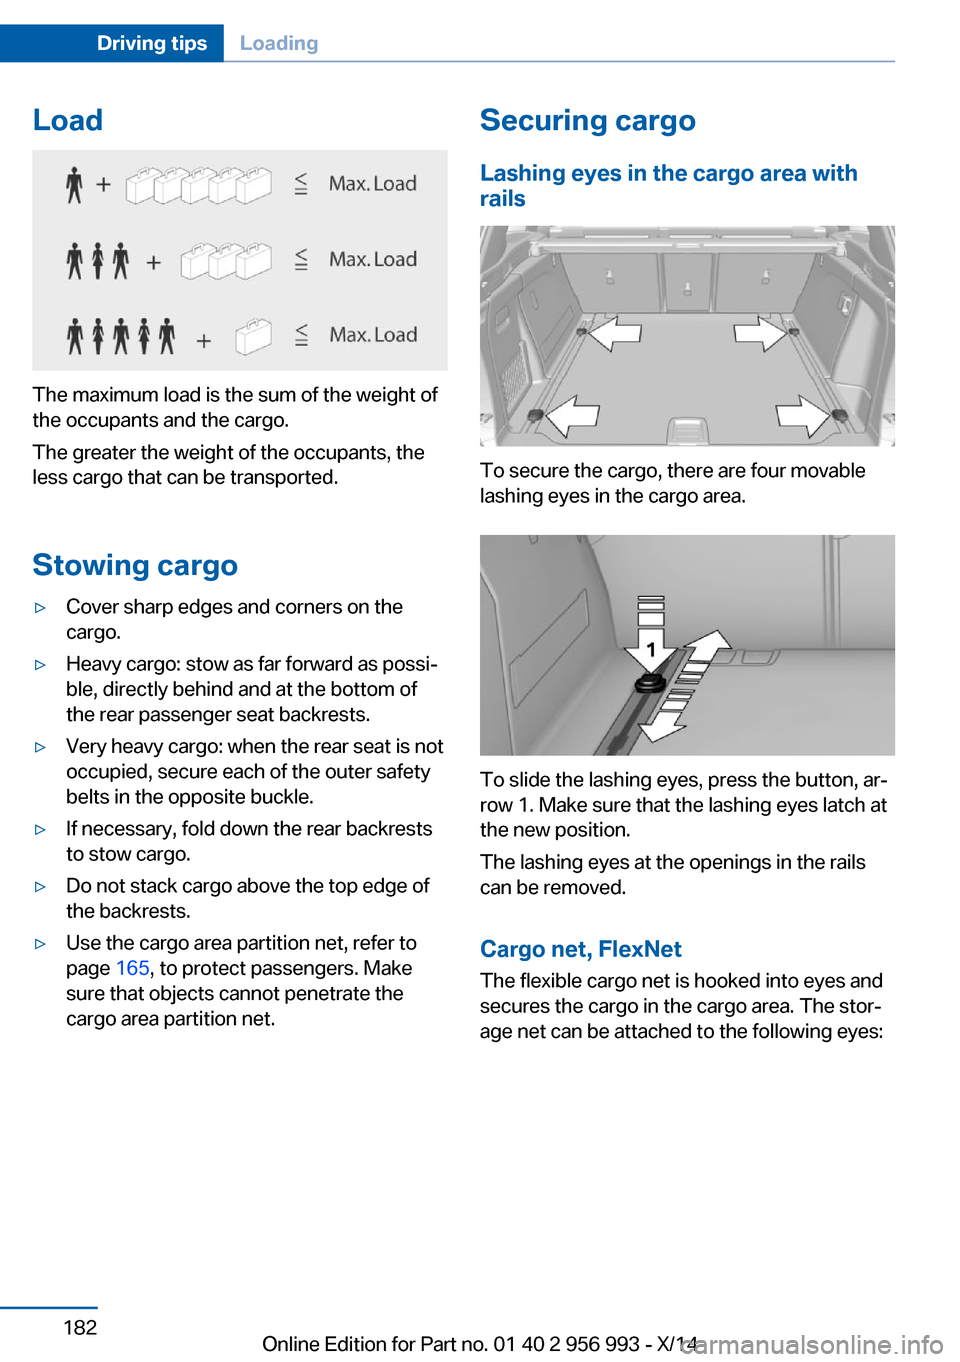
Load
The maximum load is the sum of the weight of
the occupants and the cargo.
The greater the weight of the occupants, the
less cargo that can be transported.
Stowing cargo
▷Cover sharp edges and corners on the
cargo.▷Heavy cargo: stow as far forward as possi‐
ble, directly behind and at the bottom of
the rear passenger seat backrests.▷Very heavy cargo: when the rear seat is not
occupied, secure each of the outer safety
belts in the opposite buckle.▷If necessary, fold down the rear backrests
to stow cargo.▷Do not stack cargo above the top edge of
the backrests.▷Use the cargo area partition net, refer to
page 165, to protect passengers. Make
sure that objects cannot penetrate the
cargo area partition net.Securing cargo
Lashing eyes in the cargo area with
rails
To secure the cargo, there are four movable
lashing eyes in the cargo area.
To slide the lashing eyes, press the button, ar‐
row 1. Make sure that the lashing eyes latch at
the new position.
The lashing eyes at the openings in the rails
can be removed.
Cargo net, FlexNet The flexible cargo net is hooked into eyes and
secures the cargo in the cargo area. The stor‐
age net can be attached to the following eyes:
Seite 182Driving tipsLoading182
Online Edition for Part no. 01 40 2 956 993 - X/14
Page 187 of 251
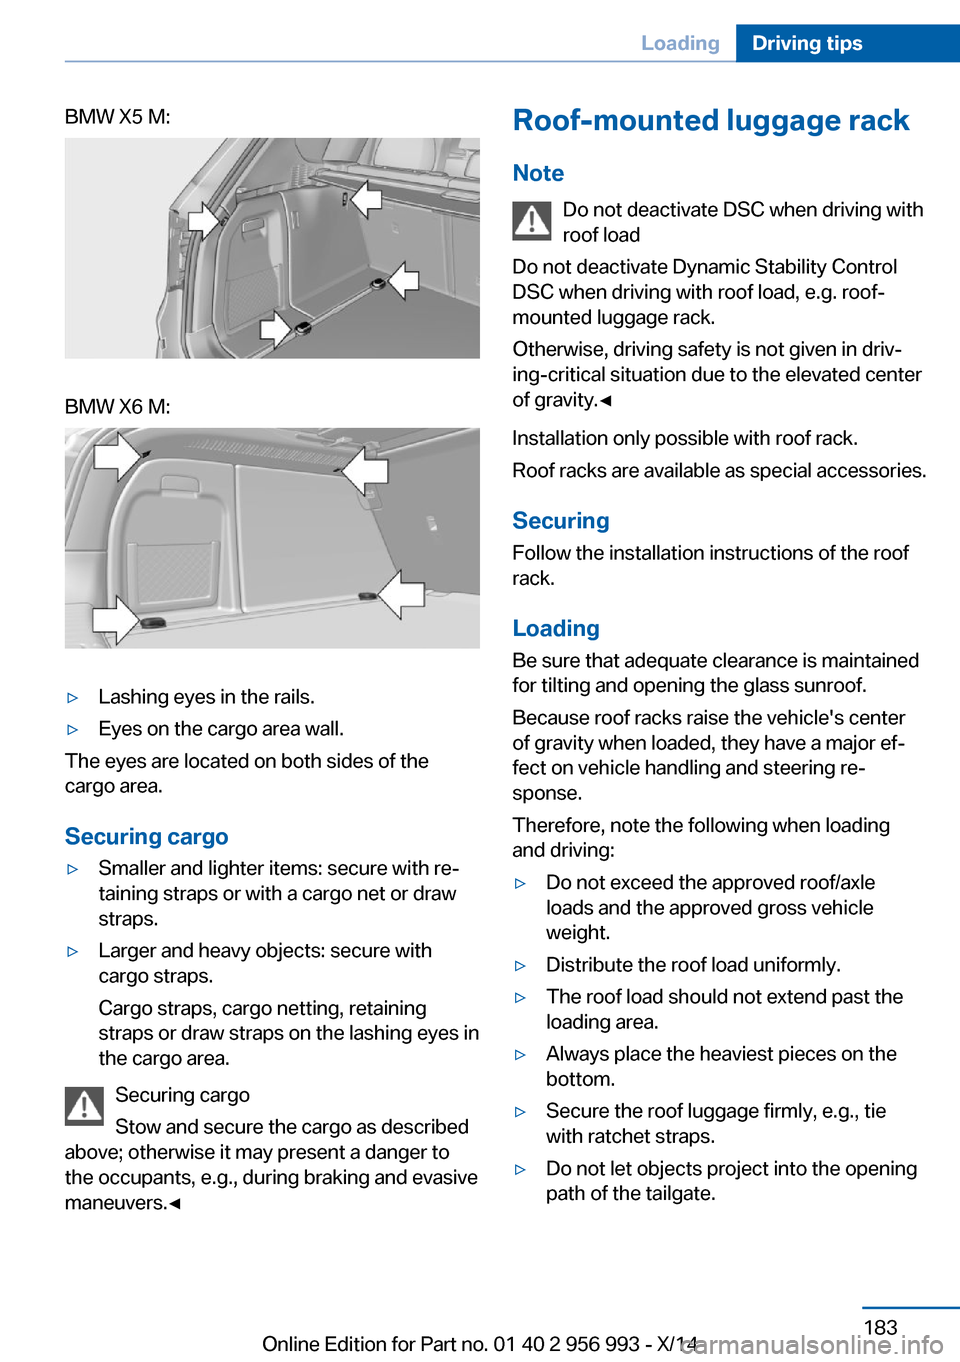
BMW X5 M:BMW X6 M:▷Lashing eyes in the rails.▷Eyes on the cargo area wall.
The eyes are located on both sides of the
cargo area.
Securing cargo
▷Smaller and lighter items: secure with re‐
taining straps or with a cargo net or draw
straps.▷Larger and heavy objects: secure with
cargo straps.
Cargo straps, cargo netting, retaining
straps or draw straps on the lashing eyes in
the cargo area.
Securing cargo
Stow and secure the cargo as described
above; otherwise it may present a danger to
the occupants, e.g., during braking and evasive
maneuvers.◀
Roof-mounted luggage rack
Note Do not deactivate DSC when driving with
roof load
Do not deactivate Dynamic Stability Control
DSC when driving with roof load, e.g. roof-
mounted luggage rack.
Otherwise, driving safety is not given in driv‐
ing-critical situation due to the elevated center
of gravity.◀
Installation only possible with roof rack.
Roof racks are available as special accessories.
Securing Follow the installation instructions of the roof
rack.
Loading
Be sure that adequate clearance is maintained
for tilting and opening the glass sunroof.
Because roof racks raise the vehicle's center
of gravity when loaded, they have a major ef‐
fect on vehicle handling and steering re‐
sponse.
Therefore, note the following when loading
and driving:▷Do not exceed the approved roof/axle
loads and the approved gross vehicle
weight.▷Distribute the roof load uniformly.▷The roof load should not extend past the
loading area.▷Always place the heaviest pieces on the
bottom.▷Secure the roof luggage firmly, e.g., tie
with ratchet straps.▷Do not let objects project into the opening
path of the tailgate.Seite 183LoadingDriving tips183
Online Edition for Part no. 01 40 2 956 993 - X/14
Page 202 of 251
in combination, can cause heat buildup and
possible tire failure.
If necessary, have the vehicle towed.◀
M+S
Winter and all-season tires with better cold weather performance than summer tires.
Tire tread Summer tires Do not drive with a tire tread depth of less than
0.12 in/3 mm.
There is an increased danger of hydroplaning if
the tire tread depth is less than 0.12 in/3 mm.
Winter tires
Do not drive with a tire tread depth of less than
0.16 in/4 mm.
Below a tread depth of 0.16 in/4 mm, tires are
less suitable for winter operation.
Minimum tread depth
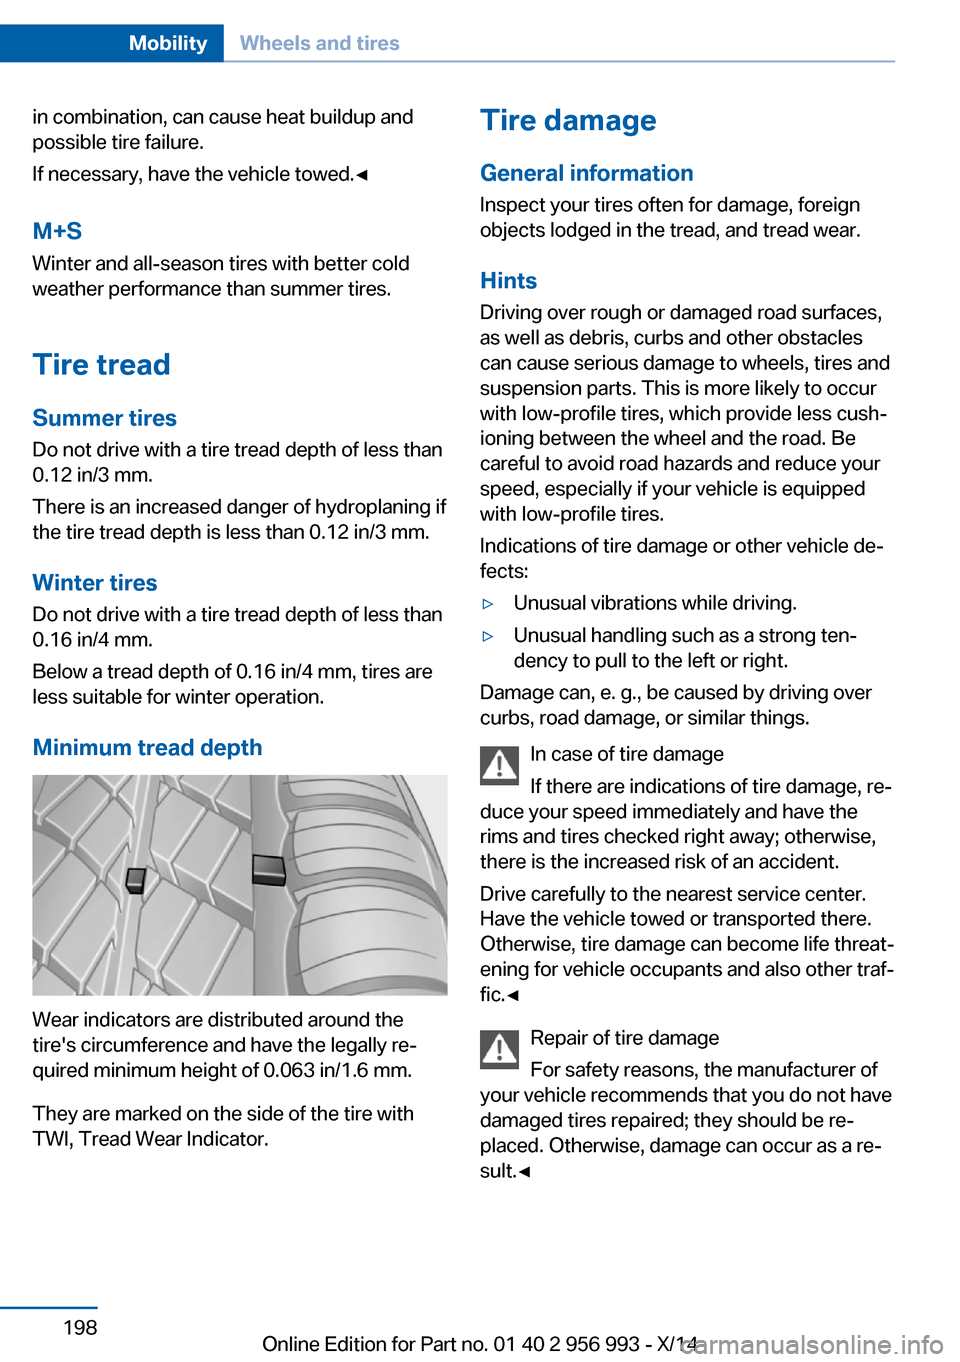
Wear indicators are distributed around the
tire's circumference and have the legally re‐
quired minimum height of 0.063 in/1.6 mm.
They are marked on the side of the tire with
TWI, Tread Wear Indicator.
Tire damage
General information Inspect your tires often for damage, foreign
objects lodged in the tread, and tread wear.
Hints Driving over rough or damaged road surfaces,
as well as debris, curbs and other obstacles
can cause serious damage to wheels, tires and
suspension parts. This is more likely to occur
with low-profile tires, which provide less cush‐
ioning between the wheel and the road. Be
careful to avoid road hazards and reduce your
speed, especially if your vehicle is equipped
with low-profile tires.
Indications of tire damage or other vehicle de‐
fects:▷Unusual vibrations while driving.▷Unusual handling such as a strong ten‐
dency to pull to the left or right.
Damage can, e. g., be caused by driving over
curbs, road damage, or similar things.
In case of tire damage
If there are indications of tire damage, re‐
duce your speed immediately and have the
rims and tires checked right away; otherwise,
there is the increased risk of an accident.
Drive carefully to the nearest service center.
Have the vehicle towed or transported there.
Otherwise, tire damage can become life threat‐
ening for vehicle occupants and also other traf‐
fic.◀
Repair of tire damage
For safety reasons, the manufacturer of
your vehicle recommends that you do not have
damaged tires repaired; they should be re‐
placed. Otherwise, damage can occur as a re‐
sult.◀
Seite 198MobilityWheels and tires198
Online Edition for Part no. 01 40 2 956 993 - X/14
Page 206 of 251
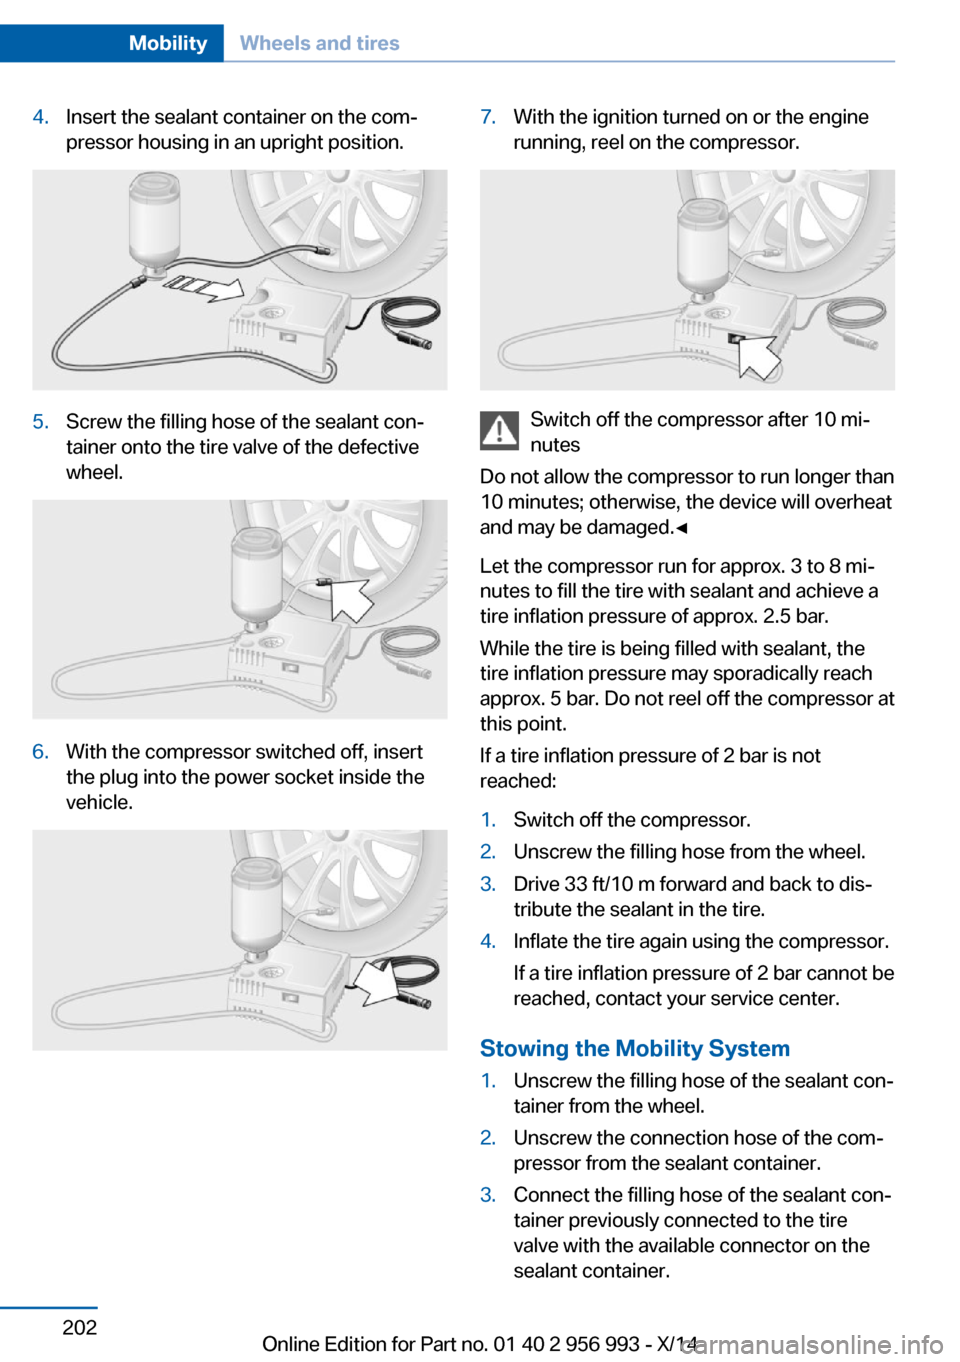
4.Insert the sealant container on the com‐
pressor housing in an upright position.5.Screw the filling hose of the sealant con‐
tainer onto the tire valve of the defective
wheel.6.With the compressor switched off, insert
the plug into the power socket inside the
vehicle.7.With the ignition turned on or the engine
running, reel on the compressor.
Switch off the compressor after 10 mi‐
nutes
Do not allow the compressor to run longer than
10 minutes; otherwise, the device will overheat
and may be damaged.◀
Let the compressor run for approx. 3 to 8 mi‐
nutes to fill the tire with sealant and achieve a
tire inflation pressure of approx. 2.5 bar.
While the tire is being filled with sealant, the
tire inflation pressure may sporadically reach
approx. 5 bar. Do not reel off the compressor at
this point.
If a tire inflation pressure of 2 bar is not
reached:
1.Switch off the compressor.2.Unscrew the filling hose from the wheel.3.Drive 33 ft/10 m forward and back to dis‐
tribute the sealant in the tire.4.Inflate the tire again using the compressor.
If a tire inflation pressure of 2 bar cannot be
reached, contact your service center.
Stowing the Mobility System
1.Unscrew the filling hose of the sealant con‐
tainer from the wheel.2.Unscrew the connection hose of the com‐
pressor from the sealant container.3.Connect the filling hose of the sealant con‐
tainer previously connected to the tire
valve with the available connector on the
sealant container.Seite 202MobilityWheels and tires202
Online Edition for Part no. 01 40 2 956 993 - X/14
Page 207 of 251
This prevents leftover sealant from escap‐
ing from the container.4.Wrap the empty sealant container in suita‐
ble material to avoid dirtying the cargo
area.5.Stow the Mobility System back in the vehi‐
cle.
Distributing the sealant
Immediately drive approx. 5 miles/10 km to en‐
sure that the sealant is evenly distributed in the
tire.
Do not exceed a speed of 50 mph/80 km/h.
If possible, do not drive at speeds less than
12 mph/20 km/h.
To correct the tire inflation pressure
1.Stop at a suitable location.2.Screw the connection hose of the com‐
pressor directly onto the tire valve stem.3.Insert the connector into the power socket
inside the vehicle.4.Correct the tire inflation pressure to
2.5 bar.▷Increase pressure: with the ignition
turned on or the engine running, reel
on the compressor.▷To reduce the pressure: press the but‐
ton on the compressor.
Continuing the trip
Do not exceed the maximum permissible
speed of 50 mph/80 km/h.
Reinitialize the Flat Tire Monitor.
Reinitialize the Tire Pressure Monitor.
Replace the defective tire and the sealant con‐
tainer of the Mobility System as soon as possi‐
ble.
Snow chains
Fine-link snow chains Only certain types of fine-link snow chains
have been tested by the manufacturer of the
vehicle, classified as road-safe and approved.
Information about the approved snow chains
are available from the service center.
Use Use only in pairs on the rear wheels, equipped
with the tires of the following size:▷285/40 R 20
Follow the snow chain manufacturer's instruc‐
tions.
Make sure that the snow chains are always
sufficiently tight. Retighten as needed accord‐
ing to the chain manufacturer's instructions.
Do not initialize the Flat Tire Monitor after
mounting snow chains, as doing so may result
in incorrect readings.
Do not initialize the Tire Pressure Monitor after
mounting snow chains, as doing so may result
in incorrect readings.
When driving with snow chains, if needed
briefly activate M Dynamic Mode.
Maximum speed with snow chains
Do not exceed a speed of 30 mph/50 km/h
when using snow chains.
Seite 203Wheels and tiresMobility203
Online Edition for Part no. 01 40 2 956 993 - X/14
Page 222 of 251
Check for secure seating of the lug
bolts
For safety reasons, have the secure seat‐
ing of the lug bolts checked with a cali‐
brated torque wrench; otherwise, a safety
hazard results from incorrectly tightened
lug bolts.◀2.Stow the defective wheel in the cargo area.
The defective wheel cannot be stored un‐
der the cargo floor panel because of its
size.3.Check tire inflation pressure at the next op‐
portunity and correct as needed.4.Reinitialize the Flat Tire Monitor.
Reset the Tire Pressure Monitor.5.Replace the damaged tires as soon as pos‐
sible.
Driving with emergency wheel
Watch the speed when driving with the
emergency wheel
Drive conservatively and do not exceed a
speed of 50 mph/80 km/h; otherwise, changed
driving characteristics such as reduced lane
stability while braking, extended braking dis‐
tance and changed self-steering properties in
the limit area.◀
Mount one emergency wheel only
Only a single emergency wheel may be
mounted. Reinstall wheels and tires of the
original size as quickly as possible; otherwise,
there is a safety risk.◀
Vehicle battery Maintenance
The battery is maintenance-free.
The added amount of acid is sufficient for the service life of the battery.
Further information about the battery can be
obtained from your service center.
Battery replacement Use approved vehicle batteries only
Only use vehicle batteries that have been
approved for your vehicle by the manufacturer;
otherwise, the vehicle could be damaged and
systems or functions may not be fully availa‐
ble.◀
After a battery replacement, have the battery
registered on the vehicle by your service cen‐
ter to ensure that all comfort features are fully
available and that any Check Control mes‐
sages of these comfort features are no longer
displayed.
Charging the battery
Note Do not connect charging devices to the
12 volt socket in the vehicle
Do not connect battery chargers to the fac‐
tory-installed 12 volt sockets in the vehicle as
this may damage the vehicle battery due to an
increased power consumption.◀
General information
Make sure that the battery is always suffi‐
ciently charged to guarantee that the battery
remains usable for its full service life.
The battery may need to be charged in the fol‐
lowing cases:▷When making frequent short-distance
drives.▷If the vehicle is not used for prolonged pe‐
riods, longer than a month.
Starting aid terminals
In the vehicle, only charge the battery via the
starting aid terminals, refer to page 222, in the
engine compartment with the engine off.
Seite 218MobilityReplacing components218
Online Edition for Part no. 01 40 2 956 993 - X/14