park assist BMW X6 2008 Owners Manual
[x] Cancel search | Manufacturer: BMW, Model Year: 2008, Model line: X6, Model: BMW X6 2008Pages: 288, PDF Size: 8.08 MB
Page 19 of 288
At a glance
17Reference
Controls
Driving tips
Communications
Navigation
Entertainment
Mobility
Menu overview
Communication
>Telephone*
>BMW Assist* or TeleService*
Navigation or onboard information
>Navigation system*
>Onboard information, e.g. for displaying
the average fuel consumption
Entertainment
>Radio
>CD player and CD changer
*
>External audio device
Climate
>Vent settings
>Seat heater distribution
*
>Automatic programs
>Parked car ventilation
*
menu
>Switching off Control Display
>Tone and display settings
>Settings for traffic information
*
>Settings for your vehicle, e.g. for the central
locking system
>Display of maintenance intervals and dead-
lines for legally mandated inspections
>Settings for telephone
*
Operating principle
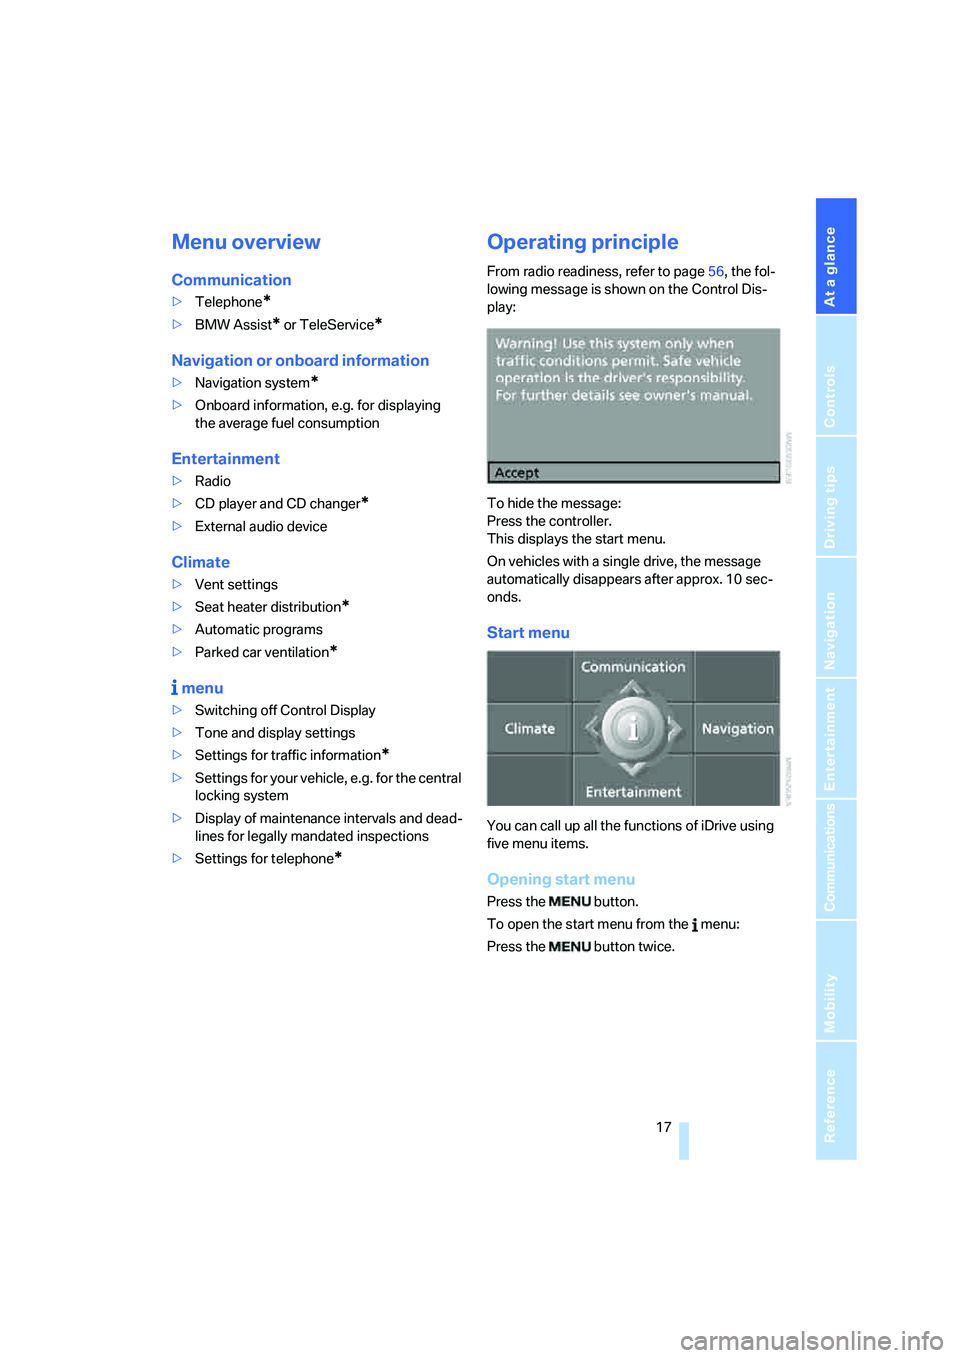
From radio readiness, refer to page56, the fol-
lowing message is shown on the Control Dis-
play:
To hide the message:
Press the controller.
This displays the start menu.
On vehicles with a single drive, the message
automatically disappears after approx. 10 sec-
onds.
Start menu
You can call up all the functions of iDrive using
five menu items.
Opening start menu
Press the button.
To open the start menu from the menu:
Press the button twice.
Page 60 of 288
Driving
58 With the engine stopped, the parking brake acts
on the rear wheels via an electromechanical
system. When the engine is running, the park-
ing brake acts on the disk brakes of the front
and rear wheels via the brake hydraulics.
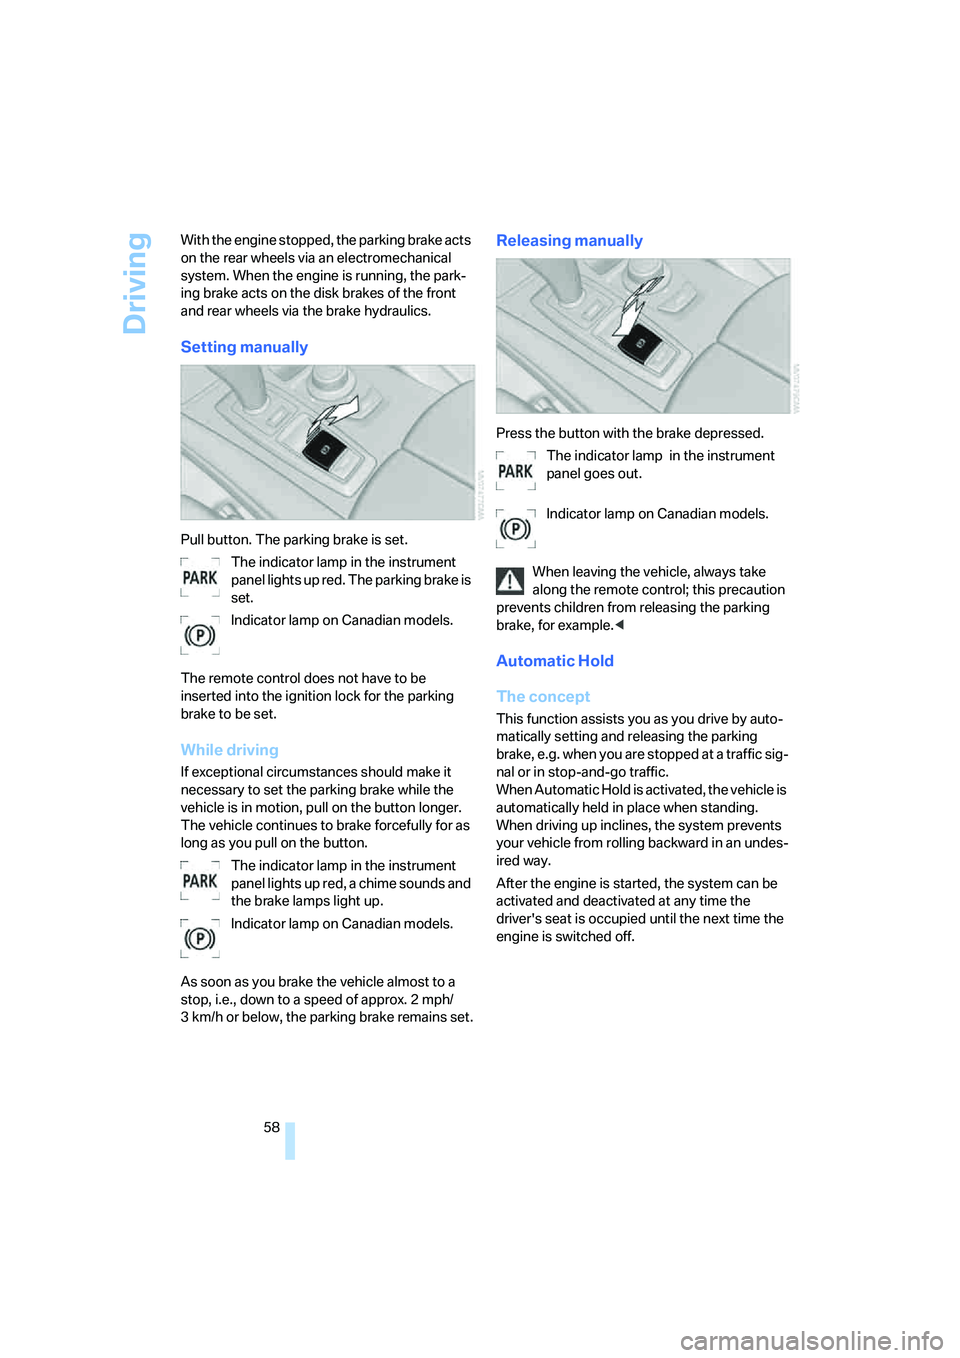
Setting manually
Pull button. The parking brake is set.
The indicator lamp in the instrument
panel lights up red. The parking brake is
set.
Indicator lamp on Canadian models.
The remote control does not have to be
inserted into the ignition lock for the parking
brake to be set.
While driving
If exceptional circumstances should make it
necessary to set the parking brake while the
vehicle is in motion, pull on the button longer.
The vehicle continues to brake forcefully for as
long as you pull on the button.
The indicator lamp in the instrument
panel lights up red, a chime sounds and
the brake lamps light up.
Indicator lamp on Canadian models.
As soon as you brake the vehicle almost to a
stop, i.e., down to a speed of approx. 2 mph/
3 km/h or below, the parking brake remains set.
Releasing manually
Press the button with the brake depressed.
The indicator lamp in the instrument
panel goes out.
Indicator lamp on Canadian models.
When leaving the vehicle, always take
along the remote control; this precaution
prevents children from releasing the parking
brake, for example.<
Automatic Hold
The concept
This function assists you as you drive by auto-
matically setting and releasing the parking
brake, e.g. when you are stopped at a traffic sig-
nal or in stop-and-go traffic.
When Automatic Hold is activated, the vehicle is
automatically held in place when standing.
When driving up inclines, the system prevents
your vehicle from rolling backward in an undes-
ired way.
After the engine is started, the system can be
activated and deactivated at any time the
driver's seat is occupied until the next time the
engine is switched off.
Page 83 of 288
Controls
81Reference
At a glance
Driving tips
Communications
Navigation
Entertainment
Mobility
Technology for comfort, convenience and
safety
PDC Park Distance Control*
The concept
The PDC assists you when you are parking.
Acoustic signals and an optical display
* alert
you to the approach of an object from behind
your vehicle. To measure the distance, there
are four ultrasonic sensors in each bumper.
The range of these sensors is approx. 7 ft/2 m.
However, an acoustic warning first sounds for
the sensors at the front and at the two rear cor-
ners at approx. 24 in/60 cm, and for the center
rear sensors at approx. 5 ft/1.50 m.
PDC is a parking aid that can indicate
objects when they are approached
slowly, as is usually the case when parking.
Avoid approaching an object at high speed, oth-
erwise the physical circumstances would mean
that the system warning was too late.<
Automatic activation
Whenever the engine is running or the ignition
is on, each time you move the selector lever into
position R, the PDC system is activated after
approx. 1 second.
Wait this short period before driving off.
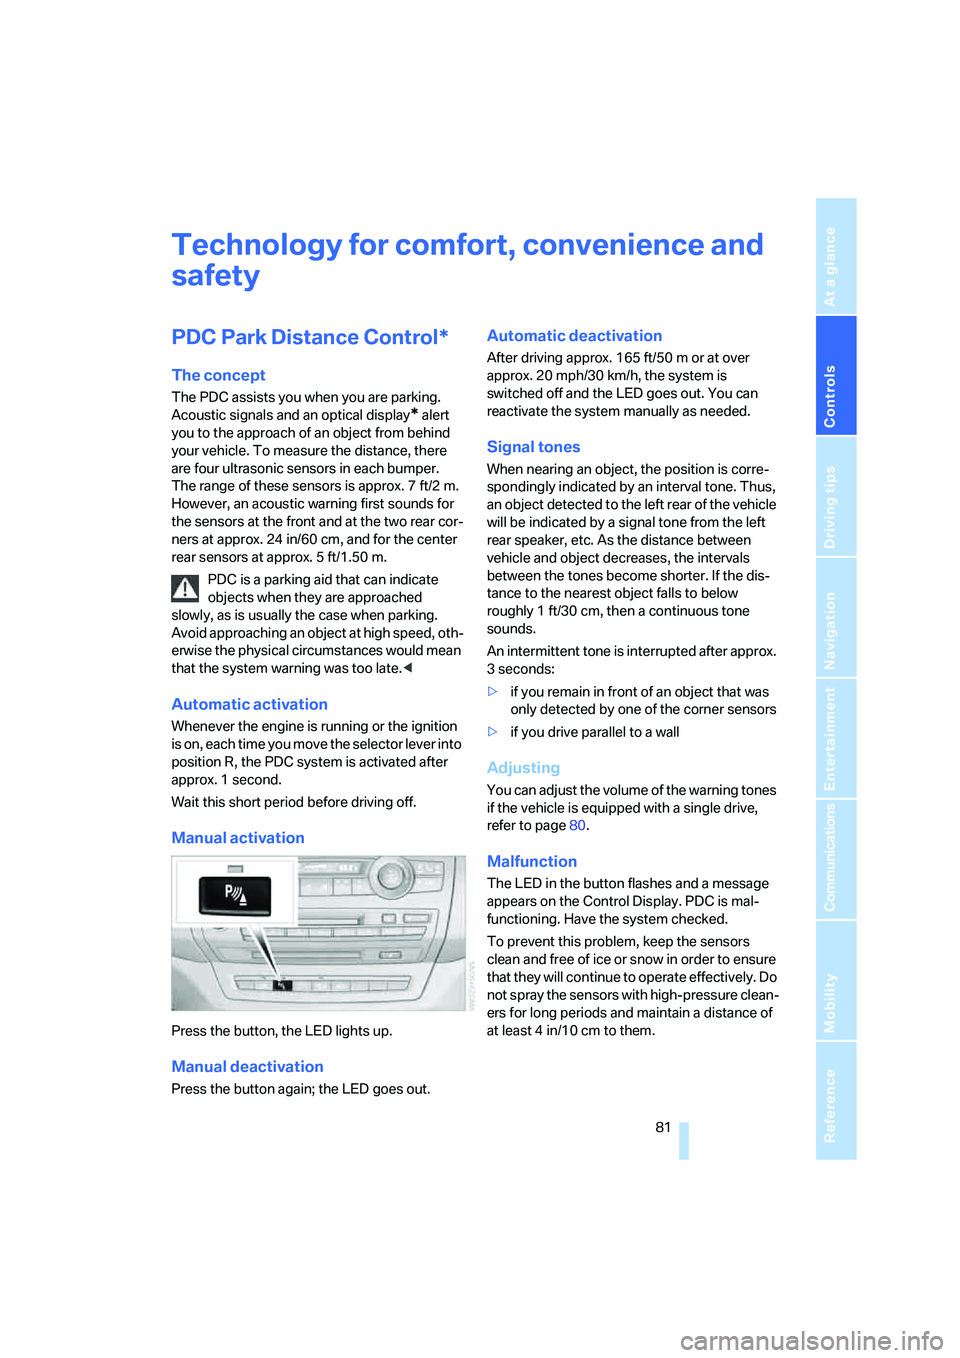
Manual activation
Press the button, the LED lights up.
Manual deactivation
Press the button again; the LED goes out.
Automatic deactivation
After driving approx. 165 ft/50 m or at over
approx. 20 mph/30 km/h, the system is
switched off and the LED goes out. You can
reactivate the system manually as needed.
Signal tones
When nearing an object, the position is corre-
spondingly indicated by an interval tone. Thus,
an object detected to the left rear of the vehicle
will be indicated by a signal tone from the left
rear speaker, etc. As the distance between
vehicle and object decreases, the intervals
between the tones become shorter. If the dis-
tance to the nearest object falls to below
roughly 1 ft/30 cm, then a continuous tone
sounds.
An intermittent tone is interrupted after approx.
3seconds:
>if you remain in front of an object that was
only detected by one of the corner sensors
>if you drive parallel to a wall
Adjusting
You can adjust the volume of the warning tones
if the vehicle is equipped with a single drive,
refer to page80.
Malfunction
The LED in the button flashes and a message
appears on the Control Display. PDC is mal-
functioning. Have the system checked.
To prevent this problem, keep the sensors
clean and free of ice or snow in order to ensure
that they will continue to operate effectively. Do
not spray the sensors with high-pressure clean-
ers for long periods and maintain a distance of
at least 4 in/10 cm to them.
Page 85 of 288
Controls
83Reference
At a glance
Driving tips
Communications
Navigation
Entertainment
Mobility
Rear view camera*
The concept
The rear view camera in the liftgate displays the
area behind your vehicle on the Control Display.
Also check the traffic situation around the
vehicle during parking and maneuvering
with direct vision, as otherwise danger of an
accident could result, for example, from road
users or objects located outside the picture
area of the rear view camera.<
Switching on
Automatically
With the engine running, shift into reverse.
If the image of the Park Distance Control
PDC appears in the Control Display, you
can switch the image to the rear view camera,
refer to Displays on page85.<
Manually
Press the button.
PDC is activated at the same time, refer to
page81.
If the image of the Park Distance Control
PDC appears in the Control Display, you
can switch the image to the rear view camera,
refer to Displays on page85.<
Switching off
Automatically
When driving forward at over approx. 12 mph/
20 km/h or after driving approx. 164 ft/50 m.
Manually
Press the button again; the LED goes out.
Driver assistance functions
The following functions can improve the effect
of the rear view camera depending on the situa-
tion.
They can only be activated when the liftgate is
completely closed.
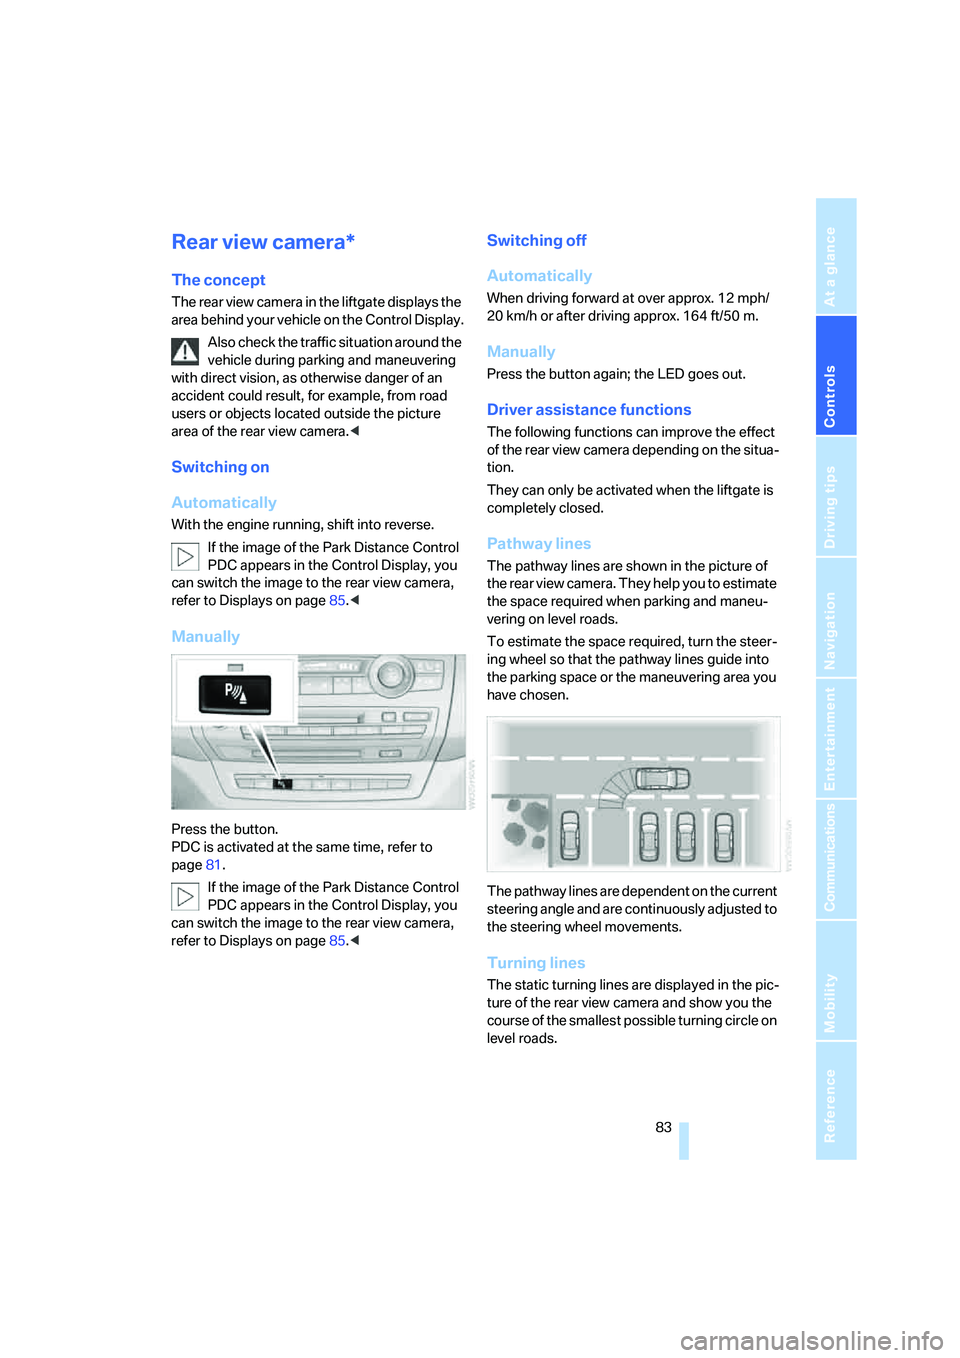
Pathway lines
The pathway lines are shown in the picture of
the rear view camera. They help you to estimate
the space required when parking and maneu-
vering on level roads.
To estimate the space required, turn the steer-
ing wheel so that the pathway lines guide into
the parking space or the maneuvering area you
have chosen.
The pathway lines are dependent on the current
steering angle and are continuously adjusted to
the steering wheel movements.
Turning lines
The static turning lines are displayed in the pic-
ture of the rear view camera and show you the
course of the smallest possible turning circle on
level roads.
Page 86 of 288
Technology for comfort, convenience and safety
84
Using pathway and turning lines
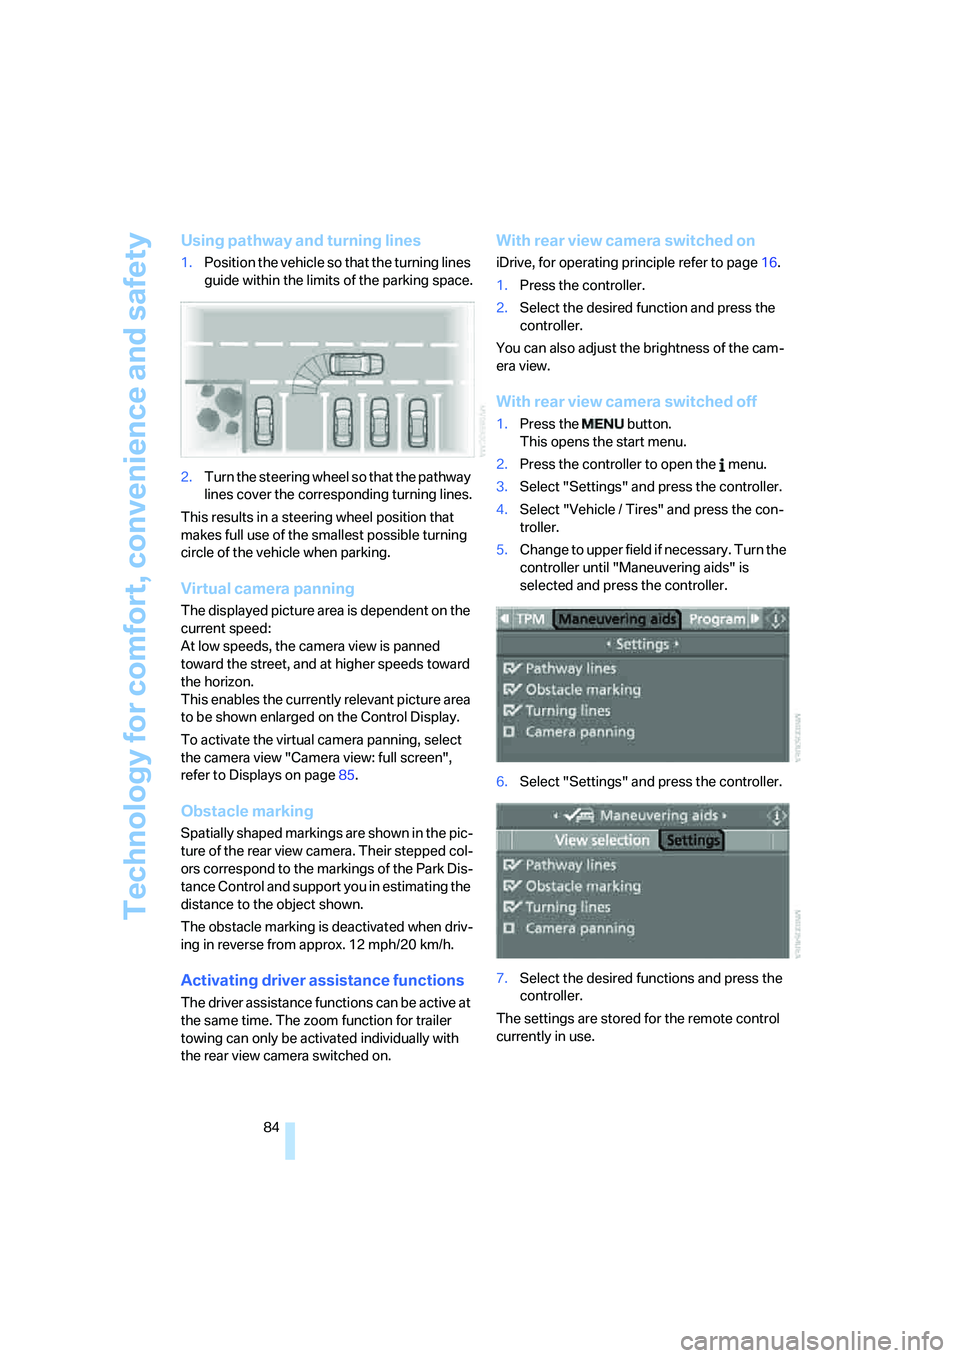
1.Position the vehicle so that the turning lines
guide within the limits of the parking space.
2.Turn the steering wheel so that the pathway
lines cover the corresponding turning lines.
This results in a steering wheel position that
makes full use of the smallest possible turning
circle of the vehicle when parking.
Virtual camera panning
The displayed picture area is dependent on the
current speed:
At low speeds, the camera view is panned
toward the street, and at higher speeds toward
the horizon.
This enables the currently relevant picture area
to be shown enlarged on the Control Display.
To activate the virtual camera panning, select
the camera view "Camera view: full screen",
refer to Displays on page85.
Obstacle marking
Spatially shaped markings are shown in the pic-
ture of the rear view camera. Their stepped col-
ors correspond to the markings of the Park Dis-
tance Control and support you in estimating the
distance to the object shown.
The obstacle marking is deactivated when driv-
ing in reverse from approx. 12 mph/20 km/h.
Activating driver assistance functions
The driver assistance functions can be active at
the same time. The zoom function for trailer
towing can only be activated individually with
the rear view camera switched on.
With rear view camera switched on
iDrive, for operating principle refer to page16.
1.Press the controller.
2.Select the desired function and press the
controller.
You can also adjust the brightness of the cam-
era view.
With rear view camera switched off
1.Press the button.
This opens the start menu.
2.Press the controller to open the menu.
3.Select "Settings" and press the controller.
4.Select "Vehicle / Tires" and press the con-
troller.
5.Change to upper field if necessary. Turn the
controller until "Maneuvering aids" is
selected and press the controller.
6.Select "Settings" and press the controller.
7.Select the desired functions and press the
controller.
The settings are stored for the remote control
currently in use.
Page 87 of 288
Controls
85Reference
At a glance
Driving tips
Communications
Navigation
Entertainment
Mobility
Displays
You can have the picture from the rear view
camera displayed in several formats and in
combination with the PDC Park Distance Con-
trol, refer to page82.
In addition, you also have the option of display-
ing only the PDC Park Distance Control.
>"Camera picture and PDC"
The rear view camera picture is shown in
the main window of the Control Display.
>"Camera view: full screen"
The picture of the rear view camera is
shown on the entire Control Display.
>"Camera view: main window"
The picture of the rear view camera is
shown in the main window of the Control
Display.
>"PDC in main window only"
PDC is shown in the main window of the
Control Display.
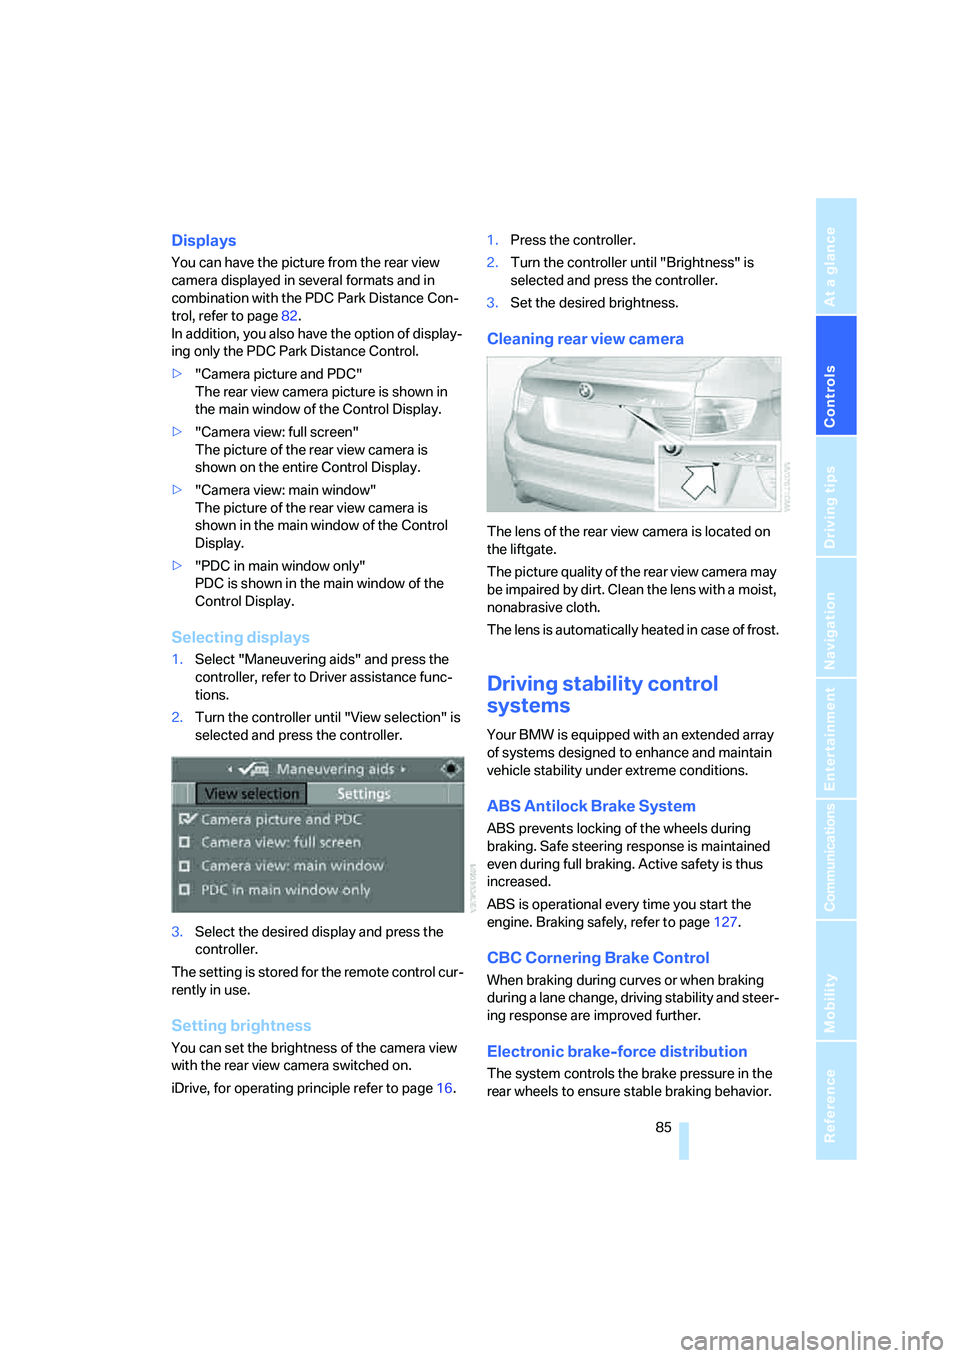
Selecting displays
1.Select "Maneuvering aids" and press the
controller, refer to Driver assistance func-
tions.
2.Turn the controller until "View selection" is
selected and press the controller.
3.Select the desired display and press the
controller.
The setting is stored for the remote control cur-
rently in use.
Setting brightness
You can set the brightness of the camera view
with the rear view camera switched on.
iDrive, for operating principle refer to page16.1.Press the controller.
2.Turn the controller until "Brightness" is
selected and press the controller.
3.Set the desired brightness.
Cleaning rear view camera
The lens of the rear view camera is located on
the liftgate.
The picture quality of the rear view camera may
be impaired by dirt. Clean the lens with a moist,
nonabrasive cloth.
The lens is automatically heated in case of frost.
Driving stability control
systems
Your BMW is equipped with an extended array
of systems designed to enhance and maintain
vehicle stability under extreme conditions.
ABS Antilock Brake System
ABS prevents locking of the wheels during
braking. Safe steering response is maintained
even during full braking. Active safety is thus
increased.
ABS is operational every time you start the
engine. Braking safely, refer to page127.
CBC Cornering Brake Control
When braking during curves or when braking
during a lane change, driving stability and steer-
ing response are improved further.
Electronic brake-force distribution
The system controls the brake pressure in the
rear wheels to ensure stable braking behavior.
Page 91 of 288
Controls
89Reference
At a glance
Driving tips
Communications
Navigation
Entertainment
Mobility
Chassis and suspension tuning
You can choose between two types of chassis
and suspension tuning.
>Normal:
The comfortable basic setting offers opti-
mum comfort when traveling.
>Sport:
The sporty basic setting offers increased
driving agility.
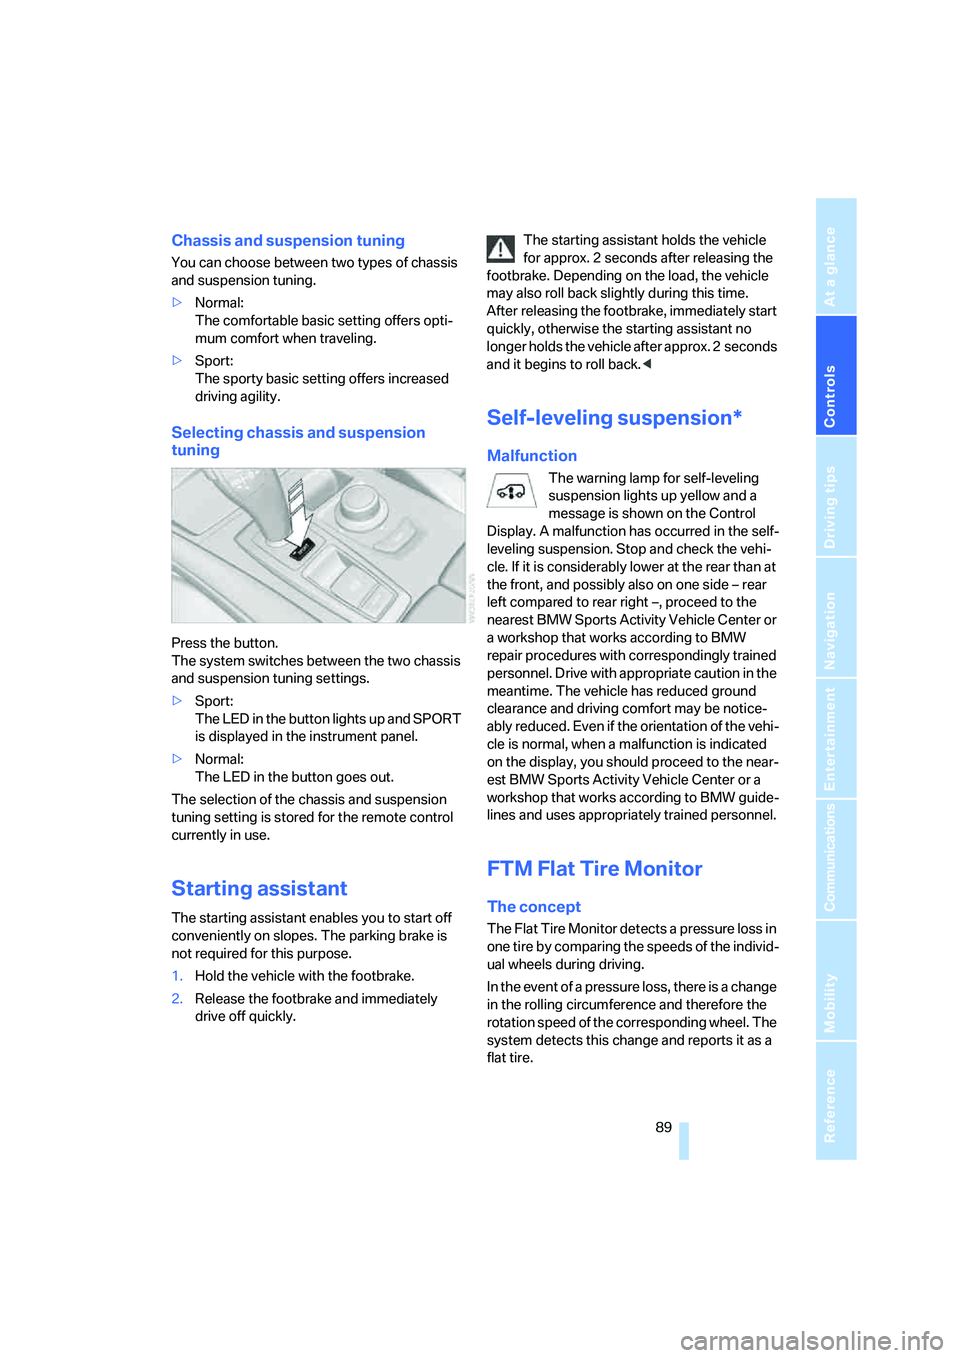
Selecting chassis and suspension
tuning
Press the button.
The system switches between the two chassis
and suspension tuning settings.
>Sport:
The LED in the button lights up and SPORT
is displayed in the instrument panel.
>Normal:
The LED in the button goes out.
The selection of the chassis and suspension
tuning setting is stored for the remote control
currently in use.
Starting assistant
The starting assistant enables you to start off
conveniently on slopes. The parking brake is
not required for this purpose.
1.Hold the vehicle with the footbrake.
2.Release the footbrake and immediately
drive off quickly.The starting assistant holds the vehicle
for approx. 2 seconds after releasing the
footbrake. Depending on the load, the vehicle
may also roll back slightly during this time.
After releasing the footbrake, immediately start
quickly, otherwise the starting assistant no
longer holds the vehicle after approx. 2 seconds
and it begins to roll back.<
Self-leveling suspension*
Malfunction
The warning lamp for self-leveling
suspension lights up yellow and a
message is shown on the Control
Display. A malfunction has occurred in the self-
leveling suspension. Stop and check the vehi-
cle. If it is considerably lower at the rear than at
the front, and possibly also on one side – rear
left compared to rear right –, proceed to the
nearest BMW Sports Activity Vehicle Center or
a workshop that works according to BMW
repair procedures with correspondingly trained
personnel. Drive with appropriate caution in the
meantime. The vehicle has reduced ground
clearance and driving comfort may be notice-
ably reduced. Even if the orientation of the vehi-
cle is normal, when a malfunction is indicated
on the display, you should proceed to the near-
est BMW Sports Activity Vehicle Center or a
workshop that works according to BMW guide-
lines and uses appropriately trained personnel.
FTM Flat Tire Monitor
The concept
The Flat Tire Monitor detects a pressure loss in
one tire by comparing the speeds of the individ-
ual wheels during driving.
In the event of a pressure loss, there is a change
in the rolling circumference and therefore the
rotation speed of the corresponding wheel. The
system detects this change and reports it as a
flat tire.
Page 255 of 288
Mobility
253Reference
At a glance
Controls
Driving tips
Communications
Navigation
Entertainment
Warning triangle*
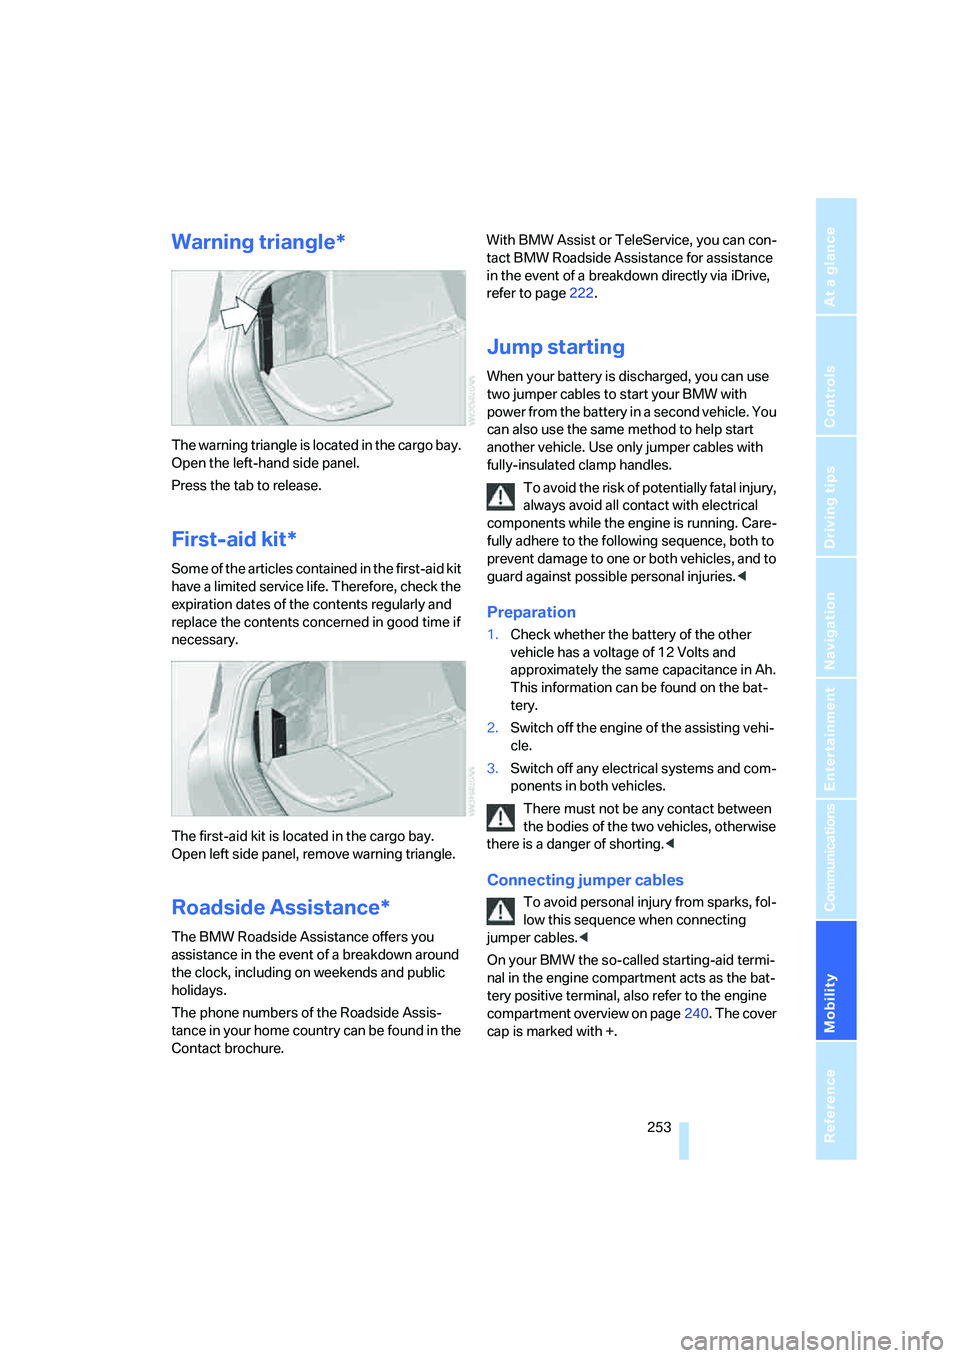
The warning triangle is located in the cargo bay.
Open the left-hand side panel.
Press the tab to release.
First-aid kit*
Some of the articles contained in the first-aid kit
have a limited service life. Therefore, check the
expiration dates of the contents regularly and
replace the contents concerned in good time if
necessary.
The first-aid kit is located in the cargo bay.
Open left side panel, remove warning triangle.
Roadside Assistance*
The BMW Roadside Assistance offers you
assistance in the event of a breakdown around
the clock, including on weekends and public
holidays.
The phone numbers of the Roadside Assis-
tance in your home country can be found in the
Contact brochure.With BMW Assist or TeleService, you can con-
tact BMW Roadside Assistance for assistance
in the event of a breakdown directly via iDrive,
refer to page222.
Jump starting
When your battery is discharged, you can use
two jumper cables to start your BMW with
power from the battery in a second vehicle. You
can also use the same method to help start
another vehicle. Use only jumper cables with
fully-insulated clamp handles.
To avoid the risk of potentially fatal injury,
always avoid all contact with electrical
components while the engine is running. Care-
fully adhere to the following sequence, both to
prevent damage to one or both vehicles, and to
guard against possible personal injuries.<
Preparation
1.Check whether the battery of the other
vehicle has a voltage of 12 Volts and
approximately the same capacitance in Ah.
This information can be found on the bat-
tery.
2.Switch off the engine of the assisting vehi-
cle.
3.Switch off any electrical systems and com-
ponents in both vehicles.
There must not be any contact between
the bodies of the two vehicles, otherwise
there is a danger of shorting.<
Connecting jumper cables
To avoid personal injury from sparks, fol-
low this sequence when connecting
jumper cables.<
On your BMW the so-called starting-aid termi-
nal in the engine compartment acts as the bat-
tery positive terminal, also refer to the engine
compartment overview on page240. The cover
cap is marked with +.
Page 268 of 288
Everything from A to Z
266
Everything from A to Z
Index
"..." Identifies Control Display
texts used to select
individual functions, and
indicates where to find them
in the text.
A
ABS Antilock Brake
System85
Accessories6
Acoustic signal, refer to Check
Control75
Activated-charcoal filter108
"Activation time" for parked
car ventilation110
Active seat49
Active seat ventilation48
Active steering94
– warning lamp94
Adaptive brake lamps, refer to
Brake force display94
Adaptive Drive88
Adaptive fastening
system120
Adaptive Head Light101
"Add digits" for mobile
phone214
"Address book" for
navigation144
Address for navigation
– deleting145
– entering137,144
– selecting144
– storing144
– storing current position144
"Add to destination list"139
Adjusting confirmation signals
for locking and unlocking31
Adjusting temperature with
expanded-scope automatic
climate control105Adjusting the tone during
audio operation, refer to
Tone control161
Adjusting thigh
support43,44
"After door opened"45
"After unlocking"45
Airbags95
– sitting safely42
– warning lamp96
Air distribution
– automatic104,109
– manual105
Airing, refer to Ventilation107
Air recirculation106
– AUC Automatic
recirculated-air control106
– recirculated-air mode106
"Air recirculation on / off"52
Air vents103
– refer to Ventilation107
Air vents of automatic climate
control
103
Air volume105,109
AKI, refer to Fuel
specifications231
Alarm system35
– avoiding unintentional
alarms36
– interior motion sensor36
– switching off alarm35
– switching off tilt alarm
sensor and interior motion
sensor36
– tilt alarm sensor36
"All channels" on satellite
radio171
"All doors"30
All-season tires, refer to
Winter tires238
"All stations", displaying on
radio164All-wheel drive, refer to
xDrive87
Alterations, technical, refer to
For your own safety5
"AM", reception
range161,164
"Angle of view"
– DVD changer183
– DVD system in rear195
Antenna for mobile phone206
Antifreeze
– coolant242
– washer fluid65
Antilock Brake System
ABS85
Anti-theft system
– refer to Alarm system35
– refer to Central locking
system29
Approved axle loads, refer to
Weights260
Approved engine oils241
Approved gross vehicle
weight, refer to Weights260
Armrest, refer to Center
armrest, front116
Around the center console14
Around the steering wheel10
Arrival time
– refer to Computer70
– refer to Starting destination
guidance148
"Arrow display" for
navigation149
Arrow view for navigation
system149
Ashtray
– front117
– rear117
Assist, refer to separate
operating instructions
Page 269 of 288
Reference 267
At a glance
Controls
Driving tips
Communications
Navigation
Entertainment
Mobility
Assistance systems, refer to
Driving stability control
systems85
Assistance window20
"Assist. window off"21
AUC Automatic recirculated-
air control106
"Audio"163,167
– for DVD system in rear202
Audio160
– controls160
– switching on/off160
– tone control161
– volume161
Audio CD for DVD system in
rear196
Audio device, external116
Automatic
– air distribution104,109
– air volume104,109
– headlamp control99
– liftgate operation34
– service notification223
– steering wheel adjustment,
refer to Easy entry/exit51
– storing stations165
Automatic car washes128
– also refer to Caring for your
vehicle brochure
Automatic climate control104
– automatic air
distribution104,109
– in rear108
– switching off107,109
– ventilation in rear108
Automatic closing of doors,
refer to Automatic soft
closing33
Automatic curb monitor50
Automatic Hold58
– activating59
– deactivating59
– parking59Automatic lighting
– refer to Automatic headlamp
control99
– refer to Daytime running
lamps100
– refer to Interior lamps102
– refer to Pathway lighting100
"Automatic programs"105
Automatic recirculated-air
control AUC106
Automatic soft closing
33
Automatic station search165
Automatic transmission with
Steptronic61
– deactivating selector lever
interlock61
– kick-down62
– manually releasing
transmission lock63
– tow-starting255
– with comfort access37
"Automatic ventilation"110
AUTO program for automatic
climate control104,109
"Auto Request"223
"Autostore" on the radio166
"AUX"161,186,188
– AUX-In connection186
– for DVD system in rear201
– USB audio interface187
"AUX / Rear"192
AUX-In connection116,186
Average fuel consumption70
– setting units79
Average speed, refer to
Computer70
"Avoid ferries" for
navigation147
"Avoid highways" for
navigation146
Avoiding highways for
navigation146
Avoiding unintentional
alarms36
"Avoid tollroads" for
navigation147
Axle loads, refer to
Weights260
"A - Z"214
B
Backrest contour, refer to
Lumbar support44
Backrests, refer to Seats43
Backrest width adjustment44
Backup lamps, replacing
bulbs246
Balance, refer to Tone
control162
"Balance" for DVD system in
rear195
Band-aids, refer to First-aid
kit253
Bass, refer to Tone
control161
Battery
– charging250
– jump starting253
– power failure251
– refer to Vehicle battery250
Battery disposal
– remote control with comfort
access38
– vehicle battery251
Battery replacement
– remote control for DVD
system in rear192
– remote control with comfort
access38
Being towed255
Belts, refer to Safety belts47
Beverage holder, refer to Cup
holders117
Blower, refer to Air
volume105,109
"BMW Assist"222,223,224
BMW Assist
– activating226
– concierge service224
– contacting BMW Customer
Relations224
– offered services221
– roadside assistance222
– TeleService223
"BMW Contact"216
"BMW Contact
Numbers"216
BMW homepage4