change wheel BMW X6 XDRIVE 35I 2014 Owner's Manual
[x] Cancel search | Manufacturer: BMW, Model Year: 2014, Model line: X6 XDRIVE 35I, Model: BMW X6 XDRIVE 35I 2014Pages: 323, PDF Size: 8.36 MB
Page 214 of 323
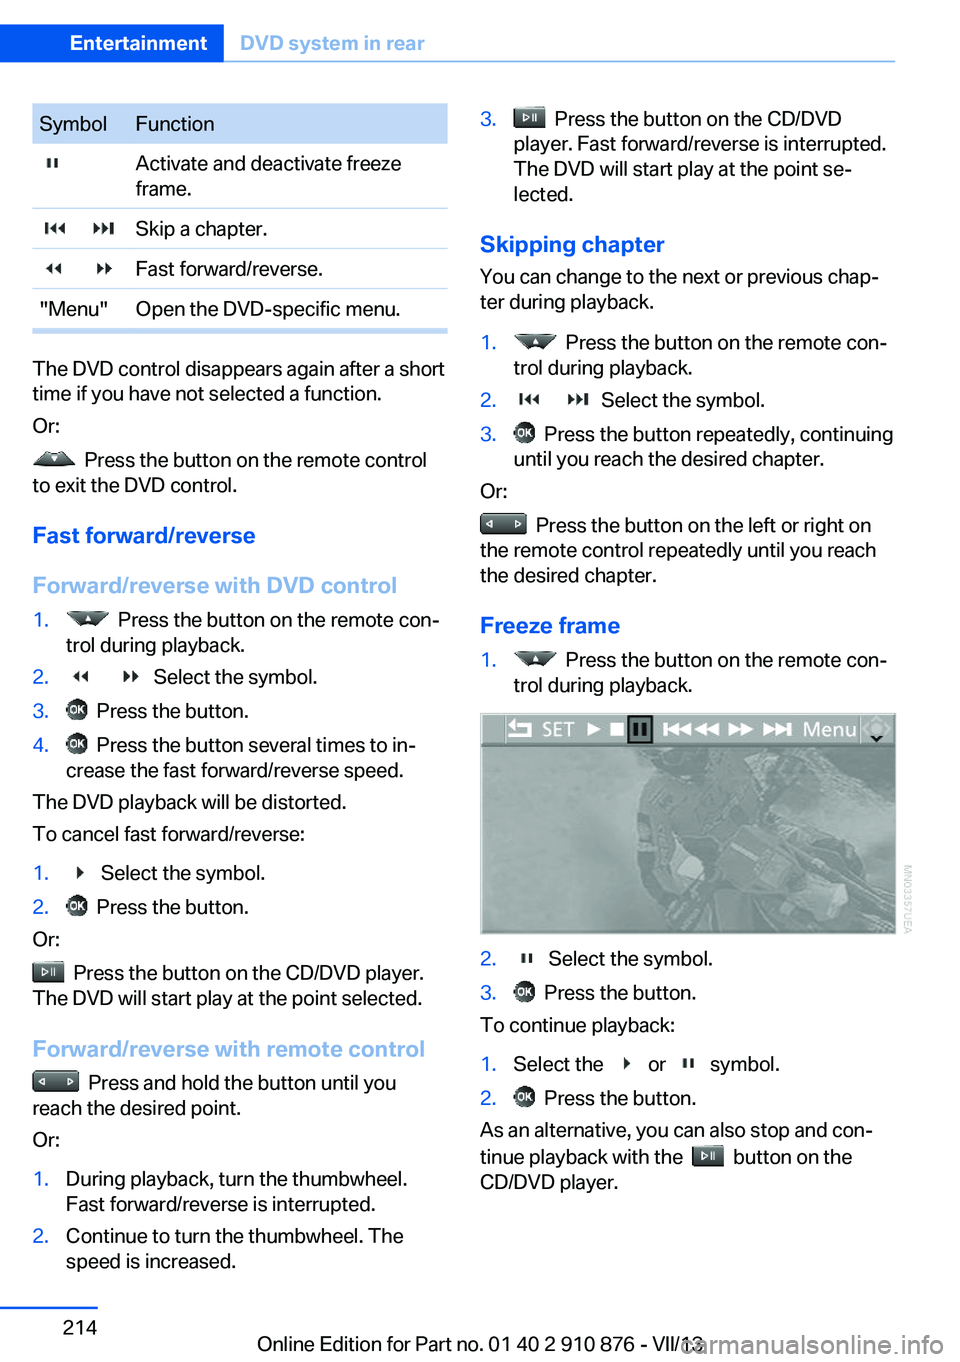
SymbolFunction Activate and deactivate freeze
frame. Skip a chapter. Fast forward/reverse."Menu"Open the DVD-specific menu.
The DVD control disappears again after a short
time if you have not selected a function.
Or:
Press the button on the remote control
to exit the DVD control.
Fast forward/reverse
Forward/reverse with DVD control
1. Press the button on the remote con‐
trol during playback.2. Select the symbol.3. Press the button.4. Press the button several times to in‐
crease the fast forward/reverse speed.
The DVD playback will be distorted.
To cancel fast forward/reverse:
1. Select the symbol.2. Press the button.
Or:
Press the button on the CD/DVD player.
The DVD will start play at the point selected.
Forward/reverse with remote control
Press and hold the button until you
reach the desired point.
Or:
1.During playback, turn the thumbwheel.
Fast forward/reverse is interrupted.2.Continue to turn the thumbwheel. The
speed is increased.3. Press the button on the CD/DVD
player. Fast forward/reverse is interrupted.
The DVD will start play at the point se‐
lected.
Skipping chapter
You can change to the next or previous chap‐
ter during playback.
1. Press the button on the remote con‐
trol during playback.2. Select the symbol.3. Press the button repeatedly, continuing
until you reach the desired chapter.
Or:
Press the button on the left or right on
the remote control repeatedly until you reach
the desired chapter.
Freeze frame
1. Press the button on the remote con‐
trol during playback.2. Select the symbol.3. Press the button.
To continue playback:
1.Select the or symbol.2. Press the button.
As an alternative, you can also stop and con‐
tinue playback with the
button on the
CD/DVD player.
Seite 214EntertainmentDVD system in rear214
Online Edition for Part no. 01 40 2 910 876 - VII/13
Page 219 of 323
Displaying overview1.Select the subdirectory if necessary.2.Select "Overview".3. Press the button.
It may take some time until the overview is
completely displayed.
If a symbol appears instead of an image, the
image cannot be displayed in the overview.
Displaying images
1.Use the buttons or the thumbwheel of the
remote control to select an image.2. Press the button.3.Displaying images:▷Scroll using the menu navigation but‐
tons of the remote control.▷Display the slide show: turn the thumb‐
wheel to set the display duration of the
images.
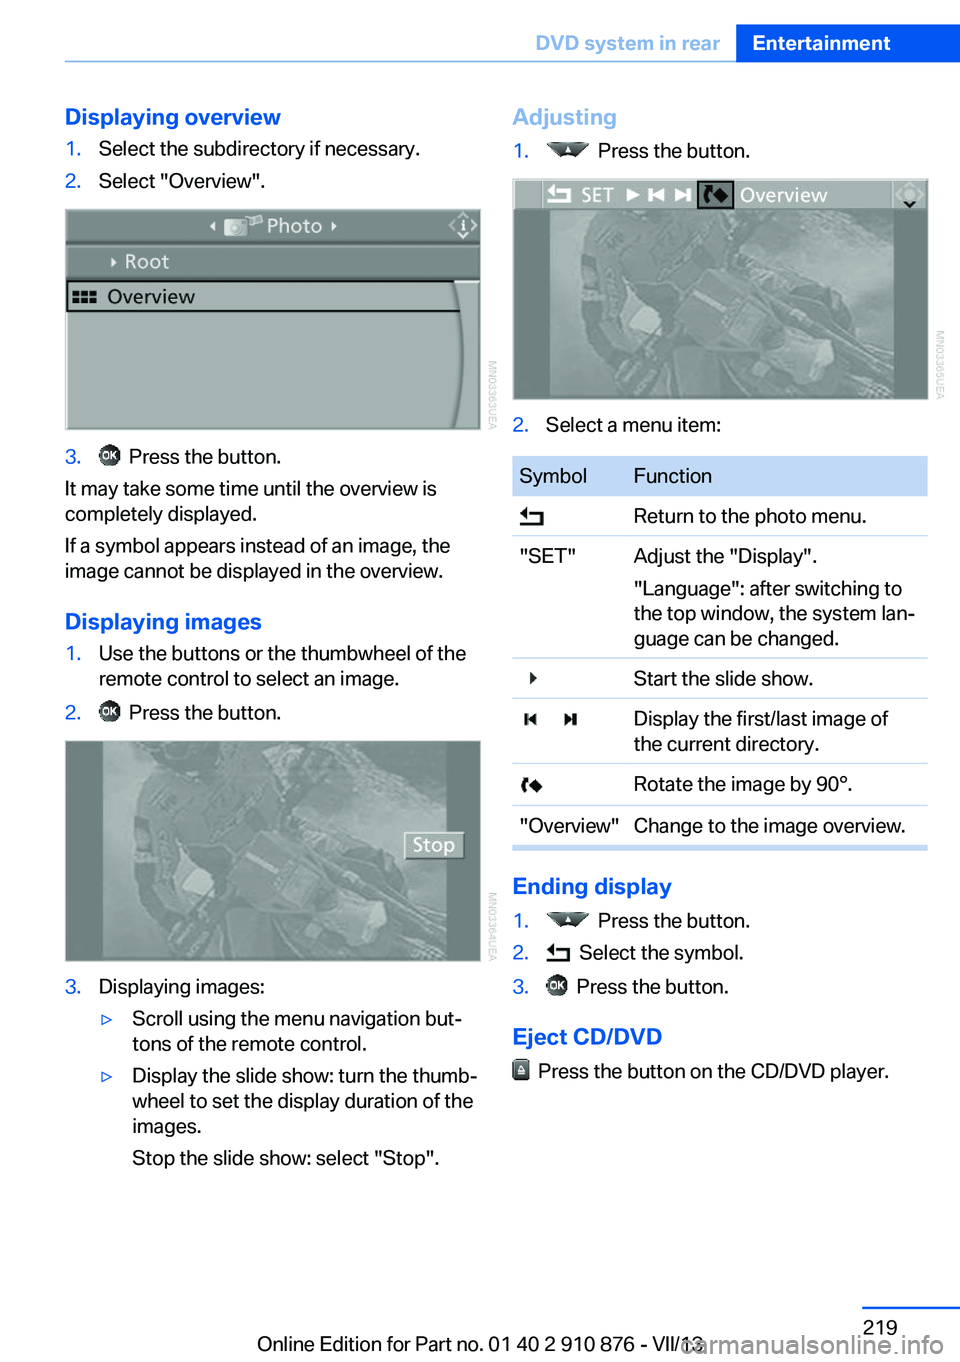
Stop the slide show: select "Stop".Adjusting1. Press the button.2.Select a menu item:SymbolFunction Return to the photo menu."SET"Adjust the "Display".
"Language": after switching to
the top window, the system lan‐
guage can be changed. Start the slide show. Display the first/last image of
the current directory. Rotate the image by 90°."Overview"Change to the image overview.
Ending display
1. Press the button.2. Select the symbol.3. Press the button.
Eject CD/DVD
Press the button on the CD/DVD player.
Seite 219DVD system in rearEntertainment219
Online Edition for Part no. 01 40 2 910 876 - VII/13
Page 233 of 323
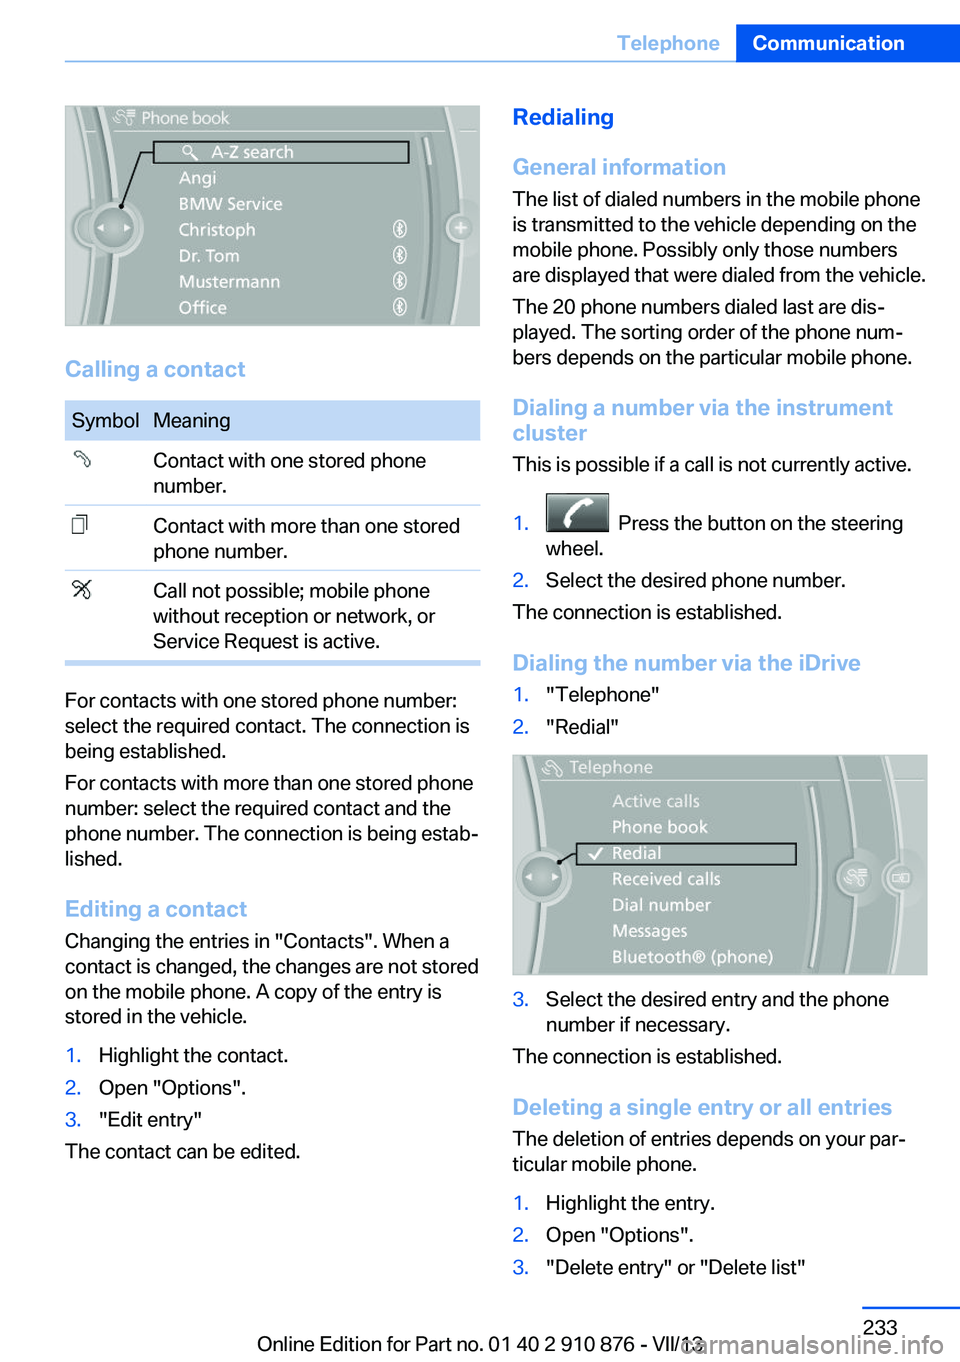
Calling a contact
SymbolMeaningContact with one stored phone
number.Contact with more than one stored
phone number.Call not possible; mobile phone
without reception or network, or
Service Request is active.
For contacts with one stored phone number:
select the required contact. The connection is
being established.
For contacts with more than one stored phone
number: select the required contact and the
phone number. The connection is being estab‐
lished.
Editing a contact Changing the entries in "Contacts". When a
contact is changed, the changes are not stored
on the mobile phone. A copy of the entry is
stored in the vehicle.
1.Highlight the contact.2.Open "Options".3."Edit entry"
The contact can be edited.
Redialing
General information
The list of dialed numbers in the mobile phone
is transmitted to the vehicle depending on the
mobile phone. Possibly only those numbers
are displayed that were dialed from the vehicle.
The 20 phone numbers dialed last are dis‐
played. The sorting order of the phone num‐
bers depends on the particular mobile phone.
Dialing a number via the instrument cluster
This is possible if a call is not currently active.1. Press the button on the steering
wheel.2.Select the desired phone number.
The connection is established.
Dialing the number via the iDrive
1."Telephone"2."Redial"3.Select the desired entry and the phone
number if necessary.
The connection is established.
Deleting a single entry or all entries The deletion of entries depends on your par‐
ticular mobile phone.
1.Highlight the entry.2.Open "Options".3."Delete entry" or "Delete list"Seite 233TelephoneCommunication233
Online Edition for Part no. 01 40 2 910 876 - VII/13
Page 281 of 323
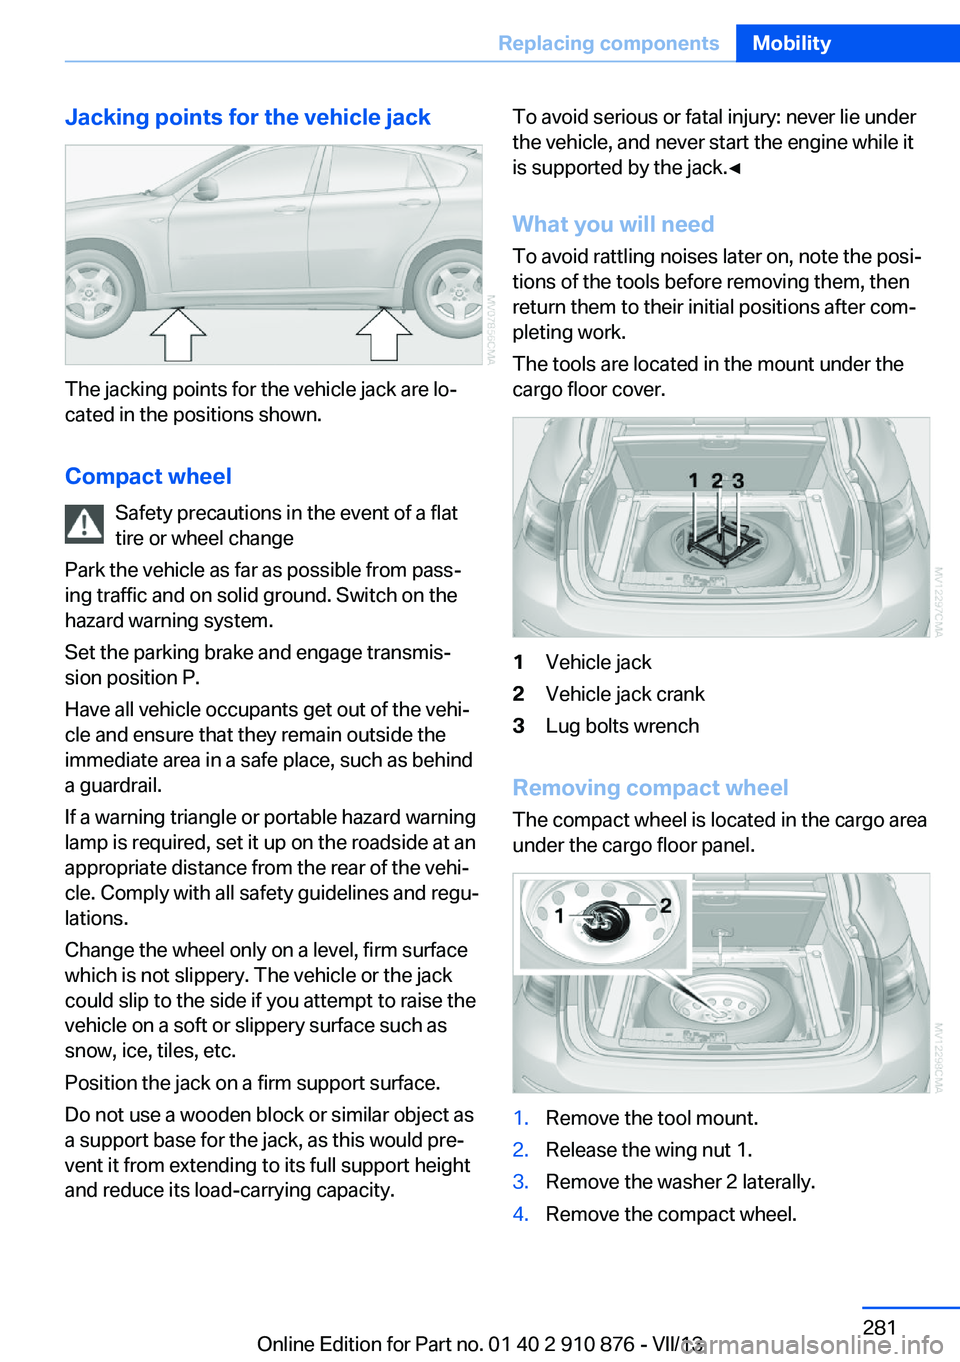
Jacking points for the vehicle jack
The jacking points for the vehicle jack are lo‐
cated in the positions shown.
Compact wheel Safety precautions in the event of a flat
tire or wheel change
Park the vehicle as far as possible from pass‐
ing traffic and on solid ground. Switch on the
hazard warning system.
Set the parking brake and engage transmis‐
sion position P.
Have all vehicle occupants get out of the vehi‐
cle and ensure that they remain outside the
immediate area in a safe place, such as behind
a guardrail.
If a warning triangle or portable hazard warning
lamp is required, set it up on the roadside at an
appropriate distance from the rear of the vehi‐
cle. Comply with all safety guidelines and regu‐
lations.
Change the wheel only on a level, firm surface
which is not slippery. The vehicle or the jack
could slip to the side if you attempt to raise the
vehicle on a soft or slippery surface such as
snow, ice, tiles, etc.
Position the jack on a firm support surface.
Do not use a wooden block or similar object as a support base for the jack, as this would pre‐
vent it from extending to its full support height
and reduce its load-carrying capacity.
To avoid serious or fatal injury: never lie under
the vehicle, and never start the engine while it
is supported by the jack.◀
What you will need
To avoid rattling noises later on, note the posi‐
tions of the tools before removing them, then
return them to their initial positions after com‐
pleting work.
The tools are located in the mount under the
cargo floor cover.1Vehicle jack2Vehicle jack crank3Lug bolts wrench
Removing compact wheel
The compact wheel is located in the cargo area
under the cargo floor panel.
1.Remove the tool mount.2.Release the wing nut 1.3.Remove the washer 2 laterally.4.Remove the compact wheel.Seite 281Replacing componentsMobility281
Online Edition for Part no. 01 40 2 910 876 - VII/13
Page 282 of 323
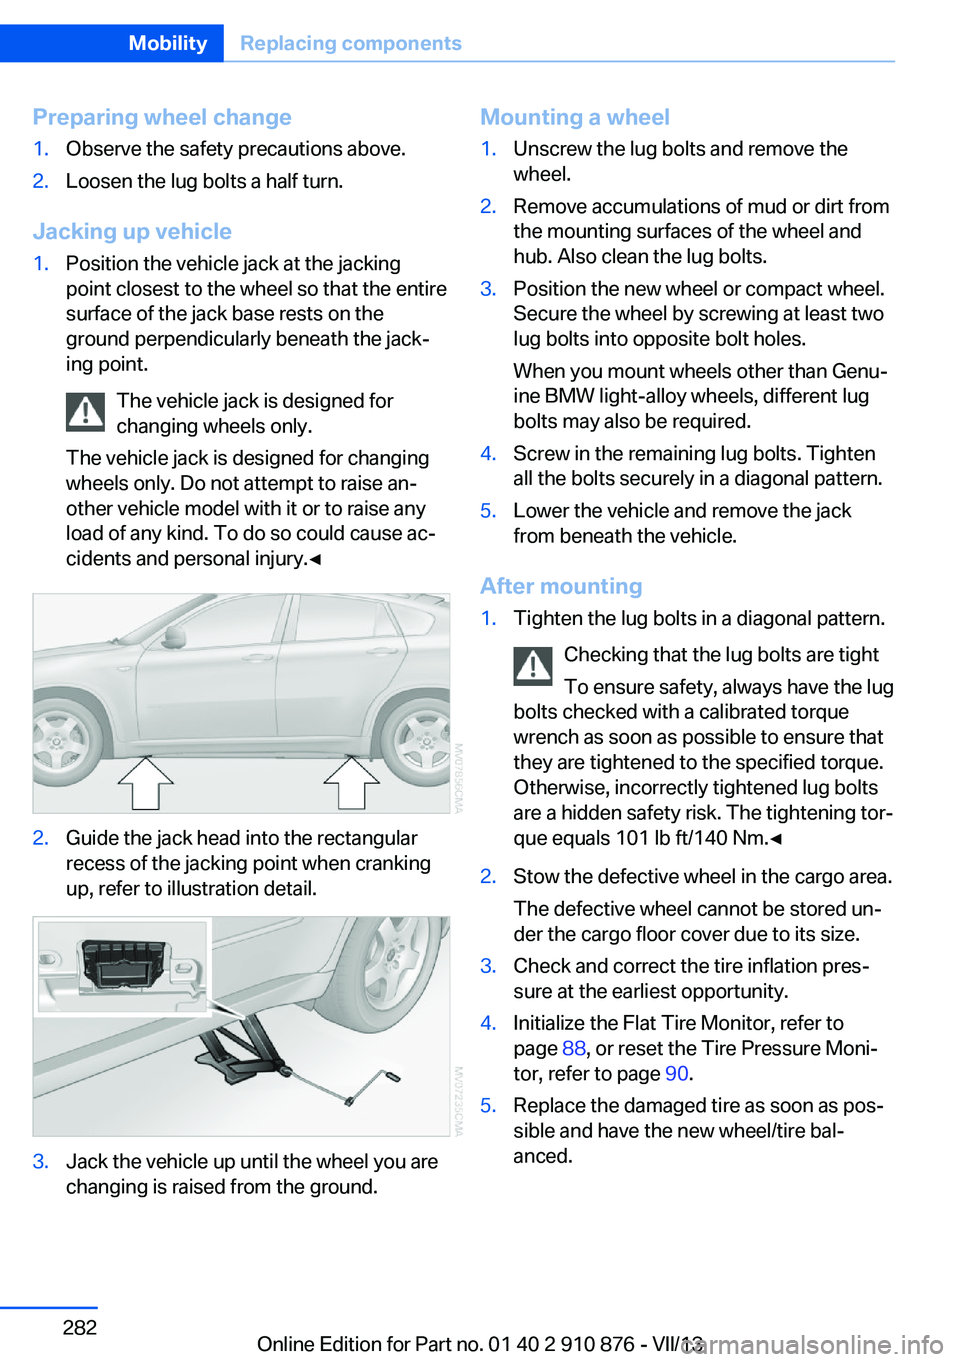
Preparing wheel change1.Observe the safety precautions above.2.Loosen the lug bolts a half turn.
Jacking up vehicle
1.Position the vehicle jack at the jacking
point closest to the wheel so that the entire
surface of the jack base rests on the
ground perpendicularly beneath the jack‐
ing point.
The vehicle jack is designed for
changing wheels only.
The vehicle jack is designed for changing
wheels only. Do not attempt to raise an‐
other vehicle model with it or to raise any
load of any kind. To do so could cause ac‐
cidents and personal injury.◀2.Guide the jack head into the rectangular
recess of the jacking point when cranking
up, refer to illustration detail.3.Jack the vehicle up until the wheel you are
changing is raised from the ground.Mounting a wheel1.Unscrew the lug bolts and remove the
wheel.2.Remove accumulations of mud or dirt from
the mounting surfaces of the wheel and
hub. Also clean the lug bolts.3.Position the new wheel or compact wheel.
Secure the wheel by screwing at least two
lug bolts into opposite bolt holes.
When you mount wheels other than Genu‐
ine BMW light-alloy wheels, different lug
bolts may also be required.4.Screw in the remaining lug bolts. Tighten
all the bolts securely in a diagonal pattern.5.Lower the vehicle and remove the jack
from beneath the vehicle.
After mounting
1.Tighten the lug bolts in a diagonal pattern.
Checking that the lug bolts are tight
To ensure safety, always have the lug
bolts checked with a calibrated torque
wrench as soon as possible to ensure that
they are tightened to the specified torque.
Otherwise, incorrectly tightened lug bolts
are a hidden safety risk. The tightening tor‐
que equals 101 lb ft/140 Nm.◀2.Stow the defective wheel in the cargo area.
The defective wheel cannot be stored un‐
der the cargo floor cover due to its size.3.Check and correct the tire inflation pres‐
sure at the earliest opportunity.4.Initialize the Flat Tire Monitor, refer to
page 88, or reset the Tire Pressure Moni‐
tor, refer to page 90.5.Replace the damaged tire as soon as pos‐
sible and have the new wheel/tire bal‐
anced.Seite 282MobilityReplacing components282
Online Edition for Part no. 01 40 2 910 876 - VII/13
Page 283 of 323
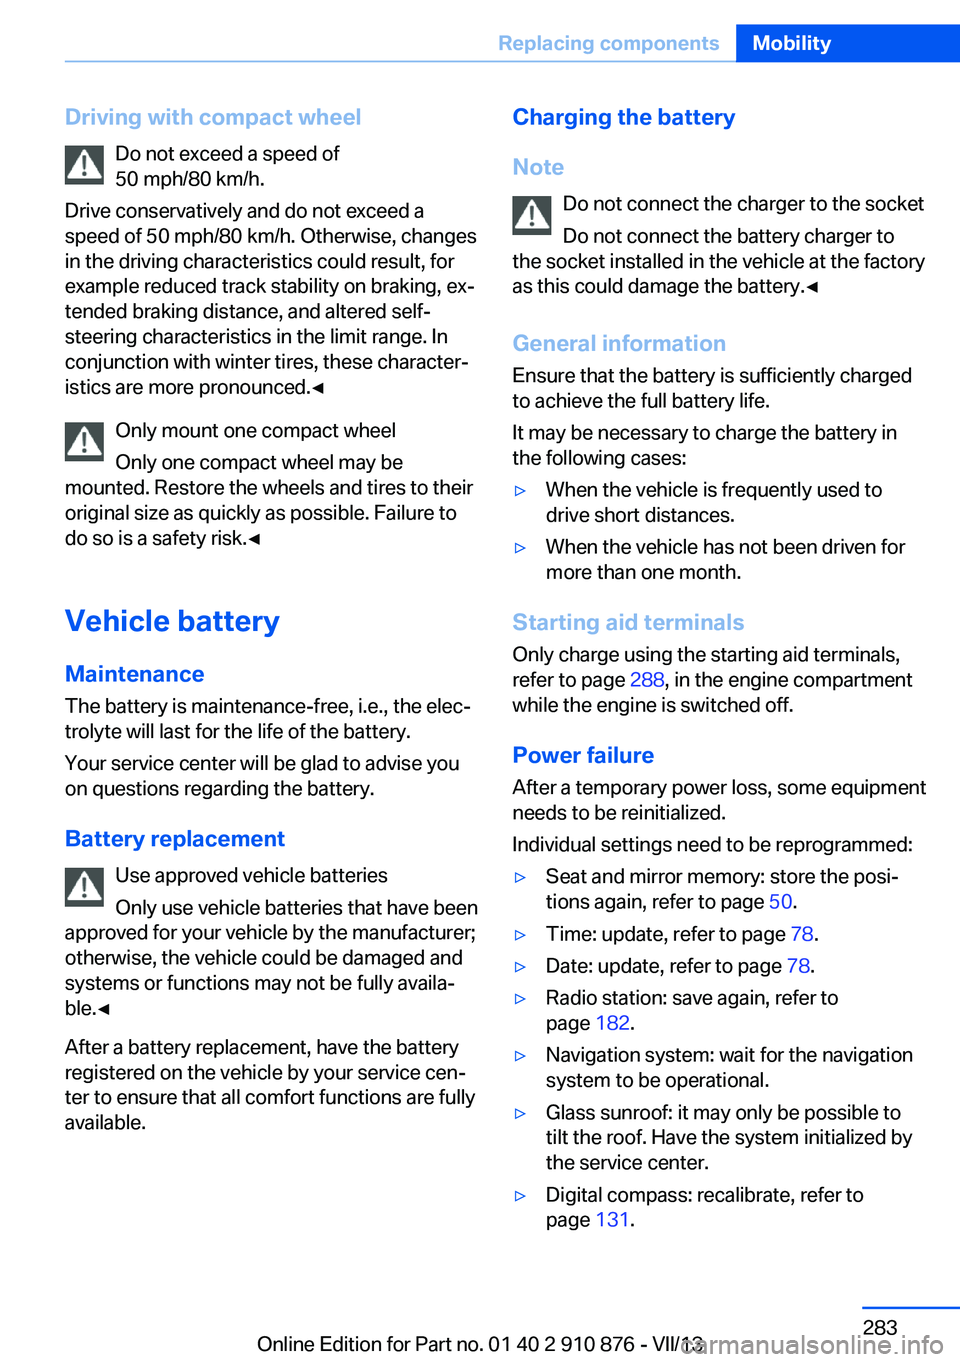
Driving with compact wheelDo not exceed a speed of
50 mph/80 km/h.
Drive conservatively and do not exceed a
speed of 50 mph/80 km/h. Otherwise, changes
in the driving characteristics could result, for
example reduced track stability on braking, ex‐ tended braking distance, and altered self-
steering characteristics in the limit range. In
conjunction with winter tires, these character‐
istics are more pronounced.◀
Only mount one compact wheel
Only one compact wheel may be
mounted. Restore the wheels and tires to their
original size as quickly as possible. Failure to
do so is a safety risk.◀
Vehicle battery Maintenance
The battery is maintenance-free, i.e., the elec‐
trolyte will last for the life of the battery.
Your service center will be glad to advise you
on questions regarding the battery.
Battery replacement Use approved vehicle batteries
Only use vehicle batteries that have been
approved for your vehicle by the manufacturer;
otherwise, the vehicle could be damaged and
systems or functions may not be fully availa‐
ble.◀
After a battery replacement, have the battery
registered on the vehicle by your service cen‐
ter to ensure that all comfort functions are fully
available.Charging the battery
Note Do not connect the charger to the socket
Do not connect the battery charger to
the socket installed in the vehicle at the factory
as this could damage the battery.◀
General information Ensure that the battery is sufficiently charged
to achieve the full battery life.
It may be necessary to charge the battery in
the following cases:▷When the vehicle is frequently used to
drive short distances.▷When the vehicle has not been driven for
more than one month.
Starting aid terminals
Only charge using the starting aid terminals,
refer to page 288, in the engine compartment
while the engine is switched off.
Power failure
After a temporary power loss, some equipment
needs to be reinitialized.
Individual settings need to be reprogrammed:
▷Seat and mirror memory: store the posi‐
tions again, refer to page 50.▷Time: update, refer to page 78.▷Date: update, refer to page 78.▷Radio station: save again, refer to
page 182.▷Navigation system: wait for the navigation
system to be operational.▷Glass sunroof: it may only be possible to
tilt the roof. Have the system initialized by
the service center.▷Digital compass: recalibrate, refer to
page 131.Seite 283Replacing componentsMobility283
Online Edition for Part no. 01 40 2 910 876 - VII/13
Page 310 of 323
California Proposition 65Warning 7
Camera, care 294
Camera, refer to Backup cam‐ era 113
Camera, side view 118
Camera, Top View 117
Can holder, refer to Cu‐ pholder 139
Car battery, refer to Vehicle battery 283
Car care products 292
Care 291
Care, displays 294
Care, vehicle 292
Cargo 150
Cargo area– Comfort Access 38
Cargo area, capacities 298
Cargo area, enlarging 135
Cargo area lamp, refer to Inte‐ rior lamps 85
Cargo area lid, refer to Tail‐
gate 36
Cargo area, opening/closing, refer to Tailgate 36
Cargo area, refer to Cargo area 135
Cargo cover 135
Cargo, securing with ski bag, refer to Securing cargo 142
Cargo straps, securing cargo 151
Car key, refer to Integrated key/remote control 30
Carpet, care 293
Car phone, installation loca‐ tion, refer to Center arm‐
rest 138
Car phone, refer to Tele‐ phone 226
Car vacuum cleaner, connect‐ ing, refer to Connecting
electrical devices 133
Car wash 291
Catalytic converter, refer to Hot exhaust system 146
CBC, refer to Cornering Brake
Control 96
CBS Condition Based Serv‐ ice 274
CD/DVD 190
CD/DVD changer 194
CD/DVD in rear 211
CD/DVD notes 196
CD, refer to Playing audio tracks, rear DVD sys‐
tem 216
CDs, storing 197
Cell phone 226
Cell phone, installation loca‐ tion, refer to Center arm‐
rest 138
Center armrest, front 138
Center armrest, rear 138
Center brake lamp 280
Center console, refer to Around the center con‐
sole 16
Central locking– Comfort Access 37– From the inside 35– Setting the unlocking char‐
acteristics 32
Central locking system
– From the outside 32– Principle 32
Central screen, refer to Con‐
trol Display 19
Changes, technical, refer to Safety 6
Changing wheels/tires 267
Chassis number, refer to En‐ gine compartment 270
Check Control 76
Children, transporting 54
Child restraint fixing system LATCH 55
Child restraint fixing sys‐ tems 54
Child restraint fixing systems, mounting 54
Child safety locks 57
Child seat, mounting 54
Child seats, refer to Trans‐
porting children safely 54
Chrome parts, care 293
Cigarette lighter, connecting electrical devices 133
Cigarette lighter, refer to Lighter 133
Cigarette lighter socket 133
Circulation of air, refer to Re‐ circulated air mode 124
Cleaning, displays 294
Cleaning your BMW, refer to Care 291
Clock 70
Clock, 12h/24h mode 78
Closing– From the inside 35– From the outside 32
Clothes hooks 138
Cockpit 12
Cold start, refer to Starting the engine 60
Combination instrument, refer to Instrument cluster 14
Combination switch, refer to Turn signal/high beams/
headlamp flasher 64
Combination switch, refer to Washer/wiper system 65
Comfort Access
– Battery replacement 39
Comfort area, refer to Around
the center console 16
Compact wheel, inflation pressure 262
Compartment for remote control, refer to Ignition
lock 59
Compartments, refer to Stor‐ age compart‐
ments 137, 138
Compass, digital 131
Computer 72
Computer, displaying infor‐ mation 72
Computer, displays on the Control Display 73
Seite 310ReferenceEverything from A to Z310
Online Edition for Part no. 01 40 2 910 876 - VII/13
Page 312 of 323
DVD system in rear 210
DVD, video 192
Dynamic destination guid‐ ance 176
Dynamic Performance Con‐ trol 98
Dynamic Stability Control DSC 96
Dynamic Traction Control DTC 97
E
Easy entry/exit 53
EfficientDynamics, refer to Saving fuel 153
Electrical malfunction– Door lock 34– Driver's door 34– Fuel filler flap 258
Electrical malfunction, park‐
ing brake 63
Electric seat adjustment 45
Electric steering wheel ad‐
justment 53
Electronic brake-force distri‐ bution 96
Electronic engine oil level check 271
Electronic Stability Program ESP, refer to Dynamic Sta‐
bility Control DSC 96
Emergency operation
– Door lock, refer to Manual
operation 34
Emergency operation, fuel
filler flap, unlocking man‐
ually 258
Emergency Request 286
Emergency service, refer to Roadside Assistance 287
Energy-conscious driving, re‐ fer to Current fuel consump‐
tion 71
Energy, saving, refer to Sav‐ ing fuel 153
Engine, breaking in 146
Engine compartment 270
Engine coolant, refer to Cool‐ ant 273
Engine oil, adding 272
Engine oil, additives, refer to Approved engine oils 272
Engine oil, alternative oil types 273
Engine oil, BMW maintenance system 274
Engine oil change intervals, refer to Service require‐
ments 74
Engine oil, checking the level 271
Engine oil, filling ca‐ pacity 299
Engine oil temperature 71
Engine oil types, alterna‐ tive 272
Engine oil types, ap‐ proved 272
Engine, overheating, refer to Coolant temperature 71
Engine start, assistance 287
Engine, starting 60
Engine, starting– Comfort Access 37
Engine, starting, Start/Stop
button 59
Engine, stopping, Start/Stop button 59
Engine, switching off 60
Environmentally friendly driv‐ ing, refer to Current fuel
consumption 71
Equalizer 180
Equipment, interior 129
ESP Electronic Stability Pro‐ gram, refer to Dynamic Sta‐
bility Control DSC 96
Exchanging wheels/tires 267
Exhaust system 146
Exterior mirrors 51
Exterior mirrors, adjusting 51
Exterior mirrors, automatic dimming 52
Exterior mirrors, automatic
heating 52
Exterior mirrors, folding in and out 52
External audio device 138
External devices 202
External temperature dis‐ play 70
External temperature display, changing the units of meas‐
ure, changing the units of
measure on the Control Dis‐
play 79
External temperature warn‐ ing 70
Externel temperature dis‐ play 70
Eyes for securing cargo 151
F
Fader 180
Failure messages, refer to Check Control 76
False alarm– Avoiding unintentional
alarms 40– Ending an alarm 40
Fastening safety belts, refer
to Safety belts 47
Fault messages, refer to Check Control 76
Filling capacities 299
Filter, refer to Microfilter/acti‐ vated-charcoal filter 126
Fine wood, care 293
First aid kit 287
Fitting for towing 290
Fixing system, adaptive 140
Flashing when locking/ unlocking 33
Flat Tire Monitor FTM 88
Flat Tire Monitor FTM, snow chains 269
Flat tire, run-flat tires 268
Flat tire, Tire Pressure Moni‐ tor TPM 90
Seite 312ReferenceEverything from A to Z312
Online Edition for Part no. 01 40 2 910 876 - VII/13
Page 313 of 323
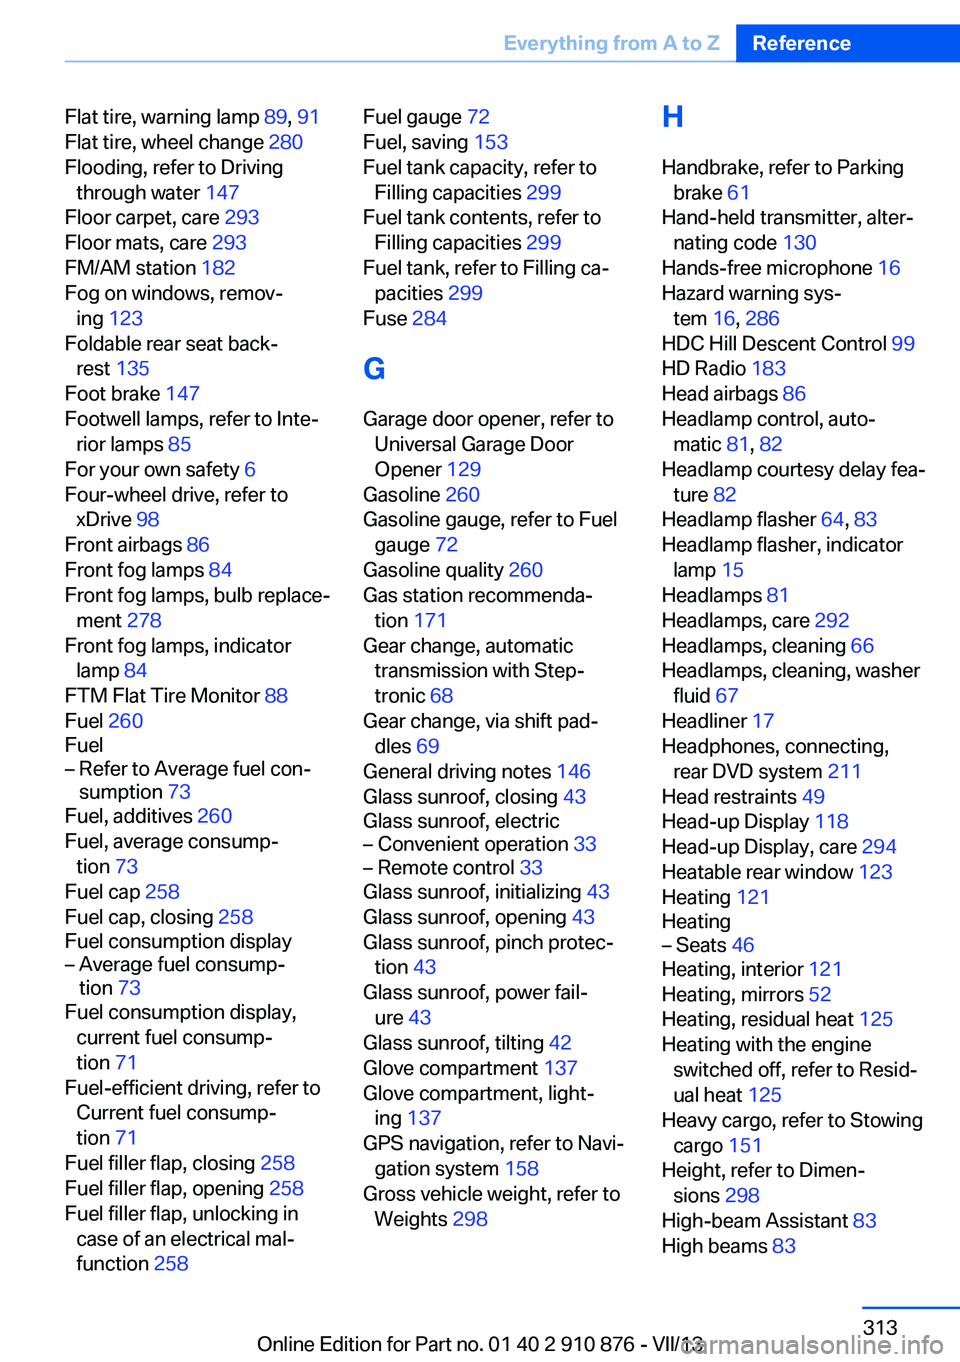
Flat tire, warning lamp 89, 91
Flat tire, wheel change 280
Flooding, refer to Driving through water 147
Floor carpet, care 293
Floor mats, care 293
FM/AM station 182
Fog on windows, remov‐ ing 123
Foldable rear seat back‐ rest 135
Foot brake 147
Footwell lamps, refer to Inte‐ rior lamps 85
For your own safety 6
Four-wheel drive, refer to xDrive 98
Front airbags 86
Front fog lamps 84
Front fog lamps, bulb replace‐ ment 278
Front fog lamps, indicator lamp 84
FTM Flat Tire Monitor 88
Fuel 260
Fuel– Refer to Average fuel con‐
sumption 73
Fuel, additives 260
Fuel, average consump‐ tion 73
Fuel cap 258
Fuel cap, closing 258
Fuel consumption display
– Average fuel consump‐
tion 73
Fuel consumption display,
current fuel consump‐
tion 71
Fuel-efficient driving, refer to Current fuel consump‐
tion 71
Fuel filler flap, closing 258
Fuel filler flap, opening 258
Fuel filler flap, unlocking in case of an electrical mal‐
function 258
Fuel gauge 72
Fuel, saving 153
Fuel tank capacity, refer to Filling capacities 299
Fuel tank contents, refer to Filling capacities 299
Fuel tank, refer to Filling ca‐ pacities 299
Fuse 284
G
Garage door opener, refer to Universal Garage Door
Opener 129
Gasoline 260
Gasoline gauge, refer to Fuel gauge 72
Gasoline quality 260
Gas station recommenda‐ tion 171
Gear change, automatic transmission with Step‐
tronic 68
Gear change, via shift pad‐ dles 69
General driving notes 146
Glass sunroof, closing 43
Glass sunroof, electric– Convenient operation 33– Remote control 33
Glass sunroof, initializing 43
Glass sunroof, opening 43
Glass sunroof, pinch protec‐ tion 43
Glass sunroof, power fail‐ ure 43
Glass sunroof, tilting 42
Glove compartment 137
Glove compartment, light‐ ing 137
GPS navigation, refer to Navi‐ gation system 158
Gross vehicle weight, refer to Weights 298
H
Handbrake, refer to Parking brake 61
Hand-held transmitter, alter‐ nating code 130
Hands-free microphone 16
Hazard warning sys‐ tem 16, 286
HDC Hill Descent Control 99
HD Radio 183
Head airbags 86
Headlamp control, auto‐ matic 81, 82
Headlamp courtesy delay fea‐ ture 82
Headlamp flasher 64, 83
Headlamp flasher, indicator lamp 15
Headlamps 81
Headlamps, care 292
Headlamps, cleaning 66
Headlamps, cleaning, washer fluid 67
Headliner 17
Headphones, connecting, rear DVD system 211
Head restraints 49
Head-up Display 118
Head-up Display, care 294
Heatable rear window 123
Heating 121
Heating– Seats 46
Heating, interior 121
Heating, mirrors 52
Heating, residual heat 125
Heating with the engine switched off, refer to Resid‐
ual heat 125
Heavy cargo, refer to Stowing cargo 151
Height, refer to Dimen‐ sions 298
High-beam Assistant 83
High beams 83
Seite 313Everything from A to ZReference313
Online Edition for Part no. 01 40 2 910 876 - VII/13
Page 319 of 323
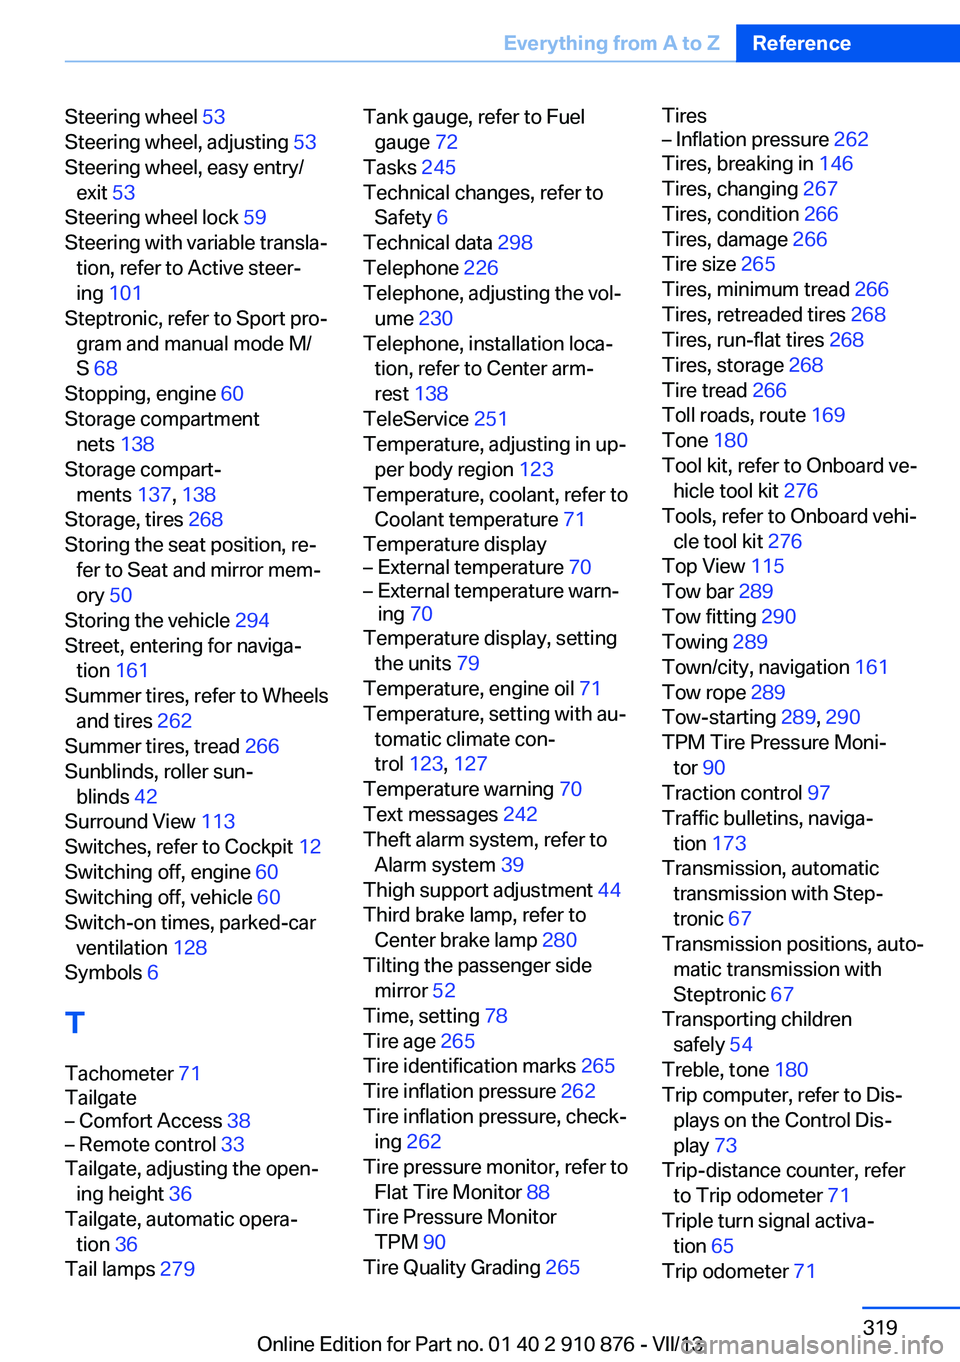
Steering wheel 53
Steering wheel, adjusting 53
Steering wheel, easy entry/ exit 53
Steering wheel lock 59
Steering with variable transla‐ tion, refer to Active steer‐
ing 101
Steptronic, refer to Sport pro‐ gram and manual mode M/
S 68
Stopping, engine 60
Storage compartment nets 138
Storage compart‐ ments 137, 138
Storage, tires 268
Storing the seat position, re‐ fer to Seat and mirror mem‐
ory 50
Storing the vehicle 294
Street, entering for naviga‐ tion 161
Summer tires, refer to Wheels and tires 262
Summer tires, tread 266
Sunblinds, roller sun‐ blinds 42
Surround View 113
Switches, refer to Cockpit 12
Switching off, engine 60
Switching off, vehicle 60
Switch-on times, parked-car ventilation 128
Symbols 6
T Tachometer 71
Tailgate– Comfort Access 38– Remote control 33
Tailgate, adjusting the open‐
ing height 36
Tailgate, automatic opera‐ tion 36
Tail lamps 279
Tank gauge, refer to Fuel
gauge 72
Tasks 245
Technical changes, refer to Safety 6
Technical data 298
Telephone 226
Telephone, adjusting the vol‐ ume 230
Telephone, installation loca‐ tion, refer to Center arm‐
rest 138
TeleService 251
Temperature, adjusting in up‐ per body region 123
Temperature, coolant, refer to Coolant temperature 71
Temperature display– External temperature 70– External temperature warn‐
ing 70
Temperature display, setting
the units 79
Temperature, engine oil 71
Temperature, setting with au‐ tomatic climate con‐
trol 123 , 127
Temperature warning 70
Text messages 242
Theft alarm system, refer to Alarm system 39
Thigh support adjustment 44
Third brake lamp, refer to Center brake lamp 280
Tilting the passenger side mirror 52
Time, setting 78
Tire age 265
Tire identification marks 265
Tire inflation pressure 262
Tire inflation pressure, check‐ ing 262
Tire pressure monitor, refer to Flat Tire Monitor 88
Tire Pressure Monitor TPM 90
Tire Quality Grading 265
Tires– Inflation pressure 262
Tires, breaking in 146
Tires, changing 267
Tires, condition 266
Tires, damage 266
Tire size 265
Tires, minimum tread 266
Tires, retreaded tires 268
Tires, run-flat tires 268
Tires, storage 268
Tire tread 266
Toll roads, route 169
Tone 180
Tool kit, refer to Onboard ve‐ hicle tool kit 276
Tools, refer to Onboard vehi‐ cle tool kit 276
Top View 115
Tow bar 289
Tow fitting 290
Towing 289
Town/city, navigation 161
Tow rope 289
Tow-starting 289, 290
TPM Tire Pressure Moni‐ tor 90
Traction control 97
Traffic bulletins, naviga‐ tion 173
Transmission, automatic transmission with Step‐
tronic 67
Transmission positions, auto‐ matic transmission with
Steptronic 67
Transporting children safely 54
Treble, tone 180
Trip computer, refer to Dis‐ plays on the Control Dis‐
play 73
Trip-distance counter, refer to Trip odometer 71
Triple turn signal activa‐ tion 65
Trip odometer 71
Seite 319Everything from A to ZReference319
Online Edition for Part no. 01 40 2 910 876 - VII/13