transmission BMW X6 XDRIVE 50I 2011 User Guide
[x] Cancel search | Manufacturer: BMW, Model Year: 2011, Model line: X6 XDRIVE 50I, Model: BMW X6 XDRIVE 50I 2011Pages: 312, PDF Size: 8.91 MB
Page 66 of 312
Driving
64
R Reverse
Select only with the vehicle stationary.
A lock prevents the transmission from being
inadvertently shifted into position R. To release
the lock, press the unlock button1.
P Park
Select only with the vehicle stationary. The rear
wheels are locked.
P is engaged automatically as soon as
you switch off the engine unless N is
engaged and on vehicles with Comfort Access
the remote control is inserted in the ignition
lock, refer to page58.<
N Neutral
Can, for example, be engaged in automatic car
washes. The vehicle can roll.
N remains engaged even after the engine
is switched off whenever you leave the
remote control in the ignition lock. This function
is used, for example, in a car wash, refer to
page59. After approx. 30 minutes P is auto-
matically engaged.<
D Drive, automatic position
Position for normal vehicle operation. All for-
ward gears are available.
Under normal operating conditions, the fuel
consumption is lowest when driving in position
D.
Kickdown
The kickdown mode provides maximum accel-
eration.
Press the accelerator pedal beyond the
increased resistance at full throttle.
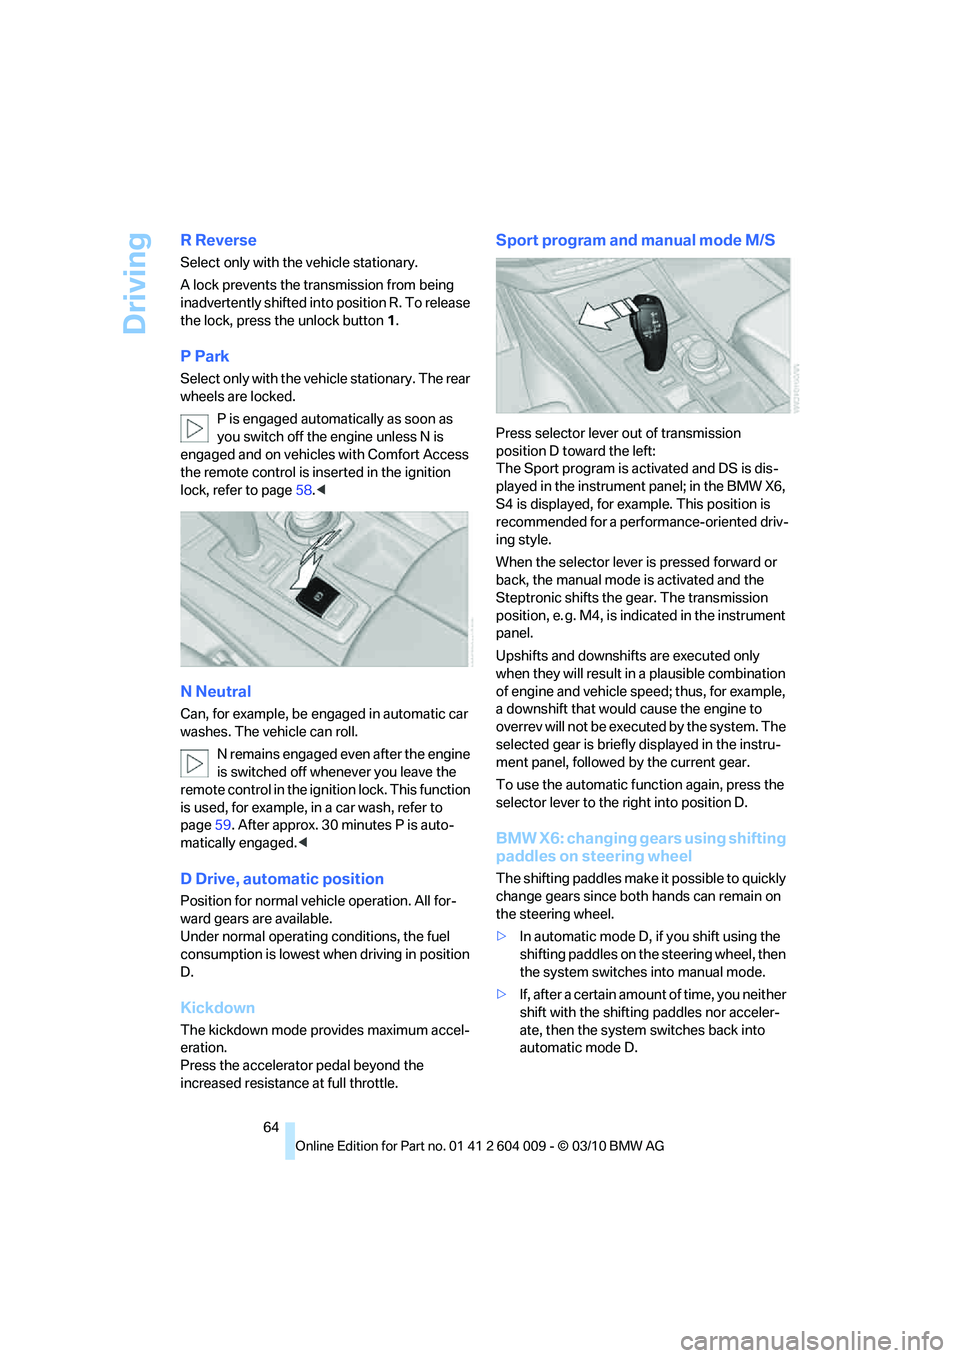
Sport program and manual mode M/S
Press selector lever out of transmission
position D toward the left:
The Sport program is activated and DS is dis-
played in the instrument panel; in the BMW X6,
S4 is displayed, for example. This position is
recommended for a performance-oriented driv-
ing style.
When the selector lever is pressed forward or
back, the manual mode is activated and the
Steptronic shifts the gear. The transmission
position, e. g. M4, is indicated in the instrument
panel.
Upshifts and downshifts are executed only
when they will result in a plausible combination
of engine and vehicle speed; thus, for example,
a downshift that would cause the engine to
overrev will not be executed by the system. The
selected gear is briefly displayed in the instru-
ment panel, followed by the current gear.
To use the automatic function again, press the
selector lever to the right into position D.
BMW X6: changing gears using shifting
paddles on steering wheel
The shifting paddles make it possible to quickly
change gears since both hands can remain on
the steering wheel.
>In automatic mode D, if you shift using the
shifting paddles on the steering wheel, then
the system switches into manual mode.
>If, after a certain amount of time, you neither
shift with the shifting paddles nor acceler-
ate, then the system switches back into
automatic mode D.
Page 67 of 312
Controls
65Reference
At a glance
Driving tips
Communications
Navigation
Entertainment
Mobility
With the transmission position M/S
selected, the manual mode remains
active.<
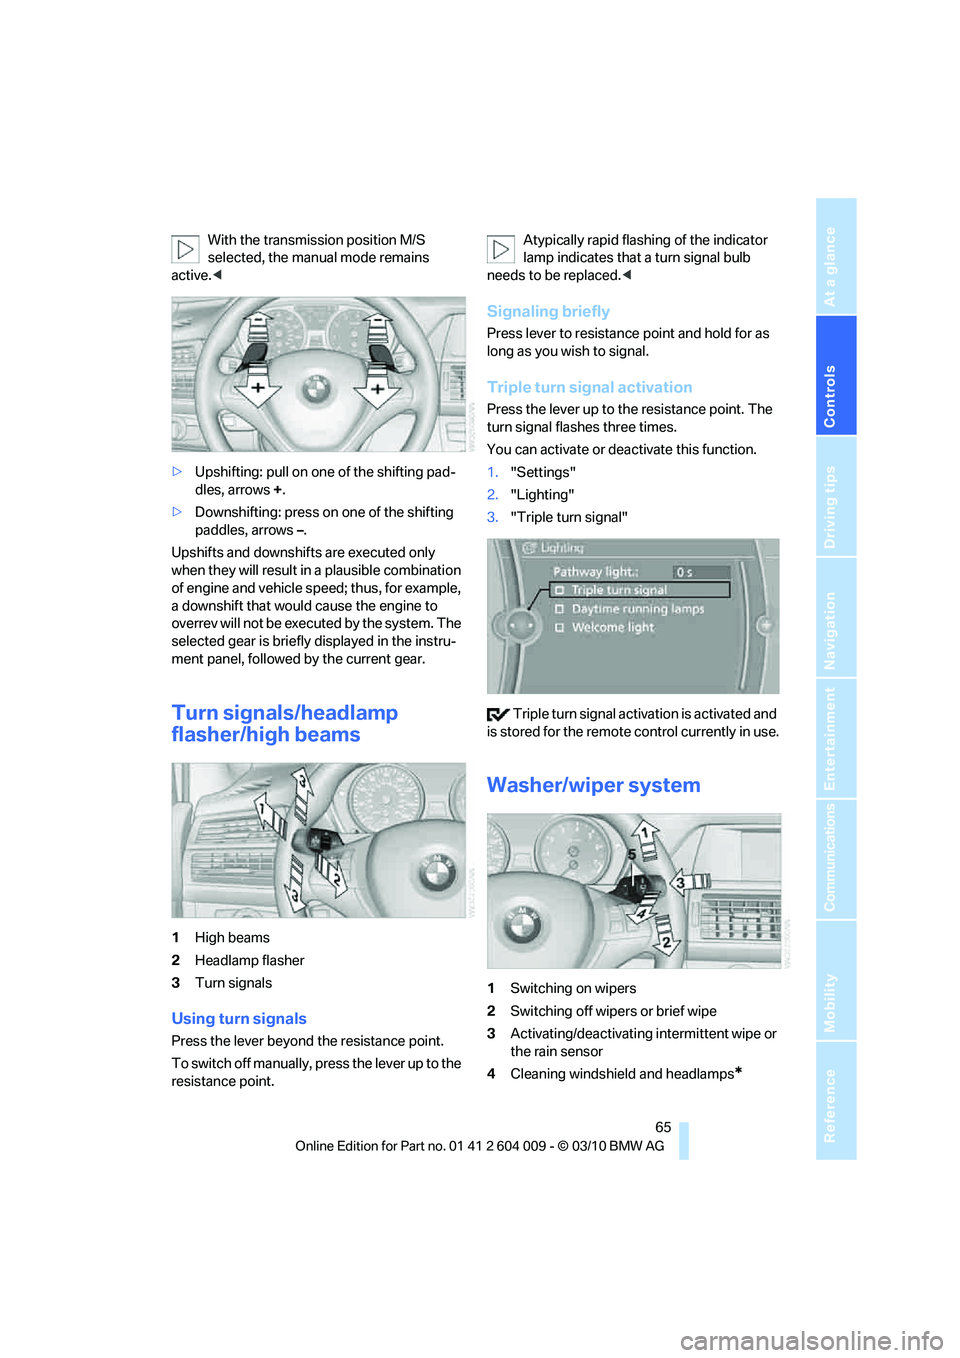
>Upshifting: pull on one of the shifting pad-
dles, arrows +.
>Downshifting: press on one of the shifting
paddles, arrows –.
Upshifts and downshifts are executed only
when they will result in a plausible combination
of engine and vehicle speed; thus, for example,
a downshift that would cause the engine to
overrev will not be executed by the system. The
selected gear is briefly displayed in the instru-
ment panel, followed by the current gear.
Turn signals/headlamp
flasher/high beams
1High beams
2Headlamp flasher
3Turn signals
Using turn signals
Press the lever beyond the resistance point.
To switch off manually, press the lever up to the
resistance point.Atypically rapid flashing of the indicator
lamp indicates that a turn signal bulb
needs to be replaced.<
Signaling briefly
Press lever to resistance point and hold for as
long as you wish to signal.
Triple turn signal activation
Press the lever up to the resistance point. The
turn signal flashes three times.
You can activate or deactivate this function.
1."Settings"
2."Lighting"
3."Triple turn signal"
Triple turn signal activation is activated and
is stored for the remote control currently in use.
Washer/wiper system
1Switching on wipers
2Switching off wipers or brief wipe
3Activating/deactivating intermittent wipe or
the rain sensor
4Cleaning windshield and headlamps*
Page 70 of 312
Driving
68 Press the lever to the resistance point for an
extended period:
The vehicle accelerates without pressure on
the accelerator pedal. When you release the
lever, the system maintains and stores the cur-
rent speed.
Press the lever beyond the resistance point:
Increase the speed by a maximum of 5 mph or
10 km/h to the next position on the speedome-
ter.
Press the lever beyond the resistance point for
an extended period:
The vehicle accelerates more rapidly.
Maintaining, storing and reducing the
speed
Pull the lever, arrow2:
The functions are the same as1, only that the
speed is reduced.
Interrupting the system
Press the lever up or down, arrow3:
The display1 in the speedometer change color;
refer to page68.
In addition, the system is interrupted:
>When the brakes are applied
>When transmission position D is disen-
gaged
>When DTC is activated or DSC is deacti-
vated
>When DSC is activated
Warning lamp
The warning lamp lights up if the
cruise control has been deactivated
automatically, e.g. by a control inter-
vention of the DSC. A message appears on the
Control Display.
Resuming cruising speed
Press button4:
The stored speed is resumed and maintained.
Deactivating the system
>Press the lever up or down twice, arrow3.>Switch off the ignition
The stored speed is cleared.
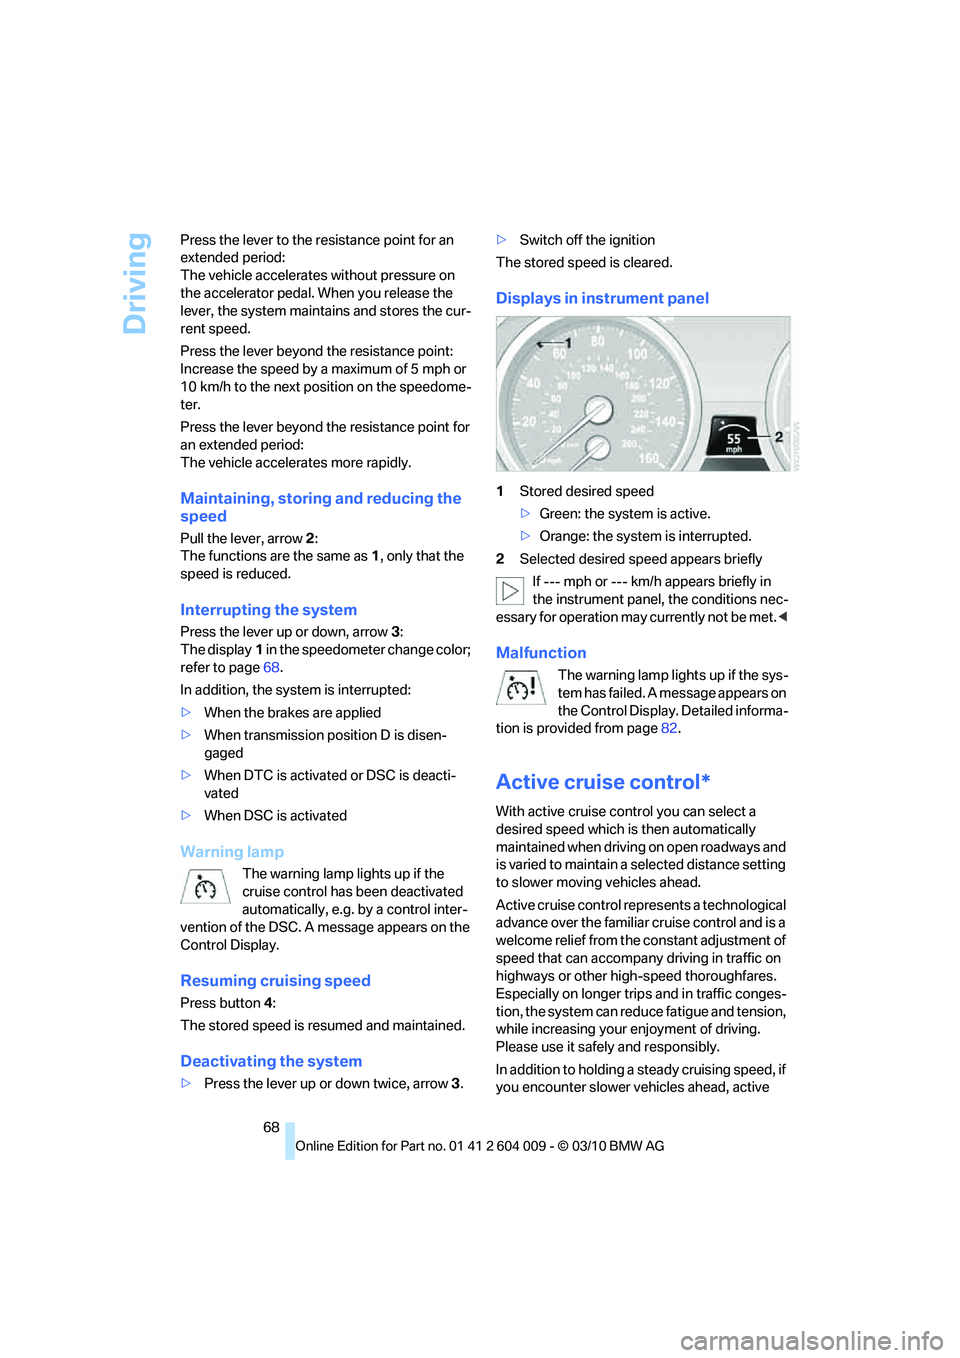
Displays in instrument panel
1Stored desired speed
>Green: the system is active.
>Orange: the system is interrupted.
2Selected desired speed appears briefly
If --- mph or --- km/h appears briefly in
the instrument panel, the conditions nec-
essary for operation may currently not be met.<
Malfunction
The warning lamp lights up if the sys-
tem has failed. A message appears on
the Control Display. Detailed informa-
tion is provided from page82.
Active cruise control*
With active cruise control you can select a
desired speed which is then automatically
maintained when driving on open roadways and
is varied to maintain a selected distance setting
to slower moving vehicles ahead.
Active cruise control represents a technological
advance over the familiar cruise control and is a
welcome relief from the constant adjustment of
speed that can accompany driving in traffic on
highways or other high-speed thoroughfares.
Especially on longer trips and in traffic conges-
tion, the system can reduce fatigue and tension,
while increasing your enjoyment of driving.
Please use it safely and responsibly.
In addition to holding a steady cruising speed, if
you encounter slower vehicles ahead, active
Page 71 of 312
Controls
69Reference
At a glance
Driving tips
Communications
Navigation
Entertainment
Mobility
cruise control will, within limits, adjust your
vehicle's speed automatically so that you can
flow with the traffic without having to make con-
stant adjustments. If, for example, while cruis-
ing at the selected speed, you begin to
approach a slower vehicle ahead of you in the
same lane, the system will reduce your vehicle's
speed to the same as that of the vehicle ahead
to maintain your selected distance setting. You
can vary the following distance, which will vary
with speed. Based on your selected distance
setting, the system automatically decreases the
throttle setting and lightly applies the brakes if
necessary. In addition, if the vehicle ahead of
you slows to a complete stop, the system can
follow this action within the given scope and
can also accelerate from a complete stop if the
vehicle ahead of you drives off again shortly
thereafter. During braking, your vehicle brake
lamps will automatically illuminate to alert a fol-
lowing driver to take action. In addition, it may
be necessary for your vehicle to downshift the
automatic transmission to maintain the dis-
tance setting selected. As soon as the road in
front of you has no moving vehicles, the system
will accelerate to your desired speed. This set
speed is also maintained on downhill grades,
however the vehicle speed can drop below the
set speed when driving uphill if the engine out-
put is not sufficient.
Active cruise control cannot detect stop
signs, red lights, or any object that is
stopped or is blocking the road.
Active cruise control is not and must not be
used as a collision avoidance/warning system.
Since this active cruise control system is a new
technology and operates differently from con-
ventional cruise control systems to which you
may be accustomed, it is necessary that you
read all of the pages relating to this system
before use. Carefully read and observe the
information on the system limitations beginning
on page73 to obtain a good command of the
system and its range of applications.
the brake pedal, a somewhat different braking
feel results.
Professional navigation system*
If the vehicle is equipped with a Professional
navigation system, the system adapts the
acceleration and deceleration behavior of the
vehicle to the road on which you are currently
driving.
To ensure that the system has the latest
information on the course of the road, use
the most recent version of the navigation
data.<
If the vehicle position is unknown, e. g. if you
have left the region covered by the map, the
navigation system ceases to influence vehicle
behavior.
Applications
Please try the system first during sparse traffic
and clear road conditions so that you can get
used to the system. After you have experience
and understand the system, only then use it
during normal traffic.
As with conventional cruise control systems,
active cruise control in no way reduces or sub-
stitutes for the driver's own personal experi-
ence, responsibility, alertness and awareness in
adjusting speed, braking or otherwise control-
ling the vehicle. The driver should decide when
to use the system on the basis of road, traffic,
visibility, and weather conditions. Active cruise
control is intended for use on highway-type
roadways where traffic is moving relatively
smoothly as well as in slow-moving traffic con-
gestion. Do not use the system in city driving; in
complex driving situations; heavy traffic such as
during rush hour; on curvy, winding roads, slip-
pery roads or roads with sharp curves such as
highway off-ramps; during inclement weather
such as snow, strong rain or fog; or when enter-
ing interchanges, service/parking areas or toll
booths. It is also important to regulate your
vehicle's speed and distance setting within
applicable legal limits. Always be ready to take
Page 73 of 312
Controls
71Reference
At a glance
Driving tips
Communications
Navigation
Entertainment
Mobility
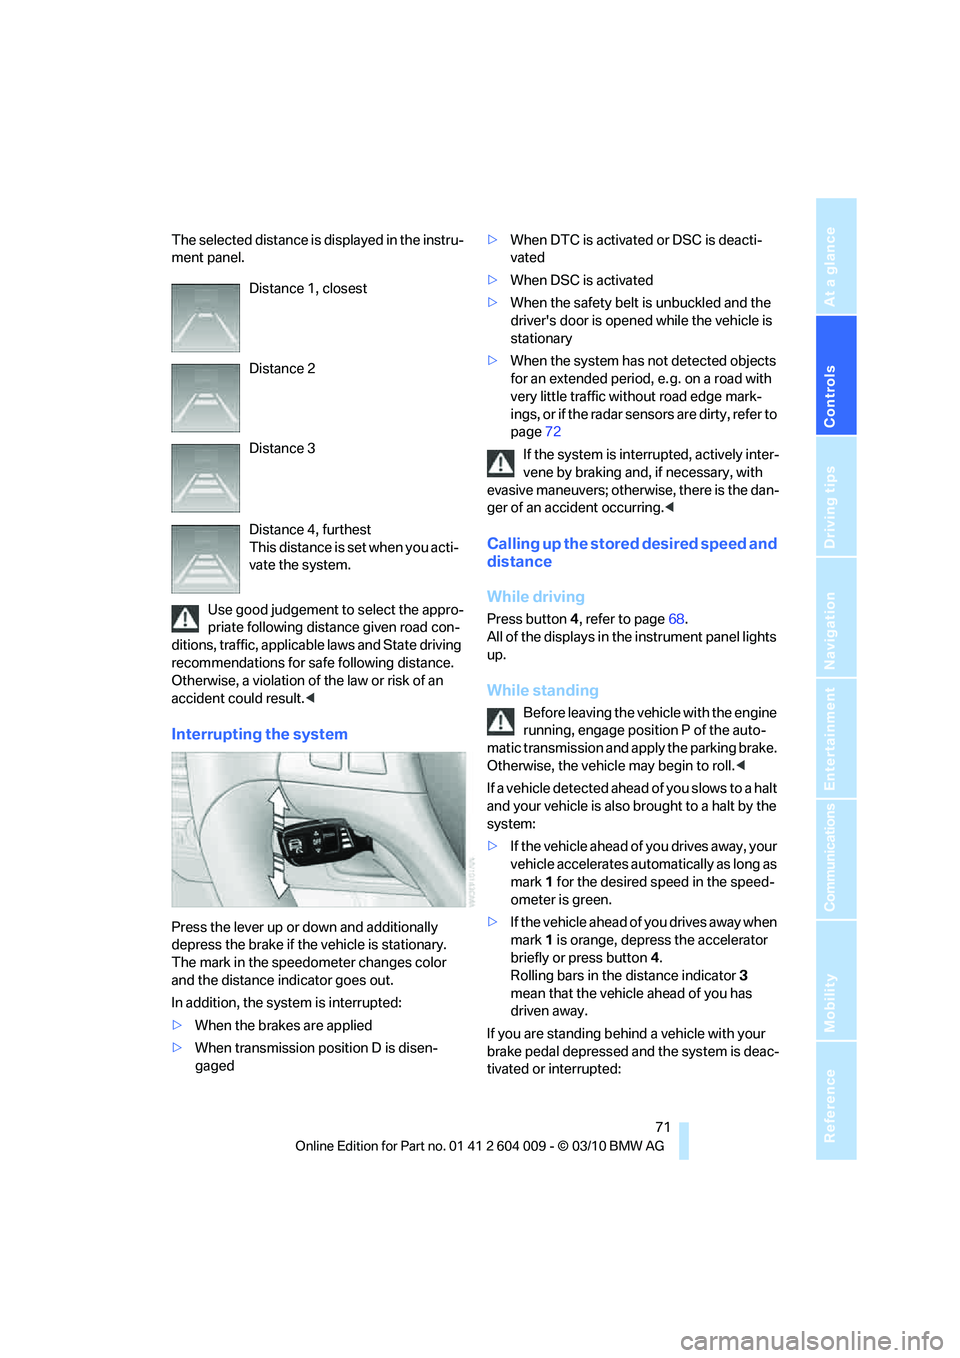
The selected distance is displayed in the instru-
ment panel.
Use good judgement to select the appro-
priate following distance given road con-
ditions, traffic, applicable laws and State driving
recommendations for safe following distance.
Otherwise, a violation of the law or risk of an
accident could result.<
Interrupting the system
Press the lever up or down and additionally
depress the brake if the vehicle is stationary.
The mark in the speedometer changes color
and the distance indicator goes out.
In addition, the system is interrupted:
>When the brakes are applied
>When transmission position D is disen-
gaged>When DTC is activated or DSC is deacti-
vated
>When DSC is activated
>When the safety belt is unbuckled and the
driver's door is opened while the vehicle is
stationary
>When the system has not detected objects
for an extended period, e. g. on a road with
very little traffic without road edge mark-
ings, or if the radar sensors are dirty, refer to
page72
If the system is interrupted, actively inter-
vene by braking and, if necessary, with
evasive maneuvers; otherwise, there is the dan-
ger of an accident occurring.<
Calling up the stored desired speed and
distance
While driving
Press button4, refer to page68.
All of the displays in the instrument panel lights
up.
While standing
Before leaving the vehicle with the engine
running, engage position P of the auto-
matic transmission and apply the parking brake.
Otherwise, the vehicle may begin to roll.<
If a vehicle detected ahead of you slows to a halt
and your vehicle is also brought to a halt by the
system:
>If the vehicle ahead of you drives away, your
vehicle accelerates automatically as long as
mark 1 for the desired speed in the speed-
ometer is green.
>If the vehicle ahead of you drives away when
mark 1 is orange, depress the accelerator
briefly or press button 4.
Rolling bars in the distance indicator 3
mean that the vehicle ahead of you has
driven away.
If you are standing behind a vehicle with your
brake pedal depressed and the system is deac-
tivated or interrupted: Distance 1, closest
Distance 2
Distance 3
Distance 4, furthest
This distance is set when you acti-
vate the system.
Page 95 of 312
Controls
93Reference
At a glance
Driving tips
Communications
Navigation
Entertainment
Mobility
Cameras
The two camera lenses are located on the sides
of the bumper.
The presence of dirt can impair image quality.
Clean the objective, refer to page260.
Rear view camera*
The concept
The rear view camera assists you when parking
and maneuvering in reverse. To accomplish
this, the region behind your vehicle is shown on
the Control Display.
System limitations
Also make a direct visual check of the
traffic situation around the vehicle. Other-
wise, there could be a risk of accident, for exam-
ple due to other road users or objects outside
the image range of the rear view camera.<
T he r e a r v i e w c a m e r a i s n o t a b l e t o de t e c t
objects at greater heights or protruding
objects such as projections from walls.<
Automatic activation
With the engine running or the ignition switched
on, shift the selector lever into position R.
The image of the rear view camera is displayed
when the system has been switched on using
iDrive.
Automatic deactivation
The system switches off and the LED goes out:
>After approx. 33 ft/10 m when driving for-
ward>At speeds over approx. 9 mph/15 km/h
when driving forward
Switch the system back on as needed.
Switching on/off manually
Press the button.
>On: LED lights up.
>Off: LED goes out.
If PDC is displayed, switch on the rear view
camera using iDrive, refer to page89.
Assistance functions
Function requirements
>Rear view camera is switched on.
>Liftgate is completely closed.
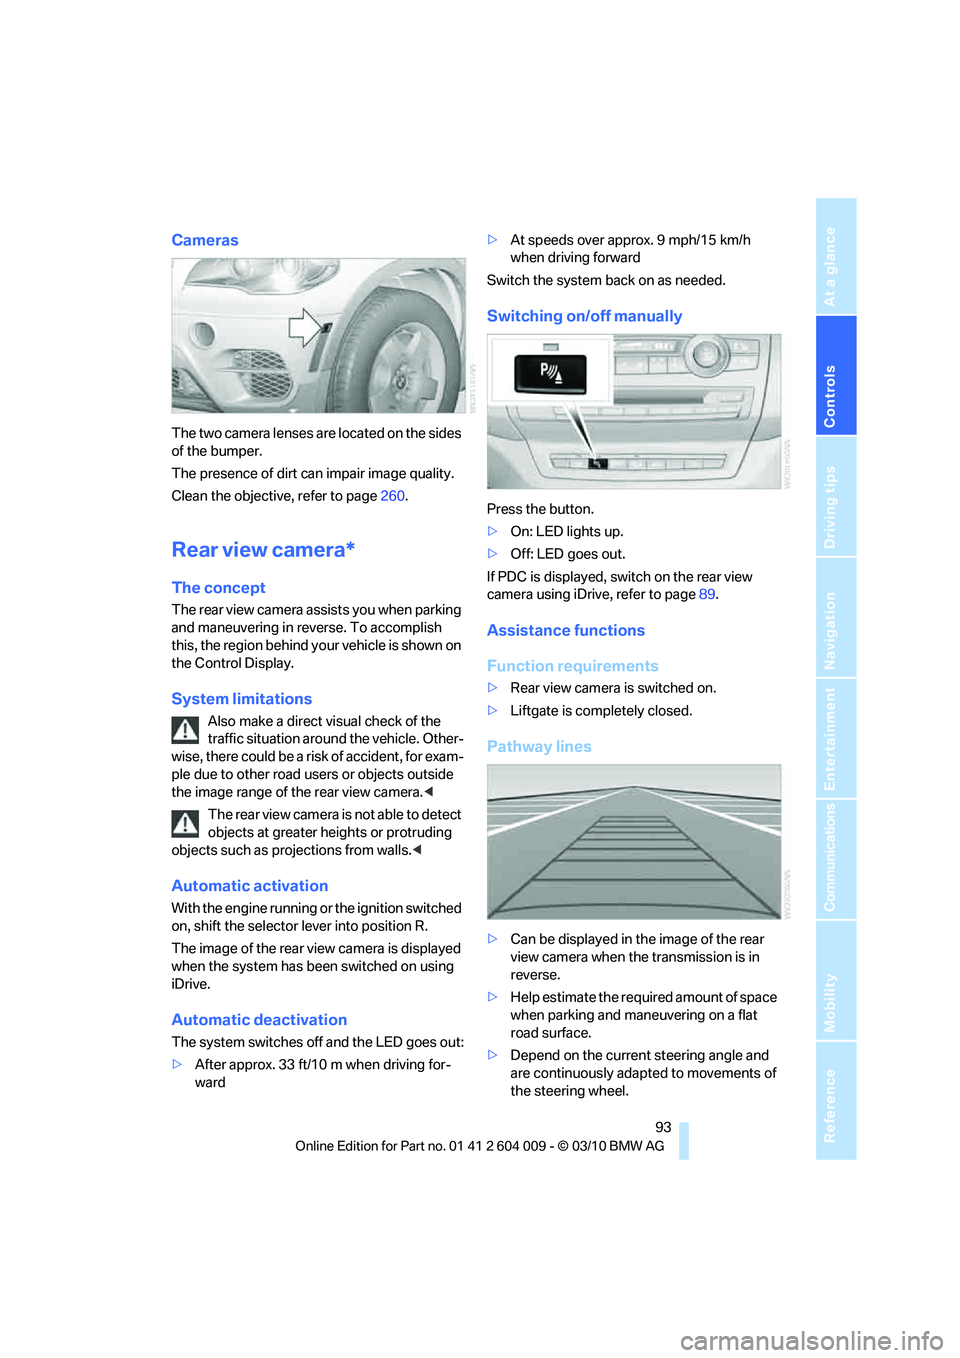
Pathway lines
>Can be displayed in the image of the rear
view camera when the transmission is in
reverse.
>Help estimate the required amount of space
when parking and maneuvering on a flat
road surface.
>Depend on the current steering angle and
are continuously adapted to movements of
the steering wheel.
Page 100 of 312
Technology for comfort, convenience and safety
98 speed, approx. 5 mph/8 km/h, and then main-
tains this speed at a constant.
Only use HDC in transmission positions D or R.
Increasing or reducing speed
You can use the accelerator or brakes to vary
this automatically controlled speed within a
range extending from approx. 4 mph/6 km/h to
15 mph/25 km/h.
You can specify a target speed within the same
range by using the lever of the cruise control.
With downhill grade over 10Ξ you can reduce
the speed to approx. 3 mph/4 km/h. Pull the
lever of the cruise control beyond the resis-
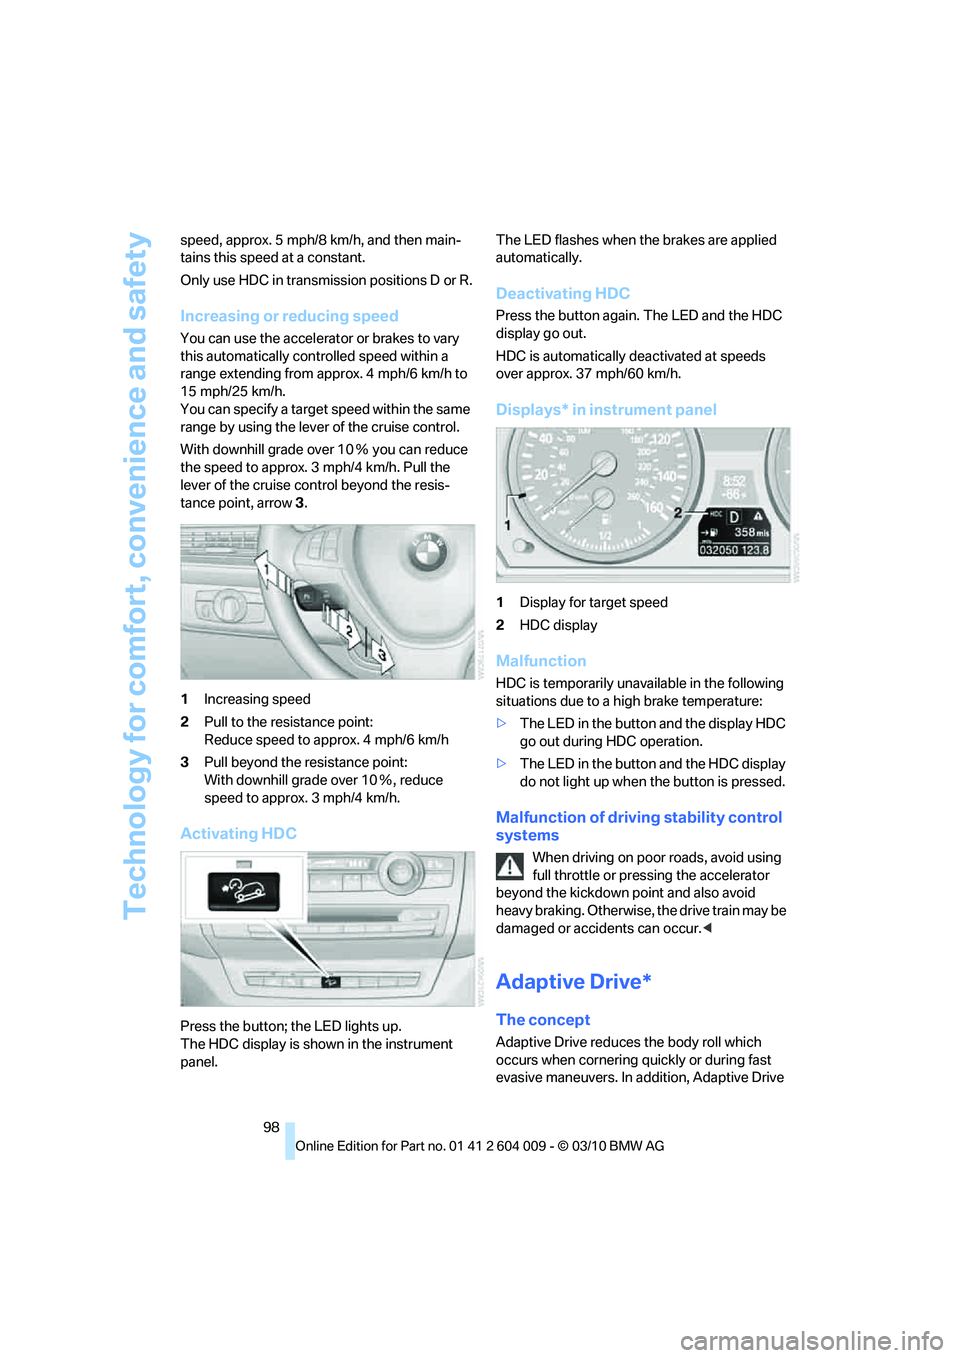
tance point, arrow3.
1Increasing speed
2Pull to the resistance point:
Reduce speed to approx. 4 mph/6 km/h
3Pull beyond the resistance point:
With downhill grade over 10Ξ, reduce
speed to approx. 3 mph/4 km/h.
Activating HDC
Press the button; the LED lights up.
The HDC display is shown in the instrument
panel.The LED flashes when the brakes are applied
automatically.
Deactivating HDC
Press the button again. The LED and the HDC
display go out.
HDC is automatically deactivated at speeds
over approx. 37 mph/60 km/h.
Displays* in instrument panel
1Display for target speed
2HDC display
Malfunction
HDC is temporarily unavailable in the following
situations due to a high brake temperature:
>The LED in the button and the display HDC
go out during HDC operation.
>The LED in the button and the HDC display
do not light up when the button is pressed.
Malfunction of driving stability control
systems
When driving on poor roads, avoid using
full throttle or pressing the accelerator
beyond the kickdown point and also avoid
heavy braking. Otherwise, the drive train may be
damaged or accidents can occur.<
Adaptive Drive*
The concept
Adaptive Drive reduces the body roll which
occurs when cornering quickly or during fast
evasive maneuvers. In addition, Adaptive Drive
Page 126 of 312
Practical interior accessories
124
Practical interior accessories
Integrated universal remote
control*
The concept
The integrated universal remote control can
replace as many as three hand-held transmit-
ters for various remote-controlled accessories,
such as garage and gate or lighting systems.
The integrated universal remote control regis-
ters and stores signals from the original hand-
held transmitters.
The signal of an original hand-held transmitter
can be programmed on one of the three mem-
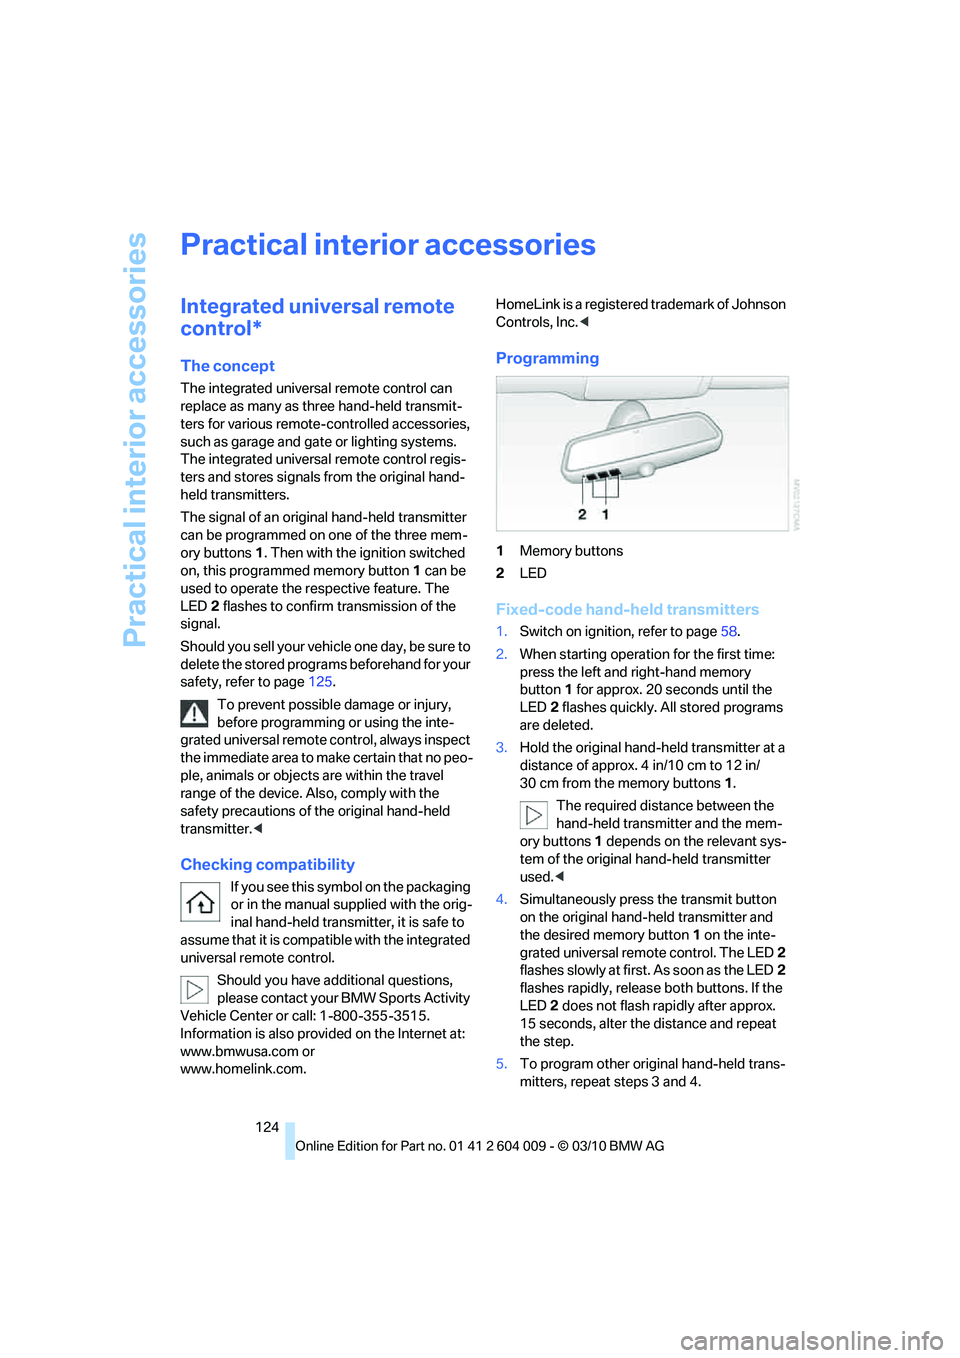
ory buttons1. Then with the ignition switched
on, this programmed memory button1 can be
used to operate the respective feature. The
LED2 flashes to confirm transmission of the
signal.
Should you sell your vehicle one day, be sure to
delete the stored programs beforehand for your
safety, refer to page125.
To prevent possible damage or injury,
before programming or using the inte-
grated universal remote control, always inspect
the immediate area to make certain that no peo-
ple, animals or objects are within the travel
range of the device. Also, comply with the
safety precautions of the original hand-held
transmitter.<
Checking compatibility
If you see this symbol on the packaging
or in the manual supplied with the orig-
inal hand-held transmitter, it is safe to
assume that it is compatible with the integrated
universal remote control.
Should you have additional questions,
please contact your BMW Sports Activity
Vehicle Center or call: 1-800-355-3515.
Information is also provided on the Internet at:
www.bmwusa.com or
www.homelink.com.HomeLink is a registered trademark of Johnson
Controls, Inc.<
Programming
1Memory buttons
2LED
Fixed-code hand-held transmitters
1.Switch on ignition, refer to page58.
2.When starting operation for the first time:
press the left and right-hand memory
button1 for approx. 20 seconds until the
LED2 flashes quickly. All stored programs
are deleted.
3.Hold the original hand-held transmitter at a
distance of approx. 4 in/10 cm to 12 in/
30 cm from the memory buttons1.
The required distance between the
hand-held transmitter and the mem-
ory buttons1 depends on the relevant sys-
tem of the original hand-held transmitter
used.<
4.Simultaneously press the transmit button
on the original hand-held transmitter and
the desired memory button1 on the inte-
grated universal remote control. The LED 2
flashes slowly at first. As soon as the LED2
flashes rapidly, release both buttons. If the
LED2 does not flash rapidly after approx.
15 seconds, alter the distance and repeat
the step.
5.To program other original hand-held trans-
mitters, repeat steps 3 and 4.
Page 129 of 312
Controls
127Reference
At a glance
Driving tips
Communications
Navigation
Entertainment
Mobility
Procedure
1.Make sure that there are no large metal
objects or overhead power lines in the vicin-
ity of your vehicle and that you have enough
space to drive in a circle.
2.Enter the currently applicable compass
zone.
3.Press the adjustment button for approx. 6-
7 seconds to display C. Then drive in a
complete circle at least once at a maximum
speed of 4 mph/7 km/h.
If the calibration is successful, display C is
replaced with the points of the compass.
Setting right/left-hand drive vehicle
Your digital compass is already set to right or
left-hand drive vehicle to match your vehicle at
the factory.
Setting language
You can set the language of the display:
Press the adjustment button for approx. 12-
13 seconds. Briefly press the adjustment but-
ton again to change between English "E" and
German "O".
The setting is automatically stored after approx.
10 seconds.
Roller sun blinds for rear side
windows*
Pull the loop of the roller sun blind and hook
onto bracket.
Do not open the window with the roller
blind raised, as otherwise there is a dan-
ger of damage, and therefore a danger of inju-
ries at higher speeds.<
Glove compartment
Opening
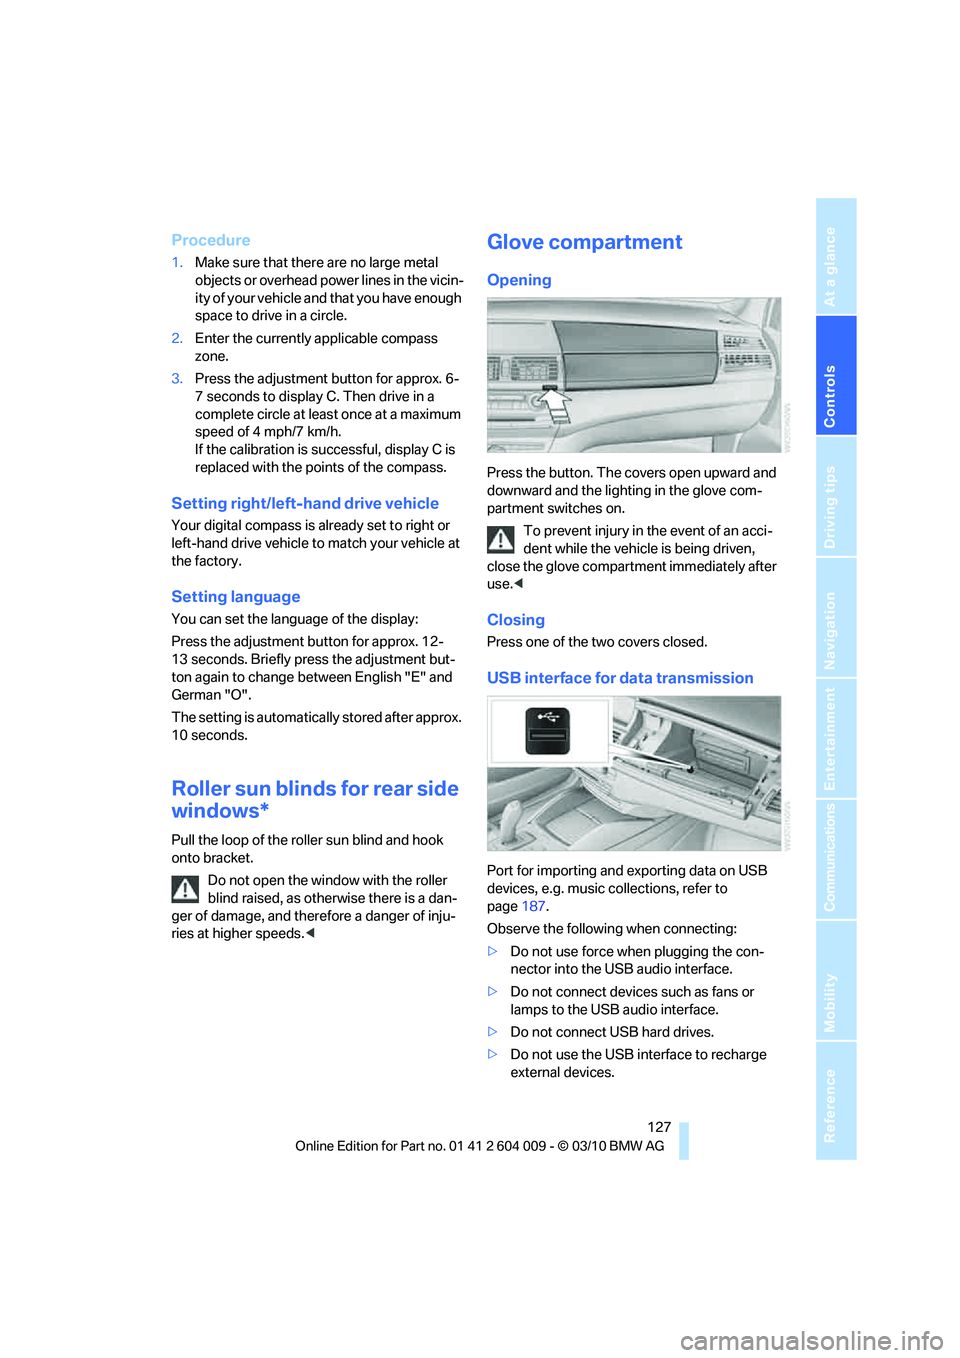
Press the button. The covers open upward and
downward and the lighting in the glove com-
partment switches on.
To prevent injury in the event of an acci-
dent while the vehicle is being driven,
close the glove compartment immediately after
use.<
Closing
Press one of the two covers closed.
USB interface for data transmission
Port for importing and exporting data on USB
devices, e.g. music collections, refer to
page187.
Observe the following when connecting:
>Do not use force when plugging the con-
nector into the USB audio interface.
>Do not connect devices such as fans or
lamps to the USB audio interface.
>Do not connect USB hard drives.
>Do not use the USB interface to recharge
external devices.
Page 140 of 312
Things to remember when driving
138
Things to remember when driving
Break-in period
Moving parts need breaking-in time to adjust to
each other. To ensure that your vehicle contin-
ues to provide optimized economy of operation
throughout an extended service life, we request
that you devote careful attention to the follow-
ing section.
Engine and rear axle differential
Always obey all official speed limits.
Up to 1,200 miles/2,000 km
Drive at various engine and vehicle speeds, but
do not exceed:
>Gasoline engine
4,500 rpm or 100 mph/160 km/h
>Diesel engine
3,500 rpm or 90 mph/150 km/h
Avoid full-throttle operation and use of the
transmission's kickdown mode during these
initial miles.
From 1,200 miles/2,000 km
The engine and vehicle speed can gradually be
increased.
Tires
Due to technical factors associated with their
manufacture, tires do not achieve their full trac-
tion potential until after an initial break-in
period. Therefore, drive reservedly during the
first 200 miles/300 km.
Brake system
Brakes require an initial break-in period of
approx. 300 miles/500 km to achieve optimized
contact and wear patterns between brake pads
and rotors. Drive in a reserved manner during
this break-in period.
Following part replacement
Observe the break-in instructions again if com-
ponents mentioned above must be replaced
after subsequent driving operation.
Saving fuel
The fuel consumption of your vehicle depends
on various factors. Through a few simple steps,
your driving style, and regular maintenance, you
can have a positive influence on your fuel con-
sumption and environmental impact.
Removing unnecessary cargo
Additional weight increases fuel consumption.
Removing add-on parts after use
Remove unneeded auxiliary mirrors, roof or rear
luggage racks after use. Add-on parts attached
to the vehicle impede the aerodynamics and
increase the fuel consumption.
Closing windows and glass sunroof*/
panoramic glass sunroof*
An open glass sunroof/panoramic glass sunroof
or open windows likewise increase the drag
coefficient and therefore the fuel consumption.
Checking tire inflation pressures
regularly
Check and correct the tire inflation pressure as
needed at least twice a month and before long
trips.
An insufficient tire inflation pressure increases
the rolling resistance and thus increases the
fuel consumption and tire wear.
Driving off immediately
Do not allow the engine to warm up by leaving it
running while the vehicle remains stationary.
Instead, begin to drive at a moderate engine