instrument panel BMW Z3 2002 Owners Manual
[x] Cancel search | Manufacturer: BMW, Model Year: 2002, Model line: Z3, Model: BMW Z3 2002Pages: 187, PDF Size: 2.73 MB
Page 39 of 187
39n
IndexDataTechnologyRepairsMaintenanceControlsOverview
Electric power windows Sunroof
*, coupe
Jam protectionIf one of the windows comes into
contact with an object between the
window and roof frame when it is
closing, the closing cycle is interrupted
immediately and the window will open
again slightly.
You can override this jam protec-
tion function (if there is an
attempted unauthorized entrance from
the outside, for instance) by pressing
the switch beyond the resistance point
and holding it.<
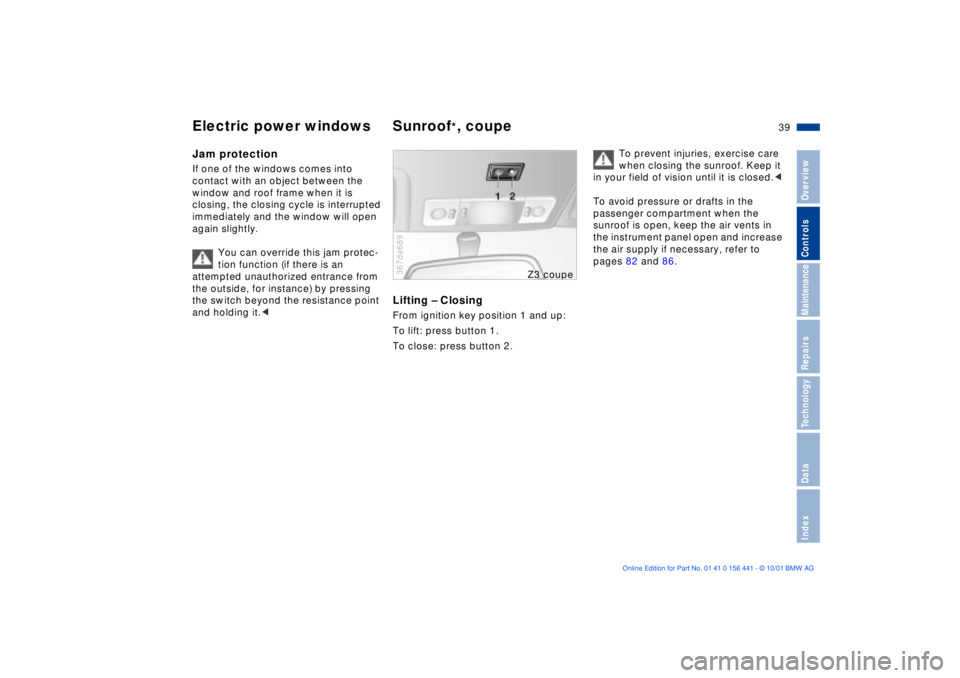
Lifting Ð ClosingFrom ignition key position 1 and up:
To lift: press button 1.
To close: press button 2.367de689
Z3 cou
pe
To prevent injuries, exercise care
when closing the sunroof. Keep it
in your field of vision until it is closed.<
To avoid pressure or drafts in the
passenger compartment when the
sunroof is open, keep the air vents in
the instrument panel open and increase
the air supply if necessary, refer to
pages 82 and 86.
Page 49 of 187
49n
IndexDataTechnologyRepiarsMaintenanceControlsOverview
For maximum safety, please comply
with the following:
Never try to adjust your seat while
operating the vehicle. The seat
could respond with an unexpected
movement, and the ensuing loss of
vehicle control could result in an acci-
dent.
Be sure that the safety belt is fastened
firmly against your body at all times. In
the event of a frontal impact, a loose lap
belt could slide over your hips, leading
to abdominal injury. In addition, the
safety belt's restraint effectiveness is
reduced if the belt is worn loosely.
When adjusting your seat, select a
position that provides the maximum
distance between you and the steering
wheel, instrument panel and door while
still allowing comfortable and safe
access to all vehicle controls.<
Correct sitting postureTo reduce strain on your spinal column,
sit all the way back in the seat and rest
your back fully against the backrest.
In the ideal sitting posture, your head
extends along a straight line from your
spine.
For long-distance driving, you may wish
to increase the backrest tilt angle
slightly to reduce muscular tension.
You should also be able to grasp the
highest point of the steering wheel with
your arms slightly bent.
After a seat adjustment in the coupe,
adjust the height of the safety belt also,
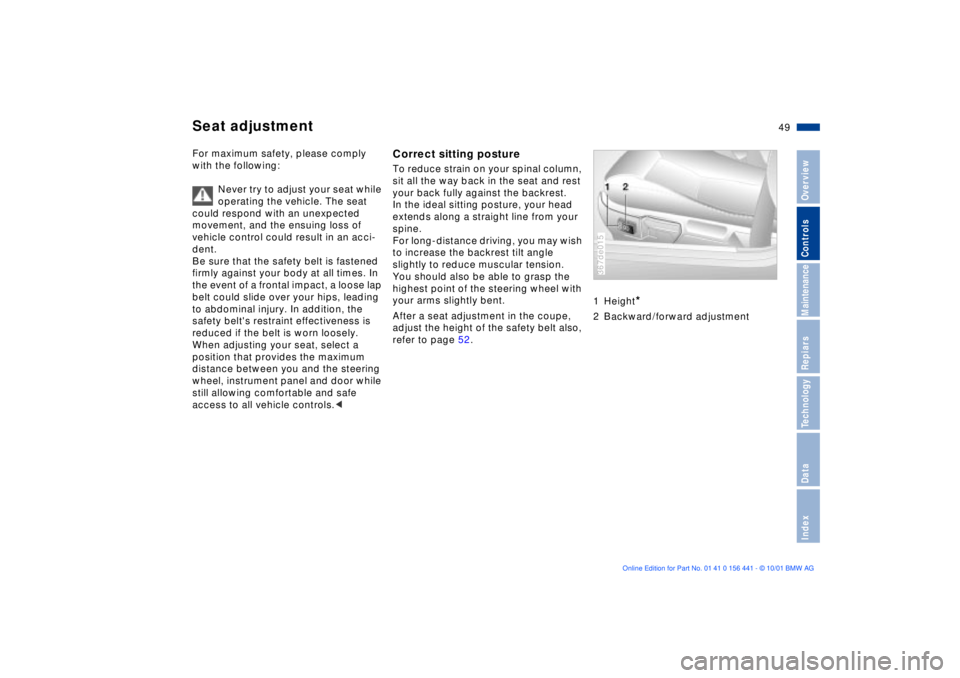
refer to page 52.1 Height
*
2 Backward/forward adjustment367de015
Seat adjustment
Page 55 of 187
55n
IndexDataTechnologyRepairsMaintenanceControlsOverview
AirbagsSitting correctly with airbags
For your safety, comply with the
following instructions for the
airbags. If you do not, the airbags may
not be able to provide their maximum
protection. All passengers in the vehicle
should be aware of and comply with this
information:
The airbags are supplemental restraint
devices designed to provide extra
protection; they are not a substitute for
safety belts. Wear your safety belt at
all times.
Adjust your seat to a position that is
comfortable for you, allowing unre-
stricted vehicle operation, and is not
closer to the steering wheel than neces-
sary.
Always grasp the steering wheel by the
steering wheel rim, keeping your hands
at the "9-o'clock" and "3-o'clock" posi-
tions in order to minimize any risk of
injury to hands or arms if the airbag does
deploy.
There should not be any other persons,
animals or objects between the airbag
and the passenger in that seat.
Do not use the cover panel for the front
airbag on the passenger side as a
storage area.
Do not apply adhesive materials to the
cover panels of the airbags, cover them
or modify them in any other way.
If you use a child-restraint system, read
carefully and comply with the instruc-
tions on page 56.
Be sure that child-restraint systems are
installed correctly and with the greatest
possible distance from the airbag in the
side trim panel. Do not allow children to
lean out of the child-restraint system in
the direction of the side trim panel.
Otherwise, serious injuries could occur
if the airbag is triggered.<
Even when you have complied with all
of these guidelines, there is still a small
residual risk of minor facial, hand and
arm injuries from airbag deployment
occurring in isolated instances.
The ignition and inflation noise may
cause a mild temporary hearing loss in
extremely sensitive individuals.
Corresponding airbag safety precau-
tions are provided on both sun visors
and the instrument panel (US models).
For additional information concerning
the airbag system, refer to pages 130
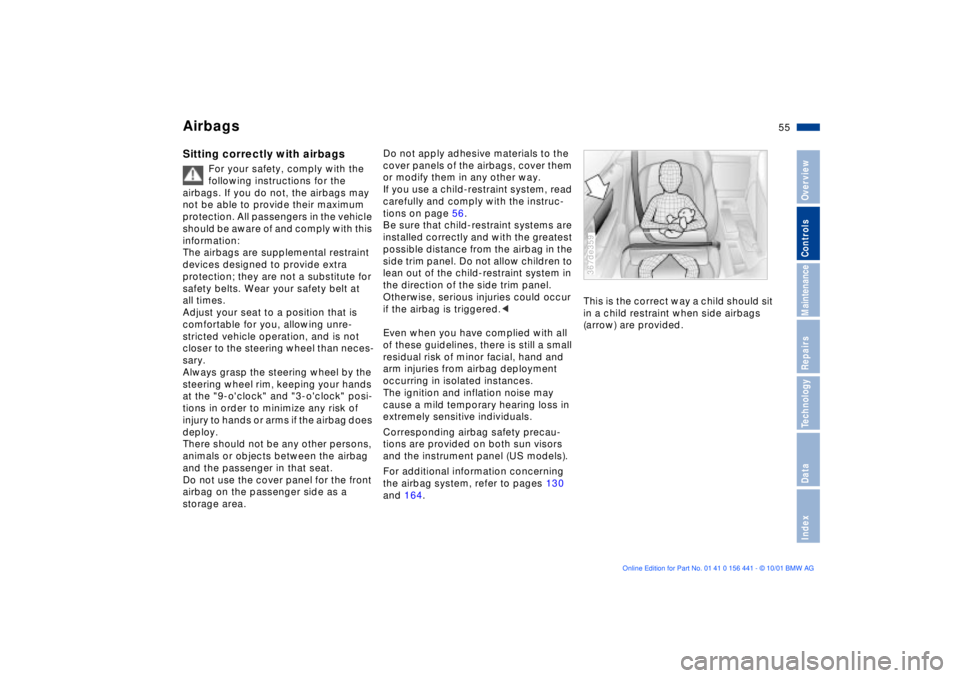
and 164.This is the correct way a child should sit
in a child restraint when side airbags
(arrow) are provided.
367de359
Page 56 of 187
56n
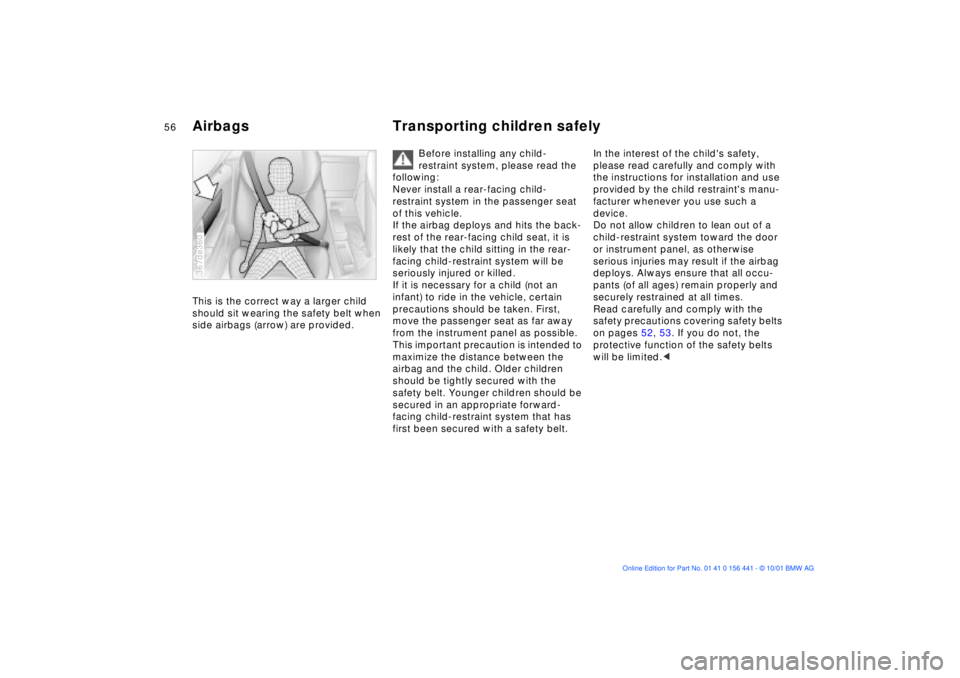
Airbags Transporting children safely This is the correct way a larger child
should sit wearing the safety belt when
side airbags (arrow) are provided.367de360
Before installing any child-
restraint system, please read the
following:
Never install a rear-facing child-
restraint system in the passenger seat
of this vehicle.
If the airbag deploys and hits the back-
rest of the rear-facing child seat, it is
likely that the child sitting in the rear-
facing child-restraint system will be
seriously injured or killed.
If it is necessary for a child (not an
infant) to ride in the vehicle, certain
precautions should be taken. First,
move the passenger seat as far away
from the instrument panel as possible.
This important precaution is intended to
maximize the distance between the
airbag and the child. Older children
should be tightly secured with the
safety belt. Younger children should be
secured in an appropriate forward-
facing child-restraint system that has
first been secured with a safety belt.
In the interest of the child's safety,
please read carefully and comply with
the instructions for installation and use
provided by the child restraint's manu-
facturer whenever you use such a
device.
Do not allow children to lean out of a
child-restraint system toward the door
or instrument panel, as otherwise
serious injuries may result if the airbag
deploys. Always ensure that all occu-
pants (of all ages) remain properly and
securely restrained at all times.
Read carefully and comply with the
safety precautions covering safety belts
on pages 52, 53. If you do not, the
protective function of the safety belts
will be limited.<
Page 60 of 187
60n
Switching off the engine Parking brakeTurn the ignition key to position 1 or 0.
Do not remove the ignition key
while the vehicle is rolling. The
steering locks and it is impossible to
steer the vehicle.
Always remove the ignition key and
engage the steering lock before leaving
the vehicle.
Vehicles with manual transmission:
Always engage the parking brake when
parking on slopes and inclined
surfaces, since even placing the gear-
shift lever in 1st gear or reverse may not
provide adequate resistance to rolling.
Vehicles with automatic transmission:
Place the selector lever in "P".<
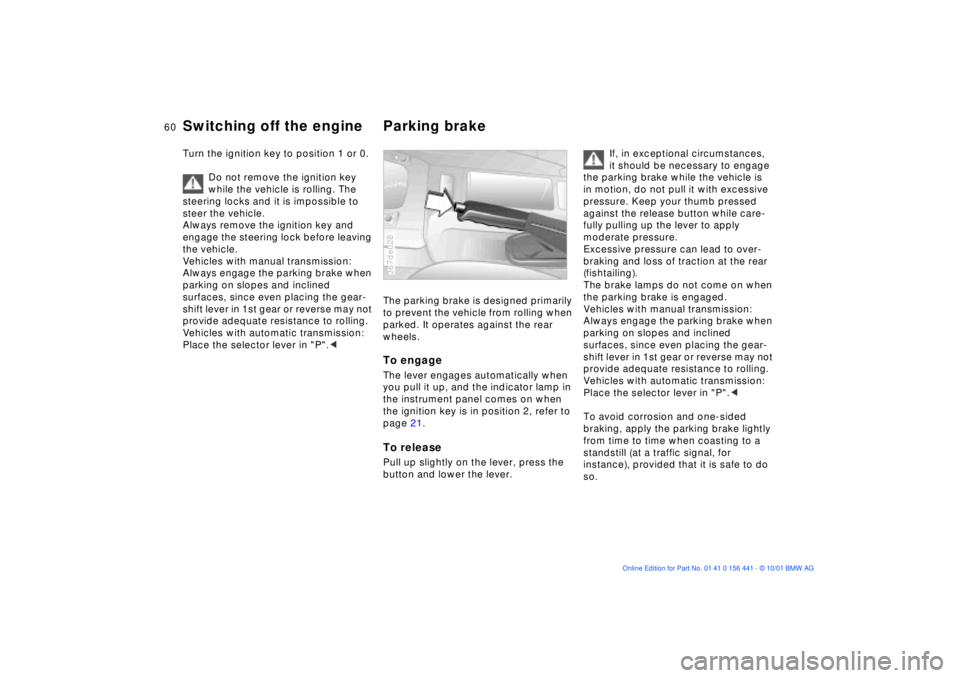
The parking brake is designed primarily
to prevent the vehicle from rolling when
parked. It operates against the rear
wheels.To engageThe lever engages automatically when
you pull it up, and the indicator lamp in
the instrument panel comes on when
the ignition key is in position 2, refer to
page 21.To releasePull up slightly on the lever, press the
button and lower the lever.367de028
If, in exceptional circumstances,
it should be necessary to engage
the parking brake while the vehicle is
in motion, do not pull it with excessive
pressure. Keep your thumb pressed
against the release button while care-
fully pulling up the lever to apply
moderate pressure.
Excessive pressure can lead to over-
braking and loss of traction at the rear
(fishtailing).
The brake lamps do not come on when
the parking brake is engaged.
Vehicles with manual transmission:
Always engage the parking brake when
parking on slopes and inclined
surfaces, since even placing the gear-
shift lever in 1st gear or reverse may not
provide adequate resistance to rolling.
Vehicles with automatic transmission:
Place the selector lever in "P".<
To avoid corrosion and one-sided
braking, apply the parking brake lightly
from time to time when coasting to a
standstill (at a traffic signal, for
instance), provided that it is safe to do
so.
Page 76 of 187
76n
Parking lamps/Low beams Fog lampsParking lamps (position lamps/
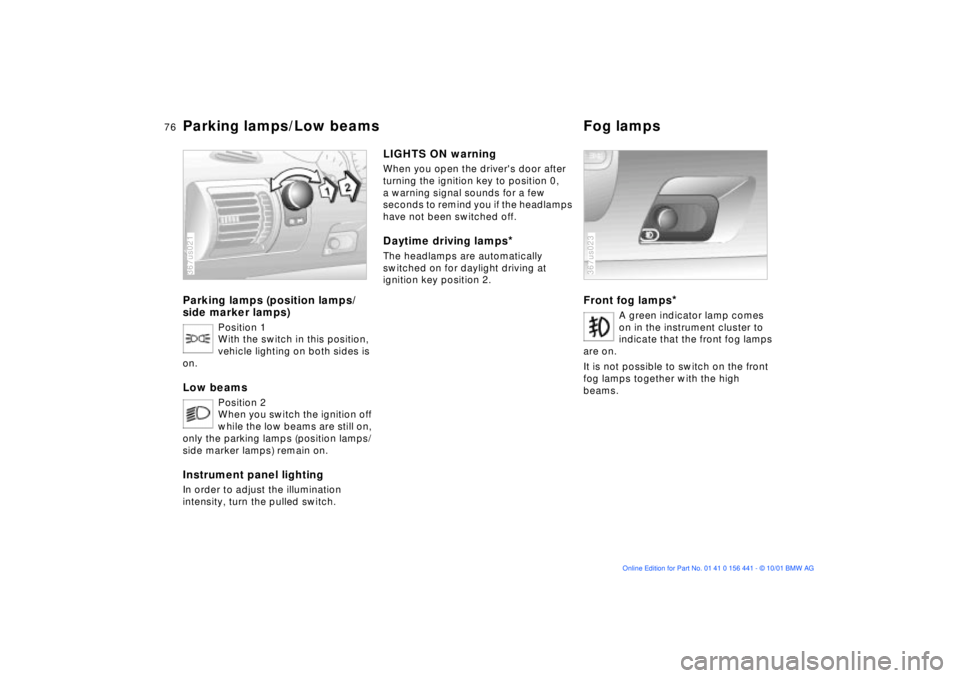
side marker lamps)
Position 1
With the switch in this position,
vehicle lighting on both sides is
on.
Low beams
Position 2
When you switch the ignition off
while the low beams are still on,
only the parking lamps (position lamps/
side marker lamps) remain on.
Instrument panel lightingIn order to adjust the illumination
intensity, turn the pulled switch. 367us021
LIGHTS ON warningWhen you open the driver's door after
turning the ignition key to position 0,
a warning signal sounds for a few
seconds to remind you if the headlamps
have not been switched off.Daytime driving lamps
*
The headlamps are automatically
switched on for daylight driving at
ignition key position 2.
Front fog lamps
*
A green indicator lamp comes
on in the instrument cluster to
indicate that the front fog lamps
are on.
It is not possible to switch on the front
fog lamps together with the high
beams.
367us023
Page 118 of 187
118n
Do not work on your vehicle
without appropriate skills. Always
switch off the engine and allow it to
cool down before working in the engine
compartment. Always disconnect the
battery before working on any electrical
systems or equipment, especially when
these are located within the engine
compartment. Comply with all appli-
cable instructions and warnings. If you
are not familiar with all guidelines, have
the work performed by your BMW
center. Otherwise, safety hazards for
vehicle occupants and other road users
may occur as a result of improper
handling of components and mate-
rials.<
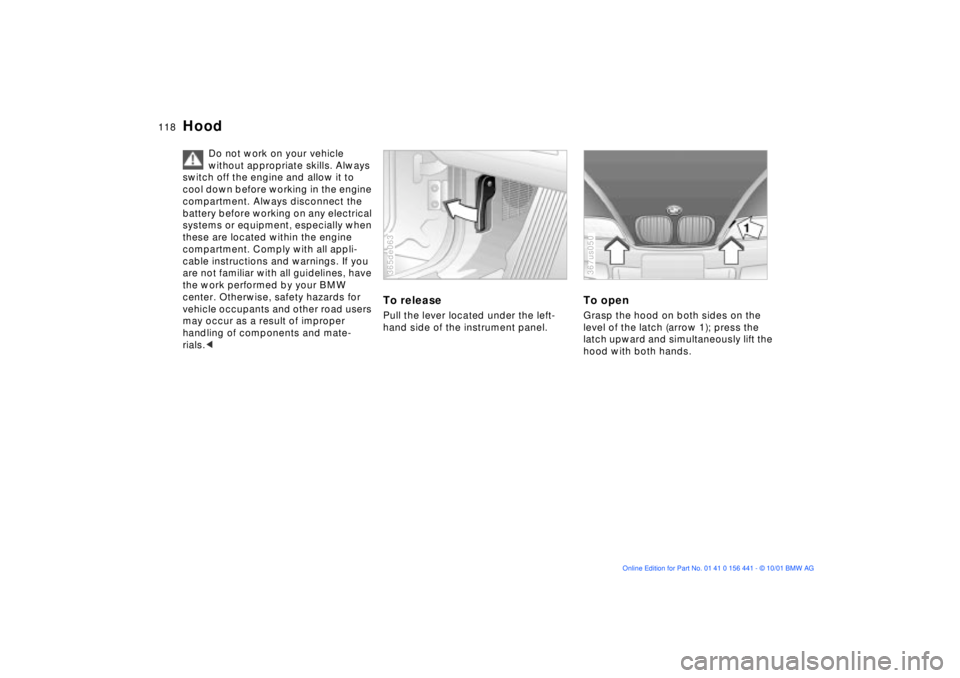
To release Pull the lever located under the left-
hand side of the instrument panel.365de063
To openGrasp the hood on both sides on the
level of the latch (arrow 1); press the
latch upward and simultaneously lift the
hood with both hands.367us050
Hood
Page 127 of 187
127n
IndexDataTechnologyRepairsMaintenanceControlsOverview
Brake fluid Vehicle Identification Brake fluid is hazardous to health and
will damage the vehicle's paint. You
should always store it in its original
container and in a location which is
inaccessible to children. Avoid brake
fluid spills. Do not fill brake fluid beyond
the "MAX" level in the
reservoir. The brake fluid could ignite
upon contact with hot engine parts and
cause serious burns.<
Comply with the applicable envi-
ronmental laws regulating the
disposal of brake fluid.<
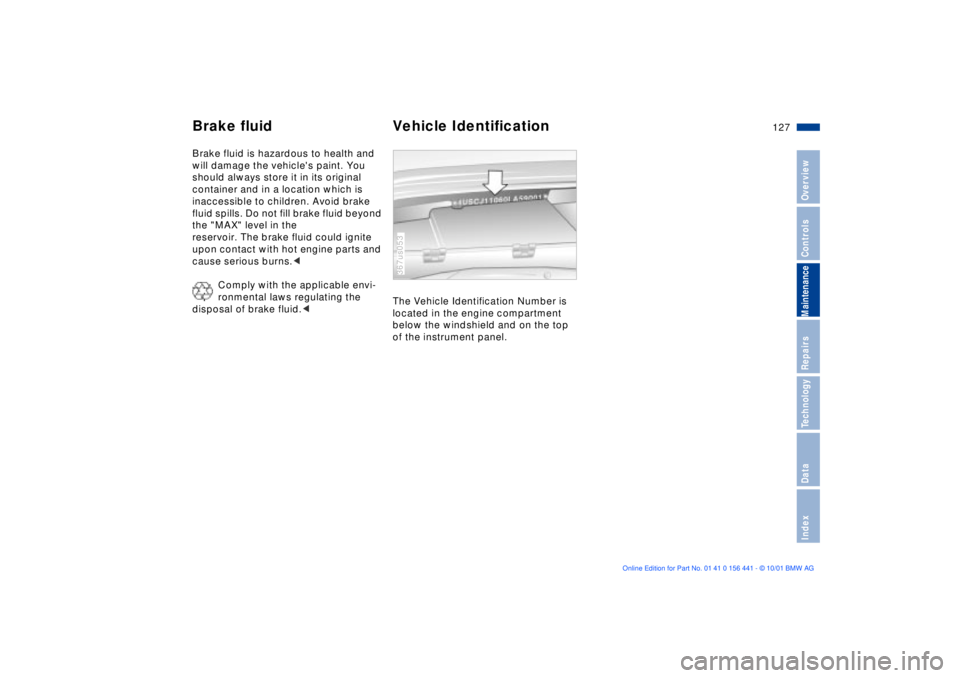
The Vehicle Identification Number is
located in the engine compartment
below the windshield and on the top
of the instrument panel. 367us053
Page 130 of 187
130n
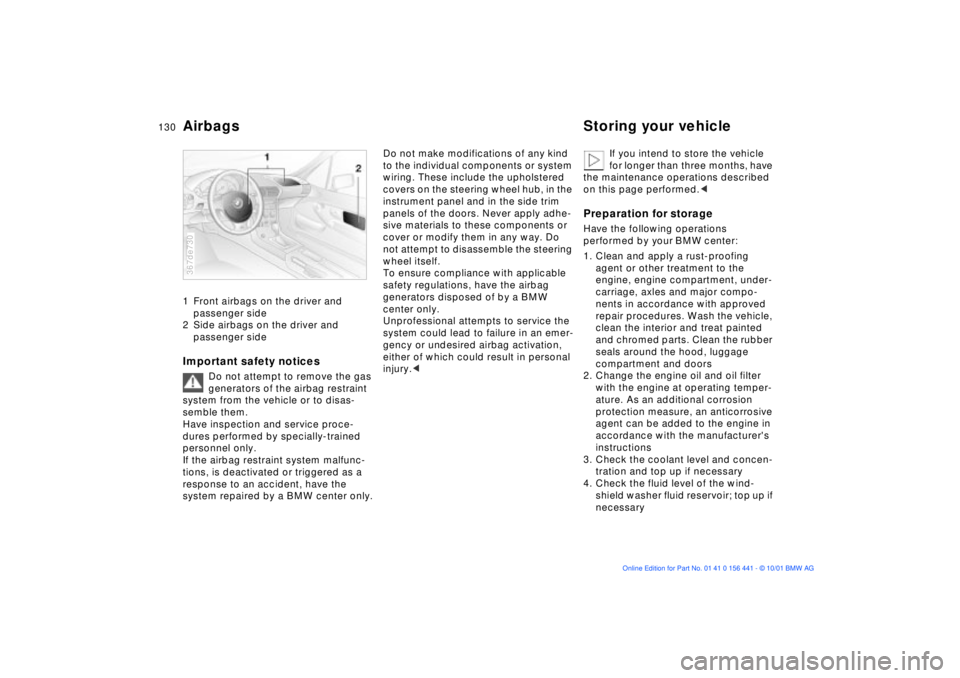
Airbags Storing your vehicle1 Front airbags on the driver and
passenger side
2 Side airbags on the driver and
passenger sideImportant safety notices
Do not attempt to remove the gas
generators of the airbag restraint
system from the vehicle or to disas-
semble them.
Have inspection and service proce-
dures performed by specially-trained
personnel only.
If the airbag restraint system malfunc-
tions, is deactivated or triggered as a
response to an accident, have the
system repaired by a BMW center only.
367de730
Do not make modifications of any kind
to the individual components or system
wiring. These include the upholstered
covers on the steering wheel hub, in the
instrument panel and in the side trim
panels of the doors. Never apply adhe-
sive materials to these components or
cover or modify them in any way. Do
not attempt to disassemble the steering
wheel itself.
To ensure compliance with applicable
safety regulations, have the airbag
generators disposed of by a BMW
center only.
Unprofessional attempts to service the
system could lead to failure in an emer-
gency or undesired airbag activation,
either of which could result in personal
injury.< If you intend to store the vehicle
for longer than three months, have
the maintenance operations described
on this page performed.<
Preparation for storageHave the following operations
performed by your BMW center:
1. Clean and apply a rust-proofing
agent or other treatment to the
engine, engine compartment, under-
carriage, axles and major compo-
nents in accordance with approved
repair procedures. Wash the vehicle,
clean the interior and treat painted
and chromed parts. Clean the rubber
seals around the hood, luggage
compartment and doors
2. Change the engine oil and oil filter
with the engine at operating temper-
ature. As an additional corrosion
protection measure, an anticorrosive
agent can be added to the engine in
accordance with the manufacturer's
instructions
3. Check the coolant level and concen-
tration and top up if necessary
4. Check the fluid level of the wind-
shield washer fluid reservoir; top up if
necessary
Page 181 of 187
Everything from A to Z
181n
IndexDataTechnologyRepairsMaintenanceControlsOverview
Heated seats89
Heating and
ventilation80, 84
Heat-up, rapid83
Height171
Height adjustment, seats49
Help with jump starting158
High beams23, 64
bulb replacement137t
High Performance Synthetic
Oil124
High-mount brake lamp
(center)141
Hood release118t
Horn17
Hub cover150
Hydraulic brake assistant,
refer to DBCIIce warning71
Identification number of the
vehicle127
Identification, tires114
Ignition key30
Ignition switch58
Immobilizer, electronic31
Immobilizer, vehicle31Imprint4
Indicator lamps20
Inflation
pressures26t, 110
Inflation pressures,
tires26t
INSPECTION69
Instrument panel16
lighting76
Instruments18
Interface socket for onboard
diagnostics (OBD)133
Interior lamps77
bulb replacement142t
Interlock58
Intermittent wipe switch65
JJack146t
Jump-starting158tKKeys30
Keys with remote
control30, 33
Key, battery change143t
Kickdown63
LLamp switch76
Lashing eyes94
Leather care, refer to the
"Caring for your vehicle"
manual
Length171
License plate lamps
bulb replacement141t
Light-alloy wheel116
LIGHTS ON warning76
Limited slip differential166
Load-securing devices94
Lock buttons36
Locks, care105
Low beams76
bulb replacement137t
Low-fuel indicator lamp68
Lug bolts150, 151
Lug wrench147t
Luggage compartment36
capacity172
locking separately37
Luggage compartment lamp
bulb replacement142tLuggage compartment
lid36
electrical
malfunction37t
emergency release from
luggage compartment's
interior38
manual operation37t
MM + S tires115
Magic Eye
refer to Battery charge
condition154
Maintenance69, 128
Malfunction, cellular
phone107
Manual operation
doors32t
fuel filler door157t
luggage
compartment37t
luggage compartment
lid37t
Manual transmission61
Master key with battery
lamp143