button BMW Z4 2015 E89 Owner's Guide
[x] Cancel search | Manufacturer: BMW, Model Year: 2015, Model line: Z4, Model: BMW Z4 2015 E89Pages: 289, PDF Size: 7.16 MB
Page 43 of 289
After the engine is switched off, the engine can
only be restarted within approx. 10 seconds.
The indicator lamp in the instrument
cluster comes on and a message ap‐
pears on the Control Display: replace
the remote control battery.
Replacing the battery
The remote control for Comfort Access con‐
tains a battery that will need to be replaced
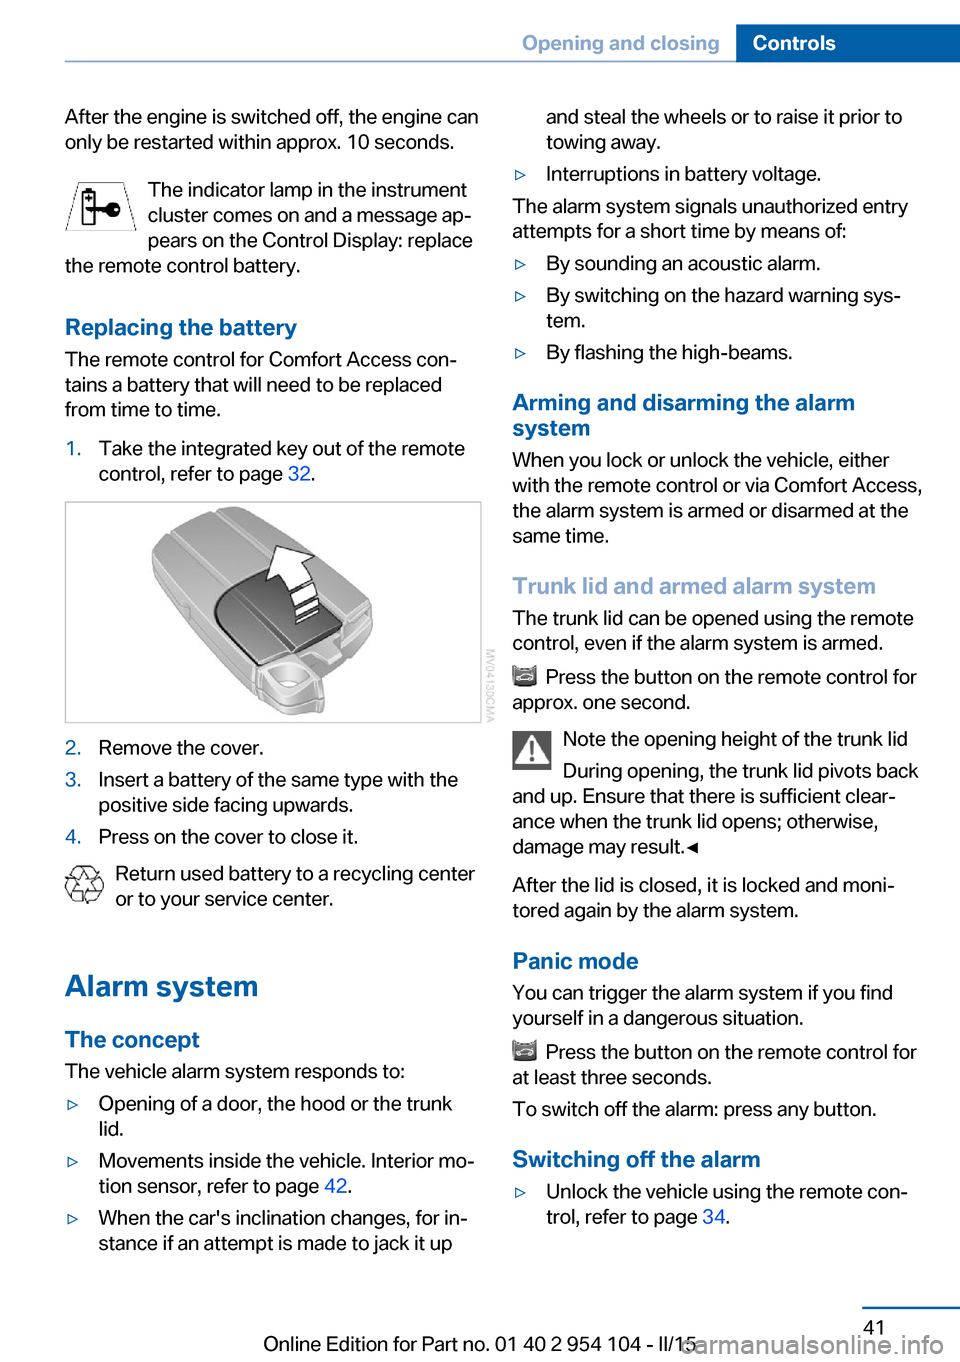
from time to time.1.Take the integrated key out of the remote
control, refer to page 32.2.Remove the cover.3.Insert a battery of the same type with the
positive side facing upwards.4.Press on the cover to close it.
Return used battery to a recycling center
or to your service center.
Alarm system The conceptThe vehicle alarm system responds to:
▷Opening of a door, the hood or the trunk
lid.▷Movements inside the vehicle. Interior mo‐
tion sensor, refer to page 42.▷When the car's inclination changes, for in‐
stance if an attempt is made to jack it upand steal the wheels or to raise it prior to
towing away.▷Interruptions in battery voltage.
The alarm system signals unauthorized entry
attempts for a short time by means of:
▷By sounding an acoustic alarm.▷By switching on the hazard warning sys‐
tem.▷By flashing the high-beams.
Arming and disarming the alarm
system
When you lock or unlock the vehicle, either
with the remote control or via Comfort Access,
the alarm system is armed or disarmed at the
same time.
Trunk lid and armed alarm systemThe trunk lid can be opened using the remote
control, even if the alarm system is armed.
Press the button on the remote control for
approx. one second.
Note the opening height of the trunk lid
During opening, the trunk lid pivots back
and up. Ensure that there is sufficient clear‐
ance when the trunk lid opens; otherwise,
damage may result.◀
After the lid is closed, it is locked and moni‐
tored again by the alarm system.
Panic mode
You can trigger the alarm system if you find
yourself in a dangerous situation.
Press the button on the remote control for
at least three seconds.
To switch off the alarm: press any button.
Switching off the alarm
▷Unlock the vehicle using the remote con‐
trol, refer to page 34.Seite 41Opening and closingControls41
Online Edition for Part no. 01 40 2 954 104 - II/15
Page 44 of 289
▷Insert the remote control all the way into
the ignition lock.▷With Comfort Access: if you are carrying
the remote control with you, pull on the
door handle.
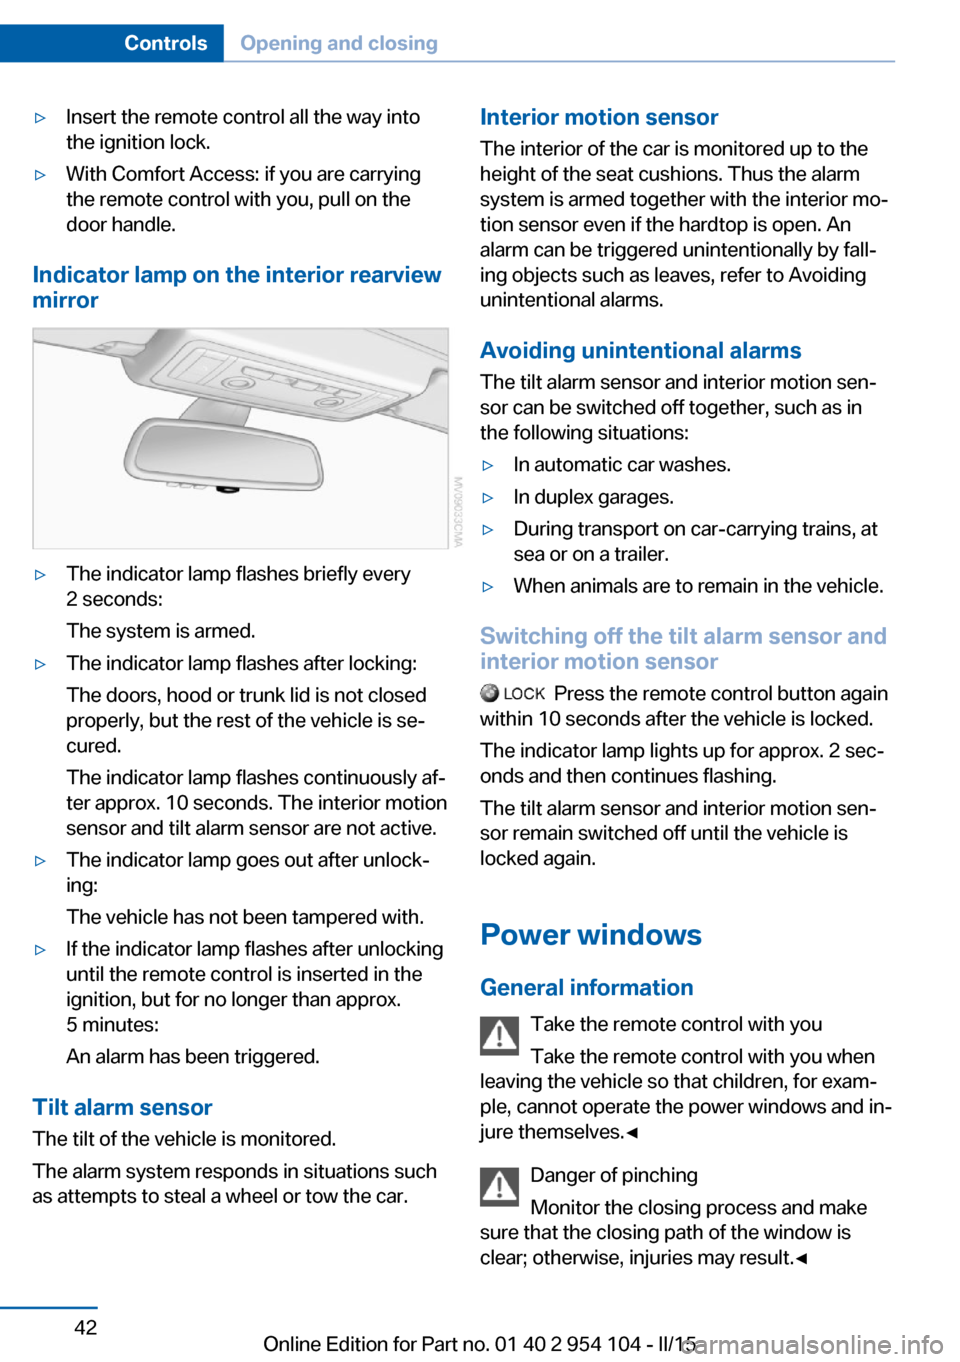
Indicator lamp on the interior rearview
mirror
▷The indicator lamp flashes briefly every
2 seconds:
The system is armed.▷The indicator lamp flashes after locking:
The doors, hood or trunk lid is not closed
properly, but the rest of the vehicle is se‐
cured.
The indicator lamp flashes continuously af‐
ter approx. 10 seconds. The interior motion
sensor and tilt alarm sensor are not active.▷The indicator lamp goes out after unlock‐
ing:
The vehicle has not been tampered with.▷If the indicator lamp flashes after unlocking
until the remote control is inserted in the
ignition, but for no longer than approx.
5 minutes:
An alarm has been triggered.
Tilt alarm sensor The tilt of the vehicle is monitored.
The alarm system responds in situations such
as attempts to steal a wheel or tow the car.
Interior motion sensor
The interior of the car is monitored up to theheight of the seat cushions. Thus the alarm
system is armed together with the interior mo‐
tion sensor even if the hardtop is open. An
alarm can be triggered unintentionally by fall‐
ing objects such as leaves, refer to Avoiding unintentional alarms.
Avoiding unintentional alarms The tilt alarm sensor and interior motion sen‐
sor can be switched off together, such as in
the following situations:▷In automatic car washes.▷In duplex garages.▷During transport on car-carrying trains, at
sea or on a trailer.▷When animals are to remain in the vehicle.
Switching off the tilt alarm sensor and
interior motion sensor
Press the remote control button again
within 10 seconds after the vehicle is locked.
The indicator lamp lights up for approx. 2 sec‐
onds and then continues flashing.
The tilt alarm sensor and interior motion sen‐
sor remain switched off until the vehicle is
locked again.
Power windows General information Take the remote control with youTake the remote control with you when
leaving the vehicle so that children, for exam‐
ple, cannot operate the power windows and in‐
jure themselves.◀
Danger of pinching
Monitor the closing process and make
sure that the closing path of the window is
clear; otherwise, injuries may result.◀
Seite 42ControlsOpening and closing42
Online Edition for Part no. 01 40 2 954 104 - II/15
Page 47 of 289
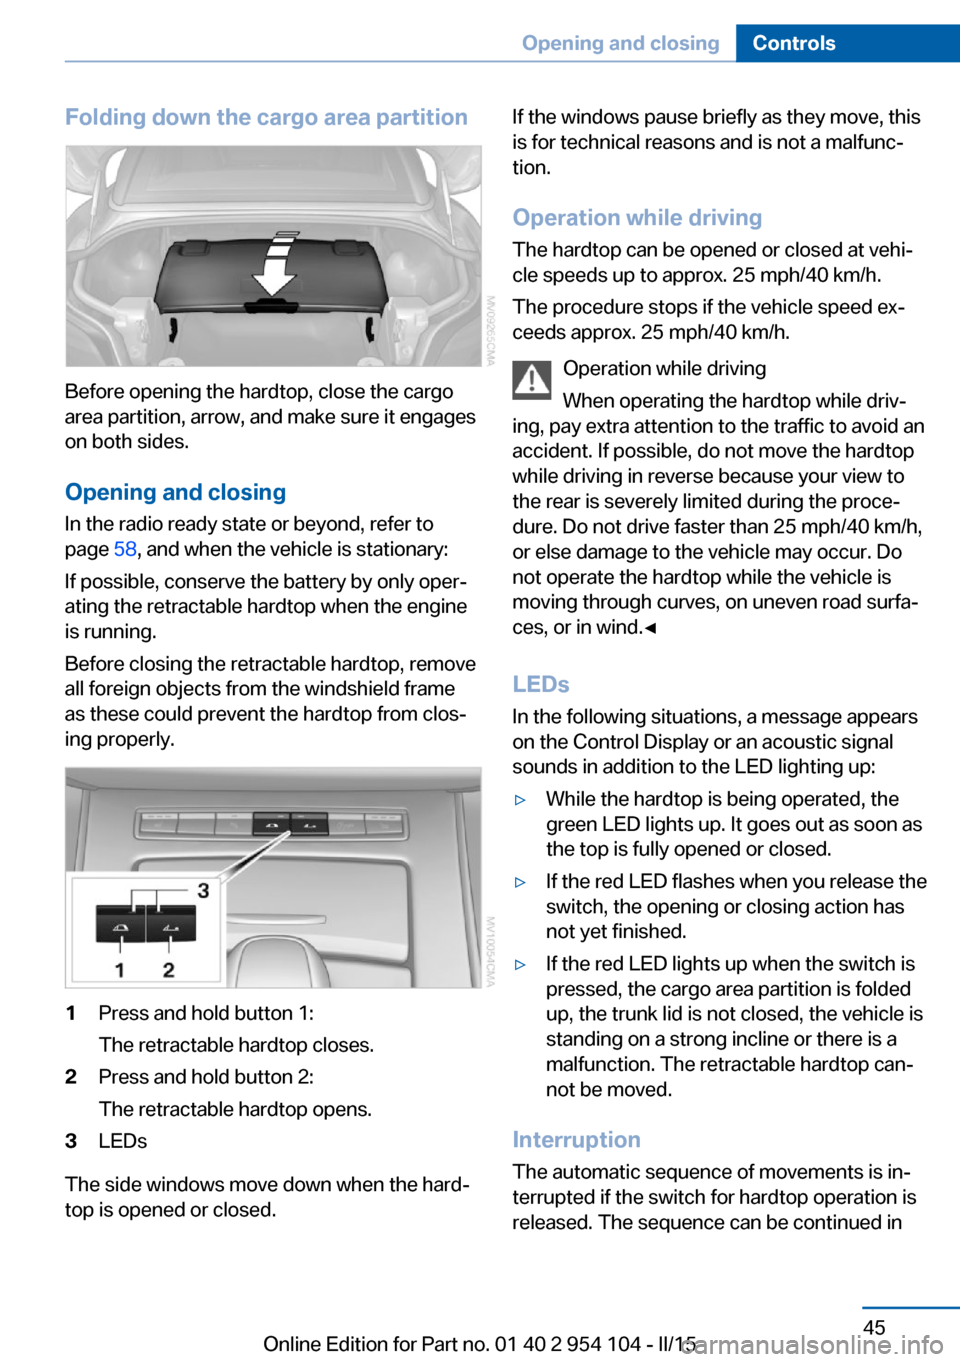
Folding down the cargo area partition
Before opening the hardtop, close the cargo
area partition, arrow, and make sure it engages
on both sides.
Opening and closing In the radio ready state or beyond, refer to
page 58, and when the vehicle is stationary:
If possible, conserve the battery by only oper‐
ating the retractable hardtop when the engine
is running.
Before closing the retractable hardtop, remove
all foreign objects from the windshield frame
as these could prevent the hardtop from clos‐
ing properly.
1Press and hold button 1:
The retractable hardtop closes.2Press and hold button 2:
The retractable hardtop opens.3LEDs
The side windows move down when the hard‐
top is opened or closed.
If the windows pause briefly as they move, this
is for technical reasons and is not a malfunc‐
tion.
Operation while driving
The hardtop can be opened or closed at vehi‐
cle speeds up to approx. 25 mph/40 km/h.
The procedure stops if the vehicle speed ex‐
ceeds approx. 25 mph/40 km/h.
Operation while driving
When operating the hardtop while driv‐
ing, pay extra attention to the traffic to avoid an
accident. If possible, do not move the hardtop
while driving in reverse because your view to
the rear is severely limited during the proce‐
dure. Do not drive faster than 25 mph/40 km/h,
or else damage to the vehicle may occur. Do
not operate the hardtop while the vehicle is
moving through curves, on uneven road surfa‐
ces, or in wind.◀
LEDs
In the following situations, a message appears
on the Control Display or an acoustic signal
sounds in addition to the LED lighting up:▷While the hardtop is being operated, the
green LED lights up. It goes out as soon as
the top is fully opened or closed.▷If the red LED flashes when you release the
switch, the opening or closing action has
not yet finished.▷If the red LED lights up when the switch is
pressed, the cargo area partition is folded
up, the trunk lid is not closed, the vehicle is
standing on a strong incline or there is a
malfunction. The retractable hardtop can‐
not be moved.
Interruption
The automatic sequence of movements is in‐
terrupted if the switch for hardtop operation is
released. The sequence can be continued in
Seite 45Opening and closingControls45
Online Edition for Part no. 01 40 2 954 104 - II/15
Page 52 of 289
▷Press the upper/lower section of the
switch.
The curvature is shifted up/down.
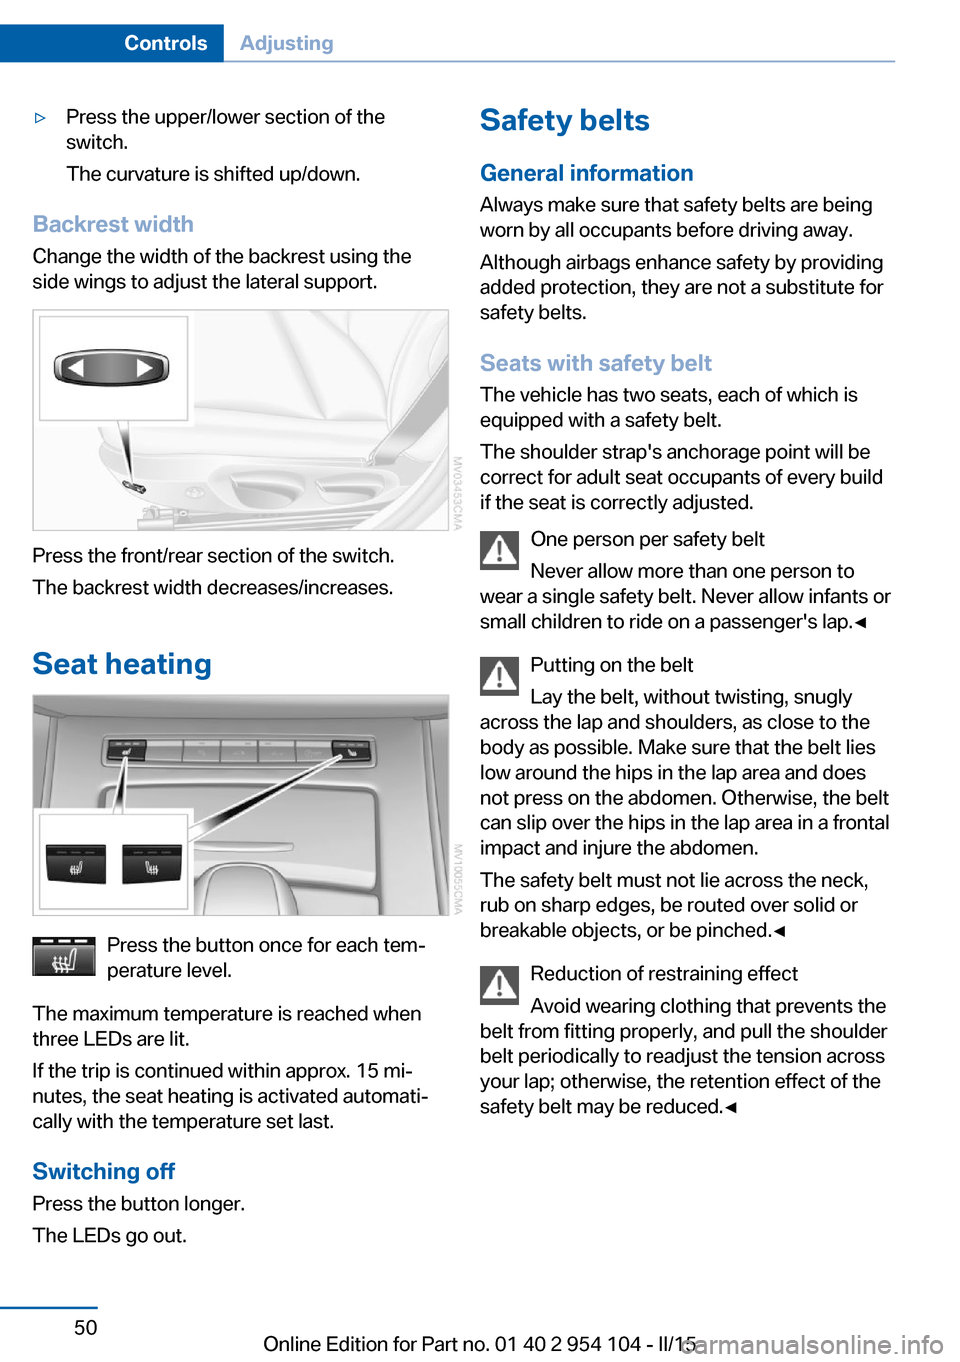
Backrest width Change the width of the backrest using the
side wings to adjust the lateral support.
Press the front/rear section of the switch.
The backrest width decreases/increases.
Seat heating
Press the button once for each tem‐
perature level.
The maximum temperature is reached when
three LEDs are lit.
If the trip is continued within approx. 15 mi‐
nutes, the seat heating is activated automati‐
cally with the temperature set last.
Switching off
Press the button longer.
The LEDs go out.
Safety belts
General information
Always make sure that safety belts are being
worn by all occupants before driving away.
Although airbags enhance safety by providing
added protection, they are not a substitute for
safety belts.
Seats with safety belt The vehicle has two seats, each of which is
equipped with a safety belt.
The shoulder strap's anchorage point will be
correct for adult seat occupants of every build
if the seat is correctly adjusted.
One person per safety belt
Never allow more than one person to
wear a single safety belt. Never allow infants or
small children to ride on a passenger's lap.◀
Putting on the belt
Lay the belt, without twisting, snugly
across the lap and shoulders, as close to the
body as possible. Make sure that the belt lies
low around the hips in the lap area and does
not press on the abdomen. Otherwise, the belt
can slip over the hips in the lap area in a frontal
impact and injure the abdomen.
The safety belt must not lie across the neck,
rub on sharp edges, be routed over solid or
breakable objects, or be pinched.◀
Reduction of restraining effect
Avoid wearing clothing that prevents the
belt from fitting properly, and pull the shoulder
belt periodically to readjust the tension across
your lap; otherwise, the retention effect of the
safety belt may be reduced.◀Seite 50ControlsAdjusting50
Online Edition for Part no. 01 40 2 954 104 - II/15
Page 53 of 289
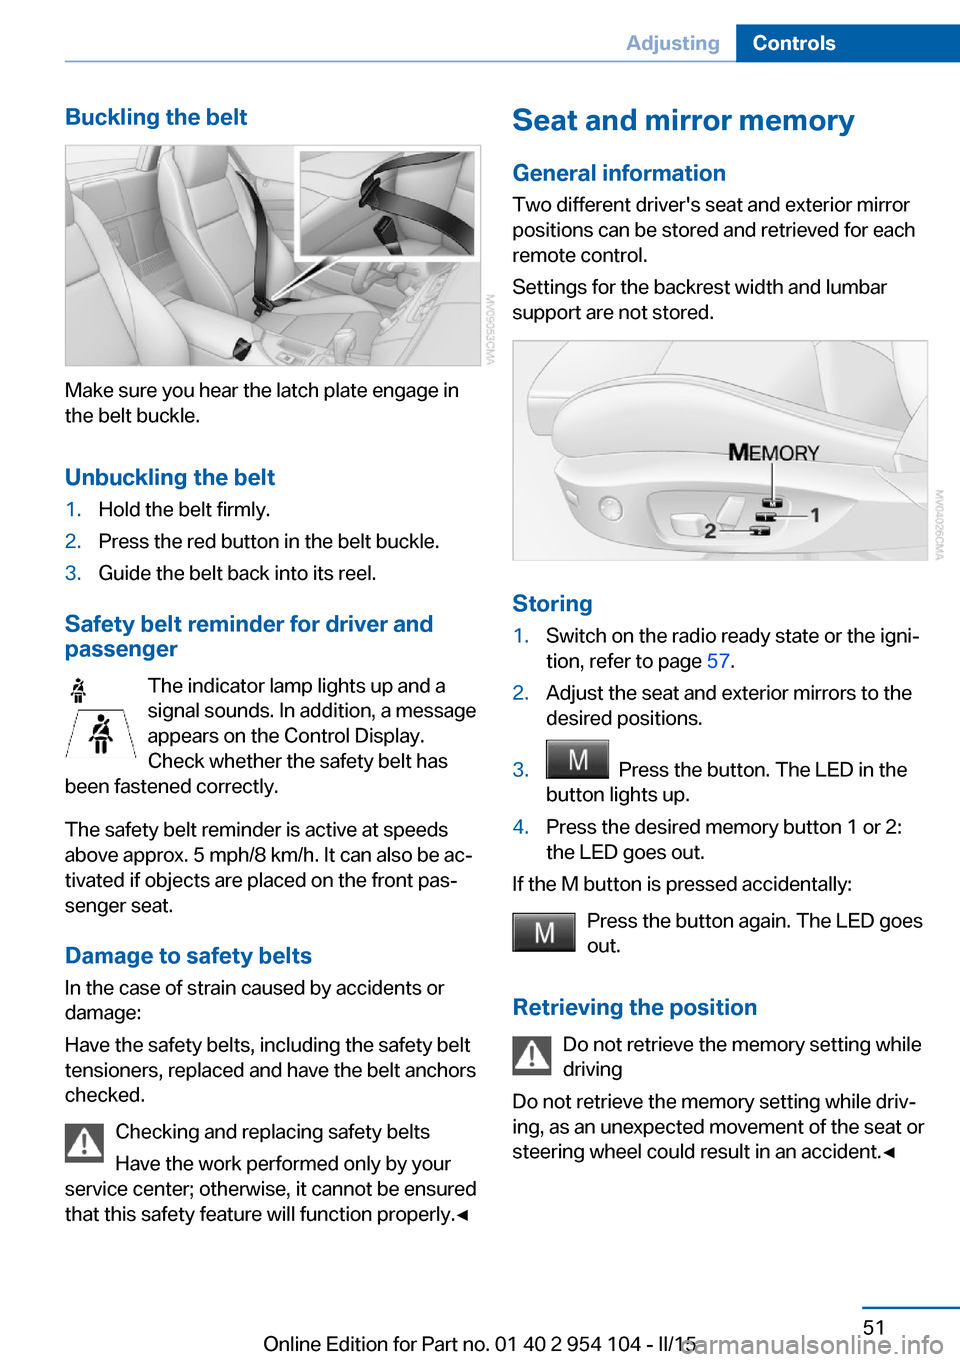
Buckling the belt
Make sure you hear the latch plate engage in
the belt buckle.
Unbuckling the belt
1.Hold the belt firmly.2.Press the red button in the belt buckle.3.Guide the belt back into its reel.
Safety belt reminder for driver and
passenger
The indicator lamp lights up and a
signal sounds. In addition, a message
appears on the Control Display.
Check whether the safety belt has
been fastened correctly.
The safety belt reminder is active at speeds
above approx. 5 mph/8 km/h. It can also be ac‐
tivated if objects are placed on the front pas‐
senger seat.
Damage to safety belts In the case of strain caused by accidents or
damage:
Have the safety belts, including the safety belt
tensioners, replaced and have the belt anchors
checked.
Checking and replacing safety belts
Have the work performed only by your
service center; otherwise, it cannot be ensured
that this safety feature will function properly.◀
Seat and mirror memory
General information Two different driver's seat and exterior mirrorpositions can be stored and retrieved for each
remote control.
Settings for the backrest width and lumbar
support are not stored.
Storing
1.Switch on the radio ready state or the igni‐
tion, refer to page 57.2.Adjust the seat and exterior mirrors to the
desired positions.3. Press the button. The LED in the
button lights up.4.Press the desired memory button 1 or 2:
the LED goes out.
If the M button is pressed accidentally:
Press the button again. The LED goes
out.
Retrieving the position Do not retrieve the memory setting while
driving
Do not retrieve the memory setting while driv‐ ing, as an unexpected movement of the seat or
steering wheel could result in an accident.◀
Seite 51AdjustingControls51
Online Edition for Part no. 01 40 2 954 104 - II/15
Page 54 of 289
Comfort function1.Open the driver's door or switch on the
radio ready state, refer to page 57.2.Briefly press the desired memory but‐
ton 1 or 2.
The seat is automatically moved to the stored
position.
The procedure stops when a switch for adjust‐
ing the seat or one of the buttons is pressed.
Safety mode
1.Close the driver's door and switch the igni‐
tion on or off, refer to page 57.2.Press and hold the desired button 1 or 2
until the adjustment procedure is com‐
pleted.
Mirrors
Exterior mirrors
General information The mirror on the passenger side is more
curved than the driver's mirror.
Estimating distances correctly
Objects reflected in the mirror are closer
than they appear. Do not estimate the distance
to the traffic behind you based on what you
see in the mirror, as this will increase your risk
of an accident.◀
The setting for the exterior mirrors is stored for
the remote control currently in use. The stored
position is called up automatically when the
vehicle is unlocked.
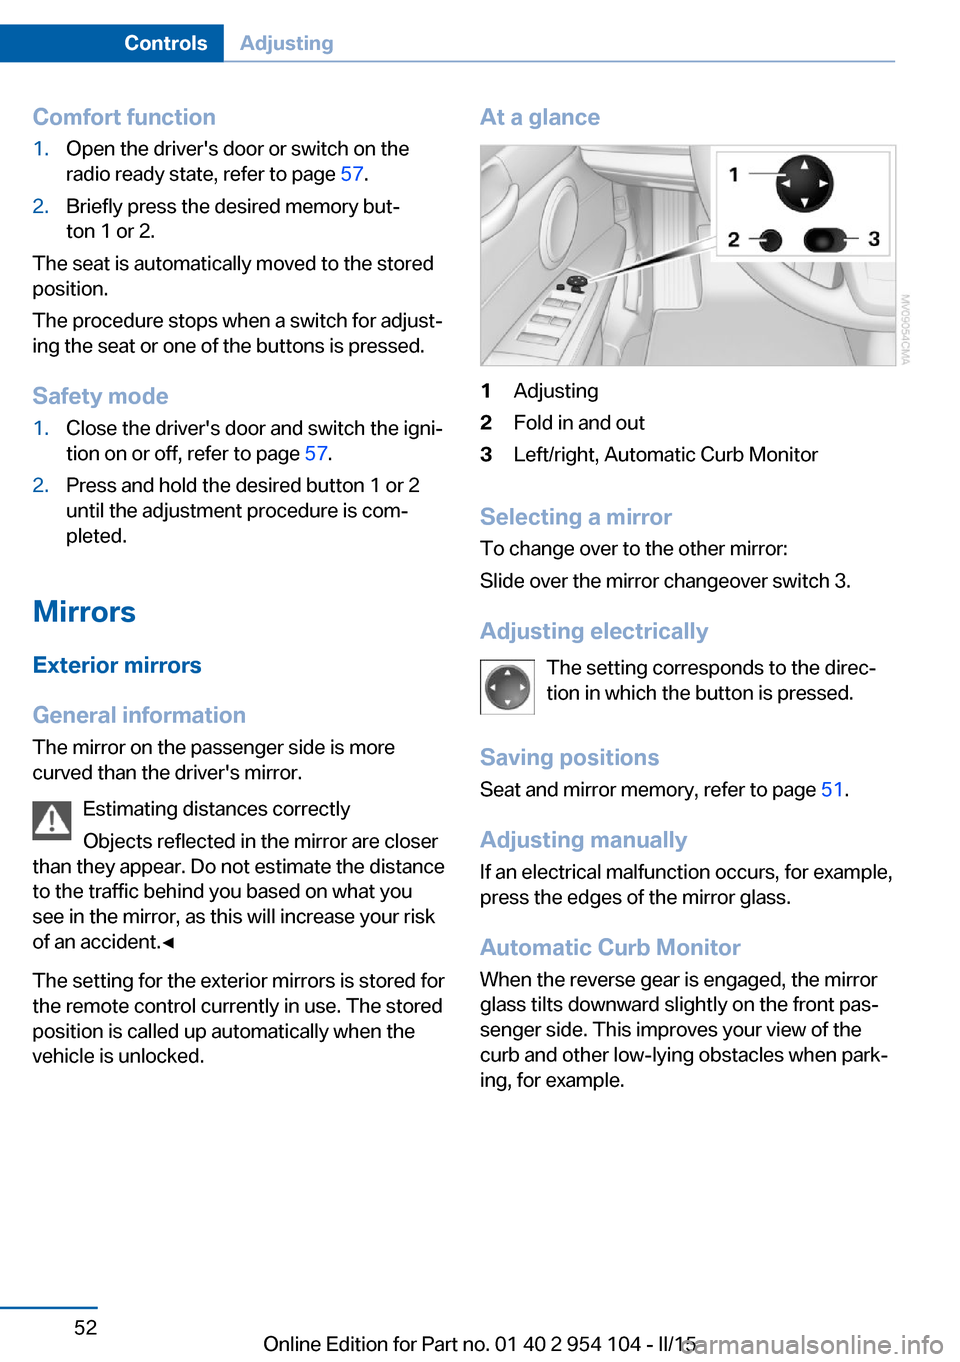
At a glance1Adjusting2Fold in and out3Left/right, Automatic Curb Monitor
Selecting a mirror
To change over to the other mirror:
Slide over the mirror changeover switch 3.
Adjusting electrically The setting corresponds to the direc‐
tion in which the button is pressed.
Saving positions Seat and mirror memory, refer to page 51.
Adjusting manually If an electrical malfunction occurs, for example,
press the edges of the mirror glass.
Automatic Curb Monitor When the reverse gear is engaged, the mirror
glass tilts downward slightly on the front pas‐
senger side. This improves your view of the
curb and other low-lying obstacles when park‐
ing, for example.
Seite 52ControlsAdjusting52
Online Edition for Part no. 01 40 2 954 104 - II/15
Page 55 of 289
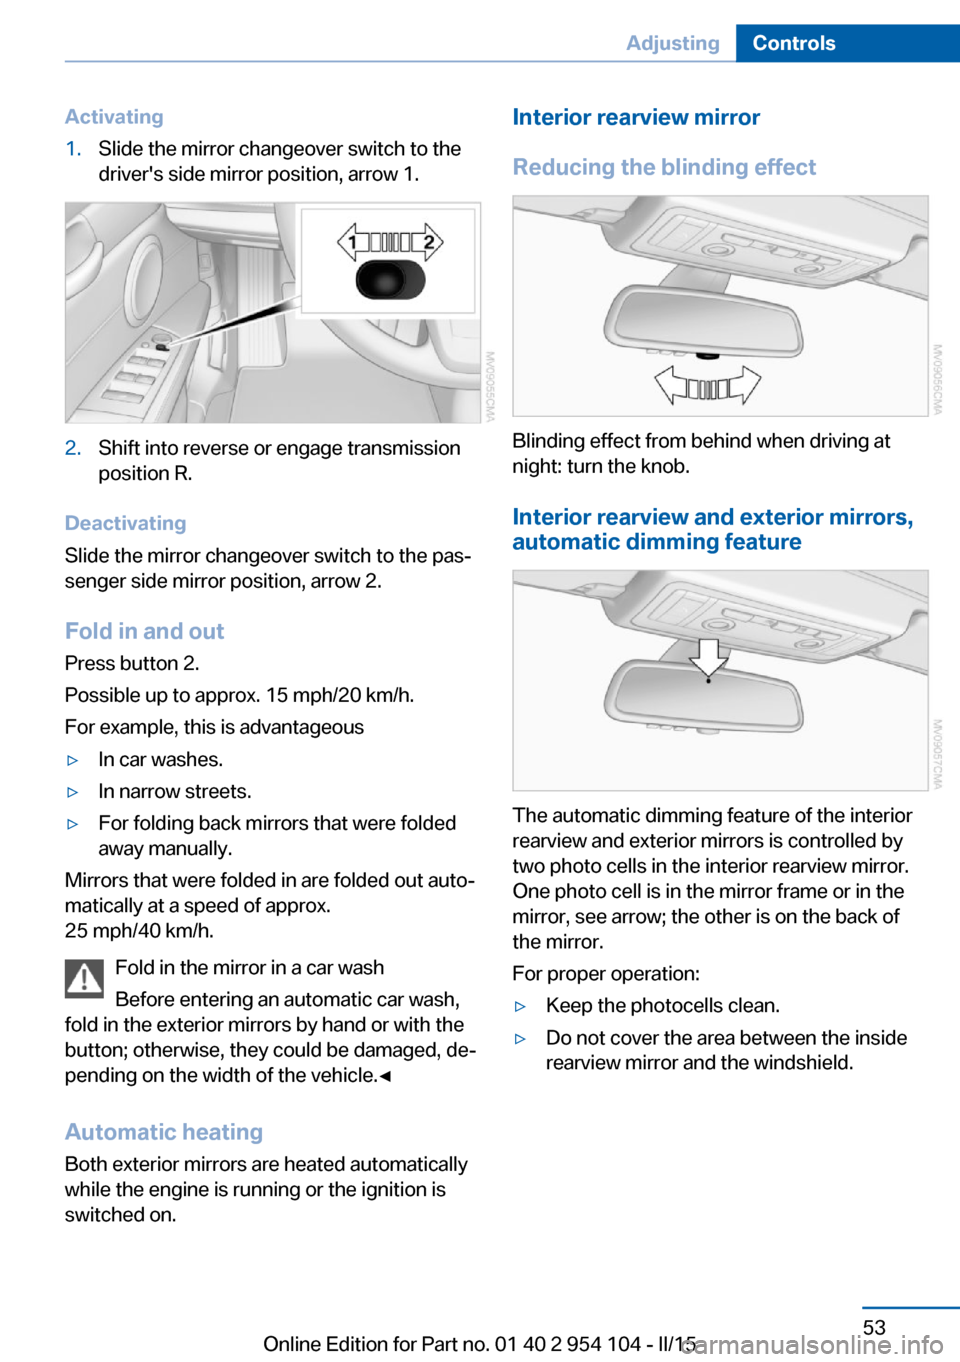
Activating1.Slide the mirror changeover switch to the
driver's side mirror position, arrow 1.2.Shift into reverse or engage transmission
position R.
Deactivating
Slide the mirror changeover switch to the pas‐
senger side mirror position, arrow 2.
Fold in and outPress button 2.
Possible up to approx. 15 mph/20 km/h.
For example, this is advantageous
▷In car washes.▷In narrow streets.▷For folding back mirrors that were folded
away manually.
Mirrors that were folded in are folded out auto‐
matically at a speed of approx.
25 mph/40 km/h.
Fold in the mirror in a car wash
Before entering an automatic car wash,
fold in the exterior mirrors by hand or with the
button; otherwise, they could be damaged, de‐
pending on the width of the vehicle.◀
Automatic heating
Both exterior mirrors are heated automatically
while the engine is running or the ignition is
switched on.
Interior rearview mirror
Reducing the blinding effect
Blinding effect from behind when driving at
night: turn the knob.
Interior rearview and exterior mirrors,
automatic dimming feature
The automatic dimming feature of the interior
rearview and exterior mirrors is controlled by
two photo cells in the interior rearview mirror.
One photo cell is in the mirror frame or in the
mirror, see arrow; the other is on the back of
the mirror.
For proper operation:
▷Keep the photocells clean.▷Do not cover the area between the inside
rearview mirror and the windshield.Seite 53AdjustingControls53
Online Edition for Part no. 01 40 2 954 104 - II/15
Page 56 of 289
Steering wheel
General information Do not adjust while driving
Do not adjust the steering wheel while
driving; otherwise, an unexpected movement
could result in an accident.◀
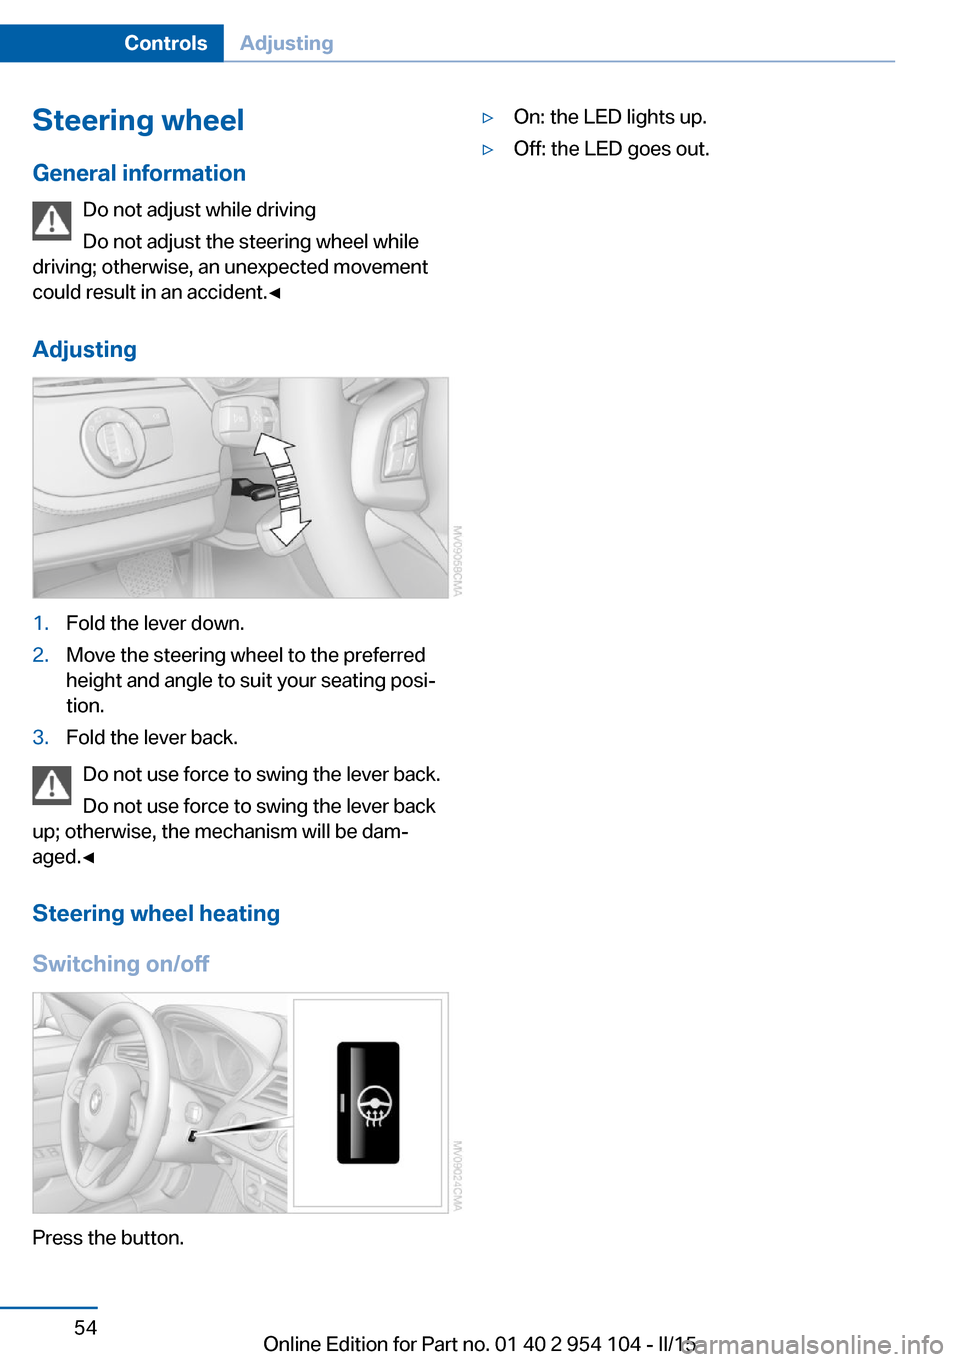
Adjusting1.Fold the lever down.2.Move the steering wheel to the preferred
height and angle to suit your seating posi‐
tion.3.Fold the lever back.
Do not use force to swing the lever back.
Do not use force to swing the lever back
up; otherwise, the mechanism will be dam‐
aged.◀
Steering wheel heating
Switching on/off
Press the button.
▷On: the LED lights up.▷Off: the LED goes out.Seite 54ControlsAdjusting54
Online Edition for Part no. 01 40 2 954 104 - II/15
Page 59 of 289
DrivingVehicle equipment
This chapter describes all series equipment as
well as country-specific and special equipment
offered for this model series. Therefore, it also
describes equipment that may not be found in
your vehicle, for instance due to the selected
special equipment or the country version. This
also applies to safety-related functions and
systems.
When using the features and systems descri‐
bed here, adhere to local regulations.
Ignition lock Insert the remote control into the
ignition lock
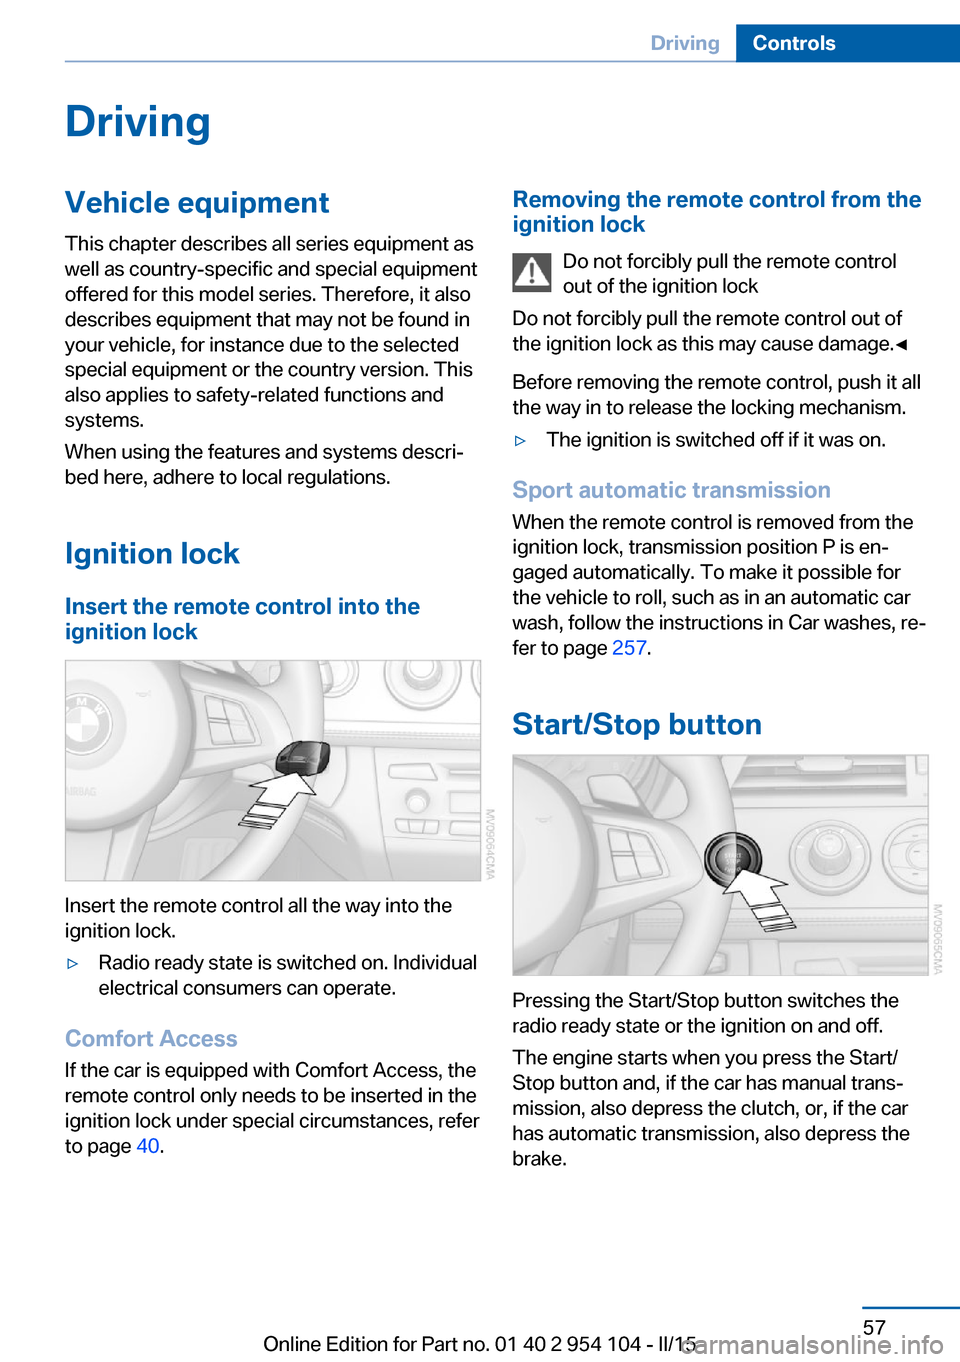
Insert the remote control all the way into the
ignition lock.
▷Radio ready state is switched on. Individual
electrical consumers can operate.
Comfort Access
If the car is equipped with Comfort Access, the
remote control only needs to be inserted in the
ignition lock under special circumstances, refer
to page 40.
Removing the remote control from the
ignition lock
Do not forcibly pull the remote control
out of the ignition lock
Do not forcibly pull the remote control out of
the ignition lock as this may cause damage.◀
Before removing the remote control, push it all
the way in to release the locking mechanism.▷The ignition is switched off if it was on.
Sport automatic transmission
When the remote control is removed from the
ignition lock, transmission position P is en‐
gaged automatically. To make it possible for
the vehicle to roll, such as in an automatic car
wash, follow the instructions in Car washes, re‐
fer to page 257.
Start/Stop button
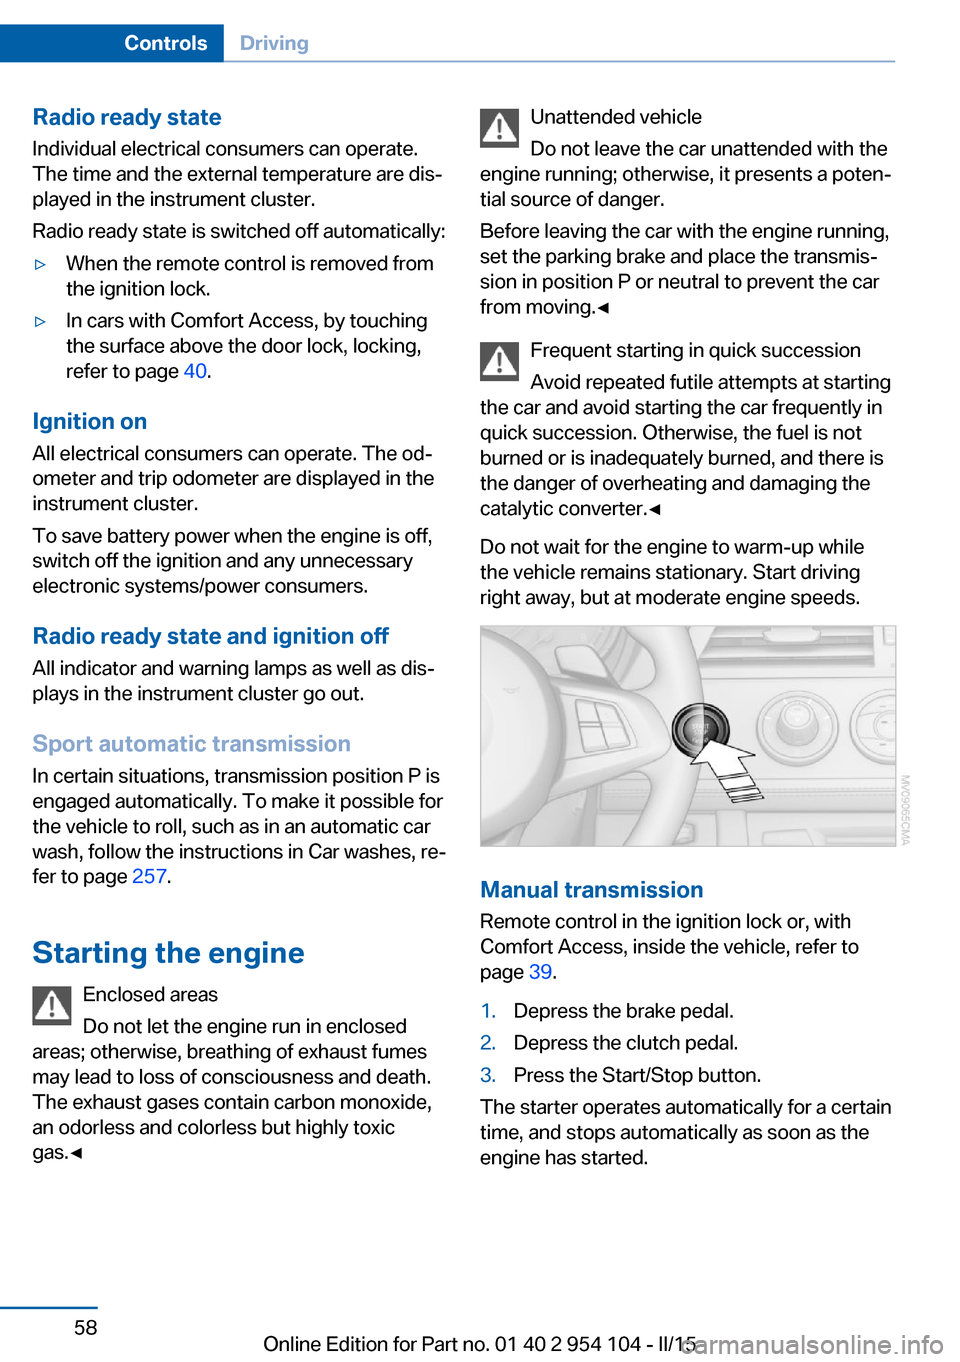
Pressing the Start/Stop button switches the
radio ready state or the ignition on and off.
The engine starts when you press the Start/
Stop button and, if the car has manual trans‐
mission, also depress the clutch, or, if the car
has automatic transmission, also depress the
brake.
Seite 57DrivingControls57
Online Edition for Part no. 01 40 2 954 104 - II/15
Page 60 of 289
Radio ready stateIndividual electrical consumers can operate.
The time and the external temperature are dis‐
played in the instrument cluster.
Radio ready state is switched off automatically:▷When the remote control is removed from
the ignition lock.▷In cars with Comfort Access, by touching
the surface above the door lock, locking,
refer to page 40.
Ignition on
All electrical consumers can operate. The od‐
ometer and trip odometer are displayed in the
instrument cluster.
To save battery power when the engine is off,
switch off the ignition and any unnecessary
electronic systems/power consumers.
Radio ready state and ignition off
All indicator and warning lamps as well as dis‐
plays in the instrument cluster go out.
Sport automatic transmission
In certain situations, transmission position P is
engaged automatically. To make it possible for
the vehicle to roll, such as in an automatic car
wash, follow the instructions in Car washes, re‐
fer to page 257.
Starting the engine Enclosed areas
Do not let the engine run in enclosed
areas; otherwise, breathing of exhaust fumes
may lead to loss of consciousness and death.
The exhaust gases contain carbon monoxide,
an odorless and colorless but highly toxic
gas.◀
Unattended vehicle
Do not leave the car unattended with the
engine running; otherwise, it presents a poten‐
tial source of danger.
Before leaving the car with the engine running,
set the parking brake and place the transmis‐
sion in position P or neutral to prevent the car
from moving.◀
Frequent starting in quick succession
Avoid repeated futile attempts at starting
the car and avoid starting the car frequently in
quick succession. Otherwise, the fuel is not
burned or is inadequately burned, and there is
the danger of overheating and damaging the
catalytic converter.◀
Do not wait for the engine to warm-up while
the vehicle remains stationary. Start driving
right away, but at moderate engine speeds.
Manual transmission
Remote control in the ignition lock or, with
Comfort Access, inside the vehicle, refer to
page 39.
1.Depress the brake pedal.2.Depress the clutch pedal.3.Press the Start/Stop button.
The starter operates automatically for a certain
time, and stops automatically as soon as the
engine has started.
Seite 58ControlsDriving58
Online Edition for Part no. 01 40 2 954 104 - II/15