interior lights BMW Z4 2015 E89 Owner's Manual
[x] Cancel search | Manufacturer: BMW, Model Year: 2015, Model line: Z4, Model: BMW Z4 2015 E89Pages: 289, PDF Size: 7.16 MB
Page 44 of 289
▷Insert the remote control all the way into
the ignition lock.▷With Comfort Access: if you are carrying
the remote control with you, pull on the
door handle.
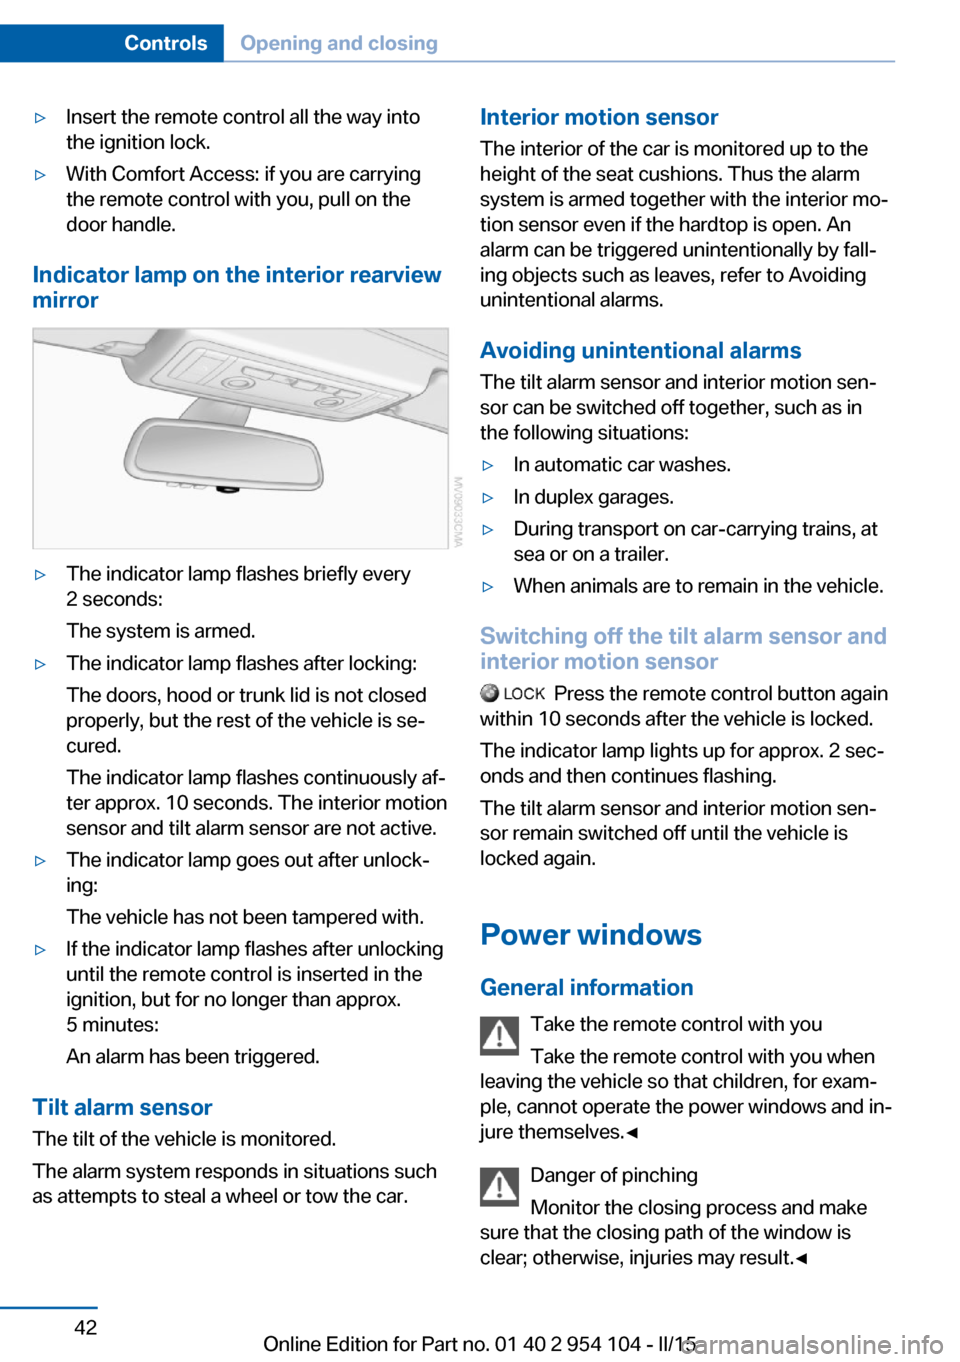
Indicator lamp on the interior rearview
mirror
▷The indicator lamp flashes briefly every
2 seconds:
The system is armed.▷The indicator lamp flashes after locking:
The doors, hood or trunk lid is not closed
properly, but the rest of the vehicle is se‐
cured.
The indicator lamp flashes continuously af‐
ter approx. 10 seconds. The interior motion
sensor and tilt alarm sensor are not active.▷The indicator lamp goes out after unlock‐
ing:
The vehicle has not been tampered with.▷If the indicator lamp flashes after unlocking
until the remote control is inserted in the
ignition, but for no longer than approx.
5 minutes:
An alarm has been triggered.
Tilt alarm sensor The tilt of the vehicle is monitored.
The alarm system responds in situations such
as attempts to steal a wheel or tow the car.
Interior motion sensor
The interior of the car is monitored up to theheight of the seat cushions. Thus the alarm
system is armed together with the interior mo‐
tion sensor even if the hardtop is open. An
alarm can be triggered unintentionally by fall‐
ing objects such as leaves, refer to Avoiding unintentional alarms.
Avoiding unintentional alarms The tilt alarm sensor and interior motion sen‐
sor can be switched off together, such as in
the following situations:▷In automatic car washes.▷In duplex garages.▷During transport on car-carrying trains, at
sea or on a trailer.▷When animals are to remain in the vehicle.
Switching off the tilt alarm sensor and
interior motion sensor
Press the remote control button again
within 10 seconds after the vehicle is locked.
The indicator lamp lights up for approx. 2 sec‐
onds and then continues flashing.
The tilt alarm sensor and interior motion sen‐
sor remain switched off until the vehicle is
locked again.
Power windows General information Take the remote control with youTake the remote control with you when
leaving the vehicle so that children, for exam‐
ple, cannot operate the power windows and in‐
jure themselves.◀
Danger of pinching
Monitor the closing process and make
sure that the closing path of the window is
clear; otherwise, injuries may result.◀
Seite 42ControlsOpening and closing42
Online Edition for Part no. 01 40 2 954 104 - II/15
Page 62 of 289
▷High external temperature and operation of
the automatic climate control.▷The interior is not yet heated or cooled as
much as desired.▷The engine is not yet at operating temper‐
ature.▷Sharp steering angle or the steering wheel
is being turned.▷After driving in reverse.▷Fogging of the windows when the auto‐
matic climate control is switched on.▷Vehicle battery charge is very low.▷Hood is unlocked.▷Stop-and-go traffic.
The indicator lamp is lit.
Parking the vehicle during an
automatic engine stop
The vehicle can be parked safely during an au‐
tomatic engine stop, such as when you wish to
leave the vehicle.
1.Press the Start/Stop button. The ignition is
switched off. The Auto Start/Stop function
is deactivated.2.Set the parking brake.
Start the engine as usual using the Start/Stop
button.
Automatic engine start To drive away, the engine starts automatically
as soon as the clutch pedal is depressed.
After the engine starts, accelerate as usual.
Safety mode
The engine does not start by itself after it is
switched off automatically if any of the follow‐
ing conditions are fulfilled:
▷The driver's safety belt is unfastened or
the driver's door is open.▷Hood was unlocked.The indicator lamp lights up. A mes‐
sage appears on the Control Display.
The engine can only be started via
the Start/Stop button.
Note Even if you do not wish to drive away, the stop‐
ped engine still starts automatically in the fol‐
lowing situations:▷The interior has heated up strongly with
the cooling function switched on.▷The steering wheel is turned.▷The vehicle begins to roll.▷Fogging of the windows when the auto‐
matic climate control is switched on.▷Vehicle battery charge is very low.▷The interior has cooled down strongly with
the heating switched on.▷Low braking pressure, such as from de‐
pressing the brake pedal a number of times
consecutively.
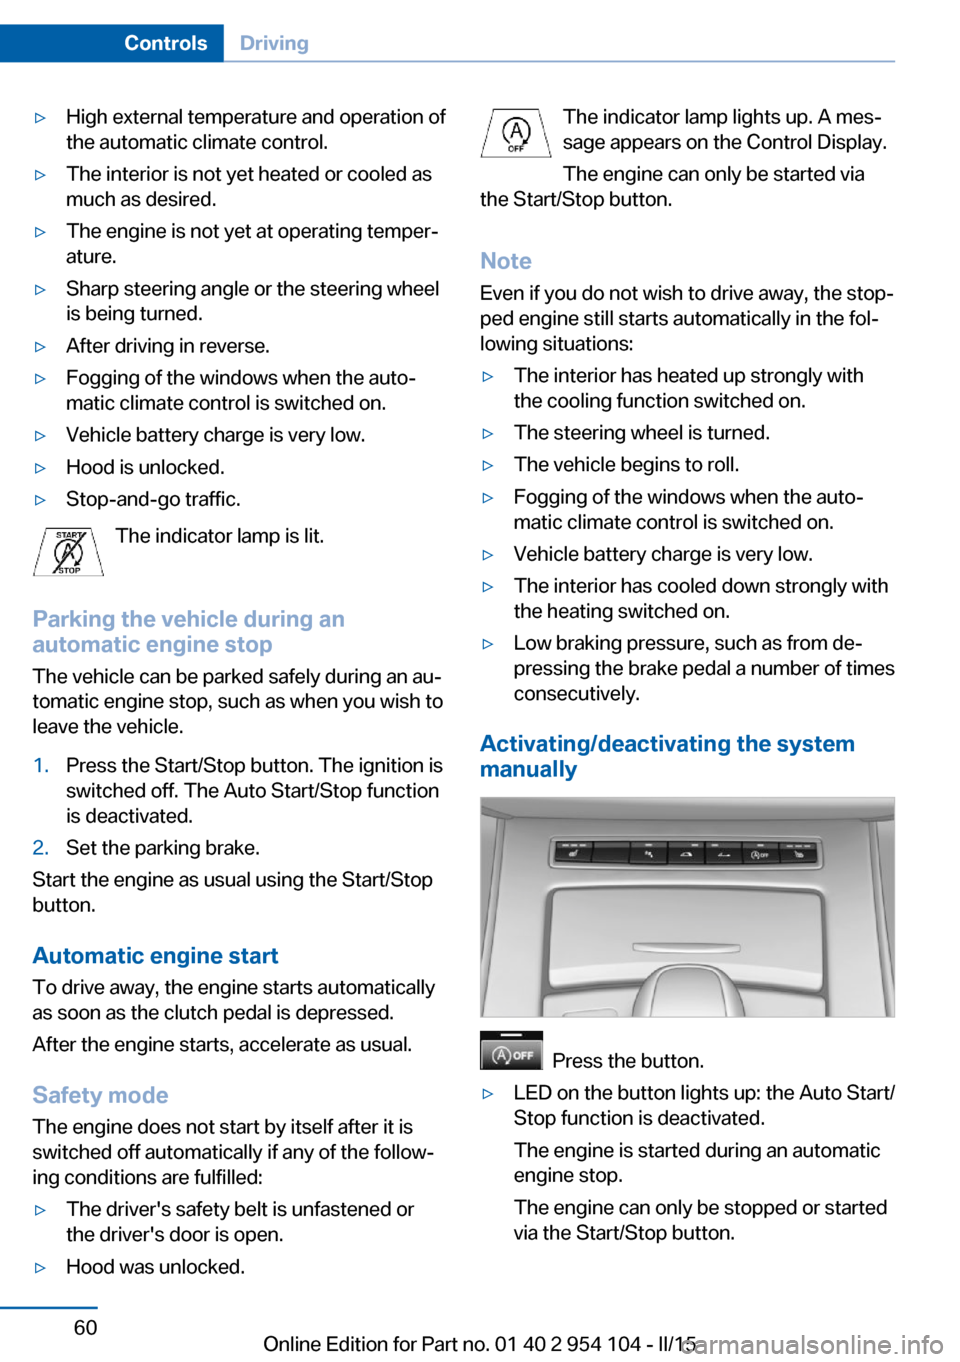
Activating/deactivating the system
manually
Press the button.
▷LED on the button lights up: the Auto Start/
Stop function is deactivated.
The engine is started during an automatic
engine stop.
The engine can only be stopped or started
via the Start/Stop button.Seite 60ControlsDriving60
Online Edition for Part no. 01 40 2 954 104 - II/15
Page 89 of 289
LampsVehicle equipment
This chapter describes all series equipment as
well as country-specific and special equipment
offered for this model series. Therefore, it also
describes equipment that may not be found in
your vehicle, for instance due to the selected
special equipment or the country version. This
also applies to safety-related functions and
systems.
When using the features and systems descri‐
bed here, adhere to local regulations.
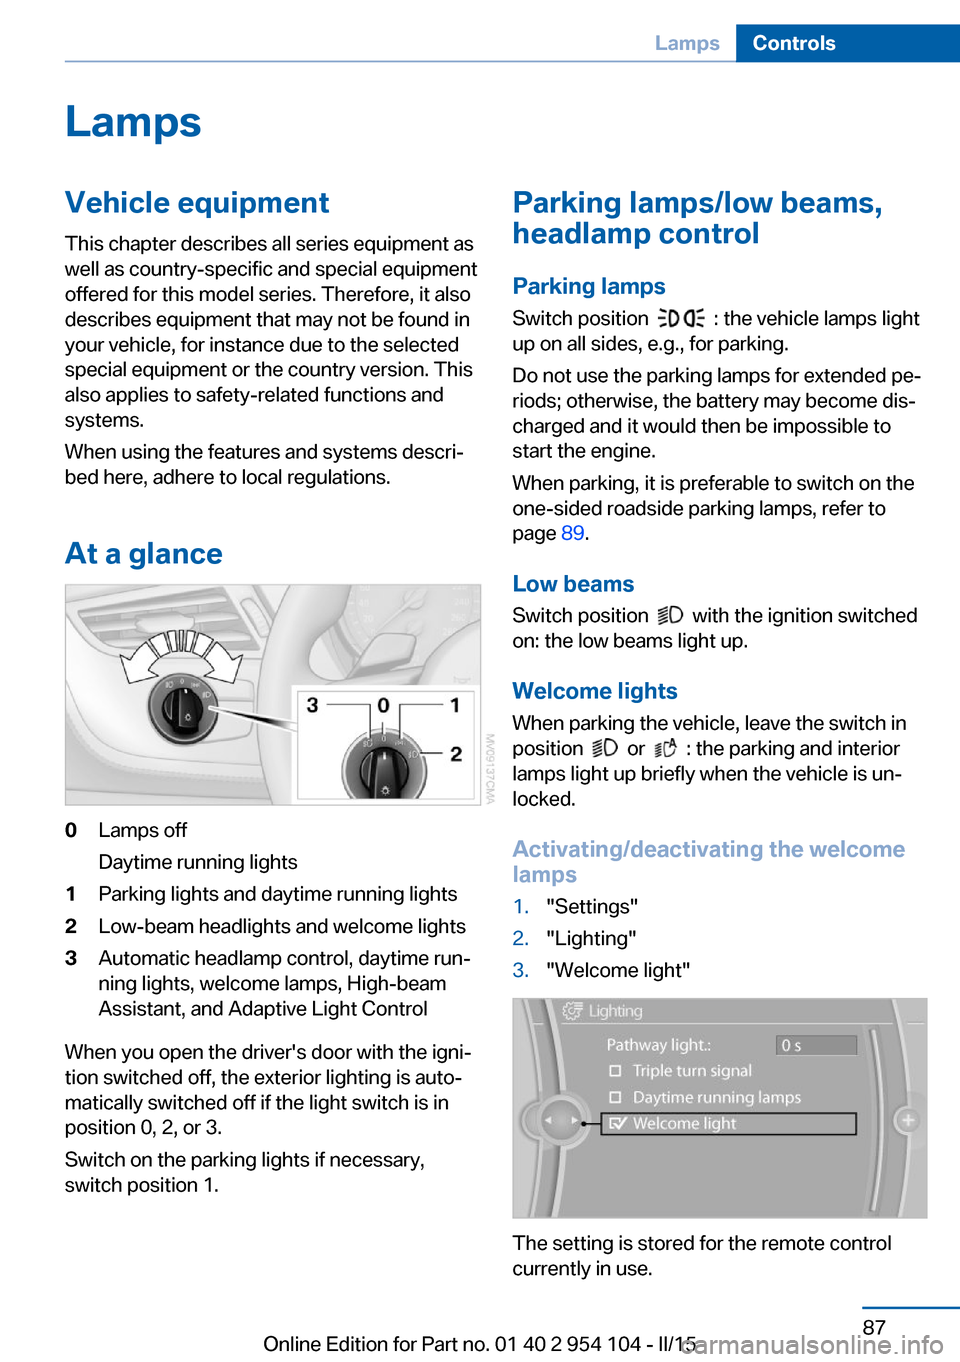
At a glance0Lamps off
Daytime running lights1Parking lights and daytime running lights2Low-beam headlights and welcome lights3Automatic headlamp control, daytime run‐
ning lights, welcome lamps, High-beam
Assistant, and Adaptive Light Control
When you open the driver's door with the igni‐
tion switched off, the exterior lighting is auto‐
matically switched off if the light switch is in
position 0, 2, or 3.
Switch on the parking lights if necessary,
switch position 1.
Parking lamps/low beams,
headlamp control
Parking lamps Switch position
: the vehicle lamps light
up on all sides, e.g., for parking.
Do not use the parking lamps for extended pe‐
riods; otherwise, the battery may become dis‐
charged and it would then be impossible to
start the engine.
When parking, it is preferable to switch on the
one-sided roadside parking lamps, refer to
page 89.
Low beams Switch position
with the ignition switched
on: the low beams light up.
Welcome lights When parking the vehicle, leave the switch in
position
or : the parking and interior
lamps light up briefly when the vehicle is un‐
locked.
Activating/deactivating the welcome
lamps
1."Settings"2."Lighting"3."Welcome light"
The setting is stored for the remote control
currently in use.
Seite 87LampsControls87
Online Edition for Part no. 01 40 2 954 104 - II/15
Page 91 of 289
To avoid blinding oncoming traffic, the Adap‐
tive Light Control does not swivel to the driv‐
er's side when the vehicle is at a standstill.
Malfunction The warning lamp lights up. A mes‐
sage appears on the Control Display.
Adaptive Light Control is malfunc‐
tioning or has failed. Have the system checked
as soon as possible.
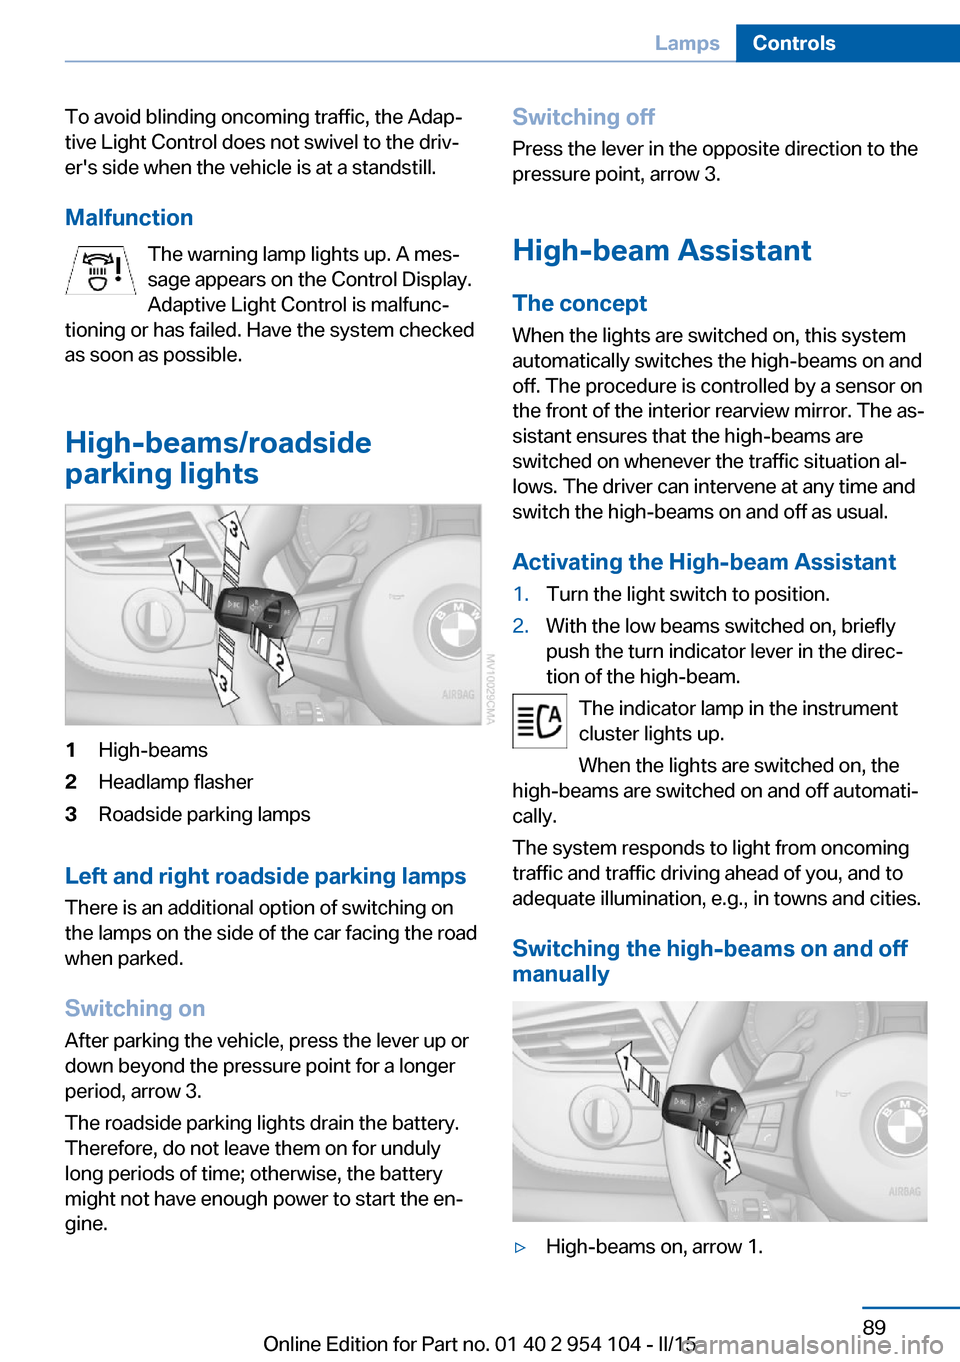
High-beams/roadside
parking lights1High-beams2Headlamp flasher3Roadside parking lamps
Left and right roadside parking lamps
There is an additional option of switching on
the lamps on the side of the car facing the road
when parked.
Switching on After parking the vehicle, press the lever up or
down beyond the pressure point for a longer
period, arrow 3.
The roadside parking lights drain the battery.
Therefore, do not leave them on for unduly
long periods of time; otherwise, the battery
might not have enough power to start the en‐
gine.
Switching off
Press the lever in the opposite direction to the
pressure point, arrow 3.
High-beam Assistant The concept
When the lights are switched on, this system
automatically switches the high-beams on and
off. The procedure is controlled by a sensor on
the front of the interior rearview mirror. The as‐
sistant ensures that the high-beams are
switched on whenever the traffic situation al‐
lows. The driver can intervene at any time and
switch the high-beams on and off as usual.
Activating the High-beam Assistant1.Turn the light switch to position.2.With the low beams switched on, briefly
push the turn indicator lever in the direc‐
tion of the high-beam.
The indicator lamp in the instrument
cluster lights up.
When the lights are switched on, the
high-beams are switched on and off automati‐
cally.
The system responds to light from oncoming
traffic and traffic driving ahead of you, and to
adequate illumination, e.g., in towns and cities.
Switching the high-beams on and off
manually
▷High-beams on, arrow 1.Seite 89LampsControls89
Online Edition for Part no. 01 40 2 954 104 - II/15
Page 92 of 289
▷High-beams off/headlamp flasher, arrow 2.
To reactivate the High-beam Assistant, briefly
push the turn indicator lever toward the high-
beams.
Activating/deactivating via iDrive
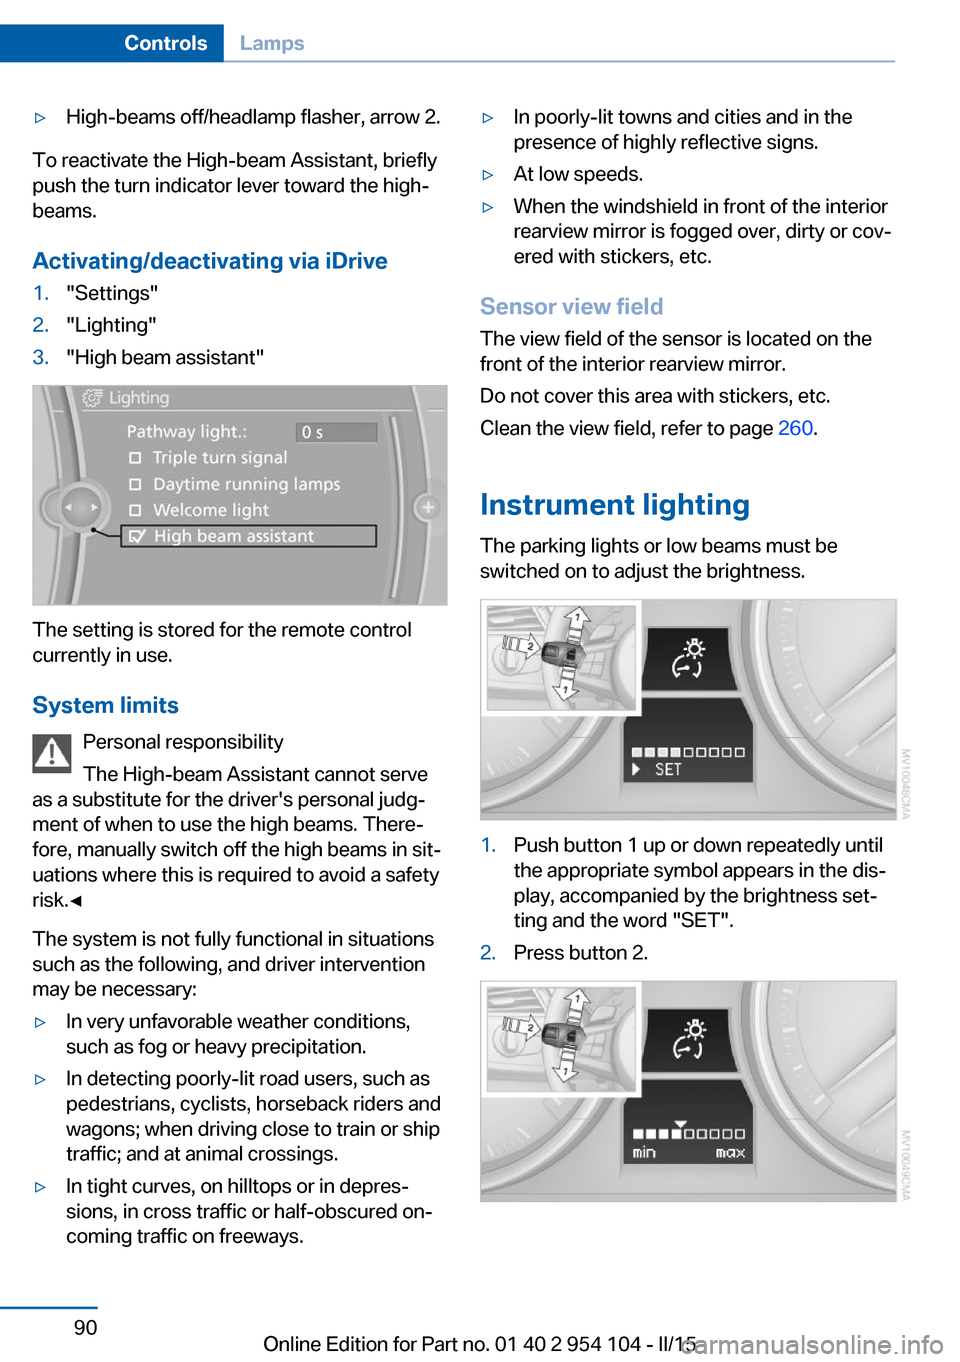
1."Settings"2."Lighting"3."High beam assistant"
The setting is stored for the remote control
currently in use.
System limits Personal responsibility
The High-beam Assistant cannot serve
as a substitute for the driver's personal judg‐
ment of when to use the high beams. There‐
fore, manually switch off the high beams in sit‐
uations where this is required to avoid a safety
risk.◀
The system is not fully functional in situations
such as the following, and driver intervention
may be necessary:
▷In very unfavorable weather conditions,
such as fog or heavy precipitation.▷In detecting poorly-lit road users, such as
pedestrians, cyclists, horseback riders and
wagons; when driving close to train or ship
traffic; and at animal crossings.▷In tight curves, on hilltops or in depres‐
sions, in cross traffic or half-obscured on‐
coming traffic on freeways.▷In poorly-lit towns and cities and in the
presence of highly reflective signs.▷At low speeds.▷When the windshield in front of the interior
rearview mirror is fogged over, dirty or cov‐
ered with stickers, etc.
Sensor view field
The view field of the sensor is located on thefront of the interior rearview mirror.
Do not cover this area with stickers, etc.
Clean the view field, refer to page 260.
Instrument lighting The parking lights or low beams must be
switched on to adjust the brightness.
1.Push button 1 up or down repeatedly until
the appropriate symbol appears in the dis‐
play, accompanied by the brightness set‐
ting and the word "SET".2.Press button 2.Seite 90ControlsLamps90
Online Edition for Part no. 01 40 2 954 104 - II/15
Page 93 of 289
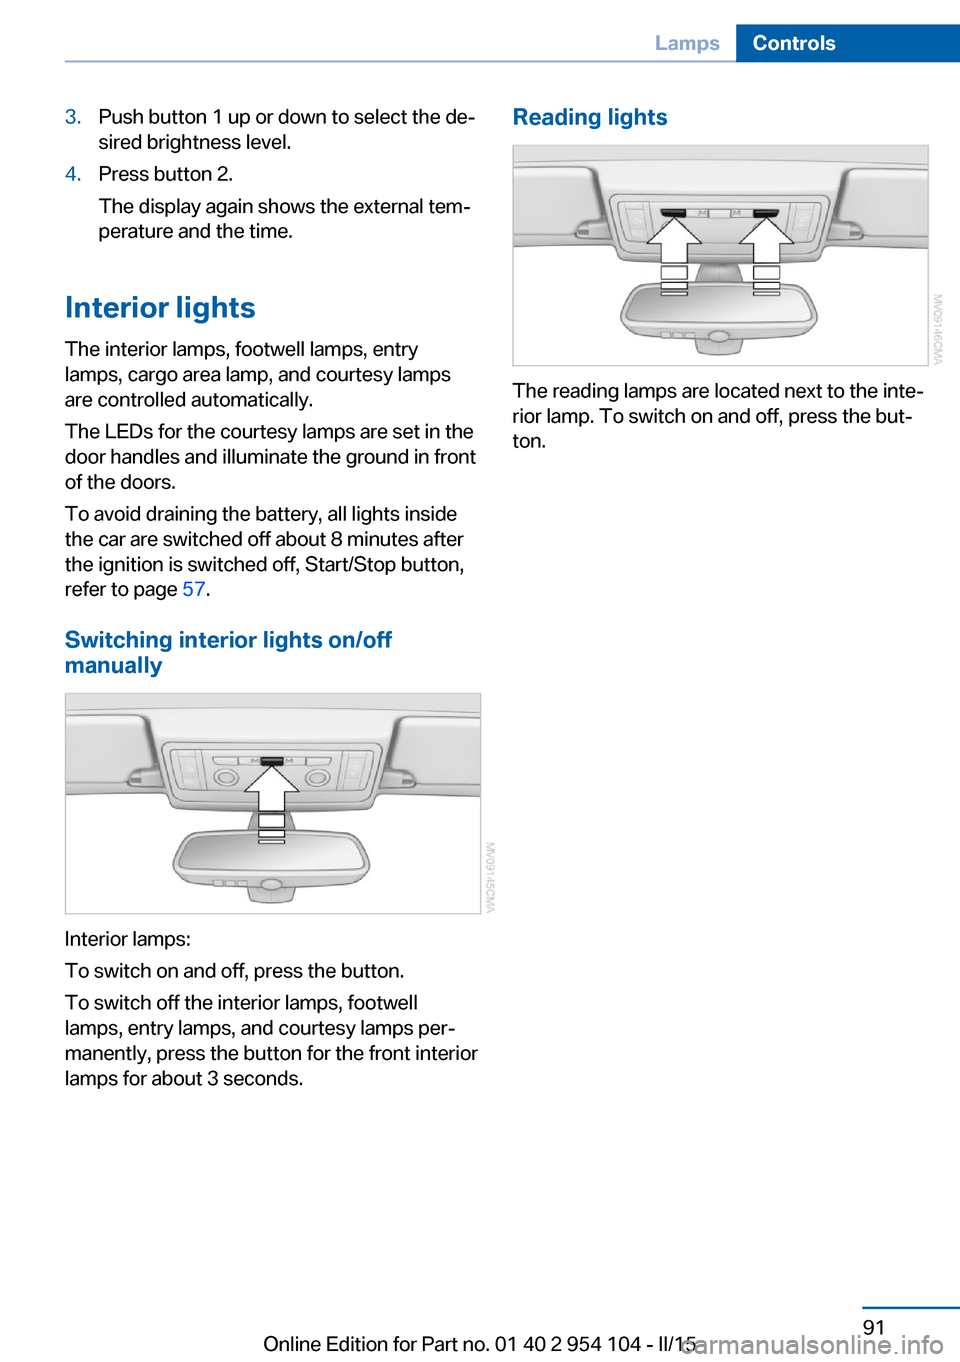
3.Push button 1 up or down to select the de‐
sired brightness level.4.Press button 2.
The display again shows the external tem‐
perature and the time.
Interior lights
The interior lamps, footwell lamps, entry
lamps, cargo area lamp, and courtesy lamps
are controlled automatically.
The LEDs for the courtesy lamps are set in the
door handles and illuminate the ground in front
of the doors.
To avoid draining the battery, all lights inside
the car are switched off about 8 minutes after
the ignition is switched off, Start/Stop button,
refer to page 57.
Switching interior lights on/off
manually
Interior lamps:
To switch on and off, press the button.
To switch off the interior lamps, footwell
lamps, entry lamps, and courtesy lamps per‐
manently, press the button for the front interior
lamps for about 3 seconds.
Reading lights
The reading lamps are located next to the inte‐
rior lamp. To switch on and off, press the but‐
ton.
Seite 91LampsControls91
Online Edition for Part no. 01 40 2 954 104 - II/15
Page 116 of 289
▷Left LED on, automatic recirculated air
control: a sensor detects pollutants in the
outside air. If necessary, the system blocks
the supply of outside air and recirculates
the inside air. As soon as the concentration
of pollutants in the outside air has de‐
creased sufficiently, the system automati‐
cally switches back to outside air supply.▷Right LED on, recirculated air mode: the
supply of outside air into the vehicle is per‐
manently blocked. The system then recir‐
culates the air currently within the vehicle.
Adjusting air flow rate manually
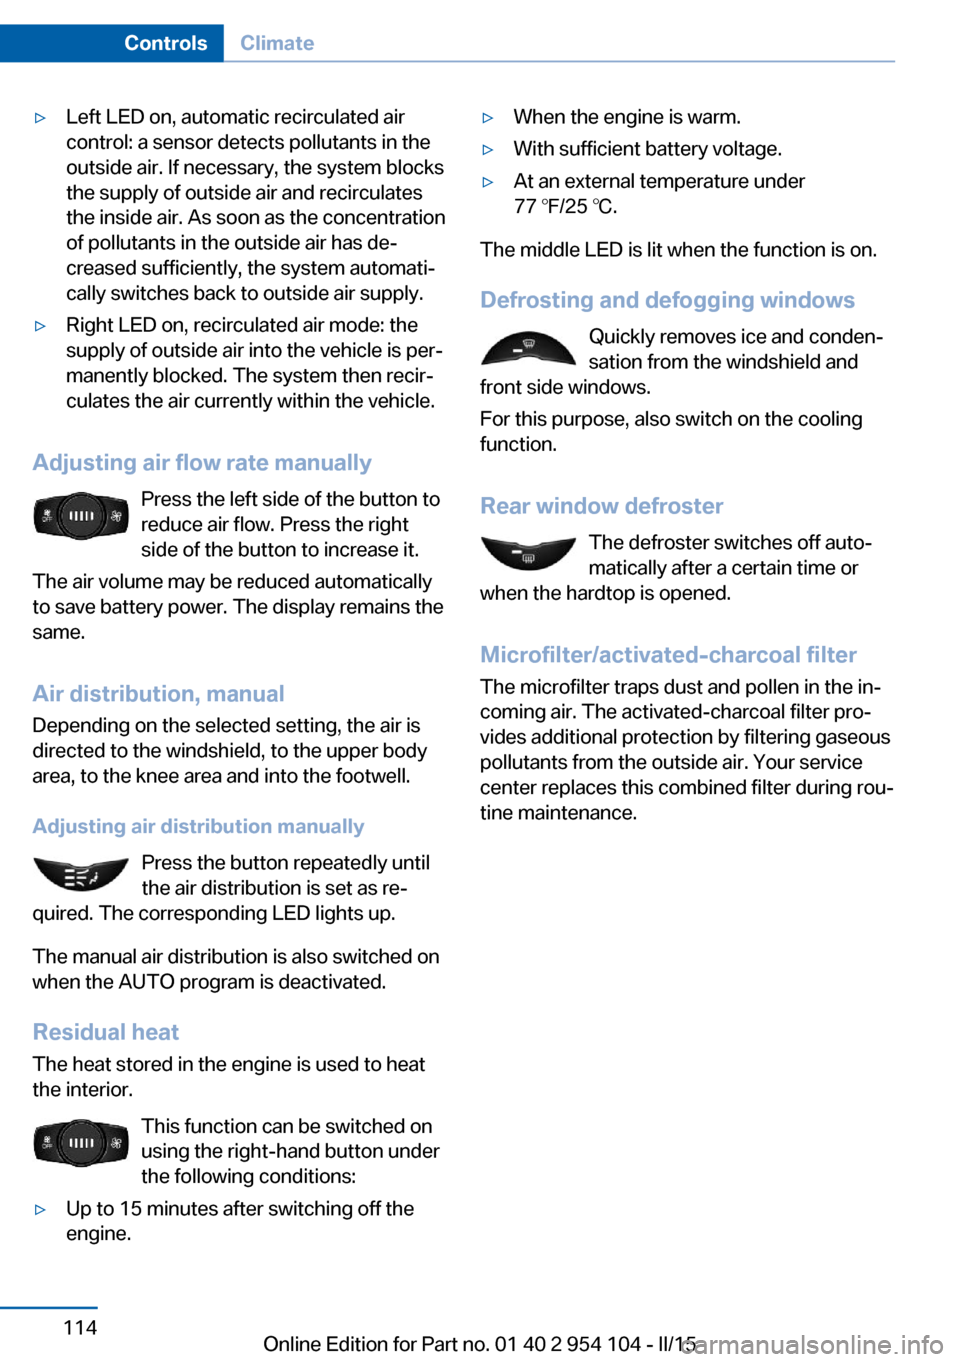
Press the left side of the button to
reduce air flow. Press the right
side of the button to increase it.
The air volume may be reduced automatically
to save battery power. The display remains the
same.
Air distribution, manual
Depending on the selected setting, the air is
directed to the windshield, to the upper body
area, to the knee area and into the footwell.
Adjusting air distribution manually Press the button repeatedly until
the air distribution is set as re‐
quired. The corresponding LED lights up.
The manual air distribution is also switched on
when the AUTO program is deactivated.
Residual heat
The heat stored in the engine is used to heat
the interior.
This function can be switched on
using the right-hand button under
the following conditions:
▷Up to 15 minutes after switching off the
engine.▷When the engine is warm.▷With sufficient battery voltage.▷At an external temperature under
77 ℉/25 ℃.
The middle LED is lit when the function is on.
Defrosting and defogging windows Quickly removes ice and conden‐
sation from the windshield and
front side windows.
For this purpose, also switch on the cooling
function.
Rear window defroster The defroster switches off auto‐
matically after a certain time or
when the hardtop is opened.
Microfilter/activated-charcoal filter
The microfilter traps dust and pollen in the in‐
coming air. The activated-charcoal filter pro‐
vides additional protection by filtering gaseous
pollutants from the outside air. Your service
center replaces this combined filter during rou‐
tine maintenance.
Seite 114ControlsClimate114
Online Edition for Part no. 01 40 2 954 104 - II/15
Page 119 of 289
3.Hold the hand-held transmitter of the sys‐
tem to be operated a distance of approx. 1
to 3 in/2.5 to 8 cm away from the buttons
on the interior rearview mirror. The re‐
quired distance depends on the particular
hand-held transmitter.4.Press the button of the desired function on
the hand-held transmitter and the button
being programmed on the interior rearview
mirror simultaneously and hold. The LED
on the interior rearview mirror flashes
slowly at first.5.When the LED flashes more rapidly, re‐
lease both buttons. Rapid flashing indi‐
cates that the button on the interior rear‐
view mirror has been programmed.
If the LED does not flash faster after
60 seconds, change the distance between
the interior rearview mirror and the hand-
held transmitter and repeat the step. Multi‐
ple trials at different distances may be nec‐
essary. Wait at least 15 seconds between
trials.
Canada: if the programming procedure
with the hand-held transmitter was inter‐
rupted, press and hold the button on the
interior rearview mirror and press the but‐
ton on the hand-held transmitter multiple
times for 2 seconds each and release.6.To program additional functions on other
buttons, repeat steps 3 to 5.
The systems can be operated with the buttons
on the interior rearview mirror.
Special characteristics of alternating-
code radio systems
If the system cannot be operated after re‐
peated programming, check whether the sys‐
tem to be operated uses an alternating-code
system.
Read the operating instructions of the system
or press and hold the programmed button on
the interior rearview mirror. If the LED on the
interior rearview mirror flashes rapidly at first
and then lights up continuously for 2 seconds,
the system is equipped with an alternating-
code system. This flashing LED pattern re‐
peats itself for approx. 20 seconds.
In systems with an alternating-code system,
the universal garage door opener and the sys‐
tem must be additionally synchronized.
Please obtain additional information on syn‐
chronization in the operating instructions of
the system being set up.
The systems will be easier to synchronize with
the aid of a second person.
Synchronization:1.Park the vehicle within range of the re‐
mote-controlled system.2.Program the corresponding button on the
interior rearview mirror as described.3.Identify and press the synchronization but‐
ton on the system being set up. You have
approx. 30 seconds for the next step.4.Press and hold the button on the interior
rearview mirror for approx. 3 seconds and
then release it. Repeat this step up to three
times if necessary to complete the syn‐
chronization procedure. When synchroni‐
zation is completed, the programmed func‐
tion is executed.
Reprogramming individual buttons
1.Switch on the ignition.2.Hold the hand-held transmitter at a dis‐
tance of approx. 1 to 3 in/2.5 to 8 cm from
the memory buttons.
The required distance depends on the par‐
ticular hand-held transmitter.3.Press the memory button of the universal
garage door opener.4.If the LED flashes slowly after approx.
20 seconds, press the transmit button on
the hand-held transmitter.5.Release both buttons when the LED
flashes rapidly.Seite 117Interior equipmentControls117
Online Edition for Part no. 01 40 2 954 104 - II/15
Page 120 of 289
If the LED does not flash rapidly after ap‐
prox. 60 seconds, change the distance and
repeat the step.
Canada: if the LED does not flash rapidly
after approx. 60 seconds, change the dis‐
tance and repeat the step. If programming
was aborted by the hand-held transmitter,
hold down the memory button and press
and release the button on the hand-held
transmitter several times for 2 seconds.
Controls
Prior to operation
Before operating a unit with the Universal
Garage Door Opener, ensure that there are no
people, animals, or objects in the range of
movement of the system; otherwise, there is a
risk of injury or damage.
Also follow the safety instructions of the hand-
held transmitter.◀
The system, such as the garage door, can be
operated using the button on the interior rear‐
view mirror with the engine running or the igni‐
tion switched on. When you are within the re‐
ception range of the system, press and hold
the button until the function is initiated. The
LED on the interior rearview mirror lights up
continuously while the radio signal is being
transmitted.
Deleting stored functions Press the right and left buttons on the interior
rearview mirror simultaneously for approx.
20 seconds until the LED flashes rapidly. All
stored functions are deleted. The functions
cannot be deleted individually.
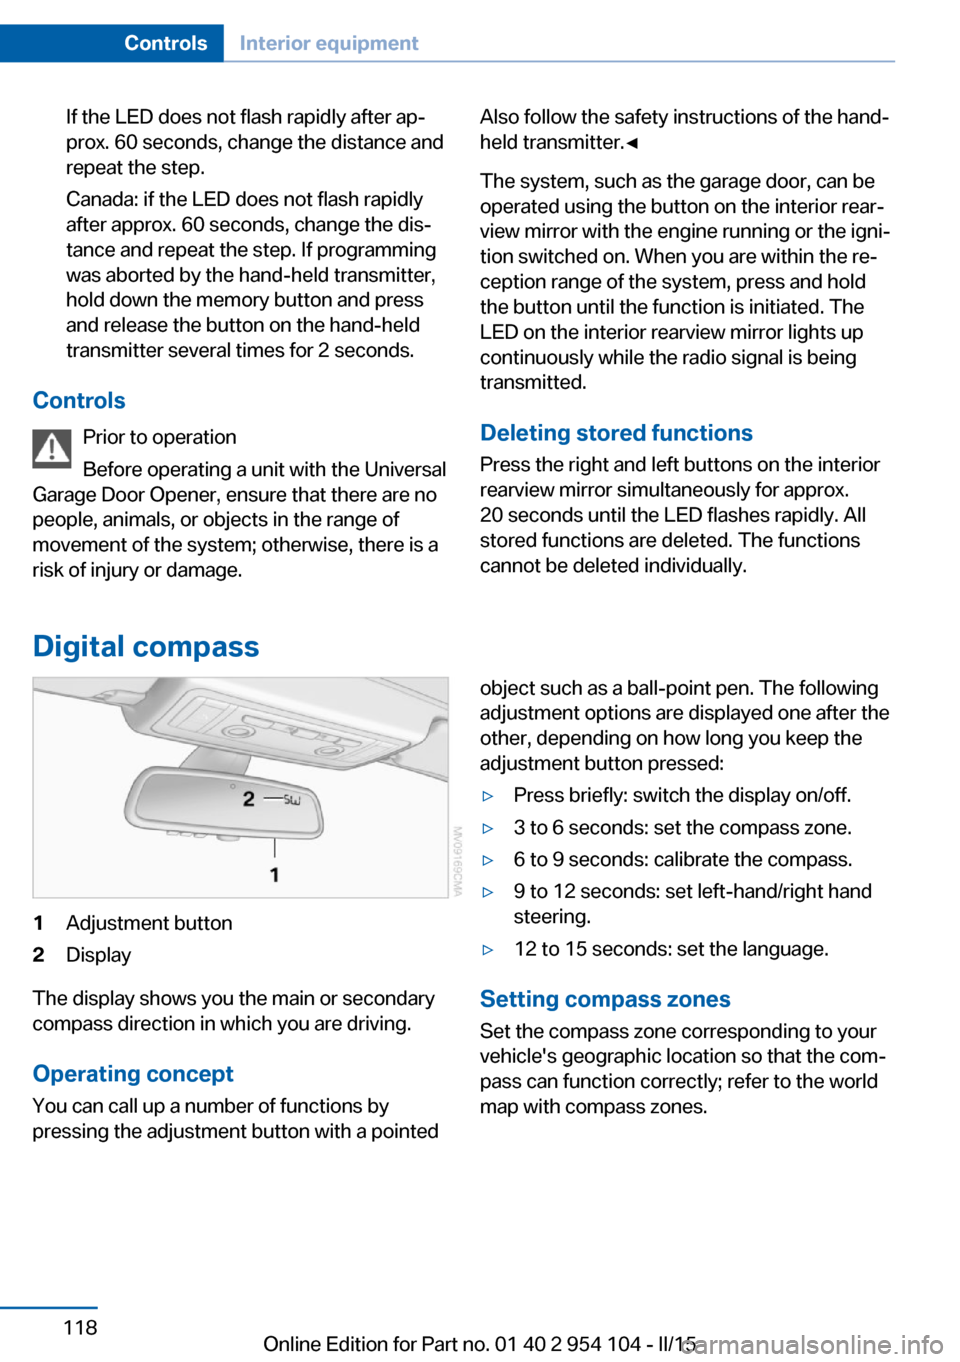
Digital compass
1Adjustment button2Display
The display shows you the main or secondary
compass direction in which you are driving.
Operating concept
You can call up a number of functions by
pressing the adjustment button with a pointed
object such as a ball-point pen. The following
adjustment options are displayed one after the
other, depending on how long you keep the
adjustment button pressed:▷Press briefly: switch the display on/off.▷3 to 6 seconds: set the compass zone.▷6 to 9 seconds: calibrate the compass.▷9 to 12 seconds: set left-hand/right hand
steering.▷12 to 15 seconds: set the language.
Setting compass zones
Set the compass zone corresponding to your
vehicle's geographic location so that the com‐
pass can function correctly; refer to the world
map with compass zones.
Seite 118ControlsInterior equipment118
Online Edition for Part no. 01 40 2 954 104 - II/15
Page 260 of 289
Sport automatic transmission1.Insert the remote control into the ignition
lock, even with Comfort Access.2.Release the parking brake, refer to
page 61.3.Drive into the car wash.4.Engage transmission position N.5.Switch the engine off.6.Leave the remote control in the ignition
lock so that the vehicle can roll.
When starting the engine:
1.Depress the brake pedal.2.Press the Start/Stop button.
Transmission position P is engaged automati‐
cally:
▷Automatically after approx. 30 minutes.▷When the remote control is removed from
the ignition lock.
Headlights
▷Do not rub dry and do not use abrasive or
caustic cleansers.▷Soak areas that have been soiled e.g. due
to insects, with shampoo and wash off with
water.▷Thaw ice with de-icing spray; do not use an
ice scraper.
Retractable hardtop
When you open a wet hardtop, water drops
may run into the cargo area. If necessary, re‐
move items from the cargo area beforehand to
avoid water stains or soiling.
After washing the vehicle
After washing the vehicle, apply the brakes
briefly to dry them; otherwise, braking action
can be reduced and corrosion of the brake
discs can occur.
Fully remove any residue from the windows to
prevent obstruction of view from streaking,
wiping noises, and wiper wear.
Vehicle careCar care productsBMW recommends using cleaning and care
products from BMW, since these have been
tested and approved.
Car care and cleaning products
Follow the instructions on the container.
When cleaning the interior, open the doors or
windows.
Only use products intended for cleaning vehi‐
cles.
Cleansers can contain substances that are
dangerous and harmful to your health.◀
Vehicle paint Regular care contributes to driving safety and
value retention. Environmental influences in
areas with high air pollution or natural contami‐
nants, such as tree resin or pollen, can have an
impact on the vehicle paint. Tailor the fre‐
quency and extent of your car care to these in‐
fluences.
Immediately remove aggressive substances,
such as spilled fuel, oil, grease, or bird drop‐
pings, to prevent damage to or discoloration of
the paintwork.
Leather care
Remove dust from the leather often, using a
cloth or vacuum cleaner.
Otherwise, particles of dust and road grime
chafe in pores and folds, and lead to increased
wear and premature degradation of the leather
surface.
To guard against discoloration, such as from
clothing, provide leather care roughly every
two months.Seite 258MobilityCare258
Online Edition for Part no. 01 40 2 954 104 - II/15