ECO mode BMW Z4 COUPE 2006 E86 Owner's Manual
[x] Cancel search | Manufacturer: BMW, Model Year: 2006, Model line: Z4 COUPE, Model: BMW Z4 COUPE 2006 E86Pages: 128, PDF Size: 4.41 MB
Page 8 of 128
Notes
6
Parts and accessories
For your own safety, use genuine parts
and accessories approved by BMW.
When you purchase accessories tested and
approved by BMW and Original BMW Parts, you
simultaneously acquire the assurance that they
have been thoroughly tested by BMW to ensure
optimum performance when installed on your
vehicle.
BMW warrants these parts to be free from
defects in material and workmanship.
BMW will not accept any liability for damage
resulting from installation of parts and accesso-
ries not approved by BMW.
BMW cannot test every product made by other
manufacturers to verify if it can be used on a
BMW safely and without risk to either the vehi-
cle, its operation, or its occupants.
Original BMW Parts, BMW Accessories and
other products approved by BMW, together
with professional advice on using these items,
are available from all BMW Centers.
Installation and operation of non-BMW
approved accessories such as alarms, radios,
amplifiers, radar detectors, wheels, suspension
components, brake dust shields, telephones,
including operation of any mobile phone from
within the vehicle without using an externally
mounted antenna, or transceiver equipment, for
instance, CBs, walkie-talkie, ham radio or simi-
lar accessories, may cause extensive damage
to the vehicle, compromise its safety, interfere
with the vehicle’s electrical system or affect the
validity of the BMW Limited Warranty. See your
BMW Center for additional information.<
Maintenance, replacement or repair of
the emission control devices and sys-
tems may be performed by any automotive
repair establishment or individual using any cer-
tified automotive part.<
Service and warranty
We recommend that you read this publication
thoroughly.
Your BMW is covered by the following warran-
ties:
>New Vehicle Limited Warranty
>Rust Perforation Limited Warranty
>Federal Emissions System Defect Warranty
>Federal Emissions Performance Warranty
>California Emission Control System Limited
Warranty
Detailed information about these warranties is
listed in the Service and Warranty Information
Booklet for US models or in the Warranty and
Service Guide Booklet for Canadian models.
Page 22 of 128
Opening and closing
20 The luggage compartment lid/tailgate opens a
short distance, regardless of whether it was
locked or unlocked.
A previously locked luggage compart-
ment lid/tailgate is locked again after
closing.
Before and after each trip, check that the lug-
gage compartment lid/tailgate has not been
inadvertently unlocked.<
Panic mode*
You can also trigger the alarm system* if you
find yourself in a dangerous situation:
Press the button for at least 3 seconds.
To switch off the alarm: press any button.
Malfunctions
The remote control may malfunction due to
local radio waves. If this occurs, unlock and lock
the car at the door lock or luggage compart-
ment lid/tailgate lock with the key.
If the car can no longer be locked with a remote
control, the battery in the remote control is dis-
charged. Use this remote control key while driv-
ing for an extended period in order to recharge
the battery, refer to page18.
For US owners only
The transmitter and receiver units comply with
part 15 of the FCC/Federal Communications
Commission regulations. Operation is gov-
erned by the following:
FCC ID:
LX8EWS
LX8FZVS
LX8FZVE
Compliance statement:
This device complies with part 15 of the FCC
Rules. Operation is subject to the following two
conditions:
>This device may not cause harmful interfer-
ence, and
>this device must accept any interference
received, including interference that may
cause undesired operation.Any unauthorized modifications or
changes to these devices could void the
user’s authority to operate this equipment.<
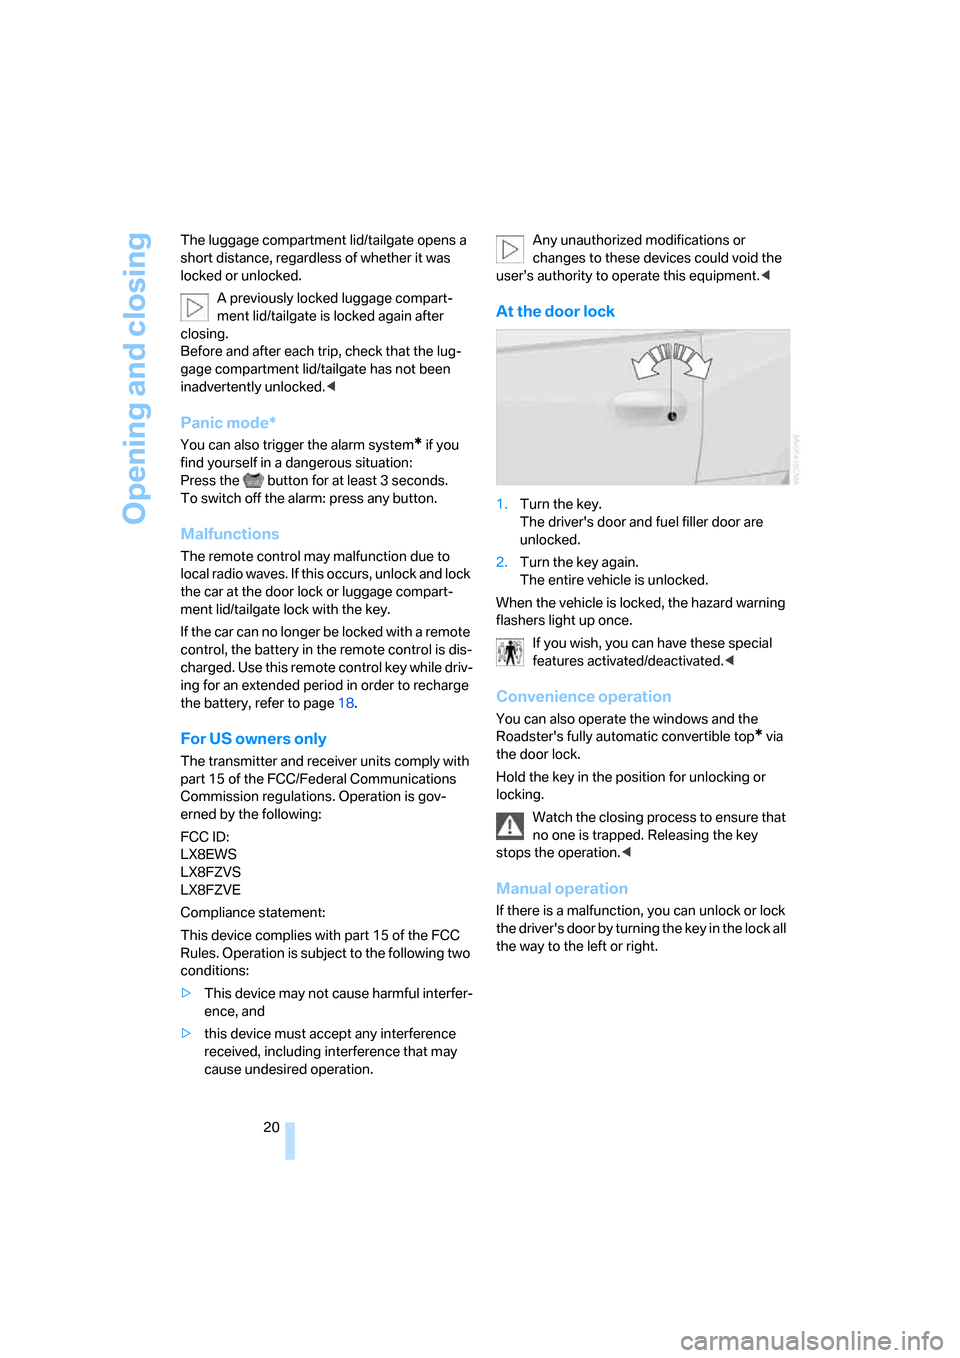
At the door lock
1.Turn the key.
The driver's door and fuel filler door are
unlocked.
2.Turn the key again.
The entire vehicle is unlocked.
When the vehicle is locked, the hazard warning
flashers light up once.
If you wish, you can have these special
features activated/deactivated.<
Convenience operation
You can also operate the windows and the
Roadster's fully automatic convertible top
* via
the door lock.
Hold the key in the position for unlocking or
locking.
Watch the closing process to ensure that
no one is trapped. Releasing the key
stops the operation.<
Manual operation
If there is a malfunction, you can unlock or lock
the driver's door by turning the key in the lock all
the way to the left or right.
Page 40 of 128
Driving
38
Driving
Ignition lock
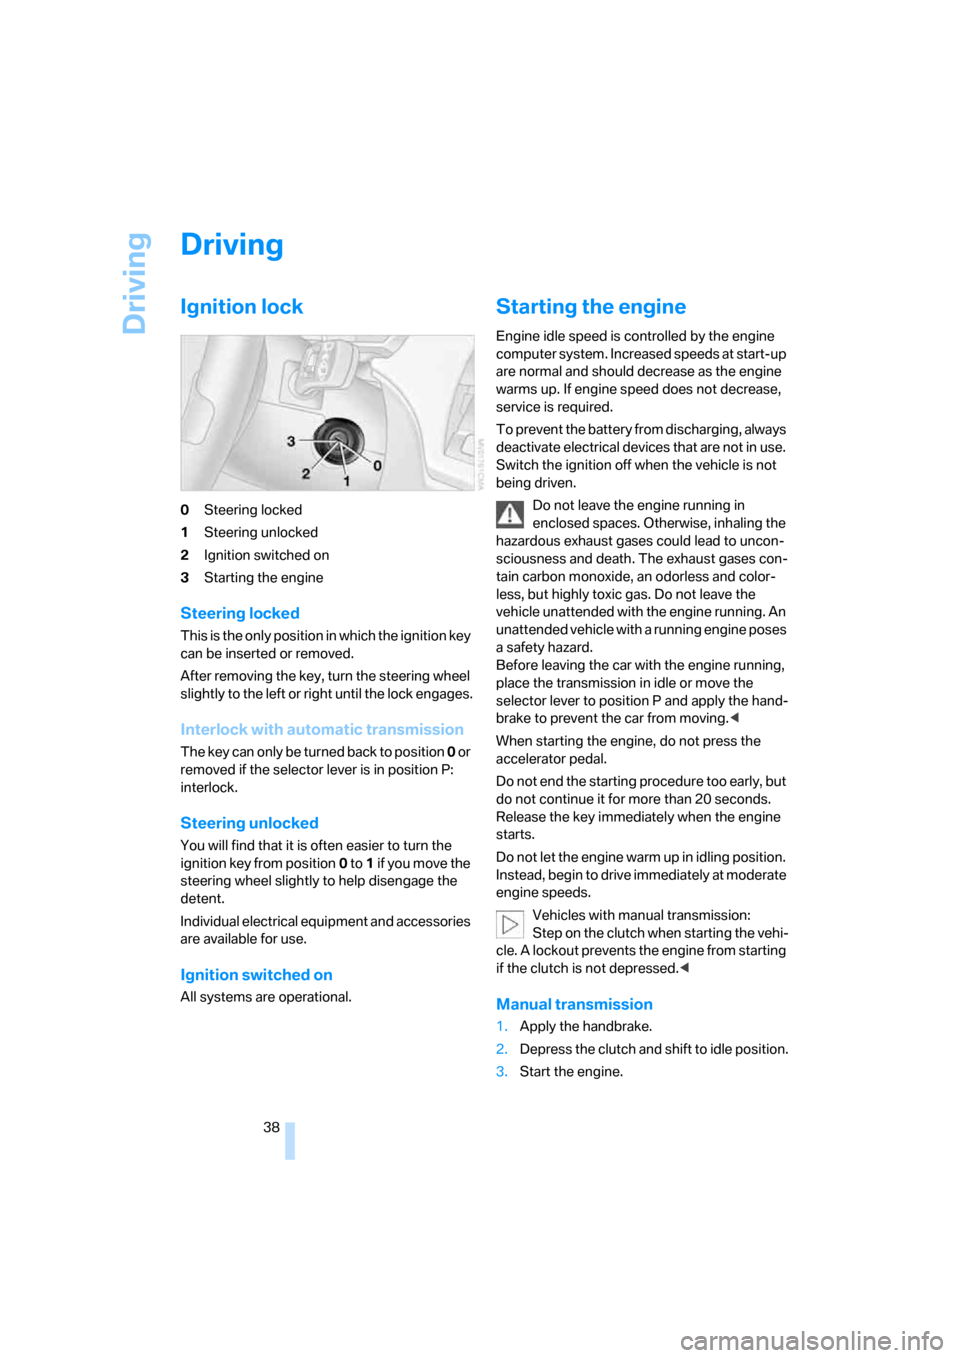
0Steering locked
1Steering unlocked
2Ignition switched on
3Starting the engine
Steering locked
This is the only position in which the ignition key
can be inserted or removed.
After removing the key, turn the steering wheel
slightly to the left or right until the lock engages.
Interlock with automatic transmission
The key can only be turned back to position 0 or
removed if the selector lever is in position P:
interlock.
Steering unlocked
You will find that it is often easier to turn the
ignition key from position0 to 1 if yo u m ove the
steering wheel slightly to help disengage the
detent.
Individual electrical equipment and accessories
are available for use.
Ignition switched on
All systems are operational.
Starting the engine
Engine idle speed is controlled by the engine
computer system. Increased speeds at start-up
are normal and should decrease as the engine
warms up. If engine speed does not decrease,
service is required.
To prevent the battery from discharging, always
deactivate electrical devices that are not in use.
Switch the ignition off when the vehicle is not
being driven.
Do not leave the engine running in
enclosed spaces. Otherwise, inhaling the
hazardous exhaust gases could lead to uncon-
sciousness and death. The exhaust gases con-
tain carbon monoxide, an odorless and color-
less, but highly toxic gas. Do not leave the
vehicle unattended with the engine running. An
unattended vehicle with a running engine poses
a safety hazard.
Before leaving the car with the engine running,
place the transmission in idle or move the
selector lever to position P and apply the hand-
brake to prevent the car from moving.<
When starting the engine, do not press the
accelerator pedal.
Do not end the starting procedure too early, but
do not continue it for more than 20 seconds.
Release the key immediately when the engine
starts.
Do not let the engine warm up in idling position.
Instead, begin to drive immediately at moderate
engine speeds.
Vehicles with manual transmission:
Step on the clutch when starting the vehi-
cle. A lockout prevents the engine from starting
if the clutch is not depressed.<
Manual transmission
1.Apply the handbrake.
2.Depress the clutch and shift to idle position.
3.Start the engine.
Page 43 of 128
Reference
At a glance
Controls
Driving tips
Mobility
41
R Reverse
Select only when the vehicle is stationary.
N Neutral, idle
You can select this in a car wash, for example.
The vehicle can roll.
D Drive, automatic position
This position is designed for driving under all
normal operating conditions. All forward gears
are selected automatically.
Under normal operating conditions, fuel con-
sumption is lowest when you are driving in posi-
tion D.
Kickdown
Kick-down enables you to achieve maximum
performance.
Press the accelerator pedal beyond the full-
throttle resistance point.
Manual operation and Sport program
M/S
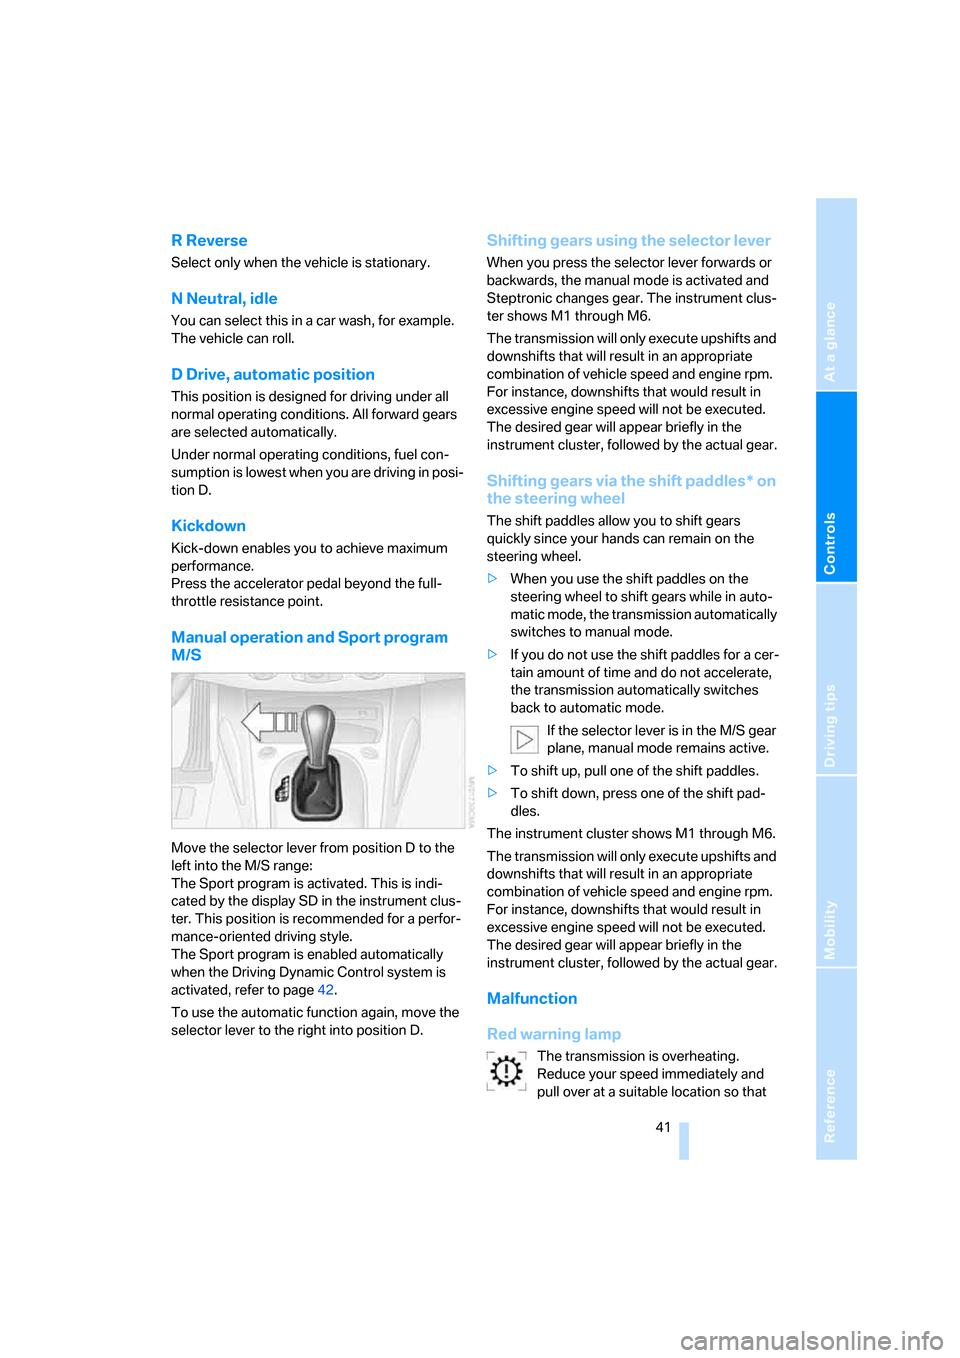
Move the selector lever from position D to the
left into the M/S range:
The Sport program is activated. This is indi-
cated by the display SD in the instrument clus-
ter. This position is recommended for a perfor-
mance-oriented driving style.
The Sport program is enabled automatically
when the Driving Dynamic Control system is
activated, refer to page42.
To use the automatic function again, move the
selector lever to the right into position D.
Shifting gears using the selector lever
When you press the selector lever forwards or
backwards, the manual mode is activated and
Steptronic changes gear. The instrument clus-
ter shows M1 through M6.
The transmission will only execute upshifts and
downshifts that will result in an appropriate
combination of vehicle speed and engine rpm.
For instance, downshifts that would result in
excessive engine speed will not be executed.
The desired gear will appear briefly in the
instrument cluster, followed by the actual gear.
Shifting gears via the shift paddles* on
the steering wheel
The shift paddles allow you to shift gears
quickly since your hands can remain on the
steering wheel.
>When you use the shift paddles on the
steering wheel to shift gears while in auto-
matic mode, the transmission automatically
switches to manual mode.
>If you do not use the shift paddles for a cer-
tain amount of time and do not accelerate,
the transmission automatically switches
back to automatic mode.
If the selector lever is in the M/S gear
plane, manual mode remains active.
>To shift up, pull one of the shift paddles.
>To shift down, press one of the shift pad-
dles.
The instrument cluster shows M1 through M6.
The transmission will only execute upshifts and
downshifts that will result in an appropriate
combination of vehicle speed and engine rpm.
For instance, downshifts that would result in
excessive engine speed will not be executed.
The desired gear will appear briefly in the
instrument cluster, followed by the actual gear.
Malfunction
Red warning lamp
The transmission is overheating.
Reduce your speed immediately and
pull over at a suitable location so that
Page 50 of 128
Everything under control
48
Setting the clock
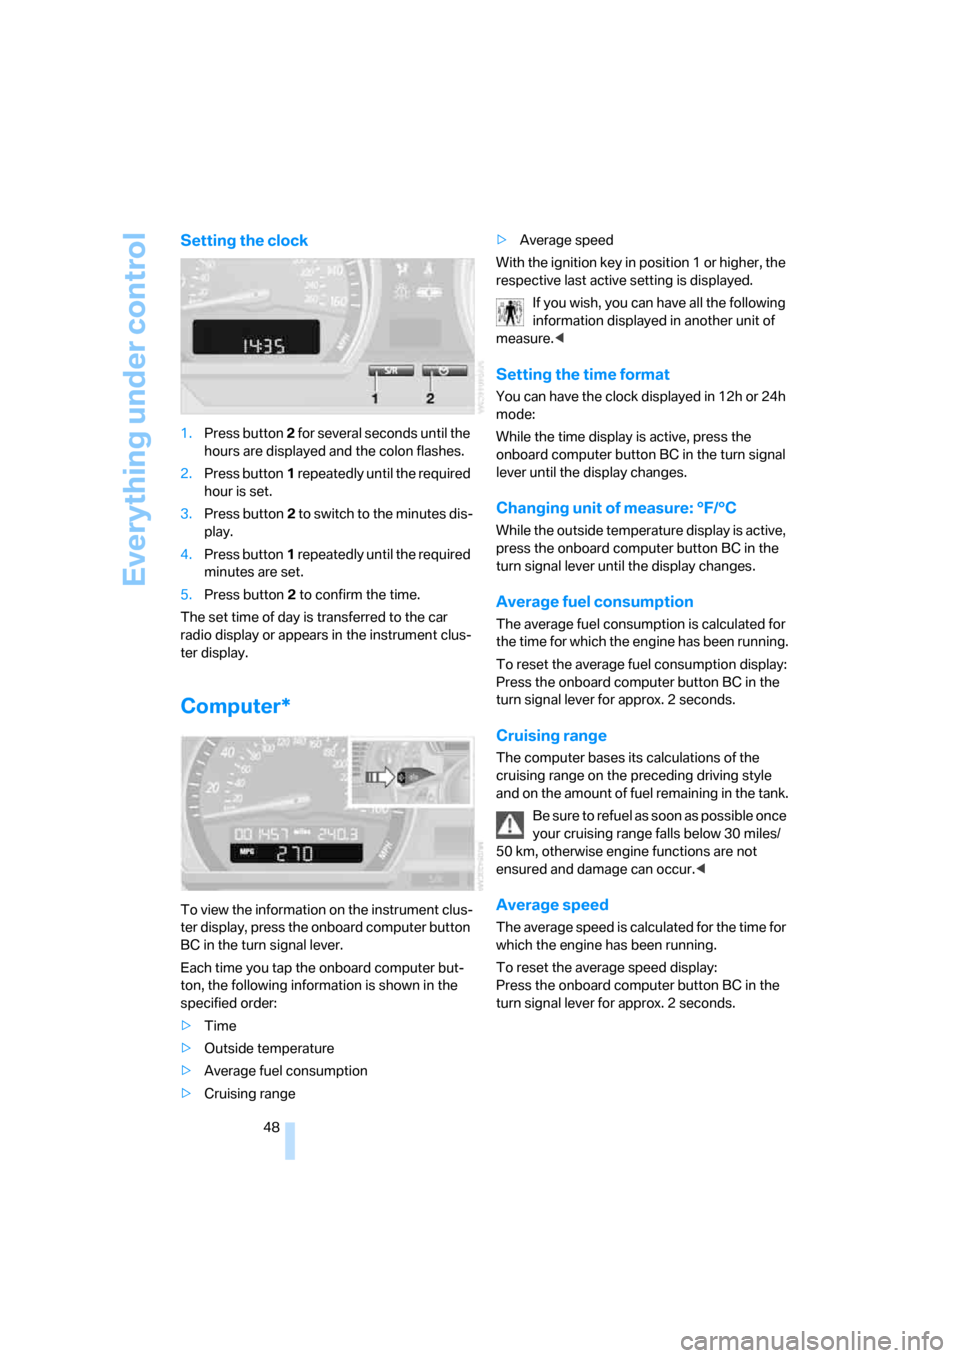
1.Press button 2 for several seconds until the
hours are displayed and the colon flashes.
2.Press button1 repeatedly until the required
hour is set.
3.Press button2 to switch to the minutes dis-
play.
4.Press button1 repeatedly until the required
minutes are set.
5.Press button2 to confirm the time.
The set time of day is transferred to the car
radio display or appears in the instrument clus-
ter display.
Computer*
To view the information on the instrument clus-
ter display, press the onboard computer button
BC in the turn signal lever.
Each time you tap the onboard computer but-
ton, the following information is shown in the
specified order:
>Time
>Outside temperature
>Average fuel consumption
>Cruising range>Average speed
With the ignition key in position 1 or higher, the
respective last active setting is displayed.
If you wish, you can have all the following
information displayed in another unit of
measure.<
Setting the time format
You can have the clock displayed in 12h or 24h
mode:
While the time display is active, press the
onboard computer button BC in the turn signal
lever until the display changes.
Changing unit of measure: °F/°C
While the outside temperature display is active,
press the onboard computer button BC in the
turn signal lever until the display changes.
Average fuel consumption
The average fuel consumption is calculated for
the time for which the engine has been running.
To reset the average fuel consumption display:
Press the onboard computer button BC in the
turn signal lever for approx. 2 seconds.
Cruising range
The computer bases its calculations of the
cruising range on the preceding driving style
and on the amount of fuel remaining in the tank.
Be sure to refuel as soon as possible once
your cruising range falls below 30 miles/
50 km, otherwise engine functions are not
ensured and damage can occur.<
Average speed
The average speed is calculated for the time for
which the engine has been running.
To reset the average speed display:
Press the onboard computer button BC in the
turn signal lever for approx. 2 seconds.
Page 52 of 128
Technology for driving comfort and safety
50 In the following exceptional circumstances, it
may be effective to activate the DTC for a short
period:
>When driving on snow-covered grades, in
slush or on uncleared, snow-covered roads
>When rocking the vehicle or starting off in
deep snow or on loose surfaces
>When driving with snow chains
Activating DTC
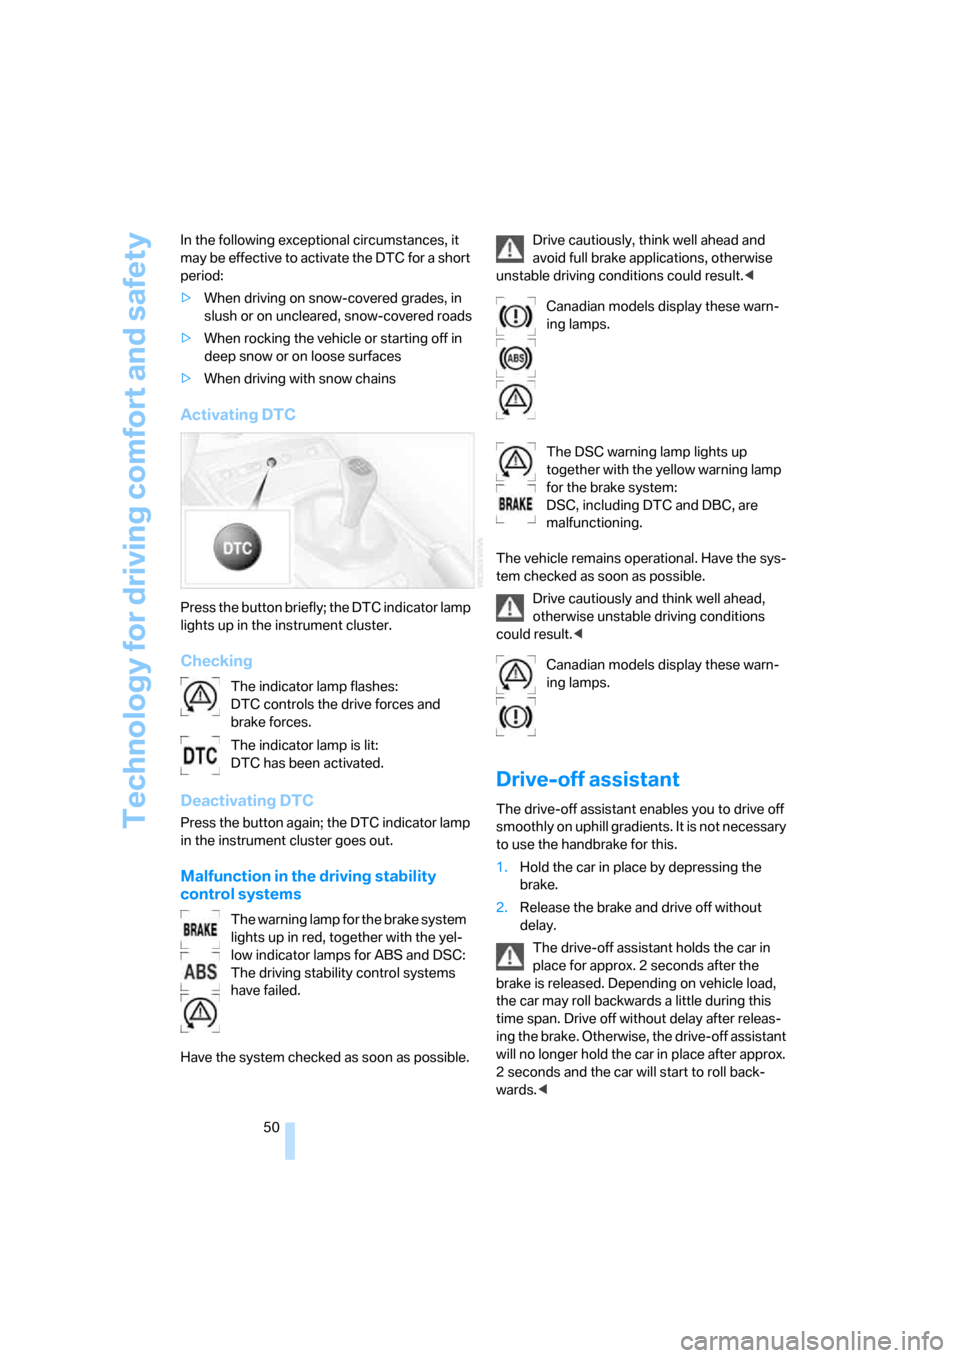
Press the button briefly; the DTC indicator lamp
lights up in the instrument cluster.
Checking
Deactivating DTC
Press the button again; the DTC indicator lamp
in the instrument cluster goes out.
Malfunction in the driving stability
control systems
Have the system checked as soon as possible.Drive cautiously, think well ahead and
avoid full brake applications, otherwise
unstable driving conditions could result.<
The vehicle remains operational. Have the sys-
tem checked as soon as possible.
Drive cautiously and think well ahead,
otherwise unstable driving conditions
could result.<
Drive-off assistant
The drive-off assistant enables you to drive off
smoothly on uphill gradients. It is not necessary
to use the handbrake for this.
1.Hold the car in place by depressing the
brake.
2.Release the brake and drive off without
delay.
The drive-off assistant holds the car in
place for approx. 2 seconds after the
brake is released. Depending on vehicle load,
the car may roll backwards a little during this
time span. Drive off without delay after releas-
ing the brake. Otherwise, the drive-off assistant
will no longer hold the car in place after approx.
2 seconds and the car will start to roll back-
wards.< The indicator lamp flashes:
DTC controls the drive forces and
brake forces.
The indicator lamp is lit:
DTC has been activated.
The warning lamp for the brake system
lights up in red, together with the yel-
low indicator lamps for ABS and DSC:
The driving stability control systems
have failed.
Canadian models display these warn-
ing lamps.
The DSC warning lamp lights up
together with the yellow warning lamp
for the brake system:
DSC, including DTC and DBC, are
malfunctioning.
Canadian models display these warn-
ing lamps.
Page 61 of 128
Reference
At a glance
Controls
Driving tips
Mobility
59
Air distribution
Direct the flow of air to the windows
, to the upper body area and to
the footwell . Intermediate settings
are possible.
Switching cooling function on/off
When the cooling function is on, the
air is cooled, dehumidified, then
reheated depending on the tempera-
ture setting.
Depending on the weather, the windshield may
fog over briefly when the engine is started.
Recirculated-air mode
If the air outside the car has an
unpleasant odor or contains pollut-
ants, temporarily shut off the supply
to the interior of the car. The system
recirculates the air within the vehicle.
If the windows fog over in the recircu-
lated-air mode, you should switch it off
and, if necessary, increase the air flow rate.
The manually controlled recirculated-air mode
should not be used continuously for lengthy
periods, otherwise the quality of the air inside
the car will gradually deteriorate.<
Temperature
For a higher temperature, turn the
rotary switch clockwise towards red.
For a lower temperature, turn the
rotary switch counterclockwise
towards blue.
Air flow rate
Adjust the air flow rate. The higher
the rate, the more effective the heat-
ing or cooling will be.
Switching the system on/off
Set the air flow rate to 0. Blower and air condi-
tioning are switched off and the air supply is cut
off.
To switch on the heater or air conditioning, set
any desired air flow rate.
Rear window defroster
The defroster switches off automati-
cally after a certain time.
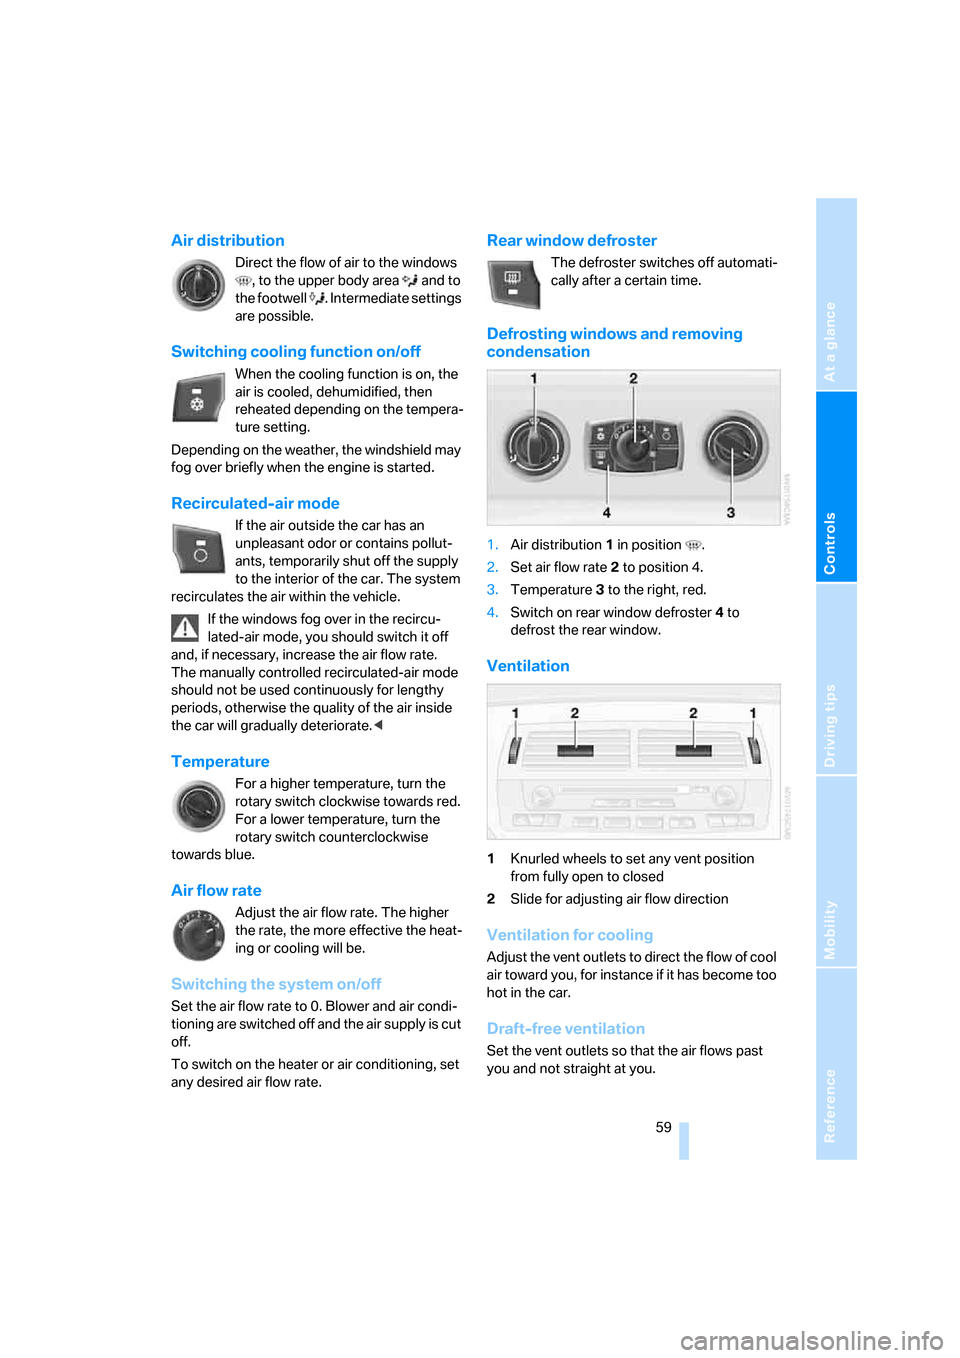
Defrosting windows and removing
condensation
1.Air distribution1 in position .
2.Set air flow rate 2 to position 4.
3.Temperature3 to the right, red.
4.Switch on rear window defroster 4 to
defrost the rear window.
Ventilation
1Knurled wheels to set any vent position
from fully open to closed
2Slide for adjusting air flow direction
Ventilation for cooling
Adjust the vent outlets to direct the flow of cool
air toward you, for instance if it has become too
hot in the car.
Draft-free ventilation
Set the vent outlets so that the air flows past
you and not straight at you.
Page 65 of 128
Reference
At a glance
Controls
Driving tips
Mobility
63
automatic climate control does not have
enough time to achieve the set temperature.<
AUC Automatic recirculated-air
control/Recirculated-air mode
Switch on the desired operating
mode by pressing this button repeat-
edly:
>LEDs off: outside air flows in continuously.
>Left-hand LED on, AUC mode: a sensor
detects pollutants in the outside air. If nec-
essary, the system blocks the supply of out-
side air and recirculates the inside air. As
soon as the concentration of pollutants in
the outside air has decreased sufficiently,
the system automatically switches back to
outside air supply.
>Right-hand LED on, recirculated-air mode:
the inflow of outside air is shut off perma-
nently. The system recirculates the air
within the vehicle.
If the windows fog over in the recircu-
lated-air mode, you should switch it off
and, if necessary, increase the air flow rate.
The recirculated-air mode should not be used
over an extended period of time, otherwise the
air quality inside the car will deteriorate contin-
uously.<
Rear window defroster
The defroster switches off automati-
cally after a certain time.
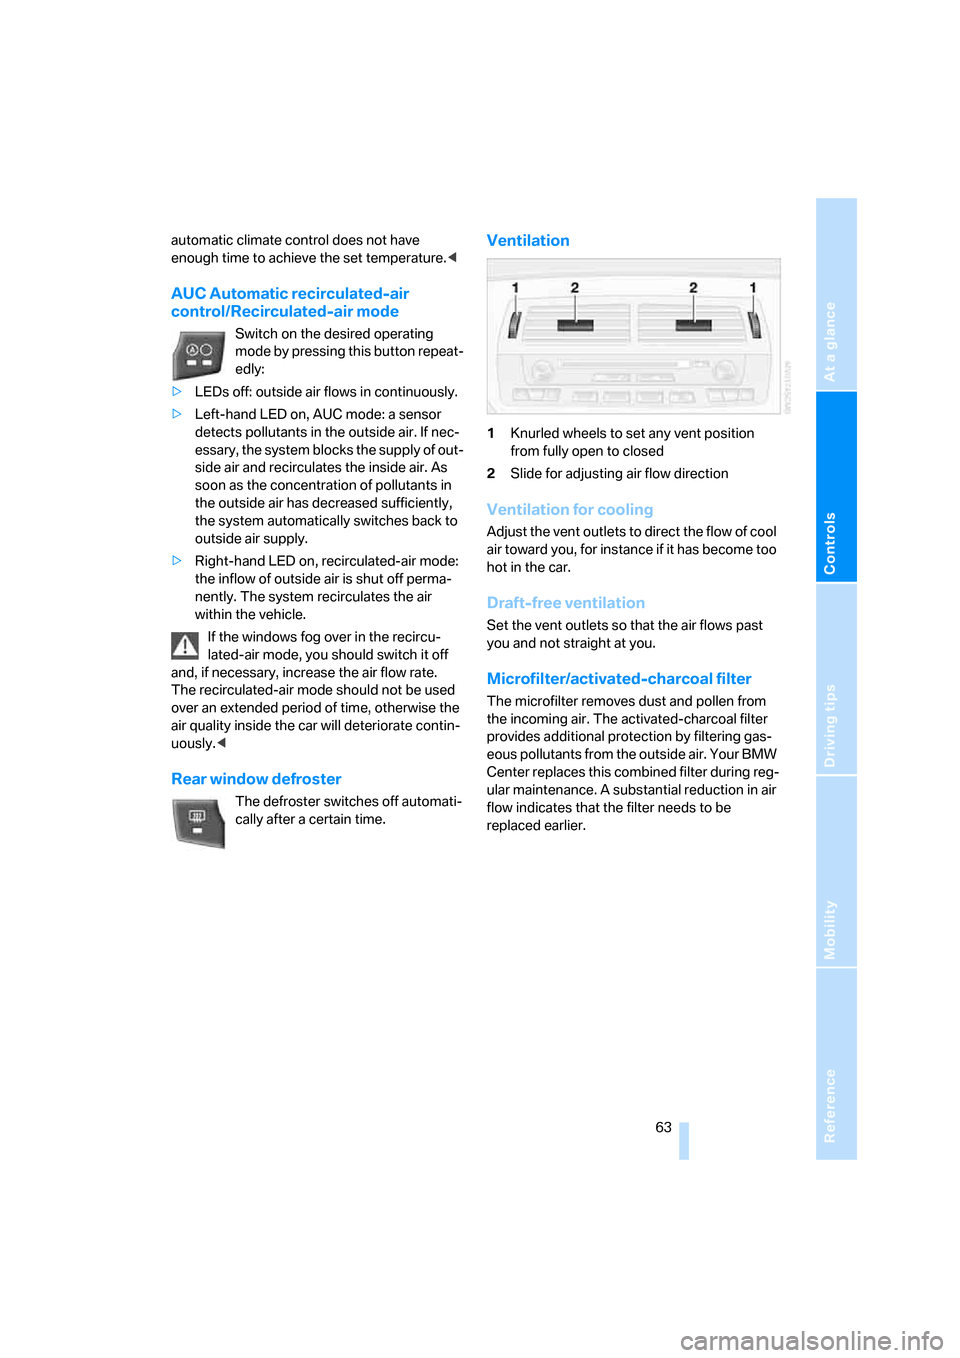
Ventilation
1Knurled wheels to set any vent position
from fully open to closed
2Slide for adjusting air flow direction
Ventilation for cooling
Adjust the vent outlets to direct the flow of cool
air toward you, for instance if it has become too
hot in the car.
Draft-free ventilation
Set the vent outlets so that the air flows past
you and not straight at you.
Microfilter/activated-charcoal filter
The microfilter removes dust and pollen from
the incoming air. The activated-charcoal filter
provides additional protection by filtering gas-
eous pollutants from the outside air. Your BMW
Center replaces this combined filter during reg-
ular maintenance. A substantial reduction in air
flow indicates that the filter needs to be
replaced earlier.
Page 73 of 128
Reference
At a glance
Controls
Driving tips
Mobility
71
cannot be ruled out that vehicle electronics and
the mobile communications device interfere
with one another. In addition, it is not ensured
that the radio waves emitted during transmis-
sion are directed outside of the vehicle inte-
rior.<
Interior and exterior mirrors with
automatic dimming feature*
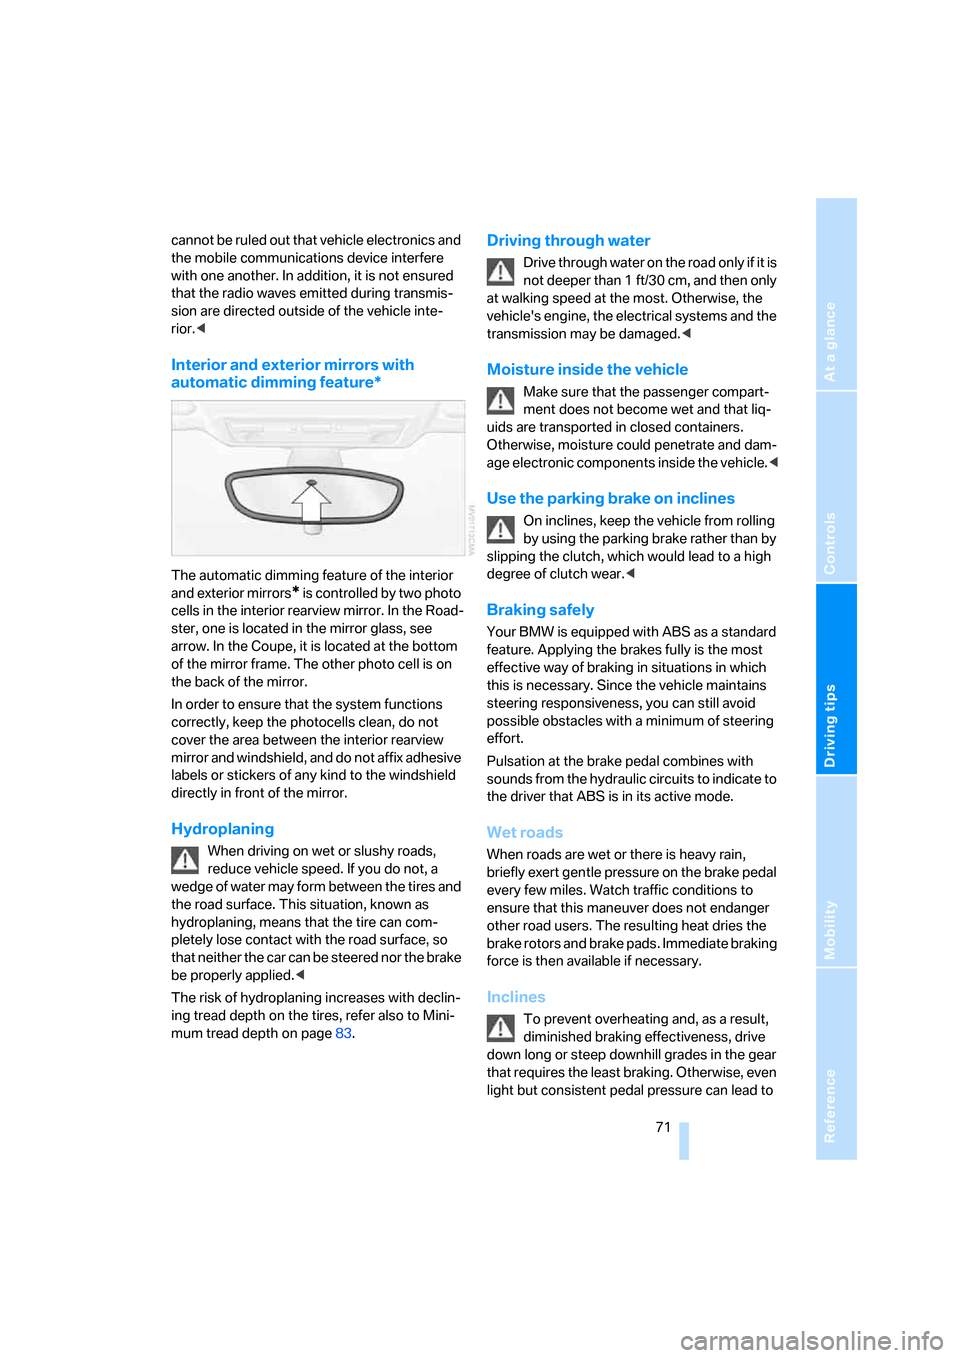
The automatic dimming feature of the interior
and exterior mirrors
* is controlled by two photo
cells in the interior rearview mirror. In the Road-
ster, one is located in the mirror glass, see
arrow. In the Coupe, it is located at the bottom
of the mirror frame. The other photo cell is on
the back of the mirror.
In order to ensure that the system functions
correctly, keep the photocells clean, do not
cover the area between the interior rearview
mirror and windshield, and do not affix adhesive
labels or stickers of any kind to the windshield
directly in front of the mirror.
Hydroplaning
When driving on wet or slushy roads,
reduce vehicle speed. If you do not, a
wedge of water may form between the tires and
the road surface. This situation, known as
hydroplaning, means that the tire can com-
pletely lose contact with the road surface, so
that neither the car can be steered nor the brake
be properly applied.<
The risk of hydroplaning increases with declin-
ing tread depth on the tires, refer also to Mini-
mum tread depth on page83.
Driving through water
Drive through water on the road only if it is
not deeper than 1 ft/30 cm, and then only
at walking speed at the most. Otherwise, the
vehicle's engine, the electrical systems and the
transmission may be damaged.<
Moisture inside the vehicle
Make sure that the passenger compart-
ment does not become wet and that liq-
uids are transported in closed containers.
Otherwise, moisture could penetrate and dam-
age electronic components inside the vehicle.<
Use the parking brake on inclines
On inclines, keep the vehicle from rolling
by using the parking brake rather than by
slipping the clutch, which would lead to a high
degree of clutch wear.<
Braking safely
Your BMW is equipped with ABS as a standard
feature. Applying the brakes fully is the most
effective way of braking in situations in which
this is necessary. Since the vehicle maintains
steering responsiveness, you can still avoid
possible obstacles with a minimum of steering
effort.
Pulsation at the brake pedal combines with
sounds from the hydraulic circuits to indicate to
the driver that ABS is in its active mode.
Wet roads
When roads are wet or there is heavy rain,
briefly exert gentle pressure on the brake pedal
every few miles. Watch traffic conditions to
ensure that this maneuver does not endanger
other road users. The resulting heat dries the
brake rotors and brake pads. Immediate braking
force is then available if necessary.
Inclines
To prevent overheating and, as a result,
diminished braking effectiveness, drive
down long or steep downhill grades in the gear
that requires the least braking. Otherwise, even
light but consistent pedal pressure can lead to
Page 86 of 128
Wheels and tires
84 the letters TWI, for Tread Wear Indicator, on the
tire's sidewalls identify tires that incorporate
these wear indicators. Once the tire tread has
worn down to the wear indicators, the tire has
worn to a depth of 1/16 in/1.6 mm.
Wheel/tire damage
Due to low-profile tires, please note that
wheels, tires and suspension parts are
more susceptible to road hazards and conse-
quential damages.<
Unusual vibrations encountered during normal
vehicle operation can indicate tire failure or
some other vehicle malfunction. This can, for
example, be caused by driving over curbs. The
same applies to any other abnormal road
behavior, such as pulling severely to the right or
left.
In these cases, reduce speed immedi-
ately and have wheels and tires thor-
oughly checked. To do so, drive carefully to the
nearest BMW Center or tire shop that works
according to BMW repair procedures with cor-
respondingly trained personnel. If necessary,
have the vehicle towed there.
Tire damage can be extremely dangerous for
vehicle occupants and other road users.<
Tire age
For various reasons, such as the development
of brittleness, BMW recommends tire replace-
ment after no more than 6 years, regardless of
the actual wear of the tires.
The date on which the tire was manufactured is
indicated by the code on the sidewall:
DOT … 5005 indicates that the tire was manu-
factured in week 50 of the year 2005.
Run-Flat Tires
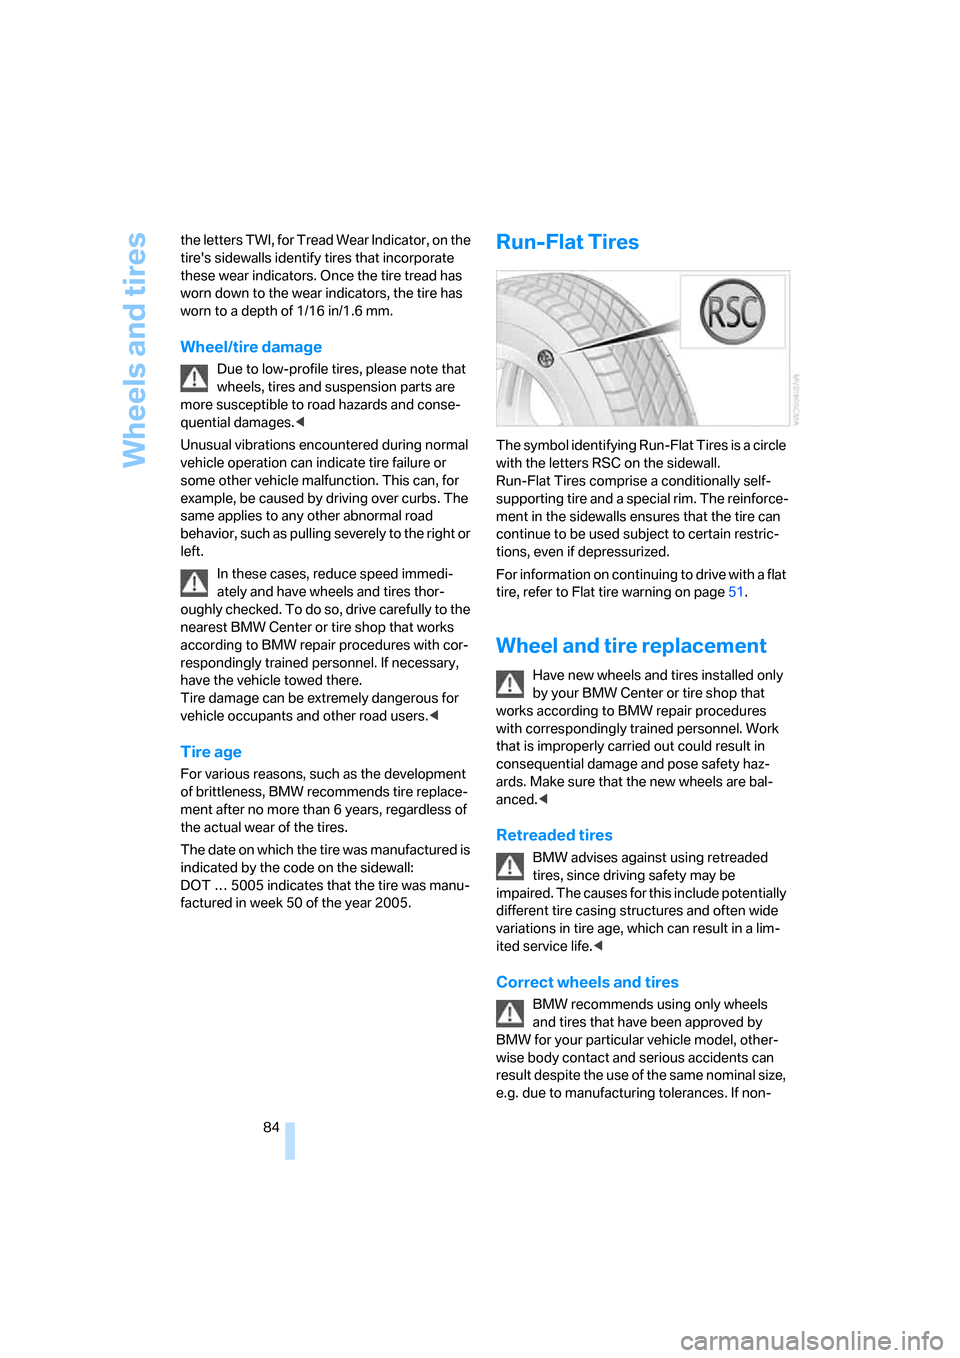
The symbol identifying Run-Flat Tires is a circle
with the letters RSC on the sidewall.
Run-Flat Tires comprise a conditionally self-
supporting tire and a special rim. The reinforce-
ment in the sidewalls ensures that the tire can
continue to be used subject to certain restric-
tions, even if depressurized.
For information on continuing to drive with a flat
tire, refer to Flat tire warning on page51.
Wheel and tire replacement
Have new wheels and tires installed only
by your BMW Center or tire shop that
works according to BMW repair procedures
with correspondingly trained personnel. Work
that is improperly carried out could result in
consequential damage and pose safety haz-
ards. Make sure that the new wheels are bal-
anced.<
Retreaded tires
BMW advises against using retreaded
tires, since driving safety may be
impaired. The causes for this include potentially
different tire casing structures and often wide
variations in tire age, which can result in a lim-
ited service life.<
Correct wheels and tires
BMW recommends using only wheels
and tires that have been approved by
BMW for your particular vehicle model, other-
wise body contact and serious accidents can
result despite the use of the same nominal size,
e.g. due to manufacturing tolerances. If non-