wheel BMW Z4 ROADSTER SDRIVE35I 2010 E89 User Guide
[x] Cancel search | Manufacturer: BMW, Model Year: 2010, Model line: Z4 ROADSTER SDRIVE35I, Model: BMW Z4 ROADSTER SDRIVE35I 2010 E89Pages: 254, PDF Size: 8.04 MB
Page 49 of 254
Controls
47Reference
At a glance
Driving tips
Communications
Navigation
Entertainment
Mobility
3.Swing the lever back up.
Do not use force to swing the lever
back up; otherwise, the mechanism
will be damaged.<
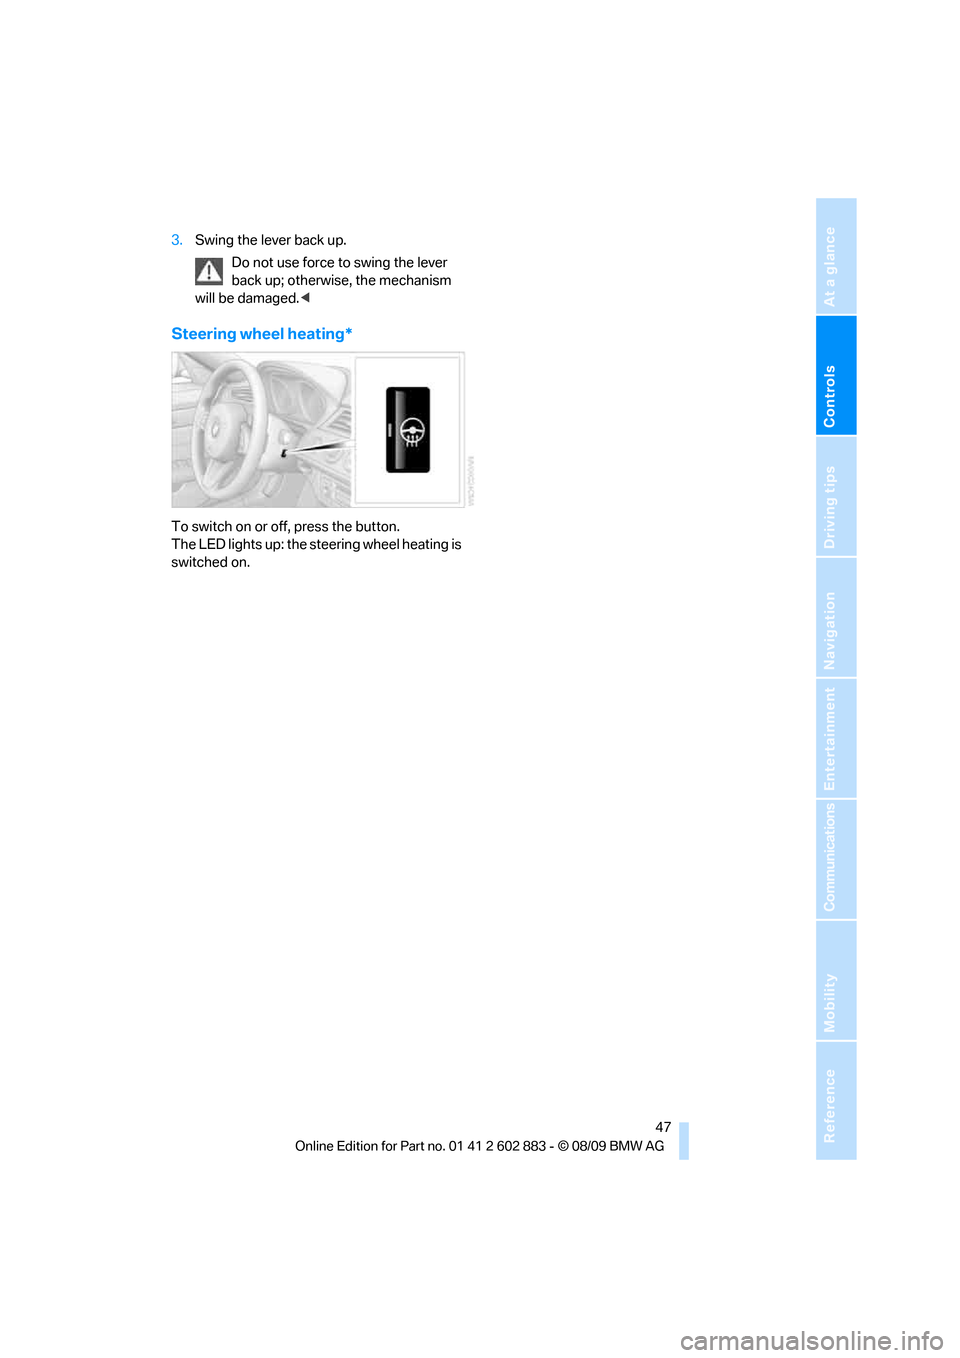
Steering wheel heating*
To switch on or off, press the button.
The LED lights up: the steering wheel heating is
switched on.
Page 54 of 254
Driving
52
Switching off the engine
Always take the remote control with you
when you leave the vehicle.
Set the parking brake firmly when parking; oth-
erwise, the vehicle could roll.<
Manual transmission
1.With the car at a standstill, press the start/
stop button.
2.Shift into first gear or reverse.
3.Set the parking brake.
4.Removing the remote control from the igni-
tion lock, refer to page50.
Automatic transmission
1.With the car at a standstill, move the selec-
tor lever to position P.
2.Press the start/stop button.
3.Set the parking brake.
4.Removing the remote control from the igni-
tion lock, refer to page50.
7-gear sport automatic transmission
with dual clutch
1.With the car at a standstill, engage trans-
mission position P.
2.Press the start/stop button.
3.Set the parking brake.
4.Removing the remote control from the igni-
tion lock, refer to page50.
Parking brake
The concept
Your BMW is equipped with an electromechan-
ical parking brake that can be set and released
by using a button.
The parking brake is primarily used to prevent
the vehicle from rolling when it is parked.When the vehicle is stationary, the parking
brake acts on the rear wheels via an electrome-
chanical mechanism. When the vehicle is rolling
or being driven, the parking brake acts on the
disc brakes of the front and rear wheels via the
hydraulic brake system.
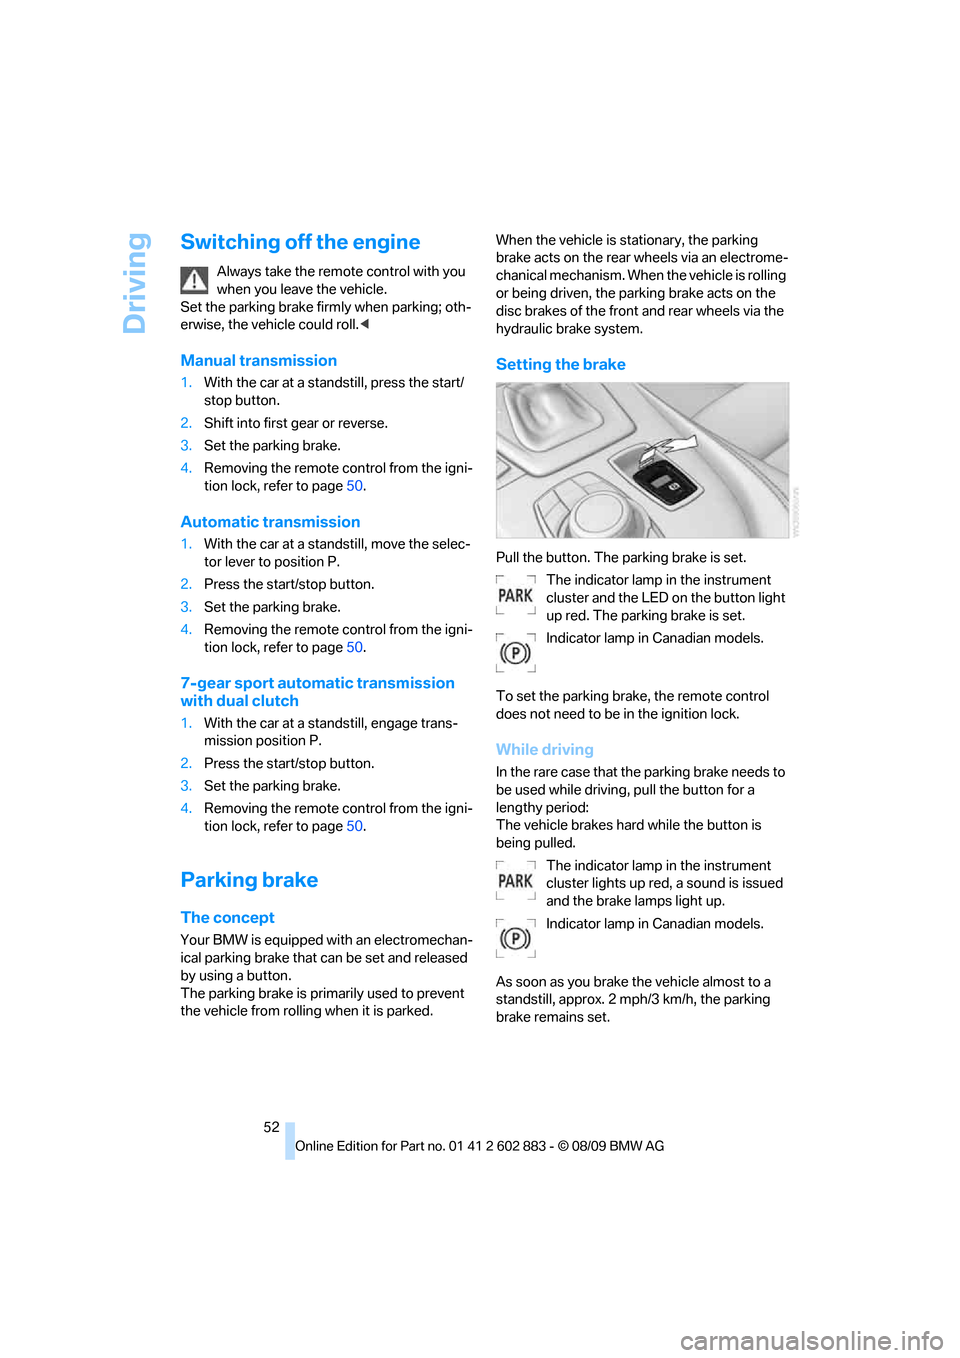
Setting the brake
Pull the button. The parking brake is set.
The indicator lamp in the instrument
cluster and the LED on the button light
up red. The parking brake is set.
Indicator lamp in Canadian models.
To set the parking brake, the remote control
does not need to be in the ignition lock.
While driving
In the rare case that the parking brake needs to
be used while driving, pull the button for a
lengthy period:
The vehicle brakes hard while the button is
being pulled.
The indicator lamp in the instrument
cluster lights up red, a sound is issued
and the brake lamps light up.
Indicator lamp in Canadian models.
As soon as you brake the vehicle almost to a
standstill, approx. 2 mph/3 km/h, the parking
brake remains set.
Page 55 of 254
Controls
53Reference
At a glance
Driving tips
Communications
Navigation
Entertainment
Mobility
Releasing
Take the remote control with you when
leaving the vehicle so that children, for
example, cannot release the parking brake.<
The parking brake can only be released while
the ignition is switched on or the engine is
running.
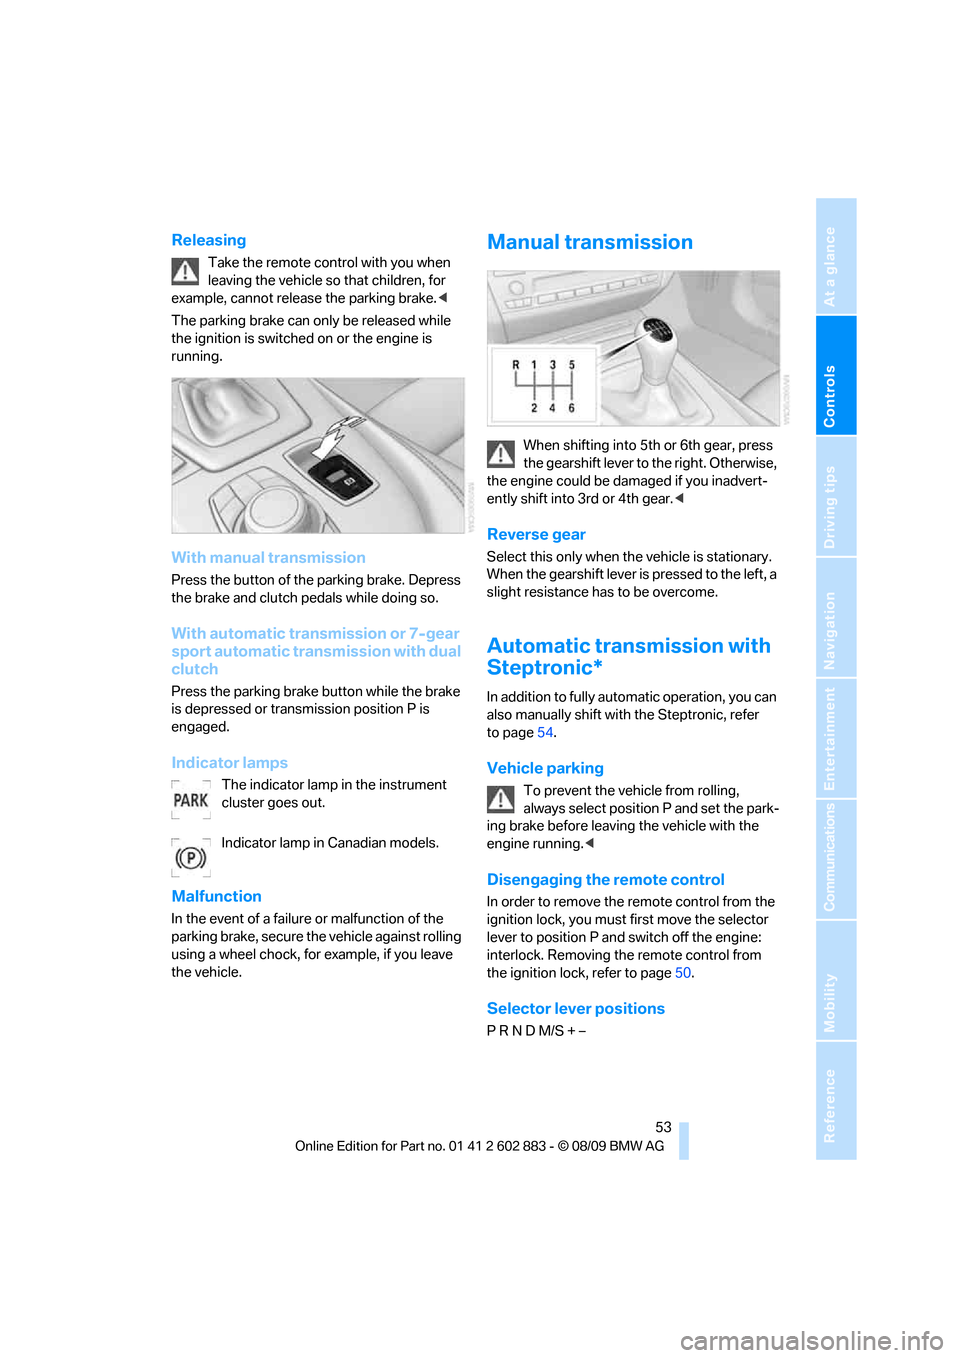
With manual transmission
Press the button of the parking brake. Depress
the brake and clutch pedals while doing so.
With automatic transmission or 7-gear
sport automatic transmission with dual
clutch
Press the parking brake button while the brake
is depressed or transmission position P is
engaged.
Indicator lamps
The indicator lamp in the instrument
cluster goes out.
Indicator lamp in Canadian models.
Malfunction
In the event of a failure or malfunction of the
parking brake, secure the vehicle against rolling
using a wheel chock, for example, if you leave
the vehicle.
Manual transmission
When shifting into 5th or 6th gear, press
the gearshift lever to the right. Otherwise,
the engine could be damaged if you inadvert-
ently shift into 3rd or 4th gear.<
Reverse gear
Select this only when the vehicle is stationary.
When the gearshift lever is pressed to the left, a
slight resistance has to be overcome.
Automatic transmission with
Steptronic*
In addition to fully automatic operation, you can
also manually shift with the Steptronic, refer
to page54.
Vehicle parking
To prevent the vehicle from rolling,
always select position P and set the park-
ing brake before leaving the vehicle with the
engine running.<
Disengaging the remote control
In order to remove the remote control from the
ignition lock, you must first move the selector
lever to position P and switch off the engine:
interlock. Removing the remote control from
the ignition lock, refer to page50.
Selector lever positions
P R N D M/S + –
Page 56 of 254
Driving
54
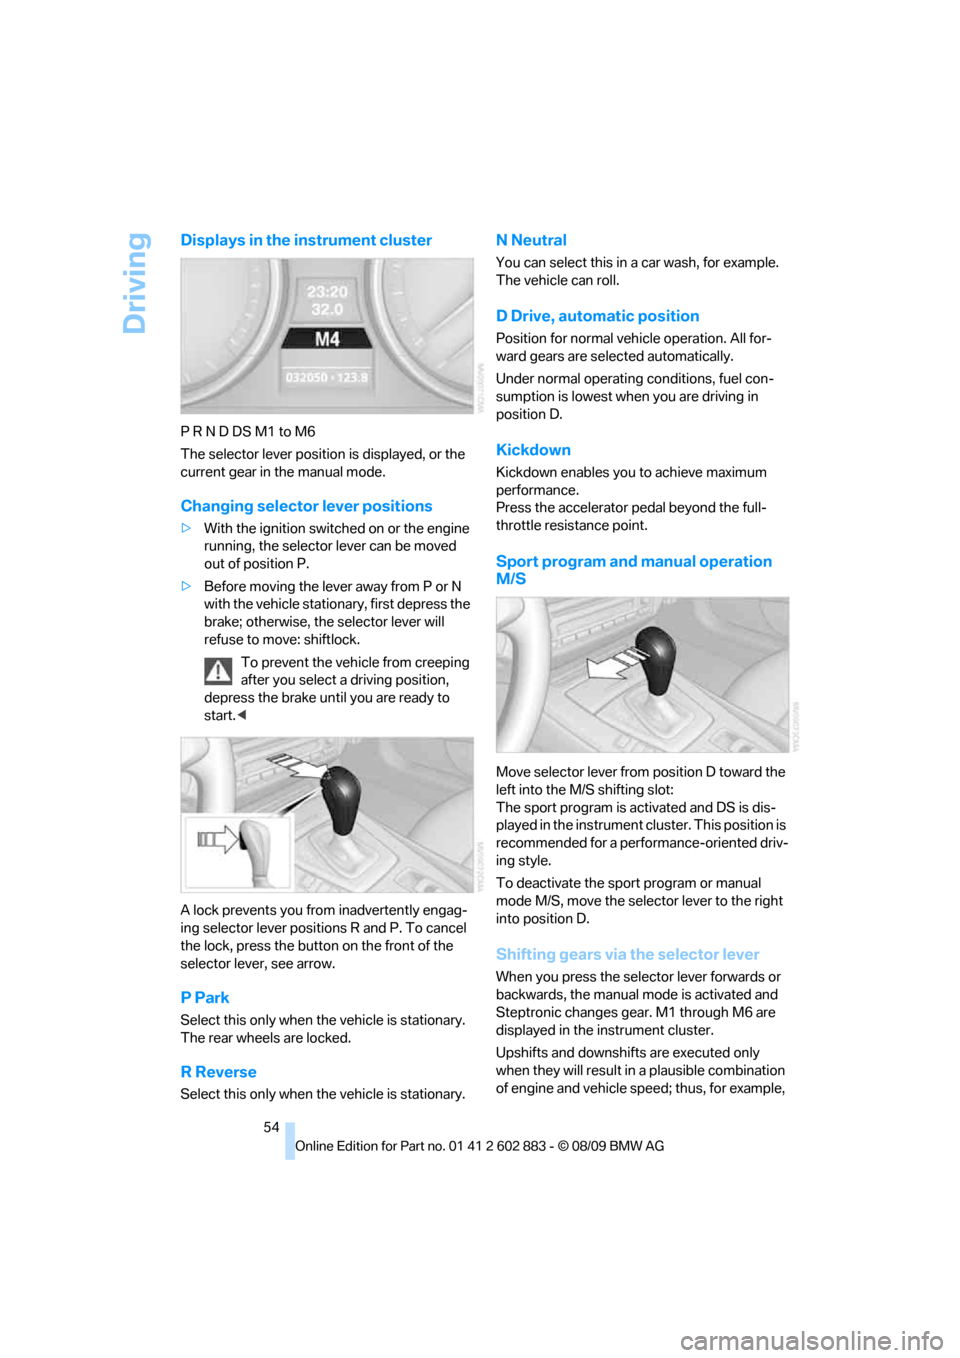
Displays in the instrument cluster
P R N D DS M1 to M6
The selector lever position is displayed, or the
current gear in the manual mode.
Changing selector lever positions
>With the ignition switched on or the engine
running, the selector lever can be moved
out of position P.
>Before moving the lever away from P or N
with the vehicle stationary, first depress the
brake; otherwise, the selector lever will
refuse to move: shiftlock.
To prevent the vehicle from creeping
after you select a driving position,
depress the brake until you are ready to
start.<
A lock prevents you from inadvertently engag-
ing selector lever positions R and P. To cancel
the lock, press the button on the front of the
selector lever, see arrow.
P Park
Select this only when the vehicle is stationary.
The rear wheels are locked.
R Reverse
Select this only when the vehicle is stationary.
N Neutral
You can select this in a car wash, for example.
The vehicle can roll.
D Drive, automatic position
Position for normal vehicle operation. All for-
ward gears are selected automatically.
Under normal operating conditions, fuel con-
sumption is lowest when you are driving in
position D.
Kickdown
Kickdown enables you to achieve maximum
performance.
Press the accelerator pedal beyond the full-
throttle resistance point.
Sport program and manual operation
M/S
Move selector lever from position D toward the
left into the M/S shifting slot:
The sport program is activated and DS is dis-
played in the instrument cluster. This position is
recommended for a performance-oriented driv-
ing style.
To deactivate the sport program or manual
mode M/S, move the selector lever to the right
into position D.
Shifting gears via the selector lever
When you press the selector lever forwards or
backwards, the manual mode is activated and
Steptronic changes gear. M1 through M6 are
displayed in the instrument cluster.
Upshifts and downshifts are executed only
when they will result in a plausible combination
of engine and vehicle speed; thus, for example,
Page 57 of 254
Controls
55Reference
At a glance
Driving tips
Communications
Navigation
Entertainment
Mobility
a downshift that would cause the engine to
overrev will not be executed by the system. The
gear selected is briefly displayed in the instru-
ment cluster, followed by the gear actually
in use.
Shifting gears via shift paddles* on the
steering wheel
The shift paddles allow you to shift gears with-
out taking your hands off the steering wheel.
>When you use the shift paddles on the
steering wheel to shift gears in automatic
mode, the transmission switches to man-
ual mode.
>If you do not accelerate or shift gears using
the shift paddles for a certain amount of
time, the transmission switches back to
automatic mode.
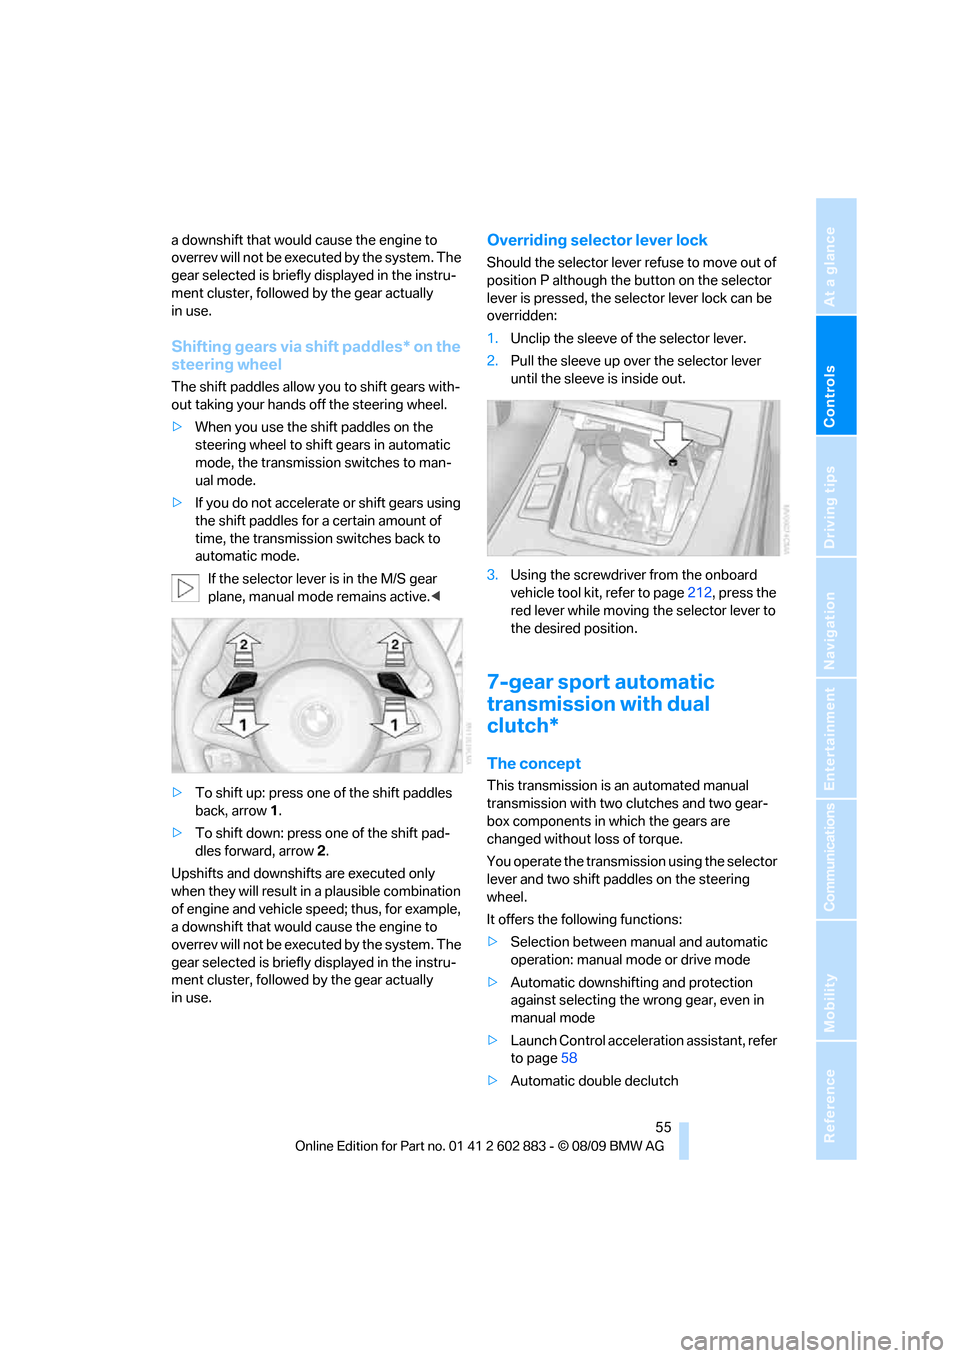
If the selector lever is in the M/S gear
plane, manual mode remains active.<
>To shift up: press one of the shift paddles
back, arrow 1.
>To shift down: press one of the shift pad-
dles forward, arrow 2.
Upshifts and downshifts are executed only
when they will result in a plausible combination
of engine and vehicle speed; thus, for example,
a downshift that would cause the engine to
overrev will not be executed by the system. The
gear selected is briefly displayed in the instru-
ment cluster, followed by the gear actually
in use.
Overriding selector lever lock
Should the selector lever refuse to move out of
position P although the button on the selector
lever is pressed, the selector lever lock can be
overridden:
1.Unclip the sleeve of the selector lever.
2.Pull the sleeve up over the selector lever
until the sleeve is inside out.
3.Using the screwdriver from the onboard
vehicle tool kit, refer to page212, press the
red lever while moving the selector lever to
the desired position.
7-gear sport automatic
transmission with dual
clutch*
The concept
This transmission is an automated manual
transmission with two clutches and two gear-
box components in which the gears are
changed without loss of torque.
You operate the transmission using the selector
lever and two shift paddles on the steering
wheel.
It offers the following functions:
>Selection between manual and automatic
operation: manual mode or drive mode
>Automatic downshifting and protection
against selecting the wrong gear, even in
manual mode
>Launch Control acceleration assistant, refer
to page58
>Automatic double declutch
Page 59 of 254
Controls
57Reference
At a glance
Driving tips
Communications
Navigation
Entertainment
Mobility
P Park
The rear wheels are locked.
P is engaged automatically when the following
conditions are met:
>The driver's door is opened while the
engine is running, your safety belt is not fas-
tened and neither the brake pedal nor the
accelerator are activated.
>The engine is switched off unless N is
engaged and the remote control is in the
ignition lock.
>The remote control is removed from the
ignition lock.
Kickdown
T o a cc ele ra te ra pidly, e.g., when passing, press
the accelerator down past the resistance point.
This provides maximum acceleration.
Activating the Sport program and
manual mode M/S
Move the selector lever from position D toward
the left:
The Sport program is activated.
Sport program
S1 through S7 is displayed in the instrument
cluster. This position is recommended for a
performance-oriented driving style.
Manual mode:
When you press the selector lever forward or
backward, or when you press the shift paddles,
manual mode is activated and the gear is
changed.
M1 through M7 are displayed in the instrument
cluster.The transmission provides assistance in the fol-
lowing situations:
>Upshifts and downshifts are executed only
when they will result in a plausible combina-
tion of engine and vehicle speed; thus, for
example, a downshift that would cause the
engine to overrev will not be executed by
the system.
>When the vehicle stops, the transmission
automatically shifts down to first gear.
>Shortly before the vehicle slows down to
below the minimum speed of the gear cur-
rently engaged, the transmission automati-
cally shifts down without requiring your
intervention.
Rapid downshifting: in manual mode, you can
skip several gears to achieve optimal accelera-
tion. Do so by pressing the accelerator past the
resistance point.
Changing to drive mode
Push the selector lever to the right.
Shifting gears via the selector lever
In manual mode:
>To shift up, pull back the selector lever.
>To shift down, push it forward.
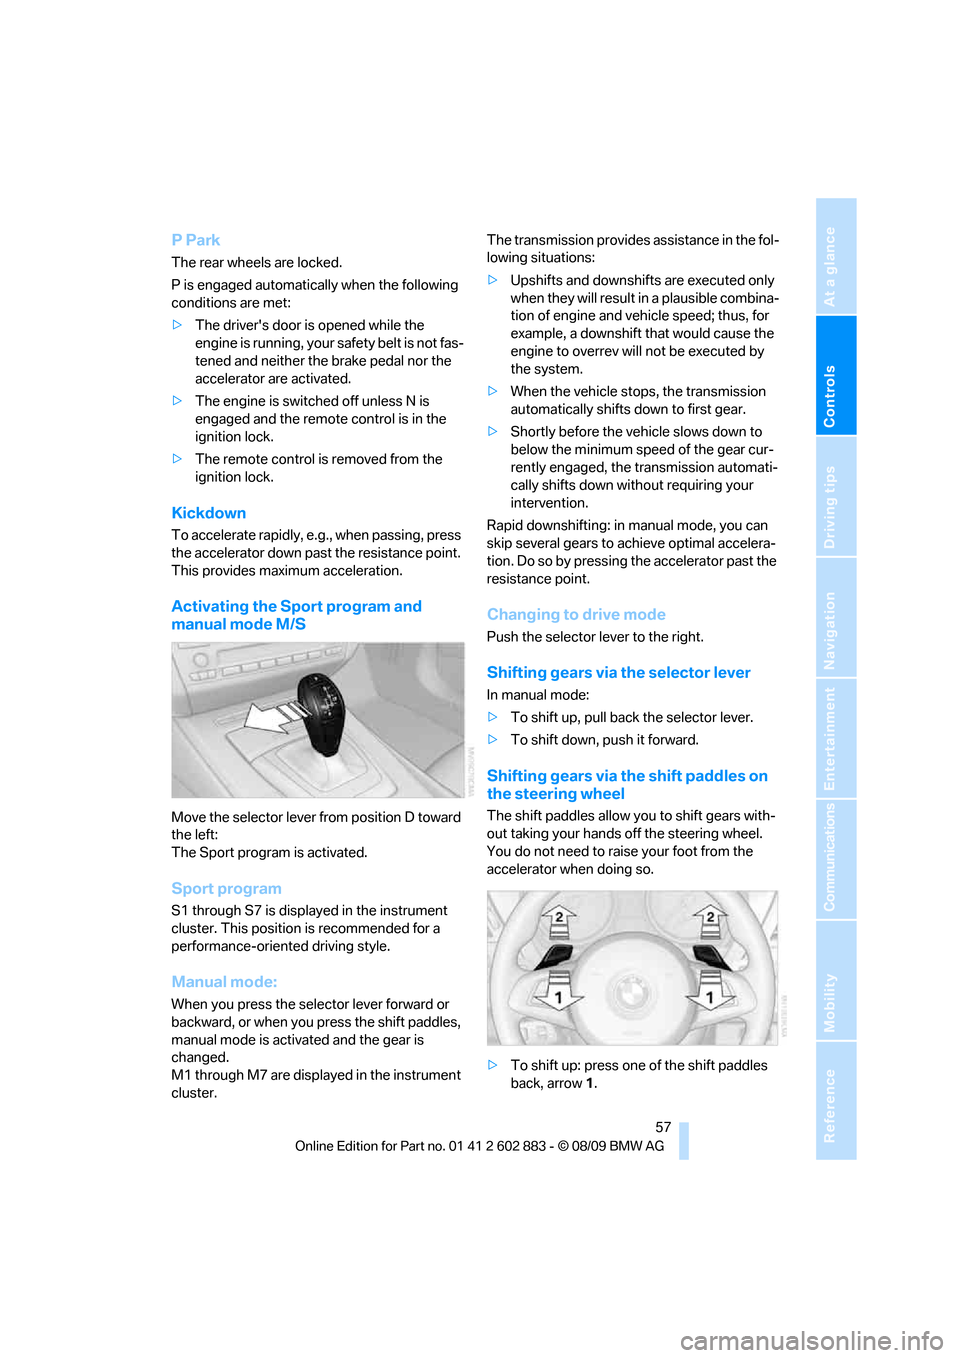
Shifting gears via the shift paddles on
the steering wheel
The shift paddles allow you to shift gears with-
out taking your hands off the steering wheel.
You do not need to raise your foot from the
accelerator when doing so.
>To shift up: press one of the shift paddles
back, arrow1.
Page 60 of 254
Driving
58 >To shift down: press one of the shift pad-
dles forward, arrow2.
Gears can be shifted using the shift paddles in
drive mode or in manual mode.
Gear change in manual mode:
When manual mode is active, refer to page57,
gears can be changed using the shift paddles or
the selector lever.
Gear change in drive mode
The shift paddles can be used to change gears
in drive mode as well.
Afterwards, if the shift paddles are not used for
some time and vehicle acceleration is insuffi-
cient, the forward gears are changed again
automatically.
Launch Control
Launch Control enables you to drive off with an
optimal vehicle acceleration on a high grip road
surface.
Do not use Launch Control too often, as
the higher loads on the vehicle lead to
premature component wear.<
Launch Control is available when the engine is
at operating temperature, i.e., after driving con-
tinuously for at least 6 miles/10 km.
1.With the engine running, depress the brake
pedal with your left foot.
2.Activate the SPORT+ program of the
Dynamic Driving Control, refer to page79.
3.With the vehicle stationary, activate manual
mode and select first gear.
4.Press the accelerator all the way down. The
engine speed when driving off is controlled.
A flag symbol appears in the instrument
cluster.
5.The vehicle accelerates when you release
the brake pedal. Keep the accelerator
pressed all the way down.
6.The transmission shifts up automatically as
long as the accelerator is pressed all the
way down.Launch Control only becomes available again
after a certain distance has been driven.
Launch Control can only be used after the
break-in phase, refer to page112.
To maintain driving stability, activate DSC
whenever possible.<
Manually releasing and engaging the
transmission lock
If a power failure occurs, e.g., if the battery
is discharged or disconnected or if there
is an electrical malfunction, the transmission
lock must be released manually; otherwise, the
rear wheels are blocked and the vehicle cannot
be towed.<
Release the transmission lock manually for tow-
ing only and set the parking brake beforehand
to prevent the vehicle from rolling. After parking
the vehicle, lock the transmission lock again
manually, refer to page59.
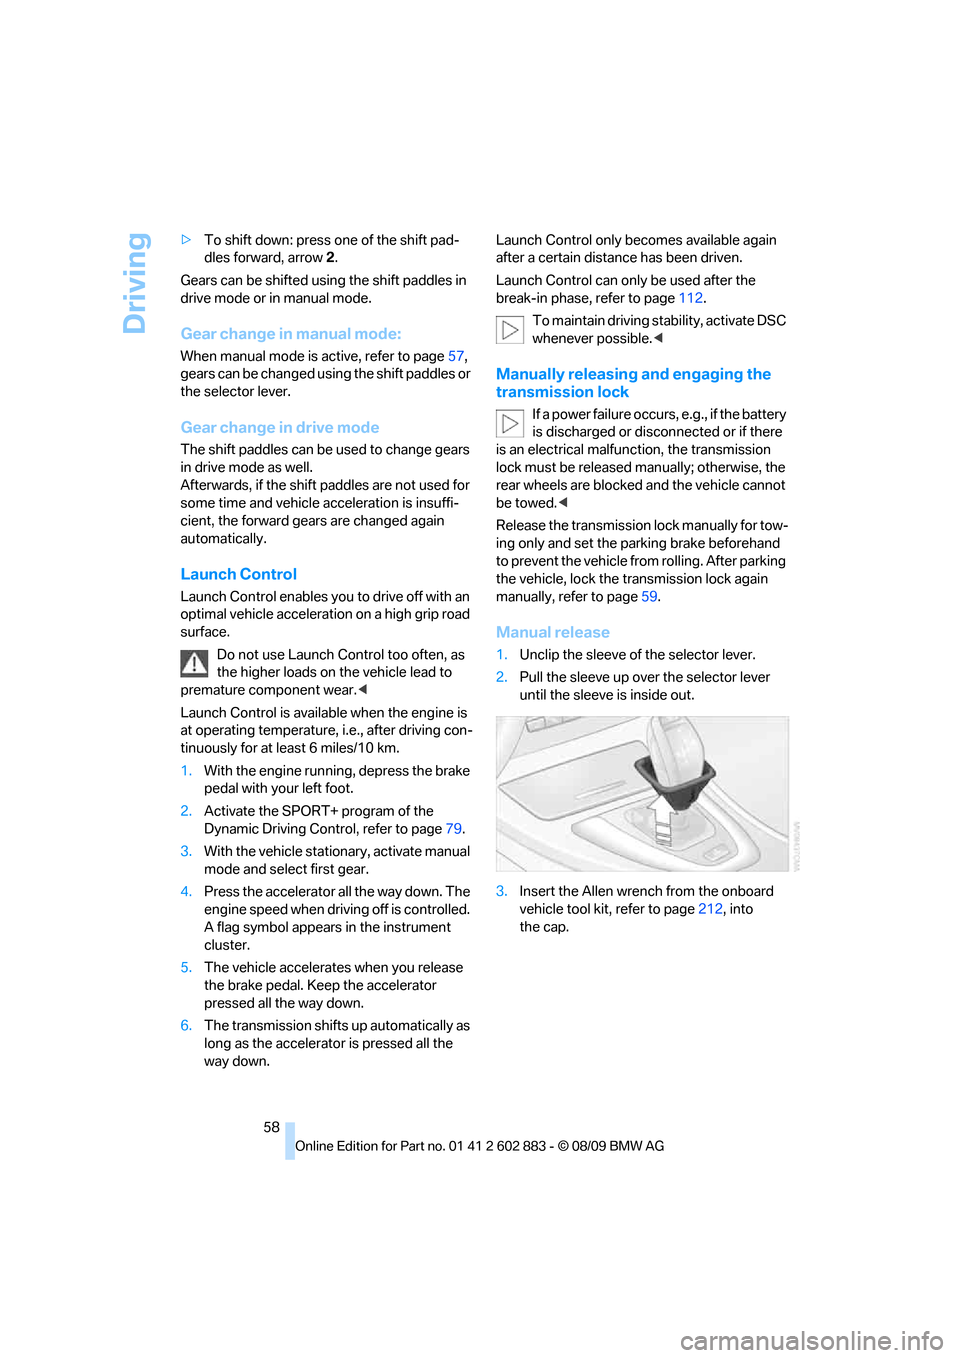
Manual release
1.Unclip the sleeve of the selector lever.
2.Pull the sleeve up over the selector lever
until the sleeve is inside out.
3.Insert the Allen wrench from the onboard
vehicle tool kit, refer to page212, into
the cap.
Page 62 of 254
Driving
60
Triple turn signal activation
Press the lever as far as the resistance point.
The turn signals flash once.
You can set whether it should flash once or
three times when activated.
1. Press the button.
2."Settings"
3."Lighting"
4."Triple turn signal"
The setting is stored for the remote control
currently in use.
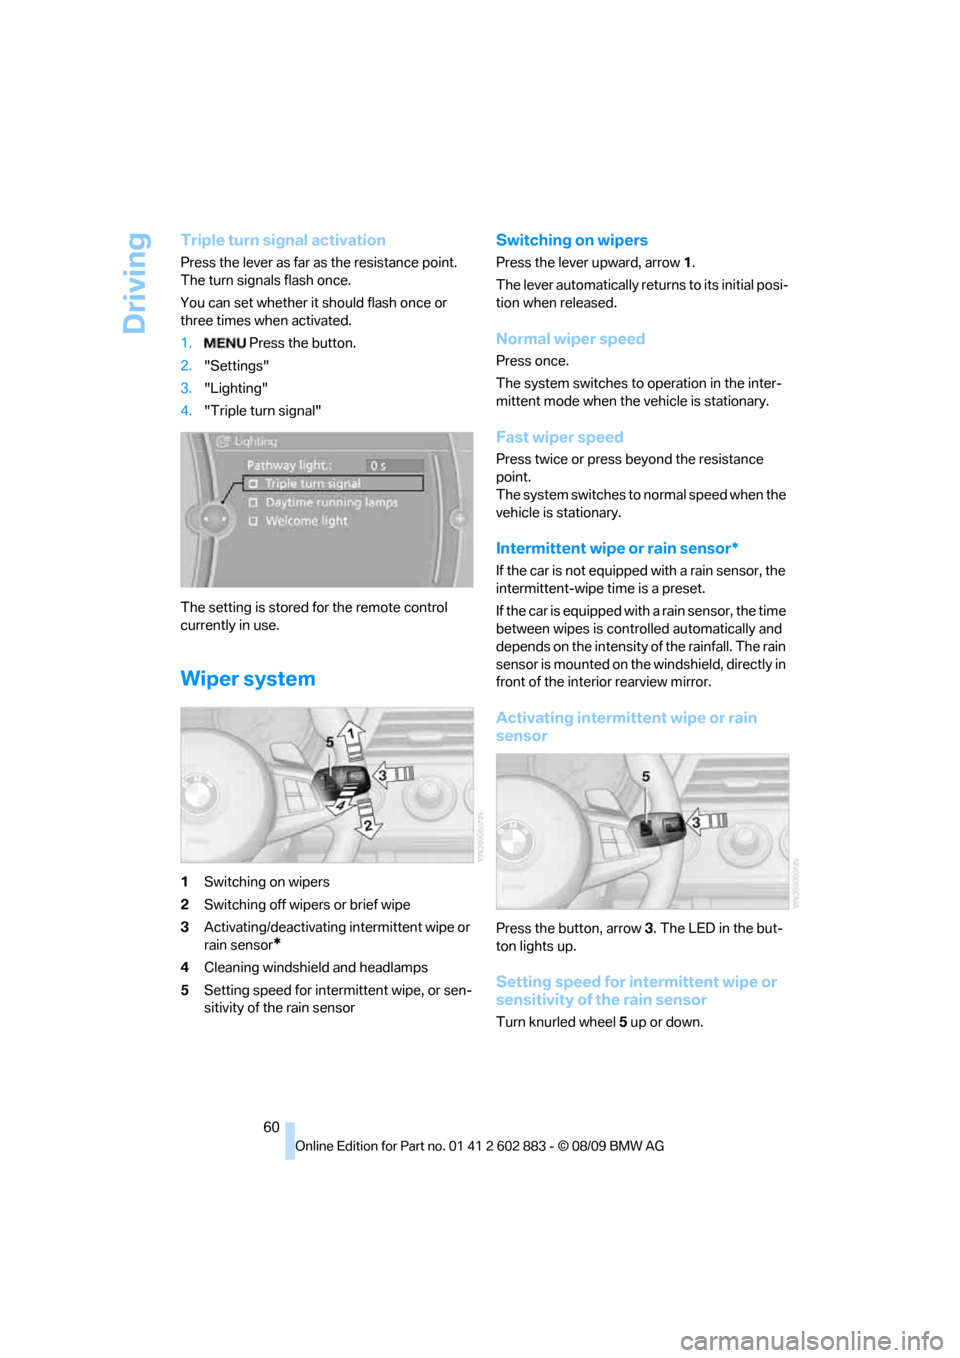
Wiper system
1Switching on wipers
2Switching off wipers or brief wipe
3Activating/deactivating intermittent wipe or
rain sensor
*
4Cleaning windshield and headlamps
5Setting speed for intermittent wipe, or sen-
sitivity of the rain sensor
Switching on wipers
Press the lever upward, arrow 1.
The lever automatically returns to its initial posi-
tion when released.
Normal wiper speed
Press once.
The system switches to operation in the inter-
mittent mode when the vehicle is stationary.
Fast wiper speed
Press twice or press beyond the resistance
point.
The system switches to normal speed when the
vehicle is stationary.
Intermittent wipe or rain sensor*
If the car is not equipped with a rain sensor, the
intermittent-wipe time is a preset.
If the car is equipped with a rain sensor, the time
between wipes is controlled automatically and
depends on the intensity of the rainfall. The rain
sensor is mounted on the windshield, directly in
front of the interior rearview mirror.
Activating intermittent wipe or rain
sensor
Press the button, arrow3. The LED in the but-
ton lights up.
Setting speed for intermittent wipe or
sensitivity of the rain sensor
Turn knurled wheel5 up or down.
Page 80 of 254
Technology for driving comfort and safety
78 Loud sound sources outside or inside the car
can drown out the PDC signal. Therefore,
always drive cautiously; otherwise, there is a
risk of personal injury or property damage.<
Driving stability control
systems
Your BMW has a number of systems that help
to maintain the vehicle's stability even in
adverse driving conditions.
Antilock Brake System ABS
ABS prevents locking of the wheels during
braking. Safe steering response is maintained
even during full braking. Active safety is thus
increased.
The ABS is operational every time you start the
engine. Braking safely, refer to page114.
Electronic brake-force distribution
The system controls the brake pressure in the
rear wheels to ensure stable braking behavior.
Dynamic Brake Control DBC
When you apply the brakes rapidly, this system
automatically produces the maximum braking
force boost and thus helps to achieve the short-
est possible braking distance during full brak-
ing. This system exploits all of the benefits pro-
vided by ABS.
Do not reduce the pressure on the brake for the
duration of the full braking application.
Dynamic Stability Control DSC
DSC prevents the driving wheels from losing
traction when you pull away from rest or accel-
erate. The system also recognizes unstable
driving conditions, for example if the rear of the
car is about to swerve or if momentum is acting
at an angle past the front wheels. In these
cases, DSC helps the vehicle maintain a safe
course within physical limits by reducing engine
output and through braking actions at the indi-
vidual wheels.The laws of physics cannot be repealed,
even with DSC. An appropriate driving
style always remains the responsibility of the
driver. Therefore, do not reduce the additional
s a f e t y m a r g i n a g a i n b y t a k i n g r i s k s , a s t h i s c o u l d
result in an accident.<
Deactivating/activating the DSC OFF
program
The program can be deactivated via Dynamic
Driving Control, refer to DSC OFF.
For better control
The indicator lamp flashes: DSC con-
trols the drive forces and brake forces.
The indicator lamp lights up: DSC has
failed.
DTC Dynamic Traction Control
The concept
The DTC system and the TRACTION program
are a variant of the DSC in which forward
momentum is optimized.
The system ensures maximum forward
momentum on special road conditions, e.g.,
unplowed snowy roads, but driving stability is
limited.
It is therefore necessary to drive with appropri-
ate caution.
You may find it useful to briefly activate DTC
under the following special circumstances:
>When driving in slush or on uncleared,
snow-covered roads.
>When rocking the vehicle or driving off in
deep snow or on loose surfaces.
>When driving with snow chains.
Deactivating/activating DTC Dynamic
Traction Control
The system and program can be deactivated/
activated via Dynamic Driving Control.
Page 83 of 254
Controls
81Reference
At a glance
Driving tips
Communications
Navigation
Entertainment
Mobility
assistant will not hold the car in place after
approx. 2 seconds, the car would otherwise
start to roll backwards.<
Flat Tire Monitor FTM*
The concept
The Flat Tire Monitor detects pressure loss in a
tire by comparing the rotating speeds of the
individual tires while moving.
In the event of pressure loss, the rolling circum-
ference changes and, thus, the rotating speed
of the affected wheel. This change is detected
and is reported as a flat tire.
Functional requirement
In order to assure the reliable reporting of a flat
tire, the system must be initialized for the cor-
rect tire inflation pressure.
The system must be reinitialized each
time a tire inflation pressure has been cor-
rected or a wheel or tire has been changed.<
System limitations
The Flat Tire Monitor is unable to warn
the driver of sudden, severe tire damage
caused by external factors, nor can it identify
the gradual loss of pressure that will inevitably
occur in all four tires over a lengthy period
of time.<
In the following situations, the system could be
delayed or malfunction:
>System has not been initialized
>Driving on snowy or slippery road surface
>Performance-oriented style of driving: slip
in the drive wheels, high lateral acceleration
>Snow chains are attached
Initializing the system
The initialization is completed during driv-
ing, which can be interrupted at any time.
When driving resumes, the initialization is con-
tinued automatically.
Do not initialize the system while snow chains
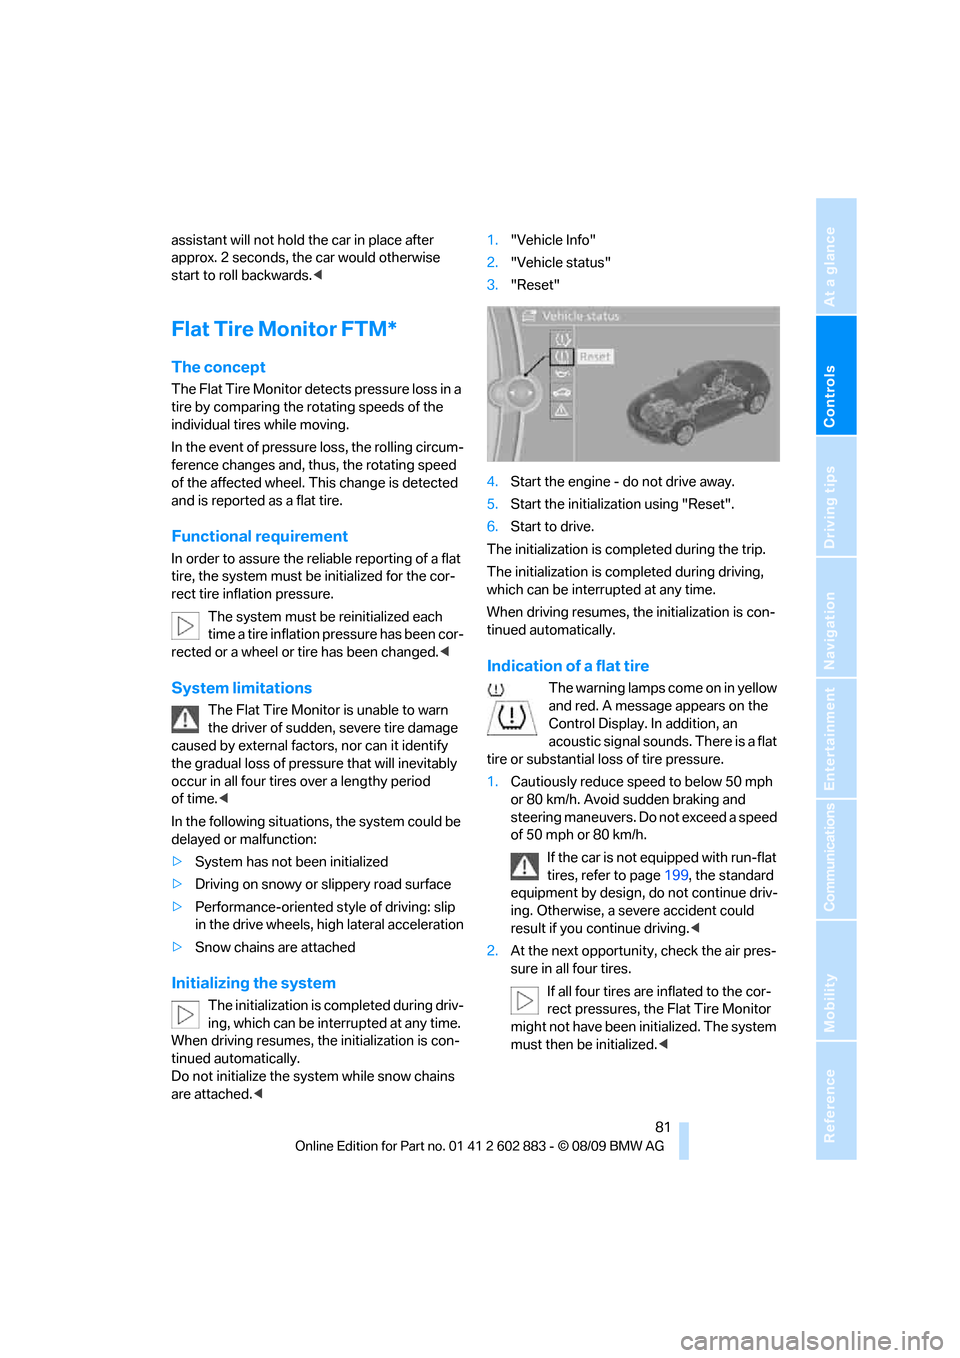
are attached.<1."Vehicle Info"
2."Vehicle status"
3."Reset"
4.Start the engine - do not drive away.
5.Start the initialization using "Reset".
6.Start to drive.
The initialization is completed during the trip.
The initialization is completed during driving,
which can be interrupted at any time.
When driving resumes, the initialization is con-
tinued automatically.
Indication of a flat tire
The warning lamps come on in yellow
and red. A message appears on the
Control Display. In addition, an
acoustic signal sounds. There is a flat
tire or substantial loss of tire pressure.
1.Cautiously reduce speed to below 50 mph
or 80 km/h. Avoid sudden braking and
steering maneuvers. Do not exceed a speed
of 50 mph or 80 km/h.
If the car is not equipped with run-flat
tires, refer to page199, the standard
equipment by design, do not continue driv-
ing. Otherwise, a severe accident could
result if you continue driving.<
2.At the next opportunity, check the air pres-
sure in all four tires.
If all four tires are inflated to the cor-
rect pressures, the Flat Tire Monitor
might not have been initialized. The system
must then be initialized.<