ESP BMW Z8 2000 Owner's Manual
[x] Cancel search | Manufacturer: BMW, Model Year: 2000, Model line: Z8, Model: BMW Z8 2000Pages: 172, PDF Size: 1.9 MB
Page 105 of 172
104n
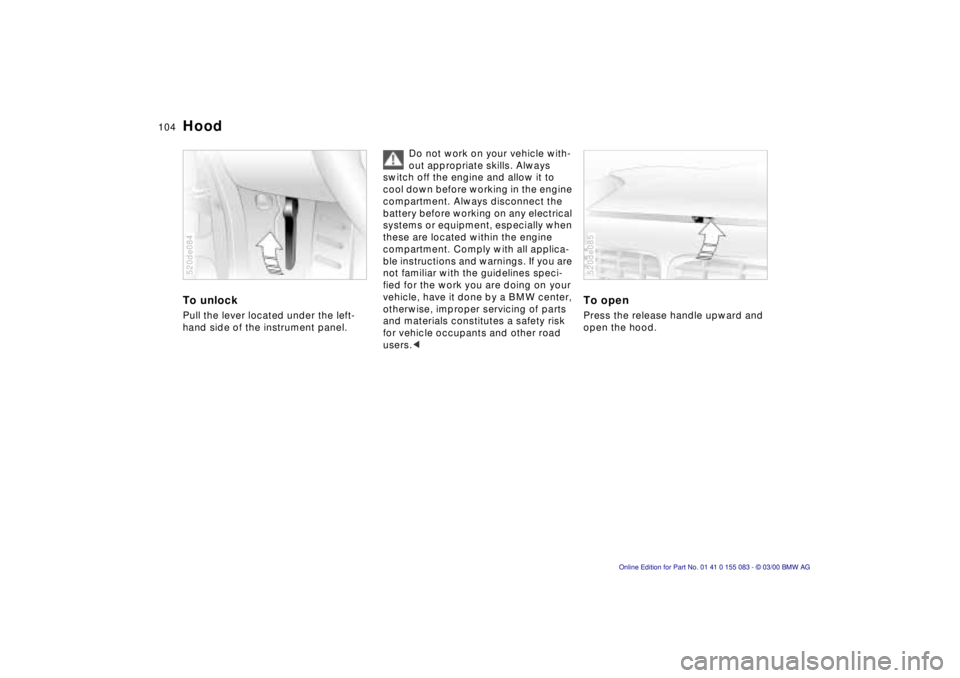
To unlock Pull the lever located under the left-
hand side of the instrument panel. 520de084
Do not work on your vehicle with-
out appropriate skills. Always
switch off the engine and allow it to
cool down before working in the engine
compartment. Always disconnect the
battery before working on any electrical
systems or equipment, especially when
these are located within the engine
compartment. Comply with all applica-
ble instructions and warnings. If you are
not familiar with the guidelines speci-
fied for the work you are doing on your
vehicle, have it done by a BMW center,
otherwise, improper servicing of parts
and materials constitutes a safety risk
for vehicle occupants and other road
users.<
To openPress the release handle upward and
open the hood.520de085
Hood
Page 110 of 172
109n
IndexDataTechnologyRepairsCar careControlsOverview
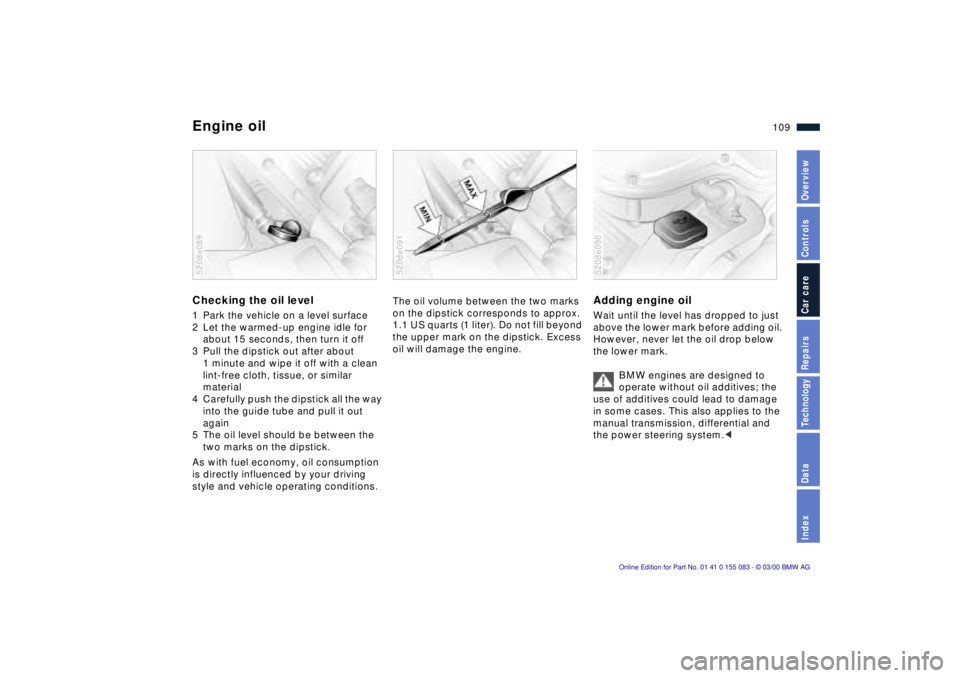
Engine oilChecking the oil level 1 Park the vehicle on a level surface
2 Let the warmed-up engine idle for
about 15 seconds, then turn it off
3 Pull the dipstick out after about
1 minute and wipe it off with a clean
lint-free cloth, tissue, or similar
material
4 Carefully push the dipstick all the way
into the guide tube and pull it out
again
5 The oil level should be between the
two marks on the dipstick.
As with fuel economy, oil consumption
is directly influenced by your driving
style and vehicle operating conditions.520de089
The oil volume between the two marks
on the dipstick corresponds to approx.
1.1 US quarts (1 liter). Do not fill beyond
the upper mark on the dipstick. Excess
oil will damage the engine.520de091
Adding engine oil Wait until the level has dropped to just
above the lower mark before adding oil.
However, never let the oil drop below
the lower mark.
BMW engines are designed to
operate without oil additives; the
use of additives could lead to damage
in some cases. This also applies to the
manual transmission, differential and
the power steering system.<520de090
Page 116 of 172
115n
IndexDataTechnologyRepairsCar careControlsOverview
Washing your vehicle You can have your new BMW washed
in an automatic car wash. Car wash
systems that do not employ brushes
are preferable.
Wipe away tough dirt and loosen and
remove dead insects before washing
the vehicle.
In order to avoid spots, do not wash the
vehicle when the hood is warm, or dur-
ing or immediately after exposure to
strong sunlight.
In order to protect your convertible top,
do not have any special waxing pro-
gram done to your vehicle. The small
amount of beading wax always used in
automatic car washes will not harm the
convertible top.
When using an automatic car wash, be
sure that:
>The car wash system is suited for the
dimensions of your vehicle
>No damage will occur on vehicles
with attached body accessories (such
as spoilers or antennas). Consult the
car wash operator if necessary >The wheels and tires of your vehicle
cannot be damaged by the convey-
ance devices of the car wash system
>The vehicle is cleaned with minimum
brush pressure, and that ample water
is available for washing and rinsing.
Parts of the vehicle which are inacces-
sible to the automatic washer Ð such as
door sills, door and hood edges, etc. Ð
should be cleaned by hand.
In the winter months, it is especially
important to ensure that the vehicle is
washed on a regular basis. Large quan-
tities of dirt and road salt are difficult to
remove, and they also cause damage to
the vehicle.
If spray wands or high-pressure
washers are used, be sure to
maintain an adequate distance between
the spray source and the vehicle's sur-
face. Inadequate distance and exces-
sive pressure can damage or weaken
the finish, making it more susceptible to
further damage. In addition, moisture
could penetrate to vehicle components,
leading to long-term damage.<
When cleaning the headlamps,
please observe the following:
>Do not clean by wiping with a dry
cloth. Never use abrasives or strong
solvents to clean the covers
>Remove dirt and contamination (such
as insects) by soaking with BMW Car
Shampoo and then rinsing with plenty
of water
>Always use a deicer spray to remove
accumulated ice and snow Ð never
use a scraper.<
After washing the vehicle, apply
the brakes briefly to dry them.
Braking efficiency might otherwise be
reduced by the moisture and the brake
rotors could also be corroded.<
Caring for your vehicle
Page 117 of 172

116n
Caring for your vehicleCleaning and care of the
convertible topThe appearance and life of the convert-
ible top are highly dependent on its
proper care and operation. You should
pay particular attention to the following
instructions if your vehicle has a light-
colored top.
Protect the vehicle from exposure to
intense sunlight whenever possible by
parking it in the shade. This will help
to prevent the paint, rubber and fabric-
covered parts from being attacked.
Never fold up the convertible top and
store it in the convertible top compart-
ment when wet, dirty or frozen, as mil-
dew stains and chafe spots may result.
To prevent the formation of a crease
in the rear window and to avoid mildew
stains, do not leave the top folded in the
convertible top compartment for long
periods.
If the vehicle will be parked for lengthy
periods in an enclosed space, be sure
that the convertible top is dry and that
there is adequate ventilation.Clean off bird droppings immediately,
since they attack the convertible top
and cause the rubber seals to swell due
to their caustic characteristics.
Besides water, treat rubber seals only
with talcum powder, rubber care prod-
ucts or silicone spray, particularly when
they feel dry or tend to stick.
Eliminate noises such as squeaks with
lubricant spray.
Never use sharp-edged objects to
clean the rear window of snow or ice.
If using a deicer spray, make sure that
none of the spray comes into contact
with the convertible top. Because of the
risk of damage and discoloration, do
not apply adhesive tape, stickers, or
similar materials to the window or cover
with plastic film. Dents and discoloration may show up
on the convertible top because of im-
proper care, cleaning or as the result of
excessive usage. The convertible top
and its seams may also develop leaks.
These occurrences are not covered by
the warranty. For repairs, please con-
sult your BMW center.
Special wash for the topIn the case of more extensive dirt,
which is especially visible on light-col-
ored top materials, clean the top with
the BMW Convertible Cleaning Set.
Please proceed as follows:
Spray the convertible top with the
cleaning agent and then rub with a well-
dampened sponge using circular mo-
tions until a foam develops. Then you
can finish washing the vehicle in an
automatic car wash. After three to five
washings the convertible top should be
treated with a special impregnating
spray. Please follow the instructions on
the spray can.
Page 118 of 172
117n
IndexDataTechnologyRepairsCar careControlsOverview
Caring for your vehicle
To remove stains from the con-
vertible top, use only BMW-ap-
proved cleaning agents. Do not use
spot removers, paint thinners, solvents,
gasoline or similar substances for re-
moving stains because these agents
destroy the rubber seals, which in turn
leads to leaks.
A full range of car-care products is
available from your BMW center.<
HardtopPlease observe and follow the instruc-
tions for caring for your vehicle starting
on page 115.
Exterior finish To provide effective protection, multi-
layer paintwork is applied at the factory.
These cataphoretic immersion priming
techniques have been carried out using
specially developed materials that have
undergone several years' worth of test-
ing.
Regular maintenance makes an impor-
tant contribution to maintaining the
safety and value of your vehicle.
Increasing awareness of the effects of
harmful environmental factors on vehi-
cle finishes have led paint and vehicle
manufacturers to initiate programs de-
signed to further improve the durability
of their finishes. Despite this, environ-
mental factors that occur locally or re-
gionally can have negative effects on
the finish of your vehicle. These should
guide you in determining the frequency
and extent of your efforts to maintain
the vehicle finish.Road dirt, tar spots, dead insects, ani-
mal droppings (strong alkali effect) and
even tree secretions (resins and pollen),
all contain substances capable of caus-
ing damage to the finish of your vehicle
if allowed to remain for any extended
period of time (such as stains, bumps,
scratches and separation of the top
coat).
In industrial areas, deposits of flue dust,
lime, oily soot, precipitation containing
sulfur-dioxide (acid rain) and other envi-
ronmental pollutants will damage the
vehicle's finish unless adequate care is
provided Ð even though this is generally
limited to the outside horizontal sur-
faces.
In tropical zones, temperatures of over
105 7 (40 6) in the shade prevail, in
addition to heavy ultraviolet radiation
and high humidity. Under those condi-
tions, light paints can reach tempera-
tures up to 175 7 (80 6) and dark
paints up to 250 7 (120 6).
Page 119 of 172

118n
Caring for your vehicleCaring for the vehicle finish Regular washing is a preventive mea-
sure against long-term effects from
substances that are harmful to the vehi-
cle's finish, especially if you drive your
vehicle in areas with high levels of air
pollution or natural contaminants (tree
resins, pollen).
Nevertheless, you should immediately
remove especially aggressive sub-
stances. Failure to do so can lead to
changes in the paint's chemical struc-
ture or to discoloration. Gasoline spilled
during refueling, oil, grease, brake fluid
and bird droppings should always be
cleaned up immediately.
Any contamination remaining on the
surface of the vehicle will be especially
conspicuous after washing. Use clean-
ing fluid or alcohol and a clean cloth
or cotton pad to remove. Remove tar
spots with tar remover. After cleaning,
the affected areas should be waxed to
ensure continued protection.
Use the cleaning and car-care
products available at your BMW
center.<
Waxing your vehicle Protect the finish using carnauba or
synthetic-based waxes only.
The best way to determine when the
finish needs to be waxed is by noting
when water stops beading on the
surface.
You can use a glass cleaner to remove
any wax or silicone that may have been
left on the windows during waxing.
Use the cleaning and car-care
products available at your BMW
center.<
Repairing the paint You can touch up small areas of paint
damage with a BMW spray paint or a
BMW touchup stick.
The color code of your vehicle is pro-
vided on a tag located near the vehicle
data plate and on the first page of the
Service and Warranty Information
Booklet (US models) or the Warranty
and Service Guide Booklet (Canadian
models).
More extensive paint damage should
be repaired professionally in accor-
dance with the manufacturer's instruc-
tions. Your BMW center uses original
BMW finish materials in accordance
with approved repair procedures.
Page 120 of 172
119n
IndexDataTechnologyRepairsCar careControlsOverview
Caring for your vehicleWindow careYou can use window and glass cleaner
to clean inside window surfaces and
mirrors without smearing and streaking.
Never use polishing pastes or abrasive
(quartz) cleansers on mirror lenses.
Clean the wiper blades with soapy
water. The wiper blades should be re-
placed twice a year Ð before and after
the cold season.
Use only wiper blades approved
by BMW.<
Caring for other vehicle
components and materials Light-alloy wheels should be treated
with alloy wheel cleaner, especially dur-
ing the winter months. However, do not
use aggressive products containing
acids, strong alkalis or abrasives. Do
not use steam cleaners operating at
temperatures above 140 7 (60 6).
Follow the manufacturer's instructions.
Carefully clean chrome parts such as
lamp socket assemblies, door handles
and similar items with an ample amount
of clean water Ð and shampoo, too, if
necessary Ð especially if there is an ac-
cumulation of road salt. Use a chrome
polish for an additional treatment.
Use water to clean plastic components,
headliners, lamp lenses, and surfaces
sprayed dull black Ð adding vinyl sham-
poo, if necessary. Do not allow mois-
ture to soak through the seats or head-
liner. Never use solvents such as lac-
quer thinner, heavy-duty grease re-
mover, fuels, or similar substances.
Use a soft, clean cloth to wipe off the
lamp covers, using methylated spirits
with distilled water as a cleaning sol-
vent, if necessary, at a mixing ratio
of 1:1.Rubber components should be cleaned
with water only; a rubber treatment or
silicone spray may also be applied.
The safety belts should be cleaned with
a mild soap and water solution without
being removed from the vehicle. Never
attempt chemical or dry cleaning, as
damage to the belt fabric could result.
After cleaning, never allow the inertia
reel to retract the belts until they are
completely dry. Dirty safety belts pre-
vent the inertia reel mechanism from
retracting the strap properly, thus
constituting a safety hazard.
Heavily soiled floor carpets and mats
*
can be cleaned with an interior cleaner.
The floor mats can be removed from
the vehicle for cleaning.
Clean the aluminum surfaces with water
and, if necessary, with a mild soap.
Never use solvents such as lacquer
thinner, heavy-duty grease remover,
fuels, or similar substances.
Use only a wet cloth to clean the painted
inner parts. Dry them afterwards with a
soft cloth.
Use the cleaning and car-care
products available at your BMW
center.<
Page 123 of 172

122n
Storing your vehicle
If you plan on parking the vehicle
for more than three months,
please adhere the maintenance opera-
tions described below.<
Preparations for storageHave your BMW center perform the
following procedures:
1 Clean and apply a rustproofing agent
or other treatment to the engine,
engine compartment, undercarriage,
axles and major components in accor-
dance with approved repair proce-
dures. Wash the vehicle, clean the
interior and treat painted and
chromed parts. Clean the weather-
stripping around the hood, luggage
compartment and doors
2 Change engine oil and oil filter at op-
erating temperature. As an additional
corrosion protection measure, an an-
ticorrosive agent can be added to the
engine in accordance with the manu-
facturer's instructions
3 Check the coolant level and concen-
tration and top off if necessary
4 Check the fluid level of the wind-
shield washer fluid reservoir; top off
if necessary
5 Fill the fuel tank completely to pre-
vent the formation of condensation
6 Increase the tire inflation pressure to
51 psi (350 kPa).Before parking the vehicle1 Dry the parking brake and footbrake
by brake applications to prevent the
brake discs and drums from
corroding
2 Park the vehicle in a covered, dry,
and well-ventilated area. Place the
transmission in first gear or, if neces-
sary, chock the wheels to prevent the
vehicle from rolling. Do not engage
the parking brake
3 Remove the battery, charge it com-
pletely and store it in a cool (but
frost-free) room
4 Remove the hardtop and store it
separately, refer to page 95
5 Close the convertible top.During storageRecharge a battery that has been taken
out of the car every six months. If it is
not recharged, it will not be serviceable.
Every time the battery is discharged,
especially over extended periods, its
service life is reduced.
Removing the vehicle from
storageRecharge the battery if the "Magic Eye"
turns black, refer to page 136.
Then have Inspection I performed by
your BMW center, including a brake
fluid replacement, if necessary. Refer to
the Service and Warranty Information
Booklet (US models) or the Warranty
and Service Guide Booklet (Canadian
models).
Page 125 of 172
124n
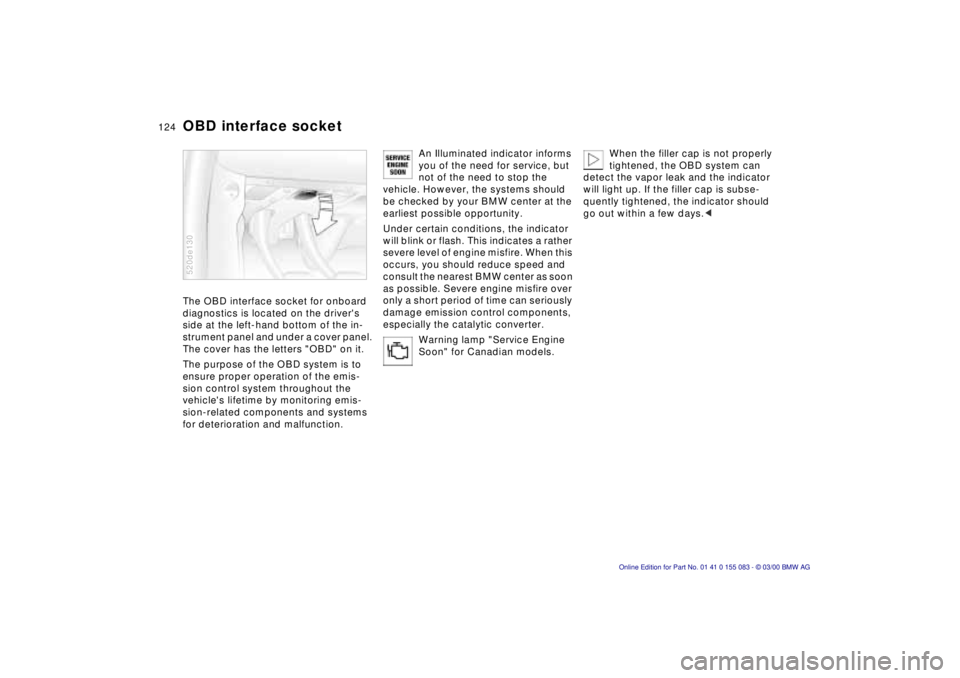
OBD interface socket The OBD interface socket for onboard
diagnostics is located on the driver's
side at the left-hand bottom of the in-
strument panel and under a cover panel.
The cover has the letters "OBD" on it.
The purpose of the OBD system is to
ensure proper operation of the emis-
sion control system throughout the
vehicle's lifetime by monitoring emis-
sion-related components and systems
for deterioration and malfunction.520de130
An Illuminated indicator informs
you of the need for service, but
not of the need to stop the
vehicle. However, the systems should
be checked by your BMW center at the
earliest possible opportunity.
Under certain conditions, the indicator
will blink or flash. This indicates a rather
severe level of engine misfire. When this
occurs, you should reduce speed and
consult the nearest BMW center as soon
as possible. Severe engine misfire over
only a short period of time can seriously
damage emission control components,
especially the catalytic converter.
Warning lamp "Service Engine
Soon" for Canadian models.
When the filler cap is not properly
tightened, the OBD system can
detect the vapor leak and the indicator
will light up. If the filler cap is subse-
quently tightened, the indicator should
go out within a few days.<
Page 138 of 172
137n
IndexDataTechnologyRepairsCar careControlsOverview
Battery
A highly explosive gas is
generated when the battery is
charged.
If you happen to get acid in
your eyes, rinse thoroughly for
some minutes with clear water.
Consult a physician immediately. If you
get acid spray on your skin or clothing,
rinse with plenty of water. If acid is acci-
dentally ingested, consult a physician
immediately.
In order to protect the battery
case from ultraviolet radiation,
do not place it in direct sunlight.
A discharged battery can freeze. Store
the battery in areas where temperature
remains above freezing.
Removing and installing
Do not disconnect the battery
cable when the engine is running.
Disconnecting the battery cable when
the engine is running will cause a volt-
age surge which will damage the vehi-
cle's onboard electronics.
Do not make any modifications in the
wires to the positive terminal. If you do
so, the protective function of the safety
battery terminal is no longer ensured.
Repairs and disposal may only be per-
formed by specially trained personnel.<
When removing, first disconnect the
cable to the negative terminal, then dis-
connect the cable to the positive termi-
nal. Loosen the center adjusting screw
for the battery's retaining strap (use the
screwdriver found in the onboard tool
kit) and remove the bracket.
When installing, first connect the cable
for the positive terminal, then the cable
for the negative terminal.
When installing, make sure that
the battery is seated properly, and
that the battery bracket is installed with
the center adjusting screw, because
otherwise in the event of an accident,
the battery will not be secure enough.<
Charging the battery Charge the battery in the vehicle only
when the engine is not running. Use the
connections provided in the engine
compartment (for correct connections,
refer to "Jump starting" on page 143).
Before performing any work on
the electrical system, disconnect
the cable from the negative terminal. If
you do not, short circuits can create the
risk of fire or personal injury.<
If you plan to park the vehicle for longer
than 4 weeks, disconnect the battery
from the vehicle's electrical system by
disconnecting the cable at the negative
terminal. Then recharge the battery with
an appropriate battery charger.
If you intend to store the vehicle for
longer than 12 weeks, remove the bat-
tery, charge it and store it in a cool and
dust-free room where there is no dan-
ger of freezing. During storage, have the
battery recharged every six months.
Also, recharge the battery before it is
reinstalled. If this is not done, the bat-
tery will not be serviceable. Every time
the battery is discharged, especially
over extended periods, its service life
is reduced.