BMW Z8 2001 Owners Manual
Manufacturer: BMW, Model Year: 2001, Model line: Z8, Model: BMW Z8 2001Pages: 170, PDF Size: 1.64 MB
Page 121 of 170
121n
IndexDataTechnologyRepairsCar careControlsOverview
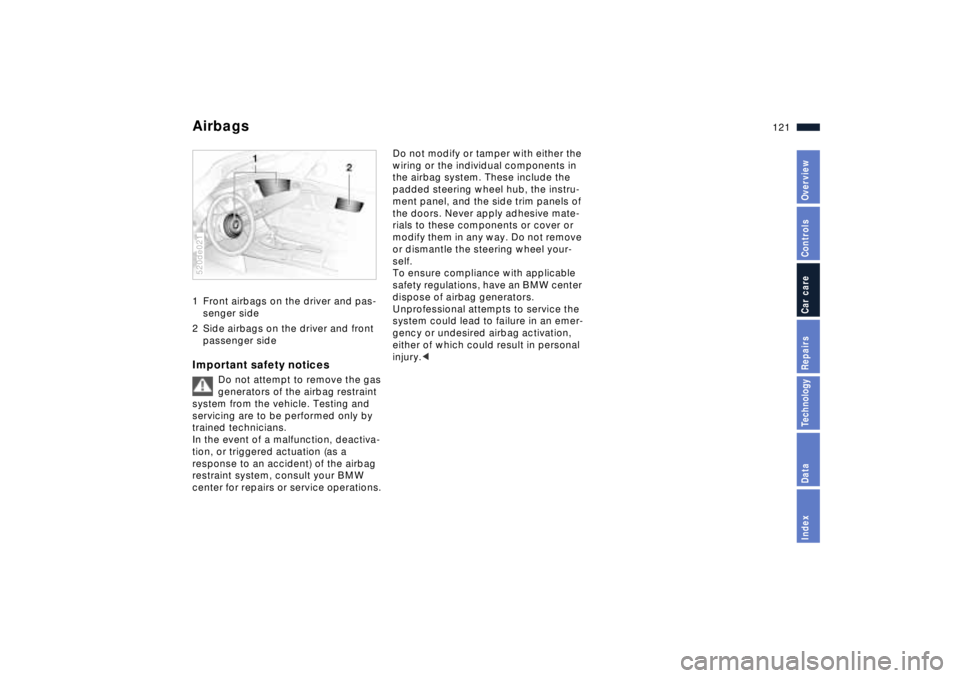
Airbags 1 Front airbags on the driver and pas-
senger side
2 Side airbags on the driver and front
passenger sideImportant safety notices
Do not attempt to remove the gas
generators of the airbag restraint
system from the vehicle. Testing and
servicing are to be performed only by
trained technicians.
In the event of a malfunction, deactiva-
tion, or triggered actuation (as a
response to an accident) of the airbag
restraint system, consult your BMW
center for repairs or service operations.
520de021
Do not modify or tamper with either the
wiring or the individual components in
the airbag system. These include the
padded steering wheel hub, the instru-
ment panel, and the side trim panels of
the doors. Never apply adhesive mate-
rials to these components or cover or
modify them in any way. Do not remove
or dismantle the steering wheel your-
self.
To ensure compliance with applicable
safety regulations, have an BMW center
dispose of airbag generators.
Unprofessional attempts to service the
system could lead to failure in an emer-
gency or undesired airbag activation,
either of which could result in personal
injury.<
Page 122 of 170

122n
Vehicle storage
If the vehicle is to be stored for
more than three months, ensure
that the following service operations
are carried out first.<
Preparations for storageHave your BMW center perform the
following procedures:
1 Clean and apply a rust proofing agent
or other treatment to the engine,
engine compartment, undercarriage,
axles and major components in accor-
dance with approved repair proce-
dures. Wash the vehicle, clean the
interior and treat painted and
chromed parts. Clean the weather-
stripping around the hood, luggage
compartment and doors
2 Change engine oil and oil filter at
operating temperature. As an addi-
tional corrosion protection measure,
an anticorrosive agent can be added
to the engine in accordance with the
manufacturer's instructions
3 Check the coolant level and concen-
tration and top off if necessary
4 Check the fluid level of the wind-
shield washer fluid reservoir; top off
if necessary
5 Fill the fuel tank completely to
prevent the formation of condensa-
tion
6 Increase the tire inflation pressure to
51 psi (350 kPa).Before parking the vehicle1 Dry the parking brake and footbrake
by brake applications to prevent the
brake discs and drums from
corroding
2 Park the vehicle in a covered, dry,
and well-ventilated area. Place the
transmission in first gear or, if neces-
sary, chock the wheels to prevent the
vehicle from rolling. Do not engage
the parking brake
3 Remove the battery, charge it
completely and store it in a cool (but
frost-free) room
4 Remove the hardtop and store it
separately, refer to page 96
5 Close the convertible top.
During storageRecharge a battery that has been taken
out of the car every six months. If it is
not recharged, it will not be serviceable.
Every time the battery is discharged,
especially over extended periods, its
service life is reduced.Removing the vehicle from
storageRecharge the battery if the "Magic Eye"
turns black, refer to page 136.
Then have Inspection I performed by
your BMW center, including a brake
fluid replacement, if necessary. Refer to
the Service and Warranty Information
Booklet (US models) or the Warranty
and Service Guide Booklet (Canadian
models).
Page 123 of 170
123n
IndexDataTechnologyRepairsCar careControlsOverview
Technical modifications California Proposition 65 WarningAny BMW center will be happy to
advise you concerning the advisability,
legal requirements and factory recom-
mendations for technical modifications
to the vehicle. The BMW center will
require the Vehicle Identification
Number and, in some cases, the
engine number as well. Light-Emitting Diodes (LEDs)Light-emitting diodes installed behind
translucent lenses serve as the light
source for many of the controls and
displays in your vehicle. These light-
emitting diodes are similar to conven-
tional lasers.
Do not remove the protective lens
and avoid staring directly at the
unfiltered beam for extended periods
(several hours). To do so could result in
inflammation of the iris.<
California laws require us to state the
following warning:
Engine exhaust, some of its
constituents, and certain vehicle
components contain or emit chemicals
known to the State of California to
cause cancer and birth defects or other
reproductive harm.<
Page 124 of 170
124n
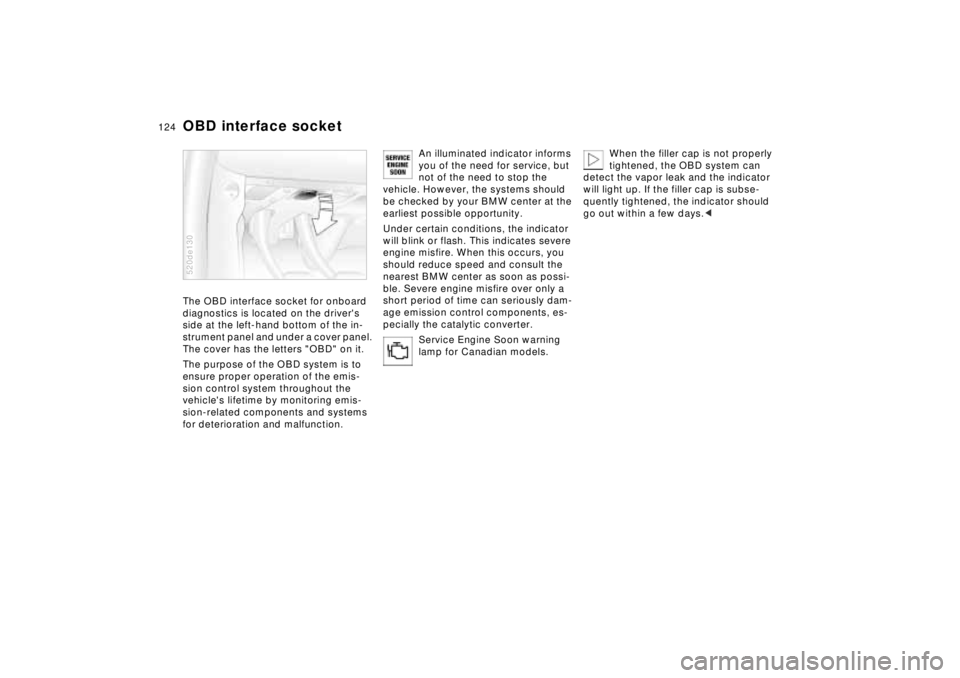
OBD interface socket The OBD interface socket for onboard
diagnostics is located on the driver's
side at the left-hand bottom of the in-
strument panel and under a cover panel.
The cover has the letters "OBD" on it.
The purpose of the OBD system is to
ensure proper operation of the emis-
sion control system throughout the
vehicle's lifetime by monitoring emis-
sion-related components and systems
for deterioration and malfunction.520de130
An illuminated indicator informs
you of the need for service, but
not of the need to stop the
vehicle. However, the systems should
be checked by your BMW center at the
earliest possible opportunity.
Under certain conditions, the indicator
will blink or flash. This indicates severe
engine misfire. When this occurs, you
should reduce speed and consult the
nearest BMW center as soon as possi-
ble. Severe engine misfire over only a
short period of time can seriously dam-
age emission control components, es-
pecially the catalytic converter.
Service Engine Soon warning
lamp for Canadian models.
When the filler cap is not properly
tightened, the OBD system can
detect the vapor leak and the indicator
will light up. If the filler cap is subse-
quently tightened, the indicator should
go out within a few days.<
Page 125 of 170

125n
IndexDataTechnologyRepairsCar careControlsOverview
Page 126 of 170
126n
Page 127 of 170
Overview
Controls and features
Operation, care
and maintenance
Owner service procedures
Technical data
Index Advanced technology
127n
IndexDataTechnologyRepairsCar careControlsOverview
Replacement procedures:
Onboard tool kit128
Windshield wiper blades128
Lamps and bulbs129
Changing a wheel135
Battery136
Fuses138
In case of electrical
malfunction:
Fuel filler door140
Luggage compartment lid,
storage compartment140
Passenger door141
Closing the convertible top141
Giving and receiving
assistance:
Jump starting143
Towing the vehicle144
Repairs
Page 128 of 170
128n
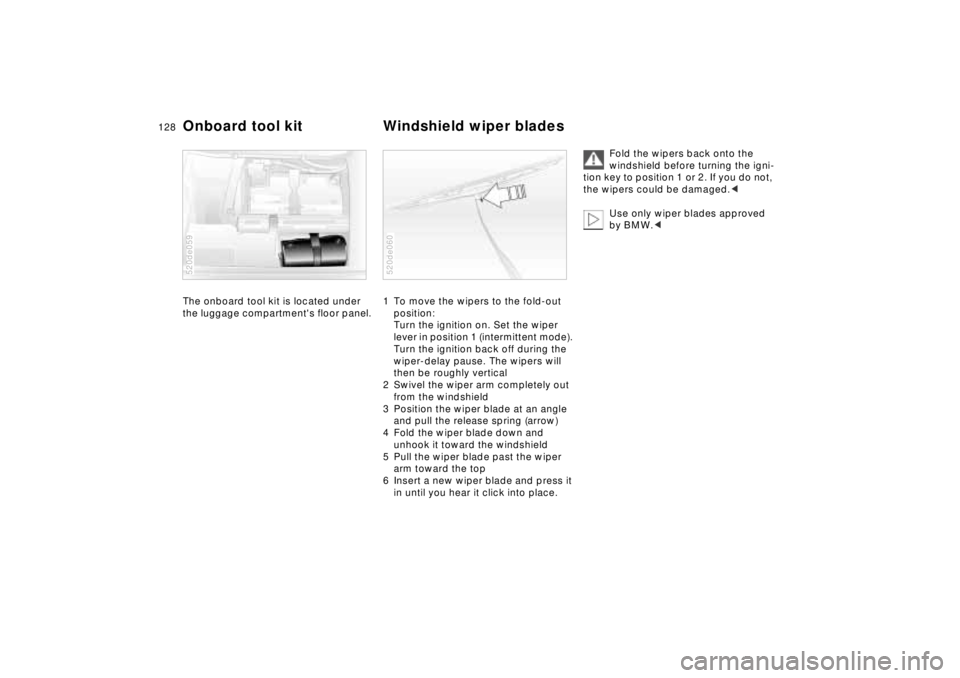
The onboard tool kit is located under
the luggage compartment's floor panel.
520de059
1 To move the wipers to the fold-out
position:
Turn the ignition on. Set the wiper
lever in position 1 (intermittent mode).
Turn the ignition back off during the
wiper-delay pause. The wipers will
then be roughly vertical
2 Swivel the wiper arm completely out
from the windshield
3 Position the wiper blade at an angle
and pull the release spring (arrow)
4 Fold the wiper blade down and
unhook it toward the windshield
5 Pull the wiper blade past the wiper
arm toward the top
6 Insert a new wiper blade and press it
in until you hear it click into place. 520de060
Fold the wipers back onto the
windshield before turning the igni-
tion key to position 1 or 2. If you do not,
the wipers could be damaged.<
Use only wiper blades approved
by BMW.<
Onboard tool kit Windshield wiper blades
Page 129 of 170
129n
IndexDataTechnologyRepairsCar careControlsOverview
Lamps and bulbs The lamps and bulbs make essential
contributions to the safety of your
vehicle. Therefore, comply fully with the
following instructions during bulb
replacement. If you are not familiar with
any of the procedures, consult your
BMW center.
Do not touch the glass portion of
a new bulb with your bare hands
since even small amounts of impurities
burn into the surface and reduce the
service life of the bulb. Use a clean
cloth, paper napkin, or a similar material,
or hold the bulb by its metallic base.<
A replacement bulb set is available from
your BMW center.
Whenever working on the elec-
trical system, switch off the elec-
trical accessory you are working on or
disconnect the cable from the negative
terminal of the battery. Failure to do this
could result in short circuits.
To prevent injuries and damage,
comply with any instructions provided
by the bulb manufacturer.<
When cleaning the headlamps,
please observe the following:
>Do not wipe dry (scratches). Never
use abrasives or strong solvents to
clean the covers
>Remove dirt and contamination (such
as insects) by soaking with BMW Car
Shampoo and then rinsing with plenty
of water
>Always use a deicer spray to remove
accumulated ice and snow Ð never
use a scraper.<
Xenon lamps
The main headlamps for your BMW
Z8 roadster have been designed using
xenon-light technology. The service life
of these bulbs is very long and the
probability of a failure is very low,
provided that they are not switched on
and off an unusual number of times.
Should a lamp ever fail, however,
please contact your BMW center for
assistance.
The xenon light unit operates at
extremely high voltages; contact
with the unit's electrical components
can be fatal. We therefore urge you to
refer all service and repairs, including
bulb changes, to qualified professional
technicians.<
Neon lampsThe front turn signal indicators (side
marker lamps), the rear turn signal indi-
cators, the rear and brake lamps, as
well as the high-mount brake lamp, are
of neon-light technology. The service
life for these lamps is very high and the
likelihood of failure very minimal.
Should a lamp ever fail, however,
please contact your BMW center for
assistance.
Page 130 of 170
130n
Lamps and bulbsSide turn signal indicators10 watt bulb
Please contact a BMW center in the
event of a malfunction.Side lamps5 watt bulb
Please contact a BMW center in the
event of a malfunction.
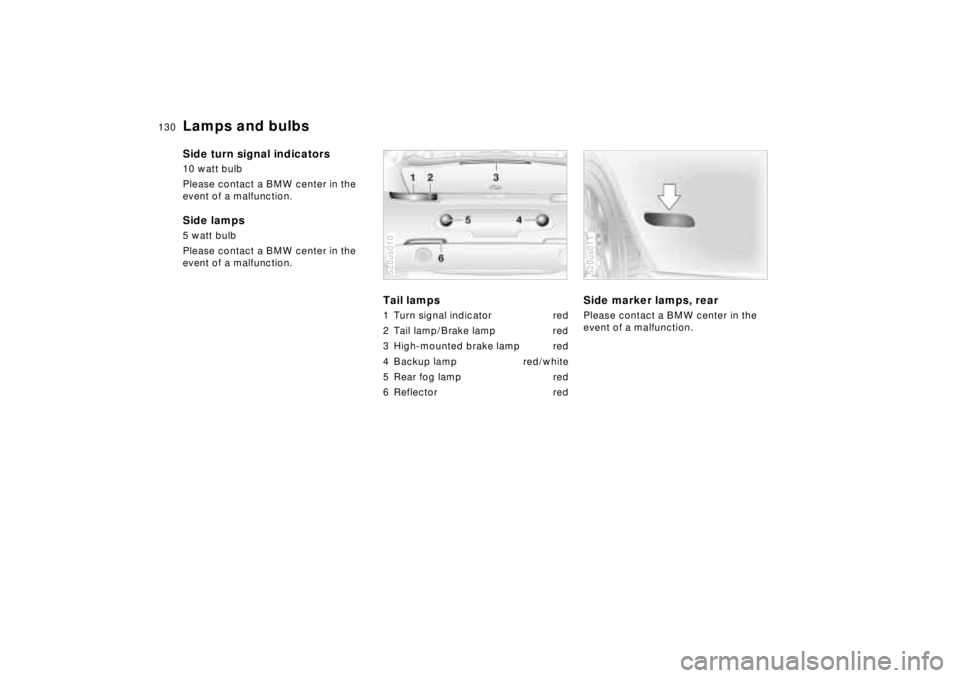
Tail lamps 1 Turn signal indicator red
2 Tail lamp/Brake lamp red
3 High-mounted brake lamp red
4 Backup lamp red/white
5 Rear fog lamp red
6 Reflector red520us010
Side marker lamps, rearPlease contact a BMW center in the
event of a malfunction.520us011