ESP BUICK CASCADA 2017 Owner's Manual
[x] Cancel search | Manufacturer: BUICK, Model Year: 2017, Model line: CASCADA, Model: BUICK CASCADA 2017Pages: 381, PDF Size: 6.58 MB
Page 28 of 381
Buick Cascada Owner Manual (GMNA-Localizing-U.S.-9967834) - 2017 - crc -
7/18/16
Keys, Doors, and Windows 27
Canceling a Remote Start
To cancel a remote start, do one of
the following:
.Press and hold
/until the
parking lamps turn off.
. Turn on the hazard warning
flashers.
. Turn the vehicle on and then off.
Conditions in Which Remote Start
Will Not Work
The remote vehicle start feature will
not operate if:
. The key is in the ignition.
. The hood is not closed.
. The hazard warning flashers
are on.
. The malfunction indicator lamp
is on.
. The engine coolant temperature
is too high.
. The oil pressure is low.
. Two remote vehicle starts, or a
single remote start with an
extension, have already
been used. .
The vehicle is not in P (Park).
Door Locks
{Warning
Unlocked doors can be
dangerous.
. Passengers, especially
children, can easily open
the doors and fall out of a
moving vehicle. The chance
of being thrown out of the
vehicle in a crash is
increased if the doors are
not locked. So, all
passengers should wear
safety belts properly and the
doors should be locked
whenever the vehicle is
driven.
. Young children who get into
unlocked vehicles may be
unable to get out. A child
can be overcome by
extreme heat and can suffer
permanent injuries or even
(Continued)
Warning (Continued)
death from heat stroke.
Always lock the vehicle
whenever leaving it.
. Outsiders can easily enter
through an unlocked door
when slowing or stopping
the vehicle. Lock the doors
to help prevent this from
happening.
To lock or unlock the doors from
outside the vehicle:
. Press
QorKon the Remote
Keyless Entry (RKE) transmitter.
. Use the key in the driver door.
To lock or unlock the doors from
inside the vehicle:
. Press
QorKon the power door
lock switch.
. Pulling an interior door handle
will unlock the door. Pulling the
door handle again unlatches it.
Page 35 of 381
Buick Cascada Owner Manual (GMNA-Localizing-U.S.-9967834) - 2017 - crc -
7/18/16
34 Keys, Doors, and Windows
Interior Mirrors
Interior Rearview Mirrors
Adjust the rearview mirror for a clear
view of the area behind the vehicle.
Do not spray glass cleaner directly
on the mirror. Use a soft towel
dampened with water.
Automatic Dimming
Rearview Mirror
The rearview mirror automatically
dims to reduce the glare of the
headlamps from behind. This
feature comes on when the vehicle
is started.
Windows
{Warning
Never leave a child, a helpless
adult, or a pet alone in a vehicle,
especially with the windows
closed in warm or hot weather.
They can be overcome by the
extreme heat and suffer
permanent injuries or even death
from heat stroke.
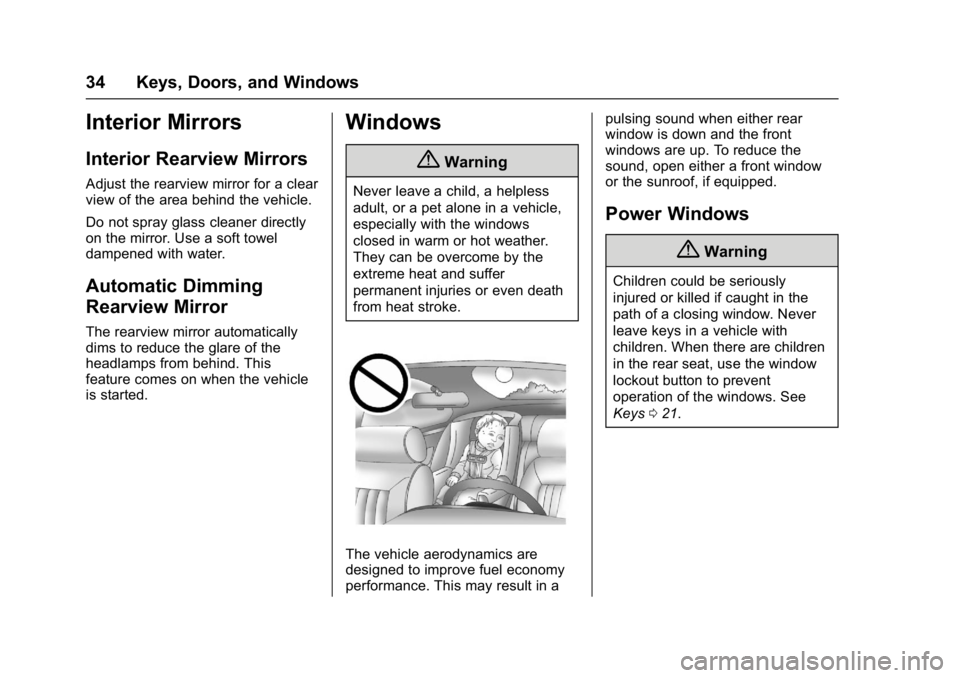
The vehicle aerodynamics are
designed to improve fuel economy
performance. This may result in apulsing sound when either rear
window is down and the front
windows are up. To reduce the
sound, open either a front window
or the sunroof, if equipped.
Power Windows
{Warning
Children could be seriously
injured or killed if caught in the
path of a closing window. Never
leave keys in a vehicle with
children. When there are children
in the rear seat, use the window
lockout button to prevent
operation of the windows. See
Keys
021.
Page 41 of 381
Buick Cascada Owner Manual (GMNA-Localizing-U.S.-9967834) - 2017 - crc -
7/18/16
40 Keys, Doors, and Windows
If the top cannot be secured, keep
clear of the top components. In
some conditions the top may move
quickly.
Do not drive with the convertible top
in an unsecured position. The top
components may move
unexpectedly. In some cases the
top may not be able to be power
operated. If this occurs, follow the
DIC messages displayed.
If the tonneau cover is not secured
and latched, and the vehicle is
moving above 10 km/h (6 mph), the
tonneau cover may automatically
move to a stable position.
Manual Closing of Top
If the DIC displays the ONLY
MANUAL OPERATION OF TOP
POSSIBLE message:1. Press and hold or pull and hold the front of the convertible top
switch to either open or close
the top. Press or pull the switch
in the opposite direction if one
does not work. 2. If the top moves, continue
holding the switch in that
direction for at least
five seconds. The top should
then work normally.
If the top does not respond in either
direction, use the following
procedure to manually close the
convertible top and tonneau cover
before servicing if needed. This
requires more than one person.
There is a hex wrench in the
glovebox. There is also string in the
glovebox for your dealer to manually
secure the top completely if needed.
1. Place the ignition switch in OFF.
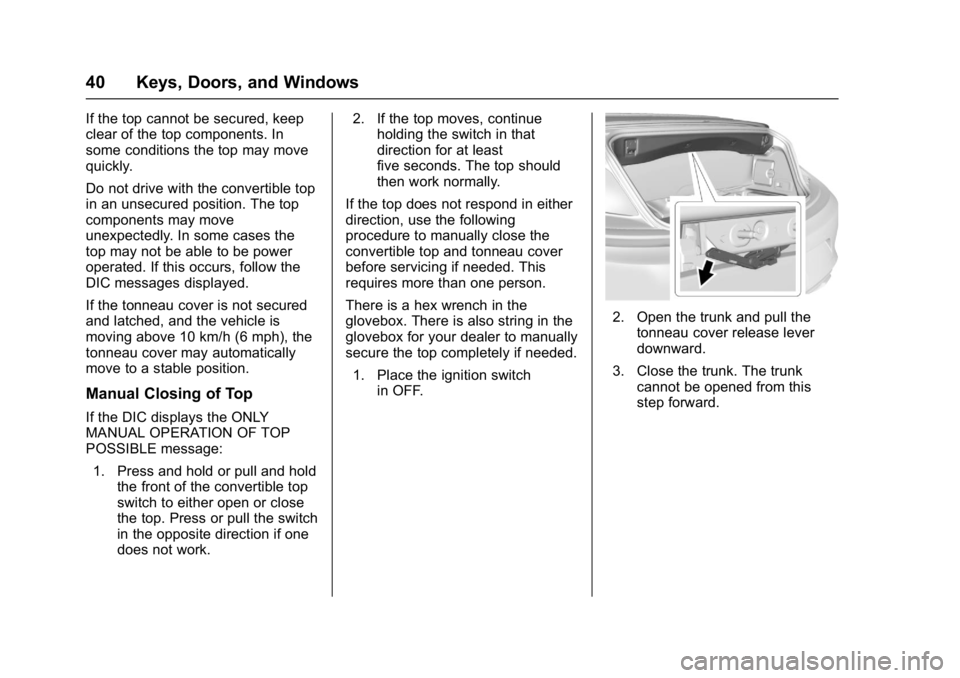
2. Open the trunk and pull the
tonneau cover release lever
downward.
3. Close the trunk. The trunk cannot be opened from this
step forward.
Page 50 of 381
Buick Cascada Owner Manual (GMNA-Localizing-U.S.-9967834) - 2017 - crc -
7/18/16
Seats and Restraints 49
Do not have a seatback reclined if
the vehicle is moving.
Seatback Latches
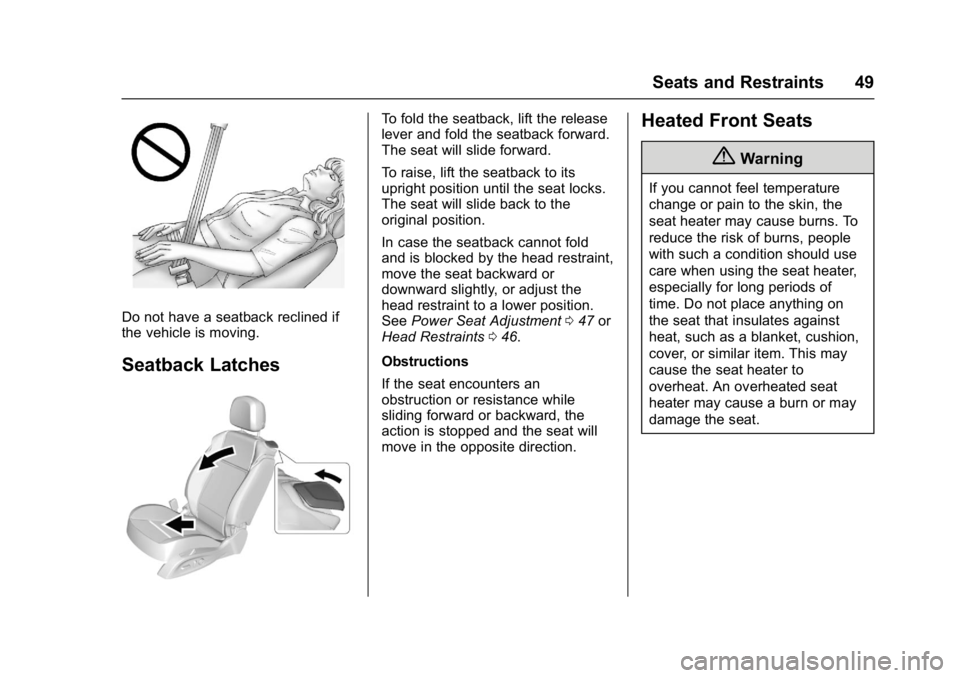
To fold the seatback, lift the release
lever and fold the seatback forward.
The seat will slide forward.
To raise, lift the seatback to its
upright position until the seat locks.
The seat will slide back to the
original position.
In case the seatback cannot fold
and is blocked by the head restraint,
move the seat backward or
downward slightly, or adjust the
head restraint to a lower position.
SeePower Seat Adjustment 047 or
Head Restraints 046.
Obstructions
If the seat encounters an
obstruction or resistance while
sliding forward or backward, the
action is stopped and the seat will
move in the opposite direction.Heated Front Seats
{Warning
If you cannot feel temperature
change or pain to the skin, the
seat heater may cause burns. To
reduce the risk of burns, people
with such a condition should use
care when using the seat heater,
especially for long periods of
time. Do not place anything on
the seat that insulates against
heat, such as a blanket, cushion,
cover, or similar item. This may
cause the seat heater to
overheat. An overheated seat
heater may cause a burn or may
damage the seat.
Page 56 of 381
Buick Cascada Owner Manual (GMNA-Localizing-U.S.-9967834) - 2017 - crc -
7/18/16
Seats and Restraints 55
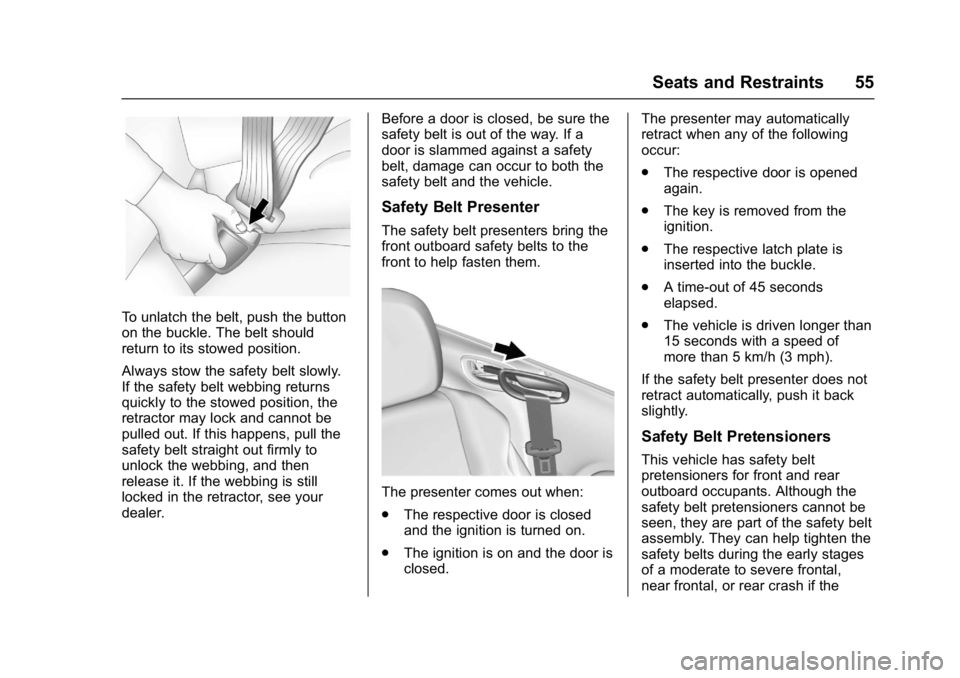
To unlatch the belt, push the button
on the buckle. The belt should
return to its stowed position.
Always stow the safety belt slowly.
If the safety belt webbing returns
quickly to the stowed position, the
retractor may lock and cannot be
pulled out. If this happens, pull the
safety belt straight out firmly to
unlock the webbing, and then
release it. If the webbing is still
locked in the retractor, see your
dealer.Before a door is closed, be sure the
safety belt is out of the way. If a
door is slammed against a safety
belt, damage can occur to both the
safety belt and the vehicle.
Safety Belt Presenter
The safety belt presenters bring the
front outboard safety belts to the
front to help fasten them.
The presenter comes out when:
.
The respective door is closed
and the ignition is turned on.
. The ignition is on and the door is
closed. The presenter may automatically
retract when any of the following
occur:
.
The respective door is opened
again.
. The key is removed from the
ignition.
. The respective latch plate is
inserted into the buckle.
. A time-out of 45 seconds
elapsed.
. The vehicle is driven longer than
15 seconds with a speed of
more than 5 km/h (3 mph).
If the safety belt presenter does not
retract automatically, push it back
slightly.
Safety Belt Pretensioners
This vehicle has safety belt
pretensioners for front and rear
outboard occupants. Although the
safety belt pretensioners cannot be
seen, they are part of the safety belt
assembly. They can help tighten the
safety belts during the early stages
of a moderate to severe frontal,
near frontal, or rear crash if the
Page 147 of 381
Buick Cascada Owner Manual (GMNA-Localizing-U.S.-9967834) - 2017 - crc -
7/18/16
146 Infotainment System
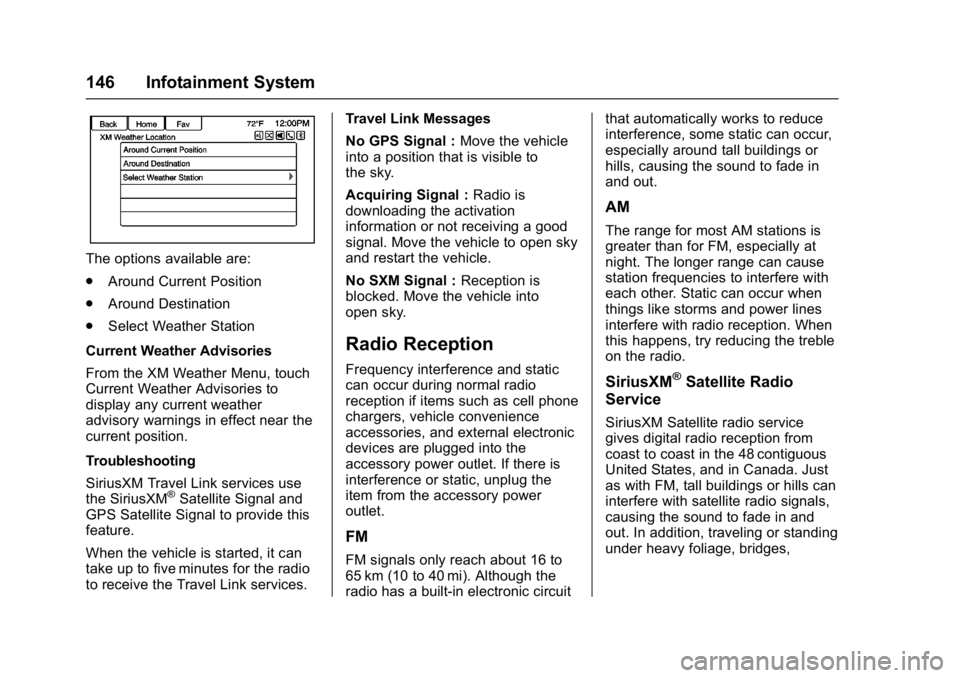
The options available are:
.Around Current Position
. Around Destination
. Select Weather Station
Current Weather Advisories
From the XM Weather Menu, touch
Current Weather Advisories to
display any current weather
advisory warnings in effect near the
current position.
Troubleshooting
SiriusXM Travel Link services use
the SiriusXM
®Satellite Signal and
GPS Satellite Signal to provide this
feature.
When the vehicle is started, it can
take up to five minutes for the radio
to receive the Travel Link services. Travel Link Messages
No GPS Signal :
Move the vehicle
into a position that is visible to
the sky.
Acquiring Signal : Radio is
downloading the activation
information or not receiving a good
signal. Move the vehicle to open sky
and restart the vehicle.
No SXM Signal : Reception is
blocked. Move the vehicle into
open sky.
Radio Reception
Frequency interference and static
can occur during normal radio
reception if items such as cell phone
chargers, vehicle convenience
accessories, and external electronic
devices are plugged into the
accessory power outlet. If there is
interference or static, unplug the
item from the accessory power
outlet.
FM
FM signals only reach about 16 to
65 km (10 to 40 mi). Although the
radio has a built-in electronic circuit that automatically works to reduce
interference, some static can occur,
especially around tall buildings or
hills, causing the sound to fade in
and out.
AM
The range for most AM stations is
greater than for FM, especially at
night. The longer range can cause
station frequencies to interfere with
each other. Static can occur when
things like storms and power lines
interfere with radio reception. When
this happens, try reducing the treble
on the radio.
SiriusXM®Satellite Radio
Service
SiriusXM Satellite radio service
gives digital radio reception from
coast to coast in the 48 contiguous
United States, and in Canada. Just
as with FM, tall buildings or hills can
interfere with satellite radio signals,
causing the sound to fade in and
out. In addition, traveling or standing
under heavy foliage, bridges,
Page 193 of 381
Buick Cascada Owner Manual (GMNA-Localizing-U.S.-9967834) - 2017 - crc -
7/18/16
192 Infotainment System
sure the vehicle is parked in a
location that is safe and has a clear
view of the sky and away from large
obstructions.
If the System Needs
Service
If the navigation system needs
service and the steps listed here
have been followed but there are
still problems, seeProblems with
Route Guidance 0191.
Map Data Updates
The map data in the vehicle is the
most up-to-date information
available when the vehicle was
produced. The map data is updated
periodically, provided that the map
information has changed.
For questions about the operation of
the navigation system or the update
process, contact the GM Nav Disc
Center toll-free phone number,
1-877-NAV-DISC (1-877-628-3472)
or go to the center ’s website,
www.gmnavdisc.com. If updates are
needed, call the GM Nav Disc
Center or order a new Map Update online. To order map data, have the
vehicle’s Vehicle Identification
Number (VIN) available. See
Vehicle Identification Number
(VIN)
0344.
After receiving the updated map
data, see Maps0172.
Database Coverage
Explanations
Coverage areas vary with respect to
the level of map detail available for
any given area. Some areas feature
greater levels of detail than others.
If this happens, it does not mean
there is a problem with the system.
As the map data is updated, more
detail can become available for
areas that previously had limited
detail. See Map Data
Updates 0192.
Voice Recognition
Voice recognition allows for
hands-free operation of the system
features.
Voice recognition can be used when
the radio is on or when Retained
Accessory Power (RAP) is active.
See Retained Accessory Power
(RAP) 0231. The system maintains
a minimum volume level.
Using Voice Recognition
1. Pressb/gon the steering
wheel. The audio system
mutes. A voice prompt states,
“Please say a command.” Wait
until the tone is heard before
speaking.
If there is no tone, make sure
that the volume is turned up.
While voice recognition is
active, the system displays a
g
symbol in the top right of the
screen.
2. Clearly speak one of the commands listed later in this
section.
Page 194 of 381
Buick Cascada Owner Manual (GMNA-Localizing-U.S.-9967834) - 2017 - crc -
7/18/16
Infotainment System 193
Pressb/gtwice on the steering
wheel to skip the voice prompt
messages.
Canceling Voice Recognition
1. Press and release$/ion
the steering wheel control to
cancel a command, if the
system response does not
match the voice command,
or say “Goodbye” or“Cancel.”
2. The system replies, “Goodbye.”
Helpful Hints for Speaking
Commands
.
When multiple commands are
available, choose the command
that works best for you.
. Words in parentheses are
optional. For example, for the
command “Tune FM
(frequency),” saying“Tune FM
87.7” or“Tune FM” are both
valid commands.
. When the command is
recognized, the system will
either perform the function or
ask to confirm the choice. .
When the system does not
recognize the command, the
system says “Pardon.”
. If experiencing difficulty with the
system recognizing a command,
confirm that the command is
correct. Try saying the command
clearly or wait for a brief moment
after the tone.
. Background noise such as a
climate control fan positioned on
high, open windows, and very
loud outside noises, even if the
windows are closed, can cause
voice commands to be
misunderstood.
. The system is able to recognize
commands in different
languages, such as English,
Canadian French, and Spanish.
The system only recognizes
commands based on the
language selected.
. To increase or decrease the
voice volume during a voice
recognition session, turn the
volume knob of the radio,
or press the volume steering
wheel control. If the volume is adjusted during a voice
recognition session, a Volume
bar appears on the screen
showing the voice volume level
as it is being adjusted. This also
changes the volume of the
guidance prompts.
. When using navigation
commands, take the time to
become familiar with the
address. Long delays when
giving the address can result in
the system not recognizing the
address or routing to a different
location than intended.
. When providing the house
number portion of the address,
the system recognizes both digit
format and numerical text. An
example would be to say,
“3-0-0-0-1” or“Thirty
Thousand One.”
. If the system provides the
destination in another country on
several attempts, say the
“Change Country” command and
say the country of interest. The
country default is the United
States. To enter a destination in
Page 198 of 381
Buick Cascada Owner Manual (GMNA-Localizing-U.S.-9967834) - 2017 - crc -
7/18/16
Infotainment System 197
POI commands for Nearby, Along
Route, and Around Destination will
be available if route guidance is
active.
Add Waypoint :Allows addition of
individual waypoints or the
destination. The system will ask for
the choice of entry method to
continue. An example is to say, “POI
Along Route” or“Intersection.”
Delete Waypoint : When guidance
is active, this command allows the
deletion of individual waypoints or
the destination. If guidance is not
active, the system will indicate the
destination list is empty.
Where Am I?, My Location,
or Current Position : Instructs the
system to give the current position
of the vehicle.
Help : The system plays back more
specific help commands associated
with Navigation or a Navigation
sub-feature.
Cancel Guidance or Cancel
Route : Instructs the system to
cancel guidance. Entering a Destination in Other
Countries
For the voice recognition to respond
to a local address, the
corresponding country needs to be
set in the navigation system.
The country can also be set using
voice commands. However, the
country will change back to the
default country when the vehicle is
keyed off.
1. Press
b/gon the steering
wheel.
2. Say “Navigation.”
3. Say “Change Country.”
4. Say the country name. For example, say “Canada.”
OnStar Command (If
Equipped)
To activate OnStar voice
recognition, press
=on the mirror
or press
b/gon the steering
wheel and say “OnStar”after the
beep. This will active the OnStar
voice control. See OnStar
Overview 0360. OnStar :
These commands can be
used after OnStar is pressed.
Help Commands
. Help
. Hands-Free Calling (if available)
. Turn-by-Turn Directions
. OnStar Info
After each list of help commands,
the following are available:
. Go Back
. Repeat
. Cancel
. Help
. Goodbye
Hands-Free Calling (if available)
. Call
. Store
. Commands
‐Call
‐ Store
‐ My Number
‐ Minutes
Page 202 of 381
Buick Cascada Owner Manual (GMNA-Localizing-U.S.-9967834) - 2017 - crc -
7/18/16
Infotainment System 201
1. Press CONFIG on the centerstack.
2. Select Phone Settings.
3. Select Device List.
4. Select the new phone to connect to and follow the
screen prompts.
Pairing with Voice Recognition
A Bluetooth-enabled cell phone
must be paired and then connected
to the vehicle before it can be used.
See the cell phone manufacturer's
user guide for Bluetooth functions
before pairing the cell phone. If a
Bluetooth phone is not connected,
calls will be made using OnStar
Hands-Free Calling, if available.
See OnStar Overview 0360.
Pairing a Phone
1. Press
b/g. The system
responds “Please say a
command,” followed by a tone.
2. Say “Pair.”The system
responds with “Please search
for Bluetooth devices on your
phone, select your vehicle, confirm or enter the PIN
number provided on the
screen.”
3. Start the search for Bluetooth devices on the phone. Then
select the device and follow the
instructions on the phone by
either entering the four-digit
PIN or confirming the six-digit
passcode. The PIN is used in
Step 4.
4. Locate and select the device named after the vehicle make
and model in the list on the cell
phone. Follow the instructions
on the cell phone to enter the
PIN provided in Step 3 or to
confirm the six-digit code
matches. The system responds
“Successfully paired.”
5. Repeat Steps 1−4 to pair additional phones. Listing All Paired and Connected
Phones
The system can list all cell phones
paired to it. If a paired cell phone is
also connected to the vehicle, the
system responds to confirm that
phone name is connected.
1. Press
b/g. The system
responds “Please say a
command,” followed by a tone.
2. Say “Device List.”
Deleting a Paired Phone
If the phone name to delete is
unknown, see “Listing All Paired
and Connected Phones.”
1. Press
b/g. The system
responds “Please say a
command,” followed by a tone.
2. Say “Delete Device.”
3. The system responds: “To
delete a device, please select
its name from the list.” Select
the device to delete on the
display and it will be removed.