clock BUICK CASCADA 2017 Owner's Manual
[x] Cancel search | Manufacturer: BUICK, Model Year: 2017, Model line: CASCADA, Model: BUICK CASCADA 2017Pages: 381, PDF Size: 6.58 MB
Page 42 of 381

Buick Cascada Owner Manual (GMNA-Localizing-U.S.-9967834) - 2017 - crc -
7/18/16
Keys, Doors, and Windows 41
4. With an additional person, liftthe tonneau cover from both
sides to approximately the half
raised position.
5. With the tonneau cover beingheld in the half raised position,
insert the hex wrench into the
marked position of the flap
drive unit. Turn the wrench
clockwise to the stop. The
sideways flaps will turn inward.
6. With an additional person, raise the tonneau cover to the
fully open position.
7. Lift the convertible top bypulling up on both sides of the
front bow and tension bow.
8. Move the front bow to the
windshield frame.
Page 43 of 381
Buick Cascada Owner Manual (GMNA-Localizing-U.S.-9967834) - 2017 - crc -
7/18/16
42 Keys, Doors, and Windows
9. Remove the cap covering themanual closure opening. There
is a recess in the cap to snap it
off using a tool. Insert the hex
wrench into the opening and
then turn the wrench clockwise
until it stops. The convertible
top is now locked.
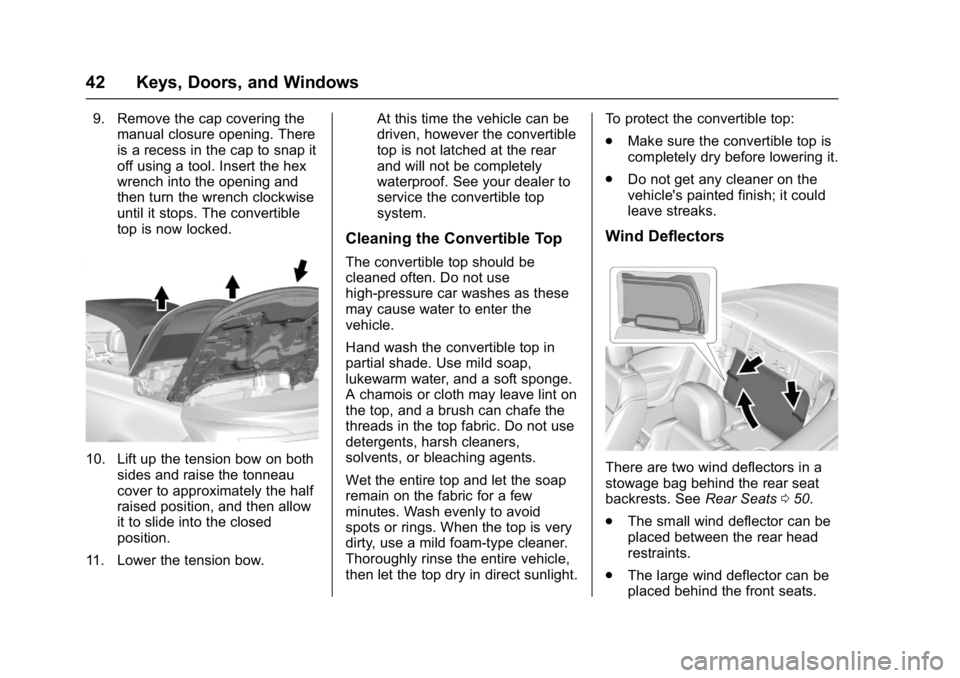
10. Lift up the tension bow on both
sides and raise the tonneau
cover to approximately the half
raised position, and then allow
it to slide into the closed
position.
11. Lower the tension bow. At this time the vehicle can be
driven, however the convertible
top is not latched at the rear
and will not be completely
waterproof. See your dealer to
service the convertible top
system.
Cleaning the Convertible Top
The convertible top should be
cleaned often. Do not use
high-pressure car washes as these
may cause water to enter the
vehicle.
Hand wash the convertible top in
partial shade. Use mild soap,
lukewarm water, and a soft sponge.
A chamois or cloth may leave lint on
the top, and a brush can chafe the
threads in the top fabric. Do not use
detergents, harsh cleaners,
solvents, or bleaching agents.
Wet the entire top and let the soap
remain on the fabric for a few
minutes. Wash evenly to avoid
spots or rings. When the top is very
dirty, use a mild foam-type cleaner.
Thoroughly rinse the entire vehicle,
then let the top dry in direct sunlight.To protect the convertible top:
.
Make sure the convertible top is
completely dry before lowering it.
. Do not get any cleaner on the
vehicle's painted finish; it could
leave streaks.
Wind Deflectors
There are two wind deflectors in a
stowage bag behind the rear seat
backrests. See Rear Seats050.
. The small wind deflector can be
placed between the rear head
restraints.
. The large wind deflector can be
placed behind the front seats.
Page 93 of 381
Buick Cascada Owner Manual (GMNA-Localizing-U.S.-9967834) - 2017 - crc -
7/18/16
92 Instruments and Controls
Instruments and
Controls
Controls
Steering Wheel Adjustment . . . . 93
Steering Wheel Controls . . . . . . . 93
Heated Steering Wheel . . . . . . . . 94
Horn . . . . . . . . . . . . . . . . . . . . . . . . . . . 94
Windshield Wiper/Washer . . . . . . 94
Compass . . . . . . . . . . . . . . . . . . . . . . 95
Clock . . . . . . . . . . . . . . . . . . . . . . . . . . 96
Power Outlets . . . . . . . . . . . . . . . . . 96
Warning Lights, Gauges, and
Indicators
Warning Lights, Gauges, andIndicators . . . . . . . . . . . . . . . . . . . . 97
Instrument Cluster . . . . . . . . . . . . . 98
Speedometer . . . . . . . . . . . . . . . . . . 99
Odometer . . . . . . . . . . . . . . . . . . . . . . 99
Trip Odometer . . . . . . . . . . . . . . . . . 99
Tachometer . . . . . . . . . . . . . . . . . . . . 99
Fuel Gauge . . . . . . . . . . . . . . . . . . . . 99
Engine Coolant Temperature Gauge . . . . . . . . . . . . . . . . . . . . . . 100
Safety Belt Reminders . . . . . . . . 100
Airbag Readiness Light . . . . . . . 101
Passenger Airbag Status Indicator . . . . . . . . . . . . . . . . . . . . 101 Charging System Light . . . . . . . 102
Malfunction Indicator Lamp
(Check Engine Light) . . . . . . . . 102
Brake System Warning Light . . . . . . . . . . . . . . . . . . . . . . . . 104
Electric Parking Brake Light . . . . . . . . . . . . . . . . . . . . . . . . 105
Service Electric Parking Brake Light . . . . . . . . . . . . . . . . . . . . . . . . 105
Antilock Brake System (ABS) Warning Light . . . . . . . . . . . . . . . 105
Operate Pedal Light . . . . . . . . . . 105
Power Steering Warning Light . . . . . . . . . . . . . . . . . . . . . . . . 106
Lane Departure Warning (LDW) Light . . . . . . . . . . . . . . . . . 106
Vehicle Ahead Indicator . . . . . . 106
StabiliTrak®OFF Light . . . . . . . . 106
Traction Control System (TCS)/ StabiliTrak
®Light . . . . . . . . . . . 107
Tire Pressure Light . . . . . . . . . . . 107
Engine Oil Pressure Light . . . . 107
Low Fuel Warning Light . . . . . . 108
Security Light . . . . . . . . . . . . . . . . . 108
High-Beam On Light . . . . . . . . . . 108
Adaptive Forward Lighting (AFL) Light . . . . . . . . . . . . . . . . . . 109
Front Fog Lamp Light . . . . . . . . . 109
Lamps On Reminder . . . . . . . . . 109
Cruise Control Light . . . . . . . . . . 109
Door Ajar Light . . . . . . . . . . . . . . . 109
Information Displays
Driver Information Center (DIC) . . . . . . . . . . . . . . . . 110
Vehicle Messages
Vehicle Messages . . . . . . . . . . . . 113
Vehicle Personalization
Vehicle Personalization . . . . . . . 113
Page 97 of 381
Buick Cascada Owner Manual (GMNA-Localizing-U.S.-9967834) - 2017 - crc -
7/18/16
96 Instruments and Controls
The compass system is designed to
operate for a certain number of
miles or degrees of turn before
needing a signal from the GPS
satellites. When the compass
display shows CAL, drive the
vehicle for a short distance in an
open area where it can receive a
GPS signal. The compass system
will automatically determine when a
GPS signal is restored and provide
a heading again.
Clock
The infotainment system controls
are used to access the time and
date settings through the menu
system. The clock menu can only
be used with the radio while in ON/
RUN or ACC/ACCESSORY. See
“Time and Date Settings”under
Configure Menu 0185.
Power Outlets
The accessory power outlets can be
used to plug in electrical equipment,
such as a cell phone or MP3 player. There is one accessory power outlet
on the center stack below the
climate controls and one on the rear
of the center floor console. These
outlets are powered when the key is
in ON/RUN or ACC/ACCESSORY,
or until the driver door is opened
within 10 minutes of turning off the
vehicle. See
Retained Accessory
Power (RAP) 0231.
Caution
Leaving electrical equipment
plugged in for an extended period
of time while the vehicle is off will
drain the battery. Always unplug
electrical equipment when not in
use and do not plug in equipment
that exceeds the maximum
20 amp rating.
Certain electrical accessories may
not be compatible with the
accessory power outlet and could
overload vehicle or adapter fuses.
If a problem is experienced, see
your dealer. When adding electrical equipment,
be sure to follow the installation
instructions included with the
equipment. See
Add-On Electrical
Equipment 0253.
Caution
Hanging heavy equipment from
the power outlet can cause
damage not covered by the
vehicle warranty. The power
outlets are designed for
accessory power plugs only, such
as cell phone charge cords.
Page 115 of 381
Buick Cascada Owner Manual (GMNA-Localizing-U.S.-9967834) - 2017 - crc -
7/18/16
114 Instruments and Controls
Using the Touch Screen
Touch a screen feature to:
.View more feature options.
. Enable or disable the feature.
w:Touch to scroll up.
x:Touch to scroll down.
Back : Touch to return to the
previous menu.
To access the
personalization menu:
1. Touch Config on the Home Page of the infotainment
display or press CONFIG on
the faceplate.
2. Select the desired feature to display a list of available
options.
3. Select the desired feature setting.
Personalization Menus
The following list of menu items may
be available:
. Languages
. Time and Date .
Radio Settings
. Phone Settings
. Navigation Settings
. Display Settings
. Vehicle Settings
Each menu is detailed in the
following information.
Languages
Select Languages, then select from
the available language(s).
Time and Date
Manually set the time and date. See
Clock 096.
Radio Settings
Select and the following may
display:
.
Auto Volume
. Gracenote Options
. SXM Channel Art
. Max Startup Volume
. Number of Favorites Pages
. SXM Categories .
Software Versions Menu
Auto Volume
This feature adjusts the volume to
minimize the effects of unwanted
background noise that can result
from changing road surfaces, driving
speeds, or open windows. This
feature works best at lower volume
settings where background noise is
typically louder than the sound
system volume.
Select Off, Low, Medium, or High.
Gracenote Options
Select and the following may
display:
. Normalization
Normalization
This feature improves voice
recognition and media groupings.
See CD Player 0157, USB 0160
Auxiliary Devices 0165, and
Bluetooth Audio 0166.
Select to enable or disable.
Page 131 of 381
Buick Cascada Owner Manual (GMNA-Localizing-U.S.-9967834) - 2017 - crc -
7/18/16
130 Infotainment System
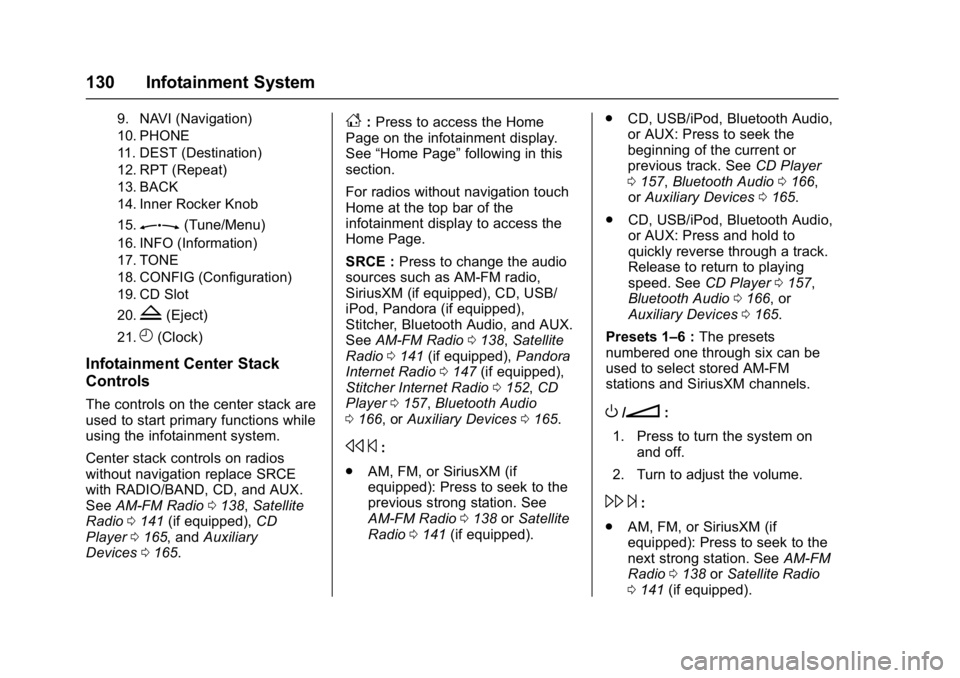
9. NAVI (Navigation)
10. PHONE
11. DEST (Destination)
12. RPT (Repeat)
13. BACK
14. Inner Rocker Knob
15.
Z(Tune/Menu)
16. INFO (Information)
17. TONE
18. CONFIG (Configuration)
19. CD Slot
20.
Z(Eject)
21.H(Clock)
Infotainment Center Stack
Controls
The controls on the center stack are
used to start primary functions while
using the infotainment system.
Center stack controls on radios
without navigation replace SRCE
with RADIO/BAND, CD, and AUX.
SeeAM-FM Radio 0138, Satellite
Radio 0141 (if equipped), CD
Player 0165, and Auxiliary
Devices 0165.
F:Press to access the Home
Page on the infotainment display.
See “Home Page” following in this
section.
For radios without navigation touch
Home at the top bar of the
infotainment display to access the
Home Page.
SRCE : Press to change the audio
sources such as AM-FM radio,
SiriusXM (if equipped), CD, USB/
iPod, Pandora (if equipped),
Stitcher, Bluetooth Audio, and AUX.
See AM-FM Radio 0138, Satellite
Radio 0141 (if equipped), Pandora
Internet Radio 0147 (if equipped),
Stitcher Internet Radio 0152, CD
Player 0157, Bluetooth Audio
0 166, or Auxiliary Devices 0165.
s ©:
. AM, FM, or SiriusXM (if
equipped): Press to seek to the
previous strong station. See
AM-FM Radio 0138 orSatellite
Radio 0141 (if equipped). .
CD, USB/iPod, Bluetooth Audio,
or AUX: Press to seek the
beginning of the current or
previous track. See CD Player
0 157, Bluetooth Audio 0166,
or Auxiliary Devices 0165.
. CD, USB/iPod, Bluetooth Audio,
or AUX: Press and hold to
quickly reverse through a track.
Release to return to playing
speed. See CD Player0157,
Bluetooth Audio 0166, or
Auxiliary Devices 0165.
Presets 1–6 : The presets
numbered one through six can be
used to select stored AM-FM
stations and SiriusXM channels.
O/n:
1. Press to turn the system on and off.
2. Turn to adjust the volume.
\ ¨:
. AM, FM, or SiriusXM (if
equipped): Press to seek to the
next strong station. See AM-FM
Radio 0138 orSatellite Radio
0 141 (if equipped).
Page 157 of 381
Buick Cascada Owner Manual (GMNA-Localizing-U.S.-9967834) - 2017 - crc -
7/18/16
156 Infotainment System
Pictures
Pictures can only be viewed using
USB devices. If pictures are on an
SD card, transfer to a USB device
or use a USB-SD adapter.
A maximum 5Mb uncompressed
photo size is supported, however to
achieve this, use a 4 Megapixel or
lower resolution camera setting.
Only jpeg, bmp, gif, and png files
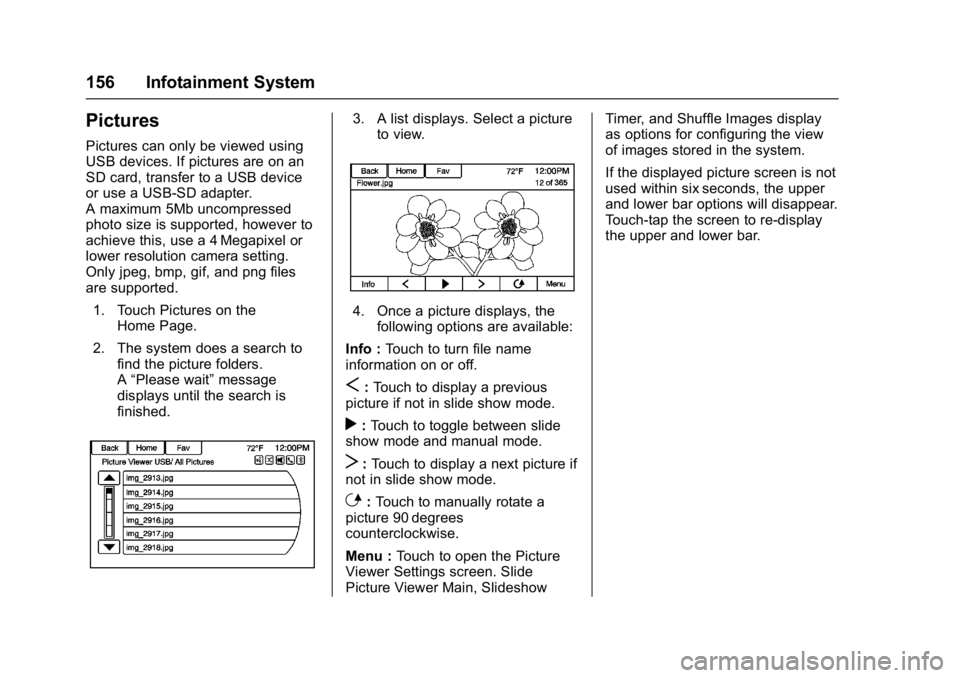
are supported.1. Touch Pictures on the Home Page.
2. The system does a search to find the picture folders.
A“Please wait” message
displays until the search is
finished.
3. A list displays. Select a picture to view.
4. Once a picture displays, thefollowing options are available:
Info : Touch to turn file name
information on or off.
S: Touch to display a previous
picture if not in slide show mode.
r: Touch to toggle between slide
show mode and manual mode.
T: Touch to display a next picture if
not in slide show mode.
E: Touch to manually rotate a
picture 90 degrees
counterclockwise.
Menu : Touch to open the Picture
Viewer Settings screen. Slide
Picture Viewer Main, Slideshow Timer, and Shuffle Images display
as options for configuring the view
of images stored in the system.
If the displayed picture screen is not
used within six seconds, the upper
and lower bar options will disappear.
Touch-tap the screen to re-display
the upper and lower bar.
Page 172 of 381
Buick Cascada Owner Manual (GMNA-Localizing-U.S.-9967834) - 2017 - crc -
7/18/16
Infotainment System 171
Destination Position Info
Touch to display a split map screen
showing the final destination.
Map Adjustments
The system lets you adjust the scale
of view on the map. Also, as you
drive, the map scrolls automatically
based on the direction of travel.
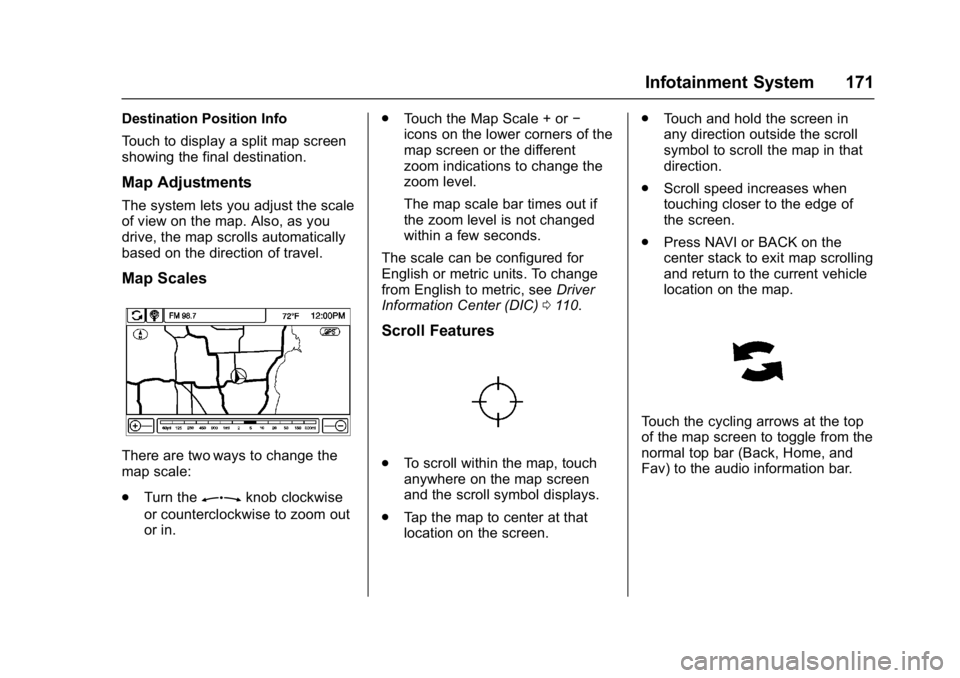
Map Scales
There are two ways to change the
map scale:
.Turn the
Zknob clockwise
or counterclockwise to zoom out
or in. .
Touch the Map Scale + or −
icons on the lower corners of the
map screen or the different
zoom indications to change the
zoom level.
The map scale bar times out if
the zoom level is not changed
within a few seconds.
The scale can be configured for
English or metric units. To change
from English to metric, see Driver
Information Center (DIC) 0110.
Scroll Features
.
To scroll within the map, touch
anywhere on the map screen
and the scroll symbol displays.
. Tap the map to center at that
location on the screen. .
Touch and hold the screen in
any direction outside the scroll
symbol to scroll the map in that
direction.
. Scroll speed increases when
touching closer to the edge of
the screen.
. Press NAVI or BACK on the
center stack to exit map scrolling
and return to the current vehicle
location on the map.
Touch the cycling arrows at the top
of the map screen to toggle from the
normal top bar (Back, Home, and
Fav) to the audio information bar.
Page 186 of 381
Buick Cascada Owner Manual (GMNA-Localizing-U.S.-9967834) - 2017 - crc -
7/18/16
Infotainment System 185
Configure Menu
The Configuration Menu is used to
adjust features and preferences,
such as Sound, Radio, Nav
(Navigation), Display, or Time
Settings.
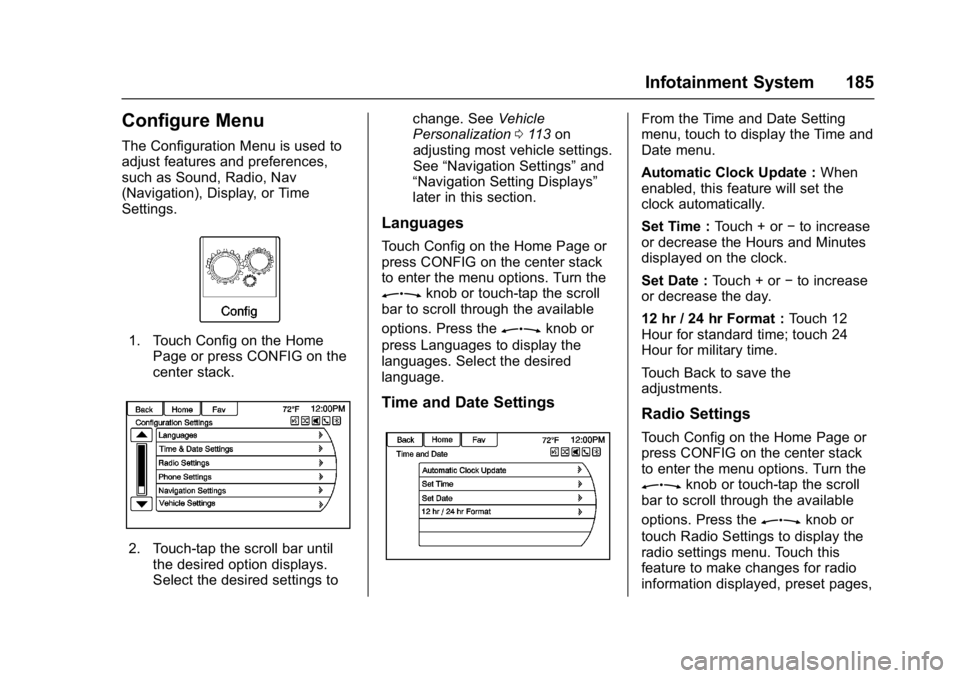
1. Touch Config on the HomePage or press CONFIG on the
center stack.
2. Touch-tap the scroll bar untilthe desired option displays.
Select the desired settings to change. See
Vehicle
Personalization 0113 on
adjusting most vehicle settings.
See “Navigation Settings” and
“Navigation Setting Displays”
later in this section.
Languages
Touch Config on the Home Page or
press CONFIG on the center stack
to enter the menu options. Turn the
Zknob or touch-tap the scroll
bar to scroll through the available
options. Press the
Zknob or
press Languages to display the
languages. Select the desired
language.
Time and Date Settings
From the Time and Date Setting
menu, touch to display the Time and
Date menu.
Automatic Clock Update : When
enabled, this feature will set the
clock automatically.
Set Time : Touch + or−to increase
or decrease the Hours and Minutes
displayed on the clock.
Set Date : Touch + or −to increase
or decrease the day.
12 hr / 24 hr Format : Touch 12
Hour for standard time; touch 24
Hour for military time.
Touch Back to save the
adjustments.
Radio Settings
Touch Config on the Home Page or
press CONFIG on the center stack
to enter the menu options. Turn the
Zknob or touch-tap the scroll
bar to scroll through the available
options. Press the
Zknob or
touch Radio Settings to display the
radio settings menu. Touch this
feature to make changes for radio
information displayed, preset pages,
Page 252 of 381

Buick Cascada Owner Manual (GMNA-Localizing-U.S.-9967834) - 2017 - crc -
7/18/16
Driving and Operating 251
Warning (Continued)
.Turn off the engine when
refueling.
. Keep sparks, flames, and
smoking materials away
from fuel.
. Do not leave the fuel pump
unattended.
. Do not use a cell phone
while refueling.
. Do not re-enter the vehicle
while pumping fuel.
. Keep children away from
the fuel pump and never let
children pump fuel.
. Fuel can spray out if the fuel
cap is opened too quickly.
This spray can happen if the
tank is nearly full, and is
more likely in hot weather.
Open the fuel cap slowly
and wait for any hiss noise
to stop, then unscrew the
cap all the way.
The fuel cap is behind a hinged fuel
door on the passenger side of the
vehicle. The fuel door is locked
when the vehicle doors are locked.
Press
Kon the RKE transmitter to
unlock. To open the fuel door, push
and release the rearward center
edge of the door.
Turn the fuel cap counterclockwise
to remove. While refueling, hang the
tethered fuel cap from the hook on
the fuel door.
{Warning
Overfilling the fuel tank by more
than three clicks of a standard fill
nozzle may cause:
. Vehicle performance issues,
including engine stalling and
damage to the fuel system.
. Fuel spills.
. Potential fuel fires.