run flat BUICK CASCADA 2017 Owner's Manual
[x] Cancel search | Manufacturer: BUICK, Model Year: 2017, Model line: CASCADA, Model: BUICK CASCADA 2017Pages: 381, PDF Size: 6.58 MB
Page 19 of 381
Buick Cascada Owner Manual (GMNA-Localizing-U.S.-9967834) - 2017 - crc -
7/18/16
18 In Brief
outlets are powered when the key is
in ON/RUN or ACC/ACCESSORY,
or until the driver door is opened
within 10 minutes of turning off the
vehicle. SeeRetained Accessory
Power (RAP) 0231.
See Power Outlets 096.
Convertible
The convertible top can be
automatically opened and closed.
For step-by-step instructions, see
Convertible Top 037.
Performance and
Maintenance
Traction Control/
Electronic Stability
Control
The Traction Control System (TCS)
limits wheel spin. The system is on
when the vehicle is started.
The StabiliTrak system assists with
directional control of the vehicle in
difficult driving conditions. The
system is on when the vehicle is
started.
.
To turn off TCS, press and
release
gon the center stack.
The appropriate DIC message is
displayed.
. Press and release
gagain to
turn TCS back on. The
appropriate DIC message is
displayed.
. To turn off both TCS and
StabiliTrak, press and hold
g
untilgcomes on in the instrument cluster and the
appropriate DIC message is
displayed.
. Press
gagain to turn on both
systems. The appropriate DIC
message is displayed.
See Traction Control/Electronic
Stability Control 0240.
Tire Pressure Monitor
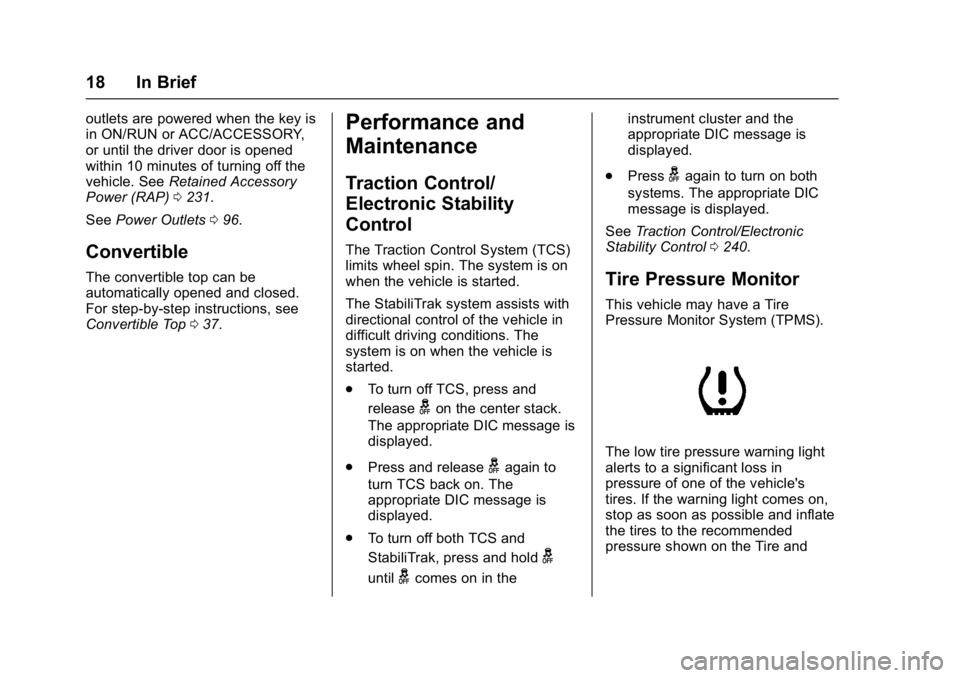
This vehicle may have a Tire
Pressure Monitor System (TPMS).
The low tire pressure warning light
alerts to a significant loss in
pressure of one of the vehicle's
tires. If the warning light comes on,
stop as soon as possible and inflate
the tires to the recommended
pressure shown on the Tire and
Page 87 of 381
Buick Cascada Owner Manual (GMNA-Localizing-U.S.-9967834) - 2017 - crc -
7/18/16
86 Seats and Restraints
{Warning
A child in a rear-facing child
restraint can be seriously injured
or killed if the front outboard
passenger frontal airbag inflates.
This is because the back of the
rear-facing child restraint would
be very close to the inflating
airbag. A child in a forward-facing
child restraint can be seriously
injured or killed if the front
outboard passenger frontal airbag
inflates and the passenger seat is
in a forward position.
Even if the passenger sensing
system has turned off the front
outboard passenger airbag(s), no
system is fail-safe. No one can
guarantee that an airbag will not
deploy under some unusual
circumstance, even though the
airbag(s) are off.
Secure rear-facing child restraints
in a rear seat, even if the
airbag(s) are off. If you secure a(Continued)
Warning (Continued)
forward-facing child restraint in
the front outboard passenger
seat, always move the seat as far
back as it will go. It is better to
secure the child restraint in a
rear seat.
SeePassenger Sensing System
0 63 for additional information.
If the child restraint uses a top
tether, see Lower Anchors and
Tethers for Children (LATCH
System) 076 for top tether anchor
locations.
Do not secure a child seat in a
position without a top tether anchor
if a national or local law requires
that the top tether be anchored, or if
the instructions that come with the
child restraint say that the top strap
must be anchored.
In Canada, the law requires that
forward-facing child restraints have
a top tether, and that the tether be
attached. When using the lap-shoulder belt to
secure the child restraint in this
position, follow the instructions that
came with the child restraint and the
following instructions:
1. Move the seat as far back as it will go before securing the
forward-facing child restraint.
Move the seat upward or the
seatback to an upright position,
if needed, to get a tight
installation of the child
restraint.
When the passenger sensing
system has turned off the front
outboard passenger frontal
airbag and knee airbag, the off
indicator on the passenger
airbag status indicator should
light and stay lit when you start
the vehicle. See Passenger
Airbag Status Indicator 0101.
2. Put the child restraint on the seat.
3. Pick up the latch plate, and run the lap and shoulder portions
of the vehicle's safety belt
Page 223 of 381
Buick Cascada Owner Manual (GMNA-Localizing-U.S.-9967834) - 2017 - crc -
7/18/16
222 Driving and Operating
Hill and Mountain Roads
Driving on steep hills or through
mountains is different than driving
on flat or rolling terrain. Tips include:
.Keep the vehicle serviced and in
good shape.
. Check all fluid levels and brakes,
tires, cooling system, and
transmission.
. Shift to a lower gear when going
down steep or long hills.
{Warning
Using the brakes to slow the
vehicle on a long downhill slope
can cause brake overheating, can
reduce brake performance, and
could result in a loss of braking.
Shift the transmission to a lower
gear to let the engine assist the
brakes on a steep downhill slope.
{Warning
Coasting downhill in N (Neutral)
or with the ignition off is
dangerous. This can cause
overheating of the brakes and
loss of steering. Always have the
engine running and the vehicle
in gear.
. Drive at speeds that keep the
vehicle in its own lane. Do not
swing wide or cross the
center line.
. Be alert on top of hills;
something could be in your lane
(e.g., stalled car, accident).
. Pay attention to special road
signs (e.g., falling rocks area,
winding roads, long grades,
passing or no-passing zones)
and take appropriate action.
Winter Driving
Driving on Snow or Ice
Snow or ice between the tires and
the road creates less traction or
grip, so drive carefully. Wet ice can
occur at about 0 °C (32 °F) when
freezing rain begins to fall. Avoid
driving on wet ice or in freezing rain
until roads can be treated.
For Slippery Road Driving:
.Accelerate gently. Accelerating
too quickly causes the wheels to
spin and makes the surface
under the tires slick.
. Turn on Traction Control. See
Traction Control/Electronic
Stability Control 0240.
. The Antilock Brake System
(ABS) improves vehicle stability
during hard stops, but the
brakes should be applied sooner
than when on dry pavement.
See Antilock Brake System
(ABS) 0237.
. Allow greater following distance
and watch for slippery spots. Icy
patches can occur on otherwise
Page 230 of 381
Buick Cascada Owner Manual (GMNA-Localizing-U.S.-9967834) - 2017 - crc -
7/18/16
Driving and Operating 229
{Warning
Turning off the vehicle while
moving may cause loss of power
assist in the brake and steering
systems and disable the airbags.
While driving, only shut the
vehicle off in an emergency.
If the vehicle cannot be pulled over,
and must be shut off while driving,
turn the ignition to ACC/
ACCESSORY.
1 : This position provides power to
some of the electrical accessories.
To move the key from ACC/
ACCESSORY to LOCK/OFF, push
in the key and then turn it to
LOCK/OFF.
2 : The ignition switch stays in this
position when the engine is running.
This position can be used to operate
the electrical accessories, including
the ventilation fan and 12-volt power
outlet, as well as to display some
warning and indicator lights. This
position can also be used for
service and diagnostics, and to verify the proper operation of the
malfunction indicator lamp as may
be required for emission inspection
purposes. The transmission is also
unlocked in this position.
The battery could be drained if the
key is left in the ACC/ACCESSORY
or ON/RUN position with the engine
off. The vehicle might not start if the
battery is allowed to drain for an
extended period of time.
3 :
This position starts the engine.
When the engine starts, release the
key. The ignition switch will return to
ON/RUN for normal driving.
A warning tone sounds when the
driver door is opened if the ignition
is still in ACC/ACCESSORY and the
key is in the ignition.
If the ignition becomes difficult to
turn, see Keys021.
Key Lock Release
The vehicle is equipped with an
electronic key lock release. The key
lock release is designed to prevent
ignition key removal unless the shift
lever is in P (Park). The key lock release is always
functional except in the case of an
uncharged or low voltage (less than
9-volt) battery. If the vehicle has an
uncharged battery or a battery with
low voltage, try charging or jump
starting the battery. See
Jump
Starting - North America 0315.
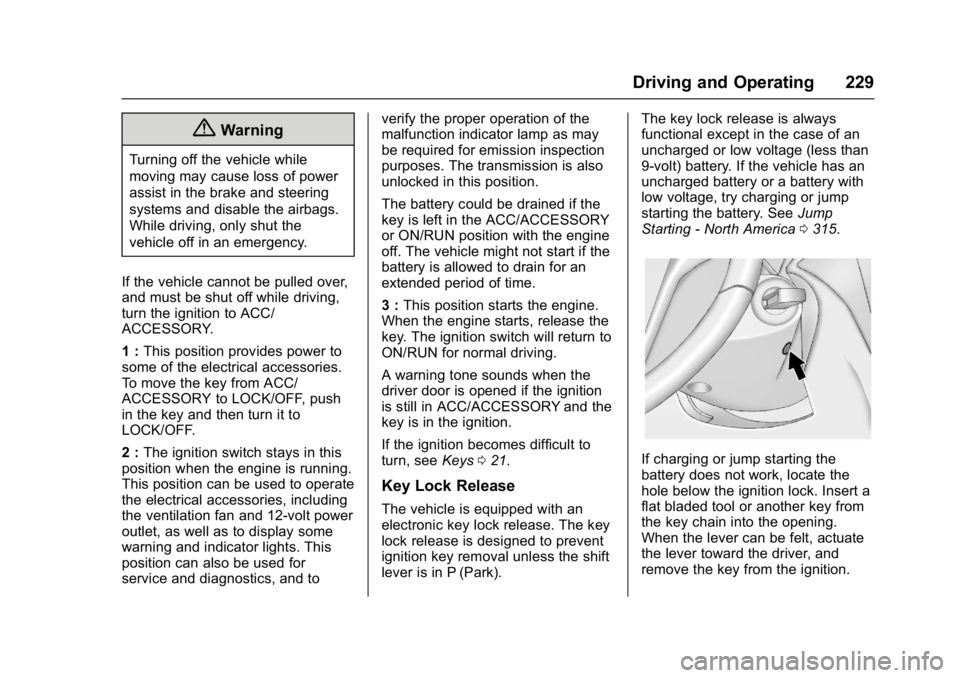
If charging or jump starting the
battery does not work, locate the
hole below the ignition lock. Insert a
flat bladed tool or another key from
the key chain into the opening.
When the lever can be felt, actuate
the lever toward the driver, and
remove the key from the ignition.
Page 310 of 381
Buick Cascada Owner Manual (GMNA-Localizing-U.S.-9967834) - 2017 - crc -
7/18/16
Vehicle Care 309
Tire Changing
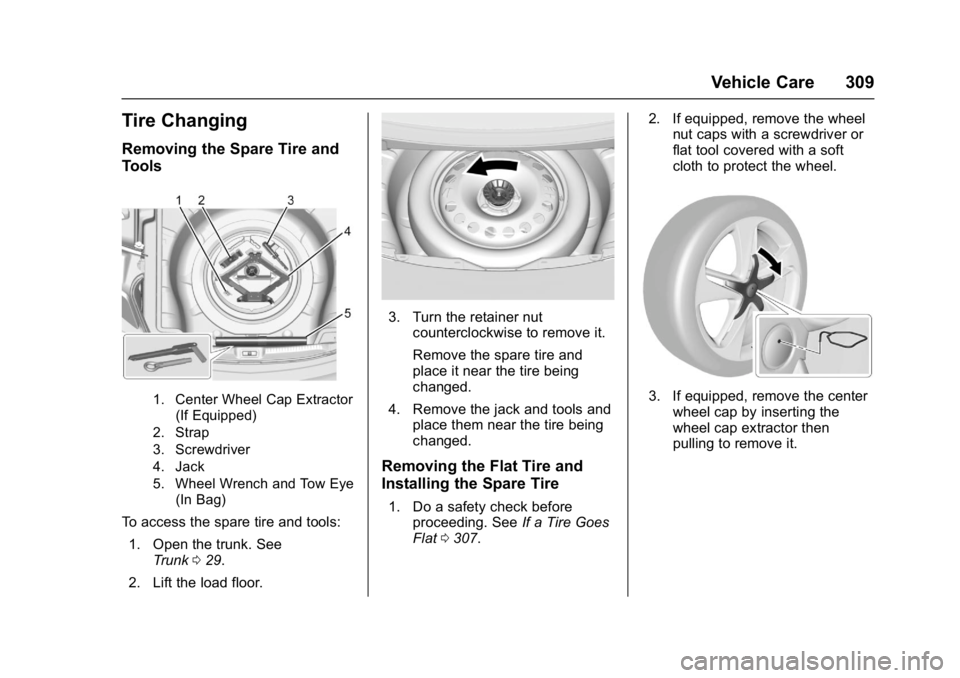
Removing the Spare Tire and
Tools
1. Center Wheel Cap Extractor(If Equipped)
2. Strap
3. Screwdriver
4. Jack
5. Wheel Wrench and Tow Eye (In Bag)
To access the spare tire and tools:
1. Open the trunk. See Trunk 029.
2. Lift the load floor.
3. Turn the retainer nut counterclockwise to remove it.
Remove the spare tire and
place it near the tire being
changed.
4. Remove the jack and tools and place them near the tire being
changed.
Removing the Flat Tire and
Installing the Spare Tire
1. Do a safety check beforeproceeding. See If a Tire Goes
Flat 0307. 2. If equipped, remove the wheel
nut caps with a screwdriver or
flat tool covered with a soft
cloth to protect the wheel.
3. If equipped, remove the center
wheel cap by inserting the
wheel cap extractor then
pulling to remove it.
Page 374 of 381

Buick Cascada Owner Manual (GMNA-Localizing-U.S.-9967834) - 2017 - crc -
7/18/16
Index 373
Driving (cont'd)Loss of Control . . . . . . . . . . . . . . . 220
Off-Road Recovery . . . . . . . . . . . 220
Vehicle Load Limits . . . . . . . . . . . 224
Wet Roads . . . . . . . . . . . . . . . . . . . 221
Winter . . . . . . . . . . . . . . . . . . . . . . . . 222
Dual Automatic Climate Control System . . . . . . . . . . . . . . . . 213
E
Electric Parking Brake . . . . . . . . . . 237
Electric Parking Brake Light . . . . 105
Electrical Equipment,Add-On . . . . . . . . . . . . . . . . . . . . . . . 253
Electrical System Engine Compartment FuseBlock . . . . . . . . . . . . . . . . . . . . . . . . 282
Fuses and Circuit Breakers . . . 282
Instrument Panel Fuse Block . . . . . . . . . . . . . . . . . . . . . . . . 285
Overload . . . . . . . . . . . . . . . . . . . . . 281
Rear Compartment Fuse Block . . . . . . . . . . . . . . . . . . . . . . . . 286
Emergency
OnStar
®. . . . . . . . . . . . . . . . . . . . . . 361
Engine Air Cleaner/Filter . . . . . . . . . . . . . 263
Check and Service EngineSoon Light . . . . . . . . . . . . . . . . . . 102 Engine (cont'd)
Compartment Overview . . . . . . . 259
Coolant . . . . . . . . . . . . . . . . . . . . . . . 265
Coolant Temperature
Gauge . . . . . . . . . . . . . . . . . . . . . . 100
Cooling System . . . . . . . . . . . . . . . 264
Drive Belt Routing . . . . . . . . . . . . 346
Exhaust . . . . . . . . . . . . . . . . . . . . . . 233
Oil Life System . . . . . . . . . . . . . . . 262
Oil Pressure Light . . . . . . . . . . . . 107
Overheating . . . . . . . . . . . . . . . . . . 268
Running While Parked . . . . . . . . 233
Starting . . . . . . . . . . . . . . . . . . . . . . . 230
Entry Lighting . . . . . . . . . . . . . . . . . . . 124
Event Data Recorders . . . . . . . . . . 358
Exit Lighting . . . . . . . . . . . . . . . . . . . . 124
Extender, Safety Belt . . . . . . . . . . . . 56
Exterior Lamp Controls . . . . . . . . . 119
Exterior Lighting Battery
Saver . . . . . . . . . . . . . . . . . . . . . . . . . 125
F
Filter,Engine Air Cleaner . . . . . . . . . . . 263
Flash-to-Pass . . . . . . . . . . . . . . . . . . . 120
Flashers, Hazard Warning . . . . . . 122
Flat Tire . . . . . . . . . . . . . . . . . . . . . . . . 307 Changing . . . . . . . . . . . . . . . . . . . . . 309
Floor Mats . . . . . . . . . . . . . . . . . . . . . . 329 Fluid
Automatic Transmission . . . . . . 263
Brakes . . . . . . . . . . . . . . . . . . . . . . . . 270
Washer . . . . . . . . . . . . . . . . . . . . . . . 269
Fog Lamps . . . . . . . . . . . . . . . . . . . . . 123 Bulb Replacement . . . . . . . . . . . . 276
Folding Mirrors . . . . . . . . . . . . . . . . . . 33
Forward Collision Alert
(FCA) System . . . . . . . . . . . . . . . . . 246
Frequency Statement Radio . . . . . . . . . . . . . . . . . . . . . . . . . 357
Front Fog Lamp Light . . . . . . . . . . . . . . . . . . . . . . . . . . 109
Front Seats Heated . . . . . . . . . . . . . . . . . . . . . . . . . 49
Front Turn Signal Lamps . . . . . . . 276
Fuel . . . . . . . . . . . . . . . . . . . . . . . . . . . . 249
Additives . . . . . . . . . . . . . . . . . . . . . 250
Economy Driving . . . . . . . . . . . 20, 19
Filling a Portable FuelContainer . . . . . . . . . . . . . . . . . . . 252
Filling the Tank . . . . . . . . . . . . . . . 250
Foreign Countries . . . . . . . . . . . . 250
Gauge . . . . . . . . . . . . . . . . . . . . . . . . . . 99
Low Fuel Warning Light . . . . . . . 108
Requirements, California . . . . . 250