check engine BUICK CASCADA 2019 User Guide
[x] Cancel search | Manufacturer: BUICK, Model Year: 2019, Model line: CASCADA, Model: BUICK CASCADA 2019Pages: 307, PDF Size: 5.12 MB
Page 111 of 307
Buick Cascada Owner Manual (GMNA-Localizing-U.S.-12461774) - 2019 -
CRC - 3/26/18
110 Instruments and Controls
Engine Oil Pressure Light
Caution
Lack of proper engine oil
maintenance can damage the
engine. Driving with the engine oil
low can also damage the engine.
The repairs would not be covered
by the vehicle warranty. Check
the oil level as soon as possible.
Add oil if required, but if the oil
level is within the operating range
and the oil pressure is still low,
have the vehicle serviced. Always
follow the maintenance schedule
for changing engine oil.
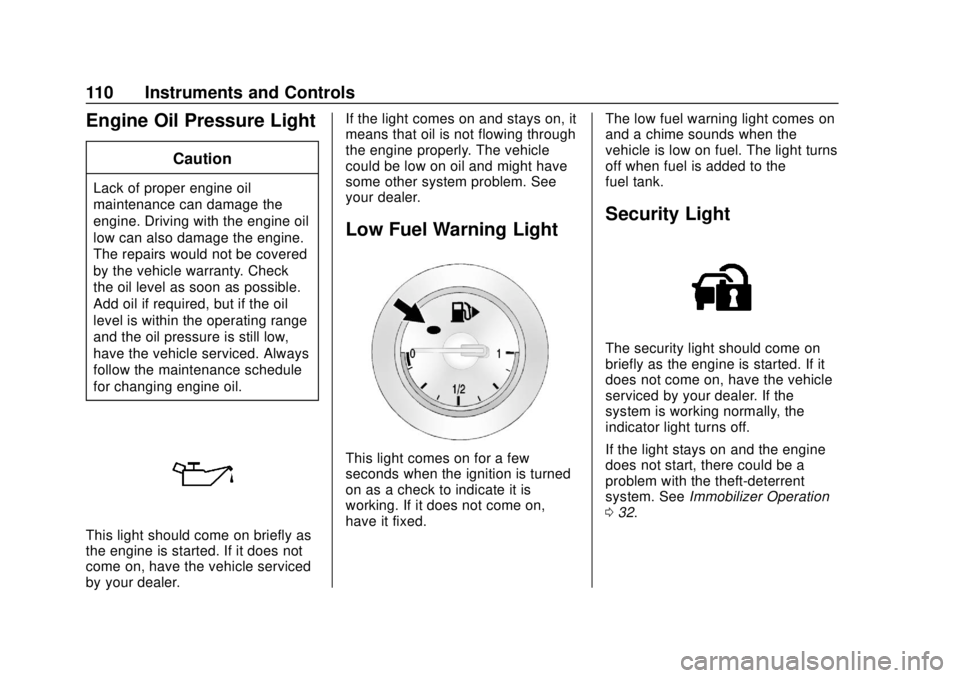
This light should come on briefly as
the engine is started. If it does not
come on, have the vehicle serviced
by your dealer.If the light comes on and stays on, it
means that oil is not flowing through
the engine properly. The vehicle
could be low on oil and might have
some other system problem. See
your dealer.
Low Fuel Warning Light
This light comes on for a few
seconds when the ignition is turned
on as a check to indicate it is
working. If it does not come on,
have it fixed.
The low fuel warning light comes on
and a chime sounds when the
vehicle is low on fuel. The light turns
off when fuel is added to the
fuel tank.
Security Light
The security light should come on
briefly as the engine is started. If it
does not come on, have the vehicle
serviced by your dealer. If the
system is working normally, the
indicator light turns off.
If the light stays on and the engine
does not start, there could be a
problem with the theft-deterrent
system. See
Immobilizer Operation
0 32.
Page 141 of 307
Buick Cascada Owner Manual (GMNA-Localizing-U.S.-12461774) - 2019 -
CRC - 3/26/18
140 Driving and Operating
Other Rainy Weather Tips
Besides slowing down, other wet
weather driving tips include:
.Allow extra following distance.
. Pass with caution.
. Keep windshield wiping
equipment in good shape.
. Keep the windshield washer fluid
reservoir filled.
. Have good tires with proper
tread depth. See Tires0211.
. Turn off cruise control.
Hill and Mountain Roads
Driving on steep hills or through
mountains is different than driving
on flat or rolling terrain. Tips include:
.Keep the vehicle serviced and in
good shape.
. Check all fluid levels and brakes,
tires, cooling system, and
transmission.
. Shift to a lower gear when going
down steep or long hills.
{Warning
Using the brakes to slow the
vehicle on a long downhill slope
can cause brake overheating, can
reduce brake performance, and
could result in a loss of braking.
Shift the transmission to a lower
gear to let the engine assist the
brakes on a steep downhill slope.
{Warning
Coasting downhill in N (Neutral)
or with the ignition off is
dangerous. This can cause
overheating of the brakes and
loss of steering assist. Always
have the engine running and the
vehicle in gear.
. Drive at speeds that keep the
vehicle in its own lane. Do not
swing wide or cross the
center line. .
Be alert on top of hills;
something could be in your lane
(e.g., stalled car, crash).
. Pay attention to special road
signs (e.g., falling rocks area,
winding roads, long grades,
passing or no-passing zones)
and take appropriate action.
Winter Driving
Driving on Snow or Ice
Snow or ice between the tires and
the road creates less traction or
grip, so drive carefully. Wet ice can
occur at about 0 °C (32 °F) when
freezing rain begins to fall. Avoid
driving on wet ice or in freezing rain
until roads can be treated.
For Slippery Road Driving:
.Accelerate gently. Accelerating
too quickly causes the wheels to
spin and makes the surface
under the tires slick.
. Turn on Traction Control. See
Traction Control/Electronic
Stability Control 0158.
Page 151 of 307
Buick Cascada Owner Manual (GMNA-Localizing-U.S.-12461774) - 2019 -
CRC - 3/26/18
150 Driving and Operating
Shifting Into Park
To shift into P (Park):1. Hold the brake pedal down and set the parking brake.
See Electric Parking Brake
0 156.
2. Hold the button on the shift lever and push the lever toward
the front of the vehicle into
P (Park).
3. Turn the ignition to LOCK/OFF.
4. Remove the key.
Leaving the Vehicle with the
Engine Running
{Warning
It can be dangerous to leave the
vehicle with the engine running.
It could overheat and catch fire.
It is dangerous to get out of the
vehicle if the shift lever is not fully
in P (Park) with the parking brake
firmly set. The vehicle can roll. (Continued)
Warning (Continued)
Do not leave the vehicle when the
engine is running. If you have left
the engine running, the vehicle
can move suddenly. You or others
could be injured. To be sure the
vehicle will not move, even when
you are on fairly level ground,
always set the parking brake and
move the shift lever to P (Park).
SeeShifting Into Park 0150.
If you have to leave the vehicle with
the engine running, the vehicle must
be in P (Park) and the parking
brake set.
Release the button and check that
the shift lever cannot be moved out
of P (Park).
Torque Lock
Torque lock is when the weight of
the vehicle puts too much force on
the parking pawl in the
transmission. This happens when
parking on a hill and shifting the
transmission into P (Park) is not done properly; then it is difficult to
shift out of P (Park). To prevent
torque lock, set the parking brake
and then shift into P (Park). To find
out how, see
“Shifting Into Park”
previously in this section.
If torque lock does occur, the
vehicle may need to be pushed
uphill by another vehicle to relieve
the parking pawl pressure, so you
can shift out of P (Park).
Shifting out of Park
Automatic Transmission
Shift Lock
The vehicle has an automatic
transmission shift lock control
system. The shift lock control
system is designed to:
. Prevent ignition key removal
unless the shift lever is in
P (Park).
. Prevent movement of the shift
lever out of P (Park), unless the
ignition is on and the brake
pedal is applied.
Page 156 of 307
Buick Cascada Owner Manual (GMNA-Localizing-U.S.-12461774) - 2019 -
CRC - 3/26/18
Driving and Operating 155
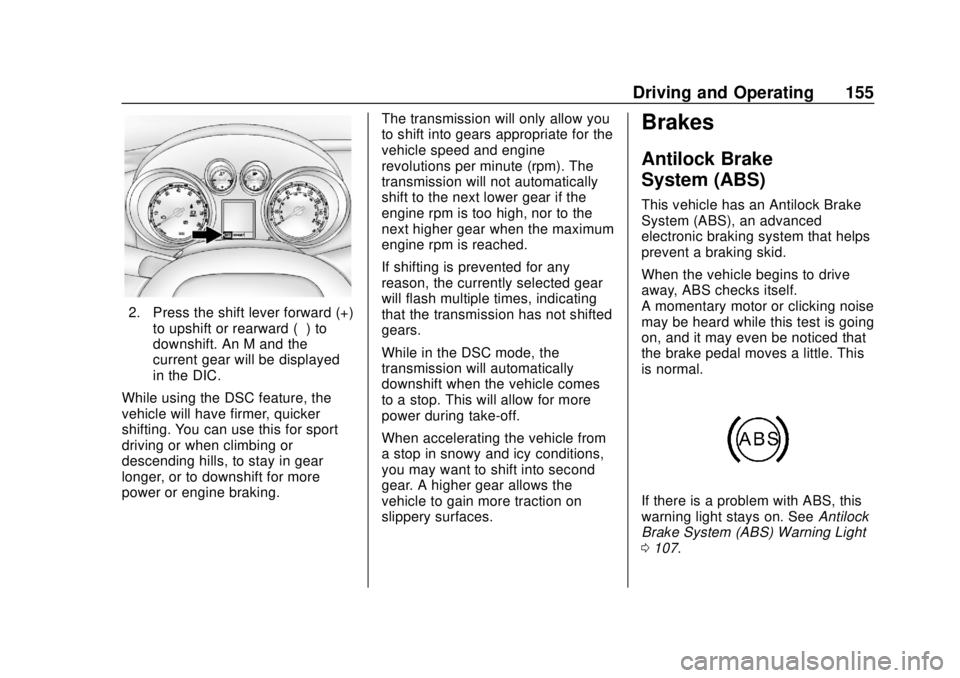
2. Press the shift lever forward (+)to upshift or rearward (−) to
downshift. An M and the
current gear will be displayed
in the DIC.
While using the DSC feature, the
vehicle will have firmer, quicker
shifting. You can use this for sport
driving or when climbing or
descending hills, to stay in gear
longer, or to downshift for more
power or engine braking. The transmission will only allow you
to shift into gears appropriate for the
vehicle speed and engine
revolutions per minute (rpm). The
transmission will not automatically
shift to the next lower gear if the
engine rpm is too high, nor to the
next higher gear when the maximum
engine rpm is reached.
If shifting is prevented for any
reason, the currently selected gear
will flash multiple times, indicating
that the transmission has not shifted
gears.
While in the DSC mode, the
transmission will automatically
downshift when the vehicle comes
to a stop. This will allow for more
power during take-off.
When accelerating the vehicle from
a stop in snowy and icy conditions,
you may want to shift into second
gear. A higher gear allows the
vehicle to gain more traction on
slippery surfaces.
Brakes
Antilock Brake
System (ABS)
This vehicle has an Antilock Brake
System (ABS), an advanced
electronic braking system that helps
prevent a braking skid.
When the vehicle begins to drive
away, ABS checks itself.
A momentary motor or clicking noise
may be heard while this test is going
on, and it may even be noticed that
the brake pedal moves a little. This
is normal.
If there is a problem with ABS, this
warning light stays on. See
Antilock
Brake System (ABS) Warning Light
0 107.
Page 157 of 307
Buick Cascada Owner Manual (GMNA-Localizing-U.S.-12461774) - 2019 -
CRC - 3/26/18
156 Driving and Operating
If driving safely on a wet road and it
becomes necessary to slam on the
brakes and continue braking to
avoid a sudden obstacle, a
computer senses the wheels are
slowing down. If one of the wheels
is about to stop rolling, the computer
will separately work the brakes at
each wheel.
ABS can change the brake pressure
to each wheel, as required, faster
than any driver could. This can help
you steer around the obstacle while
braking hard.
As the brakes are applied, the
computer keeps receiving updates
on wheel speed and controls
braking pressure accordingly.
Remember: ABS does not change
the time needed to get a foot up to
the brake pedal or always decrease
stopping distance. If you get too
close to the vehicle in front of you,
there will not be enough time to
apply the brakes if that vehicle
suddenly slows or stops. Always
leave enough room up ahead to
stop, even with ABS.Using ABS
Do not pump the brakes. Just hold
the brake pedal down firmly and let
ABS work. You may hear the ABS
pump or motor operating and feel
the brake pedal pulsate. This is
normal.
Braking in Emergencies
ABS allows you to steer and brake
at the same time. In many
emergencies, steering can help
more than even the very best
braking.
Electric Parking Brake
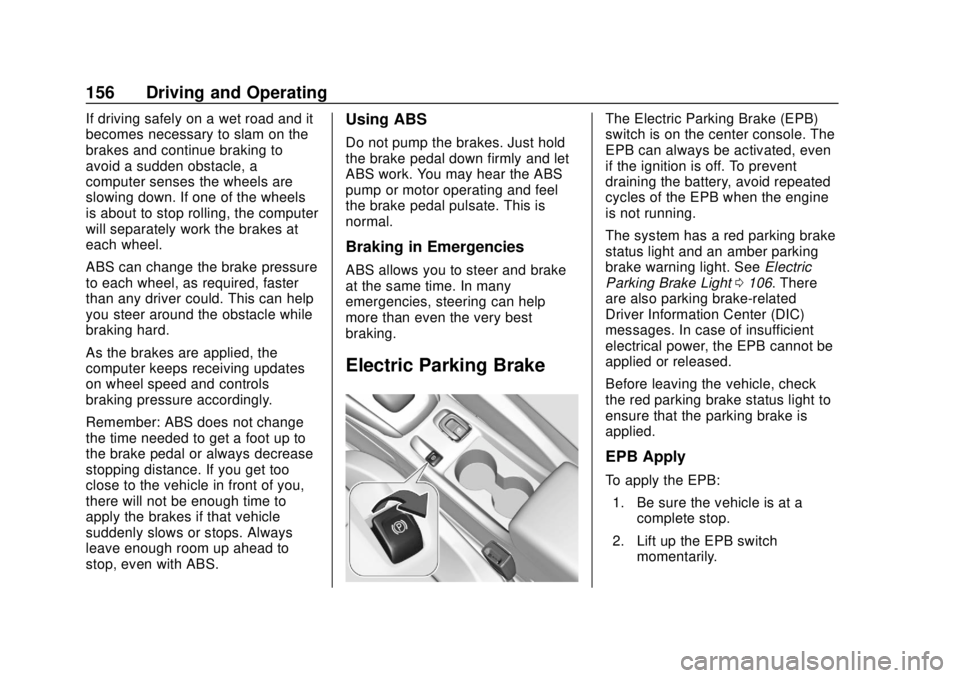
The Electric Parking Brake (EPB)
switch is on the center console. The
EPB can always be activated, even
if the ignition is off. To prevent
draining the battery, avoid repeated
cycles of the EPB when the engine
is not running.
The system has a red parking brake
status light and an amber parking
brake warning light. SeeElectric
Parking Brake Light 0106. There
are also parking brake-related
Driver Information Center (DIC)
messages. In case of insufficient
electrical power, the EPB cannot be
applied or released.
Before leaving the vehicle, check
the red parking brake status light to
ensure that the parking brake is
applied.
EPB Apply
To apply the EPB:
1. Be sure the vehicle is at a complete stop.
2. Lift up the EPB switch momentarily.
Page 160 of 307
Buick Cascada Owner Manual (GMNA-Localizing-U.S.-12461774) - 2019 -
CRC - 3/26/18
Driving and Operating 159
vehicle wheel brakes to assist the
driver in keeping the vehicle on the
intended path.
If cruise control is being used and
TCS or StabiliTrak/ESC begins to
limit wheel spin, cruise control will
disengage. Cruise control may be
turned back on when road
conditions allow.
Both systems come on
automatically when the vehicle is
started and begins to move. The
systems may be heard or felt while
they are operating or while
performing diagnostic checks. This
is normal and does not mean there
is a problem with the vehicle.
It is recommended to leave both
systems on for normal driving
conditions, but it may be necessary
to turn TCS off if the vehicle gets
stuck in sand, mud, ice, or snow.
SeeIf the Vehicle Is Stuck 0142
and “Turning the Systems Off and
On” later in this section.
The indicator light for both systems
is in the instrument cluster. This
light will:
.
Flash when TCS is limiting
wheel spin
. Flash when StabiliTrak/ESC is
activated
. Turn on and stay on when either
system is not working
If either system fails to turn on or to
activate, a message displays in the
Driver Information Center (DIC), and
dcomes on and stays on to
indicate that the system is inactive
and is not assisting the driver in
maintaining control. The vehicle is
safe to drive, but driving should be
adjusted accordingly.
If
dcomes on and stays on:
1. Stop the vehicle. 2. Turn the engine off and wait
15 seconds.
3. Start the engine.
Drive the vehicle. If
dcomes on
and stays on, the vehicle may need
more time to diagnose the problem.
If the condition persists, see your
dealer.
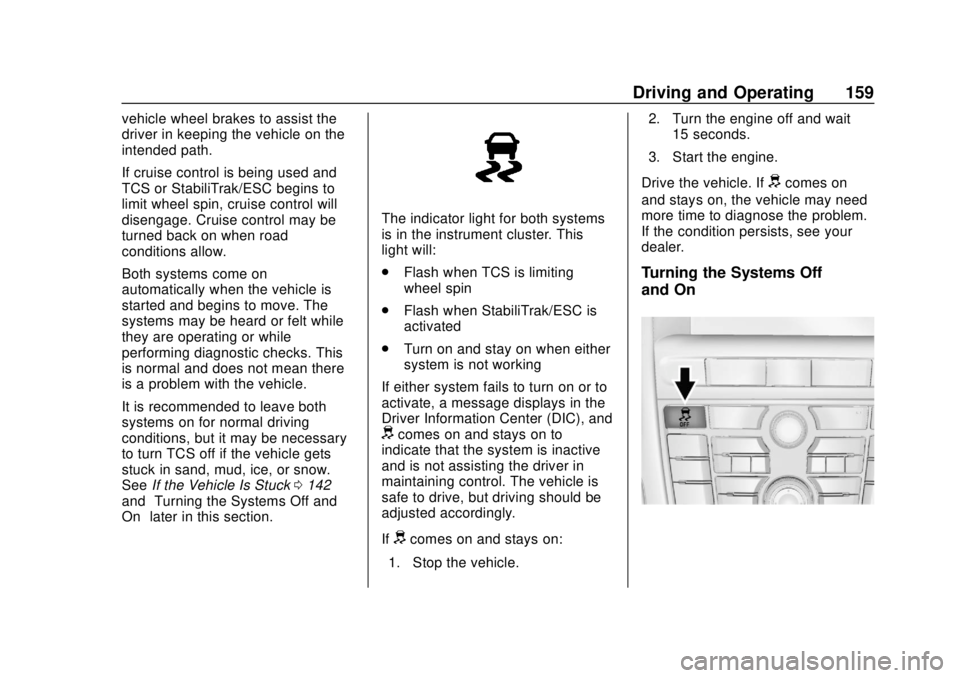
Turning the Systems Off
and On
Page 173 of 307
Buick Cascada Owner Manual (GMNA-Localizing-U.S.-12461774) - 2019 -
CRC - 3/26/18
172 Driving and Operating
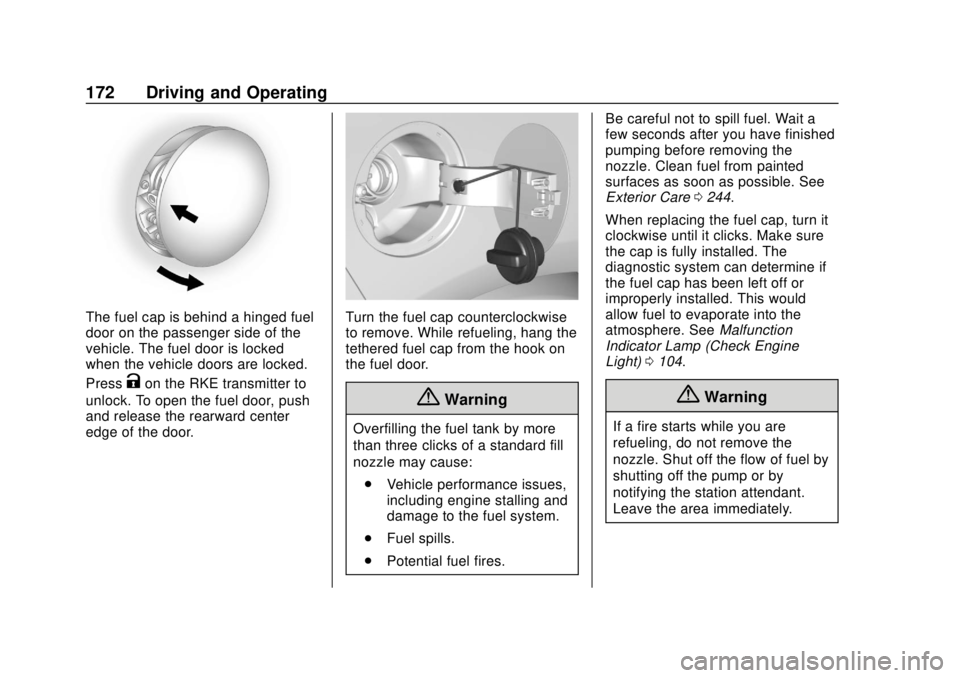
The fuel cap is behind a hinged fuel
door on the passenger side of the
vehicle. The fuel door is locked
when the vehicle doors are locked.
Press
Kon the RKE transmitter to
unlock. To open the fuel door, push
and release the rearward center
edge of the door.
Turn the fuel cap counterclockwise
to remove. While refueling, hang the
tethered fuel cap from the hook on
the fuel door.
{Warning
Overfilling the fuel tank by more
than three clicks of a standard fill
nozzle may cause:
. Vehicle performance issues,
including engine stalling and
damage to the fuel system.
. Fuel spills.
. Potential fuel fires. Be careful not to spill fuel. Wait a
few seconds after you have finished
pumping before removing the
nozzle. Clean fuel from painted
surfaces as soon as possible. See
Exterior Care
0244.
When replacing the fuel cap, turn it
clockwise until it clicks. Make sure
the cap is fully installed. The
diagnostic system can determine if
the fuel cap has been left off or
improperly installed. This would
allow fuel to evaporate into the
atmosphere. See Malfunction
Indicator Lamp (Check Engine
Light) 0104.
{Warning
If a fire starts while you are
refueling, do not remove the
nozzle. Shut off the flow of fuel by
shutting off the pump or by
notifying the station attendant.
Leave the area immediately.
Page 174 of 307
Buick Cascada Owner Manual (GMNA-Localizing-U.S.-12461774) - 2019 -
CRC - 3/26/18
Driving and Operating 173
Caution
If a new fuel cap is needed, be
sure to get the right type of cap
from your dealer. The wrong type
of fuel cap may not fit properly,
may cause the malfunction
indicator lamp to light, and could
damage the fuel tank and
emissions system. See
Malfunction Indicator Lamp
(Check Engine Light)0104.
Filling a Portable Fuel
Container
{Warning
Never fill a portable fuel container
while it is in the vehicle. Static
electricity discharge from the
container can ignite the fuel
vapor. You can be badly burned
and the vehicle damaged if this
occurs. To help avoid injury to you
and others:
(Continued)
Warning (Continued)
.Dispense fuel only into
approved containers.
. Do not fill a container while
it is inside a vehicle, in a
vehicle's trunk, pickup bed,
or on any surface other than
the ground.
. Bring the fill nozzle in
contact with the inside of
the fill opening before
operating the nozzle.
Contact should be
maintained until the filling is
complete.
. Do not smoke while
pumping fuel.
. Avoid using electronic
devices.
Trailer Towing
General Towing
Information
The vehicle is neither designed nor
intended to tow a trailer.
Page 175 of 307
Buick Cascada Owner Manual (GMNA-Localizing-U.S.-12461774) - 2019 -
CRC - 3/26/18
174 Driving and Operating
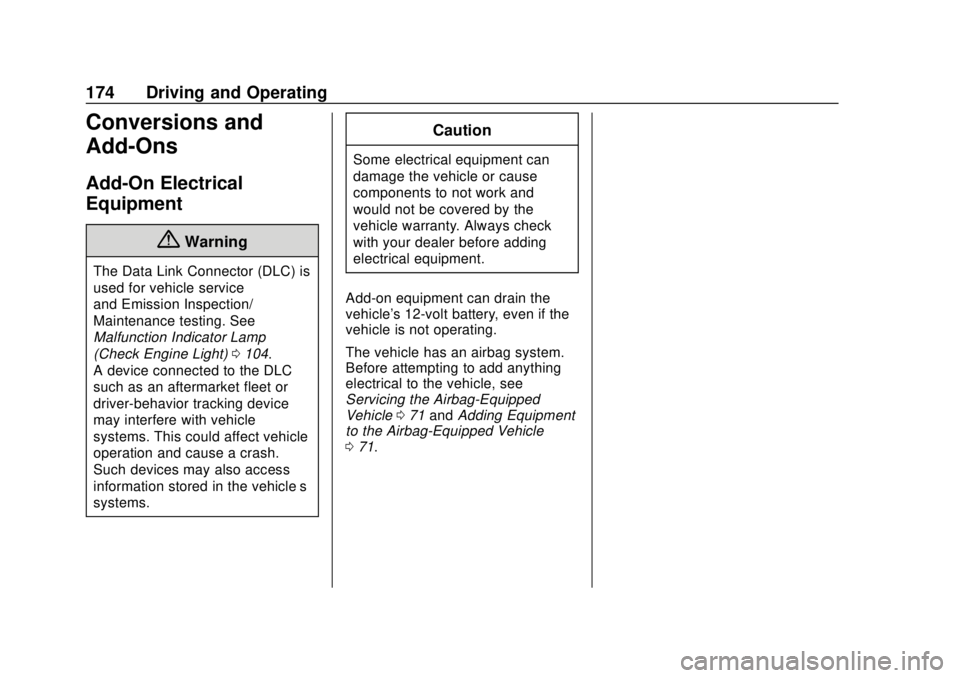
Conversions and
Add-Ons
Add-On Electrical
Equipment
{Warning
The Data Link Connector (DLC) is
used for vehicle service
and Emission Inspection/
Maintenance testing. See
Malfunction Indicator Lamp
(Check Engine Light)0104.
A device connected to the DLC —
such as an aftermarket fleet or
driver-behavior tracking device —
may interfere with vehicle
systems. This could affect vehicle
operation and cause a crash.
Such devices may also access
information stored in the vehicle’s
systems.
Caution
Some electrical equipment can
damage the vehicle or cause
components to not work and
would not be covered by the
vehicle warranty. Always check
with your dealer before adding
electrical equipment.
Add-on equipment can drain the
vehicle's 12-volt battery, even if the
vehicle is not operating.
The vehicle has an airbag system.
Before attempting to add anything
electrical to the vehicle, see
Servicing the Airbag-Equipped
Vehicle 071 and Adding Equipment
to the Airbag-Equipped Vehicle
0 71.
Page 176 of 307
Buick Cascada Owner Manual (GMNA-Localizing-U.S.-12461774) - 2019 -
CRC - 3/26/18
Vehicle Care 175
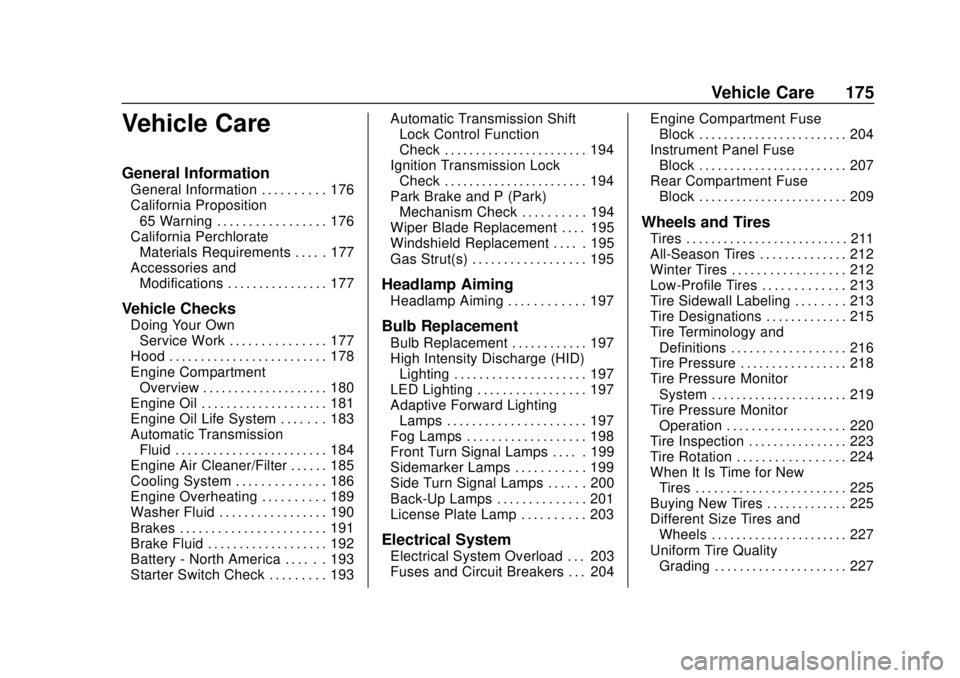
Vehicle Care
General Information
General Information . . . . . . . . . . 176
California Proposition65 Warning . . . . . . . . . . . . . . . . . 176
California Perchlorate Materials Requirements . . . . . 177
Accessories and Modifications . . . . . . . . . . . . . . . . 177
Vehicle Checks
Doing Your OwnService Work . . . . . . . . . . . . . . . 177
Hood . . . . . . . . . . . . . . . . . . . . . . . . . 178
Engine Compartment Overview . . . . . . . . . . . . . . . . . . . . 180
Engine Oil . . . . . . . . . . . . . . . . . . . . 181
Engine Oil Life System . . . . . . . 183
Automatic Transmission Fluid . . . . . . . . . . . . . . . . . . . . . . . . 184
Engine Air Cleaner/Filter . . . . . . 185
Cooling System . . . . . . . . . . . . . . 186
Engine Overheating . . . . . . . . . . 189
Washer Fluid . . . . . . . . . . . . . . . . . 190
Brakes . . . . . . . . . . . . . . . . . . . . . . . 191
Brake Fluid . . . . . . . . . . . . . . . . . . . 192
Battery - North America . . . . . . 193
Starter Switch Check . . . . . . . . . 193 Automatic Transmission Shift
Lock Control Function
Check . . . . . . . . . . . . . . . . . . . . . . . 194
Ignition Transmission Lock Check . . . . . . . . . . . . . . . . . . . . . . . 194
Park Brake and P (Park) Mechanism Check . . . . . . . . . . 194
Wiper Blade Replacement . . . . 195
Windshield Replacement . . . . . 195
Gas Strut(s) . . . . . . . . . . . . . . . . . . 195
Headlamp Aiming
Headlamp Aiming . . . . . . . . . . . . 197
Bulb Replacement
Bulb Replacement . . . . . . . . . . . . 197
High Intensity Discharge (HID) Lighting . . . . . . . . . . . . . . . . . . . . . 197
LED Lighting . . . . . . . . . . . . . . . . . 197
Adaptive Forward Lighting Lamps . . . . . . . . . . . . . . . . . . . . . . 197
Fog Lamps . . . . . . . . . . . . . . . . . . . 198
Front Turn Signal Lamps . . . . . 199
Sidemarker Lamps . . . . . . . . . . . 199
Side Turn Signal Lamps . . . . . . 200
Back-Up Lamps . . . . . . . . . . . . . . 201
License Plate Lamp . . . . . . . . . . 203
Electrical System
Electrical System Overload . . . 203
Fuses and Circuit Breakers . . . 204 Engine Compartment Fuse
Block . . . . . . . . . . . . . . . . . . . . . . . . 204
Instrument Panel Fuse Block . . . . . . . . . . . . . . . . . . . . . . . . 207
Rear Compartment Fuse
Block . . . . . . . . . . . . . . . . . . . . . . . . 209
Wheels and Tires
Tires . . . . . . . . . . . . . . . . . . . . . . . . . . 211
All-Season Tires . . . . . . . . . . . . . . 212
Winter Tires . . . . . . . . . . . . . . . . . . 212
Low-Profile Tires . . . . . . . . . . . . . 213
Tire Sidewall Labeling . . . . . . . . 213
Tire Designations . . . . . . . . . . . . . 215
Tire Terminology andDefinitions . . . . . . . . . . . . . . . . . . 216
Tire Pressure . . . . . . . . . . . . . . . . . 218
Tire Pressure Monitor
System . . . . . . . . . . . . . . . . . . . . . . 219
Tire Pressure Monitor Operation . . . . . . . . . . . . . . . . . . . 220
Tire Inspection . . . . . . . . . . . . . . . . 223
Tire Rotation . . . . . . . . . . . . . . . . . 224
When It Is Time for New Tires . . . . . . . . . . . . . . . . . . . . . . . . 225
Buying New Tires . . . . . . . . . . . . . 225
Different Size Tires and Wheels . . . . . . . . . . . . . . . . . . . . . . 227
Uniform Tire Quality Grading . . . . . . . . . . . . . . . . . . . . . 227