low oil pressure BUICK CENTURY 1993 Owners Manual
[x] Cancel search | Manufacturer: BUICK, Model Year: 1993, Model line: CENTURY, Model: BUICK CENTURY 1993Pages: 324, PDF Size: 17.58 MB
Page 109 of 324

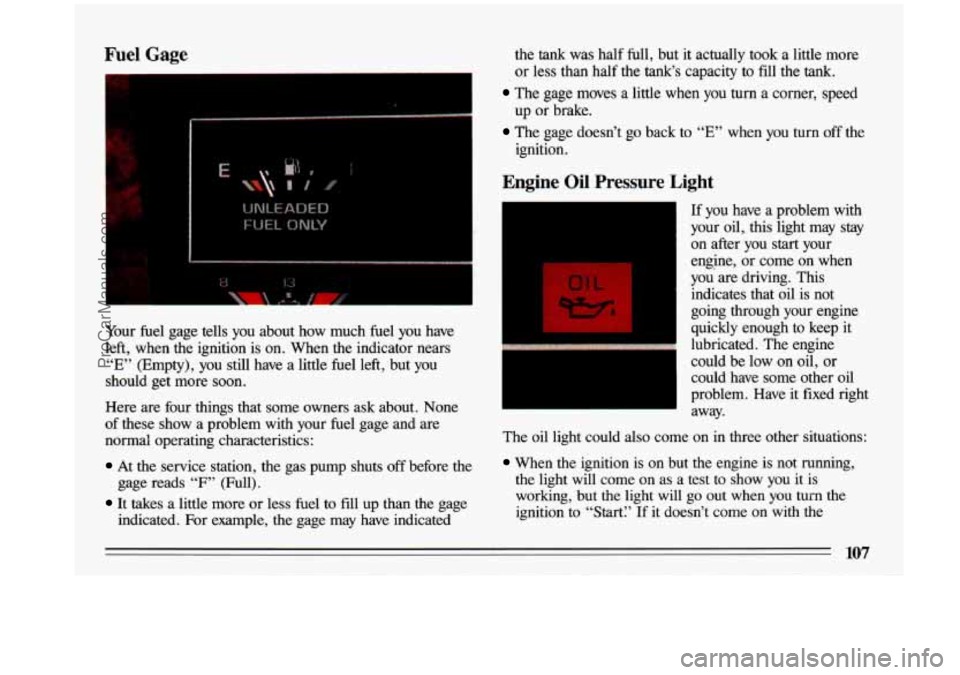
Fuel Gage
Your fuel gage tells you about how much fuel you have
left, when the ignition is on. When the indicator nears
“E” (Empty), you still have a little fuel left, but you
should get more
soon.
Here are four things that some owners ask about. None
of these show a problem with your fuel gage and are
normal operating characteristics:
At the service station, the gas pump shuts off before the
gage reads
“F” (Full).
It takes a little more or less fuel to fill up than the gage
indicated. For example, the gage may have indicated the tank was half
full, but it actually took
a little more
or less than half the
tank‘s capacity to fill the tank.
The gage moves a little when you turn a corner, speed
up or brake.
The gage doesn’t go back to “E” when you turn off the
ignition.
Engine Oil Pressure Light
If you have a problem with
your
oil, this light may stay
on after you start your
engine, or come on when
you are driving.
This
indicates that oil is not
going through your engine
quickly enough to keep it
lubricated. The engine could be low on oil, or
could have some other oil
problem. Have it fixed right
away.
The
oil light could also come on in three other situations:
When the ignition is on but the engine is not funning,
the light will come on as a test to show you it is
working, but the light will go out when
you turn the
ignition to “Start? If it doesn’t come on with the
107
ProCarManuals.com
Page 261 of 324

Using Foam-Qpe Cleaner on Fabric
Vacuum and brush the area to remove any loose dirt.
Always clean a whole trim panel or section. Mask
Mix Multi-Purpose Powdered Cleaner following the
Use suds only and apply with a clean sponge.
Don’t saturate the material.
Don’t rub it roughly.
As soon as you’ve cleaned the section, use a sponge to
remove the suds.
Rinse the section with a clean, wet sponge.
Wipe off what’s left with a slightly damp paper towel
Then dry it immediately with an air hose, a hair dryer
surrounding
trim along stitch or welt lines.
directions on the container label.
or cloth.
or a heat lamp.
Wipe with a clean cloth.
Using Solvent=Qpe Cleaner on Fabric
First, see if you have to use solvent-type cleaner at all.
Some
spots and stains will clean off better with just water
and mild soap.
If you need to use it, then:
Gently scrape excess soil from the trim material with a
clean, dull knife or scraper. Use very little cleaner,
light pressure and clean cloths (preferably cheesecloth).
Cleaning should start at the outside
of the stain,
“feathering” toward the center. Keep changing to a
clean section of the cloth.
When you clean a stain from fabric, immediately dry
the area with an air hose, hair dryer, or heat lamp to
help prevent a cleaning ring. (See the previous
NOTICE.)
259
ProCarManuals.com
Page 289 of 324

Section B: Owner Checks and Services
Listed below are owner checks and services which should be performed at the intervals specified to help
ensure the safety, dependability and emission control
performance of your vehicle. Be
sure any necessary repairs are completed at once.
Whenever any fluids or lubricants are added to your
vehicle, make sure they are the proper ones, as shown in
Section
D.
At Each Fuel Fill (It is important for you or a service station attendant to perform these undechd checks at each fuel fill.)
CHECK
I OR SERVICE I WHAT TO DO
Engine Oil Level
Check the engine oil level and add the proper oil if necessar\
y. See “Engine Oil” in the
Index for further details.
Engine Coolant Level Check the engine coolant level in the coolant recovery tank and add \
the proper coolant mix
I if necessary. See “Engine Coolant” in the Index for furth\
er details. I
Windshield Washer Check the windshield washer fluid level in th\
e windshield washer tank and add the proper
Fluid Level
I fluid if necessary. See “Windshield Washer Fluid” in the \
Index for further details. I
At Least Once a Month
CHECK
I OR SERVICE I WHAT TO DO
Tire Inflation Check tire inflation. Make sure they are inflate\
d to the pressures specified on the Tire-
Loading Information label located on the rear edge of the driv\
er’s door. See “Tires”
in the
Index
for further details.
287
ProCarManuals.com
Page 314 of 324

.
Lane Change Indicator ............................ 87
Lap-Shoulder Safety Belt
Front Automatic
................................. 30
Rear ............................................. 43
Use by Children ............................... .45, 51
Liftgate ...................................... .69, 111
Remote Release Button ........................ .66, 69
Lighter .......................................... 105
Lights Courtesy
....................................... 98
Daytime Running Lights ........................... 96
Halogen Bulbs .................................. 245
Headlights .........................;.. .......... 95
Interior Lights Delay .............................. 97
Map ............................................ 96
Operation ....................................... 95
Parking Lights ................................... 95
Reading ......................................... 97
Removing & Replacing . Bulbs ...................... 245
Replacement Bulbs .............................. 269
Supplemental Inflatable Restraint .................... 36
Taillights ....................................... 95
Warning Lights .................................. 106
Loading Your Vehicle .............................. 249
Lock, Remote Control ............. : ................ 66
Locks ........................................ 65, 69
Long Distance Driving ............................. 164
Low Battery ................................. .108, 185
Low Oil Pressure Warning ........................... 107
Turn Signal and Lane Change Indicator ............... 87
Lubricants and Fluids .............................. 292
Luggage Carrier
Deck
......................................... 100
Roof .......................................... 100
Maintenance Materials ........................... 264
Maintenance Record ............................... 295
Maintenance Schedule .............................. 275
Malfunction Indicator Lamp (Service Engine S&n Light) ... 111
ManualFrontSeat .................................. 14
Map Light ......................................... 96
Master Cylinder, Brake ............................. 243
Methanol in Gasoline ............................... 223
Mileage Chart ...................... 1 .............. 320
Mileage Indicator (see “Odometer”)
Mirrors
Convex Outside Mirror
............................ 99
Inside Manual Day/Night ............................ 98
Inside Rearview Mirror with Reading Lights ........... 98
Manual Adjust ................................... 99.
Power Remote Control ............................ 99
Visor Vanity .................................... 100
MountainDriving ................................. 166
New Vehicle Break-In ............................. 72
Night Driving .................................... 155
312
ProCarManuals.com