start BUICK ENCLAVE 2009 Owner's Manual
[x] Cancel search | Manufacturer: BUICK, Model Year: 2009, Model line: ENCLAVE, Model: BUICK ENCLAVE 2009Pages: 412
Page 1 of 412
Seats and Restraint
System............................... 1-1
Head Restraints
.............. 1-2
Front Seats
.................... 1-3
Rear Seats
.................... 1-8
Safety Belts
..................1-12
Child Restraints
.............1-26
Airbag System
..............1-45
Restraint System
Check
......................1-58
Features and Controls...... 2-1
Keys
............................. 2-2
Doors and Locks
............ 2-8
Windows
......................2-14
Theft-Deterrent
Systems
...................2-16
Starting and Operating Your
Vehicle
.....................2-20
Mirrors
.........................2-31
Object Detection
Systems
...................2-34
OnStar
®System
............2-41
Universal Home Remote
System
.....................2-44Storage Areas
...............2-49
Sunroof
........................2-53
Instrument Panel............... 3-1
Instrument Panel
Overview
.................... 3-4
Climate Controls
............3-20
Warning Lights, Gages, and
Indicators
..................3-28
Driver Information
Center (DIC)
.............3-41
Audio System(s)
............3-64
Driving Your Vehicle......... 4-1
Your Driving, the Road,
and the Vehicle
........... 4-1
Towing
........................4-21
Service and
Appearance Care............... 5-1
Service
.......................... 5-3
Fuel
.............................. 5-5
Checking Things Under
the Hood
.................... 5-9
All-Wheel Drive
.............5-32Headlamp Aiming
..........5-33
Bulb Replacement
.........5-33
Windshield
Replacement
.............5-35
Windshield Wiper Blade
Replacement
.............5-36
Tires
...........................5-36
Appearance Care
..........5-83
Vehicle Identication
......5-90
Electrical System
...........5-91
Capacities and
Specications
............5-98
Maintenance Schedule...... 6-1
Maintenance Schedule
..... 6-1
Customer Assistance
Information........................ 7-1
Customer Assistance and
Information
................. 7-1
Reporting Safety
Defects
.....................7-12
Vehicle Data Recording
and Privacy
...............7-14
Index....................................i-1
2009 Buick Enclave Owner ManualM
Page 4 of 412
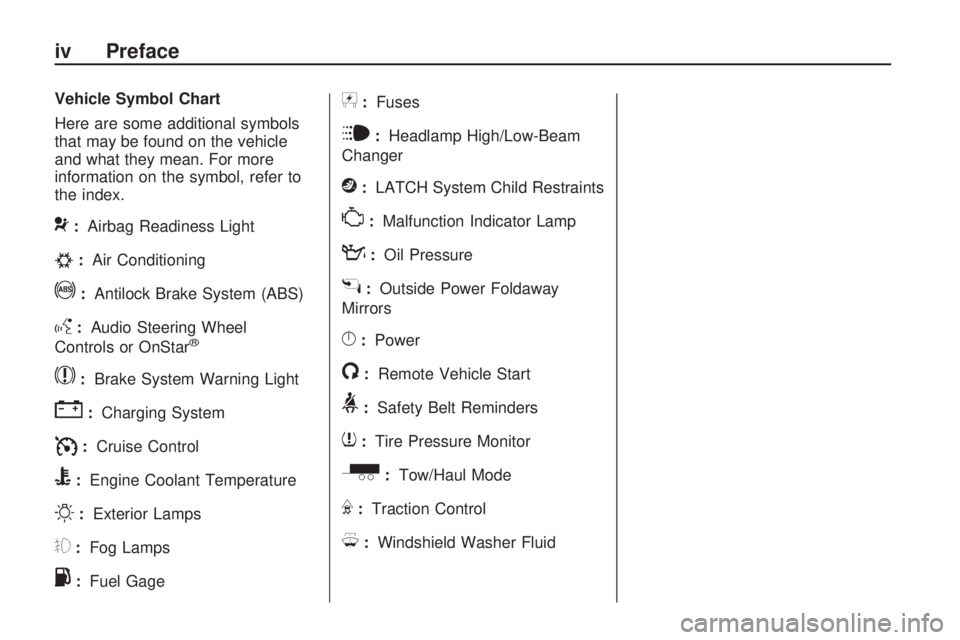
Vehicle Symbol Chart
Here are some additional symbols
that may be found on the vehicle
and what they mean. For more
information on the symbol, refer to
the index.
9:Airbag Readiness Light
#:Air Conditioning
!:Antilock Brake System (ABS)
g:Audio Steering Wheel
Controls or OnStar®
$:Brake System Warning Light
":Charging System
I:Cruise Control
B:Engine Coolant Temperature
O:Exterior Lamps
#:Fog Lamps
.:Fuel Gage
+:Fuses
i:Headlamp High/Low-Beam
Changer
j:LATCH System Child Restraints
*:Malfunction Indicator Lamp
::Oil Pressure
g:Outside Power Foldaway
Mirrors
}:Power
/:Remote Vehicle Start
>:Safety Belt Reminders
7:Tire Pressure Monitor
_:Tow/Haul Mode
F:Traction Control
M:Windshield Washer Fluid
iv Preface
Page 8 of 412
Power Lumbar
If the seats have power lumbar, the
controls used to operate this
feature are located on the outboard
side of the seats. See “Power
Lumbar” underPower Seats on
page 1-3for more information.
To increase or decrease lumbar
support, press and hold the front or
rear of the control (C).
Release the control when the
seatback reaches the desired level
of lumbar support.
The lumbar support may need to be
adjusted when changing the
seating position.
Heated Seats
On vehicles with heated front seats,
the controls are located on the center
console. To operate the heated seats
the engine must be running.
I(Heated Seatback):Press to
turn on the heated seatback.
J(Heated Seat and Seatback):
Press to turn on or off the heated
seat and seatback.
The light on the button will come on
to indicate that the feature is on.
Each time the button is pressed, the
temperature settings change from
high, to medium, to low, to off.
Indicator lights above the button will
show the level of heat selected:
three for high, two for medium, and
one for low.
The passenger seat may take
longer to heat up.
If the vehicle has remote vehicle
start and is started using the remote
keyless entry transmitter, the front
heated seats will be turned on to thehigh setting if it is cold outside. See
“Remote Vehicle Start” under
Remote Keyless Entry (RKE)
System Operation on page 2-3.
When the ignition is turned on, the
heated seat feature will turn off.
To turn the heated seat feature back
on, press the desired button.Heated and Cooled Seats
If the front seats have the heated
and cooled seat feature, the buttons
used to control this feature are
located on the front doors near the
door handle.
{(Cooled Seat):To cool the
entire seat, press the button with the
cooled seat symbol.
This symbol will appear on the
climate control display to indicate
that the feature is on. Press
the button to cycle through the
temperature settings of high,
medium, and low and to turn the
cooled seat off. Indicator bars next
to the symbol designate the
1-4 Seats and Restraint System
Page 9 of 412
level of cooling selected: three for
high, two for medium, and one
for low.
H(Heated Seat and Seatback):
To heat the entire seat, press
the button with the heated seat and
seatback symbol.
This symbol will appear on the
climate control display to indicate
that the feature is on. Press the
button to cycle through the
temperature settings of high,
medium, and low and to turn the
heated seat off. Indicator bars next to
the symbol designate the level of
heat selected: three for high, two for
medium, and one for low.
The heated and cooled seats will be
canceled after the ignition is
turned off. To use the heated and
cooled seat feature after the vehicle
is started, you will need to press
the appropriate seat button again.
Memory Seat and Mirrors
On vehicles with the memory
package, the controls are located on
the driver door.
1:Saves the seating position for
driver 1.
2:Saves the seating position for
driver 2.
S:Recalls the easy exit position.
To save a position in memory:
1. Adjust the driver seat, including
the seatback recliner, both
outside mirrors, and the power
steering column to a comfortable
position.
SeeOutside Power Mirrors on
page 2-32for more information.
Not all vehicles will have the
ability to save and recall
the mirror positions.
2. Press and hold button 1 until
two beeps sound to let you
know that the position has
been stored.A second seating and mirror
position can be programmed by
repeating the above steps and
pressing button 2.
To recall the memory positions, the
vehicle must be in P (Park). Press
and release either button 1 or 2. The
seat, outside mirrors, and power
steering column will move to the
position previously stored. You will
hear a single beep.
If a Remote Keyless Entry (RKE)
transmitter is used to enter the
vehicle and the remote recall
memory feature has been turned
on, automatic seat and mirror
movement will occur. See
“MEMORY SEAT RECALL” under
DIC Vehicle Customization on
page 3-57for more information.
To stop recall movement of
the memory feature at any time,
press one of the power seat
controls, memory buttons, or power
mirror buttons.
Seats and Restraint System 1-5
Page 10 of 412
If something has blocked the driver
seat while recalling a memory
position, the driver seat recall may
stop working. If this happens,
remove the obstruction and press
the appropriate control for the
area that is not recalling for
two seconds. Try pressing the
memory button again. If the memory
position is still not being recalled,
see your dealer/retailer for service.
Easy Exit Seat
S:With the vehicle in P (Park),
press the exit button. You will hear
a single beep. The driver seat
will move back into the exit position.
If the easy exit seat feature has
been turned on in the Driver
Information Center (DIC), automatic
seat movement will occur when
the key is removed from the ignition.
For programming information, see
DIC Vehicle Customization on
page 3-57for more information.
Reclining Seatbacks
Manual Reclining Seatbacks
{CAUTION
You can lose control of the
vehicle if you try to adjust a
manual driver’s seat while the
vehicle is moving. The sudden
movement could startle and
confuse you, or make you push a
pedal when you do not want to.
Adjust the driver’s seat only when
the vehicle is not moving.
{CAUTION
If either seatback is not locked, it
could move forward in a sudden
stop or crash. That could cause
injury to the person sitting there.
Always push and pull on the
seatbacks to be sure they are
locked.On vehicles with seats that have
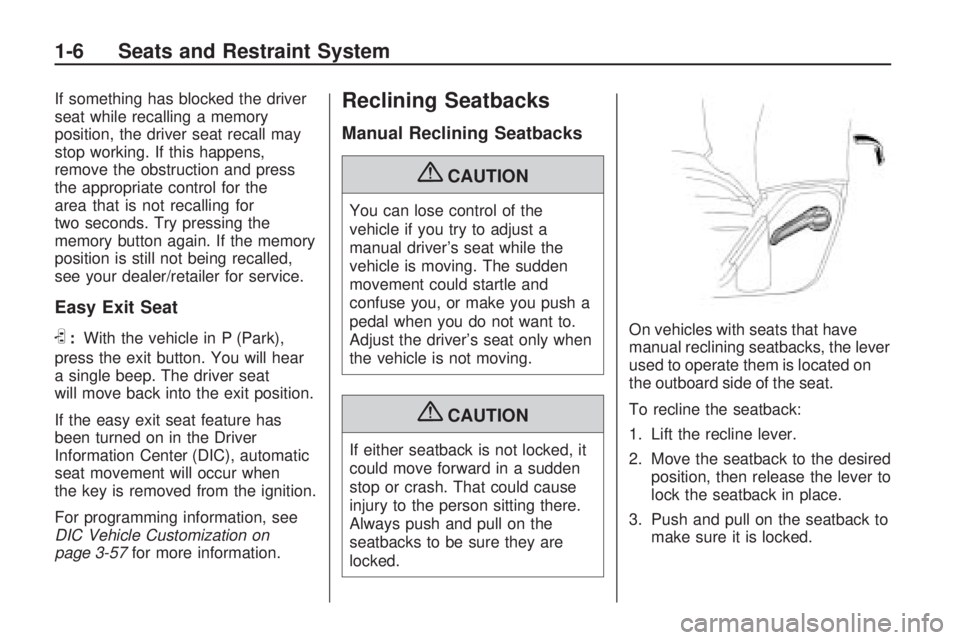
manual reclining seatbacks, the lever
used to operate them is located on
the outboard side of the seat.
To recline the seatback:
1. Lift the recline lever.
2. Move the seatback to the desired
position, then release the lever to
lock the seatback in place.
3. Push and pull on the seatback to
make sure it is locked.
1-6 Seats and Restraint System
Page 24 of 412

Q:What is wrong with this?
A:The belt is twisted across
the body.
{CAUTION
You can be seriously injured by a
twisted belt. In a crash, you would
not have the full width of the belt
to spread impact forces. If a belt
is twisted, make it straight so it
can work properly, or ask your
dealer/retailer to x it.
Lap-Shoulder Belt
All seating positions in the vehicle
have a lap-shoulder belt.
If you are using a rear seating
position with a detachable safety
belt and the safety belt is not
attached, seeThird Row Seats on
page 1-10for instruction on
reconnecting the safety belt to the
mini-buckle.
The following instructions explain
how to wear a lap-shoulder belt
properly.
1. Adjust the seat, if the seat is
adjustable, so you can sit up
straight. To see how, see “Seats”
in the Index.2. Pick up the latch plate and pull
the belt across you. Do not let
it get twisted.
The lap-shoulder belt may lock if
you pull the belt across you
very quickly. If this happens, let
the belt go back slightly to
unlock it. Then pull the belt
across you more slowly.
If the shoulder portion of a
passenger belt is pulled out all
the way, the child restraint
locking feature may be engaged.
If this happens, let the belt go
back all the way and start again.
1-20 Seats and Restraint System
Page 47 of 412

CAUTION (Continued)
Secure rear-facing child restraints
in a rear seat, even if the airbag is
off. If you secure a forward-facing
child restraint in the right front seat,
always move the front passenger
seat as far back as it will go. It is
better to secure the child restraint
in a rear seat.
SeePassenger Sensing System
on page 1-52for additional
information.
If the child restraint has the LATCH
system, seeLower Anchors and
Tethers for Children (LATCH)
on page 1-34for how and where to
install the child restraint using
LATCH. If a child restraint is secured
using a safety belt and it uses a
top tether, seeLower Anchors and
Tethers for Children (LATCH)
on page 1-34for top tether anchor
locations.Do not secure a child seat in a
position without a top tether anchor
if a national or local law requires
that the top tether be anchored, or if
the instructions that come with
the child restraint say that the top
strap must be anchored.
In Canada, the law requires that
forward-facing child restraints have
a top tether, and that the tether
be attached.
You will be using the lap-shoulder
belt to secure the child restraint in
this position. Follow the instructions
that came with the child restraint.
1. Move the seat as far back as it
will go before securing the
forward-facing child restraint.
When the passenger sensing
system has turned off the
right front passenger frontal
airbag and seat-mounted side
impact airbag, the off indicator on
the passenger airbag status
indicator should light and stay litwhen the vehicle is started. See
Passenger Airbag Status
Indicator on page 3-31.
2. Put the child restraint on
the seat.
3. Pick up the latch plate, and run
the lap and shoulder portions of
the vehicle’s safety belt
through or around the restraint.
The child restraint instructions
will show you how.
4. Push the latch plate into the
buckle until it clicks.
Seats and Restraint System 1-43
Page 48 of 412

Position the release button on
the buckle so that the safety belt
could be quickly unbuckled if
necessary.
5. Pull the rest of the shoulder belt
all the way out of the retractor to
set the lock.6. To tighten the belt, push down
on the child restraint, pull the
shoulder portion of the belt to
tighten the lap portion of the belt
and feed the shoulder belt back
into the retractor. When installing
a forward-facing child restraint, it
may be helpful to use your knee
to push down on the child
restraint as you tighten the belt.7. Push and pull the child restraint
in different directions to be sure
it is secure.
If the airbags are off, the off
indicator in the passenger airbag
status indicator will come on
and stay on when the vehicle is
started.
If a child restraint has been installed
and the on indicator is lit, see “If
the On Indicator is Lit for a
Child Restraint ” underPassenger
Sensing System on page 1-52
for more information.
To remove the child restraint,
unbuckle the vehicle safety belt and
let it return to the stowed position.
1-44 Seats and Restraint System
Page 56 of 412
Let only qualied technicians work
on the airbag systems. Improper
service can mean that an airbag
system will not work properly. See
your dealer/retailer for service.
Passenger Sensing
System
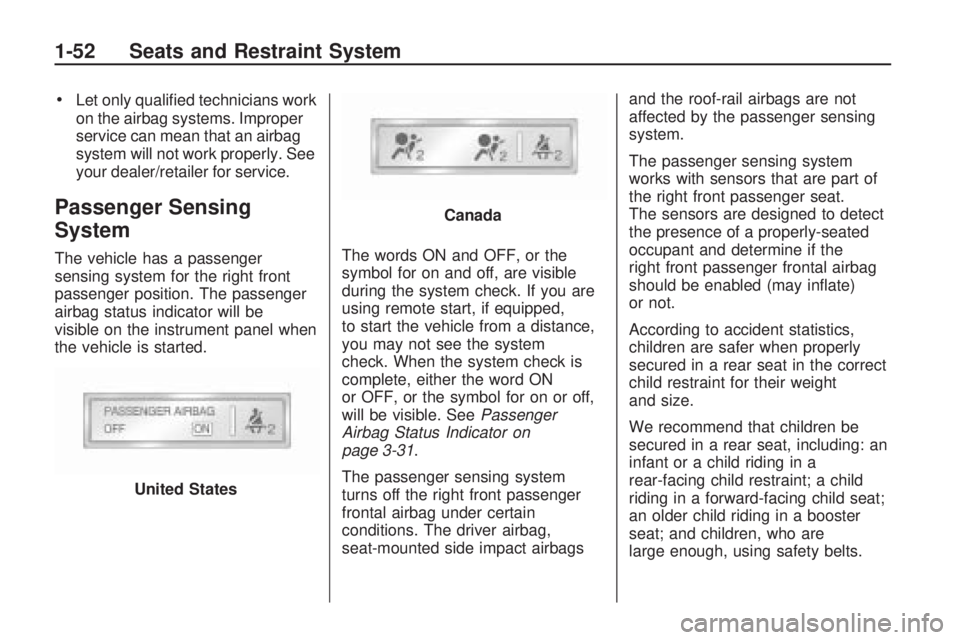
The vehicle has a passenger
sensing system for the right front
passenger position. The passenger
airbag status indicator will be
visible on the instrument panel when
the vehicle is started.The words ON and OFF, or the
symbol for on and off, are visible
during the system check. If you are
using remote start, if equipped,
to start the vehicle from a distance,
you may not see the system
check. When the system check is
complete, either the word ON
or OFF, or the symbol for on or off,
will be visible. SeePassenger
Airbag Status Indicator on
page 3-31.
The passenger sensing system
turns off the right front passenger
frontal airbag under certain
conditions. The driver airbag,
seat-mounted side impact airbagsand the roof-rail airbags are not
affected by the passenger sensing
system.
The passenger sensing system
works with sensors that are part of
the right front passenger seat.
The sensors are designed to detect
the presence of a properly-seated
occupant and determine if the
right front passenger frontal airbag
should be enabled (may inate)
or not.
According to accident statistics,
children are safer when properly
secured in a rear seat in the correct
child restraint for their weight
and size.
We recommend that children be
secured in a rear seat, including: an
infant or a child riding in a
rear-facing child restraint; a child
riding in a forward-facing child seat;
an older child riding in a booster
seat; and children, who are
large enough, using safety belts. United States
Canada
1-52 Seats and Restraint System
Page 58 of 412

The passenger sensing system is
designed to turn on (may inate) the
right front passenger frontal airbag
anytime the system senses that a
person of adult size is sitting properly
in the right front passenger seat.
When the passenger sensing
system has allowed the airbag to be
enabled, the on indicator will light
and stay lit to remind you that
the airbag is active.
For some children, including children
in child restraints, and for very small
adults, the passenger sensing
system may or may not turn off the
right front passenger frontal airbag,
depending upon the person’s seating
posture and body build. Everyone in
the vehicle who has outgrown child
restraints should wear a safety belt
properly — whether or not there is an
airbag for that person.{CAUTION
If the airbag readiness light ever
comes on and stays on, it means
that something may be wrong with
the airbag system. To help avoid
injury to yourself or others, have
the vehicle serviced right away.
SeeAirbag Readiness Light on
page 3-31for more information,
including important safety
information.
If the On Indicator is Lit for a
Child Restraint
If a child restraint has been installed
and the on indicator is lit:
1. Turn the vehicle off.
2. Remove the child restraint from
the vehicle.
3. Remove any additional items
from the seat such as blankets,
cushions, seat covers, seat
heaters, or seat massagers.4. Reinstall the child restraint
following the directions provided
by the child restraint manufacturer
and refer toSecuring a Child
Restraint in the Right Front Seat
Position on page 1-42.
5. If, after reinstalling the child
restraint and restarting the
vehicle, the on indicator is still lit,
turn the vehicle off. Then
slightly recline the vehicle
seatback and adjust the seat
cushion, if adjustable, to
make sure that the vehicle
seatback is not pushing the child
restraint into the seat cushion.
Also make sure the child restraint
is not trapped under the vehicle
head restraint. If this happens,
adjust the head restraint. See
Head Restraints on page 1-2.
1-54 Seats and Restraint System