Information button BUICK ENCLAVE 2010 User Guide
[x] Cancel search | Manufacturer: BUICK, Model Year: 2010, Model line: ENCLAVE, Model: BUICK ENCLAVE 2010Pages: 438, PDF Size: 2.47 MB
Page 33 of 438
Keys, Doors and Windows 2-5
3. Insert the new battery, positiveside facing down. Replace with a
CR2032 or equivalent battery.
4. Snap the transmitter back together.
Remote Vehicle Start
This vehicle may have a remote
starting feature that starts the
engine from outside of the vehicle.
/(Remote Start): This button is
located on the RKE transmitter if the
vehicle has remote start.
Laws in some communities may
restrict the use of remote starters.
For example, some laws may
require a person using the remote
start to have the vehicle in view
when doing so. Check local
regulations for any requirements on
remote starting of vehicles.
Do not use the remote start
feature if the vehicle is low on fuel.
The vehicle could run out of fuel. If the vehicle has the remote start
feature, the RKE transmitter
functions have an increased range
of operation. However, the range
may be less while the vehicle is
running.
There are other conditions which
can affect the performance of the
transmitter, see
Remote Keyless
Entry (RKE) System
on page 2‑2for additional information.
Starting the Engine Using
Remote Start
To start the vehicle:
1. Aim the RKE transmitter at the vehicle.
2. Press
Qon the RKE transmitter.
3. Immediately after completing Step 2, press and hold
/until
the parking lamps flash. If the
vehicle's lights can not be seen,
press and hold
/for at least
four seconds. When the vehicle starts the parking
lamps will turn on and remain on as
long as the engine is running.
The doors will be locked and the
climate control system will operate
automatically if the vehicle has the
automatic system, or at the same
setting as when the vehicle was last
turned off.
If the vehicle has an automatic
climate control system and heated
seats, the heated seats turn on
during colder outside temperatures
and shut off when the key is turned
to ON/RUN. See
Heated Front
Seats
on page 3‑7or Heated and
Ventilated Front Seatson
page 3‑8for more information.
The rear window defogger and
heated mirrors, if the vehicle has
them, turn on during colder outside
temperatures and turn off when the
key is turned to ON/RUN.
Page 34 of 438
2-6 Keys, Doors and Windows
After entering the vehicle during a
remote start, insert and turn the key
to the ON/RUN position to drive the
vehicle.
If the vehicle is left running it
automatically shuts off after
10 minutes unless a time extension
has been done.
Extending Engine Run Time
To extend the engine run time by
10 minutes, repeat Steps 1 though 3
while the engine is still running.
The engine run time can only be
extended if it is the first remote start
since the vehicle has been driven.
Remote start can be extended
one time.
If the remote start procedure is used
again before the first 10 minute
time frame has ended, the first
10 minutes will immediately expire
and the second 10 minute time
frame will start.
For example, if the lock button and
then the remote start buttons are
pressed again after the vehicle hasbeen running for five minutes,
10 minutes are added, allowing the
engine to run for a total of
15 minutes.
A maximum of two remote starts or
remote start attempts are allowed
between ignition cycles.
After the vehicle's engine has been
started two times using the remote
start button, the ignition must be
turned on and then back off before
the remote start procedure can be
used again.
Shutting the Engine Off After a
Remote Start
To manually shut off a remote start:
.Aim the RKE transmitter at the
vehicle and press
/until the
parking lamps turn off.
.Turn on the hazard warning
flashers.
.Turn the ignition switch on and
then off.
Conditions in Which the
Remote Start Will Not Work
The vehicle cannot be started using
the remote start feature if the key is
in the ignition, the hood is open, or if
there is an emission control system
malfunction.
The engine turns off during a remote
start if the coolant temperature gets
too high or if the oil pressure
gets low.
Vehicles that have the remote
vehicle start feature are shipped
from the factory with the remote
vehicle start system enabled. The
system may be enabled or disabled
through the DIC if the vehicle has
DIC buttons. See “REMOTE
START” underVehicle
Personalization
on page 5‑40for
additional information. If the vehicle
does not have DIC buttons, see
your dealer/retailer to enable or
disable the remote start system.
Page 36 of 438
2-8 Keys, Doors and Windows
Pressing the power lock switch
twice or the lock button on the RKE
transmitter twice will override the
delayed locking feature and
immediately lock all the doors.
This feature will not operate if the
key is in the ignition.
This feature can be programmed by
using the Driver Information Center
(DIC). See“DELAY DOOR LOCK”
under Vehicle Personalization
on
page 5‑40.
Automatic Door Locks
Vehicles with an automatic lock/
unlock feature enable you to
program the vehicle's power door
locks. This feature can be
programmed through the Driver
Information Center (DIC). See
Vehicle Personalization
on
page 5‑40for more information.
Lockout Protection
This feature protects you from
locking the key in the vehicle when
the key is in the ignition and a front
door is open.
If the driver side power door lock
switch is pressed when the driver's
door is open and the key is in the
ignition, all of the doors will lock and
then the driver door will unlock.
If the passenger side power door
lock switch is pressed when the
front passenger door is open and
the key is in the ignition, all of the
doors will lock and then the front
passenger door will unlock.
Safety Locks
The vehicle has rear door security
locks to prevent passengers from
opening the rear doors from the
inside.
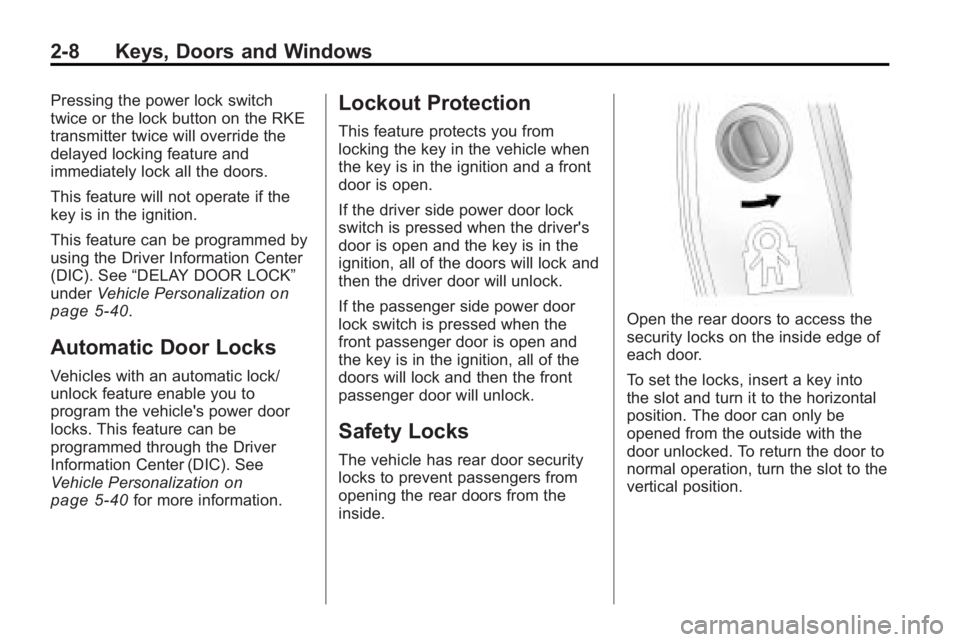
Open the rear doors to access the
security locks on the inside edge of
each door.
To set the locks, insert a key into
the slot and turn it to the horizontal
position. The door can only be
opened from the outside with the
door unlocked. To return the door to
normal operation, turn the slot to the
vertical position.
Page 37 of 438
Keys, Doors and Windows 2-9
Doors
Liftgate
Manual Liftgate Operation
{WARNING
Exhaust gases can enter the
vehicle if it is driven with the
liftgate, trunk/hatch open, or with
any objects that pass through the
seal between the body and the
trunk/hatch or liftgate. Engine
exhaust contains Carbon
Monoxide (CO) which cannot be
seen or smelled. It can cause
unconsciousness and even death.(Continued)
WARNING (Continued)
If the vehicle must be driven with
the liftgate, or trunk/hatch open:
.Close all of the windows.
.Fully open the air outlets on
or under the instrument
panel.
.Adjust the Climate Control
system to a setting that
brings in only outside air and
set the fan speed to the
highest setting. See Climate
Control System in the Index.
.If the vehicle is equipped with
a power liftgate, disable the
power liftgate function.
For more information about
carbon monoxide, see Engine
Exhaust on page 9‑22. To unlock the liftgate, use the
power door lock switch or press
the door unlock button on the
RKE transmitter twice. See
Remote
Keyless Entry (RKE) System
Operation on page 2‑3.
To open the liftgate, press the
touchpad under the liftgate handle.
The vehicle must be in P (Park) to
open the liftgate. To close the
liftgate, use the pull cup or pull strap
as an aid.
The liftgate will not open if the
battery is disconnected or has low
voltage. The liftgate will resume
operation when the battery is
reconnected and charged.
If the battery is properly connected
and has adequate voltage, and the
liftgate still will not function, the
vehicle should be taken to a
dealers/retailer for service.
Page 38 of 438
2-10 Keys, Doors and Windows
Power Liftgate Operation
The vehicle may have a power
liftgate. The vehicle must be in
P (Park) to use this feature.
The taillamps will flash and a chime
will sound when the power liftgate
is used.
{WARNING
You or others could be injured if
caught in the path of the power
liftgate. Make sure there is no one
in the way of the liftgate as it is
opening and closing.
Notice: If you open the liftgate
without checking for overhead
obstructions such as a garage
door, you could damage the
liftgate or the liftgate glass.
Always check to make sure the
area above and behind the liftgate
is clear before opening it. The power liftgate can be power
opened and closed in the
following ways:
.Press and hold the power liftgate
button on the RKE transmitter.
See
Remote Keyless Entry
(RKE) System Operation
on
page 2‑3for more information.
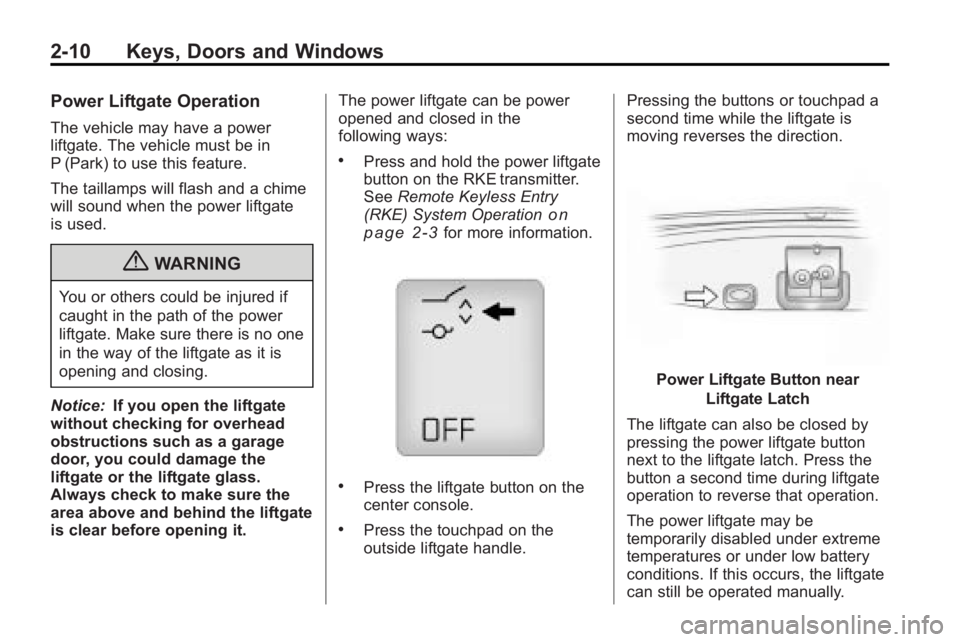
.Press the liftgate button on the
center console.
.Press the touchpad on the
outside liftgate handle. Pressing the buttons or touchpad a
second time while the liftgate is
moving reverses the direction.
Power Liftgate Button near
Liftgate Latch
The liftgate can also be closed by
pressing the power liftgate button
next to the liftgate latch. Press the
button a second time during liftgate
operation to reverse that operation.
The power liftgate may be
temporarily disabled under extreme
temperatures or under low battery
conditions. If this occurs, the liftgate
can still be operated manually.
Page 46 of 438
2-18 Keys, Doors and Windows
Interior Mirrors
Automatic Dimming
Rearview Mirror
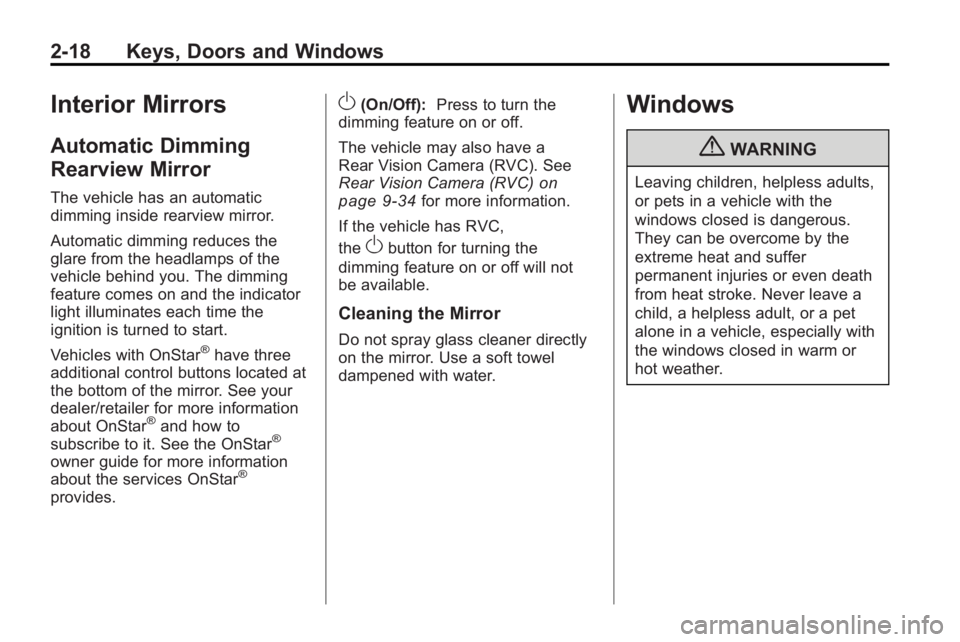
The vehicle has an automatic
dimming inside rearview mirror.
Automatic dimming reduces the
glare from the headlamps of the
vehicle behind you. The dimming
feature comes on and the indicator
light illuminates each time the
ignition is turned to start.
Vehicles with OnStar
®have three
additional control buttons located at
the bottom of the mirror. See your
dealer/retailer for more information
about OnStar
®and how to
subscribe to it. See the OnStar®
owner guide for more information
about the services OnStar®
provides.
O(On/Off): Press to turn the
dimming feature on or off.
The vehicle may also have a
Rear Vision Camera (RVC). See
Rear Vision Camera (RVC)
on
page 9‑34for more information.
If the vehicle has RVC,
the
Obutton for turning the
dimming feature on or off will not
be available.
Cleaning the Mirror
Do not spray glass cleaner directly
on the mirror. Use a soft towel
dampened with water.
Windows
{WARNING
Leaving children, helpless adults,
or pets in a vehicle with the
windows closed is dangerous.
They can be overcome by the
extreme heat and suffer
permanent injuries or even death
from heat stroke. Never leave a
child, a helpless adult, or a pet
alone in a vehicle, especially with
the windows closed in warm or
hot weather.
Page 53 of 438

Seats and Restraints 3-3
Front Seats
Power Seat Adjustment
Driver Seat with Power SeatControl, Power Recline,
and Power Lumbar shown
A. Power Seat Adjustment Control
B. Reclining Seatbacks
on
page 3‑5.
C. Lumbar Adjustment
on
page 3‑4. If the vehicle has power seats, the
controls are located on the outboard
side of the seats.
Move the seat forward or rearward
by sliding the power seat
adjustment control (A) forward or
rearward.
The vehicle may have additional
features to adjust the power seat:
.Raise or lower the entire seat by
moving the power seat
adjustment control (A) up
or down.
.Raise or lower the front part of
the seat cushion by moving the
front of the control up or down.
.Raise or lower the rear part of
the seat cushion by moving the
rear of the control up or down.
The vehicle may have a memory
function which allows seat settings
to be saved and recalled. See
“Memory Seat and Mirrors” later in
this section for more information.
Memory Seat and Mirrors
On vehicles with the memory
package, the controls are located on
the driver door.
1: Saves the seating position for
driver 1.
2: Saves the seating position for
driver 2.
S: Recalls the easy exit position.
To save a position in memory:
1. Adjust the driver seat, including the seatback recliner, both
outside mirrors, and the power
steering column to a comfortable
position.
See Power Mirrors
on
page 2‑16for more information.
Not all vehicles will have the
ability to save and recall the
mirror positions.
2. Press and hold button 1 until two beeps sound to let you know
that the position has been
stored.
Page 54 of 438
3-4 Seats and Restraints
A second seating and mirror
position can be programmed by
repeating the above steps and
pressing button 2.
To recall the memory positions, the
vehicle must be in P (Park). Press
and release either button 1 or 2. The
seat, outside mirrors, and power
steering column will move to the
position previously stored. You will
hear a single beep.
If the RKE transmitter is used to
enter the vehicle and the remote
recall memory feature has been
turned on, automatic seat and mirror
movement will occur. See
“MEMORY SEAT RECALL”under
Vehicle Personalization
on
page 5‑40for more information.
To stop recall movement of the
memory feature at any time, press
one of the power seat controls,
memory buttons, or power mirror
buttons. If something has blocked the driver
seat while recalling a memory
position, the driver seat recall may
stop working. If this happens,
remove the obstruction and press
the appropriate control for the area
that is not recalling for two seconds.
Try pressing the memory button
again. If the memory position is still
not being recalled, see your dealer/
retailer for service.
Easy Exit Seat
S:
With the vehicle in P (Park),
press the exit button. You will hear a
single beep. The driver seat will
move back into the exit position.
If the easy exit seat feature has
been turned on in the Driver
Information Center (DIC), automatic
seat movement will occur when the
key is removed from the ignition.
For programming information, see
Vehicle Personalization
on
page 5‑40for more information.
Lumbar Adjustment
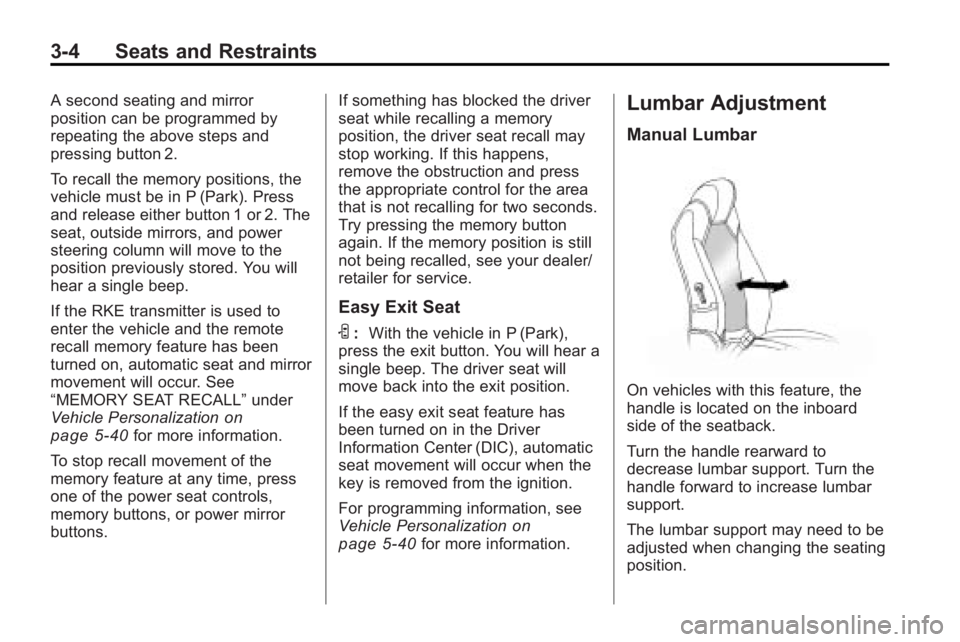
Manual Lumbar
On vehicles with this feature, the
handle is located on the inboard
side of the seatback.
Turn the handle rearward to
decrease lumbar support. Turn the
handle forward to increase lumbar
support.
The lumbar support may need to be
adjusted when changing the seating
position.
Page 73 of 438

Seats and Restraints 3-23
3. Push the latch plate into thebuckle until it clicks.
4. Pull up on the latch plate to make sure it is secure. If the belt
is not long enough, see Safety
Belt Extender on page 3‑27.
Position the release button on
the buckle so that the safety belt
could be quickly unbuckled if
necessary. 5. If equipped with a shoulder belt
height adjuster, move it to the
height that is right for you.
See “Shoulder Belt Height
Adjustment” later in this section
for instructions on use and
important safety information.
6. To make the lap part tight, pull
up on the shoulder belt.
It may be necessary to pull the
stitching on the safety belt
through the latch plate to fully
tighten the lap belt on smaller
occupants.
To unlatch the belt, push the button
on the buckle. The belt should
return to its stowed position. Slide
the latch plate up the safety belt
webbing when the safety belt is not
in use. The latch plate should rest
on the stitching on the safety belt,
near the guide loop on the side wall.
Before a door is closed, be sure the
safety belt is out of the way. If a
door is slammed against a safety
belt, damage can occur to both the
safety belt and the vehicle.
Page 122 of 438
5-4 Instruments and Controls
To navigate folders on an iPod or
USB device for vehicles without a
navigation system:
1. Press and hold
worxwhile
listening to a song until the
contents of the current folder
display on the radio display.
2. Press and hold
xto go back to
the previous folder list.
3. Press and release
worxto
scroll up or down the list.
.To select a folder, press
and hold
w, or press¨
when the folder is
highlighted.
.To go back further in the
folder list, press and
hold
x. To navigate folders on an iPod or
USB device for vehicles with a
navigation system:
1. Go to the Music Navigator by
first touching the center touch
screen folder button in the main
audio page.
2. While in Music Navigator, select the folder/artist/genre/category,
etc. using the touch screen.
3. Press and release
xto scroll
through the selected music list.
Touch the track label on the
touch screen to highlight and
begin playing the track from
that list.
4. Press and hold
xto quickly
scroll through the selected
music list
b g(Mute/Push to Talk): Press
to silence the vehicle speakers only.
Press again to turn the sound on.
For vehicles with Bluetooth or
OnStar
®systems, press and hold
for longer than two seconds to interact with those systems. See
Bluetooth
on page 7‑44and the
OnStar Owner's Guide for more
information.
c(End): Press to reject an
incoming call, or end a current call.
SRCE (Source/Voice
Recognition): Press to switch
between the radio, CD, and for
vehicles with, DVD, front auxiliary,
and rear auxiliary.
For vehicles with the navigation
system, press and hold this button
for longer than one second to
initiate voice recognition. See “Voice
Recognition” in the Navigation
System manual for more
information.
¨(Seek): Press to go to the next
radio station while in AM,
FM, or XM™.
For vehicles with or without a
navigation system:
Press
¨to go to the next track or
chapter while sourced to the CD or
DVD slot.