delay BUICK ENCLAVE 2010 User Guide
[x] Cancel search | Manufacturer: BUICK, Model Year: 2010, Model line: ENCLAVE, Model: BUICK ENCLAVE 2010Pages: 438, PDF Size: 2.47 MB
Page 176 of 438
6-6 Lighting
Lighting Features
Entry Lighting
For vehicles with courtesy lamps,
they come on and stay on for a set
time whenever the unlock symbol is
pressed on the Remote Keyless
Entry (RKE) transmitter, if the
vehicle has one.
If a door is opened, the lamps stay
on while it is open and then turn off
automatically about 20 seconds
after the door is closed. If the unlock
symbol is pressed and no door is
opened, the lamps turn off after
about 20 seconds.
Entry lighting includes a feature
called theater dimming. With theater
dimming, the lamps do not turn off
at the end of the delay time.
Instead, they slowly dim and then
go out. The delay time is canceled if
the ignition key is turned to ON/RUN
or the power door lock switch is
pressed. The lamps will dim
right away.When the ignition is on, illuminated
entry is inactive, which means the
courtesy lamps will not come on
unless a door is opened.Delayed Entry Lighting
Delayed entry lighting illuminates
the interior for a period of time after
all the doors have been closed.
The ignition must be off for delayed
entry lighting to work. Immediately
after all the doors have been closed,
the delayed entry lighting feature
continues to work until one of the
following occurs:
.The ignition is in ON/RUN.
.The doors are locked.
.An illumination period of about
25 seconds has elapsed.
If during the illumination period a
door is opened, the timed
illumination period is canceled and
the interior lamps remain on.
Delayed Exit Lighting
Delayed exit lighting illuminates the
interior for a period of time after the
key is removed from the ignition.
The ignition must be off for delayed
exit lighting to work. When the key
is removed, interior illumination
activates and remains on until one
of the following occurs:
.The ignition is in ON/RUN.
.The power door locks are
activated.
.An illumination period of
20 seconds has elapsed.
If during the illumination period a
door is opened, the timed
illumination period will be canceled
and the interior lamps will remain on
because a door is open.
Page 197 of 438
Infotainment System 7-19
.If the pause icon is showing on
display, the system is in
playback mode.
.If the DVD screen is off, press
the play button to turn the
screen on.
Some DVDs begin playing after the
previews have finished, although
there could be a delay of up to
30 seconds. If the DVD does not
begin playing the movie
automatically, press the softkey
under the play/pause icon displayed
on the radio. If the DVD still does
not play, refer to the on-screen
instructions, if available.
c(Stop): Press to stop playing,
rewinding, or fast forwarding a DVD.
r(Enter): Press to select the
choices that are highlighted in
any menu.
y(Menu): Press to access the
DVD menu. The DVD menu is
different on every DVD. Use the
softkeys under the navigation
arrows to navigate the cursor
through the DVD menu. After making a selection press this
button. This button only operates
when using a DVD.
Nav (Navigate):
Press to display
directional arrows for navigating
through the menus.
q(Return): Press to exit the
current active menu and return to
the previous menu. This button
operates only when a DVD is
playing and a menu is active.
DVD-A (Audio) Display Buttons
Once a DVD-A is inserted, the radio
display menu shows several icons.
Press the softkeys under any icon
during DVD playback. See the icon
list below for more information.
The rear seat operator can navigate
the DVD-A menus and controls
through the remote control. See
“Remote Control”, under Rear Seat
Entertainment (RSE) System
on
page 7‑34for more information.
The Video Screen does not
automatically power on when the
DVD-A is inserted into the DVD slot. It must be manually turned on by
the rear seat occupant through the
remote control power button.
r/j(Play/Pause):
Press either
the play or pause icon displayed on
the radio system, to toggle between
pausing or restarting playback of
a DVD.
.If the forward arrow is showing
on display, the system is in
pause mode.
.If the pause icon is showing on
display, the system is in
playback mode.
qGroupr: Press to cycle
through musical groupings on the
DVD-A disc.
Nav (Navigate): Press to display
directional arrows for navigating
through the menus.
e(Audio Stream): Press to cycle
through audio stream formats
located on the DVD-A disc. The
video screen shows the audio
stream changing.
Page 234 of 438
8-2 Climate Controls
Display Function
Each time the temperature, mode,
or fan control buttons are pressed,
the climate control display shows
that function along with the inside
temperature setting. The outside
temperature is displayed on the
instrument panel cluster.
O(On/Off):Press to turn the
climate control system on or off.
While the system is off, outside air
still enters through the floor outlets,
but the air delivery mode can be
adjusted.
The climate control system will also
turn on if either the fan control,
defrost, AUTO, or air conditioning
buttons are pressed.
Automatic Operation
AUTO (Automatic): The system
automatically controls the inside
temperature, the air delivery, and
the fan speed. To use automatic mode:
1. Press the AUTO button.
When AUTO is selected, the
current temperature(s) selected
and AUTO is shown on the
display. The current air delivery
mode and fan speed also
appear for approximately
five seconds.
When AUTO is selected, the air
conditioning and air inlet are
automatically controlled. The air
conditioning runs when the
outside temperature is over
4°C (40°F). The system is
automatically set to outside air,
unless it is hot outside and
then the air inlet changes to
recirculation mode to help
quickly cool the vehicle. The
recirculation indicator light will
come on. 2. Set the temperature for the
driver and passenger.
To find a comfortable setting,
start with a 22°C (73°F)
temperature setting and allow
about 20 minutes for the system
to regulate. Use the driver's side
or passenger side temperature
buttons to adjust the
temperature setting as
necessary. The system will
remain at the selected setting.
Choosing the warmest or coolest
temperatures does not cause the
vehicle to heat or cool more
quickly.
To avoid blowing cold air in cold
weather, the system delays
turning on the fan until warm air
is available. Press the fan
control to override this delay and
select the fan speed.
Page 277 of 438
Driving and Operating 9-35
WARNING (Continued)
Your judged distances using the
screen will differ from actual
distances.
So if you do not use proper care
before backing up, you could hit a
vehicle, child, pedestrian,
bicyclist, or pet, resulting in
vehicle damage, injury, or death.
Even though the vehicle has the
RVC system, always check
carefully before backing up by
checking behind and around the
vehicle.
Vehicles Without Navigation
System
The rear vision camera system is
designed to help the driver when
backing up by displaying a view of
the area behind the vehicle. When
the key is in the ON/RUN position
and the driver shifts the vehicle into
R (Reverse), the video image
automatically appears on the inside
rear view mirror. Once the driver
shifts out of R (Reverse), the video
image automatically disappears
from the inside rear view mirror.
Turning the Rear Vision Camera
System Off or On
To turn off the rear vision camera
system, press and hold
z, located
on the inside rearview mirror, until
the left indicator light turns off. The
rear camera vision display is now
disabled. To turn the rear vision camera
system on again, press and
hold
zuntil the left indicator light
illuminates. The rear vision camera
system display is now enabled and
the display will appear in the mirror
normally.
Vehicles With Navigation
System
The rear vision camera system is
designed to help the driver when
backing up by displaying a view of
the area behind the vehicle. When
the driver shifts the vehicle into
R (Reverse), the video image
automatically appears on the
navigation screen. Once the driver
shifts out of R (Reverse), the
navigation screen will go back to the
last screen that had been displayed,
after a delay.
Page 278 of 438
9-36 Driving and Operating
Turning the Rear Vision Camera
System On or Off
To turn the rear vision camera
system on or off:
1. Shift into P (Park).
2. Press the MENU button to enterthe configure menu options, then
press the MENU hard key to
select Display or touch the
Display screen button.
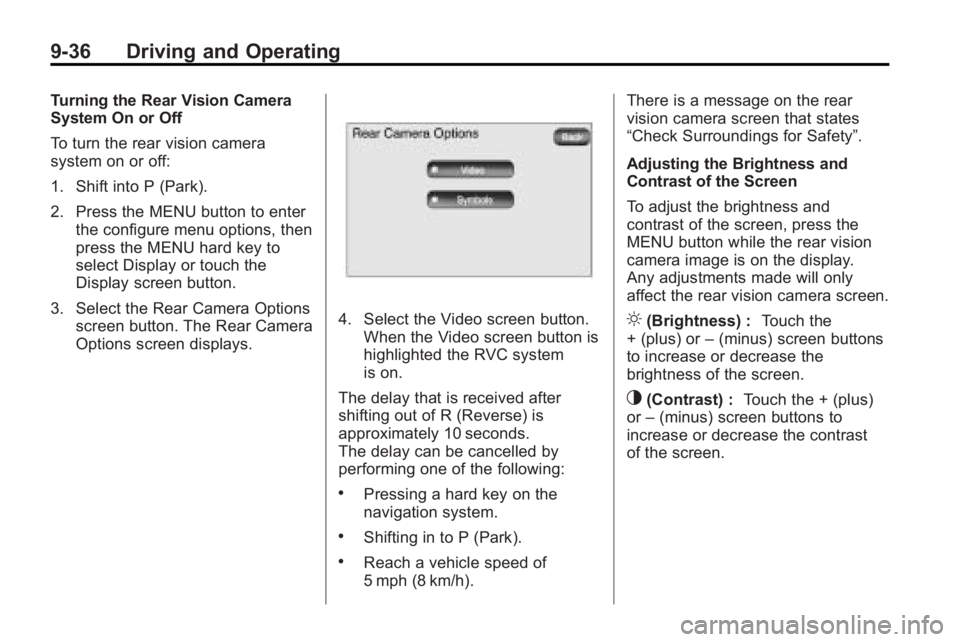
3. Select the Rear Camera Options screen button. The Rear Camera
Options screen displays.
4. Select the Video screen button.
When the Video screen button is
highlighted the RVC system
is on.
The delay that is received after
shifting out of R (Reverse) is
approximately 10 seconds.
The delay can be cancelled by
performing one of the following:
.Pressing a hard key on the
navigation system.
.Shifting in to P (Park).
.Reach a vehicle speed of
5 mph (8 km/h). There is a message on the rear
vision camera screen that states
“Check Surroundings for Safety”.
Adjusting the Brightness and
Contrast of the Screen
To adjust the brightness and
contrast of the screen, press the
MENU button while the rear vision
camera image is on the display.
Any adjustments made will only
affect the rear vision camera screen.
](Brightness) :
Touch the
+ (plus) or –(minus) screen buttons
to increase or decrease the
brightness of the screen.
_(Contrast) : Touch the + (plus)
or –(minus) screen buttons to
increase or decrease the contrast
of the screen.
Page 429 of 438
INDEX i-3
CleaningExterior Care . . . . . . . . . . . . . . . 10-88
Interior Care . . . . . . . . . . . . . . . . 10-92
Climate Control Systems Dual Automatic . . . . . . . . . . . . . . . . 8-1
Rear . . . . . . . . . . . . . . . . . . . . . . 8-7, 8-8
Clock . . . . . . . . . . . . . . . . . . . . . . . . . . . 5-8
Cluster, IP . . . . . . . . . . . . . . . . . . . . . 5-13
Collision Damage Repair . . . . . 13-10
Compact Spare Tire . . . . . . . . . . 10-80
Compass . . . . . . . . . . . . . . . . . . . . . . . 5-6
Compressor Kit, Tire
Sealant . . . . . . . . . . . . . . . . . . . . . . 10-60
Control of a Vehicle . . . . . . . . . . . . . 9-3
Convenience Net . . . . . . . . . . . . . . . 4-3
Convex Mirrors . . . . . . . . . . . . . . . . 2-15
Coolant Engine . . . . . . . . . . . . . . . . . . . . . . 10-14
Engine Temperature Gage . . . . 5-15
Engine TemperatureWarning Light . . . . . . . . . . . . . . . 5-23
Cooling System . . . . . . . . . . . . . . . 10-14 Engine Messages . . . . . . . . . . . . 5-33
Courtesy Transportation Program . . . . . . . . . . . . . . . . . . . . . . 13-8 Covers
Cargo . . . . . . . . . . . . . . . . . . . . . . . . . . 4-3
Engine . . . . . . . . . . . . . . . . . . . . . . . . 10-7
Cruise Control . . . . . . . . . . . . . . . . . 9-30 Light . . . . . . . . . . . . . . . . . . . . . . . . . . 5-25
Messages . . . . . . . . . . . . . . . . . . . . 5-32
Cupholders . . . . . . . . . . . . . . . . . . . . . 4-1
Customer Assistance . . . . . . . . . . 13-4
Offices . . . . . . . . . . . . . . . . . . . . . . . . 13-3
Text Telephone (TTY)Users . . . . . . . . . . . . . . . . . . . . . . . 13-4
Customer Information Service PublicationsOrdering Information . . . . . . 13-12
Customer Satisfaction Procedure . . . . . . . . . . . . . . . . . . . . 13-1
D
Damage Repair, Collision . . . . . 13-10
Danger, Warnings, and
Cautions . . . . . . . . . . . . . . . . . . . . . . . . iv
Data Recorders, Event . . . . . . . 13-15
Daytime Running Lamps/ Automatic Headlamp
System . . . . . . . . . . . . . . . . . . . . . . . . 6-3 Defensive Driving . . . . . . . . . . . . . . . 9-2
Delayed Entry Lighting . . . . . . . . . 6-6
Delayed Exit Lighting . . . . . . . . . . . 6-6
Delayed Headlamps . . . . . . . . . . . . 6-3
Delayed Locking . . . . . . . . . . . . . . . . 2-7
Devices, Auxiliary . . . . . . . . . . . . . 7-32
Dome Lamps . . . . . . . . . . . . . . . . . . . 6-5
Door
Ajar Messages . . . . . . . . . . . . . . . 5-32
Delayed Locking . . . . . . . . . . . . . . . 2-7
Locks . . . . . . . . . . . . . . . . . . . . . . . . . . 2-7
Power Locks . . . . . . . . . . . . . . . . . . . 2-7
Drive Systems All-Wheel Drive . . . . . . . 10-25, 9-26
Driver Information Center (DIC) . . . . . . . . . . . . . . . . . 5-25
Driving Characteristics andTowing Tips . . . . . . . . . . . . . . . . . 9-45
Defensive . . . . . . . . . . . . . . . . . . . . . . 9-2
Drunk . . . . . . . . . . . . . . . . . . . . . . . . . . 9-2
Highway Hypnosis . . . . . . . . . . . . . 9-7
Hill and Mountain Roads . . . . . . . 9-8
If the Vehicle is Stuck . . . . . . . . . 9-11
Loss of Control . . . . . . . . . . . . . . . . 9-5
Page 431 of 438
INDEX i-5
Front SeatsHeated . . . . . . . . . . . . . . . . . . . . . . . . 3-7
Heated and Ventilated . . . . . . . . . 3-8
Fuel . . . . . . . . . . . . . . . . . . . . . . . . . . . 9-39 Additives . . . . . . . . . . . . . . . . . . . . . 9-41
Filling a Portable FuelContainer . . . . . . . . . . . . . . . . . . . 9-44
Filling the Tank . . . . . . . . . . . . . . . 9-42
Fuels in Foreign Countries . . . . 9-40
Gage . . . . . . . . . . . . . . . . . . . . . . . . . 5-14
Gasoline Specifications . . . . . . . 9-40
Recommended . . . . . . . . . . . . . . . 9-40
Requirements, California . . . . . 9-40
System Messages . . . . . . . . . . . . 5-34
Fuel Economy Driving for Better . . . . . . . . . . . . . 1-20
Fuses Engine CompartmentFuse Block . . . . . . . . . . . . . . . . 10-31
Fuses and Circuit Breakers . . . . . . . . . . . . . . . . . . 10-31
Instrument Panel Fuse Block . . . . . . . . . . . . . . . . . . . . . . 10-35G
GagesEngine CoolantTemperature . . . . . . . . . . . . . . . . 5-15
Fuel . . . . . . . . . . . . . . . . . . . . . . . . . . 5-14
Odometer . . . . . . . . . . . . . . . . . . . . . 5-14
Speedometer . . . . . . . . . . . . . . . . . 5-14
Tachometer . . . . . . . . . . . . . . . . . . . 5-14
Voltmeter . . . . . . . . . . . . . . . . . . . . . 5-15
Warning Lights and Indicators . . . . . . . . . . . . . . . . . . . 5-12
Garage Door Opener . . . . . . . . . . 5-47 Programming . . . . . . . . . . . . . . . . . 5-47
Gasoline Specifications . . . . . . . . . . . . . . . . . 9-40
General Information
Service and Maintenance . . . . . 11-1
Towing . . . . . . . . . . . . . . . . . . . . . . . . 9-44
Vehicle Care . . . . . . . . . . . . . . . . . . 10-2
Glove Box . . . . . . . . . . . . . . . . . . . . . . 4-1
GM Mobility Reimbursement
Program . . . . . . . . . . . . . . . . . . . . . . 13-5
H
Halogen Bulbs . . . . . . . . . . . . . . . . 10-28
Hazard Warning Flashers . . . . . . . 6-4
Head Restraints . . . . . . . . . . . . . . . . 3-2
HeadlampsAdaptive ForwardLighting (AFL) . . . . . . . . . . . . . . . . 6-4
Aiming . . . . . . . . . . . . . . . . . . . . . . 10-28
Bulb Replacement . . . . . . . . . . 10-28
Daytime Running Lamps/ Automatic Headlamp
System . . . . . . . . . . . . . . . . . . . . . . . 6-3
Delayed . . . . . . . . . . . . . . . . . . . . . . . 6-3
Flash-to-Pass . . . . . . . . . . . . . . . . . . 6-3
High Intensity Discharge (HID) Lighting . . . . . . . . . . . . . 10-29
High-Beam On Light . . . . . . . . . . 5-24
High/Low Beam Changer . . . . . . 6-2
Heated and Ventilated Front Seats . . . . . . . . . . . . . . . . . . . . . . . . . 3-8
Heated Front Seats . . . . . . . . . . . . . 3-7
Heated Mirrors . . . . . . . . . . . . . . . . . 2-17
High Voltage Devices and Wiring . . . . . . . . . . . . . . . . . . . . . . . 10-30
Page 432 of 438
i-6 INDEX
High-Beam On Light . . . . . . . . . . . 5-24
Highway Hypnosis . . . . . . . . . . . . . . 9-7
Hill and Mountain Roads . . . . . . . . 9-8
Hood . . . . . . . . . . . . . . . . . . . . . . . . . . 10-4
Horn . . . . . . . . . . . . . . . . . . . . . . . . . . . . 5-5
How to Wear Safety BeltsProperly . . . . . . . . . . . . . . . . . . . . . . 3-17
I
Ignition Positions . . . . . . . . . . . . . . 9-16
Ignition Transmission Lock
Check . . . . . . . . . . . . . . . . . . . . . . . 10-26
Illumination Control . . . . . . . . . . . . . 6-5
Immobilizer . . . . . . . . . . . . . . . . . . . . 2-13
Infants and Young Children,
Restraints . . . . . . . . . . . . . . . . . . . . 3-46
Instrument Cluster . . . . . . . . . . . . . 5-13
Instrument Panel . . . . . . . . . . . . . . . 6-5 Storage Area . . . . . . . . . . . . . . . . . . 4-1
Introduction . . . . . . . . . . . . . . . . . . .iii, 7-1
J
Jump Starting . . . . . . . . . . . . . . . . . 10-81
K
Key and Lock Messages . . . . . . . 5-35
Keyless Entry Remote (RKE) System . . . . . . . . 2-3
Keyless Entry System . . . . . . . . . . 2-2
Keys . . . . . . . . . . . . . . . . . . . . . . . . . . . . 2-2
L
Labeling, Tire Sidewall . . . . . . . . 10-38
Lamp Messages . . . . . . . . . . . . . . . 5-35
Lamps Dome . . . . . . . . . . . . . . . . . . . . . . . . . . 6-5
Exterior Controls . . . . . . . . . . . . . . . 6-1
License Plate . . . . . . . . . . . . . . . 10-30
Malfunction Indicator . . . . . . . . . 5-18
Reading . . . . . . . . . . . . . . . . . . . . . . . 6-5
Lap-Shoulder Belt . . . . . . . . . . . . . 3-22
LATCH System Replacing Parts After aCrash . . . . . . . . . . . . . . . . . . . . . . . 3-59
Latch, Lower Anchors and Tethers for Children . . . . . . . . . . 3-52
Liftgate
Carbon Monoxide . . . . . . . . . . . . . . 2-9 Lighting
Adaptive Forward . . . . . . . . . . . . . . 6-4
Delayed Entry . . . . . . . . . . . . . . . . . 6-6
Delayed Exit . . . . . . . . . . . . . . . . . . . 6-6
Entry . . . . . . . . . . . . . . . . . . . . . . . . . . 6-6
Parade Dimming . . . . . . . . . . . . . . . 6-7
Lights
Airbag Readiness . . . . . . . . . . . . . 5-16
Antilock Brake System(ABS) Warning . . . . . . . . . . . . . . 5-22
Charging System . . . . . . . . . . . . . 5-18
Cruise Control . . . . . . . . . . . . . . . . 5-25
Engine Coolant
Temperature Warning . . . . . . . 5-23
Engine Oil Pressure . . . . . . . . . . 5-24
Flash-to-Pass . . . . . . . . . . . . . . . . . . 6-3
Fog Lamps . . . . . . . . . . . . . . . . . . . 5-25
High-Beam On . . . . . . . . . . . . . . . . 5-24
High/Low Beam Changer . . . . . . 6-2
Safety Belt Reminders . . . . . . . . 5-16
Security . . . . . . . . . . . . . . . . . . . . . . 5-24
StabiliTrak
®Indicator . . . . . . . . . 5-22
Tire Pressure . . . . . . . . . . . . . . . . . 5-23
Tow/Haul Mode . . . . . . . . . . . . . . . 5-22
Page 433 of 438
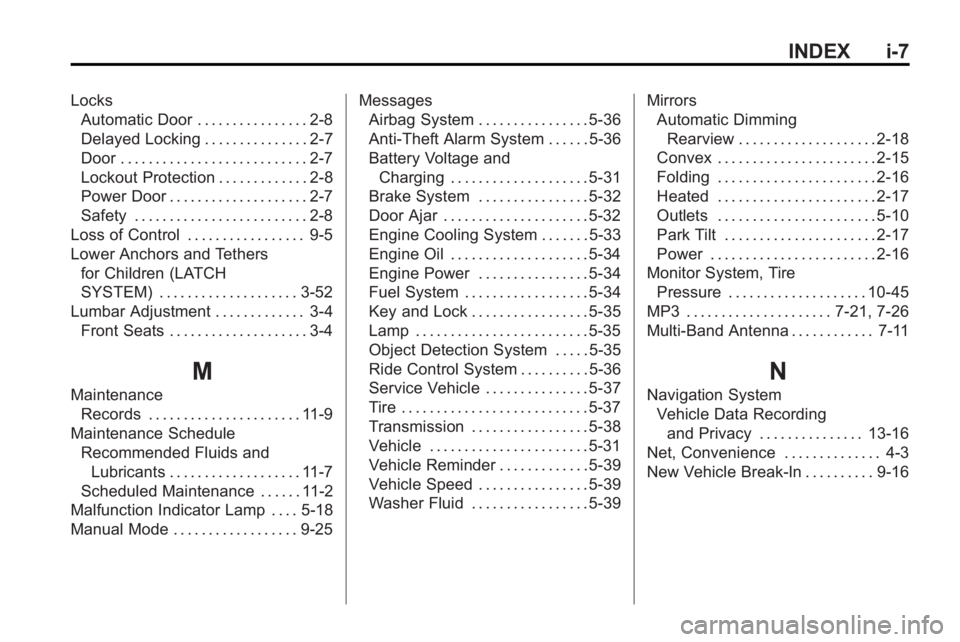
INDEX i-7
LocksAutomatic Door . . . . . . . . . . . . . . . . 2-8
Delayed Locking . . . . . . . . . . . . . . . 2-7
Door . . . . . . . . . . . . . . . . . . . . . . . . . . . 2-7
Lockout Protection . . . . . . . . . . . . . 2-8
Power Door . . . . . . . . . . . . . . . . . . . . 2-7
Safety . . . . . . . . . . . . . . . . . . . . . . . . . 2-8
Loss of Control . . . . . . . . . . . . . . . . . 9-5
Lower Anchors and Tethers for Children (LATCH
SYSTEM) . . . . . . . . . . . . . . . . . . . . 3-52
Lumbar Adjustment . . . . . . . . . . . . . 3-4 Front Seats . . . . . . . . . . . . . . . . . . . . 3-4
M
MaintenanceRecords . . . . . . . . . . . . . . . . . . . . . . 11-9
Maintenance Schedule
Recommended Fluids andLubricants . . . . . . . . . . . . . . . . . . . 11-7
Scheduled Maintenance . . . . . . 11-2
Malfunction Indicator Lamp . . . . 5-18
Manual Mode . . . . . . . . . . . . . . . . . . 9-25 Messages
Airbag System . . . . . . . . . . . . . . . . 5-36
Anti-Theft Alarm System . . . . . . 5-36
Battery Voltage and
Charging . . . . . . . . . . . . . . . . . . . . 5-31
Brake System . . . . . . . . . . . . . . . . 5-32
Door Ajar . . . . . . . . . . . . . . . . . . . . . 5-32
Engine Cooling System . . . . . . . 5-33
Engine Oil . . . . . . . . . . . . . . . . . . . . 5-34
Engine Power . . . . . . . . . . . . . . . . 5-34
Fuel System . . . . . . . . . . . . . . . . . . 5-34
Key and Lock . . . . . . . . . . . . . . . . . 5-35
Lamp . . . . . . . . . . . . . . . . . . . . . . . . . 5-35
Object Detection System . . . . . 5-35
Ride Control System . . . . . . . . . . 5-36
Service Vehicle . . . . . . . . . . . . . . . 5-37
Tire . . . . . . . . . . . . . . . . . . . . . . . . . . . 5-37
Transmission . . . . . . . . . . . . . . . . . 5-38
Vehicle . . . . . . . . . . . . . . . . . . . . . . . 5-31
Vehicle Reminder . . . . . . . . . . . . . 5-39
Vehicle Speed . . . . . . . . . . . . . . . . 5-39
Washer Fluid . . . . . . . . . . . . . . . . . 5-39 Mirrors
Automatic Dimming
Rearview . . . . . . . . . . . . . . . . . . . . 2-18
Convex . . . . . . . . . . . . . . . . . . . . . . . 2-15
Folding . . . . . . . . . . . . . . . . . . . . . . . 2-16
Heated . . . . . . . . . . . . . . . . . . . . . . . 2-17
Outlets . . . . . . . . . . . . . . . . . . . . . . . 5-10
Park Tilt . . . . . . . . . . . . . . . . . . . . . . 2-17
Power . . . . . . . . . . . . . . . . . . . . . . . . 2-16
Monitor System, Tire Pressure . . . . . . . . . . . . . . . . . . . . 10-45
MP3 . . . . . . . . . . . . . . . . . . . . . 7-21, 7-26
Multi-Band Antenna . . . . . . . . . . . . 7-11
N
Navigation System Vehicle Data Recordingand Privacy . . . . . . . . . . . . . . . 13-16
Net, Convenience . . . . . . . . . . . . . . 4-3
New Vehicle Break-In . . . . . . . . . . 9-16