remote start BUICK ENCLAVE 2010 User Guide
[x] Cancel search | Manufacturer: BUICK, Model Year: 2010, Model line: ENCLAVE, Model: BUICK ENCLAVE 2010Pages: 438, PDF Size: 2.47 MB
Page 57 of 438
Seats and Restraints 3-7
Heated Front Seats
{WARNING
If you cannot feel temperature
change or pain to the skin, the
seat heater may cause burns
even at low temperatures. To
reduce the risk of burns, people
with such a condition should use
care when using the seat heater,
especially for long periods of
time. Do not place anything on
the seat that insulates against
heat, such as a blanket, cushion,
cover or similar item. This may
cause the seat heater to
overheat. An overheated seat
heater may cause a burn or may
damage the seat.On vehicles with heated front seats,
the controls are located on the
center console. To operate the
heated seats the engine must be
running.
I
(Heated Seatback): Press to
turn on the heated seatback.
J (Heated Seat and Seatback):
Press to turn on or off the heated
seat and seatback.
The light on the button will come on
to indicate that the feature is on.
Each time the button is pressed, the
temperature settings change from
high, to medium, to low, to off.
Indicator lights above the button will
show the level of heat selected:
three for high, two for medium, and
one for low. The passenger seat may take
longer to heat up.
If the vehicle has remote vehicle
start and is started using the RKE
transmitter, the front heated seats
will be turned on to the high setting
if it is cold outside. See
“Remote
Vehicle Start” underRemote
Keyless Entry (RKE) System
Operation
on page 2‑3. When the
ignition is turned on, the heated seat
feature will turn off. To turn the
heated seat feature back on, press
the desired button.
Page 87 of 438

Seats and Restraints 3-37
Passenger Sensing
System
The vehicle has a passenger
sensing system for the right front
passenger position. The passenger
airbag status indicator will be visible
on the instrument panel when the
vehicle is started.
United States
Canada
The words ON and OFF, or the
symbol for on and off, are
visible during the system check. If you are using remote start,
if equipped, to start the vehicle from
a distance, you may not see the
system check. When the system
check is complete, either the word
ON or OFF, or the symbol for on or
off, will be visible. See
Passenger
Airbag Status Indicator
on
page 5‑17.
The passenger sensing system
turns off the right front passenger
frontal airbag under certain
conditions. The driver airbag,
seat-mounted side impact airbags
and the roof-rail airbags are not
affected by the passenger sensing
system.
The passenger sensing system
works with sensors that are part of
the right front passenger seat. The sensors are designed to detect
the presence of a properly-seated
occupant and determine if the right
front passenger frontal airbag
should be enabled (may inflate)
or not.
According to accident statistics,
children are safer when properly
secured in a rear seat in the correct
child restraint for their weight
and size.
We recommend that children be
secured in a rear seat, including: an
infant or a child riding in a
rear-facing child restraint; a child
riding in a forward-facing child seat;
an older child riding in a booster
seat; and children, who are large
enough, using safety belts.
Page 129 of 438
Instruments and Controls 5-11
When adding electrical equipment,
be sure to follow the proper
installation instructions included with
the equipment.
Notice:Improper use of the
power outlet can cause damage
not covered by the vehicle
warranty. Do not hang any type of
accessory or accessory bracket
from the plug because the power
outlets are designed for
accessory power plugs only.
Power Outlet 120 Volt
Alternative Current
The vehicle may have a power
outlet that can be used to plug in
electrical equipment that uses a
maximum limit of 150 watts.
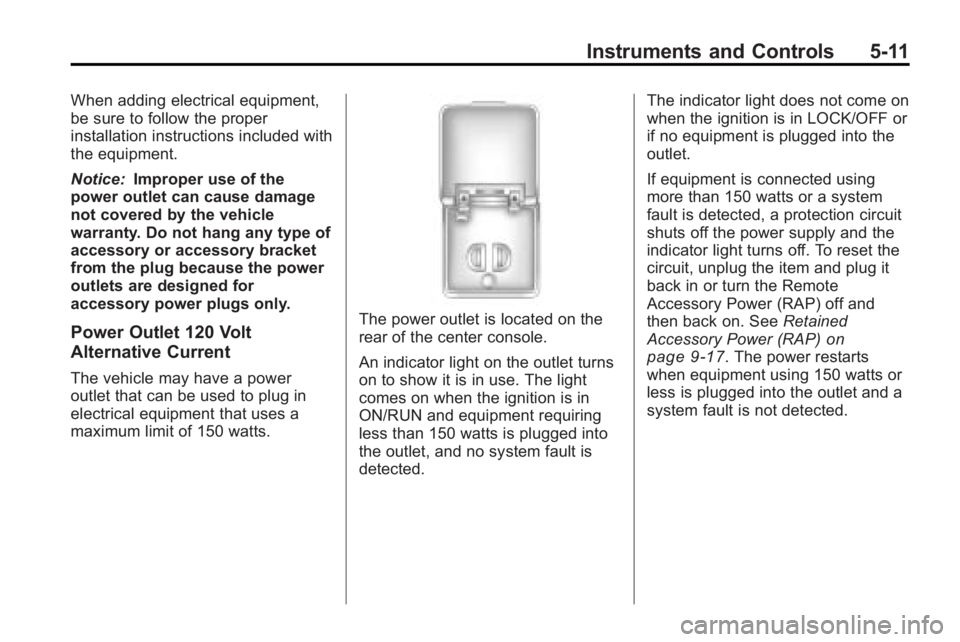
The power outlet is located on the
rear of the center console.
An indicator light on the outlet turns
on to show it is in use. The light
comes on when the ignition is in
ON/RUN and equipment requiring
less than 150 watts is plugged into
the outlet, and no system fault is
detected. The indicator light does not come on
when the ignition is in LOCK/OFF or
if no equipment is plugged into the
outlet.
If equipment is connected using
more than 150 watts or a system
fault is detected, a protection circuit
shuts off the power supply and the
indicator light turns off. To reset the
circuit, unplug the item and plug it
back in or turn the Remote
Accessory Power (RAP) off and
then back on. See
Retained
Accessory Power (RAP)
on
page 9‑17. The power restarts
when equipment using 150 watts or
less is plugged into the outlet and a
system fault is not detected.
Page 135 of 438

Instruments and Controls 5-17
If the airbag readiness light stays on
after the vehicle has been started or
comes on when while driving, the
airbag system may not work
properly. Have the vehicle serviced
right away.
{WARNING
If the airbag readiness light stays
on after the vehicle is started or
comes on while driving, it means
the airbag system might not be
working properly. The airbags in
the vehicle might not inflate in a
crash, or they could even inflate
without a crash. To help avoid
injury, have the vehicle serviced
right away.
Passenger Airbag Status
Indicator
The vehicle has a passenger
sensing system. SeePassenger
Sensing System
on page 3‑37for
important safety information. The
instrument panel has a passenger
airbag status indicator.
United States
Canada
When the vehicle is started, the
passenger airbag status indicator
will light ON and OFF, or the symbol
for on and off, for several seconds as a system check. If you are using
remote start to start the vehicle from
a distance, if equipped, you may not
see the system check. Then, after
several more seconds, the status
indicator will light either ON or OFF,
or either the on or off symbol to let
you know the status of the right front
passenger frontal airbag.
If the word ON or the on symbol is
lit on the passenger airbag status
indicator, it means that the right
front passenger frontal airbag is
enabled (may inflate).
If the word OFF or the off symbol is
lit on the passenger airbag status
indicator, it means that the
passenger sensing system has
turned off the right front passenger
frontal airbag.
Page 153 of 438
Instruments and Controls 5-35
TIGHTEN GAS CAP
This message may display along
with the check engine light on the
instrument panel cluster if the
vehicle's fuel cap is not tightened
properly. SeeMalfunction Indicator
Lamp
on page 5‑18. Reinstall the
fuel cap fully. See Filling the Tank
on page 9‑42. The diagnostic
system can determine if the fuel cap
has been left off or improperly
installed. A loose or missing fuel
cap allows fuel to evaporate into the
atmosphere. A few driving trips with
the cap properly installed should
turn this light and message off.
Key and Lock Messages
REMOTE KEY LEARNING
ACTIVE
This message displays while you
are matching a Remote Keyless
Entry (RKE) transmitter to your
vehicle. See “Matching
Transmitter(s) to Your Vehicle” under
Remote Keyless Entry (RKE)
System Operation
on page 2‑3and Driver Information Center (DIC)on page 5‑25for more information.
REPLACE BATTERY IN
REMOTE KEY
This message displays if a Remote
Keyless Entry (RKE) transmitter
battery is low. The battery needs to
be replaced in the transmitter. See
“Battery Replacement” under
Remote Keyless Entry (RKE)
System Operation on page 2‑3.
Lamp Messages
AUTOMATIC LIGHT
CONTROL OFF
This message displays when the
automatic headlamps are turned off.
This message clears itself after
10 seconds.
AUTOMATIC LIGHT
CONTROL ON
This message displays when the
automatic headlamps are turned on.
This message clears itself after
10 seconds.
TURN SIGNAL ON
This message displays and a chime
sounds if a turn signal is left on for
3/4 of a mile (1.2 km). Move the turn
signal/multifunction lever to the off
position.
Object Detection System
Messages
PARK ASSIST OFF
If your vehicle has the Ultrasonic
Rear Parking Assist (URPA) system,
after the vehicle has been started
and shifted out of P (Park), this
message displays to remind the
driver that the URPA system has
been turned off or to notify the driver
that the system has turned itself off.
Page 164 of 438
5-46 Instruments and Controls
Press the customization button until
MEMORY SEAT RECALL appears
on the DIC display. Press the set/
reset button once to access the
settings for this feature. Then press
the customization button to scroll
through the following settings:
OFF (default):No remote memory
seat recall will occur.
ON: The driver's seat and outside
mirrors will automatically move to
the stored driving position when the
unlock button on the Remote
Keyless Entry (RKE) transmitter is
pressed. The steering column will
also move on vehicles with the
power tilt and telescopic steering
feature. See Steering Wheel
Adjustment
on page 5‑2for more
information. See “Relearn Remote
Key” under Driver Information
Center (DIC)
on page 5‑25for
more information on matching
transmitters to driver ID numbers.
NO CHANGE: No change will be
made to this feature. The current
setting will remain. To select a setting, press the set/
reset button while the desired
setting is displayed on the DIC.
REMOTE START
If your vehicle has this feature, it
allows you to turn the remote start
off or on. The remote start feature
allows you to start the engine from
outside of the vehicle using the
Remote Keyless Entry (RKE)
transmitter. See
Remote Vehicle
Start
on page 2‑5for more
information.
Press the customization button until
REMOTE START appears on the
DIC display. Press the set/reset
button once to access the settings
for this feature. Then press the
customization button to scroll
through the following settings:
OFF: The remote start feature will
be disabled.
ON (default): The remote start
feature will be enabled. NO CHANGE:
No change will be
made to this feature. The current
setting will remain.
To select a setting, press the set/
reset button while the desired
setting is displayed on the DIC.
FACTORY SETTINGS
This feature allows you to set all of
the customization features back to
their factory default settings.
Press the customization button until
FACTORY SETTINGS appears on
the DIC display. Press the set/reset
button once to access the settings
for this feature. Then press the
customization button to scroll
through the following settings:
RESTORE ALL (default): The
customization features will be set to
their factory default settings.
DO NOT RESTORE: The
customization features will not be
set to their factory default settings.
Page 166 of 438
5-48 Instruments and Controls
Do not use the Universal Home
Remote with any garage door
opener that does not have the stop
and reverse feature. This includes
any garage door opener model
manufactured before April 1, 1982.
Read the instructions completely
before attempting to program the
Universal Home Remote. Because
of the steps involved, it may be
helpful to have another person
available to assist you with
programming the Universal Home
Remote.
Keep the original hand-held
transmitter for use in other vehicles
as well as for future Universal Home
Remote programming. It is also
recommended that upon the sale of
the vehicle, the programmed
Universal Home Remote buttons
should be erased for security
purposes. See“Erasing Universal
Home Remote Buttons” later in this
section. When programming a garage door,
park outside of the garage. Park
directly in line with and facing the
garage door opener motor-head or
gate motor-head. Be sure that
people and objects are clear of the
garage door or gate that is being
programmed.
It is recommended that a new
battery be installed in your
hand-held transmitter for quicker
and more accurate transmission of
the radio-frequency signal.
Programming the Universal
Home Remote System
For questions or help programming
the Universal Home Remote
System, call 1-800-355-3515 or go
to www.homelink.com.
Programming a garage door opener
involves time-sensitive actions, so
read the entire procedure before
starting. Otherwise, the device will
time out and the procedure will have
to be repeated.To program up to three devices:
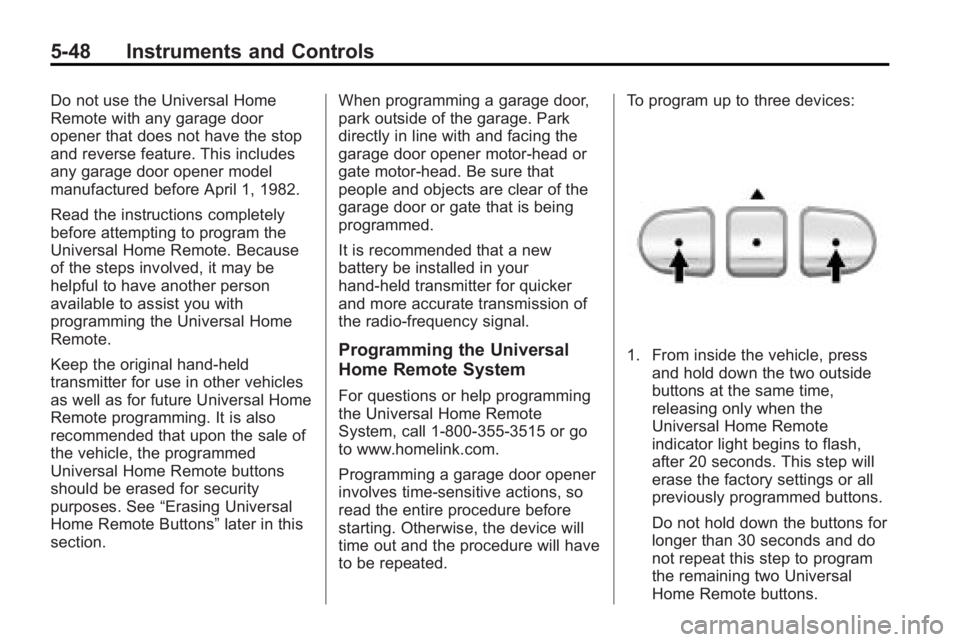
1. From inside the vehicle, press
and hold down the two outside
buttons at the same time,
releasing only when the
Universal Home Remote
indicator light begins to flash,
after 20 seconds. This step will
erase the factory settings or all
previously programmed buttons.
Do not hold down the buttons for
longer than 30 seconds and do
not repeat this step to program
the remaining two Universal
Home Remote buttons.
Page 196 of 438
7-18 Infotainment System
Playing a DVD
f(Tune):Turn to change tracks on
a CD or DVD, to manually tune a
radio station, or to change clock or
date settings, while in the clock or
date setting mode. See the
information given earlier in this
section specific to the radio, CD,
and the DVD. Also, see “Setting the
Clock” in the index, for setting the
clock and date.
©SEEK (Previous Track/
Chapter): Press to return to the
start of the current track or chapter.
Press
©again to go to the
previous track or chapter. This
button may not work when the DVD
is playing the copyright information
or the previews.
SEEK
¨(Next Track/Chapter):
Press to go to the next track or
chapter. This button may not work
when the DVD is playing the
copyright information or the
previews.
sREV (Fast Reverse): Press to
quickly reverse the DVD at
five times the normal speed. The
radio displays the elapsed time
while in fast reverse. To stop fast
reversing, press again. This button
may not work when the DVD is
playing the copyright information or
the previews.
\FWD (Fast Forward): Press to
fast forward the DVD. The radio
displays the elapsed time and fast
forwards five times the normal
speed. To stop fast forwarding,
press again. This button may not
work when the DVD is playing the
copyright information or the
previews.
Z(Eject): Press to eject a DVD.
If the DVD is ejected, but not
removed, the player automatically
pulls it back in after 15 seconds.
If loading and reading of a DVD
cannot be completed, because of an
unknown format, etc., and the disc fails to eject, press and hold for
more than five seconds to force the
disc to eject.
DVD-V (Video) Display Buttons
Once a DVD-V is inserted, the radio
display menu shows several icons.
Press the softkeys under any icon
during DVD playback. See the icon
list below for more information.
The rear seat passenger can
navigate the DVD-V menus and
controls through the remote control.
See
“Remote Control”, under Rear
Seat Entertainment (RSE) System
on page 7‑34for more information.
The Video Screen automatically
turns on when the DVD-V is
inserted into the DVD slot.
r/j(Play/Pause): Press either
the play or pause icon displayed on
the radio system, to toggle between
pausing or restarting playback of
a DVD.
.If the forward arrow is showing
on display, the system is in
pause mode.
Page 197 of 438
Infotainment System 7-19
.If the pause icon is showing on
display, the system is in
playback mode.
.If the DVD screen is off, press
the play button to turn the
screen on.
Some DVDs begin playing after the
previews have finished, although
there could be a delay of up to
30 seconds. If the DVD does not
begin playing the movie
automatically, press the softkey
under the play/pause icon displayed
on the radio. If the DVD still does
not play, refer to the on-screen
instructions, if available.
c(Stop): Press to stop playing,
rewinding, or fast forwarding a DVD.
r(Enter): Press to select the
choices that are highlighted in
any menu.
y(Menu): Press to access the
DVD menu. The DVD menu is
different on every DVD. Use the
softkeys under the navigation
arrows to navigate the cursor
through the DVD menu. After making a selection press this
button. This button only operates
when using a DVD.
Nav (Navigate):
Press to display
directional arrows for navigating
through the menus.
q(Return): Press to exit the
current active menu and return to
the previous menu. This button
operates only when a DVD is
playing and a menu is active.
DVD-A (Audio) Display Buttons
Once a DVD-A is inserted, the radio
display menu shows several icons.
Press the softkeys under any icon
during DVD playback. See the icon
list below for more information.
The rear seat operator can navigate
the DVD-A menus and controls
through the remote control. See
“Remote Control”, under Rear Seat
Entertainment (RSE) System
on
page 7‑34for more information.
The Video Screen does not
automatically power on when the
DVD-A is inserted into the DVD slot. It must be manually turned on by
the rear seat occupant through the
remote control power button.
r/j(Play/Pause):
Press either
the play or pause icon displayed on
the radio system, to toggle between
pausing or restarting playback of
a DVD.
.If the forward arrow is showing
on display, the system is in
pause mode.
.If the pause icon is showing on
display, the system is in
playback mode.
qGroupr: Press to cycle
through musical groupings on the
DVD-A disc.
Nav (Navigate): Press to display
directional arrows for navigating
through the menus.
e(Audio Stream): Press to cycle
through audio stream formats
located on the DVD-A disc. The
video screen shows the audio
stream changing.
Page 198 of 438
7-20 Infotainment System
Inserting a Disc
To play a disc, gently insert the disc,
with the label side up, into the
loading slot. The DVD player might
not accept some paper labeled
media. The player starts loading the
disc into the system and shows
“Loading Disc”on the radio display.
At the same time, the radio displays
a softkey menu of option(s). Some
discs automatically play the movie
while others default to the softkey
menu display, which requires the
Play, Enter, or Navigation softkeys
to be pressed; either by the softkey
on the radio or by the rear seat
passenger using the remote control.
It may take up to 30 seconds for a
DVD to begin playing. Stopping and Resuming Playback
To stop playing a DVD without
turning off the system, do one of
the following:
.Presscon the remote control.
.Press the softkey under the
stop or the play/pause icons
displayed on the radio.
.If the radio head is sourced to
something other than DVD-V,
press the DVD/CD AUX button
to make DVD-V the active
source.
To resume DVD playback, do one of
the following:
.Pressr/jon the remote
control.
.Press the softkey under the play/
pause icon displayed on the
radio.
The DVD should resume play from
where it last stopped if the disc has
not been ejected and the stop
button has not been pressed twice
on the remote control. If the disc has been ejected or the stop button
has been pressed twice on the
remote control, the disc resumes
playing at the beginning of the disc.
Ejecting a Disc
Press
ZDVD on the radio to eject
the disc. If a disc is ejected from the
radio, but not removed, the radio
reloads the disc after a short period
of time. The disc is stored in the
radio. The radio does not resume
play of the disc automatically. If the
movie is reloaded and the RSA
system is sourced to the DVD, the
player begins to play again.
If loading and reading a DVD or CD
cannot be completed, and the disc
fails to eject, press and hold
Z
DVD for more than five seconds to
force the disc to eject.
DVD Error Messages
Player Error: This message
displays when there are disc load or
eject problems.