front BUICK ENCLAVE 2011 Owner's Manual
[x] Cancel search | Manufacturer: BUICK, Model Year: 2011, Model line: ENCLAVE, Model: BUICK ENCLAVE 2011Pages: 388, PDF Size: 5.26 MB
Page 1 of 388
Black plate (1,1)Buick Verano Owner Manual - 2012 - CRC - 1/10/12
2012 Buick Verano Owner ManualM
In Brief. . . . . . . . . . . . . . . . . . . . . . . . 1-1
Instrument Panel . . . . . . . . . . . . . . 1-2
Initial Drive Information . . . . . . . . 1-4
Vehicle Features . . . . . . . . . . . . . 1-16
Performance and Maintenance . . . . . . . . . . . . . . . . 1-21
Keys, Doors, and Windows . . . . . . . . . . . . . . . . . . . . 2-1
Keys and Locks . . . . . . . . . . . . . . . 2-2
Doors . . . . . . . . . . . . . . . . . . . . . . . . 2-12
Vehicle Security . . . . . . . . . . . . . . 2-14
Exterior Mirrors . . . . . . . . . . . . . . . 2-16
Interior Mirrors . . . . . . . . . . . . . . . . 2-17
Windows . . . . . . . . . . . . . . . . . . . . . 2-18
Roof . . . . . . . . . . . . . . . . . . . . . . . . . . 2-20
Seats and Restraints . . . . . . . . . 3-1
Head Restraints . . . . . . . . . . . . . . . 3-2
Front Seats . . . . . . . . . . . . . . . . . . . . 3-3
Rear Seats . . . . . . . . . . . . . . . . . . . . 3-8
Safety Belts . . . . . . . . . . . . . . . . . . 3-10
Airbag System . . . . . . . . . . . . . . . . 3-19
Child Restraints . . . . . . . . . . . . . . 3-32 Storage
. . . . . . . . . . . . . . . . . . . . . . . 4-1
Storage Compartments . . . . . . . . 4-1
Instruments and Controls . . . . 5-1
Controls . . . . . . . . . . . . . . . . . . . . . . . 5-2
Warning Lights, Gauges, and Indicators . . . . . . . . . . . . . . . . . . . . 5-7
Information Displays . . . . . . . . . . 5-21
Vehicle Messages . . . . . . . . . . . . 5-25
Vehicle Personalization . . . . . . . 5-30
Lighting . . . . . . . . . . . . . . . . . . . . . . . 6-1
Exterior Lighting . . . . . . . . . . . . . . . 6-1
Interior Lighting . . . . . . . . . . . . . . . . 6-5
Lighting Features . . . . . . . . . . . . . . 6-6
Infotainment System . . . . . . . . . 7-1
Introduction . . . . . . . . . . . . . . . . . . . . 7-1
Radio . . . . . . . . . . . . . . . . . . . . . . . . . 7-12
Audio Players . . . . . . . . . . . . . . . . 7-22
Phone . . . . . . . . . . . . . . . . . . . . . . . . 7-30
Trademarks and License
Agreements . . . . . . . . . . . . . . . . . 7-42 Climate Controls
. . . . . . . . . . . . . 8-1
Climate Control Systems . . . . . . 8-1
Air Vents . . . . . . . . . . . . . . . . . . . . . . . 8-6
Maintenance . . . . . . . . . . . . . . . . . . . 8-6
Driving and Operating . . . . . . . . 9-1
Driving Information . . . . . . . . . . . . . 9-2
Starting and Operating . . . . . . . 9-14
Engine Exhaust . . . . . . . . . . . . . . 9-25
Automatic Transmission . . . . . . 9-26
Brakes . . . . . . . . . . . . . . . . . . . . . . . 9-30
Ride Control Systems . . . . . . . . 9-33
Cruise Control . . . . . . . . . . . . . . . . 9-37
Object Detection Systems . . . . 9-39
Fuel . . . . . . . . . . . . . . . . . . . . . . . . . . 9-41
Towing . . . . . . . . . . . . . . . . . . . . . . . 9-46
Conversions and
Add-Ons . . . . . . . . . . . . . . . . . . . . 9-52
Page 9 of 388
Black plate (3,1)Buick Verano Owner Manual - 2012 - CRC - 1/10/12
In Brief 1-3
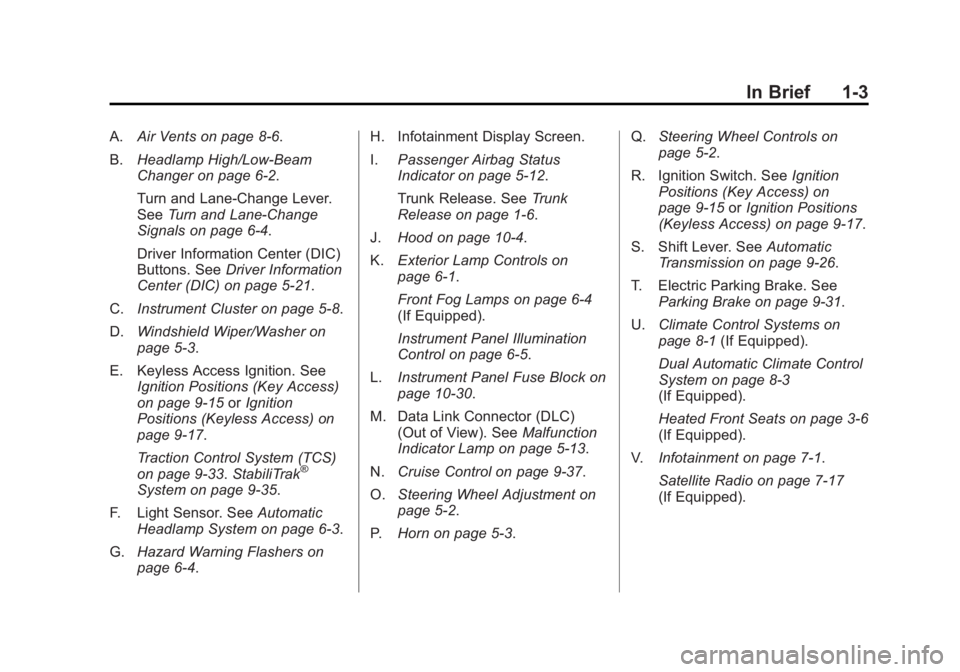
A.Air Vents on page 8‑6.
B. Headlamp High/Low-Beam
Changer on page 6‑2.
Turn and Lane-Change Lever.
See Turn and Lane-Change
Signals on page 6‑4.
Driver Information Center (DIC)
Buttons. See Driver Information
Center (DIC) on page 5‑21.
C. Instrument Cluster on page 5‑8.
D. Windshield Wiper/Washer on
page 5‑3.
E. Keyless Access Ignition. See Ignition Positions (Key Access)
on page 9‑15 orIgnition
Positions (Keyless Access) on
page 9‑17.
Traction Control System (TCS)
on page 9‑33. StabiliTrak
®
System on page 9‑35.
F. Light Sensor. See Automatic
Headlamp System on page 6‑3.
G. Hazard Warning Flashers on
page 6‑4. H. Infotainment Display Screen.
I.
Passenger Airbag Status
Indicator on page 5‑12.
Trunk Release. See Trunk
Release on page 1‑6.
J. Hood on page 10‑4.
K. Exterior Lamp Controls on
page 6‑1.
Front Fog Lamps on page 6‑4
(If Equipped).
Instrument Panel Illumination
Control on page 6‑5.
L. Instrument Panel Fuse Block on
page 10‑30.
M. Data Link Connector (DLC) (Out of View). See Malfunction
Indicator Lamp on page 5‑13.
N. Cruise Control on page 9‑37.
O. Steering Wheel Adjustment on
page 5‑2.
P. Horn on page 5‑3. Q.
Steering Wheel Controls on
page 5‑2.
R. Ignition Switch. See Ignition
Positions (Key Access) on
page 9‑15 orIgnition Positions
(Keyless Access) on page 9‑17.
S. Shift Lever. See Automatic
Transmission on page 9‑26.
T. Electric Parking Brake. See Parking Brake on page 9‑31.
U. Climate Control Systems on
page 8‑1 (If Equipped).
Dual Automatic Climate Control
System on page 8‑3
(If Equipped).
Heated Front Seats on page 3‑6
(If Equipped).
V. Infotainment on page 7‑1.
Satellite Radio on page 7‑17
(If Equipped).
Page 12 of 388
Black plate (6,1)Buick Verano Owner Manual - 2012 - CRC - 1/10/12
1-6 In Brief
Trunk Release
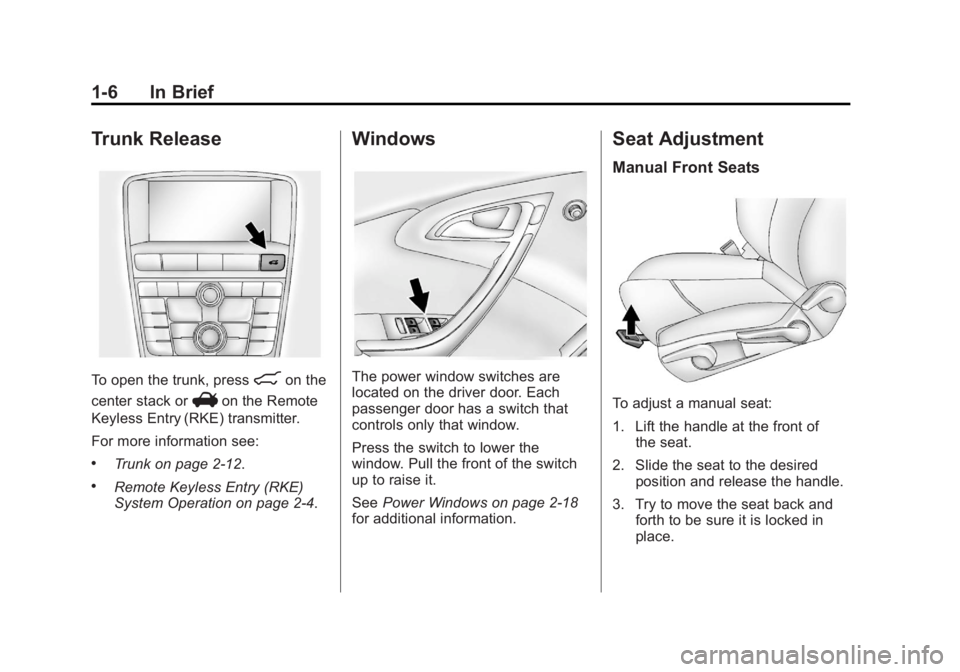
To open the trunk, press8on the
center stack or
Von the Remote
Keyless Entry (RKE) transmitter.
For more information see:
.Trunk on page 2‑12.
.Remote Keyless Entry (RKE)
System Operation on page 2‑4.
Windows
The power window switches are
located on the driver door. Each
passenger door has a switch that
controls only that window.
Press the switch to lower the
window. Pull the front of the switch
up to raise it.
See Power Windows on page 2‑18
for additional information.
Seat Adjustment
Manual Front Seats
To adjust a manual seat:
1. Lift the handle at the front of the seat.
2. Slide the seat to the desired position and release the handle.
3. Try to move the seat back and forth to be sure it is locked in
place.
Page 13 of 388
Black plate (7,1)Buick Verano Owner Manual - 2012 - CRC - 1/10/12
In Brief 1-7
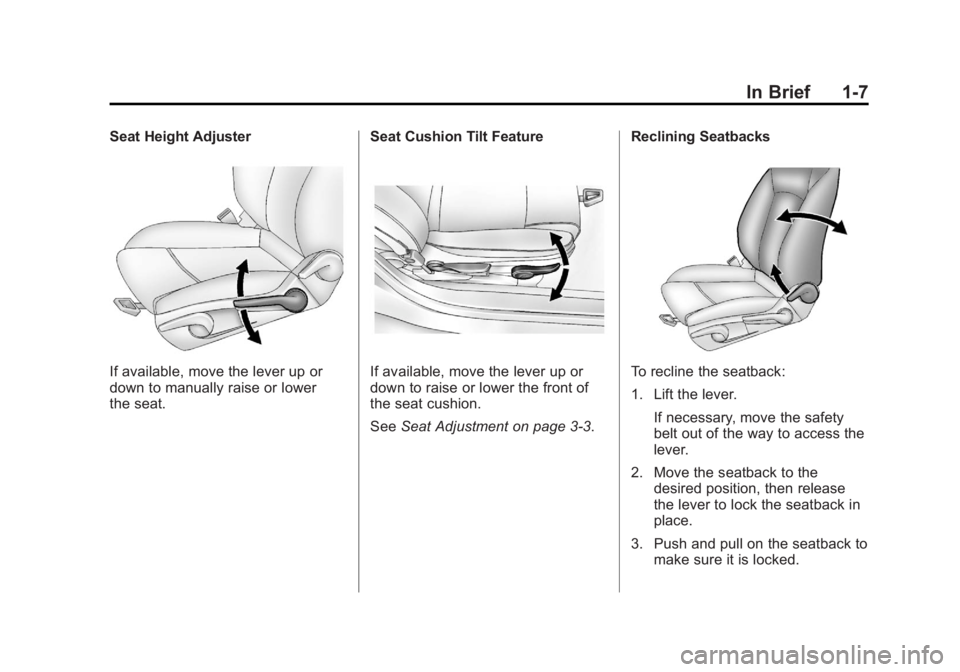
Seat Height Adjuster
If available, move the lever up or
down to manually raise or lower
the seat.Seat Cushion Tilt FeatureIf available, move the lever up or
down to raise or lower the front of
the seat cushion.
See
Seat Adjustment on page 3‑3. Reclining SeatbacksTo recline the seatback:
1. Lift the lever.
If necessary, move the safety
belt out of the way to access the
lever.
2. Move the seatback to the desired position, then release
the lever to lock the seatback in
place.
3. Push and pull on the seatback to make sure it is locked.
Page 14 of 388
Black plate (8,1)Buick Verano Owner Manual - 2012 - CRC - 1/10/12
1-8 In Brief
To return the seatback to an upright
position:
1. Lift the lever fully withoutapplying pressure to the
seatback, and the seatback
returns to the upright position.
2. Push and pull on the seatback to make sure it is locked.
See Reclining Seatbacks on
page 3‑5.Power Driver Seat
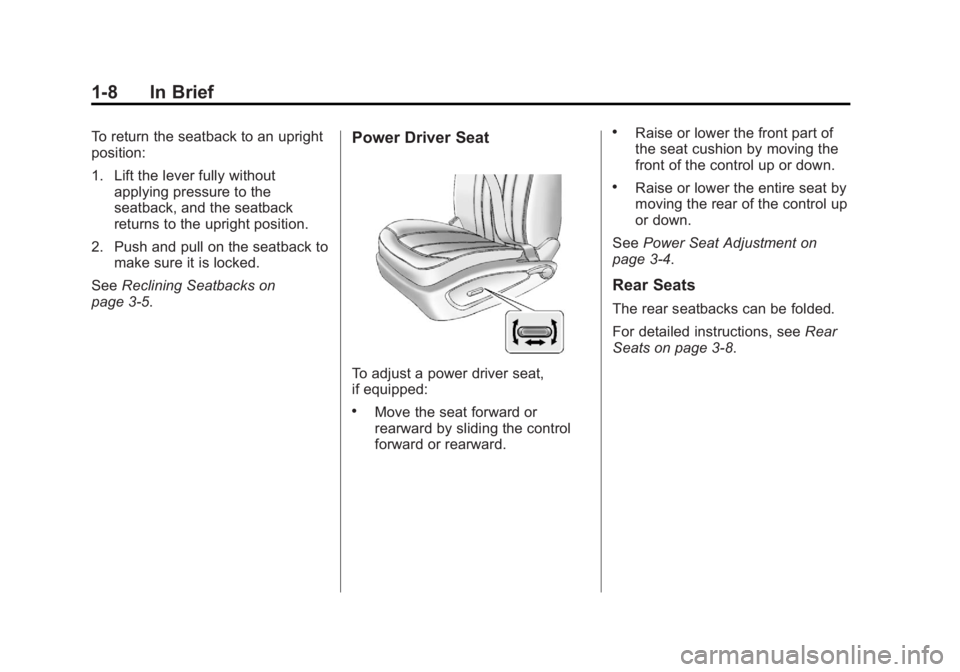
To adjust a power driver seat,
if equipped:
.Move the seat forward or
rearward by sliding the control
forward or rearward.
.Raise or lower the front part of
the seat cushion by moving the
front of the control up or down.
.Raise or lower the entire seat by
moving the rear of the control up
or down.
See Power Seat Adjustment on
page 3‑4.
Rear Seats
The rear seatbacks can be folded.
For detailed instructions, see Rear
Seats on page 3‑8.
Page 15 of 388
Black plate (9,1)Buick Verano Owner Manual - 2012 - CRC - 1/10/12
In Brief 1-9
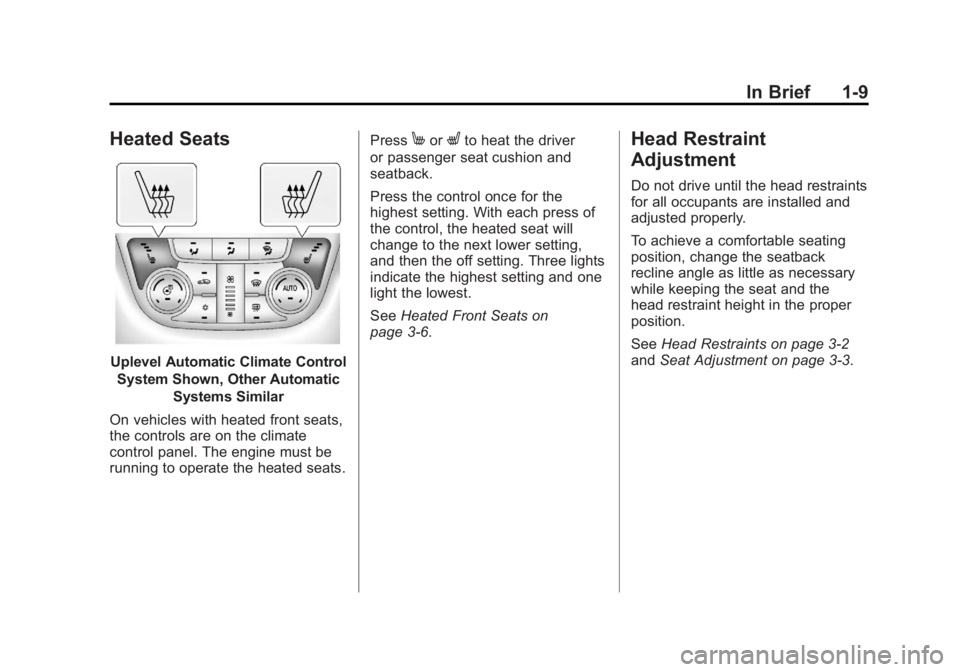
Heated Seats
Uplevel Automatic Climate ControlSystem Shown, Other Automatic Systems Similar
On vehicles with heated front seats,
the controls are on the climate
control panel. The engine must be
running to operate the heated seats. Press
MorLto heat the driver
or passenger seat cushion and
seatback.
Press the control once for the
highest setting. With each press of
the control, the heated seat will
change to the next lower setting,
and then the off setting. Three lights
indicate the highest setting and one
light the lowest.
See Heated Front Seats on
page 3‑6.Head Restraint
Adjustment
Do not drive until the head restraints
for all occupants are installed and
adjusted properly.
To achieve a comfortable seating
position, change the seatback
recline angle as little as necessary
while keeping the seat and the
head restraint height in the proper
position.
See Head Restraints on page 3‑2
and Seat Adjustment on page 3‑3.
Page 16 of 388
Black plate (10,1)Buick Verano Owner Manual - 2012 - CRC - 1/10/12
1-10 In Brief
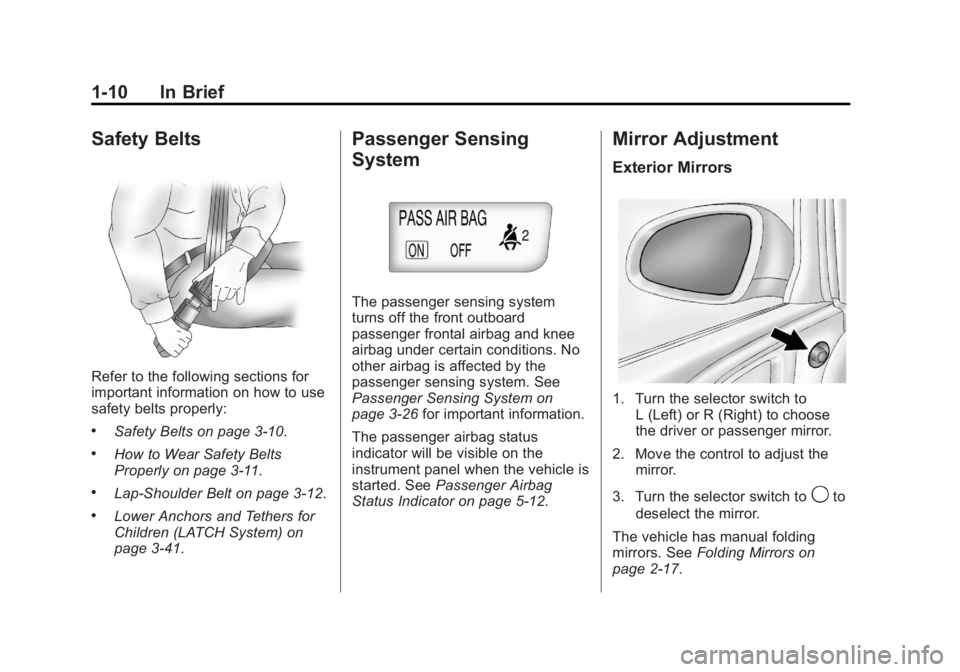
Safety Belts
Refer to the following sections for
important information on how to use
safety belts properly:
.Safety Belts on page 3‑10.
.How to Wear Safety Belts
Properly on page 3‑11.
.Lap-Shoulder Belt on page 3‑12.
.Lower Anchors and Tethers for
Children (LATCH System) on
page 3‑41.
Passenger Sensing
System
The passenger sensing system
turns off the front outboard
passenger frontal airbag and knee
airbag under certain conditions. No
other airbag is affected by the
passenger sensing system. See
Passenger Sensing System on
page 3‑26for important information.
The passenger airbag status
indicator will be visible on the
instrument panel when the vehicle is
started. See Passenger Airbag
Status Indicator on page 5‑12.
Mirror Adjustment
Exterior Mirrors
1. Turn the selector switch to
L (Left) or R (Right) to choose
the driver or passenger mirror.
2. Move the control to adjust the mirror.
3. Turn the selector switch to
9to
deselect the mirror.
The vehicle has manual folding
mirrors. See Folding Mirrors on
page 2‑17.
Page 19 of 388
Black plate (13,1)Buick Verano Owner Manual - 2012 - CRC - 1/10/12
In Brief 1-13
;:Turns on the parking lamps,
taillamps, license plate lamps,
sidemarker lamps, and instrument
panel lights.
5: Turns on the headlamps,
parking lamps, taillamps, license
plate lamps, sidemarker lamps, and
instrument panel lights. A warning
chime sounds if the driver door is
opened when the ignition switch is
off and the headlamps are on.
#: For vehicles with fog lamps,
press to turn the lamps on or off.
For more information, see:
.Exterior Lamp Controls on
page 6‑1.
.Daytime Running Lamps (DRL)
on page 6‑2.
.Front Fog Lamps on page 6‑4.
Windshield Wiper/Washer
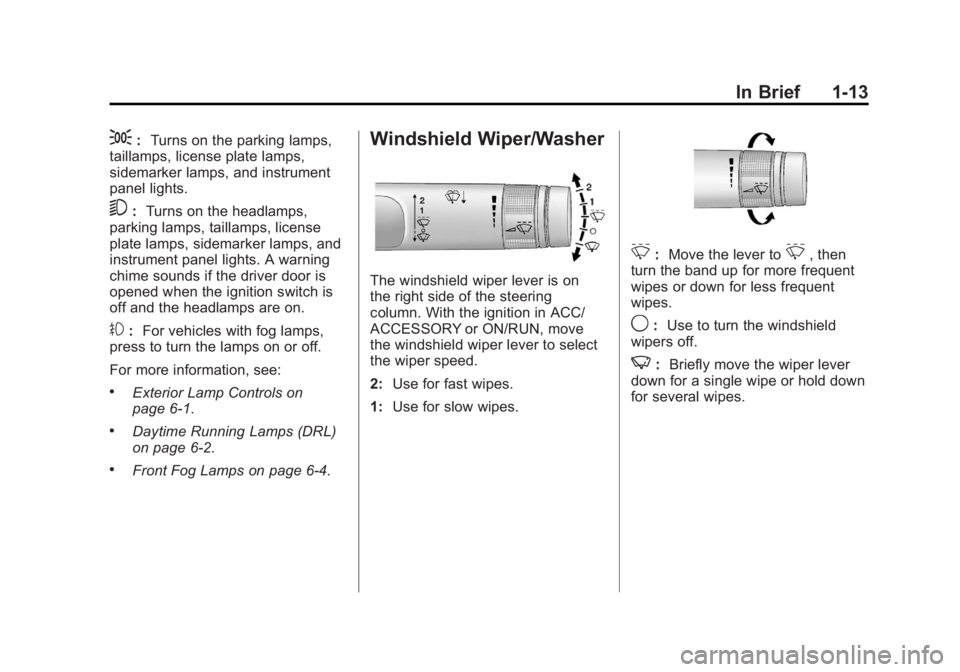
The windshield wiper lever is on
the right side of the steering
column. With the ignition in ACC/
ACCESSORY or ON/RUN, move
the windshield wiper lever to select
the wiper speed.
2: Use for fast wipes.
1: Use for slow wipes.
3:Move the lever to3, then
turn the band up for more frequent
wipes or down for less frequent
wipes.
9: Use to turn the windshield
wipers off.
3: Briefly move the wiper lever
down for a single wipe or hold down
for several wipes.
Page 26 of 388
Black plate (20,1)Buick Verano Owner Manual - 2012 - CRC - 1/10/12
1-20 In Brief
Power Outlets
The accessory power outlets can be
used to plug in electrical equipment,
such as a cell phone or MP3 player.
There is one accessory power outlet
located on the instrument panel
below the climate control and one
on the rear of the center floor
console. These outlets are powered
when the key is in ON/RUN or ACC/
ACCESSORY, or until the driver
door is opened within 10 minutes
of turning off the vehicle. See
Retained Accessory Power (RAP)
on page 9‑22.
SeePower Outlets on page 5‑6.
Sunroof
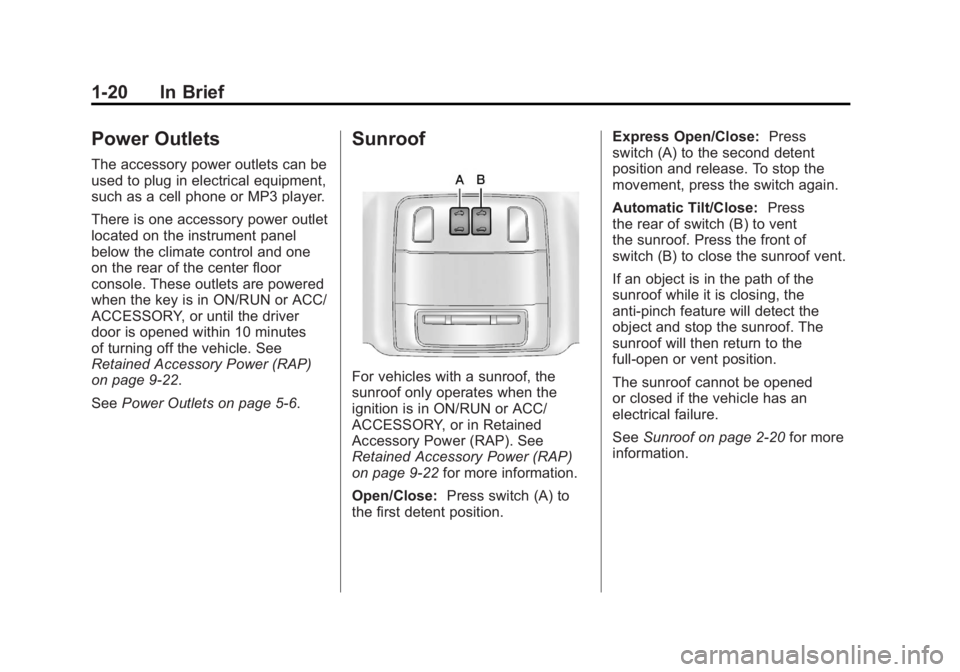
For vehicles with a sunroof, the
sunroof only operates when the
ignition is in ON/RUN or ACC/
ACCESSORY, or in Retained
Accessory Power (RAP). See
Retained Accessory Power (RAP)
on page 9‑22 for more information.
Open/Close: Press switch (A) to
the first detent position. Express Open/Close:
Press
switch (A) to the second detent
position and release. To stop the
movement, press the switch again.
Automatic Tilt/Close: Press
the rear of switch (B) to vent
the sunroof. Press the front of
switch (B) to close the sunroof vent.
If an object is in the path of the
sunroof while it is closing, the
anti-pinch feature will detect the
object and stop the sunroof. The
sunroof will then return to the
full-open or vent position.
The sunroof cannot be opened
or closed if the vehicle has an
electrical failure.
See Sunroof on page 2‑20 for more
information.
Page 38 of 388
Black plate (8,1)Buick Verano Owner Manual - 2012 - CRC - 1/10/12
2-8 Keys, Doors, and Windows
The battery is not rechargeable. To
replace the battery:
1. Push the button on thetransmitter to extend the key.
2. Remove the battery cover by prying it with a finger.
3. Remove the battery by pushing on the battery and sliding it
toward the key blade.
4. Insert the new battery, positive side facing up. Push the battery
down until it is held in place.
Replace with a CR2032 or
equivalent battery.
5. Snap the battery cover back on to the transmitter.
Remote Vehicle Start
The vehicle may have this feature
that allows you to start the engine
from outside the vehicle.
/(Remote Vehicle Start):
This button will be on the RKE
transmitter if the vehicle has remote
start. Vehicles with an automatic climate
control system will default to a
heating or cooling mode depending
on the outside temperature during
a remote start. A vehicle without
automatic climate control will default
to the last used heating or cooling
mode. Once the key is turned to
ON/RUN, the climate control system
will turn on at the setting the vehicle
was last set to. If the vehicle has
heated seats, they may come on
during a remote start. See
Heated
Front Seats on page 3‑6.
Laws in some local communities
may restrict the use of remote
starters. For example, some laws
require a person using remote
start to have the vehicle in view.
Check local regulations for any
requirements.
Other conditions can affect the
performance of the transmitter. See
Remote Keyless Entry (RKE)
System on page 2‑3. Starting the Vehicle
To start the engine using the remote
start feature:
1. Aim the RKE transmitter at the
vehicle.
2. Press and release
Q.
3. Immediately after completing Step 2, press and hold
/until
the turn signal lamps flash, or for
about two seconds if the vehicle
is not in view.
When the engine starts, the parking
lamps will turn on and remain on as
long as the engine is running. The
doors will be locked and the climate
control system may come on.
The engine will continue to run for
10 minutes. Repeat the steps for a
10-minute time extension. Remote
start can be extended only once.
Start the vehicle before driving.