ad blue BUICK ENCLAVE 2019 Owner's Manual
[x] Cancel search | Manufacturer: BUICK, Model Year: 2019, Model line: ENCLAVE, Model: BUICK ENCLAVE 2019Pages: 398, PDF Size: 5.91 MB
Page 56 of 398

Buick Enclave Owner Manual (GMNA-Localizing-U.S./Canada/Mexico-
12146155) - 2019 - crc - 9/10/18
Keys, Doors, and Windows 55
To adjust the brightness, press the
button (1) on the back of the
rearview mirror without covering the
light sensor (2).
Each button press cycles the
brightness between five settings.
{Warning
The Rear Camera Mirror (RCM)
has a limited view. Portions of the
road, vehicles, and other objects
may not be seen. Do not drive or
park the vehicle using only this
camera. Objects may appear
closer than they are. Check the
outside mirrors or glance over
your shoulder when making lane
changes or merging. Failure to
use proper care may result in
injury, death, or vehicle damage.
The camera that provides the Rear
Camera Mirror (RCM) image is
above the license plate, next to the
Rear Vision Camera (RVC).
Troubleshooting
If the tab is in the rearward position
and a blue screen and
dare
displayed in the mirror and the
display shuts off, see your dealer for
service.
The RCM may not work properly or
display a clear image if:
. There is glare from the sun or
headlamps. This may obstruct
objects from view.
Page 70 of 398
Buick Enclave Owner Manual (GMNA-Localizing-U.S./Canada/Mexico-
12146155) - 2019 - crc - 9/10/18
Seats and Restraints 69
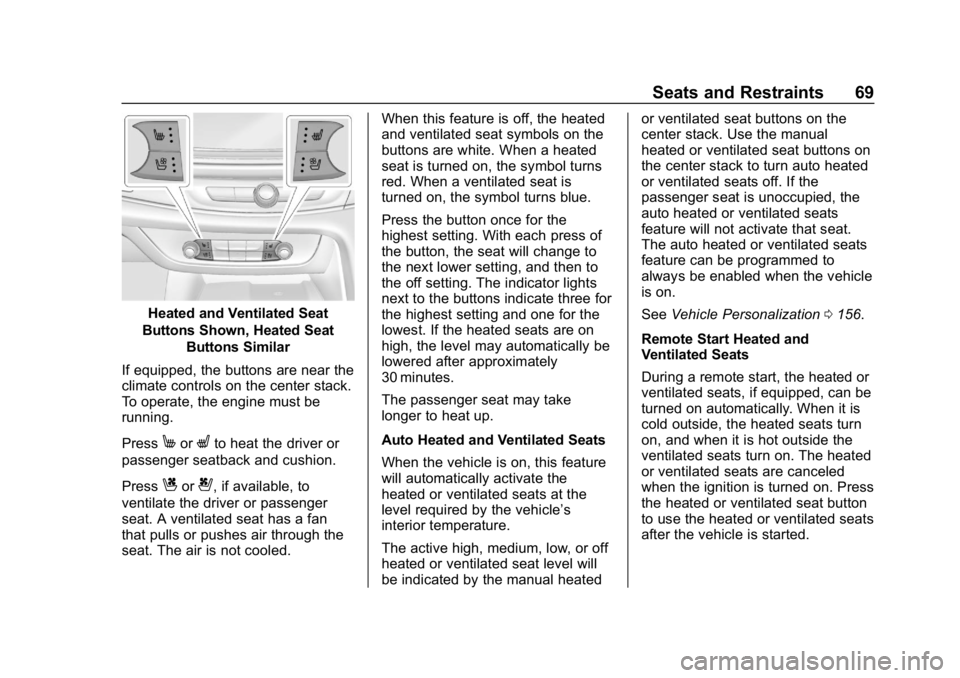
Heated and Ventilated Seat
Buttons Shown, Heated Seat Buttons Similar
If equipped, the buttons are near the
climate controls on the center stack.
To operate, the engine must be
running.
Press
MorLto heat the driver or
passenger seatback and cushion.
Press
Cor{, if available, to
ventilate the driver or passenger
seat. A ventilated seat has a fan
that pulls or pushes air through the
seat. The air is not cooled. When this feature is off, the heated
and ventilated seat symbols on the
buttons are white. When a heated
seat is turned on, the symbol turns
red. When a ventilated seat is
turned on, the symbol turns blue.
Press the button once for the
highest setting. With each press of
the button, the seat will change to
the next lower setting, and then to
the off setting. The indicator lights
next to the buttons indicate three for
the highest setting and one for the
lowest. If the heated seats are on
high, the level may automatically be
lowered after approximately
30 minutes.
The passenger seat may take
longer to heat up.
Auto Heated and Ventilated Seats
When the vehicle is on, this feature
will automatically activate the
heated or ventilated seats at the
level required by the vehicle’s
interior temperature.
The active high, medium, low, or off
heated or ventilated seat level will
be indicated by the manual heatedor ventilated seat buttons on the
center stack. Use the manual
heated or ventilated seat buttons on
the center stack to turn auto heated
or ventilated seats off. If the
passenger seat is unoccupied, the
auto heated or ventilated seats
feature will not activate that seat.
The auto heated or ventilated seats
feature can be programmed to
always be enabled when the vehicle
is on.
See
Vehicle Personalization 0156.
Remote Start Heated and
Ventilated Seats
During a remote start, the heated or
ventilated seats, if equipped, can be
turned on automatically. When it is
cold outside, the heated seats turn
on, and when it is hot outside the
ventilated seats turn on. The heated
or ventilated seats are canceled
when the ignition is turned on. Press
the heated or ventilated seat button
to use the heated or ventilated seats
after the vehicle is started.
Page 157 of 398
Buick Enclave Owner Manual (GMNA-Localizing-U.S./Canada/Mexico-
12146155) - 2019 - crc - 9/10/18
156 Instruments and Controls
be reduced the next time the vehicle
is driven. The vehicle may be driven
while this message is on, but
maximum acceleration and speed
may be reduced. Anytime this
message stays on, or displays
repeatedly, the vehicle should be
taken to your dealer for service as
soon as possible.
Vehicle Speed Messages
SPEED LIMITED TO
XXX KM/H (MPH)
This message shows that the
vehicle speed has been limited to
the speed displayed. The limited
speed is a protection for various
propulsion and vehicle systems,
such as lubrication, thermal,
suspension, Teen Driver if
equipped, or tires.
Vehicle
Personalization
Use the audio system controls to
access the personalization menus
for customizing vehicle features.
The following are all possible
personalization features. Depending
on the vehicle, some may not be
available.
Infotainment System Audio
System Controls
To access the
personalization menu:1. Touch SETTINGS on the Home Page on the infotainment
system display.
2. Touch the desired feature to display a list of available
options.
3. Touch to select the desired feature setting.
4. Touch
SBack to exit or move
backward in a menu. Personalization Menus
The following list of menu items may
be available:
.
Time and Date
. Rear Seat Reminder
. Language
. Valet Mode
. Teen Driver
. Radio
. Vehicle
. Bluetooth
. Apple CarPlay
. Android Auto
. Voice
. Display
. Rear Camera
. Return to Factory Settings
. Software Information
. Wi-Fi
Each menu is detailed in the
following information.
Page 163 of 398
Buick Enclave Owner Manual (GMNA-Localizing-U.S./Canada/Mexico-
12146155) - 2019 - crc - 9/10/18
162 Instruments and Controls
Remote Start Auto Heat Seats
If equipped and turned on, this
feature will turn the heated seats on
when using remote start on
cold days.
Select Off or On.
Remote Window Operation
If equipped, this feature enables the
remote operation of all windows
from the RKE transmitter. See
“Remote Window Operation”in
Power Windows 056.
Select Off or On.
Passive Door Unlock
This allows the selection of what
doors will unlock when using the
button on the driver door to unlock
the vehicle.
Select All Doors or Driver Door.
Passive Door Lock
This allows passive locking to be
turned on or off and selects
feedback. See Remote Keyless
Entry (RKE) System Operation 029. Select Off, On with Horn
Chirp, or On.
Remote Left in Vehicle Alert
This feature sounds an alert when
the RKE transmitter is left in the
vehicle. This menu also enables the
Remote No Longer in Vehicle Alert.
Select Off or On.
Bluetooth
Select and the following may
display:
.
Pair New Device
. Device Management
. Ringtones
. Voice Mail Numbers
. Text Message Alerts
Pair New Device
Select to pair a new device. See
“Pairing” in“Infotainment Controls”
under “Bluetooth” in the infotainment
manual. Device Management
Select to connect to a different
phone source, disconnect a phone,
or delete a phone.
Ringtones
Select to change the ring tone for
the specific phone. The phone does
not need to be connected to change
the ring tone.
Voice Mail Numbers
This feature displays the voice mail
number for all connected phones.
To change the voice mail number,
select the edit icon. Type a new
number, then select Save.
Text Message Alerts
This allows the feature to be turned
on or off.
Select Off or On.
Apple CarPlay
Select and the following may
display:
.
Apple CarPlay
. Manage Apple CarPlay Devices
Page 170 of 398
Buick Enclave Owner Manual (GMNA-Localizing-U.S./Canada/Mexico-
12146155) - 2019 - crc - 9/10/18
Lighting 169
;:Turns on the parking lamps
including all lamps, except the
headlamps.
5: Turns on the headlamps
together with the parking lamps and
instrument panel lights.
IntelliBeam System
If equipped, this system turns the
vehicle's high-beam headlamps on
and off according to surrounding
traffic conditions.
The system turns the high-beam
headlamps on when it is dark
enough and there is no other traffic
present.
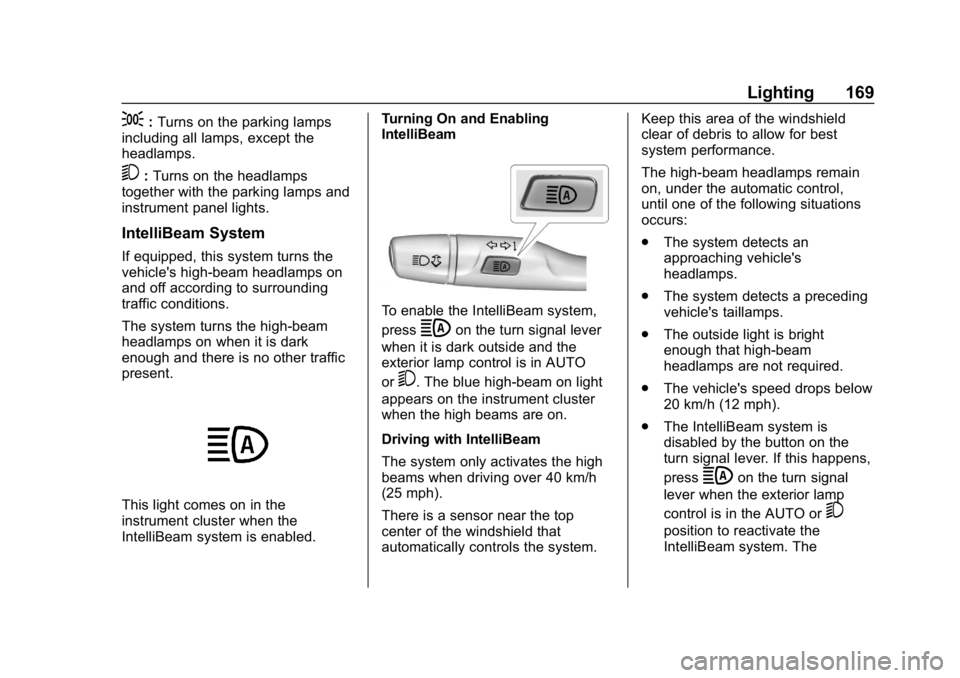
This light comes on in the
instrument cluster when the
IntelliBeam system is enabled. Turning On and Enabling
IntelliBeam
To enable the IntelliBeam system,
press
bon the turn signal lever
when it is dark outside and the
exterior lamp control is in AUTO
or
5. The blue high-beam on light
appears on the instrument cluster
when the high beams are on.
Driving with IntelliBeam
The system only activates the high
beams when driving over 40 km/h
(25 mph).
There is a sensor near the top
center of the windshield that
automatically controls the system. Keep this area of the windshield
clear of debris to allow for best
system performance.
The high-beam headlamps remain
on, under the automatic control,
until one of the following situations
occurs:
.
The system detects an
approaching vehicle's
headlamps.
. The system detects a preceding
vehicle's taillamps.
. The outside light is bright
enough that high-beam
headlamps are not required.
. The vehicle's speed drops below
20 km/h (12 mph).
. The IntelliBeam system is
disabled by the button on the
turn signal lever. If this happens,
press
bon the turn signal
lever when the exterior lamp
control is in the AUTO or
5
position to reactivate the
IntelliBeam system. The
Page 231 of 398

Buick Enclave Owner Manual (GMNA-Localizing-U.S./Canada/Mexico-
12146155) - 2019 - crc - 9/10/18
230 Driving and Operating
Once ACC has resumed, if there is
no vehicle ahead, if the vehicle
ahead is beyond the selected
following gap, or if the vehicle has
exited a sharp curve, then the
vehicle speed will increase to the
set speed.
Increasing Speed While ACC is at
a Set Speed
Do one of the following:
.Use the accelerator to get to the
higher speed. Press SET– down.
Release the control and the
accelerator pedal. The vehicle
will now cruise at the higher
speed.
When the accelerator pedal is
pressed, ACC will not brake
because it is overridden. The
ACC indicator turns blue on the
instrument cluster.
. Press and hold RES+ up until
the desired set speed appears
on the display, then release it.
. To increase speed in small
increments, briefly press RES+.
For each press, the vehicle speed increases to the next
5 km/h (1 mph) mark on the
speedometer.
The set speed can also be
increased while the vehicle is
stopped.
. If stopped with the brake
applied, press RES+ until the
desired set speed is displayed.
. If ACC is holding the vehicle at a
stop and there is another vehicle
directly ahead, pressing RES+
will increase the set speed.
Pressing RES+ when there is no
longer a vehicle ahead will
cause ACC to resume.
Reducing Speed While ACC is at a
Set Speed
Do one of the following:
. Use the brake to get to the
desired lower speed. Press
SET– down and release the
accelerator pedal. The vehicle
will now cruise at the lower
speed. .
Press and hold SET– down until
the desired lower speed is
reached, then release it.
. To decrease the vehicle speed in
smaller increments, press SET−
down briefly. For each press, the
vehicle speed decreases to the
next 5 km/h (1 mph) mark on the
speedometer.
. To decrease speed while the
vehicle is stopped, press SET−
until the desired set speed is
displayed.
Selecting the Follow Distance Gap
When a slower moving vehicle is
detected ahead within the selected
following gap, ACC will adjust the
vehicle's speed and attempt to
maintain the follow distance gap
selected.
Press
[on the steering wheel to
adjust the following gap. Each press
cycles the gap button through three
settings: Far, Medium, or Near.
Page 234 of 398
Buick Enclave Owner Manual (GMNA-Localizing-U.S./Canada/Mexico-
12146155) - 2019 - crc - 9/10/18
Driving and Operating 233
Electric Parking Brake0219. To
resume ACC and release the EPB,
press the accelerator pedal.
A DIC warning message may
display indicating to shift to P (Park)
before exiting the vehicle.
{Warning
If ACC has stopped the vehicle,
and if ACC is disengaged, turned
off, or canceled, the vehicle will
no longer be held at a stop. The
vehicle can move. When ACC is
holding the vehicle at a stop,
always be prepared to manually
apply the brakes.
{Warning
Leaving the vehicle without
placing it in P (Park) can be
dangerous. Do not leave the
vehicle while it is being held at a
stop by ACC. Always place the
(Continued)
Warning (Continued)
vehicle in P (Park) and turn off
the ignition before leaving the
vehicle.
ACC Override
If using the accelerator pedal while
ACC is active, the ACC indicator
turns blue on the instrument cluster.
ACC will resume operation when the
accelerator pedal is not being
pressed.
{Warning
The ACC will not automatically
apply the brakes if your foot is
resting on the accelerator pedal.
You could crash into a vehicle
ahead of you. Curves in the Road
{Warning
On curves, ACC may not detect a
vehicle ahead in your lane. You
could be startled if the vehicle
accelerates up to the set speed,
especially when following a
vehicle exiting or entering exit
ramps. You could lose control of
the vehicle or crash. Do not use
ACC while driving on an entrance
or exit ramp. Always be ready to
use the brakes if necessary.
{Warning
On curves, ACC may respond to
a vehicle in another lane, or may
not have time to react to a vehicle
in your lane. You could crash into
a vehicle ahead of you, or lose
control of your vehicle. Give extra
attention in curves and be ready
(Continued)
Page 264 of 398
Buick Enclave Owner Manual (GMNA-Localizing-U.S./Canada/Mexico-
12146155) - 2019 - crc - 9/10/18
Driving and Operating 263
Trailer Brakes
Loaded trailers over 450 kg
(1,000 lb) must be equipped with
brake systems and with brakes for
each axle. Trailer braking equipment
conforming to Canadian Standards
Association (CSA) requirement
CAN3-D313, or its equivalent, is
recommended.
State or local regulations may
require trailers to have their own
braking system if the loaded weight
of the trailer exceeds certain
requirements that can vary from
state to state.
Read and follow the instructions for
the trailer brakes so they are
installed, adjusted, and maintained
properly.
Never attempt to tap into your
vehicle's hydraulic brake system.
If you do, both the vehicle anti-lock
brakes and the trailer brakes may
not function and could result in a
crash.
Trailer Wiring
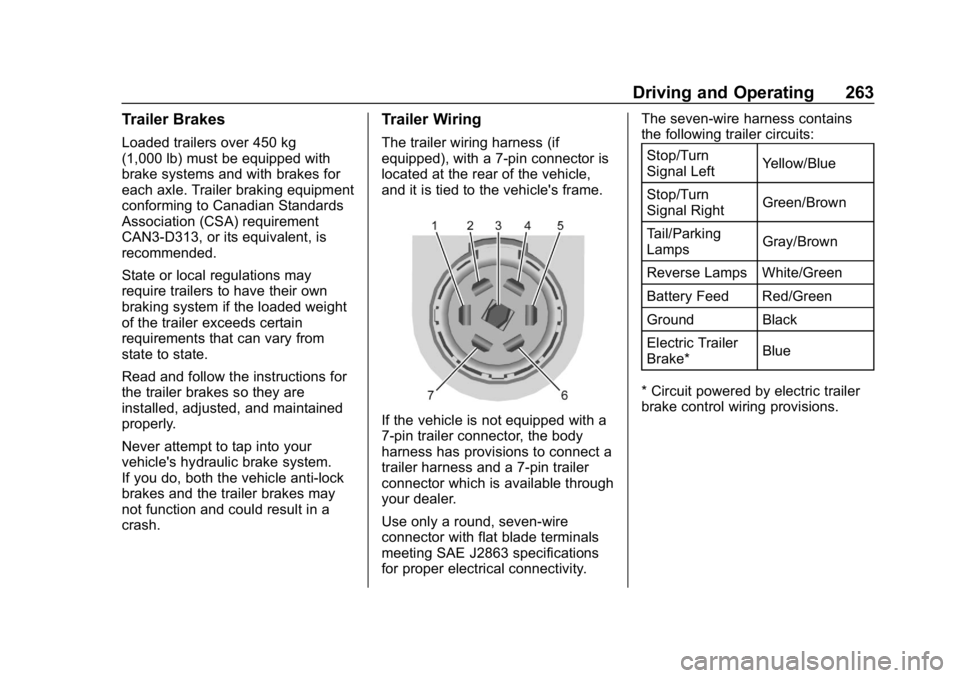
The trailer wiring harness (if
equipped), with a 7-pin connector is
located at the rear of the vehicle,
and it is tied to the vehicle's frame.
If the vehicle is not equipped with a
7-pin trailer connector, the body
harness has provisions to connect a
trailer harness and a 7-pin trailer
connector which is available through
your dealer.
Use only a round, seven-wire
connector with flat blade terminals
meeting SAE J2863 specifications
for proper electrical connectivity.The seven-wire harness contains
the following trailer circuits:
Stop/Turn
Signal Left Yellow/Blue
Stop/Turn
Signal Right Green/Brown
Tail/Parking
Lamps Gray/Brown
Reverse Lamps White/Green
Battery Feed Red/Green
Ground Black
Electric Trailer
Brake* Blue
* Circuit powered by electric trailer
brake control wiring provisions.
Page 265 of 398
Buick Enclave Owner Manual (GMNA-Localizing-U.S./Canada/Mexico-
12146155) - 2019 - crc - 9/10/18
264 Driving and Operating
Electric Trailer Brake Control
Wiring Provisions
Wiring provisions for an aftermarket
electric trailer brake controller are
included with the vehicle as part of
the trailer wiring package. The
harness contains the following
circuits:Electric Trailer
Brakes Blue
Battery Feed Red/Green or
Red/Blue
Brake Apply
Signal White/Blue
Ground Black
Refer to the aftermarket electric
trailer brake controller owner's
manual to determine wire color
coding of the electric trailer brake
controller. The wire colors on the
brake controller may be different
from the vehicle. The electric trailer
brake controller should be installed
by your dealer or a qualified service
center. If equipped, there are four blunt cut
wires inside the front driver side
instrument panel. It will be
necessary to have a technician
connect the 12-volt power to the
engine compartment fuse block.
Trailer Lamps
Always check all trailer lamps are
working at the beginning of each
trip, and periodically on longer trips.
Turn Signals When Towing a
Trailer
When properly connected, the trailer
turn signals will illuminate to indicate
the vehicle is turning, changing
lanes, or stopping. When towing a
trailer, the arrows on the instrument
cluster will illuminate even if the
trailer is not properly connected or
the bulbs are burned out.
Always check all trailer lamps are
working at the beginning of each
trip, and periodically on longer trips.
Tow/Haul Mode
For instructions on how to enter
Tow/Haul mode, see
Driver Mode
Control 0223.
Tow/Haul assists when pulling a
heavy trailer or a large or heavy
load. See Tow/Haul Mode 0217.
Tow/Haul Mode is designed to be
most effective when the vehicle and
trailer combined weight is at least
75% of the vehicle's Gross
Combined Weight Rating (GCWR).
See “Weight of the Trailer” under
Trailer Towing 0258.
Tow/Haul Mode is most useful when
pulling a heavy trailer or a large or
heavy load:
. through rolling terrain
. in stop-and-go traffic
. in busy parking lots
Operating the vehicle in Tow/Haul
Mode when lightly loaded or not
towing will not cause damage. It is
not recommended and may result in
Page 375 of 398
Buick Enclave Owner Manual (GMNA-Localizing-U.S./Canada/Mexico-
12146155) - 2019 - crc - 9/10/18
374 OnStar
OnStar
OnStar Overview
OnStar Overview . . . . . . . . . . . . . 374
OnStar Services
Emergency . . . . . . . . . . . . . . . . . . . 375
Security . . . . . . . . . . . . . . . . . . . . . . 376
OnStar Additional Information
OnStar AdditionalInformation . . . . . . . . . . . . . . . . . . 376
OnStar Overview
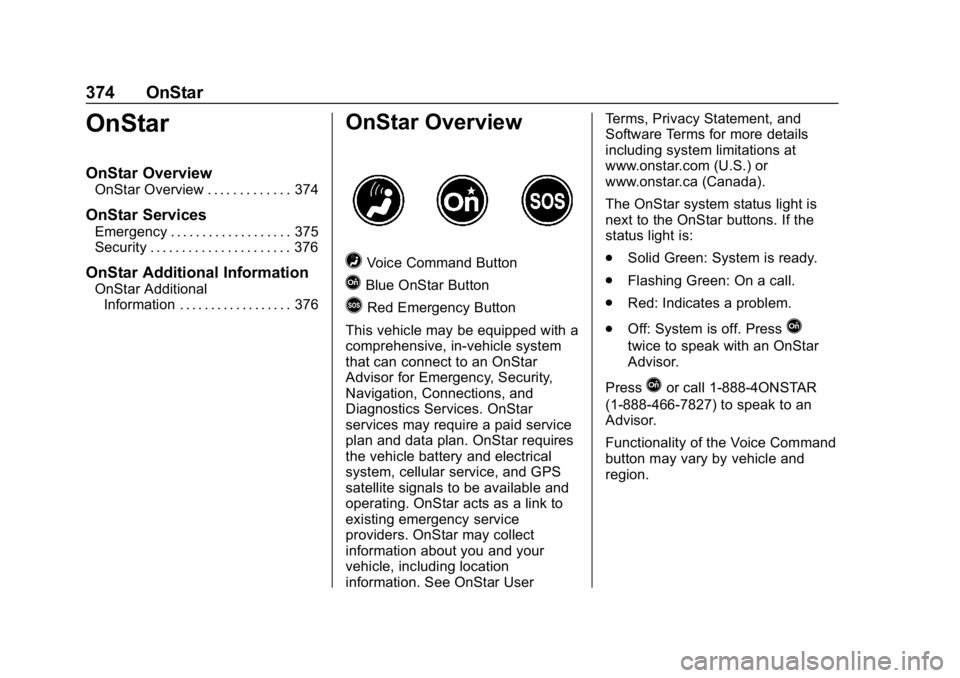
=Voice Command Button
QBlue OnStar Button
>Red Emergency Button
This vehicle may be equipped with a
comprehensive, in-vehicle system
that can connect to an OnStar
Advisor for Emergency, Security,
Navigation, Connections, and
Diagnostics Services. OnStar
services may require a paid service
plan and data plan. OnStar requires
the vehicle battery and electrical
system, cellular service, and GPS
satellite signals to be available and
operating. OnStar acts as a link to
existing emergency service
providers. OnStar may collect
information about you and your
vehicle, including location
information. See OnStar User Terms, Privacy Statement, and
Software Terms for more details
including system limitations at
www.onstar.com (U.S.) or
www.onstar.ca (Canada).
The OnStar system status light is
next to the OnStar buttons. If the
status light is:
.
Solid Green: System is ready.
. Flashing Green: On a call.
. Red: Indicates a problem.
. Off: System is off. Press
Q
twice to speak with an OnStar
Advisor.
Press
Qor call 1-888-4ONSTAR
(1-888-466-7827) to speak to an
Advisor.
Functionality of the Voice Command
button may vary by vehicle and
region.