instrument cluster BUICK ENCLAVE 2023 User Guide
[x] Cancel search | Manufacturer: BUICK, Model Year: 2023, Model line: ENCLAVE, Model: BUICK ENCLAVE 2023Pages: 366, PDF Size: 6.62 MB
Page 116 of 366
Buick Enclave Owner Manual (GMNA-Localizing-U.S./Canada/Mexico-
16411536) - 2023 - CRC - 3/28/22
Instruments and Controls 115
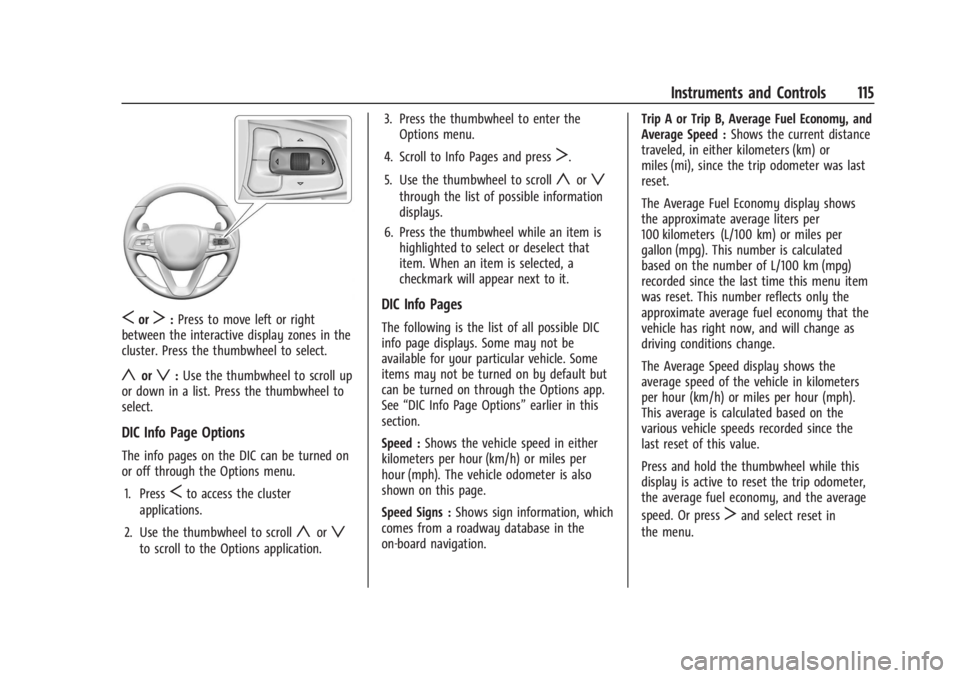
SorT:Press to move left or right
between the interactive display zones in the
cluster. Press the thumbwheel to select.
yorz: Use the thumbwheel to scroll up
or down in a list. Press the thumbwheel to
select.
DIC Info Page Options
The info pages on the DIC can be turned on
or off through the Options menu.
1. Press
Sto access the cluster
applications.
2. Use the thumbwheel to scroll
yorz
to scroll to the Options application. 3. Press the thumbwheel to enter the
Options menu.
4. Scroll to Info Pages and press
T.
5. Use the thumbwheel to scroll
yorz
through the list of possible information
displays.
6. Press the thumbwheel while an item is highlighted to select or deselect that
item. When an item is selected, a
checkmark will appear next to it.
DIC Info Pages
The following is the list of all possible DIC
info page displays. Some may not be
available for your particular vehicle. Some
items may not be turned on by default but
can be turned on through the Options app.
See “DIC Info Page Options” earlier in this
section.
Speed : Shows the vehicle speed in either
kilometers per hour (km/h) or miles per
hour (mph). The vehicle odometer is also
shown on this page.
Speed Signs : Shows sign information, which
comes from a roadway database in the
on-board navigation. Trip A or Trip B, Average Fuel Economy, and
Average Speed :
Shows the current distance
traveled, in either kilometers (km) or
miles (mi), since the trip odometer was last
reset.
The Average Fuel Economy display shows
the approximate average liters per
100 kilometers (L/100 km) or miles per
gallon (mpg). This number is calculated
based on the number of L/100 km (mpg)
recorded since the last time this menu item
was reset. This number reflects only the
approximate average fuel economy that the
vehicle has right now, and will change as
driving conditions change.
The Average Speed display shows the
average speed of the vehicle in kilometers
per hour (km/h) or miles per hour (mph).
This average is calculated based on the
various vehicle speeds recorded since the
last reset of this value.
Press and hold the thumbwheel while this
display is active to reset the trip odometer,
the average fuel economy, and the average
speed. Or press
Tand select reset in
the menu.
Page 118 of 366
Buick Enclave Owner Manual (GMNA-Localizing-U.S./Canada/Mexico-
16411536) - 2023 - CRC - 3/28/22
Instruments and Controls 117
Following Distance :The following distance
to a moving vehicle ahead is displayed as a
time value on this page. See Forward
Collision Alert (FCA) System 0232.
Economy Trend : Shows history of the
Average Fuel Economy from the last 50 km
(30 mi). Each bar represents about 5 km
(3 mi) of driving. During driving the bars will
shift to always reflect the most recent
distance on the right side. Press and hold
the thumbwheel to clear the graph or press
Tto reset through the menu.
Oil Temperature (Base Cluster) : Shows the
current oil temperature in either degrees
Celsius (°C) or degrees Fahrenheit (°F). This
display is available in the Performance app
on the uplevel cluster.
Off Road : Displays vehicle pitch and roll
information, road wheel angle, and
four-wheel drive (4WD) status.
Blank Page : Shows no information.
Head-Up Display (HUD)
{Warning
If the HUD image is too bright or too
high in your field of view, it may take
you more time to see things you need to
see when it is dark outside. Be sure to
keep the HUD image dim and placed low
in your field of view.
If equipped with HUD, some information
concerning the operation of the vehicle is
projected onto the windshield. The image is
projected through the HUD lens on top of
the instrument panel. The information
appears as an image focused out toward the
front of the vehicle.
Caution
If you try to use the HUD image as a
parking aid, you may misjudge the
distance and damage your vehicle. Do not
use the HUD image as a parking aid.
The HUD information can be displayed in
various languages in some vehicles. The
speedometer reading and other numerical
values can be displayed in either English or
metric units. The language selection is changed through
the radio and the units of measurement are
changed through the instrument cluster. See
Settings
0165 and “Options” under
Instrument Cluster (Base Level) 096 or
Instrument Cluster (Uplevel) 098.
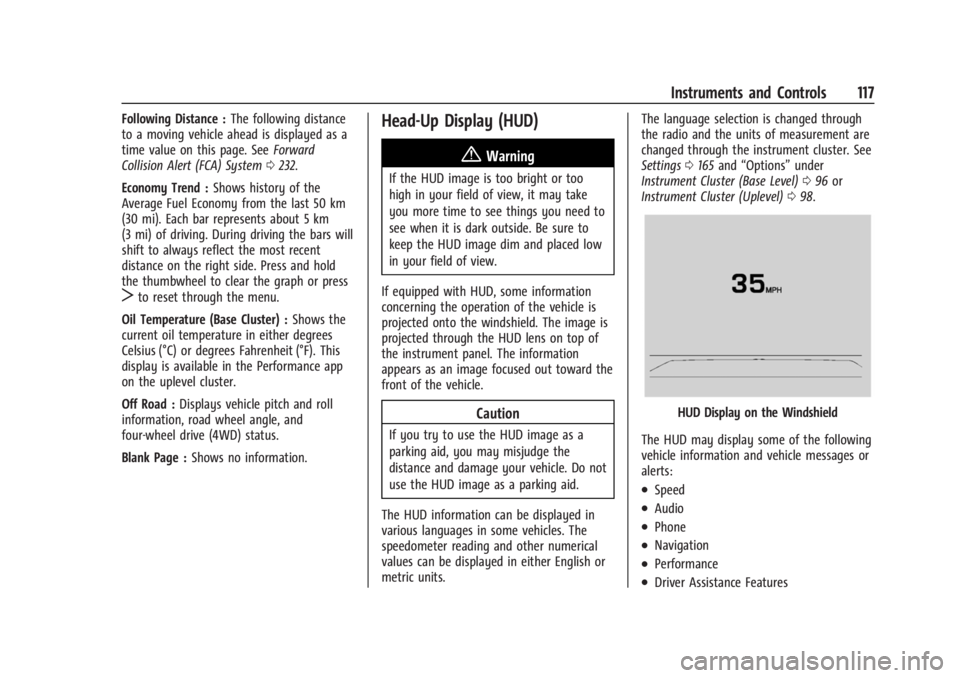
HUD Display on the Windshield
The HUD may display some of the following
vehicle information and vehicle messages or
alerts:
.Speed
.Audio
.Phone
.Navigation
.Performance
.Driver Assistance Features
Page 119 of 366
Buick Enclave Owner Manual (GMNA-Localizing-U.S./Canada/Mexico-
16411536) - 2023 - CRC - 3/28/22
118 Instruments and Controls
.Vehicle Messages
Some vehicle messages or alerts displayed in
the HUD may be cleared by using the
steering wheel controls. See Vehicle
Messages 0119.
Some information shown may not be
available on your vehicle if it is not
equipped with these features.
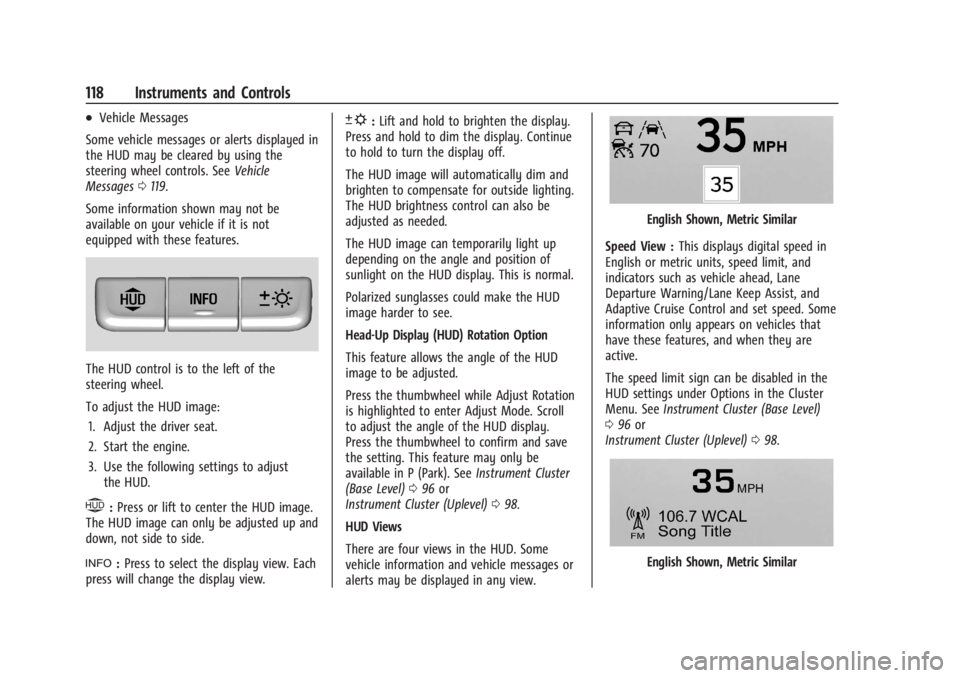
The HUD control is to the left of the
steering wheel.
To adjust the HUD image: 1. Adjust the driver seat.
2. Start the engine.
3. Use the following settings to adjust the HUD.
$:Press or lift to center the HUD image.
The HUD image can only be adjusted up and
down, not side to side.
!: Press to select the display view. Each
press will change the display view.
D: Lift and hold to brighten the display.
Press and hold to dim the display. Continue
to hold to turn the display off.
The HUD image will automatically dim and
brighten to compensate for outside lighting.
The HUD brightness control can also be
adjusted as needed.
The HUD image can temporarily light up
depending on the angle and position of
sunlight on the HUD display. This is normal.
Polarized sunglasses could make the HUD
image harder to see.
Head-Up Display (HUD) Rotation Option
This feature allows the angle of the HUD
image to be adjusted.
Press the thumbwheel while Adjust Rotation
is highlighted to enter Adjust Mode. Scroll
to adjust the angle of the HUD display.
Press the thumbwheel to confirm and save
the setting. This feature may only be
available in P (Park). See Instrument Cluster
(Base Level) 096 or
Instrument Cluster (Uplevel) 098.
HUD Views
There are four views in the HUD. Some
vehicle information and vehicle messages or
alerts may be displayed in any view.
English Shown, Metric Similar
Speed View : This displays digital speed in
English or metric units, speed limit, and
indicators such as vehicle ahead, Lane
Departure Warning/Lane Keep Assist, and
Adaptive Cruise Control and set speed. Some
information only appears on vehicles that
have these features, and when they are
active.
The speed limit sign can be disabled in the
HUD settings under Options in the Cluster
Menu. See Instrument Cluster (Base Level)
0 96 or
Instrument Cluster (Uplevel) 098.
English Shown, Metric Similar
Page 120 of 366
Buick Enclave Owner Manual (GMNA-Localizing-U.S./Canada/Mexico-
16411536) - 2023 - CRC - 3/28/22
Instruments and Controls 119
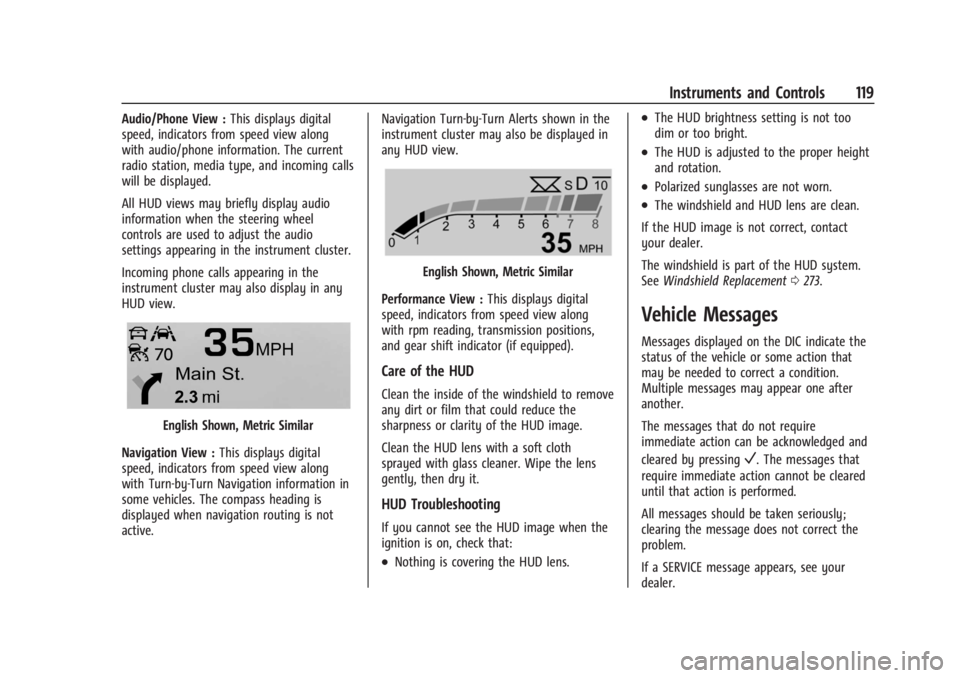
Audio/Phone View :This displays digital
speed, indicators from speed view along
with audio/phone information. The current
radio station, media type, and incoming calls
will be displayed.
All HUD views may briefly display audio
information when the steering wheel
controls are used to adjust the audio
settings appearing in the instrument cluster.
Incoming phone calls appearing in the
instrument cluster may also display in any
HUD view.
English Shown, Metric Similar
Navigation View : This displays digital
speed, indicators from speed view along
with Turn-by-Turn Navigation information in
some vehicles. The compass heading is
displayed when navigation routing is not
active. Navigation Turn-by-Turn Alerts shown in the
instrument cluster may also be displayed in
any HUD view.
English Shown, Metric Similar
Performance View : This displays digital
speed, indicators from speed view along
with rpm reading, transmission positions,
and gear shift indicator (if equipped).
Care of the HUD
Clean the inside of the windshield to remove
any dirt or film that could reduce the
sharpness or clarity of the HUD image.
Clean the HUD lens with a soft cloth
sprayed with glass cleaner. Wipe the lens
gently, then dry it.
HUD Troubleshooting
If you cannot see the HUD image when the
ignition is on, check that:
.Nothing is covering the HUD lens.
.The HUD brightness setting is not too
dim or too bright.
.The HUD is adjusted to the proper height
and rotation.
.Polarized sunglasses are not worn.
.The windshield and HUD lens are clean.
If the HUD image is not correct, contact
your dealer.
The windshield is part of the HUD system.
See Windshield Replacement 0273.
Vehicle Messages
Messages displayed on the DIC indicate the
status of the vehicle or some action that
may be needed to correct a condition.
Multiple messages may appear one after
another.
The messages that do not require
immediate action can be acknowledged and
cleared by pressing
V. The messages that
require immediate action cannot be cleared
until that action is performed.
All messages should be taken seriously;
clearing the message does not correct the
problem.
If a SERVICE message appears, see your
dealer.
Page 124 of 366

Buick Enclave Owner Manual (GMNA-Localizing-U.S./Canada/Mexico-
16411536) - 2023 - CRC - 3/28/22
Lighting 123
Lighting
Exterior Lighting
Exterior Lamp Controls . . . . . . . . . . . . . . . . . 123
Exterior Lamps Off Reminder . . . . . . . . . . 124
Headlamp High/Low-Beam Changer . . . . 124
Flash-to-Pass . . . . . . . . . . . . . . . . . . . . . . . . . . . 125
Daytime Running Lamps (DRL) . . . . . . . . . 125
Automatic Headlamp System . . . . . . . . . . 125
Hazard Warning Flashers . . . . . . . . . . . . . . 126
Turn and Lane-Change Signals . . . . . . . . . 126
Interior Lighting
Instrument Panel IlluminationControl . . . . . . . . . . . . . . . . . . . . . . . . . . . . . . 126
Courtesy Lamps . . . . . . . . . . . . . . . . . . . . . . . . 127
Dome Lamps . . . . . . . . . . . . . . . . . . . . . . . . . . . 127
Reading Lamps . . . . . . . . . . . . . . . . . . . . . . . . . 127
Lighting Features
Entry Lighting . . . . . . . . . . . . . . . . . . . . . . . . . 128
Exit Lighting . . . . . . . . . . . . . . . . . . . . . . . . . . . 128
Battery Load Management . . . . . . . . . . . . 128
Battery Power Protection . . . . . . . . . . . . . . 129
Exterior Lighting Battery Saver . . . . . . . . 129
Exterior Lighting
Exterior Lamp Controls
The exterior lamp control is on the turn
signal lever.
Turn the control to the following positions:
O: Turns the exterior lamps off and
deactivates the AUTO mode. Turn to
O
again to reactivate the AUTO mode.
If equipped, the headlamps may
automatically reactivate when the vehicle is
shifted out of P (Park).
AUTO : Automatically turns the exterior
lamps on and off, depending on outside
lighting.
;: Turns on the parking lamps including
all lamps, except the headlamps.
2: Turns on the headlamps together with
the parking lamps and instrument panel
lights.
IntelliBeam System
If equipped, this system turns the vehicle's
high-beam headlamps on and off according
to surrounding traffic conditions.
The system turns the high-beam headlamps
on when it is dark enough and there is no
other traffic present.
This light
bcomes on in the instrument
cluster when the IntelliBeam system is
enabled.
Turning On and Enabling IntelliBeam
Page 125 of 366

Buick Enclave Owner Manual (GMNA-Localizing-U.S./Canada/Mexico-
16411536) - 2023 - CRC - 3/28/22
124 Lighting
To enable the IntelliBeam system, press
bon the turn signal lever when it is
dark outside and the exterior lamp control is
in AUTO or
2.
Driving with IntelliBeam
The system only activates the high beams
when driving over 40 km/h (25 mph).
The blue high-beam on light appears on the
instrument cluster when the high beams
are on.
There is a sensor near the top center of the
windshield that automatically controls the
system. Keep this area of the windshield
clear of debris to allow for best system
performance.
The high-beam headlamps remain on, under
the automatic control, until one of the
following situations occurs:
.The system detects an approaching
vehicle's headlamps.
.The system detects a preceding vehicle's
taillamps.
.The outside light is bright enough that
high-beam headlamps are not required.
.The vehicle's speed drops below 20 km/h
(12 mph).
.The IntelliBeam system is disabled by the
button on the turn signal lever. If this
happens, press
bon the turn signal
lever when the exterior lamp control is in
the AUTO or
2position to reactivate the
IntelliBeam system. The instrument
cluster light will come on to indicate the
IntelliBeam system is reactivated.
The high beams may not turn off
automatically if the system cannot detect
another vehicle's lamps because of any of
the following:
.The other vehicle's lamps are missing,
damaged, obstructed from view,
or otherwise undetected.
.The other vehicle's lamps are covered
with dirt, snow, and/or road spray.
.The other vehicle's lamps cannot be
detected due to dense exhaust, smoke,
fog, snow, road spray, mist, or other
airborne obstructions.
.The vehicle's windshield is dirty, cracked,
or obstructed by something that blocks
the view of the light sensor.
.The vehicle is loaded such that the front
end points upward, causing the light
sensor to aim high and not detect
headlamps and taillamps.
.The vehicle is being driven on winding or
hilly roads.
The automatic high-beam headlamps may
need to be disabled if any of the above
conditions exist.
Exterior Lamps Off Reminder
A warning chime sounds if the driver door is
opened while the ignition is off and the
exterior lamps are on.
Headlamp High/Low-Beam
Changer
Push the turn signal lever away from you
and release, to turn the high beams on. To
return to low beams, push the lever again
or pull it toward you and release.
This indicator light turns on in the
instrument cluster when the high-beam
headlamps are on.
Page 126 of 366

Buick Enclave Owner Manual (GMNA-Localizing-U.S./Canada/Mexico-
16411536) - 2023 - CRC - 3/28/22
Lighting 125
Flash-to-Pass
This feature is used to signal to the vehicle
ahead that you want to pass.
If the headlamps are off or in the low-beam
position, pull the turn signal lever toward
you to momentarily switch to high beams.
Release the lever to turn the high-beam
headlamps off.
Daytime Running Lamps (DRL)
DRL can make it easier for others to see the
front of your vehicle during the day. Fully
functional DRL are required on all vehicles
first sold in Canada.
The dedicated DRL will come on when all of
the following conditions are met:
.The vehicle is on.
.The exterior lamp control is in AUTO.
.The light sensor determines it is daytime.
The taillamps, instrument panel lights, and
other lamps will not be on.
The DRL turn off when the headlamps are
turned to
Oor the vehicle is off. For
vehicles sold in Canada, this control only
works when the vehicle is parked.
Automatic Headlamp System
When the exterior lamp control is set to
AUTO and it is dark enough outside, the
headlamps come on automatically.
There is a light sensor on top of the
instrument panel. Do not cover the sensor;
otherwise the headlamps will come on when
they are not needed.
The system may also turn on the headlamps
when driving through a parking garage or
tunnel.
If the vehicle is started in a dark garage, the
automatic headlamp system comes on
immediately. If it is light outside when the
vehicle leaves the garage, there is a slight delay before the automatic headlamp
system changes to the Daytime Running
Lamps (DRL). During that delay, the
instrument cluster may not be as bright as
usual. Make sure the instrument panel
brightness control is in the full bright
position. See
Instrument Panel Illumination
Control 0126.
When it is bright enough outside, the
headlamps will turn off or may change
to DRL.
The automatic headlamp system turns off
when the exterior lamp control is turned to
Oor the ignition is off.
Lights On with Wipers
If the windshield wipers are activated in
daylight with the engine on, and the
exterior lamp control is in AUTO, the
headlamps, parking lamps, and other
exterior lamps come on. The transition time
for the lamps coming on varies based on
wiper speed. When the wipers are not
operating, these lamps turn off. Move the
exterior lamp control to
Oor;to disable
this feature.
Page 127 of 366

Buick Enclave Owner Manual (GMNA-Localizing-U.S./Canada/Mexico-
16411536) - 2023 - CRC - 3/28/22
126 Lighting
Hazard Warning Flashers
|:Press to make the front and rear turn
signal lamps flash on and off. This warns
others that you are having trouble.
Press
|again to turn the flashers off.
Turn and Lane-Change Signals
Move the lever all the way up or down to
signal a turn.
An arrow on the instrument cluster will
flash in the direction of the turn or lane
change.
Raise or lower the lever until the arrow
starts to flash to signal a lane change. Hold
it there until the lane change is complete.
If the lever is moved momentarily to the
lane change position, the arrow will flash
three times. It will flash six times if Tow/
Haul Mode is active.
The lever returns to its starting position
when it is released.
If after signaling a turn or lane change, the
arrow flashes rapidly or does not come on, a
signal bulb may be burned out. Have any burned out bulbs replaced. If a
bulb is not burned out, check the fuse. See
Instrument Panel Fuse Block
0281.
Interior Lighting
Instrument Panel Illumination
Control
This feature adjusts the brightness of all
illuminated controls. This feature is on the
left side of the instrument panel.
D:Move the thumbwheel up or down to
brighten or dim the lights.
Page 131 of 366
Buick Enclave Owner Manual (GMNA-Localizing-U.S./Canada/Mexico-
16411536) - 2023 - CRC - 3/28/22
130 Infotainment System
Infotainment System
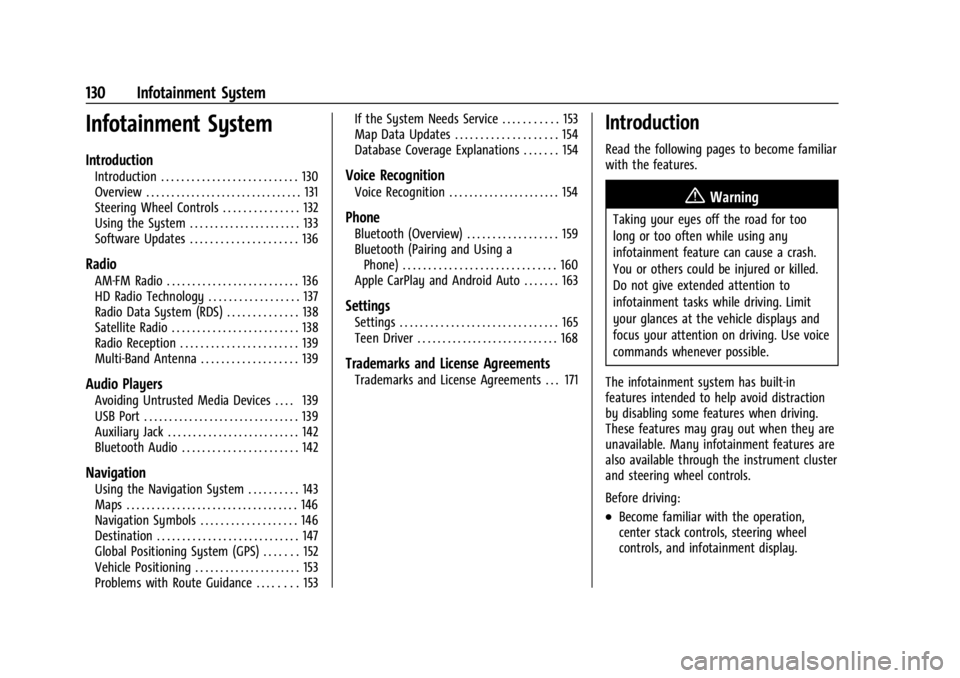
Introduction
Introduction . . . . . . . . . . . . . . . . . . . . . . . . . . . 130
Overview . . . . . . . . . . . . . . . . . . . . . . . . . . . . . . . 131
Steering Wheel Controls . . . . . . . . . . . . . . . 132
Using the System . . . . . . . . . . . . . . . . . . . . . . 133
Software Updates . . . . . . . . . . . . . . . . . . . . . 136
Radio
AM-FM Radio . . . . . . . . . . . . . . . . . . . . . . . . . . 136
HD Radio Technology . . . . . . . . . . . . . . . . . . 137
Radio Data System (RDS) . . . . . . . . . . . . . . 138
Satellite Radio . . . . . . . . . . . . . . . . . . . . . . . . . 138
Radio Reception . . . . . . . . . . . . . . . . . . . . . . . 139
Multi-Band Antenna . . . . . . . . . . . . . . . . . . . 139
Audio Players
Avoiding Untrusted Media Devices . . . . 139
USB Port . . . . . . . . . . . . . . . . . . . . . . . . . . . . . . . 139
Auxiliary Jack . . . . . . . . . . . . . . . . . . . . . . . . . . 142
Bluetooth Audio . . . . . . . . . . . . . . . . . . . . . . . 142
Navigation
Using the Navigation System . . . . . . . . . . 143
Maps . . . . . . . . . . . . . . . . . . . . . . . . . . . . . . . . . . 146
Navigation Symbols . . . . . . . . . . . . . . . . . . . 146
Destination . . . . . . . . . . . . . . . . . . . . . . . . . . . . 147
Global Positioning System (GPS) . . . . . . . 152
Vehicle Positioning . . . . . . . . . . . . . . . . . . . . . 153
Problems with Route Guidance . . . . . . . . 153If the System Needs Service . . . . . . . . . . . 153
Map Data Updates . . . . . . . . . . . . . . . . . . . . 154
Database Coverage Explanations . . . . . . . 154
Voice Recognition
Voice Recognition . . . . . . . . . . . . . . . . . . . . . . 154
Phone
Bluetooth (Overview) . . . . . . . . . . . . . . . . . . 159
Bluetooth (Pairing and Using a
Phone) . . . . . . . . . . . . . . . . . . . . . . . . . . . . . . 160
Apple CarPlay and Android Auto . . . . . . . 163
Settings
Settings . . . . . . . . . . . . . . . . . . . . . . . . . . . . . . . 165
Teen Driver . . . . . . . . . . . . . . . . . . . . . . . . . . . . 168
Trademarks and License Agreements
Trademarks and License Agreements . . . 171
Introduction
Read the following pages to become familiar
with the features.
{Warning
Taking your eyes off the road for too
long or too often while using any
infotainment feature can cause a crash.
You or others could be injured or killed.
Do not give extended attention to
infotainment tasks while driving. Limit
your glances at the vehicle displays and
focus your attention on driving. Use voice
commands whenever possible.
The infotainment system has built-in
features intended to help avoid distraction
by disabling some features when driving.
These features may gray out when they are
unavailable. Many infotainment features are
also available through the instrument cluster
and steering wheel controls.
Before driving:
.Become familiar with the operation,
center stack controls, steering wheel
controls, and infotainment display.
Page 156 of 366
Buick Enclave Owner Manual (GMNA-Localizing-U.S./Canada/Mexico-
16411536) - 2023 - CRC - 3/28/22
Infotainment System 155
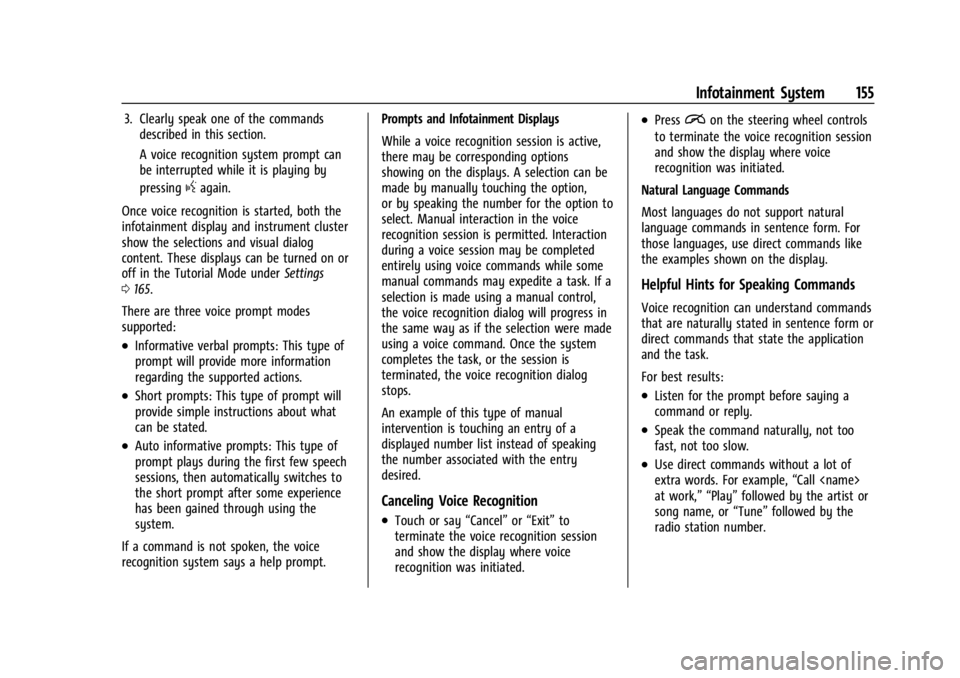
3. Clearly speak one of the commandsdescribed in this section.
A voice recognition system prompt can
be interrupted while it is playing by
pressing
gagain.
Once voice recognition is started, both the
infotainment display and instrument cluster
show the selections and visual dialog
content. These displays can be turned on or
off in the Tutorial Mode under Settings
0 165.
There are three voice prompt modes
supported:
.Informative verbal prompts: This type of
prompt will provide more information
regarding the supported actions.
.Short prompts: This type of prompt will
provide simple instructions about what
can be stated.
.Auto informative prompts: This type of
prompt plays during the first few speech
sessions, then automatically switches to
the short prompt after some experience
has been gained through using the
system.
If a command is not spoken, the voice
recognition system says a help prompt. Prompts and Infotainment Displays
While a voice recognition session is active,
there may be corresponding options
showing on the displays. A selection can be
made by manually touching the option,
or by speaking the number for the option to
select. Manual interaction in the voice
recognition session is permitted. Interaction
during a voice session may be completed
entirely using voice commands while some
manual commands may expedite a task. If a
selection is made using a manual control,
the voice recognition dialog will progress in
the same way as if the selection were made
using a voice command. Once the system
completes the task, or the session is
terminated, the voice recognition dialog
stops.
An example of this type of manual
intervention is touching an entry of a
displayed number list instead of speaking
the number associated with the entry
desired.
Canceling Voice Recognition
.Touch or say
“Cancel”or“Exit” to
terminate the voice recognition session
and show the display where voice
recognition was initiated.
.Pression the steering wheel controls
to terminate the voice recognition session
and show the display where voice
recognition was initiated.
Natural Language Commands
Most languages do not support natural
language commands in sentence form. For
those languages, use direct commands like
the examples shown on the display.
Helpful Hints for Speaking Commands
Voice recognition can understand commands
that are naturally stated in sentence form or
direct commands that state the application
and the task.
For best results:
.Listen for the prompt before saying a
command or reply.
.Speak the command naturally, not too
fast, not too slow.
.Use direct commands without a lot of
extra words. For example, “Call
at work,” “Play” followed by the artist or
song name, or “Tune”followed by the
radio station number.