buttons BUICK ENCORE 2018 Owner's Manual
[x] Cancel search | Manufacturer: BUICK, Model Year: 2018, Model line: ENCORE, Model: BUICK ENCORE 2018Pages: 330, PDF Size: 4.99 MB
Page 12 of 330
Buick Encore Owner Manual (GMNA-Localizing-U.S./Canada/Mexico-
11354409) - 2018 - crc - 11/8/17
In Brief 11
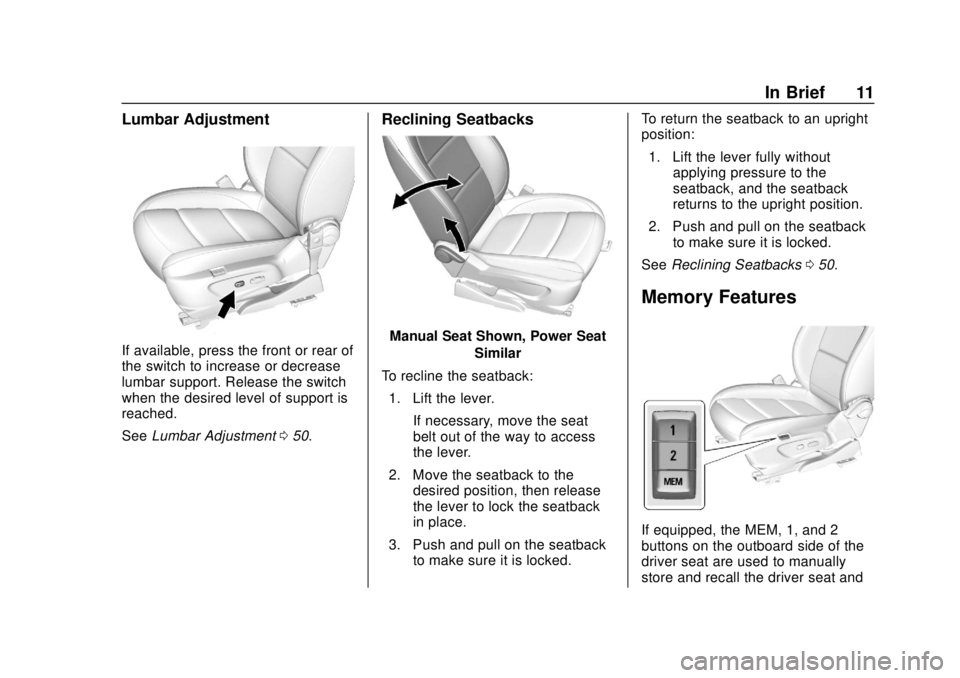
Lumbar Adjustment
If available, press the front or rear of
the switch to increase or decrease
lumbar support. Release the switch
when the desired level of support is
reached.
SeeLumbar Adjustment 050.
Reclining Seatbacks
Manual Seat Shown, Power Seat
Similar
To recline the seatback: 1. Lift the lever. If necessary, move the seat
belt out of the way to access
the lever.
2. Move the seatback to the desired position, then release
the lever to lock the seatback
in place.
3. Push and pull on the seatback to make sure it is locked. To return the seatback to an upright
position:
1. Lift the lever fully without applying pressure to the
seatback, and the seatback
returns to the upright position.
2. Push and pull on the seatback to make sure it is locked.
See Reclining Seatbacks 050.
Memory Features
If equipped, the MEM, 1, and 2
buttons on the outboard side of the
driver seat are used to manually
store and recall the driver seat and
Page 33 of 330
Buick Encore Owner Manual (GMNA-Localizing-U.S./Canada/Mexico-
11354409) - 2018 - crc - 11/8/17
32 Keys, Doors, and Windows
The DIC display should now
show READY FOR REMOTE
# 1.
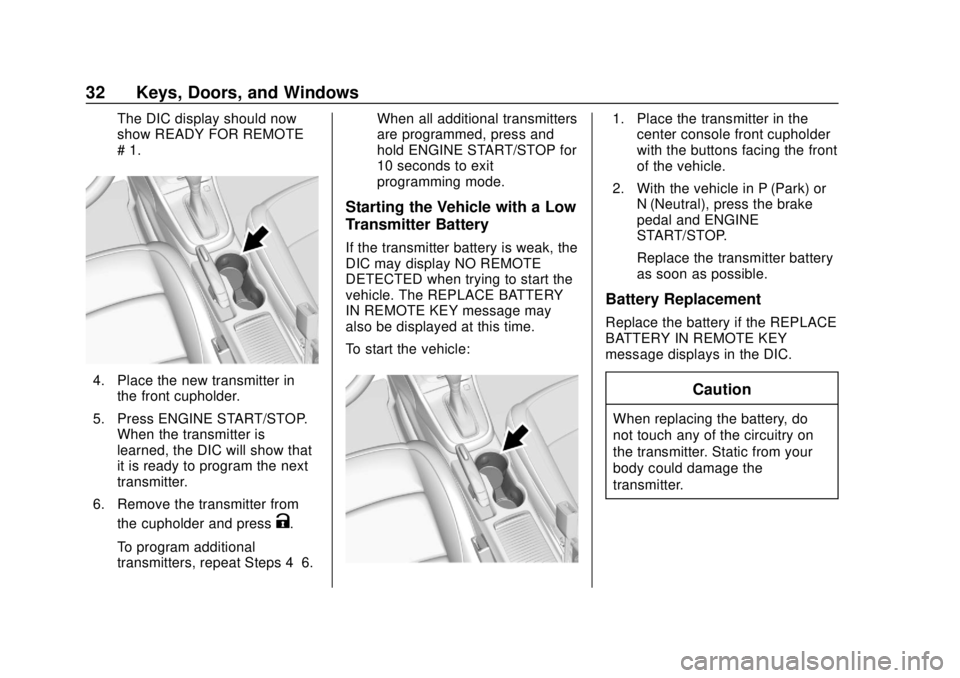
4. Place the new transmitter inthe front cupholder.
5. Press ENGINE START/STOP. When the transmitter is
learned, the DIC will show that
it is ready to program the next
transmitter.
6. Remove the transmitter from the cupholder and press
K.
To program additional
transmitters, repeat Steps 4–6. When all additional transmitters
are programmed, press and
hold ENGINE START/STOP for
10 seconds to exit
programming mode.
Starting the Vehicle with a Low
Transmitter Battery
If the transmitter battery is weak, the
DIC may display NO REMOTE
DETECTED when trying to start the
vehicle. The REPLACE BATTERY
IN REMOTE KEY message may
also be displayed at this time.
To start the vehicle:
1. Place the transmitter in the
center console front cupholder
with the buttons facing the front
of the vehicle.
2. With the vehicle in P (Park) or N (Neutral), press the brake
pedal and ENGINE
START/STOP.
Replace the transmitter battery
as soon as possible.
Battery Replacement
Replace the battery if the REPLACE
BATTERY IN REMOTE KEY
message displays in the DIC.
Caution
When replacing the battery, do
not touch any of the circuitry on
the transmitter. Static from your
body could damage the
transmitter.
Page 43 of 330

Buick Encore Owner Manual (GMNA-Localizing-U.S./Canada/Mexico-
11354409) - 2018 - crc - 11/8/17
42 Keys, Doors, and Windows
The mirror(s) return to the original
position when:
.The vehicle is shifted out of
R (Reverse), or remains in
R (Reverse) for about
30 seconds.
. The ignition is turned off.
. The vehicle is driven in
R (Reverse) above a set speed.
To turn this feature on or off, see
Vehicle Personalization 0128.Interior Mirrors
Interior Rearview Mirrors
Adjust the rearview mirror for a clear
view of the area behind your
vehicle.
If equipped with OnStar, the vehicle
may have three control buttons at
the bottom of the mirror. See your
dealer for more information about
OnStar and how to subscribe to it.
See OnStar Overview 0306.
Do not spray glass cleaner directly
on the mirror. Use a soft towel
dampened with water.
Manual Rearview Mirror
If equipped with a manual rearview
mirror, push the tab forward for
daytime use and pull it for nighttime
use to avoid glare from the
headlamps from behind.
Automatic Dimming
Rearview Mirror
If equipped, automatic dimming
reduces the glare of headlamps
from behind. The dimming feature
comes on when the vehicle is
started.
Page 53 of 330
Buick Encore Owner Manual (GMNA-Localizing-U.S./Canada/Mexico-
11354409) - 2018 - crc - 11/8/17
52 Seats and Restraints
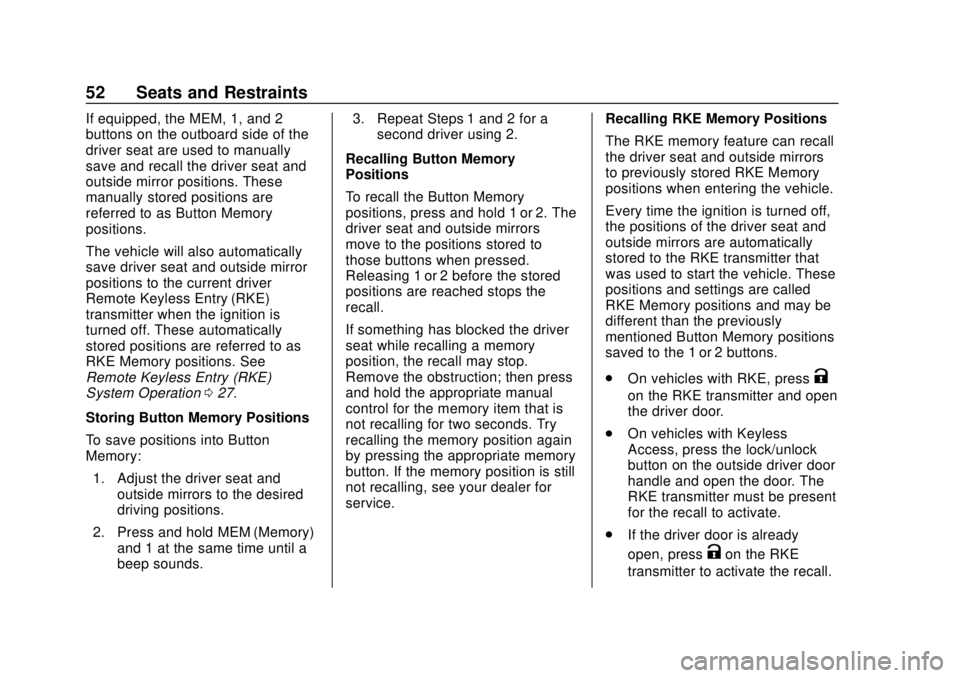
If equipped, the MEM, 1, and 2
buttons on the outboard side of the
driver seat are used to manually
save and recall the driver seat and
outside mirror positions. These
manually stored positions are
referred to as Button Memory
positions.
The vehicle will also automatically
save driver seat and outside mirror
positions to the current driver
Remote Keyless Entry (RKE)
transmitter when the ignition is
turned off. These automatically
stored positions are referred to as
RKE Memory positions. See
Remote Keyless Entry (RKE)
System Operation027.
Storing Button Memory Positions
To save positions into Button
Memory: 1. Adjust the driver seat and outside mirrors to the desired
driving positions.
2. Press and hold MEM (Memory) and 1 at the same time until a
beep sounds. 3. Repeat Steps 1 and 2 for a
second driver using 2.
Recalling Button Memory
Positions
To recall the Button Memory
positions, press and hold 1 or 2. The
driver seat and outside mirrors
move to the positions stored to
those buttons when pressed.
Releasing 1 or 2 before the stored
positions are reached stops the
recall.
If something has blocked the driver
seat while recalling a memory
position, the recall may stop.
Remove the obstruction; then press
and hold the appropriate manual
control for the memory item that is
not recalling for two seconds. Try
recalling the memory position again
by pressing the appropriate memory
button. If the memory position is still
not recalling, see your dealer for
service. Recalling RKE Memory Positions
The RKE memory feature can recall
the driver seat and outside mirrors
to previously stored RKE Memory
positions when entering the vehicle.
Every time the ignition is turned off,
the positions of the driver seat and
outside mirrors are automatically
stored to the RKE transmitter that
was used to start the vehicle. These
positions and settings are called
RKE Memory positions and may be
different than the previously
mentioned Button Memory positions
saved to the 1 or 2 buttons.
.
On vehicles with RKE, press
K
on the RKE transmitter and open
the driver door.
. On vehicles with Keyless
Access, press the lock/unlock
button on the outside driver door
handle and open the door. The
RKE transmitter must be present
for the recall to activate.
. If the driver door is already
open, press
Kon the RKE
transmitter to activate the recall.
Page 92 of 330
Buick Encore Owner Manual (GMNA-Localizing-U.S./Canada/Mexico-
11354409) - 2018 - crc - 11/8/17
Seats and Restraints 91
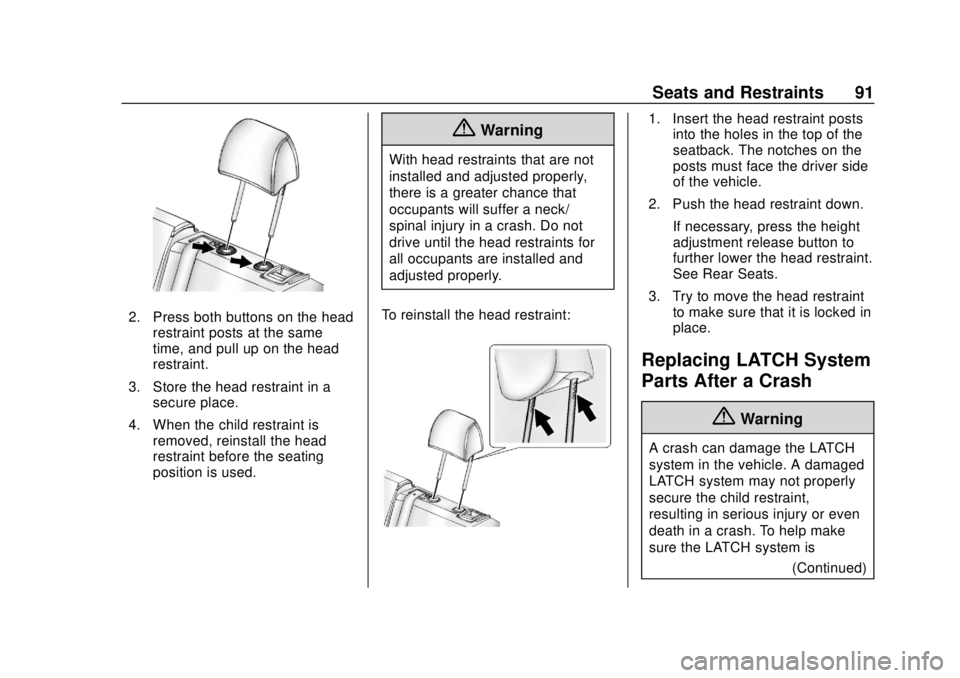
2. Press both buttons on the headrestraint posts at the same
time, and pull up on the head
restraint.
3. Store the head restraint in a secure place.
4. When the child restraint is removed, reinstall the head
restraint before the seating
position is used.
{Warning
With head restraints that are not
installed and adjusted properly,
there is a greater chance that
occupants will suffer a neck/
spinal injury in a crash. Do not
drive until the head restraints for
all occupants are installed and
adjusted properly.
To reinstall the head restraint:
1. Insert the head restraint posts into the holes in the top of the
seatback. The notches on the
posts must face the driver side
of the vehicle.
2. Push the head restraint down.
If necessary, press the height
adjustment release button to
further lower the head restraint.
See Rear Seats.
3. Try to move the head restraint to make sure that it is locked in
place.
Replacing LATCH System
Parts After a Crash
{Warning
A crash can damage the LATCH
system in the vehicle. A damaged
LATCH system may not properly
secure the child restraint,
resulting in serious injury or even
death in a crash. To help make
sure the LATCH system is
(Continued)
Page 107 of 330
Buick Encore Owner Manual (GMNA-Localizing-U.S./Canada/Mexico-
11354409) - 2018 - crc - 11/8/17
106 Instruments and Controls
Reverse Gear Wipes
If the rear wiper control is off, the
rear wiper will automatically operate
continuously when the shift lever is
in R (Reverse), and the front
windshield wiper is performing low
or high speed wipes. If the rear
wiper control is off, the shift lever is
in R (Reverse), and the front
windshield wiper is performing
interval wipes, then the rear wiper
automatically performs interval
wipes.
This feature can be changed. See
Vehicle Personalization0128.
The windshield washer reservoir is
used for the windshield and the rear
window. Check the fluid level in the
reservoir if either washer is not
working. See Washer Fluid 0216.
Compass
The vehicle may have a compass
display in the Driver Information
Center (DIC).
Setting the Compass Zone
Under certain circumstances, such
as during a long trip or moving to a
new area, the compass zone will
need to be reset. If the compass is
not set to the correct zone, it may
give false readings. The compass
zone should be set to the area in
which the vehicle is currently
traveling.
Use the DIC buttons to set the
compass zone:
1. While the vehicle is in P (Park), press the MENU button to
display the DIC menu.
2. Press and hold SET/CLR while the Set Area display is active.
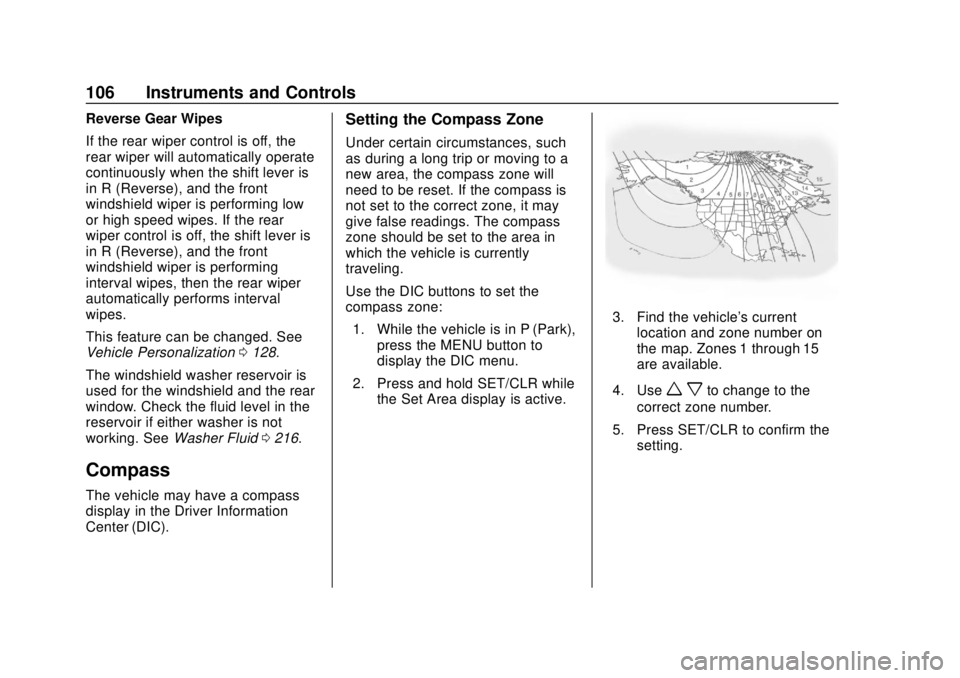
3. Find the vehicle's currentlocation and zone number on
the map. Zones 1 through 15
are available.
4. Use
w xto change to the
correct zone number.
5. Press SET/CLR to confirm the setting.
Page 124 of 330
Buick Encore Owner Manual (GMNA-Localizing-U.S./Canada/Mexico-
11354409) - 2018 - crc - 11/8/17
Instruments and Controls 123
Lamps On Reminder
This light comes on when the
exterior lamps are in use. See
Exterior Lamp Controls0138.
Cruise Control Light
For vehicles with cruise control, the
cruise control light is white when the
cruise control is on and ready, and
turns green when the cruise control
is set and active.
The light turns off when the cruise
control is turned off. See Cruise
Control 0182.
Information Displays
Driver Information Center
(DIC) (Base Level)
The DIC displays information about
your vehicle. It also displays
warning messages if a system
problem is detected. See Vehicle
Messages 0127. All messages
appear in the DIC display in the
center of the instrument cluster.
DIC Operation and Displays
The DIC has different displays
which can be accessed by using the
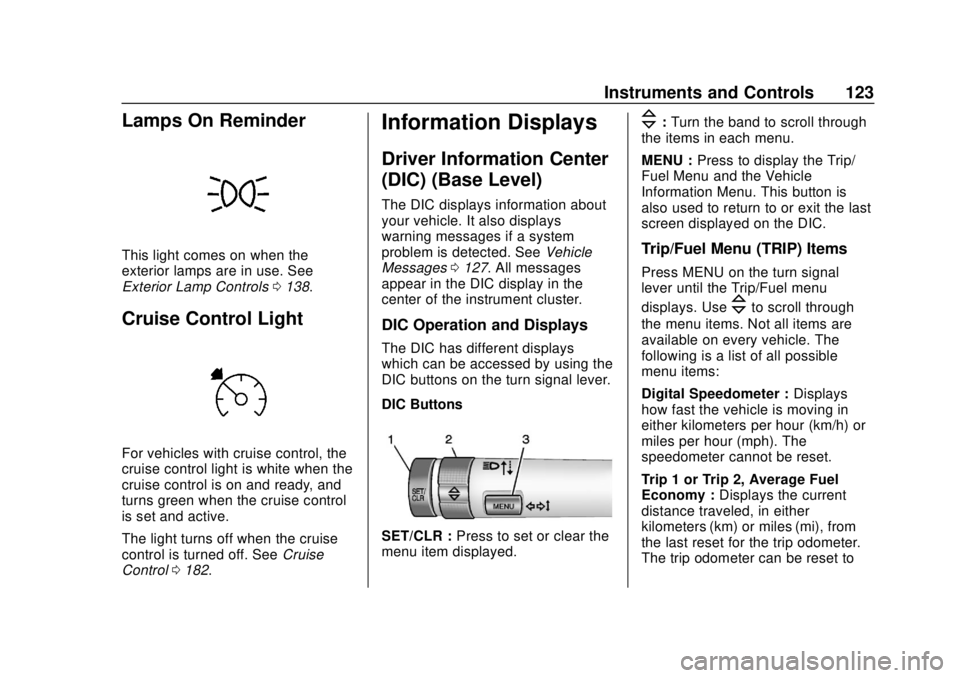
DIC buttons on the turn signal lever.
DIC Buttons
SET/CLR : Press to set or clear the
menu item displayed.
\: Turn the band to scroll through
the items in each menu.
MENU : Press to display the Trip/
Fuel Menu and the Vehicle
Information Menu. This button is
also used to return to or exit the last
screen displayed on the DIC.
Trip/Fuel Menu (TRIP) Items
Press MENU on the turn signal
lever until the Trip/Fuel menu
displays. Use
\to scroll through
the menu items. Not all items are
available on every vehicle. The
following is a list of all possible
menu items:
Digital Speedometer : Displays
how fast the vehicle is moving in
either kilometers per hour (km/h) or
miles per hour (mph). The
speedometer cannot be reset.
Trip 1 or Trip 2, Average Fuel
Economy : Displays the current
distance traveled, in either
kilometers (km) or miles (mi), from
the last reset for the trip odometer.
The trip odometer can be reset to
Page 126 of 330
Buick Encore Owner Manual (GMNA-Localizing-U.S./Canada/Mexico-
11354409) - 2018 - crc - 11/8/17
Instruments and Controls 125
Driver Information Center
(DIC) (Uplevel)
The Driver Information Center (DIC)
displays information about the
vehicle. It also displays warning
messages if a system problem is
detected. SeeVehicle Messages
0 127. All messages appear in the
DIC display in the center of the
instrument cluster.
The vehicle may also have features
that can be customized through the
controls on the radio. See Vehicle
Personalization 0128.
DIC Operation and Displays
The DIC has different displays
which can be accessed by using the
DIC buttons on the turn signal lever.
The DIC displays trip, fuel, and
vehicle system information, and
warning messages if a system
problem is detected.
The bottom of the DIC display
shows the position of the shift lever
and the odometer. It may also show
the direction the vehicle is driving. In cold weather the DIC display may
change slowly. This is normal and
will move more quickly as the
vehicle's interior temperature rises.
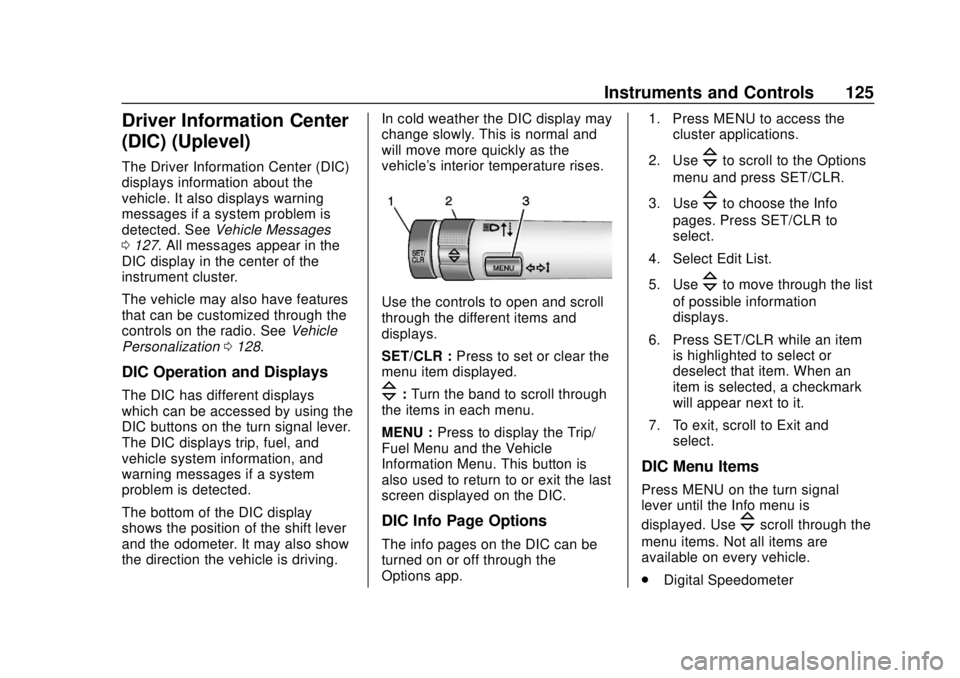
Use the controls to open and scroll
through the different items and
displays.
SET/CLR :
Press to set or clear the
menu item displayed.
\: Turn the band to scroll through
the items in each menu.
MENU : Press to display the Trip/
Fuel Menu and the Vehicle
Information Menu. This button is
also used to return to or exit the last
screen displayed on the DIC.
DIC Info Page Options
The info pages on the DIC can be
turned on or off through the
Options app. 1. Press MENU to access the
cluster applications.
2. Use
\to scroll to the Options
menu and press SET/CLR.
3. Use
\to choose the Info
pages. Press SET/CLR to
select.
4. Select Edit List.
5. Use
\to move through the list
of possible information
displays.
6. Press SET/CLR while an item is highlighted to select or
deselect that item. When an
item is selected, a checkmark
will appear next to it.
7. To exit, scroll to Exit and select.
DIC Menu Items
Press MENU on the turn signal
lever until the Info menu is
displayed. Use
\scroll through the
menu items. Not all items are
available on every vehicle.
. Digital Speedometer
Page 135 of 330
Buick Encore Owner Manual (GMNA-Localizing-U.S./Canada/Mexico-
11354409) - 2018 - crc - 11/8/17
134 Instruments and Controls
Restore Vehicle Settings
This allows selection of restoring
vehicle settings.
Select Restore or Cancel.
Clear All Private Data
This allows selection to clear all
private information from the vehicle.
Select Delete or Cancel.
Restore Radio Settings
This allows selection to restore
radio settings.
Select Restore or Cancel.
Software Information
Select to view or update the
infotainment system current
software information.
Wi-Fi
Select and the following may
display:
.Wi-Fi
. Manage Wi-Fi Networks
Wi-Fi
This feature allows Wi-Fi networks
to be turned off or on.
Select Off or On.
Manage Wi-Fi Networks
Select to manage Wi-Fi networks.
Wi-Fi must be on for this feature to
be accessed.
Universal Remote
System
See Radio Frequency Statement
0 302.
Universal Remote System
Programming
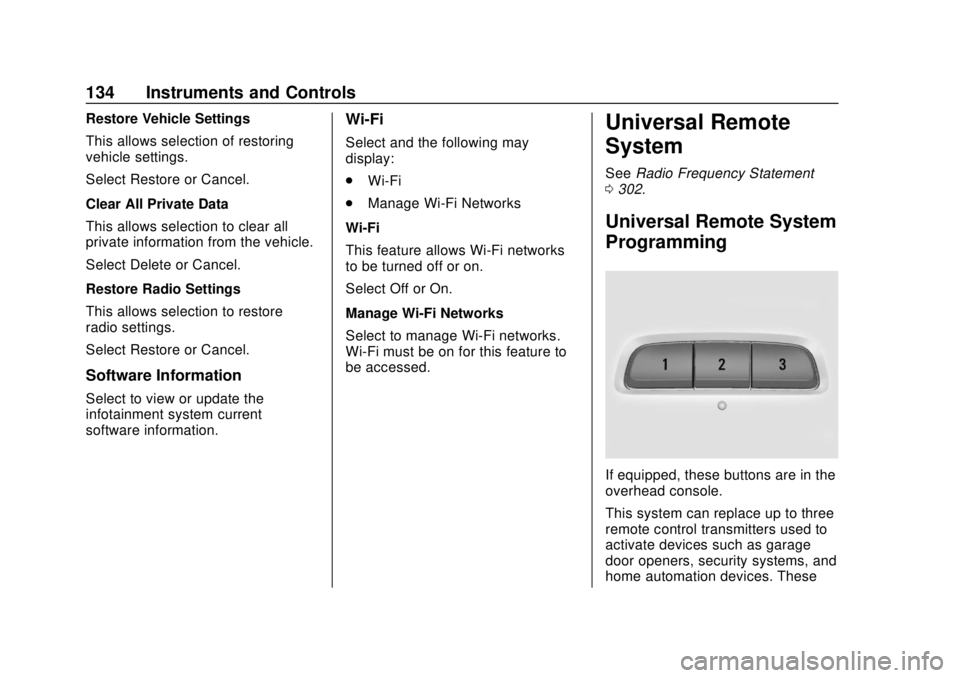
If equipped, these buttons are in the
overhead console.
This system can replace up to three
remote control transmitters used to
activate devices such as garage
door openers, security systems, and
home automation devices. These
Page 136 of 330
Buick Encore Owner Manual (GMNA-Localizing-U.S./Canada/Mexico-
11354409) - 2018 - crc - 11/8/17
Instruments and Controls 135
instructions refer to a garage door
opener, but can be used for other
devices.
Do not use the Universal Remote
system with any garage door opener
that does not have the stop and
reverse feature. This includes any
garage door opener model
manufactured before April 1, 1982.
Read these instructions completely
before programming the Universal
Remote system. It may help to have
another person assist with the
programming process.
Keep the original hand-held
transmitter for use in other vehicles
as well as for future programming.
Erase the programming when
vehicle ownership is terminated.
See“Erasing Universal Remote
System Buttons” later in this
section.
To program a garage door opener,
park outside directly in line with and
facing the garage door opener
receiver. Clear all people and
objects near the garage door. Make sure the hand-held transmitter
has a new battery for quick and
accurate transmission of the
radio-frequency signal.
Programming the Universal
Remote System
For questions or programming help,
see www.homelink.com/gm or call
1-800-355-3515.
Programming involves
time-sensitive actions, and may time
out causing the procedure to be
repeated.
To program up to three devices:
1. Hold the end of the hand-held transmitter about 3 to 8 cm (1
to 3 in) away from the
Universal Remote system
buttons with the indicator light
in view. The hand-held
transmitter was supplied by the
manufacturer of the garage
door opener receiver.
2. At the same time, press and hold both the hand-held
transmitter button and one of
the three Universal Remote system buttons to be used to
operate the garage door. Do
not release either button until
the indicator light changes from
a slow to a rapid flash. Then
release both buttons.
Some garage door openers
may require substitution of
Step 2 with the procedure
under
“Radio Signals for
Canada and Some Gate
Operators” later in this section.
3. Press and hold the newly programmed Universal Remote
system button for five seconds
while watching the indicator
light and garage door
activation.
.If the indicator light stays on
continuously or the garage
door moves when the
button is pressed, then
programming is complete.
There is no need to
complete Steps 4–6.
. If the indicator light does
not come on or the garage
door does not move, a