change BUICK ENCORE 2019 User Guide
[x] Cancel search | Manufacturer: BUICK, Model Year: 2019, Model line: ENCORE, Model: BUICK ENCORE 2019Pages: 333, PDF Size: 5.37 MB
Page 109 of 333
Buick Encore Owner Manual (GMNA-Localizing-U.S./Canada/Mexico-
12163005) - 2019 - crc - 9/17/18
108 Instruments and Controls
Reverse Gear Wipes
If the rear wiper control is off, the
rear wiper will automatically operate
continuously when the shift lever is
in R (Reverse), and the front
windshield wiper is performing low
or high speed wipes. If the rear
wiper control is off, the shift lever is
in R (Reverse), and the front
windshield wiper is performing
interval wipes, then the rear wiper
automatically performs interval
wipes.
This feature can be changed. See
Vehicle Personalization0130.
The windshield washer reservoir is
used for the windshield and the rear
window. Check the fluid level in the
reservoir if either washer is not
working. See Washer Fluid 0219.
Compass
The vehicle may have a compass
display in the Driver Information
Center (DIC).
Setting the Compass Zone
Under certain circumstances, such
as during a long trip or moving to a
new area, the compass zone will
need to be reset. If the compass is
not set to the correct zone, it may
give false readings. The compass
zone should be set to the area in
which the vehicle is currently
traveling.
Use the DIC buttons to set the
compass zone:
1. While the vehicle is in P (Park), press the MENU button to
display the DIC menu.
2. Press and hold SET/CLR while the Set Area display is active.
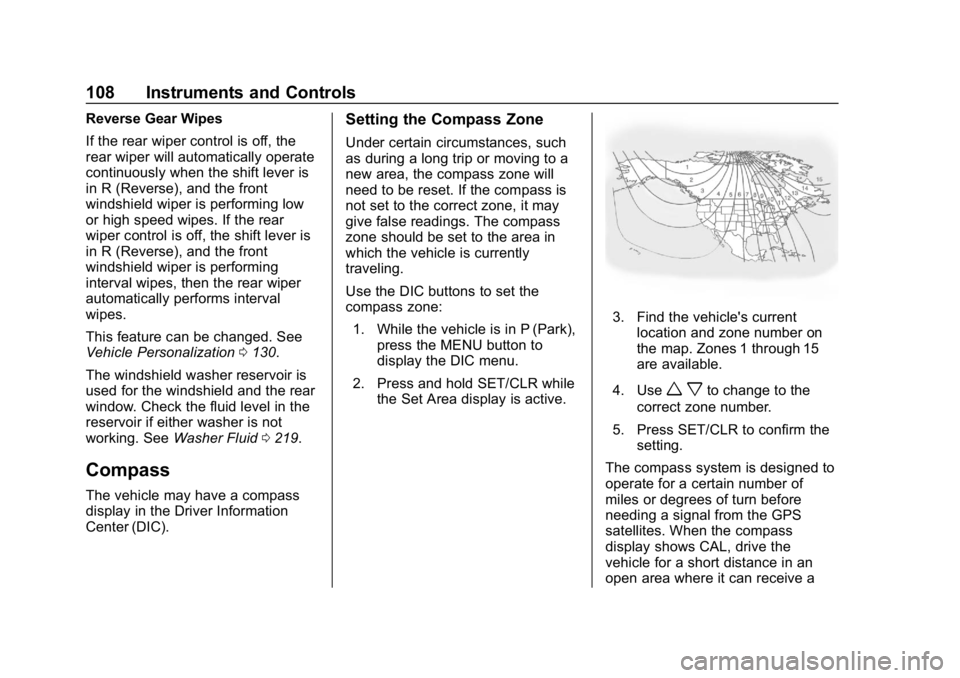
3. Find the vehicle's currentlocation and zone number on
the map. Zones 1 through 15
are available.
4. Use
w xto change to the
correct zone number.
5. Press SET/CLR to confirm the setting.
The compass system is designed to
operate for a certain number of
miles or degrees of turn before
needing a signal from the GPS
satellites. When the compass
display shows CAL, drive the
vehicle for a short distance in an
open area where it can receive a
Page 110 of 333
Buick Encore Owner Manual (GMNA-Localizing-U.S./Canada/Mexico-
12163005) - 2019 - crc - 9/17/18
Instruments and Controls 109
GPS signal. The compass system
will automatically determine when a
GPS signal is restored and provide
a heading again.
Clock
Setting the Time and Date
To set the time or date:1. Select Settings from the Home Page, then select Time
and Date.
2. Select the desired function.
To set the time or date, touch
«or
ªto change the hour, minutes,
AM, PM, day, month, or year.
To change the 12-24 Hr setting,
touch 12-24 Hr.
To turn Auto Set on and off, touch
Auto Set.
If auto timing is set, the time
displayed on the clock may not
update immediately when driving
into a new time zone.
Auto set requires an active OnStar
or connected service plan. Press
qBACK to go to the last
menu and save the changes or
{to
return to the Home Page.
Power Outlets
Power Outlet 110/120-Volt
Alternating Current
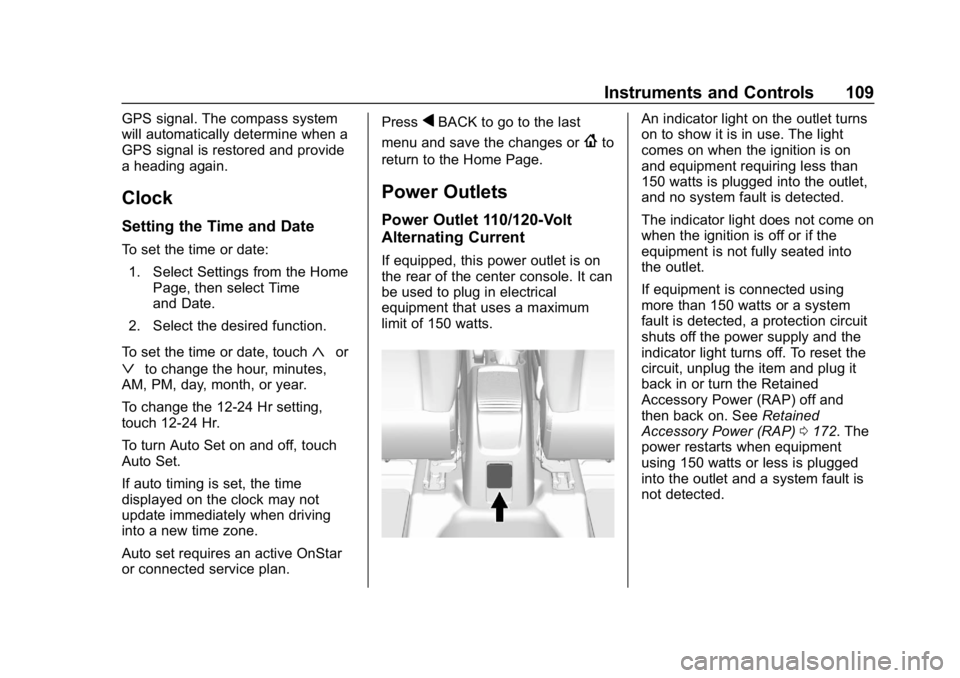
If equipped, this power outlet is on
the rear of the center console. It can
be used to plug in electrical
equipment that uses a maximum
limit of 150 watts.
An indicator light on the outlet turns
on to show it is in use. The light
comes on when the ignition is on
and equipment requiring less than
150 watts is plugged into the outlet,
and no system fault is detected.
The indicator light does not come on
when the ignition is off or if the
equipment is not fully seated into
the outlet.
If equipment is connected using
more than 150 watts or a system
fault is detected, a protection circuit
shuts off the power supply and the
indicator light turns off. To reset the
circuit, unplug the item and plug it
back in or turn the Retained
Accessory Power (RAP) off and
then back on. See Retained
Accessory Power (RAP) 0172. The
power restarts when equipment
using 150 watts or less is plugged
into the outlet and a system fault is
not detected.
Page 120 of 333
Buick Encore Owner Manual (GMNA-Localizing-U.S./Canada/Mexico-
12163005) - 2019 - crc - 9/17/18
Instruments and Controls 119
Malfunctions are often indicated by
the system before any problem is
noticeable. Being aware of the light
and seeking service promptly when
it comes on may prevent damage.
Caution
If the vehicle is driven continually
with this light on, the emission
control system may not work as
well, the fuel economy may be
lower, and the vehicle may not
run smoothly. This could lead to
costly repairs that might not be
covered by the vehicle warranty.
Caution
Modifications to the engine,
transmission, exhaust, intake,
or fuel system, or the use of
replacement tires that do not
meet the original tire
specifications, can cause this light
to come on. This could lead to(Continued)
Caution (Continued)
costly repairs not covered by the
vehicle warranty. This could also
affect the vehicle’s ability to pass
an Emissions Inspection/
Maintenance test. See
Accessories and Modifications
0203.
If the light is flashing : A
malfunction has been detected that
could damage the emission control
system and increase vehicle
emissions. Diagnosis and service
may be required.
To help prevent damage, reduce
vehicle speed and avoid hard
accelerations and uphill grades.
If the light continues to flash, find a
safe place to park. Turn the vehicle
off and wait at least 10 seconds
before restarting the engine. If the
light is still flashing, follow the
previous guidelines and see your
dealer for service as soon as
possible. If the light is on steady :
A
malfunction has been detected.
Diagnosis and service may be
required.
Check the following:
. If fuel has been added to the
vehicle using the capless funnel
adapter, make sure that it has
been removed. See “Filling the
Tank with a Portable Gas Can”
under Filling the Tank 0197.
The diagnostic system can
detect if the adapter has been
left installed in the vehicle,
allowing fuel to evaporate into
the atmosphere. A few driving
trips with the adapter removed
may turn off the light.
. Poor fuel quality can cause
inefficient engine operation and
poor driveability, which may go
away once the engine is warmed
up. If this occurs, change the
fuel brand. It may require at
least one full tank of the proper
fuel to turn the light off. See
Recommended Fuel 0196.
Page 122 of 333
Buick Encore Owner Manual (GMNA-Localizing-U.S./Canada/Mexico-
12163005) - 2019 - crc - 9/17/18
Instruments and Controls 121
released, there is a brake problem.
Have the brake system inspected
immediately.
{Warning
The brake system might not be
working properly if the brake
system warning light is on.
Driving with the brake system
warning light on can lead to a
crash. If the light is still on after
the vehicle has been pulled off
the road and carefully stopped,
have the vehicle towed for
service.
If the light comes on while driving, a
chime sounds. Pull off the road and
stop. The pedal might be harder to
push or go closer to the floor.
It might also take longer to stop.
If the light is still on, have the
vehicle towed for service. See
Towing the Vehicle 0267.
Antilock Brake System
(ABS) Warning Light
This light comes on briefly when the
engine is started.
If it does not, have the vehicle
serviced by your dealer. If the
system is working normally, the
indicator light then goes off.
If the ABS light stays on, turn the
ignition off. If the light comes on
while driving, stop as soon as it is
safely possible and turn the ignition
off. Then start the engine again to
reset the system. If the ABS light
stays on, or comes on again while
driving, the vehicle needs service.
If the regular brake system warning
light is not on, the vehicle still has
brakes, but not antilock brakes.
If the regular brake system warning
light is also on, the vehicle does not have antilock brakes and there is a
problem with the regular brakes.
See
Brake System Warning Light
0 120.
Lane Departure Warning
(LDW) Light
If equipped, this light comes on
briefly while starting the vehicle. If it
does not come on, have the vehicle
serviced.
This light is green if LDW is on and
ready to operate.
This light changes to amber and
flashes to indicate that the lane
marking has been crossed without
using a turn signal in that direction.
See Lane Departure Warning (LDW)
0 194.
Page 125 of 333
Buick Encore Owner Manual (GMNA-Localizing-U.S./Canada/Mexico-
12163005) - 2019 - crc - 9/17/18
124 Instruments and Controls
could be low on oil and might have
some other system problem. See
your dealer.
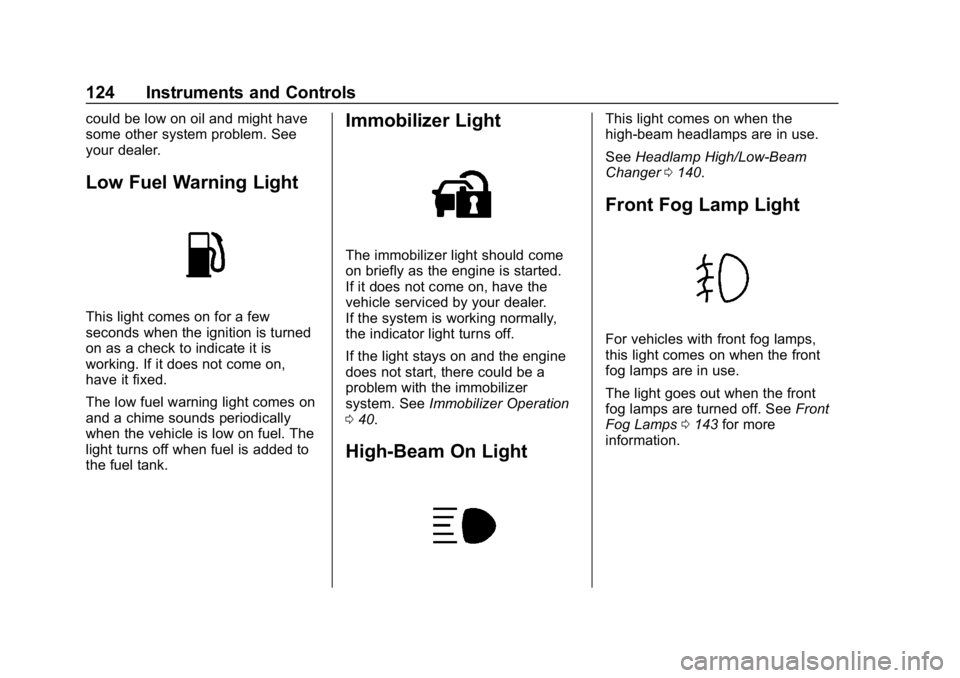
Low Fuel Warning Light
This light comes on for a few
seconds when the ignition is turned
on as a check to indicate it is
working. If it does not come on,
have it fixed.
The low fuel warning light comes on
and a chime sounds periodically
when the vehicle is low on fuel. The
light turns off when fuel is added to
the fuel tank.
Immobilizer Light
The immobilizer light should come
on briefly as the engine is started.
If it does not come on, have the
vehicle serviced by your dealer.
If the system is working normally,
the indicator light turns off.
If the light stays on and the engine
does not start, there could be a
problem with the immobilizer
system. SeeImmobilizer Operation
0 40.
High-Beam On Light
This light comes on when the
high-beam headlamps are in use.
See Headlamp High/Low-Beam
Changer 0140.
Front Fog Lamp Light
For vehicles with front fog lamps,
this light comes on when the front
fog lamps are in use.
The light goes out when the front
fog lamps are turned off. See Front
Fog Lamps 0143 for more
information.
Page 127 of 333
Buick Encore Owner Manual (GMNA-Localizing-U.S./Canada/Mexico-
12163005) - 2019 - crc - 9/17/18
126 Instruments and Controls
zero by pressing and holding the
SET/CLR button while the trip
odometer display is showing.
Also displays the approximate
average liters per 100 kilometers
(L/100 km) or miles per gallon
(mpg). This number is based on the
number of L/100 km (mpg) recorded
since the last time this menu item
was reset. This number reflects only
the approximate average fuel
economy that the vehicle has right
now, and will change as driving
conditions change. Reset the
average consumption by pressing
SET/CLR when it is displayed.
Fuel Range :Displays the
approximate distance the vehicle
can be driven without refueling. The
fuel range estimate is based on an
average of the vehicle's fuel
economy over recent driving history
and the amount of fuel remaining in
the fuel tank. Fuel range cannot be
reset.
Instantaneous Fuel Economy :
The center displays the approximate
instantaneous fuel economy. Navigation :
Used for the OnStar
Turn-by-Turn guidance. See OnStar
Overview 0309.
Vehicle Information Menu
(VEHICLE) Items
Press MENU on the turn signal
lever until the Vehicle menu is
displayed. Use
\to scroll through
the menu items. Not all items are
available on every vehicle. The
following is a list of all possible
menu items:
Remaining Oil Life : Displays an
estimate of the oil's remaining useful
life. If REMAINING OIL LIFE 99% is
displayed, that means 99% of the
current oil life remains.
When the remaining oil life is low,
the CHANGE ENGINE OIL SOON
message will appear on the display.
The oil should be changed as soon
as possible. See Engine Oil0209.
In addition to the engine oil life
system monitoring the oil life,
additional maintenance is
recommended in the Maintenance
Schedule in this manual. See
Maintenance Schedule 0281. The Oil Life display must be reset
after each oil change. Do not reset
the Oil Life display accidentally at
any time other than when the oil has
just been changed. It cannot be
reset accurately until the next oil
change. To reset the engine oil life
system, see
Engine Oil Life System
0 211.
Tire Pressure : Displays a vehicle
with the approximate pressures of
all four tires. Tire pressure is
displayed in either kilopascal (kPa)
or in pounds per square inch (psi).
See Tire Pressure Monitor System
0 247 andTire Pressure Monitor
Operation 0248.
Units : Move
\to change between
Metric or US when the Unit display
is active. Press SET/CLR to confirm
the setting. This will change the
displays on the DIC to the type of
measurements you select.
Page 128 of 333
Buick Encore Owner Manual (GMNA-Localizing-U.S./Canada/Mexico-
12163005) - 2019 - crc - 9/17/18
Instruments and Controls 127
Driver Information Center
(DIC) (Uplevel)
The Driver Information Center (DIC)
displays information about the
vehicle. It also displays warning
messages if a system problem is
detected. SeeVehicle Messages
0 129. All messages appear in the
DIC display in the center of the
instrument cluster.
The vehicle may also have features
that can be customized through the
controls on the radio. See Vehicle
Personalization 0130.
DIC Operation and Displays
The DIC has different displays
which can be accessed by using the
DIC buttons on the turn signal lever.
The DIC displays trip, fuel, and
vehicle system information, and
warning messages if a system
problem is detected.
The bottom of the DIC display
shows the position of the shift lever
and the odometer. It may also show
the direction the vehicle is driving. In cold weather the DIC display may
change slowly. This is normal and
will move more quickly as the
vehicle's interior temperature rises.
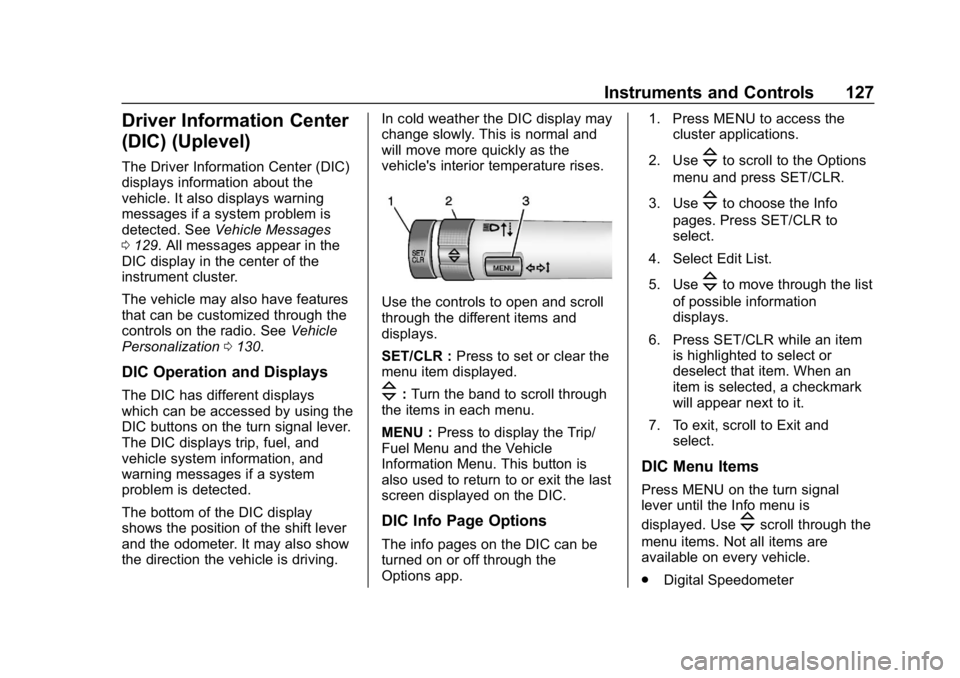
Use the controls to open and scroll
through the different items and
displays.
SET/CLR :
Press to set or clear the
menu item displayed.
\: Turn the band to scroll through
the items in each menu.
MENU : Press to display the Trip/
Fuel Menu and the Vehicle
Information Menu. This button is
also used to return to or exit the last
screen displayed on the DIC.
DIC Info Page Options
The info pages on the DIC can be
turned on or off through the
Options app. 1. Press MENU to access the
cluster applications.
2. Use
\to scroll to the Options
menu and press SET/CLR.
3. Use
\to choose the Info
pages. Press SET/CLR to
select.
4. Select Edit List.
5. Use
\to move through the list
of possible information
displays.
6. Press SET/CLR while an item is highlighted to select or
deselect that item. When an
item is selected, a checkmark
will appear next to it.
7. To exit, scroll to Exit and select.
DIC Menu Items
Press MENU on the turn signal
lever until the Info menu is
displayed. Use
\scroll through the
menu items. Not all items are
available on every vehicle.
. Digital Speedometer
Page 129 of 333
Buick Encore Owner Manual (GMNA-Localizing-U.S./Canada/Mexico-
12163005) - 2019 - crc - 9/17/18
128 Instruments and Controls
.Trip A or B, Average Fuel
Economy
. Fuel Range
. Oil Life
. Tire Pressure
. Fuel Economy
Digital Speedometer
The speedometer shows how fast
the vehicle is moving in either
kilometers per hour (km/h) or miles
per hour (mph). The speedometer
cannot be reset.
Trip A or Trip B, Average Fuel
Economy
Displays the current distance
traveled, in either kilometers (km) or
miles (mi), from the last reset for the
trip odometer. The trip odometer can
be reset to zero by pressing and
holding the reset stem in the cluster
while the trip odometer display is
showing.
Also displays the approximate
average liters per 100 kilometers (L/100 km) or miles per
gallon (mpg). This number is based on the number of L/100 km (mpg)
recorded since the last time this
menu item was reset. This number
reflects only the approximate
average fuel economy that the
vehicle has right now, and will
change as driving conditions
change. The average fuel economy
can be reset by pressing SET/CLR
while the Average Fuel Economy
display is showing.
Fuel Range
This display shows the approximate
distance the vehicle can be driven
without refueling. The fuel range
estimate is based on an average of
the vehicle’
s fuel economy over
recent driving history and the
amount of fuel remaining in the fuel
tank. Fuel range cannot be reset.
Oil Life
This display shows an estimate of
the oil's remaining useful life. If OIL
LIFE 99% REMAINING is displayed,
that means 99% of the current oil
life remains. When the remaining oil life is low,
the CHANGE ENGINE OIL SOON
message will appear on the display.
The oil should be changed as soon
as possible. See
Engine Oil0209.
In addition to the Engine Oil Life
System monitoring the oil life,
additional maintenance is
recommended in the Maintenance
Schedule in this manual. See
Maintenance Schedule 0281 for
more information.
Remember, the Oil Life display must
be reset after each oil change. It will
not reset itself. Also, be careful not
to reset the Oil Life display
accidentally at any time other than
when the oil has just been changed.
It cannot be reset accurately until
the next oil change. To reset the
Engine Oil Life System, press SET/
CLR while the Remaining Oil Life
display is active. See Engine Oil
Life System 0211.
Page 135 of 333
Buick Encore Owner Manual (GMNA-Localizing-U.S./Canada/Mexico-
12163005) - 2019 - crc - 9/17/18
134 Instruments and Controls
When set to All Doors, all of the
doors will unlock at the first press
of
K.
Select All Doors or Driver Door.
Remote Start Auto Heat Seats
If equipped and turned on, this
feature will turn on the heated seats
when using remote start on
cold days.
See Heated Front Seats 054 and
Remote Vehicle Start 033.
Select Off or On.
Passive Door Unlock
This allows the selection of what
doors will unlock when using the
button on the driver door to unlock
the vehicle.
Select All Doors or Driver Door.
Passive Door Lock
This allows passive locking to be
turned on or off and selects
feedback. See Remote Keyless
Entry (RKE) System Operation 027.
Select Off, On with Horn
Chirp, or On. Remote Left in Vehicle Alert
This feature sounds an alert when
the RKE transmitter is left in the
vehicle. This menu also enables
Remote No Longer in Vehicle Alert.
Select Off or On.
Bluetooth
Select and the following may be
displayed:
.
Pair New Device
. Device Management
. Ringtones
. Voice Mail Numbers
. Text Message Alerts
Pair New Device
Select to pair a new device. See
“Pairing” in“Infotainment Controls”
under “Bluetooth” in the infotainment
manual.
Device Management
Select to connect to a different
phone source, disconnect a phone,
or delete a phone. Ringtones
Touch to change the ring tone for
the specific phone. The phone does
not need to be connected to change
the ring tone.
Voice Mail Numbers
This feature displays the voice mail
number for all connected phones.
To change the voice mail number,
touch the edit icon. Type a new
number, then touch SAVE.
Text Message Alerts
This allows the feature to be turned
on or off.
Select Off or On.
Apple CarPlay
Select and the following may
display:
.
Apple CarPlay
. Manage Apple CarPlay Devices
Apple CarPlay
This feature allows Apple devices to
be connected to the infotainment
system through a USB port.
Page 138 of 333
Buick Encore Owner Manual (GMNA-Localizing-U.S./Canada/Mexico-
12163005) - 2019 - crc - 9/17/18
Instruments and Controls 137
instructions refer to a garage door
opener, but can be used for other
devices.
Do not use the Universal Remote
system with any garage door opener
that does not have the stop and
reverse feature. This includes any
garage door opener model
manufactured before April 1, 1982.
Read these instructions completely
before programming the Universal
Remote system. It may help to have
another person assist with the
programming process.
Keep the original hand-held
transmitter for use in other vehicles
as well as for future programming.
Erase the programming when
vehicle ownership is terminated.
See“Erasing Universal Remote
System Buttons” later in this
section.
To program a garage door opener,
park outside directly in line with and
facing the garage door opener
receiver. Clear all people and
objects near the garage door. Make sure the hand-held transmitter
has a new battery for quick and
accurate transmission of the
radio-frequency signal.
Programming the Universal
Remote System
For questions or programming help,
see www.homelink.com/gm or call
1-800-355-3515.
Programming involves
time-sensitive actions, and may time
out causing the procedure to be
repeated.
To program up to three devices:
1. Hold the end of the hand-held transmitter about 3 to 8 cm (1
to 3 in) away from the
Universal Remote system
buttons with the indicator light
in view. The hand-held
transmitter was supplied by the
manufacturer of the garage
door opener receiver.
2. At the same time, press and hold both the hand-held
transmitter button and one of
the three Universal Remote system buttons to be used to
operate the garage door. Do
not release either button until
the indicator light changes from
a slow to a rapid flash. Then
release both buttons.
Some garage door openers
may require substitution of
Step 2 with the procedure
under
“Radio Signals for
Canada and Some Gate
Operators” later in this section.
3. Press and hold the newly programmed Universal Remote
system button for five seconds
while watching the indicator
light and garage door
activation.
.If the indicator light stays on
continuously or the garage
door moves when the
button is pressed, then
programming is complete.
There is no need to
complete Steps 4–6.
. If the indicator light does
not come on or the garage
door does not move, a