bulb BUICK ENCORE GX 2020 Owner's Manual
[x] Cancel search | Manufacturer: BUICK, Model Year: 2020, Model line: ENCORE GX, Model: BUICK ENCORE GX 2020Pages: 442, PDF Size: 11.64 MB
Page 136 of 442

Buick Encore GX Owner Manual (GMNA-Localizing-U.S./Canada/Mexico-
14018934) - 2020 - CRC - 2/27/20
Instruments and Controls 135
.Brakes
. Steering
. Ride Control Systems
. Driver Assistance Systems
. Cruise Control
. Lighting and Bulb Replacement
. Wiper/Washer Systems
. Doors and Windows
. Seat Belts
. Airbag Systems
. Engine and Transmission
. Tire Pressure
. Battery
Engine Power Messages
ENGINE POWER IS REDUCED
This message displays when the
vehicle's propulsion power is
reduced. A reduction in propulsion
power can affect the vehicle's ability
to accelerate. If this message is on,
but there is no observed reduction
in performance, proceed to your
destination. The performance may be reduced the next time the vehicle
is driven. The vehicle may be driven
while this message is on, but
maximum acceleration and speed
may be reduced. Anytime this
message stays on, or displays
repeatedly, the vehicle should be
taken to your dealer for service as
soon as possible.
Under certain operating conditions,
propulsion will be disabled. Try
restarting after the vehicle has been
off for 30 seconds.
Vehicle Speed Messages
SPEED LIMITED TO XXX
KM/H (MPH)
This message shows that the
vehicle speed has been limited to
the speed displayed. The limited
speed is a protection for various
propulsion and vehicle systems,
such as lubrication, thermal, brakes,
suspension, Teen Driver if
equipped, or tires.
Vehicle
Personalization
The following are all possible
vehicle personalization features.
Depending on the vehicle, some
may not be available.
For System and Apps features and
functions, see Settings in
infotainment system.
To access the vehicle
personalization menu:
1. Touch the Settings icon on the Home Page on the
infotainment display.
2. Touch the desired category to display a list of available
options.
3. Touch to select the desired feature setting.
4. Touch
9or l to turn off or on a
feature.
5. Touch X to go to the top level of the Settings menu.
Page 148 of 442

Buick Encore GX Owner Manual (GMNA-Localizing-U.S./Canada/Mexico-
14018934) - 2020 - CRC - 2/27/20
Lighting 147
|:Press to make the front and
rear turn signal lamps flash on and
off. This warns others that you are
having trouble.
Press
|again to turn the
flashers off.
Turn and Lane-Change
Signals
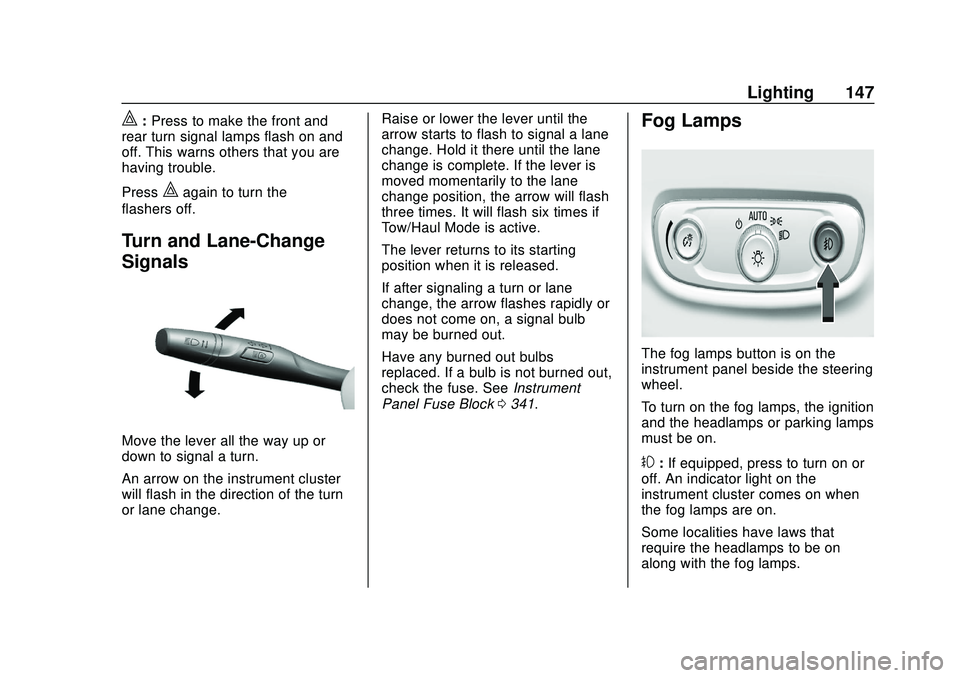
Move the lever all the way up or
down to signal a turn.
An arrow on the instrument cluster
will flash in the direction of the turn
or lane change. Raise or lower the lever until the
arrow starts to flash to signal a lane
change. Hold it there until the lane
change is complete. If the lever is
moved momentarily to the lane
change position, the arrow will flash
three times. It will flash six times if
Tow/Haul Mode is active.
The lever returns to its starting
position when it is released.
If after signaling a turn or lane
change, the arrow flashes rapidly or
does not come on, a signal bulb
may be burned out.
Have any burned out bulbs
replaced. If a bulb is not burned out,
check the fuse. See
Instrument
Panel Fuse Block 0341.
Fog Lamps
The fog lamps button is on the
instrument panel beside the steering
wheel.
To turn on the fog lamps, the ignition
and the headlamps or parking lamps
must be on.
#:If equipped, press to turn on or
off. An indicator light on the
instrument cluster comes on when
the fog lamps are on.
Some localities have laws that
require the headlamps to be on
along with the fog lamps.
Page 302 of 442

Buick Encore GX Owner Manual (GMNA-Localizing-U.S./Canada/Mexico-
14018934) - 2020 - CRC - 2/27/20
Driving and Operating 301
Tires
.Do not tow a trailer while using a
compact spare tire on the
vehicle.
. Tires must be properly inflated to
support loads while towing a
trailer. See Tires0344 for
instructions on proper tire
inflation.
Safety Chains
Always attach chains between the
vehicle and the trailer, and attach
the chains to the holes on the trailer
hitch platform. Instructions about
safety chains may be provided by
the hitch manufacturer or by the
trailer manufacturer.
Cross the safety chains under the
tongue of the trailer to help prevent
the tongue from contacting the road
if it becomes separated from the
hitch. Always leave just enough
slack so the combination can turn.
Never allow safety chains to drag on
the ground.
Trailer Brakes
Loaded trailers over 450 kg
(1,000 lb) must be equipped with
brake systems and with brakes for
each axle. Trailer braking equipment
conforming to Canadian Standards
Association (CSA) requirement
CAN3-D313, or its equivalent, is
recommended.
State or local regulations may
require trailers to have their own
braking system if the loaded weight
of the trailer exceeds certain
minimums that can vary from state
to state. Read and follow the
instructions for the trailer brakes so
they are installed, adjusted, and
maintained properly. Never attempt
to tap into your vehicle's hydraulic
brake system. If you do, both the
vehicle anti-lock brakes and the
trailer brakes may not function,
which could result in a crash.
Trailer Lamps
Always check all trailer lamps are
working at the beginning of each
trip, and periodically on longer trips.
Turn Signals When Towing a
Trailer
When properly connected, the trailer
turn signals should will illuminate to
indicate the vehicle is turning,
changing lanes, or stopping. When
towing a trailer, the arrows on the
instrument cluster will illuminate
even if the trailer is not properly
connected or the bulbs are
burned out.
Trailer Tires
Special Trailer (ST) tires differ from
vehicle tires. Trailer tires are
designed with stiff sidewalls to help
prevent sway and to support heavy
loads. These features can make it
difficult to determine if the trailer tire
pressures are low only based on a
visual inspection.
Always check all trailer tire
pressures before each trip when the
tires are cool. Low trailer tire
pressure is a leading cause of trailer
tire blow-outs.
Trailer tires deteriorate over time.
The trailer tire sidewall will show the
week and year the tire was
Page 304 of 442

Buick Encore GX Owner Manual (GMNA-Localizing-U.S./Canada/Mexico-
14018934) - 2020 - CRC - 2/27/20
Vehicle Care 303
Vehicle Care
General Information
General Information . . . . . . . . . . 304
California Proposition65 Warning . . . . . . . . . . . . . . . . . 304
California Perchlorate Materials Requirements . . . . . 305
Accessories and Modifications . . . . . . . . . . . . . . . . 305
Vehicle Checks
Doing Your OwnService Work . . . . . . . . . . . . . . . 305
Hood . . . . . . . . . . . . . . . . . . . . . . . . . 306
Engine Compartment Overview . . . . . . . . . . . . . . . . . . . . 308
Engine Oil . . . . . . . . . . . . . . . . . . . . 311
Engine Oil Life System . . . . . . . 313
Automatic Transmission Fluid . . . . . . . . . . . . . . . . . . . . . . . . 314
Engine Air Filter Life System . . . . . . . . . . . . . . . . . . . . . . 314
Engine Air Cleaner/Filter . . . . . . 315
Cooling System . . . . . . . . . . . . . . 317
Engine Overheating . . . . . . . . . . 321
Washer Fluid . . . . . . . . . . . . . . . . . 322
Brakes . . . . . . . . . . . . . . . . . . . . . . . 323
Brake Pad Life System . . . . . . . 324 Brake Fluid . . . . . . . . . . . . . . . . . . . 324
Battery - North America . . . . . . 326
All-Wheel Drive . . . . . . . . . . . . . . . 327
Automatic Transmission Shift
Lock Control Function
Check . . . . . . . . . . . . . . . . . . . . . . . 328
Park Brake and P (Park) Mechanism Check . . . . . . . . . . 328
Wiper Blade Replacement . . . . 328
Windshield Replacement . . . . . 330
Gas Strut(s) . . . . . . . . . . . . . . . . . . 330
Headlamp Aiming
Front Headlamp Aiming . . . . . . 331
Bulb Replacement
Bulb Replacement . . . . . . . . . . . . 331
Halogen Bulbs . . . . . . . . . . . . . . . . 332
LED Lighting . . . . . . . . . . . . . . . . . 332
Headlamps and Sidemarker Lamps . . . . . . . . . . . . . . . . . . . . . . 332
Front Turn Signal and Fog Lamps . . . . . . . . . . . . . . . . . . . . . . 333
Taillamps, Turn Signal, Sidemarker, Stoplamps, and
Back-Up Lamps (Uplevel) . . . 334
Taillamps, Turn Signal, Sidemarker, Stoplamps, and
Back-Up Lamps (Base
Level) . . . . . . . . . . . . . . . . . . . . . . . 335
Electrical System
Electrical System Overload . . . 337
Fuses and Circuit Breakers . . . 338
Engine Compartment FuseBlock . . . . . . . . . . . . . . . . . . . . . . . . 338
Instrument Panel Fuse
Block . . . . . . . . . . . . . . . . . . . . . . . . 341
Rear Compartment Fuse Block . . . . . . . . . . . . . . . . . . . . . . . . 343
Wheels and Tires
Tires . . . . . . . . . . . . . . . . . . . . . . . . . . 344
All-Season Tires . . . . . . . . . . . . . . 345
Winter Tires . . . . . . . . . . . . . . . . . . 345
Tire Sidewall Labeling . . . . . . . . 346
Tire Designations . . . . . . . . . . . . . 348
Tire Terminology andDefinitions . . . . . . . . . . . . . . . . . . 349
Tire Pressure . . . . . . . . . . . . . . . . . 351
Tire Pressure Monitor System . . . . . . . . . . . . . . . . . . . . . . 352
Tire Pressure Monitor Operation . . . . . . . . . . . . . . . . . . . 353
Tire Inspection . . . . . . . . . . . . . . . . 357
Tire Rotation . . . . . . . . . . . . . . . . . 358
When It Is Time for New Tires . . . . . . . . . . . . . . . . . . . . . . . . 359
Buying New Tires . . . . . . . . . . . . . 360
Different Size Tires and Wheels . . . . . . . . . . . . . . . . . . . . . . 361
Page 332 of 442

Buick Encore GX Owner Manual (GMNA-Localizing-U.S./Canada/Mexico-
14018934) - 2020 - CRC - 2/27/20
Vehicle Care 331
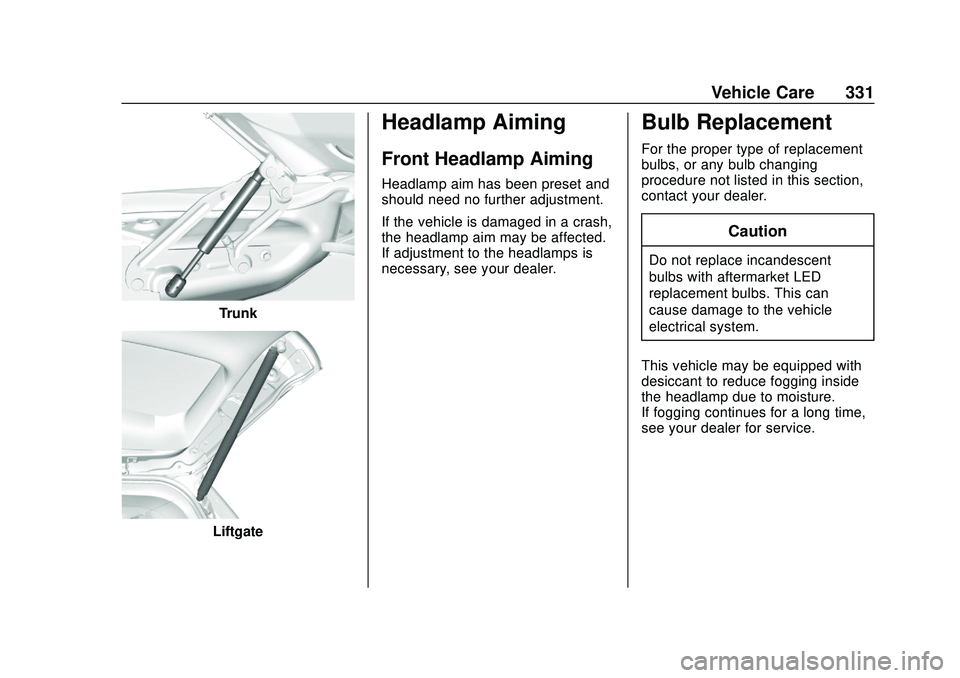
Trunk
Liftgate
Headlamp Aiming
Front Headlamp Aiming
Headlamp aim has been preset and
should need no further adjustment.
If the vehicle is damaged in a crash,
the headlamp aim may be affected.
If adjustment to the headlamps is
necessary, see your dealer.
Bulb Replacement
For the proper type of replacement
bulbs, or any bulb changing
procedure not listed in this section,
contact your dealer.
Caution
Do not replace incandescent
bulbs with aftermarket LED
replacement bulbs. This can
cause damage to the vehicle
electrical system.
This vehicle may be equipped with
desiccant to reduce fogging inside
the headlamp due to moisture.
If fogging continues for a long time,
see your dealer for service.
Page 333 of 442

Buick Encore GX Owner Manual (GMNA-Localizing-U.S./Canada/Mexico-
14018934) - 2020 - CRC - 2/27/20
332 Vehicle Care
Halogen Bulbs
{Warning
Halogen bulbs have pressurized
gas inside and can burst if you
drop or scratch the bulb. You or
others could be injured. Be sure
to read and follow the instructions
on the bulb package.
LED Lighting
This vehicle has several LED lamps.
For replacement of any LED lighting
assembly, contact your dealer.
Headlamps and
Sidemarker Lamps
Base Level Headlamp
Assembly
The base model vehicle has
halogen high-beam and low-beam
headlamps, an LED turn signal
lamp, and a DRL and parking lamp
on the headlamp assembly.
Driver Side Shown, PassengerSide Similar
1. Low-Beam Headlamp
2. High-Beam Headlamp
High-Beam Headlamp/
Low-Beam Headlamp
1. Open the hood. See Hood
0 306.
2. Remove the headlamp bulb
access cover.
3. Turn the bulb counterclockwise and pull straight back.
Page 334 of 442

Buick Encore GX Owner Manual (GMNA-Localizing-U.S./Canada/Mexico-
14018934) - 2020 - CRC - 2/27/20
Vehicle Care 333
4. Disconnect the wiring harnessconnector from the bulb.
5. Install the new bulb in the headlamp assembly by turning
clockwise.
6. Reconnect the wiring harness connector.
7. Install the headlamp bulb access cover.
Uplevel Headlamp Assembly
The uplevel model vehicle has LED
high-beam and low-beam
headlamps, a DRL and parking
lamp, and a DRL position lamp on
the headlamp assembly.
Sidemarker
The vehicle has an LED
sidemarker lamp.
Front Turn Signal and
Fog Lamps
Front Turn Signal Lamp
Driver Side Shown, Passenger
Side Similar
1. Tilt the wheel and remove the screws on the outside of the
wheel liner.
Page 335 of 442

Buick Encore GX Owner Manual (GMNA-Localizing-U.S./Canada/Mexico-
14018934) - 2020 - CRC - 2/27/20
334 Vehicle Care
2. Bend the wheel liner back tomake enough space for hand
access.
3. While holding the wheel linerwith one hand and disengage
the bulb socket from the plug
connector by pulling the
retaining rib.
4. Turn the bulb holder counterclockwise and remove it
from the reflector using the
other hand.
5. Remove the bulb from the bulbsocket and replace with a
new bulb.
6. Insert the bulb socket into the reflector by turning clockwise
and attach the plug connector. 7. Reassemble the lower cover
and front wheel liner.
Front Fog Lamp
The vehicle has LED fog lamp
Taillamps, Turn Signal,
Sidemarker, Stoplamps,
and Back-Up Lamps
(Uplevel)
Caution
Improper lamp assembly removal
and installation can cause leaks
and water intrusion which may
cause damage to the taillamp. Do
not remove the taillamp assembly
to replace a bulb. Use the tailgate
opening to access the bulb.
The stoplamp/taillamp/turn signal
lamp/side marker lamp and tailgate
inboard taillamp are LEDs. To
replace, see your dealer.
Page 336 of 442

Buick Encore GX Owner Manual (GMNA-Localizing-U.S./Canada/Mexico-
14018934) - 2020 - CRC - 2/27/20
Vehicle Care 335
Taillamps, Turn Signal,
Sidemarker, Stoplamps,
and Back-Up Lamps
(Base Level)
Caution
Improper lamp assembly removal
and installation can cause leaks
and water intrusion which may
cause damage to the taillamp. Do
not remove the taillamp assembly
to replace a bulb. Use the tailgate
opening to access the bulb.
Tailgate inboard TailLamp
Driver Side Shown, PassengerSide Similar
1. Taillamp
2. Taillamp
1. Remove the bulb access door on tailgate.
2. Remove the bulb from the bulbsocket and replace with a
new bulb.
Page 337 of 442

Buick Encore GX Owner Manual (GMNA-Localizing-U.S./Canada/Mexico-
14018934) - 2020 - CRC - 2/27/20
336 Vehicle Care
3. Insert the bulb socket andattach the plug connector.
4. Reassemble the cover.
Stop lamp/Taillamp, Turn
Signal, and Sidemarker Lamp
Driver Side Shown, Passenger Side Similar
1. Stop lamp/Taillamp
2. Turn signal lamp
1. Remove and retain both screws attaching the taillamp
assembly to the vehicle body.
2. Pull the taillamp assemblystraight back to detach it from
the vehicle body. Take care
that the cable duct remains in
place.
3. Remove the bulb socket from the taillamp assembly.4. Remove the old bulb from thebulb socket by pulling it
straight out.
5. Insert a new bulb into the bulb socket.
6. Install the bulb socket into the taillamp assembly.
7. Install the taillamp assembly to the vehicle body with the two
screws.