clock BUICK ENCORE GX 2020 Owner's Manual
[x] Cancel search | Manufacturer: BUICK, Model Year: 2020, Model line: ENCORE GX, Model: BUICK ENCORE GX 2020Pages: 442, PDF Size: 11.64 MB
Page 14 of 442
Buick Encore GX Owner Manual (GMNA-Localizing-U.S./Canada/Mexico-
14018934) - 2020 - CRC - 2/27/20
Keys, Doors, and Windows 13
counterclockwise, to the unlock
position five times within
10 seconds.
The DIC displays REMOTE
LEARN PENDING,
PLEASE WAIT.
2. Wait for 10 minutes until the DIC displays PRESS ENGINE
START BUTTON TO LEARN
and then press ENGINE
START/STOP.
The DIC display will again
show REMOTE LEARN
PENDING, PLEASE WAIT.
3. Repeat Step 2 two additional times. After the third time all
previously known transmitters
will no longer work with the
vehicle. Remaining transmitters
can be relearned during the
next steps.
The DIC display should now
show READY FOR REMOTE
# 1.
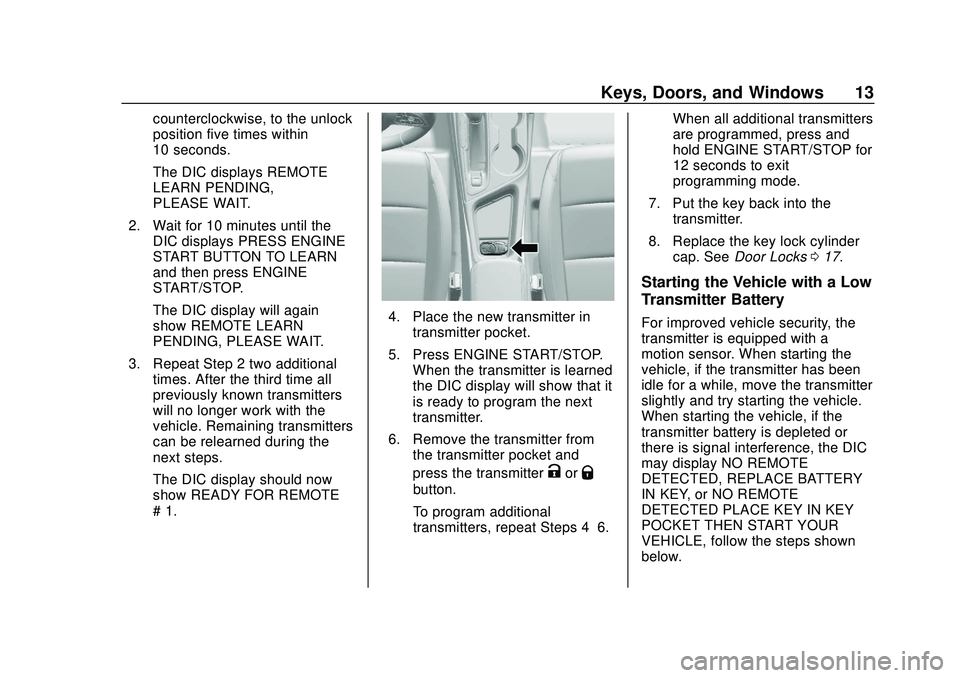
4. Place the new transmitter intransmitter pocket.
5. Press ENGINE START/STOP. When the transmitter is learned
the DIC display will show that it
is ready to program the next
transmitter.
6. Remove the transmitter from the transmitter pocket and
press the transmitter
KorQ
button.
To program additional
transmitters, repeat Steps 4–6. When all additional transmitters
are programmed, press and
hold ENGINE START/STOP for
12 seconds to exit
programming mode.
7. Put the key back into the transmitter.
8. Replace the key lock cylinder cap. See Door Locks 017.
Starting the Vehicle with a Low
Transmitter Battery
For improved vehicle security, the
transmitter is equipped with a
motion sensor. When starting the
vehicle, if the transmitter has been
idle for a while, move the transmitter
slightly and try starting the vehicle.
When starting the vehicle, if the
transmitter battery is depleted or
there is signal interference, the DIC
may display NO REMOTE
DETECTED, REPLACE BATTERY
IN KEY, or NO REMOTE
DETECTED PLACE KEY IN KEY
POCKET THEN START YOUR
VEHICLE, follow the steps shown
below.
Page 98 of 442
Buick Encore GX Owner Manual (GMNA-Localizing-U.S./Canada/Mexico-
14018934) - 2020 - CRC - 2/27/20
Instruments and Controls 97
Instruments and
Controls
Controls
Steering Wheel Adjustment . . . . 98
Steering Wheel Controls . . . . . . . 98
Heated Steering Wheel . . . . . . . . 98
Horn . . . . . . . . . . . . . . . . . . . . . . . . . . . 98
Windshield Wiper/Washer . . . . . . 98
Rear Window Wiper/Washer . . . . . . . . . . . . . . . . . . . . . 100
Compass . . . . . . . . . . . . . . . . . . . . . 101
Clock . . . . . . . . . . . . . . . . . . . . . . . . . 102
Power Outlets . . . . . . . . . . . . . . . . 102
Wireless Charging . . . . . . . . . . . . 103
Warning Lights, Gauges, and
Indicators
Warning Lights, Gauges, and Indicators . . . . . . . . . . . . . . . . . . . 106
Instrument Cluster . . . . . . . . . . . . 107
Speedometer . . . . . . . . . . . . . . . . . 111
Odometer . . . . . . . . . . . . . . . . . . . . . 111
Trip Odometer . . . . . . . . . . . . . . . . 111
Tachometer . . . . . . . . . . . . . . . . . . . 111
Fuel Gauge . . . . . . . . . . . . . . . . . . . 111
Engine Coolant Temperature
Gauge . . . . . . . . . . . . . . . . . . . . . . 112 Seat Belt Reminders . . . . . . . . . . 113
Airbag Readiness Light . . . . . . . 113
Passenger Airbag Status
Indicator . . . . . . . . . . . . . . . . . . . . . 114
Charging System Light . . . . . . . 115
Malfunction Indicator Lamp
(Check Engine Light) . . . . . . . . 115
Brake System Warning Light . . . . . . . . . . . . . . . . . . . . . . . . 117
Electric Parking Brake Light . . . . . . . . . . . . . . . . . . . . . . . . 118
Service Electric Parking Brake Light . . . . . . . . . . . . . . . . . . . . . . . . 118
Antilock Brake System (ABS) Warning Light . . . . . . . . . . . . . . . 118
Lane Keep Assist (LKA) Light . . . . . . . . . . . . . . . . . . . . . . . . 119
Vehicle Ahead Indicator . . . . . . . 119
Pedestrian Ahead Indicator . . . 119
Traction Off Light . . . . . . . . . . . . . 120
StabiliTrak OFF Light . . . . . . . . . 120
Traction Control System (TCS)/ StabiliTrak Light . . . . . . . . . . . . . 120
Tire Pressure Light . . . . . . . . . . . 121
Engine Oil Pressure Light . . . . 121
Low Fuel Warning Light . . . . . . 122
Security Light . . . . . . . . . . . . . . . . . 122
High-Beam On Light . . . . . . . . . . 122
Front Fog Lamp Light . . . . . . . . . 123
Lamps On Reminder . . . . . . . . . 123 Cruise Control Light . . . . . . . . . . 123
Information Displays
Driver Information Center (DIC)
(Base Level) . . . . . . . . . . . . . . . . 123
Driver Information Center (DIC) (Uplevel) . . . . . . . . . . . . . . . . . . . . 127
Head-Up Display (HUD) . . . . . . 130
Vehicle Messages
Vehicle Messages . . . . . . . . . . . . 134
Engine Power Messages . . . . . 135
Vehicle Speed Messages . . . . . 135
Vehicle Personalization
Vehicle Personalization . . . . . . . 135
Universal Remote System
Universal Remote System . . . . 140
Universal Remote System Programming . . . . . . . . . . . . . . . 140
Universal Remote System Operation . . . . . . . . . . . . . . . . . . . 142
Page 103 of 442
Buick Encore GX Owner Manual (GMNA-Localizing-U.S./Canada/Mexico-
14018934) - 2020 - CRC - 2/27/20
102 Instruments and Controls
Clock
Set the time and date using the
infotainment system. See "Time /
Date" underSettings0195.
Power Outlets
Power Outlets 12-Volt Direct
Current
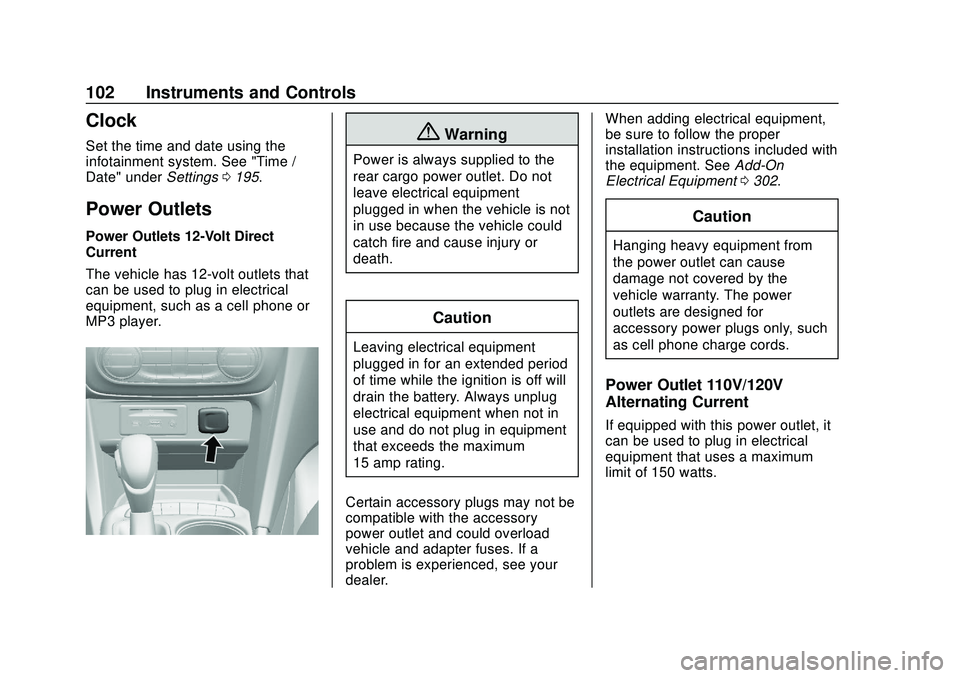
The vehicle has 12-volt outlets that
can be used to plug in electrical
equipment, such as a cell phone or
MP3 player.
{Warning
Power is always supplied to the
rear cargo power outlet. Do not
leave electrical equipment
plugged in when the vehicle is not
in use because the vehicle could
catch fire and cause injury or
death.
Caution
Leaving electrical equipment
plugged in for an extended period
of time while the ignition is off will
drain the battery. Always unplug
electrical equipment when not in
use and do not plug in equipment
that exceeds the maximum
15 amp rating.
Certain accessory plugs may not be
compatible with the accessory
power outlet and could overload
vehicle and adapter fuses. If a
problem is experienced, see your
dealer. When adding electrical equipment,
be sure to follow the proper
installation instructions included with
the equipment. See
Add-On
Electrical Equipment 0302.
Caution
Hanging heavy equipment from
the power outlet can cause
damage not covered by the
vehicle warranty. The power
outlets are designed for
accessory power plugs only, such
as cell phone charge cords.
Power Outlet 110V/120V
Alternating Current
If equipped with this power outlet, it
can be used to plug in electrical
equipment that uses a maximum
limit of 150 watts.
Page 149 of 442
Buick Encore GX Owner Manual (GMNA-Localizing-U.S./Canada/Mexico-
14018934) - 2020 - CRC - 2/27/20
148 Lighting
Interior Lighting
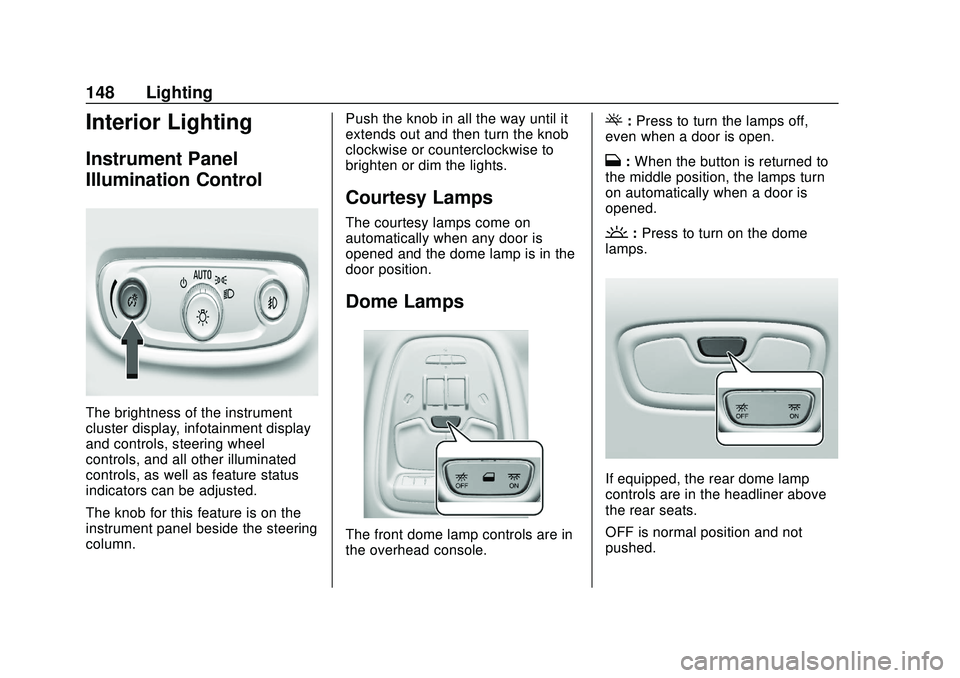
Instrument Panel
Illumination Control
The brightness of the instrument
cluster display, infotainment display
and controls, steering wheel
controls, and all other illuminated
controls, as well as feature status
indicators can be adjusted.
The knob for this feature is on the
instrument panel beside the steering
column.Push the knob in all the way until it
extends out and then turn the knob
clockwise or counterclockwise to
brighten or dim the lights.
Courtesy Lamps
The courtesy lamps come on
automatically when any door is
opened and the dome lamp is in the
door position.
Dome Lamps
The front dome lamp controls are in
the overhead console.
(:
Press to turn the lamps off,
even when a door is open.
H: When the button is returned to
the middle position, the lamps turn
on automatically when a door is
opened.
': Press to turn on the dome
lamps.
If equipped, the rear dome lamp
controls are in the headliner above
the rear seats.
OFF is normal position and not
pushed.
Page 197 of 442
Buick Encore GX Owner Manual (GMNA-Localizing-U.S./Canada/Mexico-
14018934) - 2020 - CRC - 2/27/20
196 Infotainment System
System
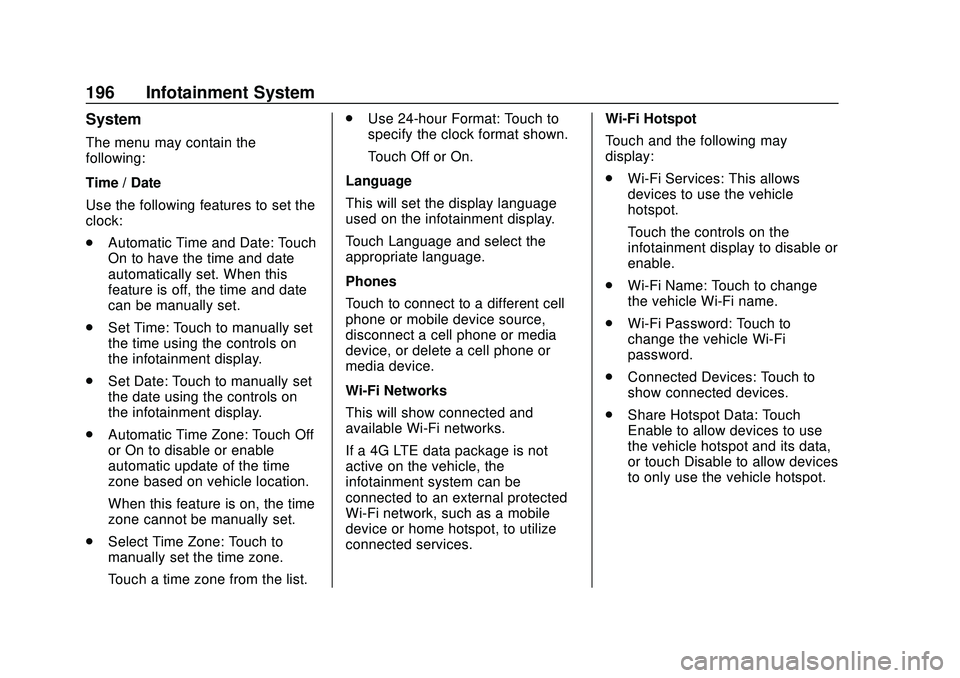
The menu may contain the
following:
Time / Date
Use the following features to set the
clock:
.Automatic Time and Date: Touch
On to have the time and date
automatically set. When this
feature is off, the time and date
can be manually set.
. Set Time: Touch to manually set
the time using the controls on
the infotainment display.
. Set Date: Touch to manually set
the date using the controls on
the infotainment display.
. Automatic Time Zone: Touch Off
or On to disable or enable
automatic update of the time
zone based on vehicle location.
When this feature is on, the time
zone cannot be manually set.
. Select Time Zone: Touch to
manually set the time zone.
Touch a time zone from the list. .
Use 24-hour Format: Touch to
specify the clock format shown.
Touch Off or On.
Language
This will set the display language
used on the infotainment display.
Touch Language and select the
appropriate language.
Phones
Touch to connect to a different cell
phone or mobile device source,
disconnect a cell phone or media
device, or delete a cell phone or
media device.
Wi-Fi Networks
This will show connected and
available Wi-Fi networks.
If a 4G LTE data package is not
active on the vehicle, the
infotainment system can be
connected to an external protected
Wi-Fi network, such as a mobile
device or home hotspot, to utilize
connected services. Wi-Fi Hotspot
Touch and the following may
display:
.
Wi-Fi Services: This allows
devices to use the vehicle
hotspot.
Touch the controls on the
infotainment display to disable or
enable.
. Wi-Fi Name: Touch to change
the vehicle Wi-Fi name.
. Wi-Fi Password: Touch to
change the vehicle Wi-Fi
password.
. Connected Devices: Touch to
show connected devices.
. Share Hotspot Data: Touch
Enable to allow devices to use
the vehicle hotspot and its data,
or touch Disable to allow devices
to only use the vehicle hotspot.
Page 218 of 442
Buick Encore GX Owner Manual (GMNA-Localizing-U.S./Canada/Mexico-
14018934) - 2020 - CRC - 2/27/20
Climate Controls 217
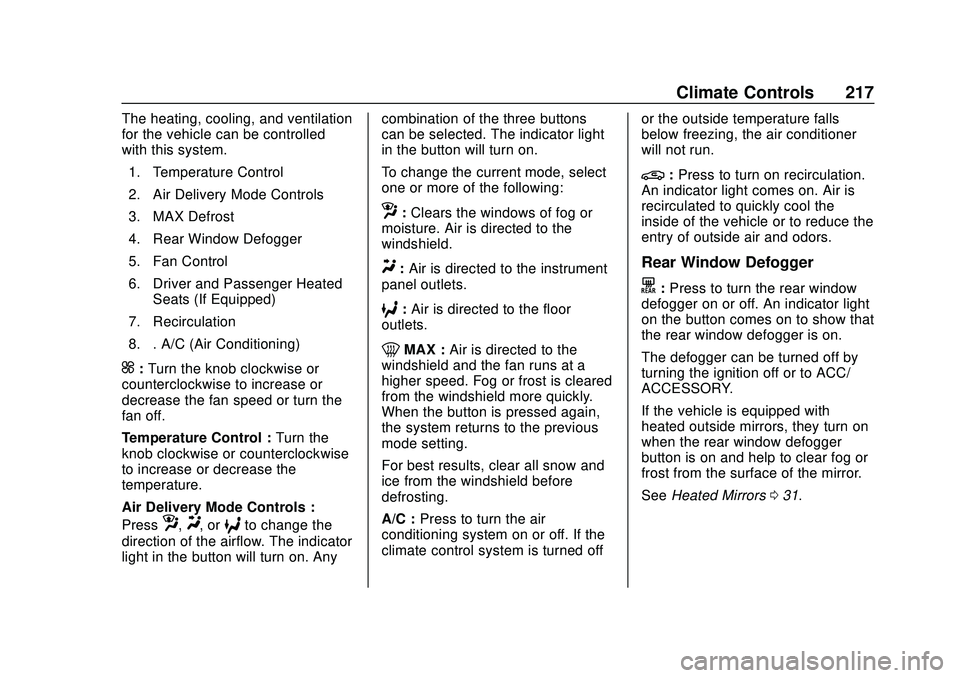
The heating, cooling, and ventilation
for the vehicle can be controlled
with this system.1. Temperature Control
2. Air Delivery Mode Controls
3. MAX Defrost
4. Rear Window Defogger
5. Fan Control
6. Driver and Passenger Heated Seats (If Equipped)
7. Recirculation
8. . A/C (Air Conditioning)
]: Turn the knob clockwise or
counterclockwise to increase or
decrease the fan speed or turn the
fan off.
Temperature Control : Turn the
knob clockwise or counterclockwise
to increase or decrease the
temperature.
Air Delivery Mode Controls :
Press
z,Y, or6to change the
direction of the airflow. The indicator
light in the button will turn on. Any combination of the three buttons
can be selected. The indicator light
in the button will turn on.
To change the current mode, select
one or more of the following:
z:
Clears the windows of fog or
moisture. Air is directed to the
windshield.
Y: Air is directed to the instrument
panel outlets.
6: Air is directed to the floor
outlets.
0MAX : Air is directed to the
windshield and the fan runs at a
higher speed. Fog or frost is cleared
from the windshield more quickly.
When the button is pressed again,
the system returns to the previous
mode setting.
For best results, clear all snow and
ice from the windshield before
defrosting.
A/C : Press to turn the air
conditioning system on or off. If the
climate control system is turned off or the outside temperature falls
below freezing, the air conditioner
will not run.
@:
Press to turn on recirculation.
An indicator light comes on. Air is
recirculated to quickly cool the
inside of the vehicle or to reduce the
entry of outside air and odors.
Rear Window Defogger
K: Press to turn the rear window
defogger on or off. An indicator light
on the button comes on to show that
the rear window defogger is on.
The defogger can be turned off by
turning the ignition off or to ACC/
ACCESSORY.
If the vehicle is equipped with
heated outside mirrors, they turn on
when the rear window defogger
button is on and help to clear fog or
frost from the surface of the mirror.
See Heated Mirrors 031.
Page 220 of 442
Buick Encore GX Owner Manual (GMNA-Localizing-U.S./Canada/Mexico-
14018934) - 2020 - CRC - 2/27/20
Climate Controls 219
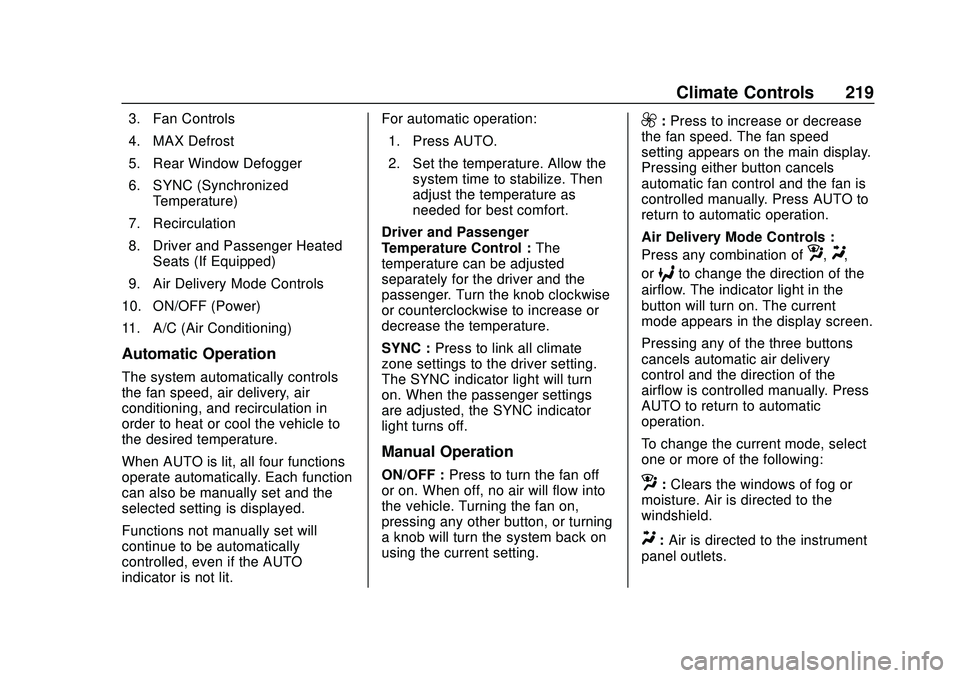
3. Fan Controls
4. MAX Defrost
5. Rear Window Defogger
6. SYNC (SynchronizedTemperature)
7. Recirculation
8. Driver and Passenger Heated Seats (If Equipped)
9. Air Delivery Mode Controls
10. ON/OFF (Power)
11. A/C (Air Conditioning)
Automatic Operation
The system automatically controls
the fan speed, air delivery, air
conditioning, and recirculation in
order to heat or cool the vehicle to
the desired temperature.
When AUTO is lit, all four functions
operate automatically. Each function
can also be manually set and the
selected setting is displayed.
Functions not manually set will
continue to be automatically
controlled, even if the AUTO
indicator is not lit. For automatic operation:
1. Press AUTO.
2. Set the temperature. Allow the system time to stabilize. Then
adjust the temperature as
needed for best comfort.
Driver and Passenger
Temperature Control : The
temperature can be adjusted
separately for the driver and the
passenger. Turn the knob clockwise
or counterclockwise to increase or
decrease the temperature.
SYNC : Press to link all climate
zone settings to the driver setting.
The SYNC indicator light will turn
on. When the passenger settings
are adjusted, the SYNC indicator
light turns off.
Manual Operation
ON/OFF : Press to turn the fan off
or on. When off, no air will flow into
the vehicle. Turning the fan on,
pressing any other button, or turning
a knob will turn the system back on
using the current setting.
9: Press to increase or decrease
the fan speed. The fan speed
setting appears on the main display.
Pressing either button cancels
automatic fan control and the fan is
controlled manually. Press AUTO to
return to automatic operation.
Air Delivery Mode Controls :
Press any combination of
z,Y,
or
6to change the direction of the
airflow. The indicator light in the
button will turn on. The current
mode appears in the display screen.
Pressing any of the three buttons
cancels automatic air delivery
control and the direction of the
airflow is controlled manually. Press
AUTO to return to automatic
operation.
To change the current mode, select
one or more of the following:
z: Clears the windows of fog or
moisture. Air is directed to the
windshield.
Y: Air is directed to the instrument
panel outlets.
Page 321 of 442
Buick Encore GX Owner Manual (GMNA-Localizing-U.S./Canada/Mexico-
14018934) - 2020 - CRC - 2/27/20
320 Vehicle Care
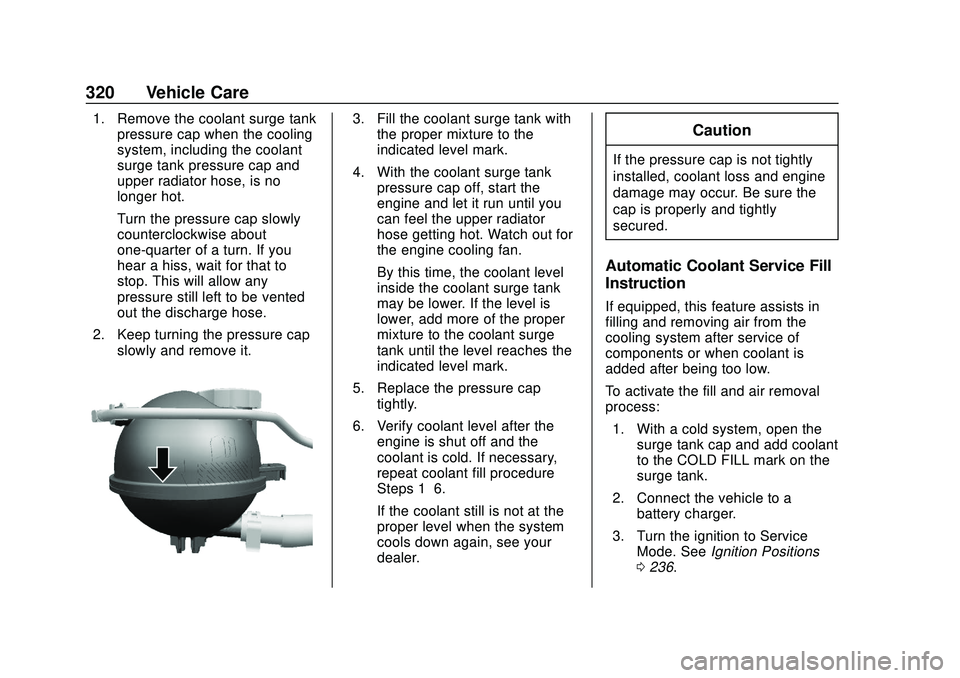
1. Remove the coolant surge tankpressure cap when the cooling
system, including the coolant
surge tank pressure cap and
upper radiator hose, is no
longer hot.
Turn the pressure cap slowly
counterclockwise about
one-quarter of a turn. If you
hear a hiss, wait for that to
stop. This will allow any
pressure still left to be vented
out the discharge hose.
2. Keep turning the pressure cap slowly and remove it.3. Fill the coolant surge tank withthe proper mixture to the
indicated level mark.
4. With the coolant surge tank pressure cap off, start the
engine and let it run until you
can feel the upper radiator
hose getting hot. Watch out for
the engine cooling fan.
By this time, the coolant level
inside the coolant surge tank
may be lower. If the level is
lower, add more of the proper
mixture to the coolant surge
tank until the level reaches the
indicated level mark.
5. Replace the pressure cap tightly.
6. Verify coolant level after the engine is shut off and the
coolant is cold. If necessary,
repeat coolant fill procedure
Steps 1–6.
If the coolant still is not at the
proper level when the system
cools down again, see your
dealer.Caution
If the pressure cap is not tightly
installed, coolant loss and engine
damage may occur. Be sure the
cap is properly and tightly
secured.
Automatic Coolant Service Fill
Instruction
If equipped, this feature assists in
filling and removing air from the
cooling system after service of
components or when coolant is
added after being too low.
To activate the fill and air removal
process:
1. With a cold system, open the surge tank cap and add coolant
to the COLD FILL mark on the
surge tank.
2. Connect the vehicle to a battery charger.
3. Turn the ignition to Service Mode. See Ignition Positions
0 236.
Page 333 of 442

Buick Encore GX Owner Manual (GMNA-Localizing-U.S./Canada/Mexico-
14018934) - 2020 - CRC - 2/27/20
332 Vehicle Care
Halogen Bulbs
{Warning
Halogen bulbs have pressurized
gas inside and can burst if you
drop or scratch the bulb. You or
others could be injured. Be sure
to read and follow the instructions
on the bulb package.
LED Lighting
This vehicle has several LED lamps.
For replacement of any LED lighting
assembly, contact your dealer.
Headlamps and
Sidemarker Lamps
Base Level Headlamp
Assembly
The base model vehicle has
halogen high-beam and low-beam
headlamps, an LED turn signal
lamp, and a DRL and parking lamp
on the headlamp assembly.
Driver Side Shown, PassengerSide Similar
1. Low-Beam Headlamp
2. High-Beam Headlamp
High-Beam Headlamp/
Low-Beam Headlamp
1. Open the hood. See Hood
0 306.
2. Remove the headlamp bulb
access cover.
3. Turn the bulb counterclockwise and pull straight back.
Page 334 of 442

Buick Encore GX Owner Manual (GMNA-Localizing-U.S./Canada/Mexico-
14018934) - 2020 - CRC - 2/27/20
Vehicle Care 333
4. Disconnect the wiring harnessconnector from the bulb.
5. Install the new bulb in the headlamp assembly by turning
clockwise.
6. Reconnect the wiring harness connector.
7. Install the headlamp bulb access cover.
Uplevel Headlamp Assembly
The uplevel model vehicle has LED
high-beam and low-beam
headlamps, a DRL and parking
lamp, and a DRL position lamp on
the headlamp assembly.
Sidemarker
The vehicle has an LED
sidemarker lamp.
Front Turn Signal and
Fog Lamps
Front Turn Signal Lamp
Driver Side Shown, Passenger
Side Similar
1. Tilt the wheel and remove the screws on the outside of the
wheel liner.