bulb BUICK ENCORE GX 2021 Owner's Manual
[x] Cancel search | Manufacturer: BUICK, Model Year: 2021, Model line: ENCORE GX, Model: BUICK ENCORE GX 2021Pages: 370, PDF Size: 12.38 MB
Page 114 of 370

Buick Encore GX Owner Manual (GMNA-Localizing-U.S./Canada/Mexico-
14608036) - 2021 - CRC - 9/21/20
Instruments and Controls 113
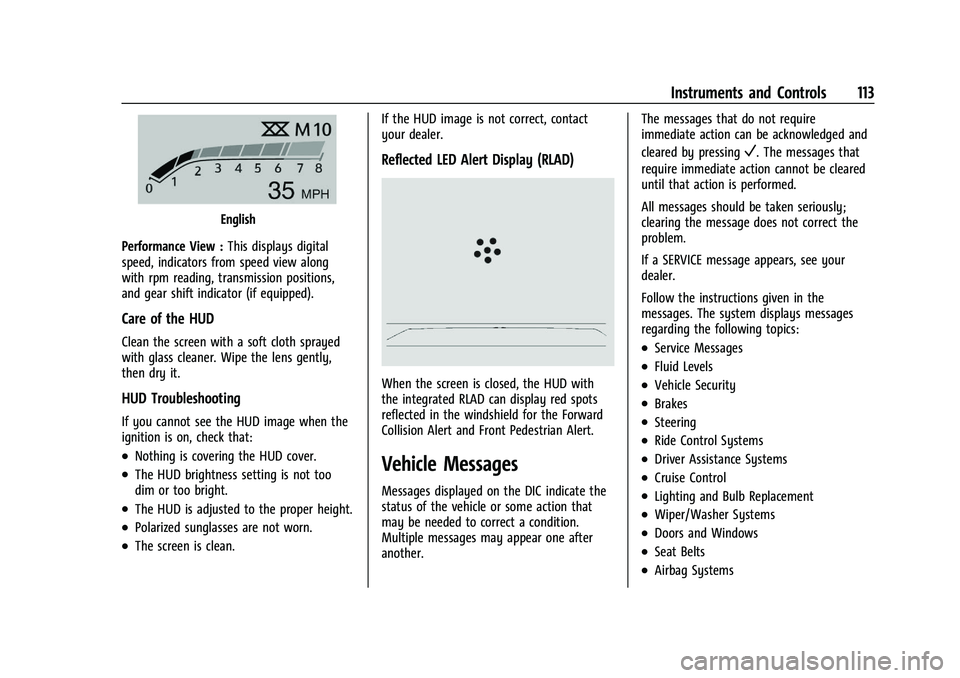
English
Performance View : This displays digital
speed, indicators from speed view along
with rpm reading, transmission positions,
and gear shift indicator (if equipped).
Care of the HUD
Clean the screen with a soft cloth sprayed
with glass cleaner. Wipe the lens gently,
then dry it.
HUD Troubleshooting
If you cannot see the HUD image when the
ignition is on, check that:
.Nothing is covering the HUD cover.
.The HUD brightness setting is not too
dim or too bright.
.The HUD is adjusted to the proper height.
.Polarized sunglasses are not worn.
.The screen is clean. If the HUD image is not correct, contact
your dealer.
Reflected LED Alert Display (RLAD)
When the screen is closed, the HUD with
the integrated RLAD can display red spots
reflected in the windshield for the Forward
Collision Alert and Front Pedestrian Alert.
Vehicle Messages
Messages displayed on the DIC indicate the
status of the vehicle or some action that
may be needed to correct a condition.
Multiple messages may appear one after
another. The messages that do not require
immediate action can be acknowledged and
cleared by pressing
V. The messages that
require immediate action cannot be cleared
until that action is performed.
All messages should be taken seriously;
clearing the message does not correct the
problem.
If a SERVICE message appears, see your
dealer.
Follow the instructions given in the
messages. The system displays messages
regarding the following topics:
.Service Messages
.Fluid Levels
.Vehicle Security
.Brakes
.Steering
.Ride Control Systems
.Driver Assistance Systems
.Cruise Control
.Lighting and Bulb Replacement
.Wiper/Washer Systems
.Doors and Windows
.Seat Belts
.Airbag Systems
Page 125 of 370

Buick Encore GX Owner Manual (GMNA-Localizing-U.S./Canada/Mexico-
14608036) - 2021 - CRC - 9/21/20
124 Lighting
Hazard Warning Flashers
|:Press to make the front and rear turn
signal lamps flash on and off. This warns
others that you are having trouble.
Press
|again to turn the flashers off.
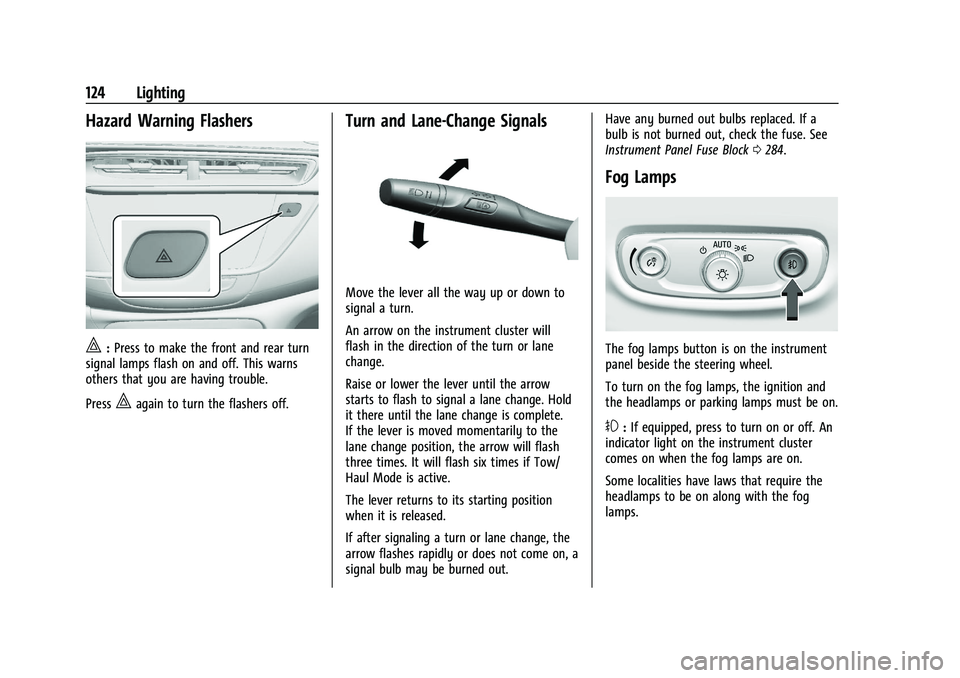
Turn and Lane-Change Signals
Move the lever all the way up or down to
signal a turn.
An arrow on the instrument cluster will
flash in the direction of the turn or lane
change.
Raise or lower the lever until the arrow
starts to flash to signal a lane change. Hold
it there until the lane change is complete.
If the lever is moved momentarily to the
lane change position, the arrow will flash
three times. It will flash six times if Tow/
Haul Mode is active.
The lever returns to its starting position
when it is released.
If after signaling a turn or lane change, the
arrow flashes rapidly or does not come on, a
signal bulb may be burned out. Have any burned out bulbs replaced. If a
bulb is not burned out, check the fuse. See
Instrument Panel Fuse Block
0284.
Fog Lamps
The fog lamps button is on the instrument
panel beside the steering wheel.
To turn on the fog lamps, the ignition and
the headlamps or parking lamps must be on.
#:If equipped, press to turn on or off. An
indicator light on the instrument cluster
comes on when the fog lamps are on.
Some localities have laws that require the
headlamps to be on along with the fog
lamps.
Page 250 of 370

Buick Encore GX Owner Manual (GMNA-Localizing-U.S./Canada/Mexico-
14608036) - 2021 - CRC - 9/21/20
Driving and Operating 249
Cross the safety chains under the tongue of
the trailer to help prevent the tongue from
contacting the road if it becomes separated
from the hitch. Always leave just enough
slack so the combination can turn. Never
allow safety chains to drag on the ground.
Trailer Brakes
Loaded trailers over 450 kg (1,000 lb) must
be equipped with brake systems and with
brakes for each axle. Trailer braking
equipment conforming to Canadian
Standards Association (CSA) requirement
CAN3-D313, or its equivalent, is
recommended.
State or local regulations may require
trailers to have their own braking system if
the loaded weight of the trailer exceeds
certain minimums that can vary from state
to state. Read and follow the instructions for
the trailer brakes so they are installed,
adjusted, and maintained properly. Never
attempt to tap into your vehicle's hydraulic
brake system. If you do, both the vehicle
anti-lock brakes and the trailer brakes may
not function, which could result in a crash.
Trailer Lamps
Always check all trailer lamps are working at
the beginning of each trip, and periodically
on longer trips.
Turn Signals When Towing a Trailer
When properly connected, the trailer turn
signals should will illuminate to indicate the
vehicle is turning, changing lanes,
or stopping. When towing a trailer, the
arrows on the instrument cluster will
illuminate even if the trailer is not properly
connected or the bulbs are burned out.
Trailer Tires
Special Trailer (ST) tires differ from vehicle
tires. Trailer tires are designed with stiff
sidewalls to help prevent sway and to
support heavy loads. These features can
make it difficult to determine if the trailer
tire pressures are low only based on a visual
inspection.
Always check all trailer tire pressures before
each trip when the tires are cool. Low trailer
tire pressure is a leading cause of trailer tire
blow-outs.Trailer tires deteriorate over time. The trailer
tire sidewall will show the week and year
the tire was manufactured. Many trailer tire
manufacturers recommend replacing tires
more than six years old.
Overloading is another leading cause of
trailer tire blow-outs. Never load your trailer
with more weight than the tires are
designed to support. The load rating is
located on the trailer tire sidewall.
Always know the maximum speed rating for
the trailer tires before driving. This may be
significantly lower than the vehicle tire
speed rating. The speed rating may be on
the trailer tire sidewall. If the speed rating is
not shown, the default trailer tire speed
rating is 105 km/h (65 mph).
Conversions and Add-Ons
Add-On Electrical Equipment
{Warning
The Data Link Connector (DLC) is used for
vehicle service and Emission Inspection/
Maintenance testing. See
Malfunction
Indicator Lamp (Check Engine Light) 097.
(Continued)
Page 252 of 370

Buick Encore GX Owner Manual (GMNA-Localizing-U.S./Canada/Mexico-
14608036) - 2021 - CRC - 9/21/20
Vehicle Care 251
Vehicle Care
General Information
General Information . . . . . . . . . . . . . . . . . . . 252
California Proposition 65 Warning . . . . . 252
California Perchlorate MaterialsRequirements . . . . . . . . . . . . . . . . . . . . . . . . 252
Accessories and Modifications . . . . . . . . . 252
Vehicle Checks
Doing Your Own Service Work . . . . . . . . . 253
Hood . . . . . . . . . . . . . . . . . . . . . . . . . . . . . . . . . . 253
Engine Compartment Overview . . . . . . . . 255
Engine Oil . . . . . . . . . . . . . . . . . . . . . . . . . . . . . 258
Engine Oil Life System . . . . . . . . . . . . . . . . 260
Automatic Transmission Fluid . . . . . . . . . 260
Engine Air Filter Life System . . . . . . . . . . 260
Engine Air Cleaner/Filter . . . . . . . . . . . . . . . 261
Cooling System . . . . . . . . . . . . . . . . . . . . . . . 262
Engine Overheating . . . . . . . . . . . . . . . . . . . 266
Washer Fluid . . . . . . . . . . . . . . . . . . . . . . . . . . 267
Brakes . . . . . . . . . . . . . . . . . . . . . . . . . . . . . . . . 268
Brake Pad Life System . . . . . . . . . . . . . . . . 268
Brake Fluid . . . . . . . . . . . . . . . . . . . . . . . . . . . . 269
Battery - North America . . . . . . . . . . . . . . . 270
All-Wheel Drive . . . . . . . . . . . . . . . . . . . . . . . . 272
Automatic Transmission Shift Lock Control Function Check . . . . . . . . . . . . . . 272
Park Brake and P (Park) Mechanism Check . . . . . . . . . . . . . . . . . . . . . . . . . . . . . . . . 272 Wiper Blade Replacement . . . . . . . . . . . . . 272
Windshield Replacement . . . . . . . . . . . . . . . 273
Gas Strut(s) . . . . . . . . . . . . . . . . . . . . . . . . . . . 274
Headlamp Aiming
Front Headlamp Aiming . . . . . . . . . . . . . . . 274
Bulb Replacement
Bulb Replacement . . . . . . . . . . . . . . . . . . . . . 275
Halogen Bulbs . . . . . . . . . . . . . . . . . . . . . . . . . 275
LED Lighting . . . . . . . . . . . . . . . . . . . . . . . . . . . 275
Headlamps and Sidemarker Lamps . . . . . 275
Front Turn Signal and Fog Lamps . . . . . . 276
Taillamps, Turn Signal, Sidemarker,
Stoplamps, and Back-Up Lamps (Base
Level) . . . . . . . . . . . . . . . . . . . . . . . . . . . . . . . . 277
Taillamps, Turn Signal, Sidemarker, Stoplamps, and Back-Up Lamps
(Uplevel) . . . . . . . . . . . . . . . . . . . . . . . . . . . . 280
Electrical System
Electrical System Overload . . . . . . . . . . . . 280
Fuses and Circuit Breakers . . . . . . . . . . . . . 281
Engine Compartment Fuse Block . . . . . . . 281
Instrument Panel Fuse Block . . . . . . . . . . 284
Rear Compartment Fuse Block . . . . . . . . . 285
Wheels and Tires
Tires . . . . . . . . . . . . . . . . . . . . . . . . . . . . . . . . . . 286
All-Season Tires . . . . . . . . . . . . . . . . . . . . . . . . 287
Winter Tires . . . . . . . . . . . . . . . . . . . . . . . . . . . 287
Tire Sidewall Labeling . . . . . . . . . . . . . . . . . 288 Tire Designations . . . . . . . . . . . . . . . . . . . . . . 289
Tire Terminology and Definitions . . . . . 290
Tire Pressure . . . . . . . . . . . . . . . . . . . . . . . . . . 292
Tire Pressure Monitor System . . . . . . . . . 293
Tire Pressure Monitor Operation . . . . . . 294
Tire Inspection . . . . . . . . . . . . . . . . . . . . . . . . 297
Tire Rotation . . . . . . . . . . . . . . . . . . . . . . . . . . 297
When It Is Time for New Tires . . . . . . . . 298
Buying New Tires . . . . . . . . . . . . . . . . . . . . . 299
Different Size Tires and Wheels . . . . . . . 300
Uniform Tire Quality Grading . . . . . . . . . 300
Wheel Alignment and Tire Balance . . . . 302
Wheel Replacement . . . . . . . . . . . . . . . . . . . 302
Tire Chains . . . . . . . . . . . . . . . . . . . . . . . . . . . . 302
If a Tire Goes Flat . . . . . . . . . . . . . . . . . . . . . 303
Tire Changing . . . . . . . . . . . . . . . . . . . . . . . . . 304
Compact Spare Tire . . . . . . . . . . . . . . . . . . . 308
Jump Starting
Jump Starting - North America . . . . . . . . 308
Towing the Vehicle
Towing the Vehicle . . . . . . . . . . . . . . . . . . . . 311
Recreational Vehicle Towing . . . . . . . . . . . . 311
Appearance Care
Exterior Care . . . . . . . . . . . . . . . . . . . . . . . . . . . 314
Interior Care . . . . . . . . . . . . . . . . . . . . . . . . . . . 318
Floor Mats . . . . . . . . . . . . . . . . . . . . . . . . . . . . 320
Page 276 of 370

Buick Encore GX Owner Manual (GMNA-Localizing-U.S./Canada/Mexico-
14608036) - 2021 - CRC - 9/21/20
Vehicle Care 275
Bulb Replacement
For the proper type of replacement bulbs,
or any bulb changing procedure not listed in
this section, contact your dealer.
Caution
Do not replace incandescent bulbs with
aftermarket LED replacement bulbs. This
can cause damage to the vehicle electrical
system.
This vehicle may be equipped with desiccant
to reduce fogging inside the headlamp due
to moisture. If fogging continues for a long
time, see your dealer for service.
Halogen Bulbs
{Warning
Halogen bulbs have pressurized gas inside
and can burst if you drop or scratch the
bulb. You or others could be injured. Be
sure to read and follow the instructions
on the bulb package.
LED Lighting
This vehicle has several LED lamps. For
replacement of any LED lighting assembly,
contact your dealer.
Headlamps and Sidemarker Lamps
Base Level Headlamp Assembly
The base model vehicle has halogen
high-beam and low-beam headlamps, an LED
turn signal lamp, and a DRL and parking
lamp on the headlamp assembly.
Driver Side Shown, Passenger Side Similar
1. Low-Beam Headlamp
2. High-Beam Headlamp
High-Beam Headlamp/Low-Beam
Headlamp
1. Open the hood. See Hood0253.
2. Remove the headlamp bulb access cover.
3. Turn the bulb counterclockwise and pull
straight back.
Page 277 of 370

Buick Encore GX Owner Manual (GMNA-Localizing-U.S./Canada/Mexico-
14608036) - 2021 - CRC - 9/21/20
276 Vehicle Care
4. Disconnect the wiring harness connectorfrom the bulb.
5. Install the new bulb in the headlamp assembly by turning clockwise.
6. Reconnect the wiring harness connector.
7. Install the headlamp bulb access cover.
Uplevel Headlamp Assembly
The uplevel model vehicle has LED
high-beam and low-beam headlamps, a DRL
and parking lamp, and a DRL position lamp
on the headlamp assembly.
Sidemarker
The vehicle has an LED sidemarker lamp.
Front Turn Signal and Fog Lamps
Front Turn Signal Lamp
Driver Side Shown, Passenger Side Similar
1. Tilt the wheel and remove the screws on the outside of the wheel liner.
Page 278 of 370

Buick Encore GX Owner Manual (GMNA-Localizing-U.S./Canada/Mexico-
14608036) - 2021 - CRC - 9/21/20
Vehicle Care 277
2. Bend the wheel liner back to makeenough space for hand access.
3. While holding the wheel liner with onehand and disengage the bulb socket
from the plug connector by pulling the
retaining rib.
4. Turn the bulb holder counterclockwise and remove it from the reflector using
the other hand.
5. Remove the bulb from the bulb socketand replace with a new bulb.
6. Insert the bulb socket into the reflector by turning clockwise and attach the plug
connector.
7. Reassemble the lower cover and front wheel liner.
Front Fog Lamp
The vehicle has LED fog lamp
Taillamps, Turn Signal,
Sidemarker, Stoplamps, and
Back-Up Lamps (Base Level)
Caution
Improper lamp assembly removal and
installation can cause leaks and water
intrusion which may cause damage to
the taillamp. Do not remove the taillamp
assembly to replace a bulb. Use the
tailgate opening to access the bulb.
Page 279 of 370

Buick Encore GX Owner Manual (GMNA-Localizing-U.S./Canada/Mexico-
14608036) - 2021 - CRC - 9/21/20
278 Vehicle Care
Tailgate inboard Taillamp
Driver Side Shown, Passenger Side Similar
1. Taillamp
2. Taillamp
1. Remove the bulb access door on tailgate.
2. Remove the bulb from the bulb socket and replace with a new bulb.
3. Insert the bulb socket and attach theplug connector. 4. Reassemble the cover.
Stop lamp/Taillamp, Turn Signal, and
Sidemarker Lamp
Driver Side Shown, Passenger Side Similar
1. Stop lamp/Taillamp
2. Turn signal lamp
1. Remove and retain both screws attaching the taillamp assembly to the
vehicle body.
Page 280 of 370

Buick Encore GX Owner Manual (GMNA-Localizing-U.S./Canada/Mexico-
14608036) - 2021 - CRC - 9/21/20
Vehicle Care 279
2. Pull the taillamp assembly straight backto detach it from the vehicle body. Take
care that the cable duct remains in place.
3. Remove the bulb socket from the taillamp assembly.4. Remove the old bulb from the bulbsocket by pulling it straight out.
5. Insert a new bulb into the bulb socket.
6. Install the bulb socket into the taillamp assembly.
7. Install the taillamp assembly to the vehicle body with the two screws.
Rear Back-Up Lamp
The bulbs are accessible from the underside
of the vehicle.
1. Turn the bulb holder anti-clockwise and remove it from reflector.
Page 281 of 370

Buick Encore GX Owner Manual (GMNA-Localizing-U.S./Canada/Mexico-
14608036) - 2021 - CRC - 9/21/20
280 Vehicle Care
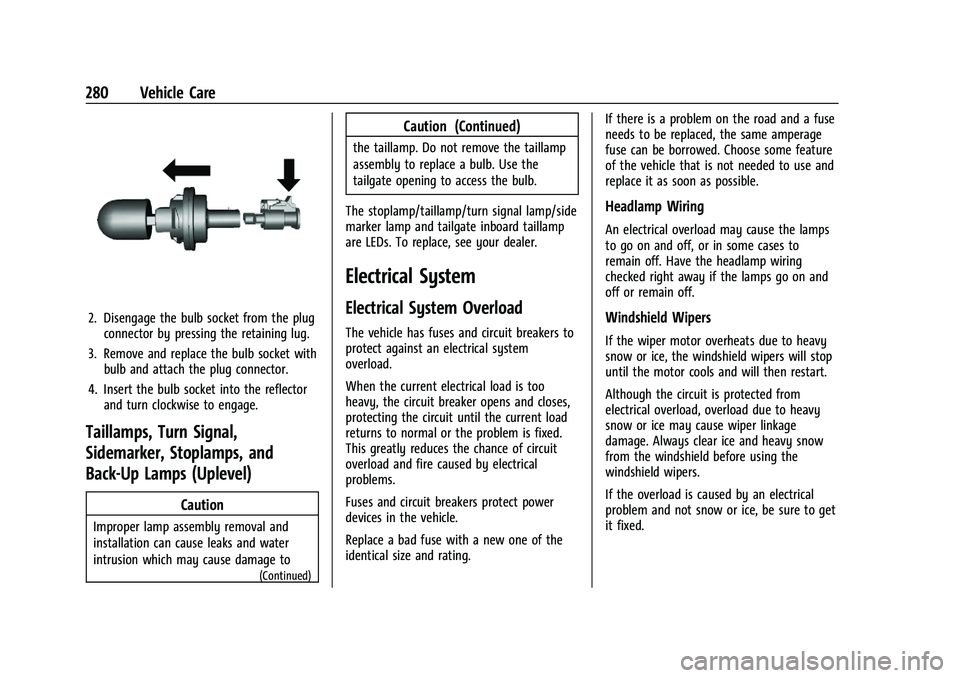
2. Disengage the bulb socket from the plugconnector by pressing the retaining lug.
3. Remove and replace the bulb socket with bulb and attach the plug connector.
4. Insert the bulb socket into the reflector and turn clockwise to engage.
Taillamps, Turn Signal,
Sidemarker, Stoplamps, and
Back-Up Lamps (Uplevel)
Caution
Improper lamp assembly removal and
installation can cause leaks and water
intrusion which may cause damage to
(Continued)
Caution (Continued)
the taillamp. Do not remove the taillamp
assembly to replace a bulb. Use the
tailgate opening to access the bulb.
The stoplamp/taillamp/turn signal lamp/side
marker lamp and tailgate inboard taillamp
are LEDs. To replace, see your dealer.
Electrical System
Electrical System Overload
The vehicle has fuses and circuit breakers to
protect against an electrical system
overload.
When the current electrical load is too
heavy, the circuit breaker opens and closes,
protecting the circuit until the current load
returns to normal or the problem is fixed.
This greatly reduces the chance of circuit
overload and fire caused by electrical
problems.
Fuses and circuit breakers protect power
devices in the vehicle.
Replace a bad fuse with a new one of the
identical size and rating. If there is a problem on the road and a fuse
needs to be replaced, the same amperage
fuse can be borrowed. Choose some feature
of the vehicle that is not needed to use and
replace it as soon as possible.
Headlamp Wiring
An electrical overload may cause the lamps
to go on and off, or in some cases to
remain off. Have the headlamp wiring
checked right away if the lamps go on and
off or remain off.
Windshield Wipers
If the wiper motor overheats due to heavy
snow or ice, the windshield wipers will stop
until the motor cools and will then restart.
Although the circuit is protected from
electrical overload, overload due to heavy
snow or ice may cause wiper linkage
damage. Always clear ice and heavy snow
from the windshield before using the
windshield wipers.
If the overload is caused by an electrical
problem and not snow or ice, be sure to get
it fixed.