air condition BUICK LACROSSE 2009 Get To Know Guide
[x] Cancel search | Manufacturer: BUICK, Model Year: 2009, Model line: LACROSSE, Model: BUICK LACROSSE 2009Pages: 20, PDF Size: 0.81 MB
Page 4 of 20

Getting to Know Your LaCrosse4
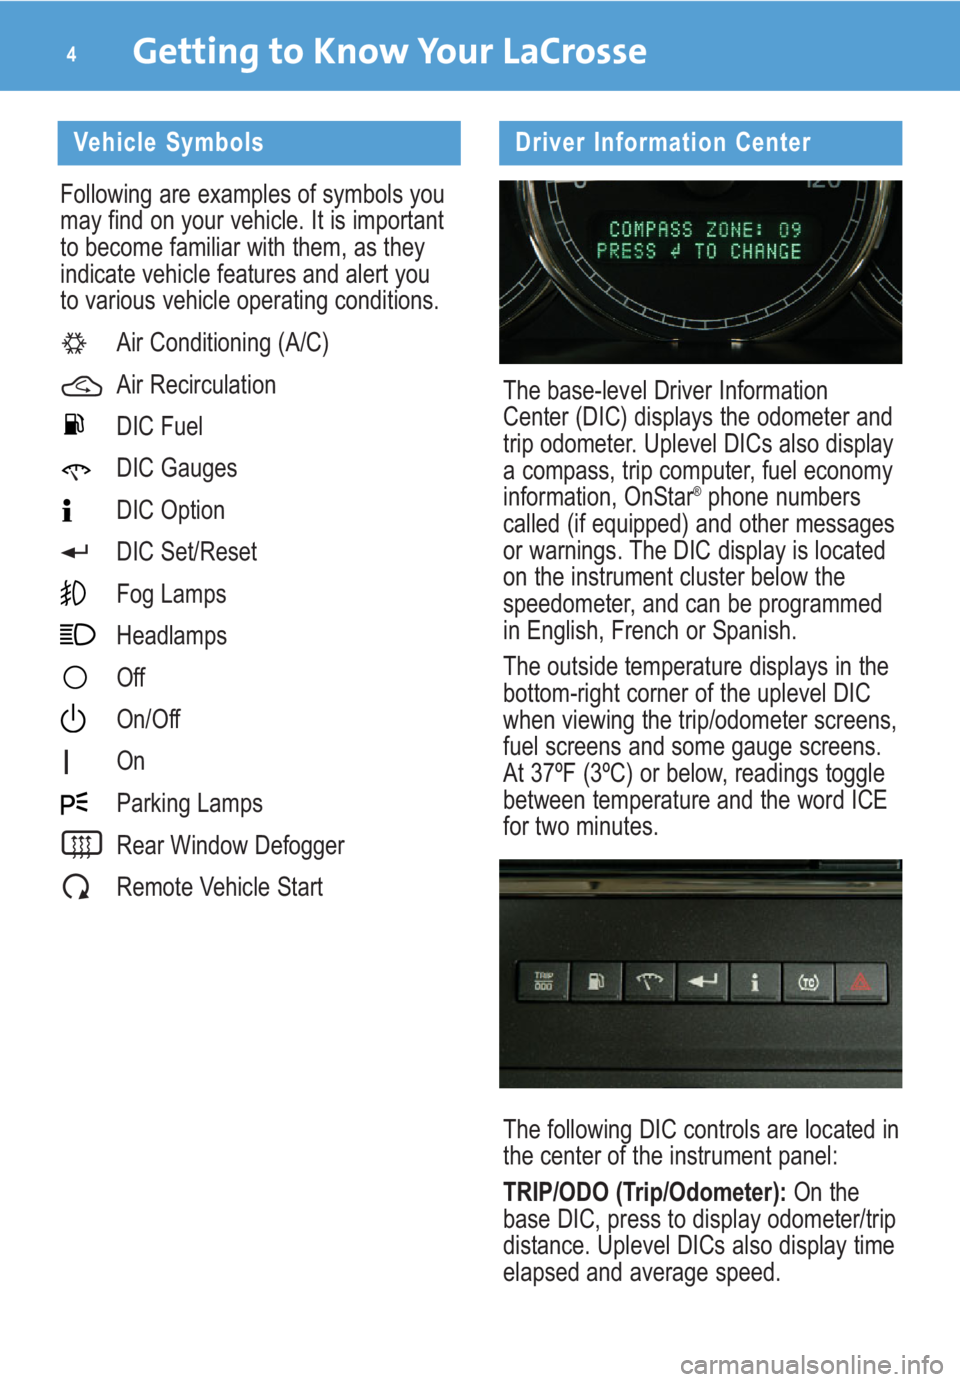
Driver Information Center
The base-level Driver Information
Center (DIC) displays the odometer and
trip odometer. Uplevel DICs also display
a compass, trip computer, fuel economy
information, OnStar
®phone numbers
called (if equipped) and other messages
or warnings. The DIC display is located
on the instrument cluster below the
speedometer, and can be programmed
in English, French or Spanish.
The outside temperature displays in the
bottom-right corner of the uplevel DIC
when viewing the trip/odometer screens,
fuel screens and some gauge screens.
At 37ºF (3ºC) or below, readings toggle
between temperature and the word ICE
for two minutes.
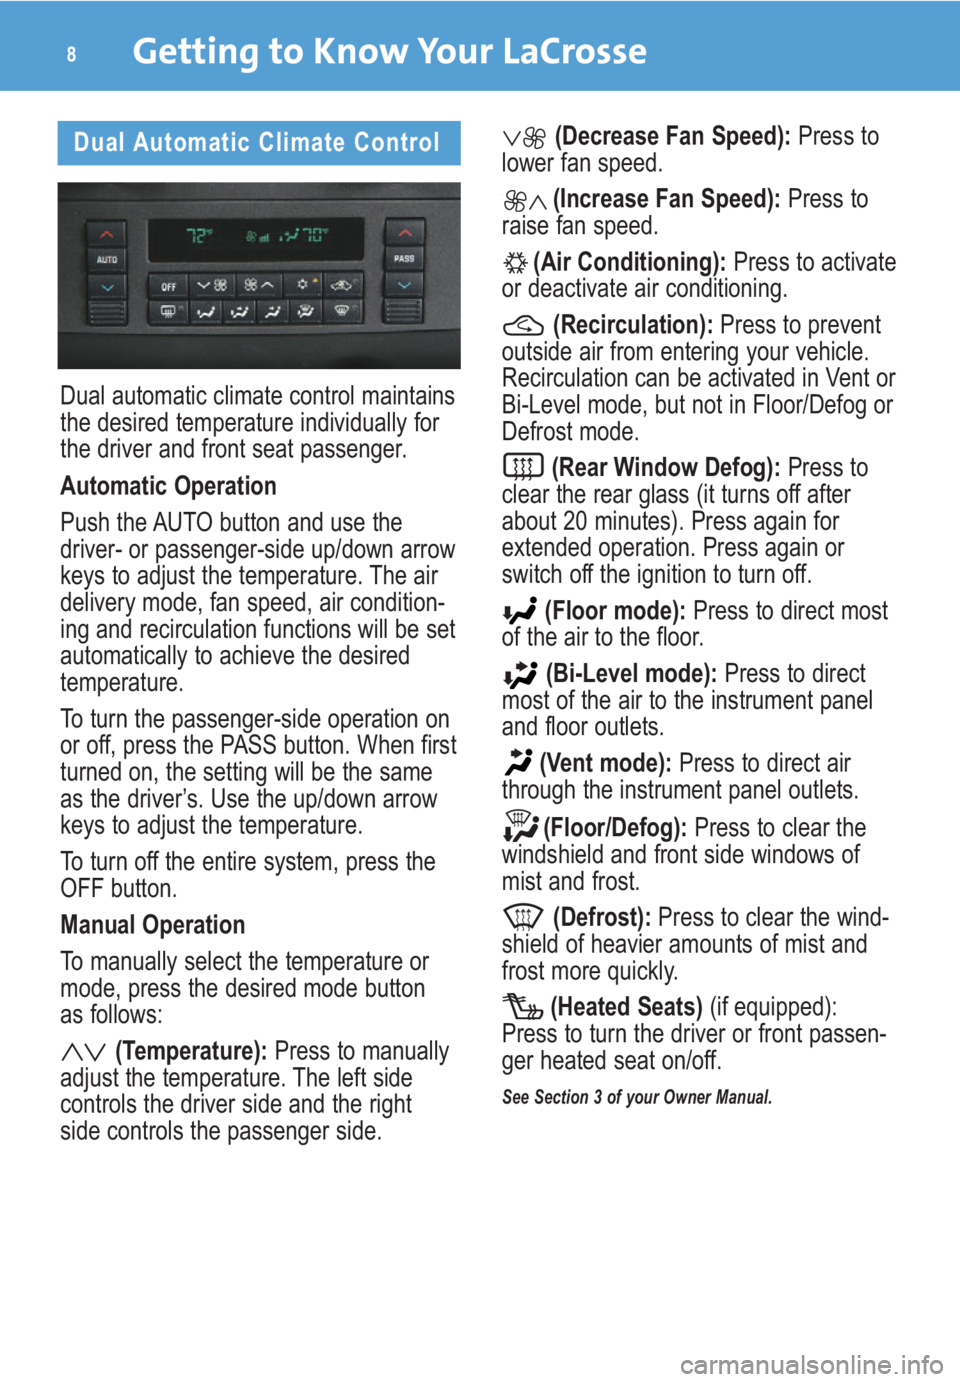
The following DIC controls are located in
the center of the instrument panel:
TRIP/ODO (Trip/Odometer):On the
base DIC, press to display odometer/trip
distance. Uplevel DICs also display time
elapsed and average speed.
Vehicle Symbols
Following are examples of symbols you
may find on your vehicle. It is important
to become familiar with them, as they
indicate vehicle features and alert you
to various vehicle operating conditions.
Air Conditioning (A/C)
Air Recirculation
DIC Fuel
DIC Gauges
DIC Option
DIC Set/Reset
Fog Lamps
Headlamps
Off
On/Off
On
Parking Lamps
Rear Window Defogger
Remote Vehicle Start
Page 8 of 20

Getting to Know Your LaCrosse8
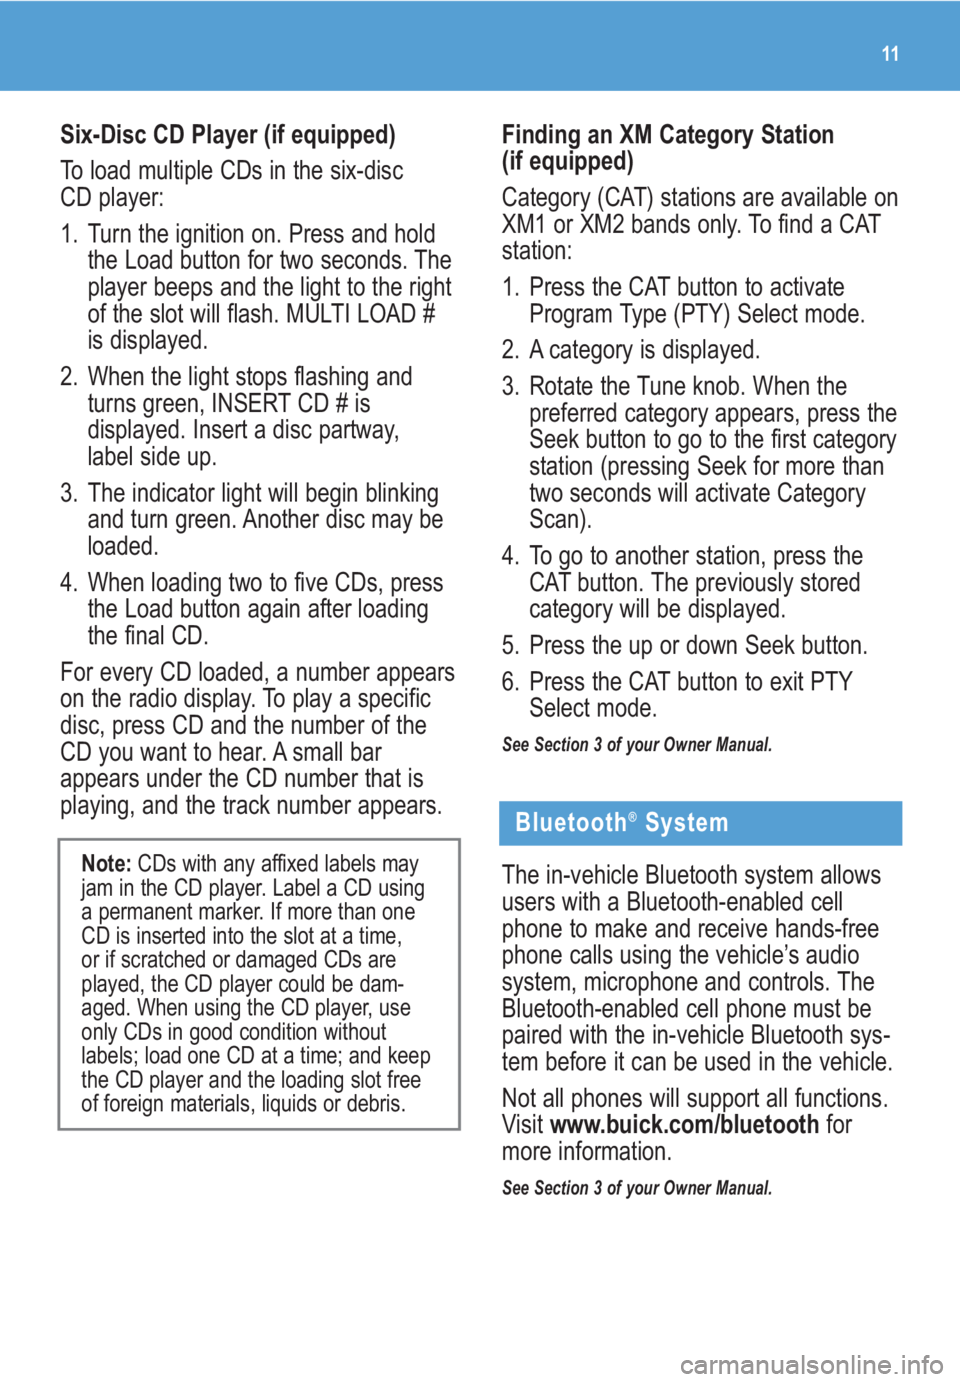
Dual Automatic Climate Control
Dual automatic climate control maintains
the desired temperature individually for
the driver and front seat passenger.
Automatic Operation
Push the AUTO button and use the
driver- or passenger-side up/down arrow
keys to adjust the temperature. The air
delivery mode, fan speed, air condition-
ing and recirculation functions will be set
automatically to achieve the desired
temperature.
To turn the passenger-side operation on
or off, press the PASS button. When first
turned on, the setting will be the same
as the driver’s. Use the up/down arrow
keys to adjust the temperature.
To turn off the entire system, press the
OFF button.
Manual Operation
To manually select the temperature or
mode, press the desired mode button
as follows:
(Temperature):Press to manually
adjust the temperature. The left side
controls the driver side and the right
side controls the passenger side.
(Decrease Fan Speed):Press to
lower fan speed.
(Increase Fan Speed):Press to
raise fan speed.
(Air Conditioning):Press to activate
or deactivate air conditioning.
(Recirculation):Press to prevent
outside air from entering your vehicle.
Recirculation can be activated in Vent or
Bi-Level mode, but not in Floor/Defog or
Defrost mode.
(Rear Window Defog):Press to
clear the rear glass (it turns off after
about 20 minutes). Press again for
extended operation. Press again or
switch off the ignition to turn off.
(Floor mode):Press to direct most
of the air to the floor.
(Bi-Level mode):Press to direct
most of the air to the instrument panel
and floor outlets.
(Vent mode):Press to direct air
through the instrument panel outlets.
(Floor/Defog):Press to clear the
windshield and front side windows of
mist and frost.
(Defrost):Press to clear the wind-
shield of heavier amounts of mist and
frost more quickly.
(Heated Seats) (if equipped):
Press to turn the driver or front passen-
ger heated seat on/off.
See Section 3 of your Owner Manual.
Page 11 of 20

11
Six-Disc CD Player (if equipped)
To load multiple CDs in the six-disc
CD player:
1. Turn the ignition on. Press and hold
the Load button for two seconds. The
player beeps and the light to the right
of the slot will flash. MULTI LOAD #
is displayed.
2. When the light stops flashing and
turns green, INSERT CD # is
displayed. Insert a disc partway,
label side up.
3. The indicator light will begin blinking
and turn green. Another disc may be
loaded.
4. When loading two to five CDs, press
the Load button again after loading
the final CD.
For every CD loaded, a number appears
on the radio display. To play a specific
disc, press CD and the number of the
CD you want to hear. A small bar
appears under the CD number that is
playing, and the track number appears.
Note:CDs with any affixed labels may
jam in the CD player. Label a CD using
a permanent marker. If more than one
CD is inserted into the slot at a time,
or if scratched or damaged CDs are
played, the CD player could be dam-
aged. When using the CD player, use
only CDs in good condition without
labels; load one CD at a time; and keep
the CD player and the loading slot free
of foreign materials, liquids or debris.
Finding an XM Category Station
(if equipped)
Category (CAT) stations are available on
XM1 or XM2 bands only. To find a CAT
station:
1. Press the CAT button to activate
Program Type (PTY) Select mode.
2. A category is displayed.
3. Rotate the Tune knob. When the
preferred category appears, press the
Seek button to go to the first category
station (pressing Seek for more than
two seconds will activate Category
Scan).
4. To go to another station, press the
CAT button. The previously stored
category will be displayed.
5. Press the up or down Seek button.
6. Press the CAT button to exit PTY
Select mode.
See Section 3 of your Owner Manual.
Bluetooth®System
The in-vehicle Bluetooth system allows
users with a Bluetooth-enabled cell
phone to make and receive hands-free
phone calls using the vehicle’s audio
system, microphone and controls. The
Bluetooth-enabled cell phone must be
paired with the in-vehicle Bluetooth sys-
tem before it can be used in the vehicle.
Not all phones will support all functions.
Visit www.buick.com/bluetoothfor
more information.
See Section 3 of your Owner Manual.
Page 17 of 20

PERFORMANCE & MAINTENANCE
Opening the Vehicle Hood
Pull the hood release handle located
under the driver’s side of the instrument
panel.
Under the leading edge of the hood
itself, push the secondary hood release
handle up and to the right. Lift the hood.
See Section 5 of your Owner Manual.
Passenger Compartment
Air Filter
The filter is located in the engine com-
partment below the air inlet grille, near
the passenger-side wiper arm. It traps
most of the pollen from the air that
enters the air conditioning module.
See your Owner Manual for scheduled
maintenance and replacement
instructions.
See Section 3 of your Owner Manual.
Accessory Power Outlets
Your vehicle is equipped with 12-volt
power outlets. One is located on the
center console below the climate con-
trols. The second outlet is located inside
the center storage console. On six-
passenger models, the second outlet is
located in the flip/fold console. Use them
to power cellular phones, CB radios, etc.
See your Owner Manual for full safety
and warranty cautions.
See Section 3 of your Owner Manual.
Hanging Garments
Use the rear assist handle or coat
hook to secure clothing on hangers for
transport.
17