start stop button BUICK LACROSSE 2015 User Guide
[x] Cancel search | Manufacturer: BUICK, Model Year: 2015, Model line: LACROSSE, Model: BUICK LACROSSE 2015Pages: 407, PDF Size: 4.89 MB
Page 212 of 407

Black plate (27,1)Buick LaCrosse Owner Manual (GMNA-Localizing-U.S./Canada/Mexico-
7707475) - 2015 - CRC - 10/9/14
Driving and Operating 9-27
Automatic
Transmission
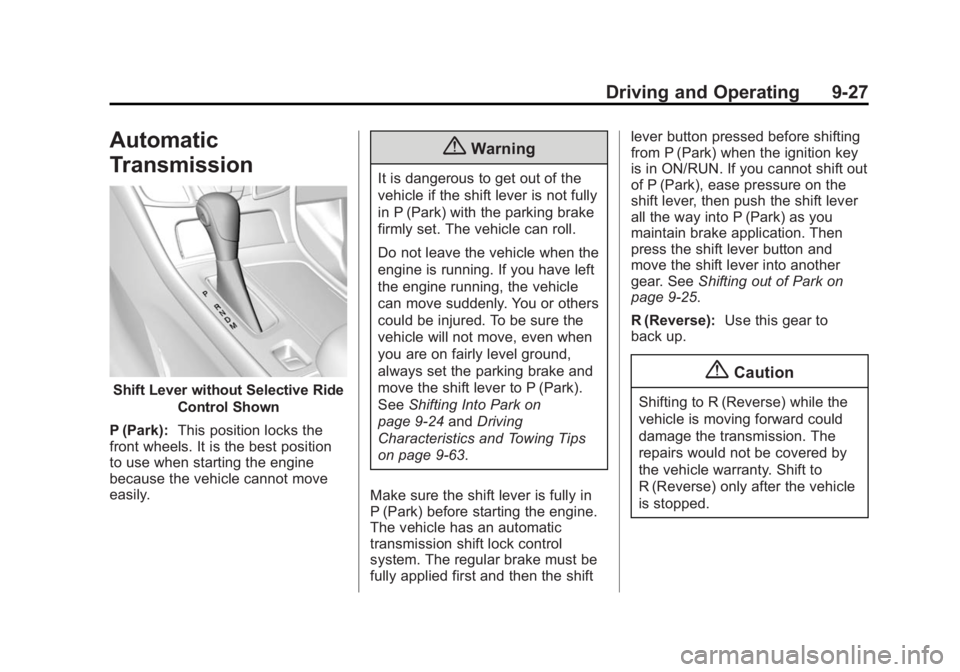
Shift Lever without Selective RideControl Shown
P (Park): This position locks the
front wheels. It is the best position
to use when starting the engine
because the vehicle cannot move
easily.
{Warning
It is dangerous to get out of the
vehicle if the shift lever is not fully
in P (Park) with the parking brake
firmly set. The vehicle can roll.
Do not leave the vehicle when the
engine is running. If you have left
the engine running, the vehicle
can move suddenly. You or others
could be injured. To be sure the
vehicle will not move, even when
you are on fairly level ground,
always set the parking brake and
move the shift lever to P (Park).
See Shifting Into Park on
page 9-24 andDriving
Characteristics and Towing Tips
on page 9-63.
Make sure the shift lever is fully in
P (Park) before starting the engine.
The vehicle has an automatic
transmission shift lock control
system. The regular brake must be
fully applied first and then the shift lever button pressed before shifting
from P (Park) when the ignition key
is in ON/RUN. If you cannot shift out
of P (Park), ease pressure on the
shift lever, then push the shift lever
all the way into P (Park) as you
maintain brake application. Then
press the shift lever button and
move the shift lever into another
gear. See
Shifting out of Park on
page 9-25.
R (Reverse): Use this gear to
back up.
{Caution
Shifting to R (Reverse) while the
vehicle is moving forward could
damage the transmission. The
repairs would not be covered by
the vehicle warranty. Shift to
R (Reverse) only after the vehicle
is stopped.
Page 220 of 407

Black plate (35,1)Buick LaCrosse Owner Manual (GMNA-Localizing-U.S./Canada/Mexico-
7707475) - 2015 - CRC - 10/9/14
Driving and Operating 9-35
Ifdcomes on and stays on:
1. Stop the vehicle.
2. Turn the engine off and wait 15 seconds.
3. Start the engine.
Drive the vehicle. If
dcomes on
and stays on, the vehicle may need
more time to diagnose the problem.
If the condition persists, see your
dealer.
Turning the Systems Off
and On
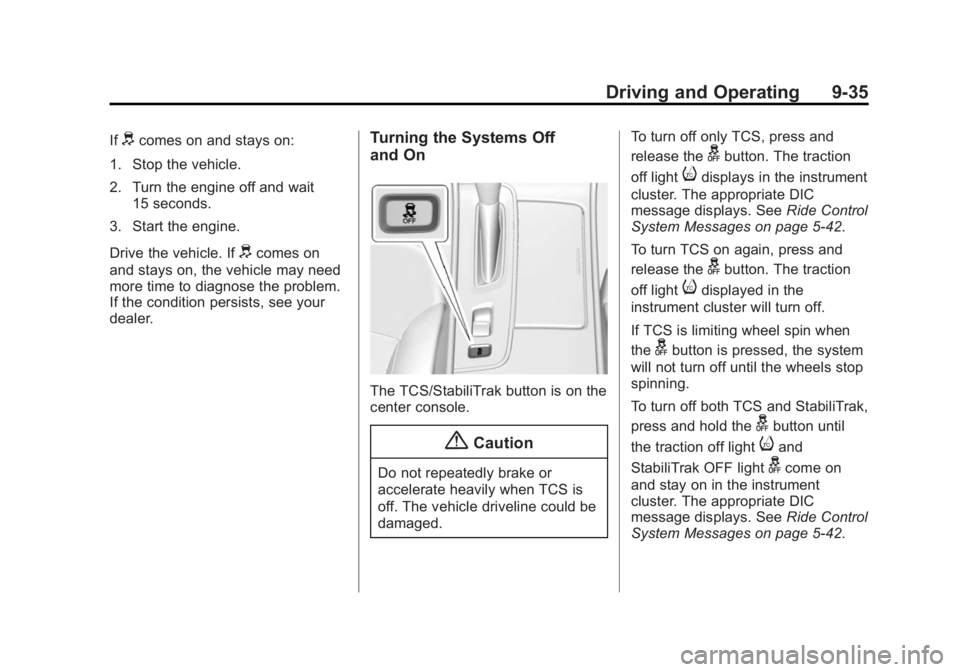
The TCS/StabiliTrak button is on the
center console.
{Caution
Do not repeatedly brake or
accelerate heavily when TCS is
off. The vehicle driveline could be
damaged. To turn off only TCS, press and
release the
gbutton. The traction
off light
idisplays in the instrument
cluster. The appropriate DIC
message displays. See Ride Control
System Messages on page 5-42.
To turn TCS on again, press and
release the
gbutton. The traction
off light
idisplayed in the
instrument cluster will turn off.
If TCS is limiting wheel spin when
the
gbutton is pressed, the system
will not turn off until the wheels stop
spinning.
To turn off both TCS and StabiliTrak,
press and hold the
gbutton until
the traction off light
iand
StabiliTrak OFF light
gcome on
and stay on in the instrument
cluster. The appropriate DIC
message displays. See Ride Control
System Messages on page 5-42.
Page 308 of 407

Black plate (55,1)Buick LaCrosse Owner Manual (GMNA-Localizing-U.S./Canada/Mexico-
7707475) - 2015 - CRC - 10/9/14
Vehicle Care 10-55
Activation Tool at
www.gmtoolsandequipment.com or
call 1-800-GM TOOLS
(1-800-468-6657).
There are two minutes to match the
first tire/wheel position, and
five minutes overall to match all four
tire/wheel positions. If it takes
longer, the matching process stops
and must be restarted.
The TPMS sensor matching
process is:
1. Set the parking brake.
2. Turn the ignition to ON/RUN withthe engine off or place the
vehicle power mode in ON/RUN/
START. See Ignition Positions
(Key Access) on page 9-15 or
Ignition Positions (Keyless
Access) on page 9-16.
3. Make sure the Tire Pressure info page option is turned on. The
info pages on the DIC can be
turned on and off through the Settings menu. See
Driver
Information Center (DIC) on
page 5-28.
4. Use the DIC controls on the right side of the steering wheel to
scroll to the Tire Pressure
screen under the DIC info page.
5. Press and hold the
V(Set/
Reset) button located in the
center of the DIC controls.
The horn sounds twice to signal
the receiver is in relearn mode
and the TIRE LEARNING
ACTIVE message displays on
the DIC screen.
6. Start with the driver side front tire.
7. Place the relearn tool against the tire sidewall, near the valve
stem. Then press the button to
activate the TPMS sensor.
A horn chirp confirms that the
sensor identification code has
been matched to this tire and
wheel position. 8. Proceed to the passenger side
front tire, and repeat the
procedure in Step 7.
9. Proceed to the passenger side rear tire, and repeat the
procedure in Step 7.
10. Proceed to the driver side rear tire, and repeat the procedure
in Step 7. The horn sounds two
times to indicate the sensor
identification code has been
matched to the driver side rear
tire, and the TPMS sensor
matching process is no longer
active. The TIRE LEARNING
ACTIVE message on the DIC
display screen goes off.
11. Turn the ignition to LOCK/OFF or press STOP to turn the
ignition off.
12. Set all four tires to the recommended air pressure
level as indicated on the Tire
and Loading Information label.
Page 332 of 407

Black plate (79,1)Buick LaCrosse Owner Manual (GMNA-Localizing-U.S./Canada/Mexico-
7707475) - 2015 - CRC - 10/9/14
Vehicle Care 10-79
3. PressTthen scrollyorz
until Jump Start displays.
4. Press
Vto activate the jump
start.
5. The system will then ask for confirmation. If Yes is selected,
the jump start will begin and the
display will show WAIT TO
START.
6. When the jump start is complete, the display will show ATTEMPT
START or JUMP START
DISABLED.
Keyless Access
With the brake pedal not applied,
press and hold the ENGINE START/
STOP button for more than
five seconds. This will place the
vehicle in the Service Only Mode.
Proceed as follows:
1. Press
Sthen scrollyorz
until the Settings menu displays.
2. Press
Vto enter the
Settings menu. 3. Press
Tthen scrollyorz
until Jump Start displays.
4. Press
Vto activate the jump
start.
5. The system will then ask for confirmation. If Yes is selected,
the jump start will begin and the
display will show WAIT TO
START.
6. When the jump start is complete, the display will show ATTEMPT
START or JUMP START
DISABLED.
If the vehicle is started, the
on-board jump start function will be
automatically disabled. If the vehicle
cranks but does not start, the
procedure may be repeated again.
If the vehicle start is still
unsuccessful, the jump start can be
attempted using the following jump
starting procedure under “Jump
Starting (with or without eAssist).” On-board jump starting may be
unavailable due to the 12-volt
battery charge level, the eAssist
battery charge level, power
capability, or an issue with the
eAssist system. In these cases, the
display will not be available because
of the power issue, or the DIC will
display JUMP START DISABLED
SEE OWNERS MANUAL.
Jump Starting (with or
without eAssist)
For more information about the
vehicle battery, see
Battery on
page 10-27.
If the battery has run down, try to
use another vehicle and some
jumper cables to start your vehicle.
Be sure to use the following steps to
do it safely.