lock BUICK LESABRE 1993 Owners Manual
[x] Cancel search | Manufacturer: BUICK, Model Year: 1993, Model line: LESABRE, Model: BUICK LESABRE 1993Pages: 324, PDF Size: 17.02 MB
Page 14 of 324
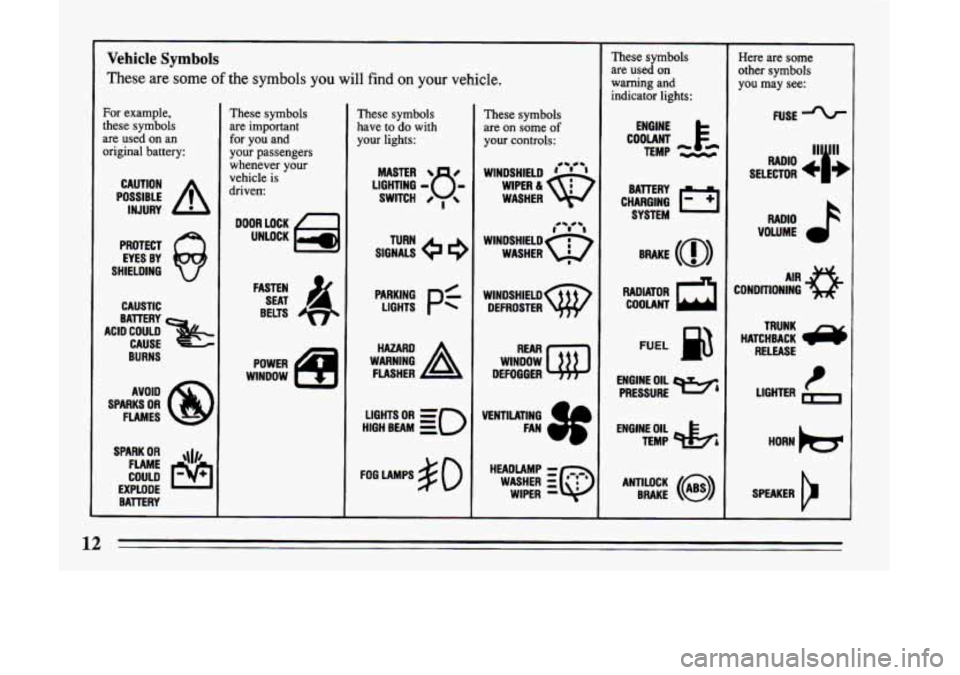
Vehicle Symbols
These
are some of the symbols you will find on your vehicle.
For example,
these symbols
are used on an
original battery:
POSSIBLE A
CAUTION
INJURY
PROTECT EYES BY
SHIELDING
Q
CAUSTIC
BURNS AVOID
SPARKS
OR
FLAMES
SPARK
OR ,\I/,
COULD FLAME
EXPLODE BATTERY
These symbols
are important
for you and
your passengers
whenever your
vehicle is
driven
DOOR LOCK
UNLOCK
FASTEN SEAT
4
BELTS
WINDOW POWER
These symbols
have
to do with
your lights:
LIGHTING - 8 -
MASTER 8
SWITCH 0 ,
SIGNALS e 9
TURN
LIGHTS
Pf
HIGH BEAM OR = =o
FOG LAMPS # 0
These symbols
are on some
of
your controls:
WINDSHIELD ' ' ' 4- e-
WASHER
wlNDsHIELDw DEFROSTER
WINDOW
DEFOGGER
HEADLAMP
- r~.c.r
WASHER :Q
WIPER -
These symbols
are used on
warning and
indicator lights:
COOLANT F*
TEMP -.--
ENGINE
CHARGING
I-1
BATTERY SYSTEM
RADIATOR
a
COOLANT
FUEL
ENGINE OIL
PRESSURE
TEMP OIL
&
ANTILOCK (@)
BRAKE
Here are some
other symbols
you
may see:
FUSE
RADIO >
VOLUME
CONDITIONING
AIR 33
HATCHBACK /y
TRUNK
RELEASE
t LIGHTER
Page 16 of 324
Seats and Seat Controls
This section tells you about the seats -- how to adjust
them, and also about reclining front seatbacks, and head
restraints.
Manual Seat
fl CAUTION:
You can lose control of the vehicle if you try to
adjust a manual driver’s seat while the vehicle is
moving. The sudden movement could startle and
confuse you, or make you
push a pedal when
you don’t want
to. Adjust the driver’s seat only
when the vehicle
is not moving.
I
I
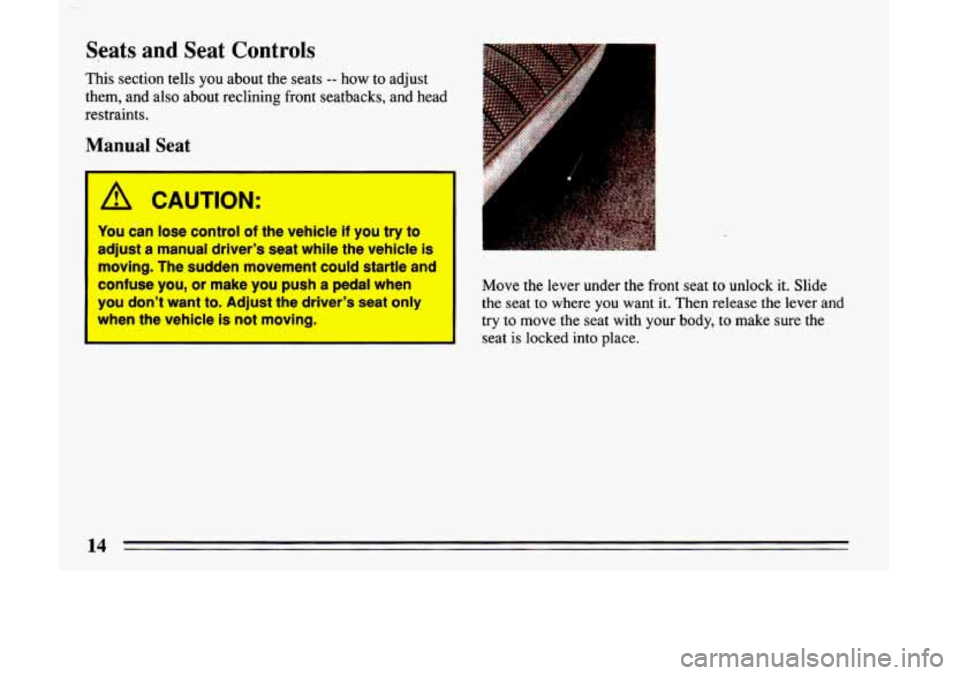
Move the lever under the front seat to unlock it. Slide
the seat
to where you want it. Then release the lever and
try to move the seat with your body, to make sure the
seat is locked into place.
Page 17 of 324

Power Seat (Option)
Front Control (F): Raise the front of the seat by pushing
on the left side of the switch. Push on
the right side of
the switch
to lower the front of the seat.
Center Control (C): Move the seat forward or back
by
holding the control to the front or back. Raise the seat
by holding
the control to the left. Hold the control to the
right
to lower the seat.
Rear Control
(R): Raise the rear of the seat by holding
the switch to the left. Holding the switch to the right
iowers the rear
of the seat.
Reclining Front Seatback(s)
To adjust the seatback, lift the lever on the outer side of
the seat and move the seatback to where you want it.
Release the lever to lock
the seatback. Pull up on the
lever and
the seat will go to an upright position.
But don't have a seatback reclined
if your vehicle, is
moving.
15
Page 21 of 324

Why Safety Belts Work
When you ride in or on anything, you go as fast as it
goes.
I
For example, if the bike is going 10 mph (16 km/h), so
is the child.
--I <-
When the bike hits the block, it stops. But the child
keeps going!
19
Page 27 of 324
Driver Position
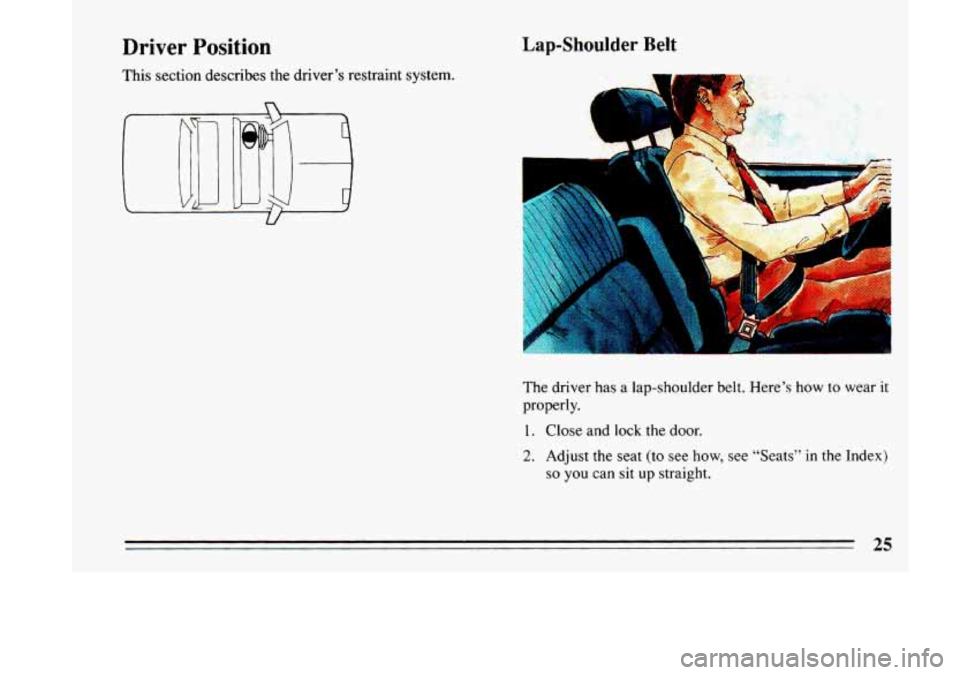
This section describes the driver’s restraint system.
Lap-Shoulder Belt
B
The driver has a lap-shoulder belt. Here’s how to wear it
properly.
1.
2.
Close and lock the door.
Adjust the seat (to see how, see “Seats” in the Index)
so you can sit up straight.
25
Page 28 of 324

3.
4.
Pick up the latch plate and pull the belt across you.
Don’t let it get twisted.
Push the latch plate
into the buckle until it clicks.
If the belt isn’t long enough, see “Safety Belt
Extender” at the end of this section.
Make sure the release button
on the buckle faces
upward or outward
so you would be able to unbuckle
it quickly if you ever had to. The
lap part
of the belt should be worn low and snug on
the hips, just touching
the thighs. In a crash, this applies
force to
the strong pelvic bones. And you’d be less
likely
to slide under the lap belt. If you slid under it, the
belt would apply force at your abdomen. This could
cause serious or even fatal injuries. The shoulder belt
should go over the shoulder and across the chest. These
parts
of the body are best able to take belt restraining
forces.
The safety belt locks
if there’s a sudden stop or crash.
26
Page 29 of 324
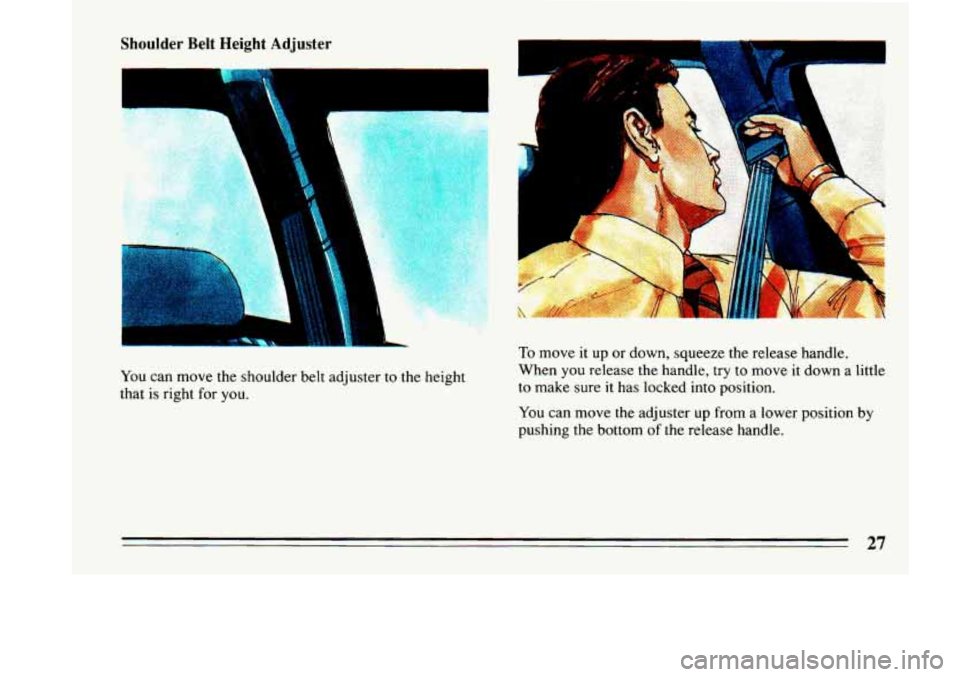
Shoulder Belt Height Adjuster
You can move the shoulder belt adjuster to the height
that is right for you.
1
I - --'
/" -
.. ,
To move it up or down, squeeze the release handle.
When you release the handle, try
to move it down a little
to make sure it has locked into position.
You can move the adjuster up from a lower position by
pushing the bottom
of the release handle.
27
Page 38 of 324
nitrogen gas used to inflate the air bag will have vented
into the passenger compartment, and the bag will be
deflated within seconds after
the collision. Nitrogen
makes up about
80% of the air we breathe and is not
hazardous.
As the nitrogen vents from the bag, small
particles are also vented into the passenger
compartment.
A CAUTION:
’
0
I’
Don’t attach anything to the steering wheel
pad.
It might injure the driver if the air bag
inflates.
The air bag
is designed to inflate only once.
After
it inflates, you’ll need some new parts
for your air bag system. If you don’t get
them, the air bag system won’t
be there to
help protect you
in another crash. A new
system will include the air bag module and
possibly other parts. The service manual
has information about the need to replace
other
parts.
Let only qualified technicians work on your
air-bag system. Improper service can mean
I
.‘that your air bag system won’t work
properly.
See your dealer fgr service.
Servicing Your Buick with the Air Bag
System
Please tell or remind anyone who works on your Buick
that
it has the air bag system. There are parts of the air
bag system
in several places around your vehicle. You
don’t want the system to inflate while someone is
working on your vehicle. The air bag system does not
need regular maintenance, Your Buick dealer and the
1993 LeSabre Service Manual have information about
the air bag system, including repair or disposal.
A CAUTION:
For up t0.2 minutes after the ignitlon key is
turned off and the battery disconnected, an air
bag can
still inflate during improper service. You
can be injured if you are close to an air bag when
it inflates. Be sure
to follow the proper service
procedures.
When electrical work is done under the hood or inside
your vehicle, the ignition should be
in “Lock” if
possible.
36
Page 40 of 324
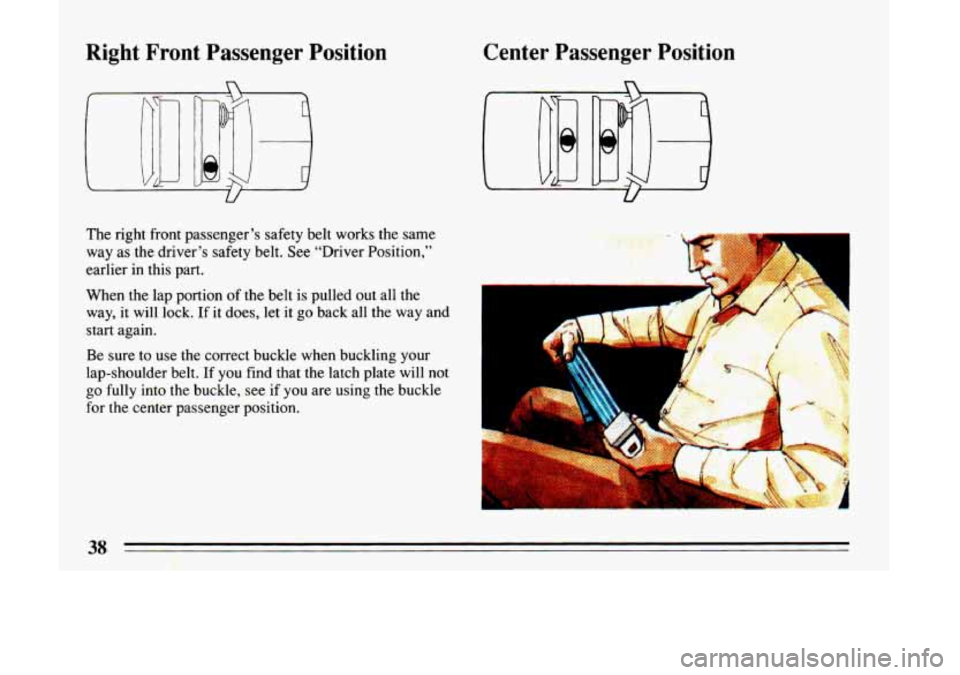
Right Front Passenger Position
The right front passenger’s safety belt works the same
way as the driver’s safety belt. See “Driver Position,”
earlier in this part.
When the lap portion
of the belt is pulled out all the
way,
it will lock. If it does, let it go back all the way and
start again.
Be sure to use the correct buckle when buckling your
lap-shoulder belt. If you find that the latch plate will not
go fully into the buckle, see if you are using the buckle
for the center passenger position.
Center Passenger Position
n
38
Page 42 of 324
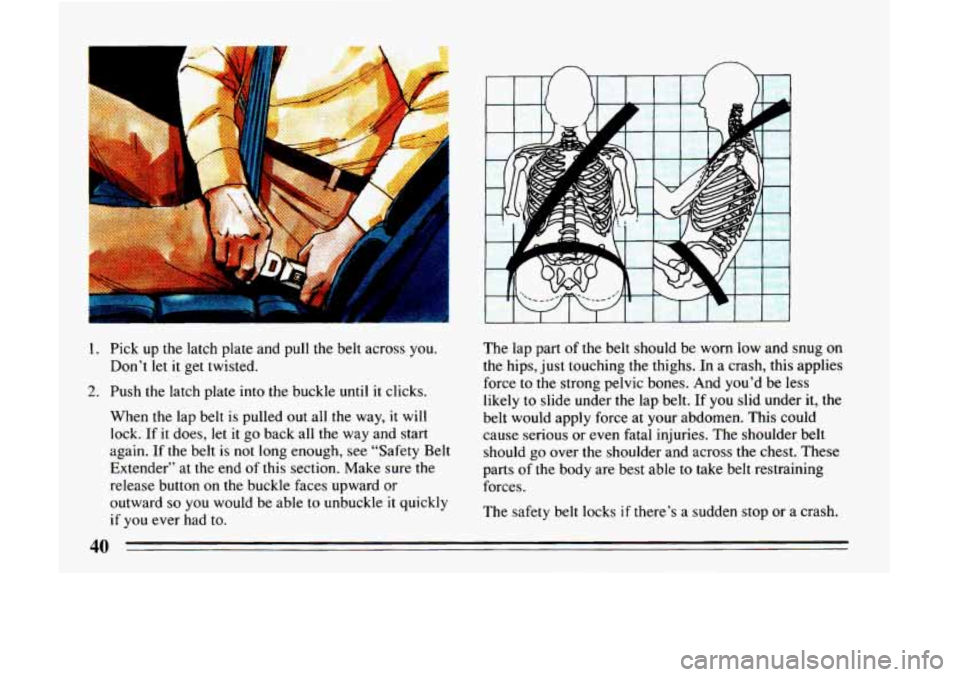
1. Pick up the latch plate and pull the belt across you.
2. Push the latch plate into the buckle until it clicks.
Don’t
let it
get twisted.
When the lap belt is pulled
out all the way, it will
lock. If
it does, let it go back all the way and start
again. If the belt
is not long enough, see “Safety Belt
Extender” at the end of this section. Make sure the
release button on the buckle faces upward or
outward
so you would be able to unbuckle it quickly
if you ever had to. The
lap part of the belt should be worn low and snug
on
the hips, just touching the thighs. In a crash, this applies
force
to the strong pelvic bones. And you’d be less
likely to slide under the lap belt.
If you slid under it, the
belt would apply force at your abdomen. This could
cause serious or even fatal injuries. The shoulder belt
should
go over the shoulder and across the chest. These
parts of the body are best able
to take belt restraining
forces.
The safety belt locks
if there’s a sudden stop or a crash.
40