BUICK LESABRE 2003 Owner's Manual
LESABRE 2003
BUICK
BUICK
https://www.carmanualsonline.info/img/43/35394/w960_35394-0.png
BUICK LESABRE 2003 Owner's Manual
Trending: brake light, Air compressor, heater, CD changer, coolant level, abs, cruise control
Page 281 of 380
The headlamp aiming devices are under the hood near
the headlamps.
If you believe your headlamps need horizontal (left/right)
adjustment, follow the horizontal aiming procedure. If
you believe your headlamps need only vertical
(up/down) adjustment, follow only the vertical aiming
procedure.
Adjustment screws can be turned with an E8 Torx
ž
socket or T15 Torxžscrewdriver.
Headlamp Horizontal Aiming
Turn the horizontal aiming screw (A) until the
indicator (B) is lined up with zero.
Once the horizontal aim is adjusted, then adjust the
vertical aim.
5-49
Page 282 of 380
Headlamp Vertical Aiming
Notice:Horizontal aiming must be performed
before making any adjustments to the vertical aim.
Adjusting the vertical aim ®rst will result in an
incorrect headlamp aim.
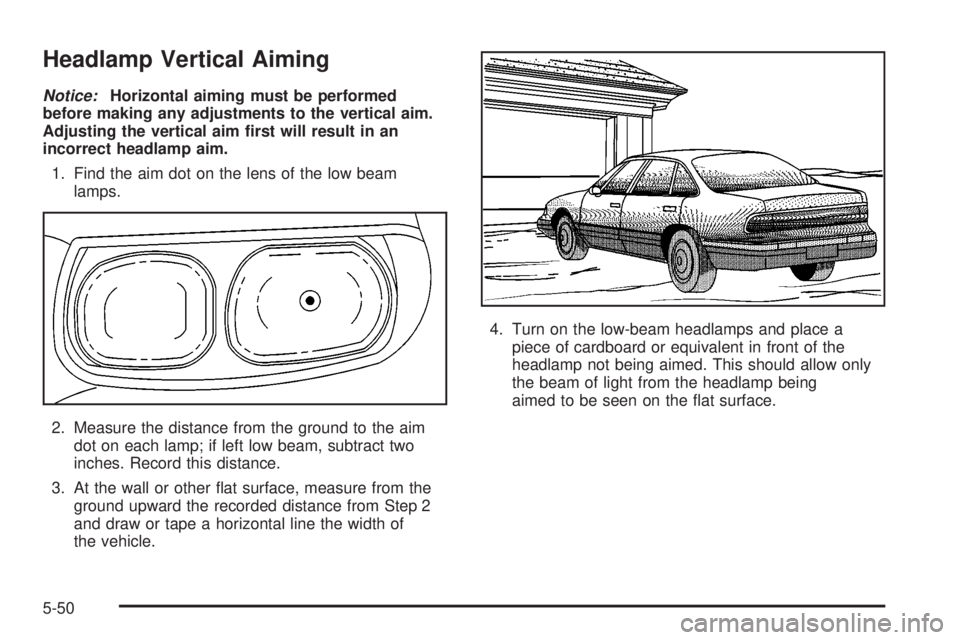
1. Find the aim dot on the lens of the low beam
lamps.
2. Measure the distance from the ground to the aim
dot on each lamp; if left low beam, subtract two
inches. Record this distance.
3. At the wall or other ¯at surface, measure from the
ground upward the recorded distance from Step 2
and draw or tape a horizontal line the width of
the vehicle.4. Turn on the low-beam headlamps and place a
piece of cardboard or equivalent in front of the
headlamp not being aimed. This should allow only
the beam of light from the headlamp being
aimed to be seen on the ¯at surface.
5-50
Page 283 of 380
Notice:Do not cover a headlamp to improve beam
cut-off when aiming. Covering a headlamp may
cause excessive heat build-up which may cause
damage to the headlamp.5. Turn the vertical aiming
screw (C) until the
headlamp beam
is aimed to the
horizontal tape line.
The top edge of the cut-off should be positioned at
the bottom edge of the horizontal tape line.
6. Repeat Steps 4 and 5 for the opposite headlamp.
5-51
Page 284 of 380
Bulb Replacement
For the type of bulb to use, seeReplacement Bulbs on
page 5-56.
For any bulb changing procedure not listed in this
section, contact your dealer.
Halogen Bulbs
{CAUTION:
Halogen bulbs have pressurized gas inside
and can burst if you drop or scratch the bulb.
You or others could be injured. Be sure to read
and follow the instructions on the bulb
package.
Headlamps
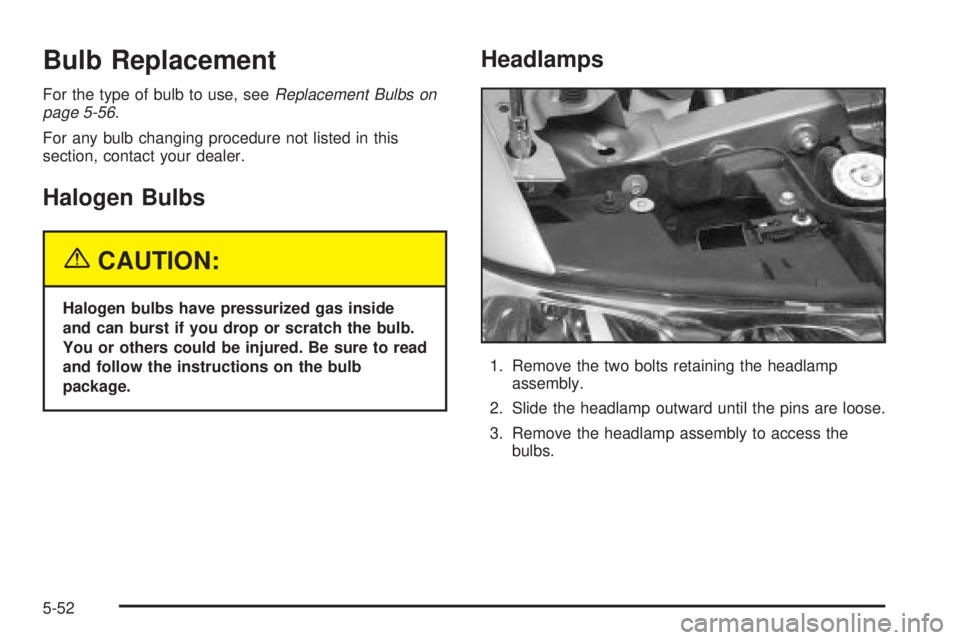
1. Remove the two bolts retaining the headlamp
assembly.
2. Slide the headlamp outward until the pins are loose.
3. Remove the headlamp assembly to access the
bulbs.
5-52
Page 285 of 380
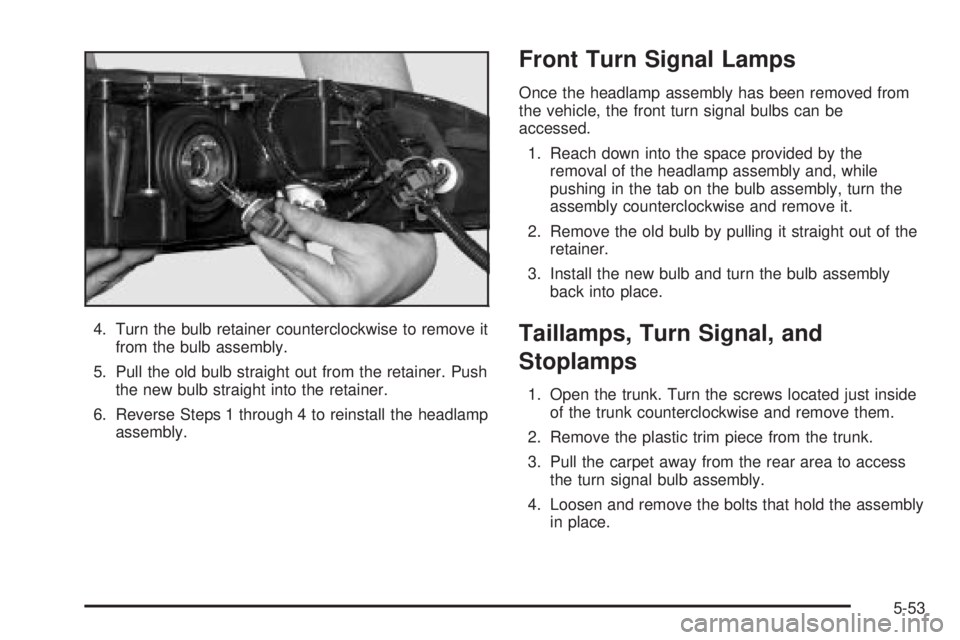
4. Turn the bulb retainer counterclockwise to remove it
from the bulb assembly.
5. Pull the old bulb straight out from the retainer. Push
the new bulb straight into the retainer.
6. Reverse Steps 1 through 4 to reinstall the headlamp
assembly.
Front Turn Signal Lamps
Once the headlamp assembly has been removed from
the vehicle, the front turn signal bulbs can be
accessed.
1. Reach down into the space provided by the
removal of the headlamp assembly and, while
pushing in the tab on the bulb assembly, turn the
assembly counterclockwise and remove it.
2. Remove the old bulb by pulling it straight out of the
retainer.
3. Install the new bulb and turn the bulb assembly
back into place.
Taillamps, Turn Signal, and
Stoplamps
1. Open the trunk. Turn the screws located just inside
of the trunk counterclockwise and remove them.
2. Remove the plastic trim piece from the trunk.
3. Pull the carpet away from the rear area to access
the turn signal bulb assembly.
4. Loosen and remove the bolts that hold the assembly
in place.
5-53
Page 286 of 380
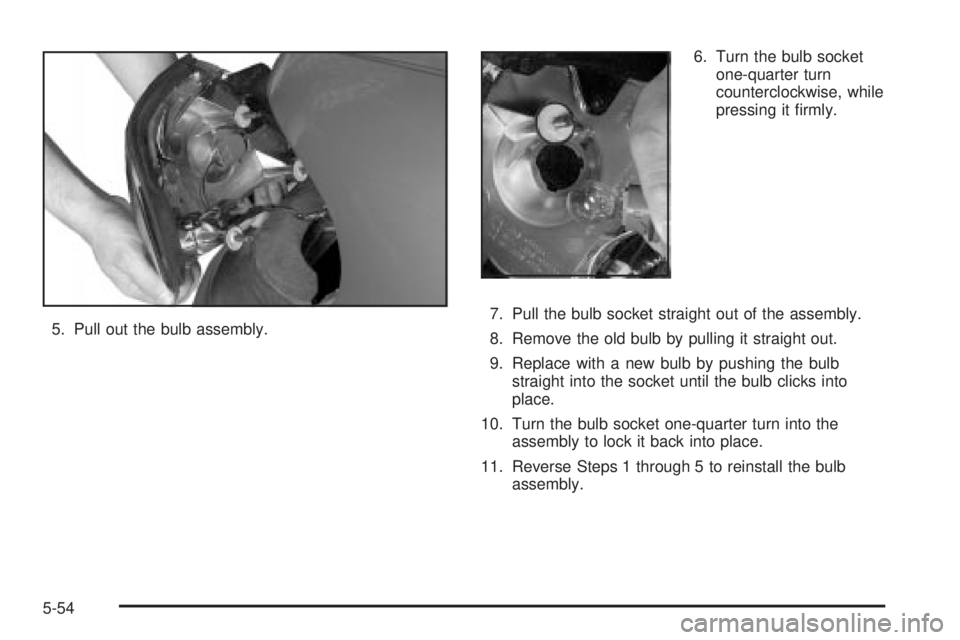
5. Pull out the bulb assembly.6. Turn the bulb socket
one-quarter turn
counterclockwise, while
pressing it ®rmly.
7. Pull the bulb socket straight out of the assembly.
8. Remove the old bulb by pulling it straight out.
9. Replace with a new bulb by pushing the bulb
straight into the socket until the bulb clicks into
place.
10. Turn the bulb socket one-quarter turn into the
assembly to lock it back into place.
11. Reverse Steps 1 through 5 to reinstall the bulb
assembly.
5-54
Page 287 of 380
Taillamps and Back-Up Lamps
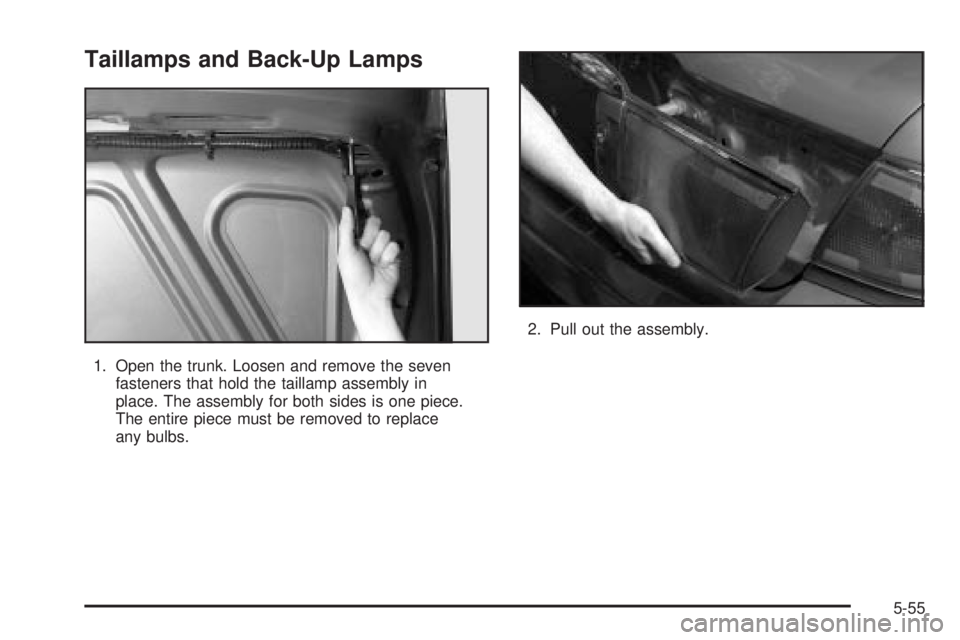
1. Open the trunk. Loosen and remove the seven
fasteners that hold the taillamp assembly in
place. The assembly for both sides is one piece.
The entire piece must be removed to replace
any bulbs.2. Pull out the assembly.
5-55
Page 288 of 380
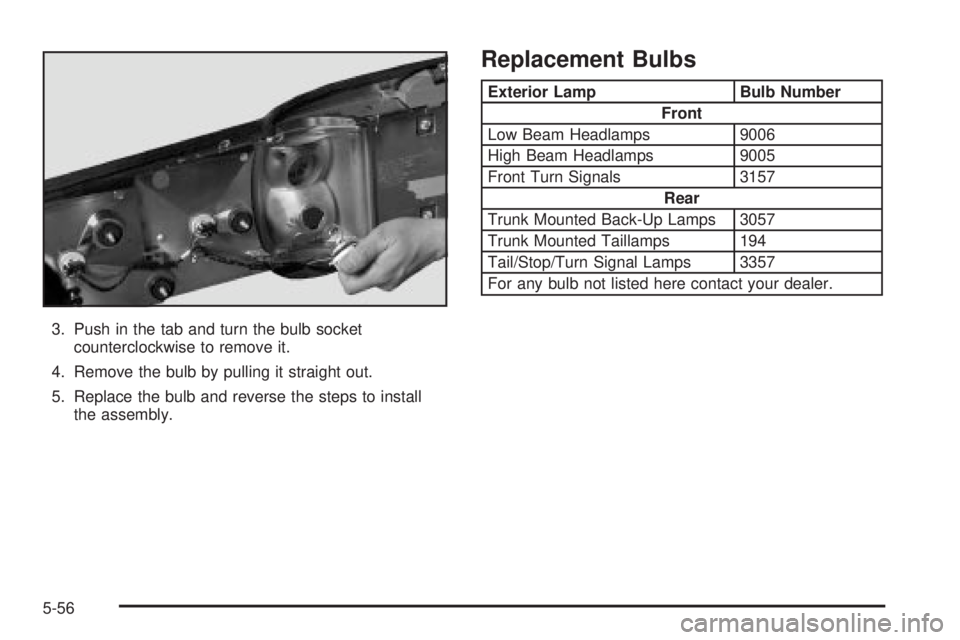
3. Push in the tab and turn the bulb socket
counterclockwise to remove it.
4. Remove the bulb by pulling it straight out.
5. Replace the bulb and reverse the steps to install
the assembly.
Replacement Bulbs
Exterior Lamp Bulb Number
Front
Low Beam Headlamps 9006
High Beam Headlamps 9005
Front Turn Signals 3157
Rear
Trunk Mounted Back-Up Lamps 3057
Trunk Mounted Taillamps 194
Tail/Stop/Turn Signal Lamps 3357
For any bulb not listed here contact your dealer.
5-56
Page 289 of 380
Windshield Wiper Blade
Replacement
Windshield wiper blades should be inspected at least
twice a year for wear or cracking. See ªWiper Blade
Checkº under
Part B: Owner Checks and Services on
page 6-17for more information.
Replacement blades come in different types and are
removed in different ways.
To replace the wiper blade assembly, do the following:
1. Lift the windshield wiper arm away from the
windshield.
2. Push the tab on the wiper blade assembly and pull
the assembly down enough to release it from the
ªUº hooked end of the wiper arm. Slide the
assembly away from the arm.
3. Remove the blade.
4. To reinstall the wiper blade assembly, slide it over
the wiper arm to engage the ªUº hooked end on the
wiper blade assembly. Pull up on the assembly
to lock it into place.
For the proper windshield wiper blade replacement
length and type, see
Normal Maintenance Replacement
Parts on page 5-94.
5-57
Page 290 of 380

Tires
Your new vehicle comes with high-quality tires made by
a leading tire manufacturer. If you ever have questions
about your tire warranty and where to obtain service,
see your Buick Warranty booklet for details.
{CAUTION:
Poorly maintained and improperly used tires
are dangerous.
·Overloading your tires can cause
overheating as a result of too much
friction. You could have an air-out and a
serious accident. See ªLoading Your
Vehicleº in the Index.
·Underin¯ated tires pose the same danger
as overloaded tires. The resulting accident
could cause serious injury. Check all tires
frequently to maintain the recommended
pressure. Tire pressure should be checked
when your tires are cold.
CAUTION: (Continued)
CAUTION: (Continued)
·
Overin¯ated tires are more likely to be
cut, punctured or broken by a sudden
impact Ð such as when you hit a pothole.
Keep tires at the recommended pressure.
·Worn, old tires can cause accidents. If
your tread is badly worn, or if your tires
have been damaged, replace them.
In¯ation -- Tire Pressure
The Tire-Loading Information label, which is on the rear
edge of the driver's door, shows the correct in¯ation
pressures for your tires when they're cold. ªColdº means
your vehicle has been sitting for at least three hours
or driven no more than 1 mile (1.6 km).
5-58
Trending: ECO mode, bulb, wiring, cruise control, steering wheel, flat tire, low beam

