CD player BUICK LESABRE 2004 Owner's Manual
[x] Cancel search | Manufacturer: BUICK, Model Year: 2004, Model line: LESABRE, Model: BUICK LESABRE 2004Pages: 392, PDF Size: 4.3 MB
Page 112 of 392
Audio System(s).............................................3-55
Setting the Time...........................................3-55
Radio with CD..............................................3-56
Radio with Cassette and CD..........................3-62
Trunk-Mounted CD Changer...........................3-73
Personal Choice Radio Controls......................3-77
Theft-Deterrent Feature..................................3-78
Audio Steering Wheel Controls.......................3-78Understanding Radio Reception......................3-79
Care of Your Cassette Tape Player.................3-80
Care of Your CDs.........................................3-81
Care of Your CD Player................................3-81
Diversity Antenna System..............................3-81
XM™ Satellite Radio Antenna System
(48 Contiguous US States).........................3-82
Chime Level Adjustment................................3-82
Section 3 Instrument Panel
3-2
Page 165 of 392
Audio System(s)
Notice:Before you add any sound equipment to
your vehicle – like a tape player, CB radio, mobile
telephone or two-way radio – be sure you can
add what you want. If you can, it’s very important to
do it properly. Added sound equipment may
interfere with the operation of your vehicle’s engine,
radio or other systems, and even damage them.
Your vehicle’s systems may interfere with the
operation of sound equipment that has been added
improperly.
So, before adding sound equipment, check with
your dealer and be sure to check federal rules
covering mobile radio and telephone units.
Your audio system has been designed to operate easily
and to give years of listening pleasure. You will get
the most enjoyment out of it if you acquaint yourself with
it �rst. Figure out which radio you have in your vehicle,
�nd out what your audio system can do and how to
operate all of its controls to be sure you’re getting the
most out of the advanced engineering that went into it.Your vehicle has a feature called Retained Accessory
Power (RAP). With RAP, you can play your audio
system even after the ignition is turned off. See
“Retained Accessory Power (RAP)” underIgnition
Positions on page 2-22.
Setting the Time
Press and hold H until the correct hour appears on the
display. AM will appear for morning hours. Press
and hold M until the correct minute appears on the
display. The time may be set with the ignition on or off.
To synchronize the time with an FM station broadcasting
Radio Data System (RDS) information, press and
hold H and M at the same time until TIME UPDATED
appears on the display. If the time is not available from
the station, NO UPDATE will appear on the display.
RDS time is broadcast once a minute. Once you have
tuned to an RDS broadcast station, it may take a
few minutes for your time to update.
3-55
Page 170 of 392

INFO (Information):If the current station has a
message, INFO will appear on the display. Press this
button to see the message. The message may display
the artist and song title, call in phone numbers, etc.
If the whole message is not displayed, parts of it
will appear every three seconds. To scroll through the
message at your own speed, press the INFO button
repeatedly. A new group of words will appear on
the display with each press. Once the complete
message has been displayed, INFO will disappear from
the display until another new message is received.
The old message can be displayed by pressing
the INFO button until a new message is received or a
different station is tuned to.
TRAF (Traffic):If TRAF appears on the display, the
tuned station broadcasts traffic announcements
and when a traffic announcement comes on the tuned
radio station you will hear it.
If the current tuned station does not broadcast traffic
announcements, press this button and the radio
will seek to a station that does. When the radio �nds a
station that broadcasts traffic announcements, it will
stop and TRAF will be displayed. When a traffic
announcement comes on the tuned radio station you
will hear it. If no station is found, NO TRAFFIC will
appear on the display.If TRAF is on the display you can press the TRAF
button to turn of the traffic announcements.
Your radio will play the traffic announcement even if the
volume is muted or interrupt the play of a CD if the
last tuned station broadcasts traffic announcements.
Radio Messages
CAL (CALIBRATE):Your audio system has been
calibrated for your vehicle from the factory. If this
message appears on the display it means that your
radio has not been con�gured properly for your vehicle
and must be returned to the dealership for service.
Playing a Compact Disc
Insert a disc partway into the slot, label side up. The
player will pull it in. The disc should begin playing. If you
want to insert a CD while the ignition or the radio is
off, �rst press the eject button or DISP.
If you turn off the ignition or radio with a disc in the
player, it will stay in the player. When you turn on the
ignition or system, the disc will start playing where
it stopped, if it was the last selected audio source.
The integral CD player can play the smaller 8 cm single
discs with an adapter ring. Full-size compact discs
and the smaller discs are loaded in the same manner.
3-60
Page 171 of 392

If playing a CD-R the sound quality may be reduced
due to CD-R quality, the method of recording, the quality
of the music that has been recorded, and the way the
CD-R has been handled. You may experience an
increase in skipping, difficulty in �nding tracks, and/or
difficulty in loading and ejecting. If these problems occur
try a known good CD.
Do not add paper labels to discs, they could get caught
in the CD player.
Do not play 3 inch discs without a standard
adapter disc.
If an error appears on the display, see “Compact Disc
Errors” later in this section.
1
s(Reverse):Press and hold this pushbutton to
quickly reverse within a track. Release is it to play the
passage. You will hear sound at a reduced level.
2
\(Forward):Press and hold this pushbutton to
quickly advance within a track. Release it to play
the passage. You will hear sound at a reduced level.
4 RDM (Random):Press this pushbutton to hear
the tracks in random, rather than sequential, order.
Press RDM again to turn off random play.
DISP (Display):Press this button to see which track is
playing. Press it again within �ve seconds to see
how long it has been playing. To change what isnormally shown on the display (track or elapsed time),
press this button until you see the display you want, then
hold the button until the display �ashes.
©SEEK¨:Press the left arrow to go to the start of
the current track if more than eight seconds have
played. If you hold the button or press it more than once,
the player will continue moving back through the disc.
Press the right arrow to go to the next track. If you hold
the button or press it more than once, the player will
continue moving forward through the disc.
To scan CD tracks, press and hold one of the SEEK
arrows for two seconds until SCAN appears on the
display. You will hear a beep. The disc will go to the next
track, play for a few seconds, then go on to the next
track. The sound will mute and SCAN and the track
number will appear on the display while scanning. The
disc will only scan forward. Press one of the SEEK
arrows again to stop scanning.
BAND:Press this button to listen to the radio when a
CD is playing.
CD:Press this button to change to playing a CD when
listening to the radio.
Z(Eject):Press this button to eject a CD.
3-61
Page 172 of 392
Compact Disc Messages
CHECK CD:If this message appears on the radio
display, it could be due to one of the following reasons:
You’re driving on a very rough road. When the
road is smoother, the disc should play.
The disc is dirty, scratched, wet, or upside down.
The air is very humid. If so, wait about an hour and
try again.
There may have been a problem while burning
the CD.
The label may be caught in the CD player.
If the CD is not playing correctly, for any other reason,
try a known good CD.
If any error occurs repeatedly or if an error can not be
corrected, contact your dealer. If your radio displays
an error number, write it down and provide it to
your dealer when reporting the problem.
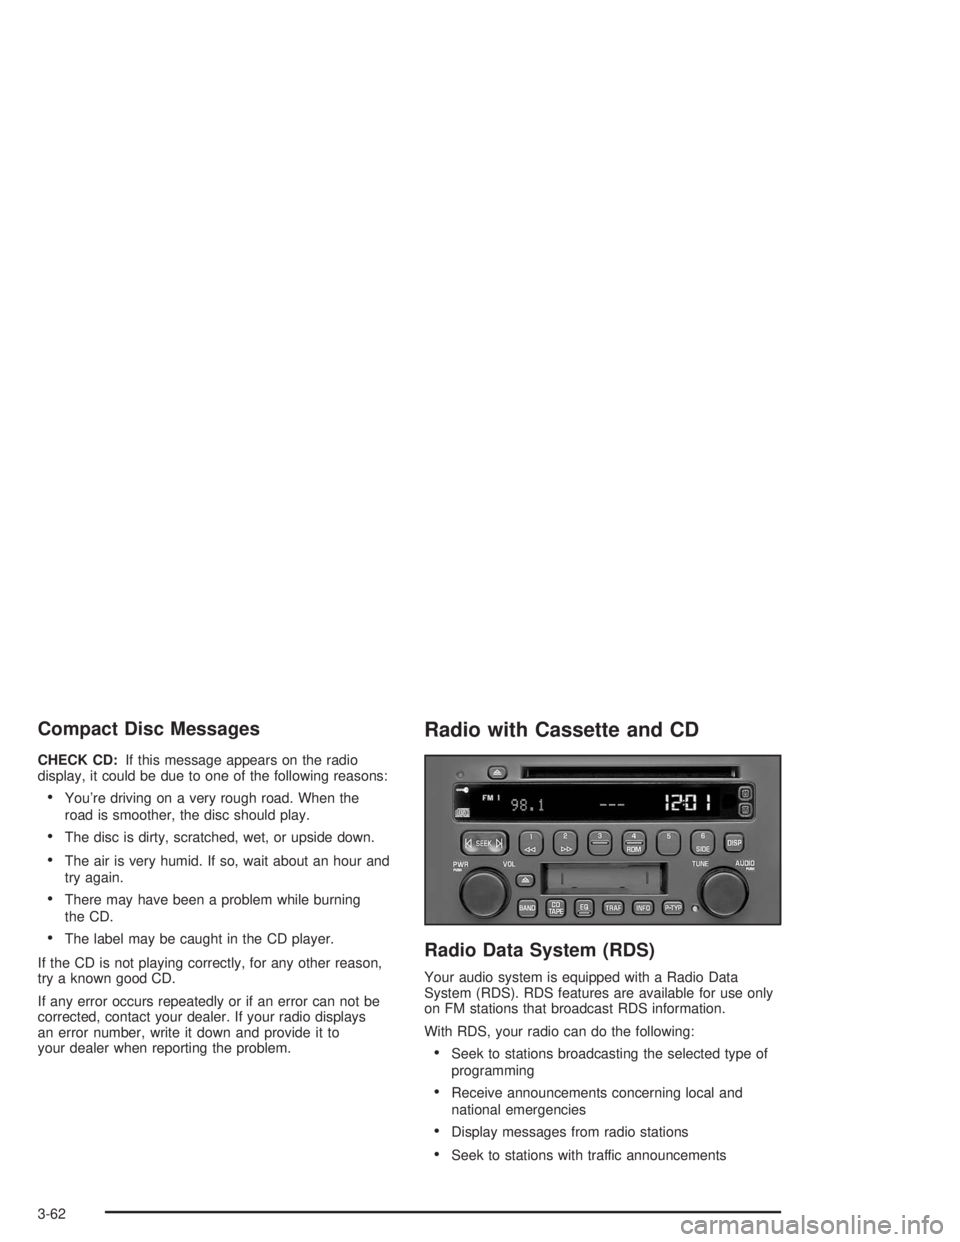
Radio with Cassette and CD
Radio Data System (RDS)
Your audio system is equipped with a Radio Data
System (RDS). RDS features are available for use only
on FM stations that broadcast RDS information.
With RDS, your radio can do the following:
Seek to stations broadcasting the selected type of
programming
Receive announcements concerning local and
national emergencies
Display messages from radio stations
Seek to stations with traffic announcements
3-62
Page 180 of 392
Playing a Cassette Tape
The longer side with the tape visible should face to the
right. If the ignition and the radio are on, the tape
can be inserted and will begin playing. If you hear
nothing or hear a garbled sound, the tape may not be in
squarely. Press the eject button to remove the tape
and start over.
While the tape is playing, use the VOLUME and AUDIO
controls just as you do for the radio. The display will
show an arrow to show which side of the tape is playing.
If you want to insert a tape while the ignition or radio
is off, �rst press the eject button or DISP. Cassette tape
adapter kits for portable compact disc players will
work in your cassette tape player.
Your tape bias is set automatically.
If an error appears on the display, see “Cassette Tape
Messages” later in this section.
1
s(Reverse):Press this pushbutton to reverse the
tape rapidly. The radio will play while the tape reverses.
Press it again to return to playing speed.
2
\(Forward):Press this pushbutton to advance
quickly to another part of the tape. The radio will play
while the tape advances. Press this pushbutton again to
return to playing speed.6 SIDE:Press this pushbutton to play the other side of
the tape.
©SEEK¨:Your tape must have at least three
seconds of silence between each selection for seek to
work. Press the left or the right arrow to go to the
previous or to the next selection on the tape. SEEK and
a negative or positive number will be displayed.
Pressing the left or right arrow multiple times will
increase the number of selections to be searched up to
-5 or +5. If -5 or +5 is shown on the display the
cassette tape player will fast forward or rewind through
the four selections and stop at the �fth selection.
To scan cassette tape selections, press and hold one of
the SEEK arrows for two seconds until SCN appears
on the display. You will hear a beep. The tape will go to
the next selection, play for a few seconds, then go on
to the next selection. The cassette tape will only
scan forward. Press one of the SEEK arrows again to
stop scanning.
BAND:Press this button to listen to the radio when a
cassette tape or CD is playing.
CD TAPE:Press this button to play a cassette tape or
a CD when listening to the radio.
Z(Eject):Press this button to eject a tape.
3-70
Page 181 of 392

Cassette Tape Messages
If an error message appears while trying to play a
cassette tape, it could be for one of the following
reasons:
TIGHT TAPE:The tape is tight and the player can’t
turn the tape hubs. Remove the tape. Hold the tape
with the open end down and try to turn the right
hub counterclockwise with a pencil. Turn the tape
over and repeat. If the hubs do not turn easily, your
tape may be damaged and should not be used in
the player. Try a new tape to make sure your player
is working properly.
BROKEN TAPE:The tape is broken. Try a
new tape.
CLEAN PLAYER:If this message appears on the
display, the cassette tape player needs to be cleaned. It
will still play tapes, but you should clean it as soon as
possible to prevent damage to the tapes and player. See
Care of Your Cassette Tape Player on page 3-80.
If any error occurs repeatedly or if an error can not be
corrected, contact your dealership. If your radio displays
an error number, write it down and provide it to your
dealership when reporting the problem.
CD Adapter Kits
It is possible to use a portable CD player adapter kit
with your cassette tape player after activating the bypass
feature on your tape player.
To activate the bypass feature, use the following steps:
1. Turn the ignition on.
2. Turn the radio off.
3. Insert the adapter into the cassette slot.
4. Press and hold the CD TAPE button until READY is
displayed.
The override feature will remain active until the eject
button is pressed.
Playing a Compact Disc
Insert a disc partway into the slot, label side up. The
player will pull it in. The disc should begin playing. If you
want to insert a CD while the ignition or the radio is
off, �rst press the eject button or DISP.
If you turn off the ignition or radio with a disc in the
player, it will stay in the player. When you turn on the
ignition or system, the disc will start playing where
it stopped, if it was the last selected audio source.
3-71
Page 182 of 392

The integral CD player can play the smaller 8 cm single
discs with an adapter ring. Full-size compact discs
and the smaller discs are loaded in the same manner.
If playing a CD-R the sound quality may be reduced due
to CD-R quality, the method of recording, the quality
of the music that has been recorded, and the way the
CD-R has been handled. You may experience an
increase in skipping, difficulty in �nding tracks, and/or
difficulty in loading and ejecting. If these problems occur
try a known good CD.
Do not add paper labels to discs, they could get caught
in the CD player.
Do not play 3 inch discs without a standard
adapter disc.
If an error appears on the display, see “Compact Disc
Errors” later in this section.
1
s(Reverse):Press and hold this pushbutton to
quickly reverse within a track. You will hear sound.
2
\(Forward):Press and hold this pushbutton
to quickly advance within a track. You will hear sound.
4 RDM (Random):Press this pushbutton to hear
the tracks in random, rather than sequential, order.
Press RDM again to turn off random play.
DISP (Display):Press this button to see which track is
playing. Press it again within �ve seconds to see
how long it has been playing. To change the default onthe display (track or elapsed time), press this button
until you see the display you want, then hold the button
until the display �ashes. The selected display will
now be the default.
©SEEK¨:Press the left SEEK arrow to go to the
start of the current track if more than eight seconds have
played. If you hold the button or press it more than
once, the player will continue moving back through
the disc.
Press the right SEEK arrow to go to the next track. If
you hold the button or press it more than once, the
player will continue moving forward through the disc.
To scan CD tracks, press and hold one of the
SEEK arrows for two seconds until SCAN appears on
the display. You will hear a beep. The disc will go to the
next track, play for a few seconds, then go on to the
next track. The disc will only scan forward. Press one of
the SEEK arrows again to stop scanning.
BAND:Press this button to listen to the radio when a
cassette tape or CD is playing.
CD TAPE:Press this button to change to playing a
cassette tape or a CD when listening to the radio.
Z(Eject):Press this button to eject a CD.
3-72
Page 183 of 392
Compact Disc Messages
CHECK CD:If this message appears on the radio
display, it could be due to one of the following reasons:
You’re driving on a very rough road. When the
road becomes smoother, the disc should play.
The disc is dirty, scratched, wet or upside down.
The air is very humid. If so, wait about an hour and
try again.
There may have been a problem while burning
the CD.
The label may be caught in the CD player.
If the CD is not playing correctly, for any other reason,
try a known good CD.
If any error occurs repeatedly or if an error can’t be
corrected, contact your dealer. If your radio displays an
error number, write it down and provide it to your
dealer when reporting the problem.
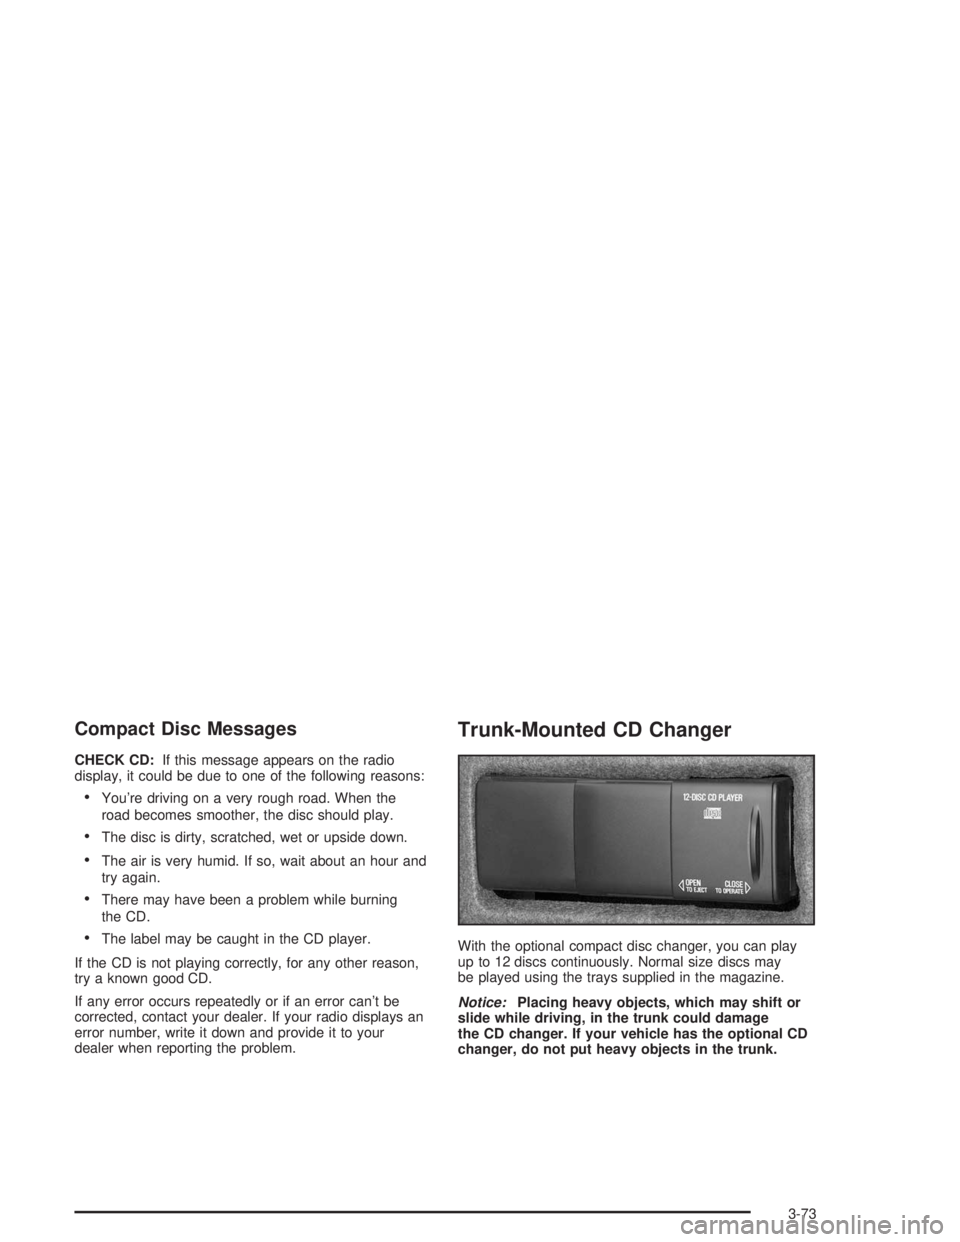
Trunk-Mounted CD Changer
With the optional compact disc changer, you can play
up to 12 discs continuously. Normal size discs may
be played using the trays supplied in the magazine.
Notice:Placing heavy objects, which may shift or
slide while driving, in the trunk could damage
the CD changer. If your vehicle has the optional CD
changer, do not put heavy objects in the trunk.
3-73
Page 185 of 392
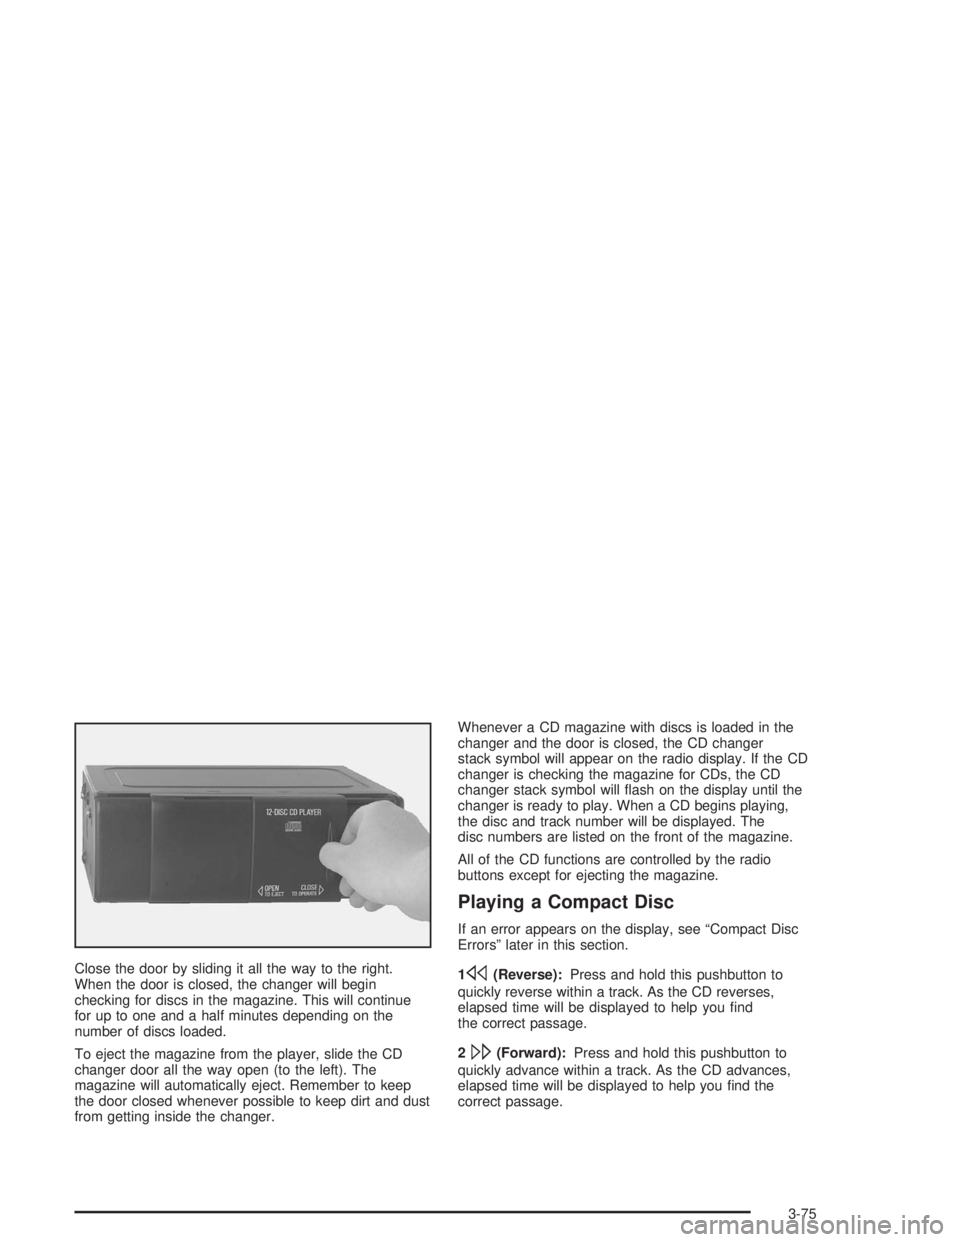
Close the door by sliding it all the way to the right.
When the door is closed, the changer will begin
checking for discs in the magazine. This will continue
for up to one and a half minutes depending on the
number of discs loaded.
To eject the magazine from the player, slide the CD
changer door all the way open (to the left). The
magazine will automatically eject. Remember to keep
the door closed whenever possible to keep dirt and dust
from getting inside the changer.Whenever a CD magazine with discs is loaded in the
changer and the door is closed, the CD changer
stack symbol will appear on the radio display. If the CD
changer is checking the magazine for CDs, the CD
changer stack symbol will �ash on the display until the
changer is ready to play. When a CD begins playing,
the disc and track number will be displayed. The
disc numbers are listed on the front of the magazine.
All of the CD functions are controlled by the radio
buttons except for ejecting the magazine.
Playing a Compact Disc
If an error appears on the display, see “Compact Disc
Errors” later in this section.
1
s(Reverse):Press and hold this pushbutton to
quickly reverse within a track. As the CD reverses,
elapsed time will be displayed to help you �nd
the correct passage.
2
\(Forward):Press and hold this pushbutton to
quickly advance within a track. As the CD advances,
elapsed time will be displayed to help you �nd the
correct passage.
3-75