window BUICK LUCERNE 2006 User Guide
[x] Cancel search | Manufacturer: BUICK, Model Year: 2006, Model line: LUCERNE, Model: BUICK LUCERNE 2006Pages: 416, PDF Size: 2.6 MB
Page 85 of 416

Remote Vehicle Start
Your vehicle may have a remote starting feature. This
feature allows you to start the engine from outside
the vehicle. It may also start the vehicle’s heating or air
conditioning systems, rear window defogger, and
heated seats. SeeHeated Seats on page 1-4and
Heated and Cooled Seats on page 1-5for additional
information. When the remote start system is active, the
climate control system will heat and cool the inside of
the vehicle based on the outside temperature. The rear
window defogger will be turned on by the climate
control system when it is heating the inside of the
vehicle. If the vehicle has heated seats, they may also
turn on. Cooled seats are not activated during a
remote start. Normal operation of the system will return
after the key is turned to the RUN position.
Laws in some communities may restrict the use of
remote starters. For example, some laws may require a
person using the remote start to have the vehicle in
view when doing so. Check local regulations for
any requirements on remote starting of vehicles.
Do not use the remote start feature if your vehicle is low
on fuel. Your vehicle may run out of fuel.
If your vehicle has remote start, the keyless entry
transmitter provides, an increased range of operation.
However, the range may be less while the vehicle
is running. As a result, you may need to be closer to
your vehicle to turn it off, than you were to turn it on.There are other conditions which can affect the
performance of the transmitter, seeRemote Keyless
Entry System on page 2-5for additional information.
/(Remote Start):Press and release the lock button
and then press and hold the remote start button to
start the vehicle.
To start the vehicle using the remote start feature, do
the following:
1. Aim the transmitter at the vehicle.
2. Press and release the transmitter’s lock button,
then immediately press and hold the transmitter’s
remote start button until the turn signal lights
�ash or if the vehicle’s lights are not visible, press
and hold the remote start button for at least
four seconds. The vehicle’s doors will lock. Pressing
the remote start button again after the vehicle
has started will turn off the ignition.
3. When the vehicle starts, the parking lamps will turn
on and remain on while the vehicle is running.
4. If it is your �rst remote start since last driving,
repeat these steps while the engine is still
running for a 10 minute time extension. Remote
start can be extended one time.
2-9
Page 87 of 416

Doors and Locks
Door Locks
{CAUTION:
Unlocked doors can be dangerous.
Passengers — especially children — can
easily open the doors and fall out of a
moving vehicle. When a door is locked, the
handle will not open it. You increase the
chance of being thrown out of the vehicle
in a crash if the doors are not locked. So,
wear safety belts properly and lock the
doors whenever you drive.
Young children who get into unlocked
vehicles may be unable to get out. A child
can be overcome by extreme heat and can
suffer permanent injuries or even death
from heat stroke. Always lock your vehicle
whenever you leave it.
Outsiders can easily enter through an
unlocked door when you slow down or
stop your vehicle. Locking your doors can
help prevent this from happening.There are several ways to lock and unlock your vehicle.
From the outside, use either the key or the remote
keyless entry (RKE) transmitter.
From the inside, use the power door lock switches or
manual lock knobs. The manual lock knobs are located
at the top of the door panel near the window.
Push the manual lock knob down to lock the door. To
unlock the door, pull up on the knob.
Power Door Locks
The power door lock switches are located on the
armrest on the front doors.
K(Unlock):Press the side of the switch with the
unlock symbol to unlock the doors.
Q(Lock):Press the side of the switch with the lock
symbol to lock the doors.
2-11
Page 90 of 416

When you want to open a rear door when the security
lock is on, do the following:
1. Unlock the door using the remote keyless entry
transmitter, if the vehicle has one, the power
door lock switch, or by lifting the rear door
manual lock.
2. Open the door from the outside.
To cancel the rear door security lock, do the following:
1. Unlock the door and open it from the outside.
2. Insert the key into the security lock slot and turn it
so the slot is in the vertical position.
Lockout Protection
If the key is in the ignition and the power door lock
switch is used to lock the doors, all doors will lock and
then the driver’s door will unlock. It is always
recommended that you remove the ignition key when
locking your vehicle.
The lockout protection feature can be overridden by
holding the power door lock switch for three seconds or
longer.
Trunk
{CAUTION:
It can be dangerous to drive with the trunk lid
open because carbon monoxide (CO) gas can
come into your vehicle. You cannot see or
smell CO. It can cause unconsciousness and
even death. If you must drive with the trunk lid
open or if electrical wiring or other cable
connections must pass through the seal
between the body and the trunk lid:
Make sure all other windows are shut.
Turn the fan on your heating or cooling
system to its highest speed and select the
control setting that will force outside air
into your vehicle. See Climate Control
System.
If you have air outlets on or under the
instrument panel, open them all the way.
SeeEngine Exhaust on page 2-31.
2-14
Page 92 of 416

Rear Seat Pass-Through
Your vehicle has a small door in the rear seat. This
door allows you to access the trunk from inside
the vehicle.
The rear seat armrest must be down for the
pass-through door to open. To release the pass-through
door, move the release up with your �ngers. To close
the door, raise it and push it until it latches.
Windows
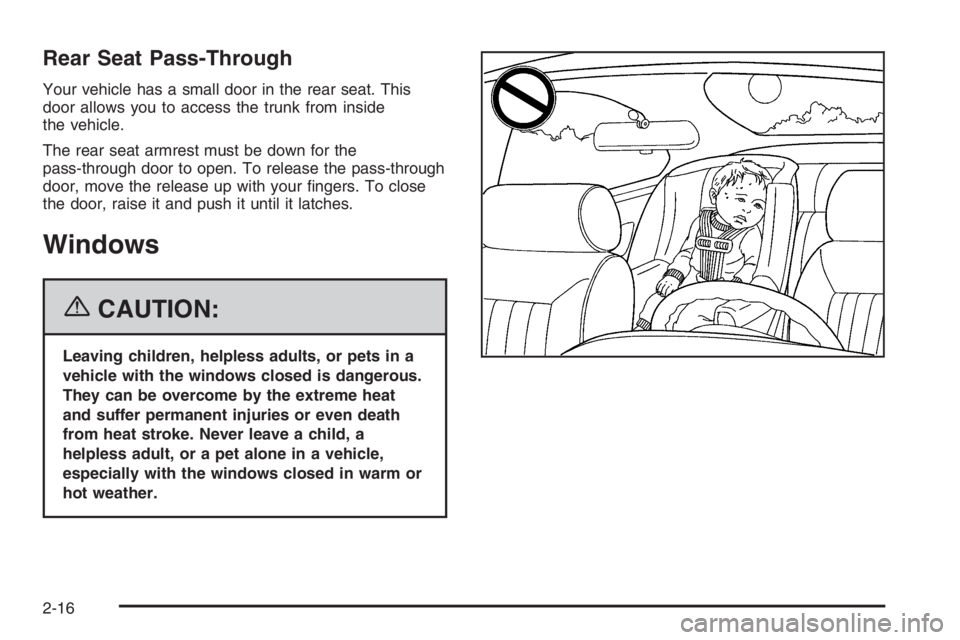
{CAUTION:
Leaving children, helpless adults, or pets in a
vehicle with the windows closed is dangerous.
They can be overcome by the extreme heat
and suffer permanent injuries or even death
from heat stroke. Never leave a child, a
helpless adult, or a pet alone in a vehicle,
especially with the windows closed in warm or
hot weather.
2-16
Page 93 of 416

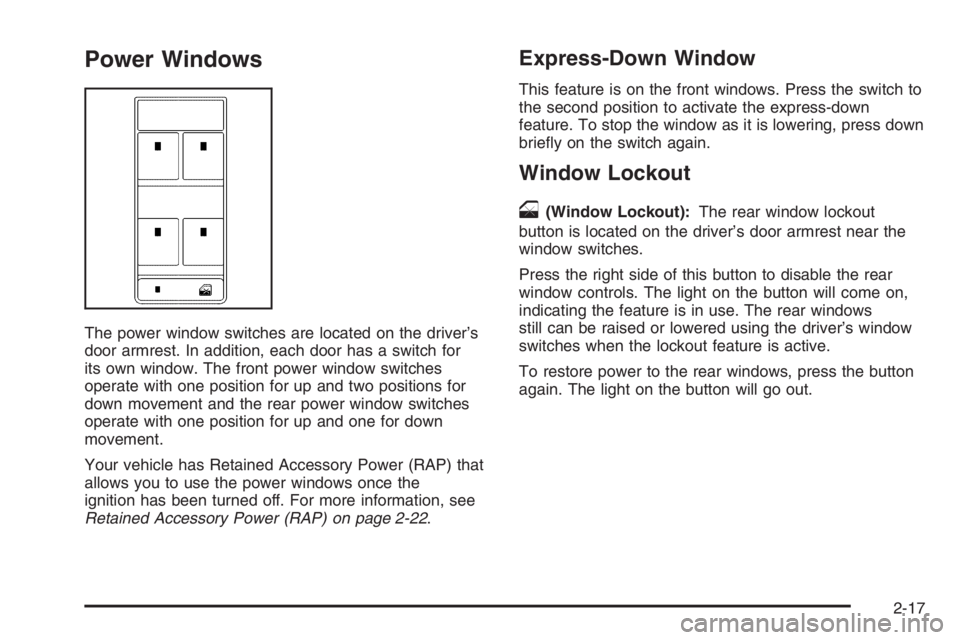
Power Windows
The power window switches are located on the driver’s
door armrest. In addition, each door has a switch for
its own window. The front power window switches
operate with one position for up and two positions for
down movement and the rear power window switches
operate with one position for up and one for down
movement.
Your vehicle has Retained Accessory Power (RAP) that
allows you to use the power windows once the
ignition has been turned off. For more information, see
Retained Accessory Power (RAP) on page 2-22.
Express-Down Window
This feature is on the front windows. Press the switch to
the second position to activate the express-down
feature. To stop the window as it is lowering, press down
brie�y on the switch again.
Window Lockout
o
(Window Lockout):The rear window lockout
button is located on the driver’s door armrest near the
window switches.
Press the right side of this button to disable the rear
window controls. The light on the button will come on,
indicating the feature is in use. The rear windows
still can be raised or lowered using the driver’s window
switches when the lockout feature is active.
To restore power to the rear windows, press the button
again. The light on the button will go out.
2-17
Page 98 of 416

Ignition Positions
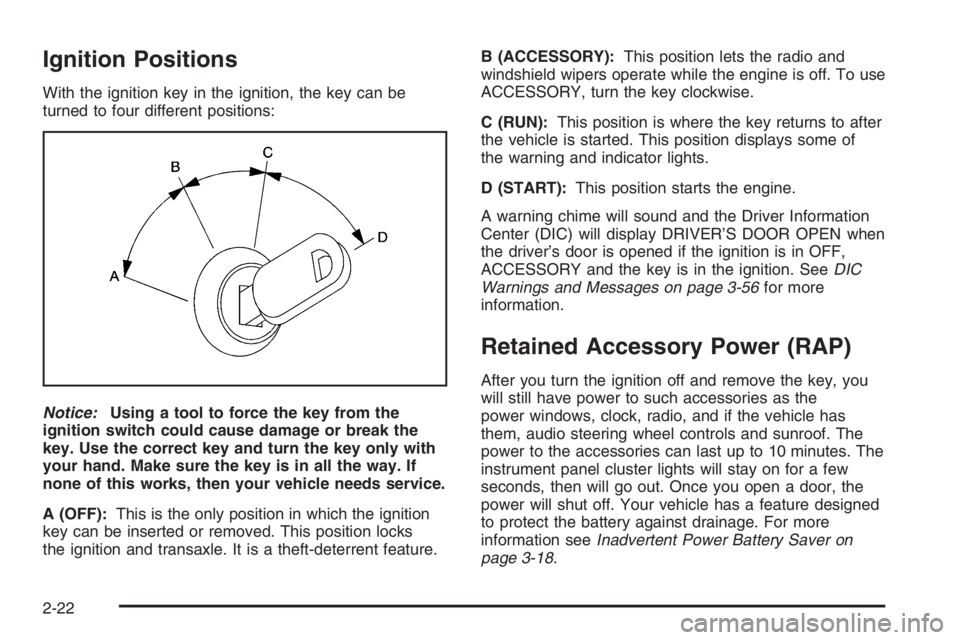
With the ignition key in the ignition, the key can be
turned to four different positions:
Notice:Using a tool to force the key from the
ignition switch could cause damage or break the
key. Use the correct key and turn the key only with
your hand. Make sure the key is in all the way. If
none of this works, then your vehicle needs service.
A (OFF):This is the only position in which the ignition
key can be inserted or removed. This position locks
the ignition and transaxle. It is a theft-deterrent feature.B (ACCESSORY):This position lets the radio and
windshield wipers operate while the engine is off. To use
ACCESSORY, turn the key clockwise.
C (RUN):This position is where the key returns to after
the vehicle is started. This position displays some of
the warning and indicator lights.
D (START):This position starts the engine.
A warning chime will sound and the Driver Information
Center (DIC) will display DRIVER’S DOOR OPEN when
the driver’s door is opened if the ignition is in OFF,
ACCESSORY and the key is in the ignition. SeeDIC
Warnings and Messages on page 3-56for more
information.
Retained Accessory Power (RAP)
After you turn the ignition off and remove the key, you
will still have power to such accessories as the
power windows, clock, radio, and if the vehicle has
them, audio steering wheel controls and sunroof. The
power to the accessories can last up to 10 minutes. The
instrument panel cluster lights will stay on for a few
seconds, then will go out. Once you open a door, the
power will shut off. Your vehicle has a feature designed
to protect the battery against drainage. For more
information seeInadvertent Power Battery Saver on
page 3-18.
2-22
Page 107 of 416

Parking Over Things That Burn
{CAUTION:
Things that can burn could touch hot exhaust
parts under your vehicle and ignite. Do not
park over papers, leaves, dry grass, or other
things that can burn.
Engine Exhaust
{CAUTION:
Engine exhaust can kill. It contains the gas
carbon monoxide (CO), which you cannot see
or smell. It can cause unconsciousness and
death.
You might have exhaust coming in if:
Your exhaust system sounds strange or
different.
Your vehicle gets rusty underneath.
Your vehicle was damaged in a collision.
Your vehicle was damaged when driving
over high points on the road or over road
debris.
Repairs were not done correctly.
Your vehicle or exhaust system had been
modi�ed improperly.
If you ever suspect exhaust is coming into
your vehicle:
Drive it only with all the windows down to
blow out any CO; and
Have your vehicle �xed immediately.
2-31
Page 110 of 416

Mirror Operation
MIRROR:Press this button to turn the automatic
dimming feature on or off.
O(On/Off):For mirrors equipped with OnStar®
controls, press and hold this button for several seconds
to turn on the automatic dimming feature on or off.
The indicator light will come on when this feature is on.
The automatic dimming feature will go on each time
the vehicle is started.
Compass Operation
COMPASS:Press and hold this button to turn the
compass feature on or off.
For mirrors equipped with OnStar
®controls, brie�y
press the on/off button to turn the compass on or off.
When the ignition and the compass feature are on, the
compass will show two character boxes for about
two seconds. After two seconds, the compass will
display the direction of the vehicle.
Compass Calibration
When on, the compass automatically calibrates as the
vehicle is driven. If, after two seconds, the display
does not show a compass direction, (N for North, for
example), there may be a strong magnetic �eld
interfering with the compass. Such interference may be
caused by a magnetic antenna mount, magnetic
note pad holder, or a similar magnetic item. If the letter
C should ever appear in the compass window, the
compass may need calibration.
The compass can be calibrated by driving the vehicle in
circles at 5 mph (8 km/h) or less until the display
shows a direction.
Mirrors equipped with OnStar
®controls can be placed
in calibration mode by pressing and holding the
on/off button until a C is shown in the compass display.
SeeDIC Controls and Displays on page 3-50for
more information regarding compass calibration and
compass variance.
2-34
Page 111 of 416

Compass Variance
Compass variance is the difference between earth’s
magnetic north and true geographic north. The mirror is
set in zone eight upon leaving the factory. It will be
necessary to adjust the compass to compensate
for compass variance if the vehicle is outside zone
eight. Under certain circumstances, as during a
long distance cross-country trip, it will be necessary to
adjust for compass variance. If not adjusted to
account for compass variance, the compass could give
false readings.
To adjust for compass variance, do the following:
1. Find the current location and variance zone number
on the following zone map.
2. Press and hold the COMPASS button (or the on/off
button for mirrors equipped with OnStar
®controls)
until a zone number appears in the display.
3. Once a zone number appears in the display, press
the COMPASS button (or the on/off button for
mirrors equipped with OnStar
®controls) quickly until
the correct zone number appears in the display. If
C appears in the compass window, the compass
may need calibration. See “Compass Calibration”
explained previously.
2-35
Page 113 of 416

Outside Convex Mirror
The passenger’s side mirror is convex. A convex
mirror’s surface is curved so more can be seen from the
driver’s seat.
{CAUTION:
A convex mirror can make things (like other
vehicles) look farther away than they really are.
If you cut too sharply into the right lane, you
could hit a vehicle on your right. Check your
inside mirror or glance over your shoulder
before changing lanes.
Outside Automatic Dimming
Heated Mirror
If you have this feature, the outside driver’s mirror will
adjust for the glare of headlamps behind you.
When you operate the rear window defogger, the
heated driver’s and passenger’s outside rearview mirrors
are warmed to help clear them of ice and snow. See
“Rear Window Defogger” underClimate Control System
on page 3-23orDual Automatic Climate Control
System on page 3-26for more information.
Your vehicle may also have a turn signal indicator on
the mirror. An arrow on the outside rearview mirror
will �ash in the direction of the turn or lane change. See
Turn and Lane-Change Signals on page 3-7for more
information.
2-37