remote start BUICK LUCERNE 2006 Owner's Manual
[x] Cancel search | Manufacturer: BUICK, Model Year: 2006, Model line: LUCERNE, Model: BUICK LUCERNE 2006Pages: 416, PDF Size: 2.6 MB
Page 1 of 416
Seats and Restraint Systems........................... 1-1
Front Seats
............................................... 1-2
Rear Seats
..............................................1-10
Safety Belts
.............................................1-10
Child Restraints
.......................................1-30
Airbag System
.........................................1-52
Restraint System Check
............................1-69
Features and Controls..................................... 2-1
Keys
........................................................ 2-3
Doors and Locks
......................................2-11
Windows
.................................................2-16
Theft-Deterrent Systems
............................2-18
Starting and Operating Your Vehicle
...........2-21
Mirrors
....................................................2-33
OnStar
®System
......................................2-38
Universal Home Remote System
................2-40
Storage Areas
.........................................2-44
Sunroof
..................................................2-46
Vehicle Personalization
.............................2-46
Instrument Panel............................................. 3-1
Instrument Panel Overview
.......................... 3-4
Climate Controls
......................................3-23
Warning Lights, Gages, and Indicators
........3-33Driver Information Center (DIC)
..................3-50
Audio System(s)
.......................................3-74
Driving Your Vehicle....................................... 4-1
Your Driving, the Road, and Your Vehicle
..... 4-2
Towing
...................................................4-34
Service and Appearance Care.......................... 5-1
Service
..................................................... 5-3
Fuel
......................................................... 5-5
Checking Things Under the Hood
...............5-10
Headlamp Aiming
.....................................5-49
Bulb Replacement
....................................5-52
Windshield Wiper Blade Replacement
.........5-55
Tires
......................................................5-56
Appearance Care
.....................................5-83
Vehicle Identi�cation
.................................5-92
Electrical System
......................................5-93
Capacities and Speci�cations
...................5-101
Maintenance Schedule..................................... 6-1
Maintenance Schedule
................................ 6-2
Customer Assistance and Information.............. 7-1
Customer Assistance and Information
........... 7-2
Reporting Safety Defects
...........................7-13
Index................................................................ 1
2006 Buick Lucerne Owner ManualM
Page 10 of 416
Heated Seats
Your vehicle may have heated front seats. To operate
the heated seats, the ignition must be on.
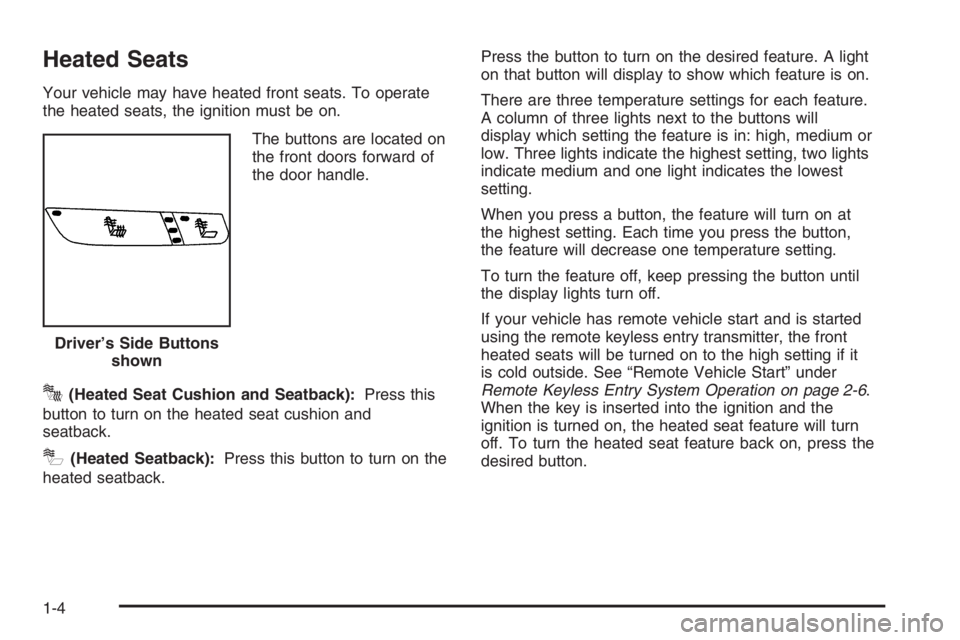
The buttons are located on
the front doors forward of
the door handle.
J(Heated Seat Cushion and Seatback):Press this
button to turn on the heated seat cushion and
seatback.
I(Heated Seatback):Press this button to turn on the
heated seatback.Press the button to turn on the desired feature. A light
on that button will display to show which feature is on.
There are three temperature settings for each feature.
A column of three lights next to the buttons will
display which setting the feature is in: high, medium or
low. Three lights indicate the highest setting, two lights
indicate medium and one light indicates the lowest
setting.
When you press a button, the feature will turn on at
the highest setting. Each time you press the button,
the feature will decrease one temperature setting.
To turn the feature off, keep pressing the button until
the display lights turn off.
If your vehicle has remote vehicle start and is started
using the remote keyless entry transmitter, the front
heated seats will be turned on to the high setting if it
is cold outside. See “Remote Vehicle Start” under
Remote Keyless Entry System Operation on page 2-6.
When the key is inserted into the ignition and the
ignition is turned on, the heated seat feature will turn
off. To turn the heated seat feature back on, press the
desired button. Driver’s Side Buttons
shown
1-4
Page 11 of 416

Heated and Cooled Seats
The front seats may have the heated and cooled seat
feature. To heat or cool the seats, the ignition must
be on.
The buttons are located on
the front doors forward of
the door handle.
J(Heated Seat Cushion and Seatback):Press this
button to heat the seat cushion and seatback.
I(Heated Seatback):Press this button to heat the
seatback.
H(Cooled Seat Cushion and Seatback):Press this
button to cool the seat cushion and seatback.Press each button to turn on the desired feature. A light
on that button will display indicating which feature is on.
There are three temperature settings for each feature.
A column of three lights next to the buttons will
display which setting the feature is in: high, medium or
low. Three lights indicate the highest setting, two lights
indicate medium and one light indicates the lowest
setting.
When you press a button, the feature will turn on at
the highest setting. Each time you press the button,
the feature will decrease one temperature setting.
To turn the feature off, keep pressing the button until
the display lights turn off.
If your vehicle has remote vehicle start and is started
using the remote keyless entry transmitter, the front
heated seats will be turned on to the high setting if it
is cold outside. See “Remote Vehicle Start” under
Remote Keyless Entry System Operation on page 2-6.
When the key is inserted into the ignition and the
ignition is turned on, the heated seat feature will turn
off. To turn the heated seat feature back on, press the
desired button. Driver’s Side Buttons
shown
1-5
Page 77 of 416
Keys...............................................................2-3
Remote Keyless Entry System.........................2-5
Remote Keyless Entry System Operation...........2-6
Doors and Locks............................................2-11
Door Locks..................................................2-11
Power Door Locks........................................2-11
Delayed Locking...........................................2-12
Programmable Automatic Door Locks..............2-13
Rear Door Security Locks..............................2-13
Lockout Protection........................................2-14
Trunk..........................................................2-14
Windows........................................................2-16
Power Windows............................................2-17
Sun Visors...................................................2-18
Theft-Deterrent Systems..................................2-18
Content Theft-Deterrent.................................2-18
PASS-Key
®III+.............................................2-19
PASS-Key®III+ Operation..............................2-20
Starting and Operating Your Vehicle................2-21
New Vehicle Break-In....................................2-21
Ignition Positions..........................................2-22
Retained Accessory Power (RAP)...................2-22
Starting the Engine.......................................2-23Engine Coolant Heater..................................2-24
Automatic Transaxle Operation.......................2-25
Parking Brake..............................................2-28
Shifting Into Park (P).....................................2-29
Shifting Out of Park (P).................................2-30
Parking Over Things That Burn.......................2-31
Engine Exhaust............................................2-31
Running the Engine While Parked...................2-32
Mirrors...........................................................2-33
Manual Rearview Mirror.................................2-33
Automatic Dimming Rearview Mirror................2-33
Automatic Dimming Rearview Mirror with
Compass.................................................2-33
Outside Power Mirrors...................................2-36
Outside Curb View Assist Mirror.....................2-36
Outside Convex Mirror...................................2-37
Outside Automatic Dimming
Heated Mirror...........................................2-37
OnStar®System.............................................2-38
Universal Home Remote System......................2-40
Universal Home Remote
System Operation......................................2-41
Section 2 Features and Controls
2-1
Page 82 of 416

Remote Keyless Entry System
Operation
The vehicle’s doors can be locked and unlocked, and
the trunk can be unlatched from about 3 feet (1 m) up to
60 feet (18 m) away with the remote keyless entry
transmitter.
If your vehicle has the remote start feature you can also
start your vehicle with the remote keyless entry
transmitter. Your remote keyless entry transmitter, with
the remote start button, provides an increased range
of 195 feet (60 m) away. However, the range may
be less while the vehicle is running. As a result, you
may need to be closer to your vehicle to turn it off than
you were to turn it on.
There are other conditions which can affect the
performance of the transmitter. SeeRemote Keyless
Entry System on page 2-5.The following functions may be available if your vehicle
has the remote keyless entry system:
/(Remote Vehicle Start):If your vehicle has this
feature, it may be started from outside the vehicle using
the remote keyless entry transmitter. See “Remote
Vehicle Start” following for more detailed information.Remote Keyless Entry
with Remote Start
Remote Keyless Entry
without Remote Start
2-6
Page 85 of 416

Remote Vehicle Start
Your vehicle may have a remote starting feature. This
feature allows you to start the engine from outside
the vehicle. It may also start the vehicle’s heating or air
conditioning systems, rear window defogger, and
heated seats. SeeHeated Seats on page 1-4and
Heated and Cooled Seats on page 1-5for additional
information. When the remote start system is active, the
climate control system will heat and cool the inside of
the vehicle based on the outside temperature. The rear
window defogger will be turned on by the climate
control system when it is heating the inside of the
vehicle. If the vehicle has heated seats, they may also
turn on. Cooled seats are not activated during a
remote start. Normal operation of the system will return
after the key is turned to the RUN position.
Laws in some communities may restrict the use of
remote starters. For example, some laws may require a
person using the remote start to have the vehicle in
view when doing so. Check local regulations for
any requirements on remote starting of vehicles.
Do not use the remote start feature if your vehicle is low
on fuel. Your vehicle may run out of fuel.
If your vehicle has remote start, the keyless entry
transmitter provides, an increased range of operation.
However, the range may be less while the vehicle
is running. As a result, you may need to be closer to
your vehicle to turn it off, than you were to turn it on.There are other conditions which can affect the
performance of the transmitter, seeRemote Keyless
Entry System on page 2-5for additional information.
/(Remote Start):Press and release the lock button
and then press and hold the remote start button to
start the vehicle.
To start the vehicle using the remote start feature, do
the following:
1. Aim the transmitter at the vehicle.
2. Press and release the transmitter’s lock button,
then immediately press and hold the transmitter’s
remote start button until the turn signal lights
�ash or if the vehicle’s lights are not visible, press
and hold the remote start button for at least
four seconds. The vehicle’s doors will lock. Pressing
the remote start button again after the vehicle
has started will turn off the ignition.
3. When the vehicle starts, the parking lamps will turn
on and remain on while the vehicle is running.
4. If it is your �rst remote start since last driving,
repeat these steps while the engine is still
running for a 10 minute time extension. Remote
start can be extended one time.
2-9
Page 86 of 416

When you enter the vehicle during a remote start, and
the engine is still running, turn the key to the RUN
position to drive the vehicle. If the vehicle is left running
it will automatically shut off after 10 minutes unless a
time extension has been done.
To manually shut off a remote start, do any of the
following:
Aim the remote keyless entry transmitter at the
vehicle and press the remote start button until
the parking lamps turn off.
Turn on the hazard warning �ashers.
Turn the ignition switch on and then off.
The vehicle can be started remotely two separate times
between driving sequences. The engine will run for
10 minutes after each remote start.
Or, you can extend the engine run time by another
10 minutes within the �rst 10 minute remote start time
frame, and before the engine stops.
For example, if the lock button and then the remote
start buttons are pressed again after the vehicle
has been running for �ve minutes, 10 minutes are
added, allowing the engine to run for 15 minutes.The additional 10 minutes are considered a second
remote vehicle start.
Once two remote starts, or a single remote start with
one time extension have been done, the vehicle must be
started with the key.
After the key is removed from the ignition, another
remote start can be performed.
The vehicle cannot be started remotely if the key is in
the ignition, the hood is not closed, or if there is an
emission control system malfunction.Remote Start Ready
If your vehicle does not have the remote vehicle start
feature, it may have the remote start ready feature. This
feature allows your dealer to add the manufacturer’s
remote vehicle start feature.
If your vehicle has the remote start ready feature, your
remote keyless entry transmitter will have extended
range that will allow you to lock or unlock your vehicle
from approximately 195 feet (60 m) away.
See your dealer if you would like to add the
manufacturer’s remote vehicle start feature to your
vehicle.
2-10
Page 118 of 416

3. Simultaneously press and hold both the desired
Universal Home Remote button and the hand-held
transmitter button. Do not release the buttons
until Step 4 has been completed.
Some entry gates and garage door openers may
require you to substitute Step 3 with the procedure
noted in “Gate Operator and Canadian
Programming” later in this section.
4. The indicator light will �ash slowly at �rst and then
rapidly after Universal Home Remote successfully
receives the frequency signal from the hand-held
transmitter. Release both buttons.
5. Press and hold the newly-trained Universal Home
Remote button and observe the indicator light.
If the indicator light stays on constantly,
programming is complete and your device should
activate when the Universal Home Remote button is
pressed and released.
To program the remaining two Universal Home
Remote buttons, begin with Step 2 under
“Programming Universal Home Remote.” Do not
repeat Step 1 as this will erase all of the
programmed channels.
If the indicator light blinks rapidly for two seconds
and then turns to a constant light, continue with
Steps 6 through 8 following to complete the
programming of a rolling-code equipped device,
most commonly, a garage door opener.6. Locate in the garage, the garage door opener
receiver (motor-head unit). Locate the “Learn”
or “Smart” button. This can usually be found where
the hanging antenna wire is attached to the
motor-head unit.
7. Firmly press and release the “Learn” or “Smart”
button. The name and color of the button may
vary by manufacturer.
You will have 30 seconds to start Step 8.
8. Return to the vehicle. Firmly press and hold the
programmed Universal Home Remote button for
two seconds, then release. Repeat the
press/hold/release sequence a second time, and
depending on the brand of the garage door opener,
or other rolling code device, repeat this sequence
a third time to complete the programming.
The Universal Home Remote should now activate
your rolling-code equipped device.
To program the remaining two Universal Home Remote
buttons, begin with Step 2 of “Programming Universal
Home Remote.” You do not want to repeat Step 1,
as this will erase all previous programming from
the Universal Home Remote buttons.
2-42
Page 147 of 416
Climate Controls
Climate Control System
With this system you can control the heating, cooling,
and ventilation for your vehicle.
If your vehicle has the remote start feature and it is
activated, the climate control system will automatically
cool the vehicle if the temperature is greater than
90°F (32°C) and heat the vehicle if the temperature is
below 37°F (3°C). If the temperature is between
37°F (3°C) and 90°F (32°C), the last control setting
selected when the engine was running will be used.
Normal operation and the last setting of the climate
control system will return after the ignition key is turned
to the C (RUN) position. SeeRemote Keyless Entry
System Operation on page 2-6for more information.
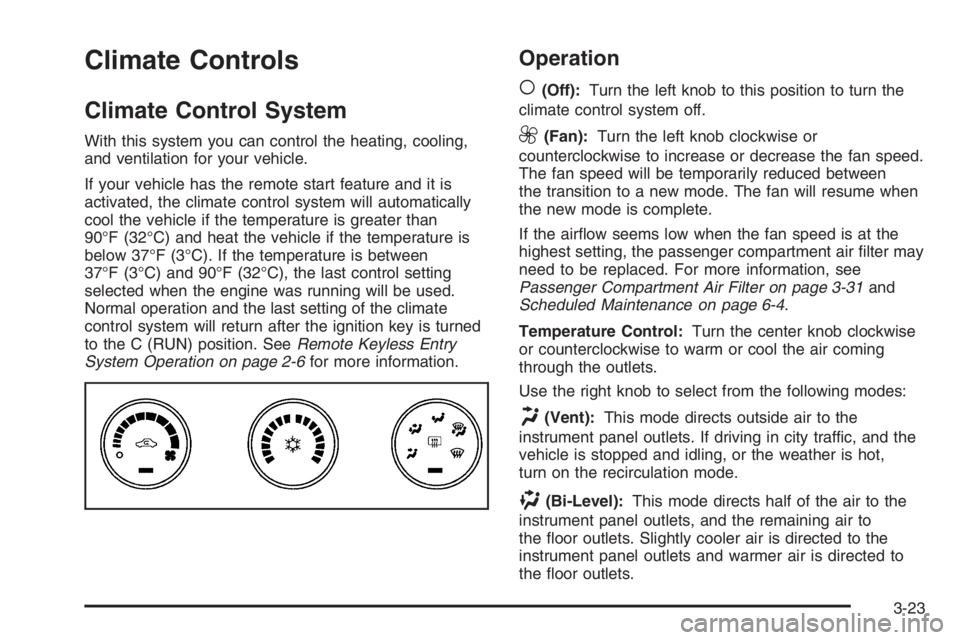
Operation
(
(Off):Turn the left knob to this position to turn the
climate control system off.
9(Fan):Turn the left knob clockwise or
counterclockwise to increase or decrease the fan speed.
The fan speed will be temporarily reduced between
the transition to a new mode. The fan will resume when
the new mode is complete.
If the air�ow seems low when the fan speed is at the
highest setting, the passenger compartment air �lter may
need to be replaced. For more information, see
Passenger Compartment Air Filter on page 3-31and
Scheduled Maintenance on page 6-4.
Temperature Control:Turn the center knob clockwise
or counterclockwise to warm or cool the air coming
through the outlets.
Use the right knob to select from the following modes:
H(Vent):This mode directs outside air to the
instrument panel outlets. If driving in city traffic, and the
vehicle is stopped and idling, or the weather is hot,
turn on the recirculation mode.
)(Bi-Level):This mode directs half of the air to the
instrument panel outlets, and the remaining air to
the �oor outlets. Slightly cooler air is directed to the
instrument panel outlets and warmer air is directed to
the �oor outlets.
3-23
Page 150 of 416
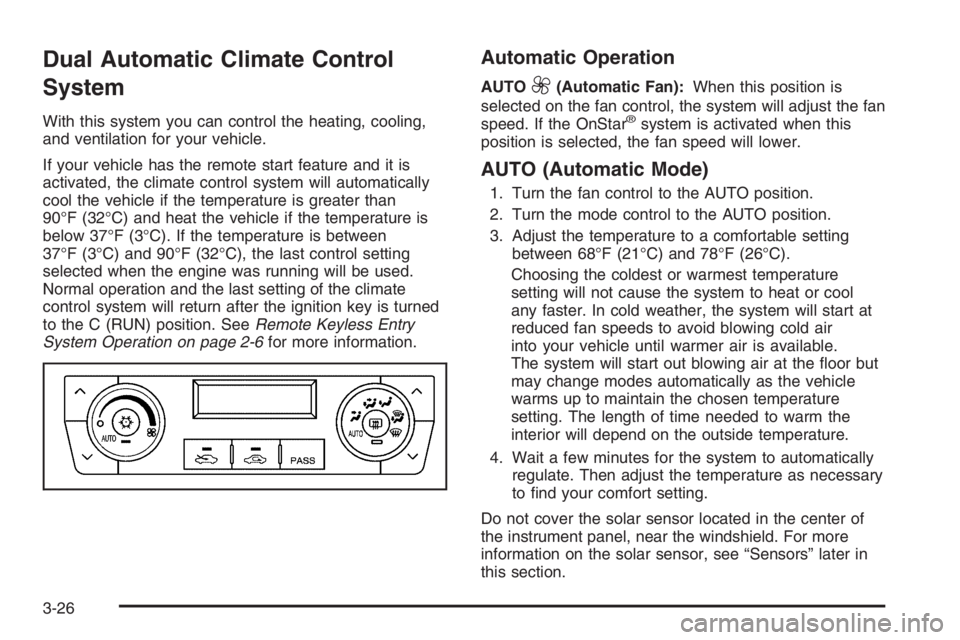
Dual Automatic Climate Control
System
With this system you can control the heating, cooling,
and ventilation for your vehicle.
If your vehicle has the remote start feature and it is
activated, the climate control system will automatically
cool the vehicle if the temperature is greater than
90°F (32°C) and heat the vehicle if the temperature is
below 37°F (3°C). If the temperature is between
37°F (3°C) and 90°F (32°C), the last control setting
selected when the engine was running will be used.
Normal operation and the last setting of the climate
control system will return after the ignition key is turned
to the C (RUN) position. SeeRemote Keyless Entry
System Operation on page 2-6for more information.
Automatic Operation
AUTO9(Automatic Fan):When this position is
selected on the fan control, the system will adjust the fan
speed. If the OnStar
®system is activated when this
position is selected, the fan speed will lower.
AUTO (Automatic Mode)
1. Turn the fan control to the AUTO position.
2. Turn the mode control to the AUTO position.
3. Adjust the temperature to a comfortable setting
between 68°F (21°C) and 78°F (26°C).
Choosing the coldest or warmest temperature
setting will not cause the system to heat or cool
any faster. In cold weather, the system will start at
reduced fan speeds to avoid blowing cold air
into your vehicle until warmer air is available.
The system will start out blowing air at the �oor but
may change modes automatically as the vehicle
warms up to maintain the chosen temperature
setting. The length of time needed to warm the
interior will depend on the outside temperature.
4. Wait a few minutes for the system to automatically
regulate. Then adjust the temperature as necessary
to �nd your comfort setting.
Do not cover the solar sensor located in the center of
the instrument panel, near the windshield. For more
information on the solar sensor, see “Sensors” later in
this section.
3-26