BUICK LUCERNE 2007 Owner's Manual
Manufacturer: BUICK, Model Year: 2007, Model line: LUCERNE, Model: BUICK LUCERNE 2007Pages: 496, PDF Size: 2.77 MB
Page 181 of 496
For Driver Information Center messages related to
URPA, seeDIC Warnings and Messages on
page 221.
If the bumper is damaged, your URPA system
may not work properly. Take the vehicle to
your dealer to repair the system.
Accessory Power Outlet(s)
The accessory power outlets can be used to plug in
electrical equipment such as a cellular telephone or
CB radio.
Your vehicle may have up to three power outlets
depending on the type of front seat you have.
If your vehicle has front bucket seats with a center
console, you will �nd two outlets inside the rear
storage compartment. An extra power outlet
can be found in the ashtray.
Your vehicle may have a small cap that must be
pulled down to access the accessory power outlet.
If it does, when not using the outlet be sure to
cover it with the protective cap.
Notice:Leaving electrical equipment on for
extended periods will drain the battery. Always
turn off electrical equipment when not in use
and do not plug in equipment that exceeds the
maximum amperage rating.Certain electrical accessories may not be
compatible to the accessory power outlets and
could result in blown vehicle or adapter fuses. If
you experience a problem see your dealer for
additional information on the accessory power
outlets.
Notice:Adding any electrical equipment to
your vehicle may damage it or keep other
components from working as they should. The
repairs would not be covered by your warranty.
Do not use equipment exceeding maximum
amperage rating of 20 amperes. Check with
your dealer before adding electrical equipment.
When adding electrical equipment, be sure to
follow the proper installation instructions included
with the equipment.
Notice:Improper use of the power outlet can
cause damage not covered by your warranty.
Do not hang any type of accessory or
accessory bracket from the plug because the
power outlets are designed for accessory
power plugs only.
181
Page 182 of 496
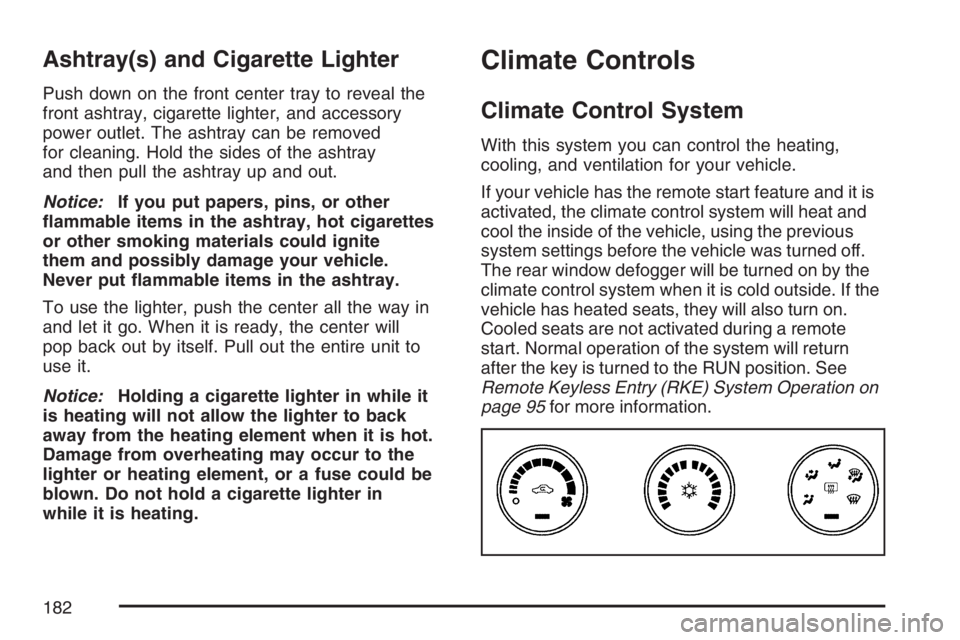
Ashtray(s) and Cigarette Lighter
Push down on the front center tray to reveal the
front ashtray, cigarette lighter, and accessory
power outlet. The ashtray can be removed
for cleaning. Hold the sides of the ashtray
and then pull the ashtray up and out.
Notice:If you put papers, pins, or other
�ammable items in the ashtray, hot cigarettes
or other smoking materials could ignite
them and possibly damage your vehicle.
Never put �ammable items in the ashtray.
To use the lighter, push the center all the way in
and let it go. When it is ready, the center will
pop back out by itself. Pull out the entire unit to
use it.
Notice:Holding a cigarette lighter in while it
is heating will not allow the lighter to back
away from the heating element when it is hot.
Damage from overheating may occur to the
lighter or heating element, or a fuse could be
blown. Do not hold a cigarette lighter in
while it is heating.
Climate Controls
Climate Control System
With this system you can control the heating,
cooling, and ventilation for your vehicle.
If your vehicle has the remote start feature and it is
activated, the climate control system will heat and
cool the inside of the vehicle, using the previous
system settings before the vehicle was turned off.
The rear window defogger will be turned on by the
climate control system when it is cold outside. If the
vehicle has heated seats, they will also turn on.
Cooled seats are not activated during a remote
start. Normal operation of the system will return
after the key is turned to the RUN position. See
Remote Keyless Entry (RKE) System Operation on
page 95for more information.
182
Page 183 of 496

Operation
(
(Off):Turn the left knob to this position to turn
the climate control system off.
9(Fan):Turn the left knob clockwise or
counterclockwise to increase or decrease the fan
speed. The fan speed will be temporarily reduced
between the transition to a new mode. The fan will
resume when the new mode is complete.
If the air�ow seems low when the fan speed is at
the highest setting, the passenger compartment
air �lter may need to be replaced. For more
information, seePassenger Compartment Air
Filter on page 192andScheduled Maintenance
on page 442.
Temperature Control:Turn the center knob
clockwise or counterclockwise to warm or cool
the air coming through the outlets.
Use the right knob to select from the following
modes:
H(Vent):This mode directs outside air to the
instrument panel outlets.
)(Bi-Level):This mode directs half of the air to
the instrument panel outlets, and the remaining
air to the �oor outlets. Slightly cooler air is directed
to the instrument panel outlets and warmer air is
directed to the �oor outlets.
6(Floor):This mode directs most of the air to
the �oor outlets with some air directed toward
the side window outlets and a little air directed to
the windshield.
In this mode, the system will automatically use
outside air.
You can also select modes by using the following
buttons:
h(Recirculate):Press this button to recirculate
cabin air through the vehicle. It can be used to
prevent outside air and odors from entering your
vehicle or to help heat or cool the air inside your
vehicle more quickly. An indicator light below the
button will come on in this mode. Operation in this
mode during periods of high humidity and cool
outside temperatures may result in increased
window fogging. If window fogging is experienced,
select the defrost mode.
183
Page 184 of 496
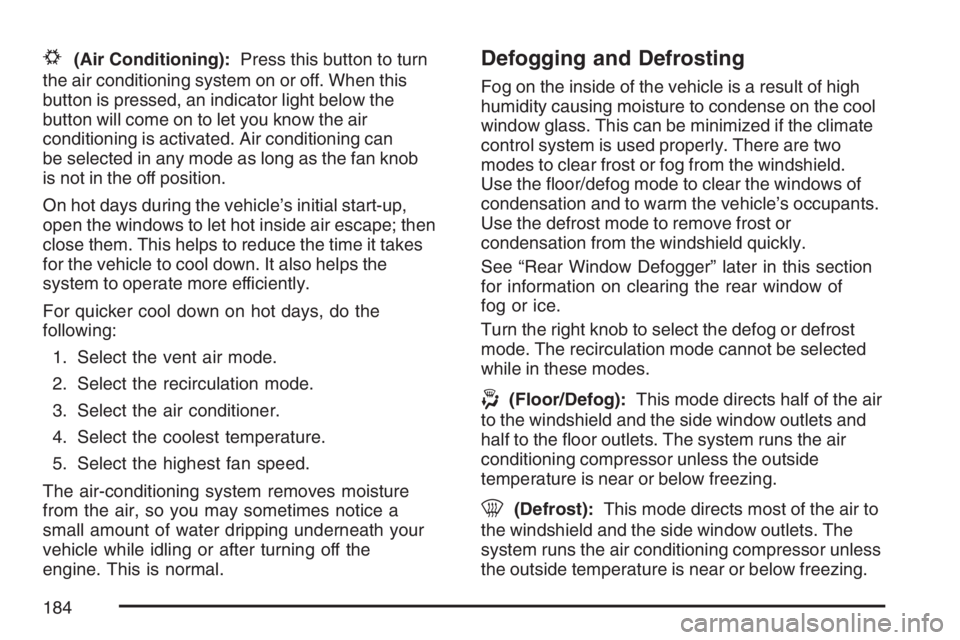
#(Air Conditioning):Press this button to turn
the air conditioning system on or off. When this
button is pressed, an indicator light below the
button will come on to let you know the air
conditioning is activated. Air conditioning can
be selected in any mode as long as the fan knob
is not in the off position.
On hot days during the vehicle’s initial start-up,
open the windows to let hot inside air escape; then
close them. This helps to reduce the time it takes
for the vehicle to cool down. It also helps the
system to operate more efficiently.
For quicker cool down on hot days, do the
following:
1. Select the vent air mode.
2. Select the recirculation mode.
3. Select the air conditioner.
4. Select the coolest temperature.
5. Select the highest fan speed.
The air-conditioning system removes moisture
from the air, so you may sometimes notice a
small amount of water dripping underneath your
vehicle while idling or after turning off the
engine. This is normal.Defogging and Defrosting
Fog on the inside of the vehicle is a result of high
humidity causing moisture to condense on the cool
window glass. This can be minimized if the climate
control system is used properly. There are two
modes to clear frost or fog from the windshield.
Use the �oor/defog mode to clear the windows of
condensation and to warm the vehicle’s occupants.
Use the defrost mode to remove frost or
condensation from the windshield quickly.
See “Rear Window Defogger” later in this section
for information on clearing the rear window of
fog or ice.
Turn the right knob to select the defog or defrost
mode. The recirculation mode cannot be selected
while in these modes.
-(Floor/Defog):This mode directs half of the air
to the windshield and the side window outlets and
half to the �oor outlets. The system runs the air
conditioning compressor unless the outside
temperature is near or below freezing.
0(Defrost):This mode directs most of the air to
the windshield and the side window outlets. The
system runs the air conditioning compressor unless
the outside temperature is near or below freezing.
184
Page 185 of 496
Rear Window Defogger
The rear window defogger uses a warming grid to
remove fog from the rear window.
<(Rear Window Defogger):Press this button
to turn the rear window defogger on or off. An
indicator light below the button will come on to
let you know that the rear window defogger is
activated. Be sure to clear as much snow from
the rear window as possible.
The rear window defogger will only work when the
ignition is in run. The rear window defogger will stay
on for about 20 minutes after the button is pressed
if you are traveling at slower vehicle speeds. At
higher vehicle speeds, the rear defogger may stay
on continuously. If turned on again, the defogger
will only run for about 10 minutes before turning off.
The defogger can be turned off by pressing
the button again, by turning the ignition to
ACCESSORY or RUN, or by turning off the engine.If your vehicle has heated outside rearview mirrors,
the mirrors will heat to help clear fog or frost from
the surface of the mirror when the rear window
defogger is on. SeeOutside Automatic Dimming
Heated Mirror on page 135for more information.
Notice:Do not use anything sharp on the
inside of the rear window. If you do, you could
cut or damage the warming grid, and the repairs
would not be covered by your warranty. Do not
attach a temporary vehicle license, tape, a decal
or anything similar to the defogger grid.
185
Page 186 of 496

Dual Automatic Climate Control
System
With this system you can control the heating,
cooling, and ventilation for your vehicle.
If your vehicle has the remote start feature and it is
activated, the climate control system will heat and
cool the inside of the vehicle, using the previous
system settings before the vehicle was turned off.
The rear window defogger will be turned on by the
climate control system when it is cold outside. If the
vehicle has heated seats, they will also turn on.
Cooled seats are not activated during a remote
start. Normal operation of the system will return
after the key is turned to the RUN position. See
Remote Keyless Entry (RKE) System Operation
on page 95for more information.
Automatic Operation
AUTO (Automatic Fan):When this position is
selected on the fan control, the system will adjust
the fan speed. If the OnStar
®system is activated
when this position is selected, the fan speed
will lower.
AUTO (Automatic Mode)
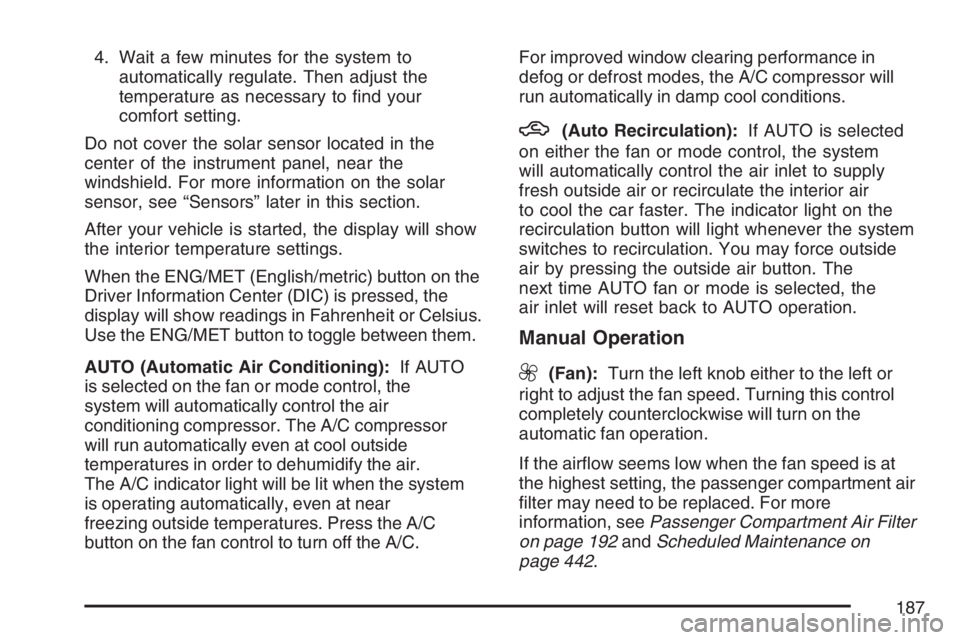
1. Turn the fan control to AUTO.
2. Turn the mode control to AUTO.
3. Adjust the temperature to a comfortable
setting between 68°F (21°C) and 78°F (26°C).
Choosing the coldest or warmest temperature
setting will not cause the system to heat or cool
any faster. In cold weather, the system will start
at reduced fan speeds to avoid blowing cold air
into your vehicle until warmer air is available.
The system will start out blowing air at the �oor
but may change modes automatically as the
vehicle warms up to maintain the chosen
temperature setting. The length of time needed
to warm the interior will depend on the outside
temperature.
186
Page 187 of 496
4. Wait a few minutes for the system to
automatically regulate. Then adjust the
temperature as necessary to �nd your
comfort setting.
Do not cover the solar sensor located in the
center of the instrument panel, near the
windshield. For more information on the solar
sensor, see “Sensors” later in this section.
After your vehicle is started, the display will show
the interior temperature settings.
When the ENG/MET (English/metric) button on the
Driver Information Center (DIC) is pressed, the
display will show readings in Fahrenheit or Celsius.
Use the ENG/MET button to toggle between them.
AUTO (Automatic Air Conditioning):If AUTO
is selected on the fan or mode control, the
system will automatically control the air
conditioning compressor. The A/C compressor
will run automatically even at cool outside
temperatures in order to dehumidify the air.
The A/C indicator light will be lit when the system
is operating automatically, even at near
freezing outside temperatures. Press the A/C
button on the fan control to turn off the A/C.For improved window clearing performance in
defog or defrost modes, the A/C compressor will
run automatically in damp cool conditions.
h(Auto Recirculation):If AUTO is selected
on either the fan or mode control, the system
will automatically control the air inlet to supply
fresh outside air or recirculate the interior air
to cool the car faster. The indicator light on the
recirculation button will light whenever the system
switches to recirculation. You may force outside
air by pressing the outside air button. The
next time AUTO fan or mode is selected, the
air inlet will reset back to AUTO operation.
Manual Operation
9(Fan):Turn the left knob either to the left or
right to adjust the fan speed. Turning this control
completely counterclockwise will turn on the
automatic fan operation.
If the air�ow seems low when the fan speed is at
the highest setting, the passenger compartment air
�lter may need to be replaced. For more
information, seePassenger Compartment Air Filter
on page 192andScheduled Maintenance on
page 442.
187
Page 188 of 496
9(Off):Turn the left control to this position to
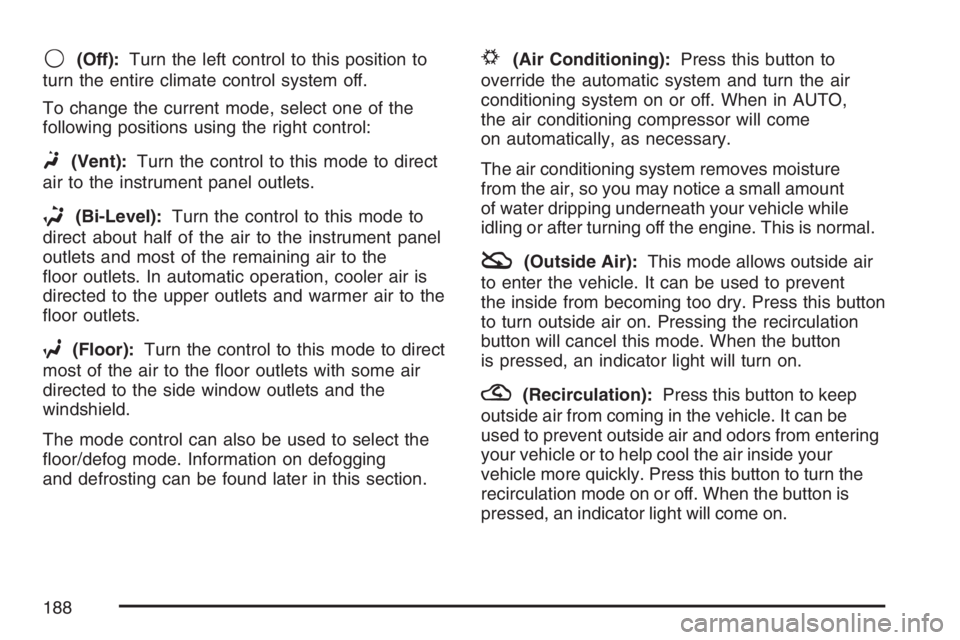
turn the entire climate control system off.
To change the current mode, select one of the
following positions using the right control:
F(Vent):Turn the control to this mode to direct
air to the instrument panel outlets.
*(Bi-Level):Turn the control to this mode to
direct about half of the air to the instrument panel
outlets and most of the remaining air to the
�oor outlets. In automatic operation, cooler air is
directed to the upper outlets and warmer air to the
�oor outlets.
7(Floor):Turn the control to this mode to direct
most of the air to the �oor outlets with some air
directed to the side window outlets and the
windshield.
The mode control can also be used to select the
�oor/defog mode. Information on defogging
and defrosting can be found later in this section.
#(Air Conditioning):Press this button to
override the automatic system and turn the air
conditioning system on or off. When in AUTO,
the air conditioning compressor will come
on automatically, as necessary.
The air conditioning system removes moisture
from the air, so you may notice a small amount
of water dripping underneath your vehicle while
idling or after turning off the engine. This is normal.
:(Outside Air):This mode allows outside air
to enter the vehicle. It can be used to prevent
the inside from becoming too dry. Press this button
to turn outside air on. Pressing the recirculation
button will cancel this mode. When the button
is pressed, an indicator light will turn on.
?(Recirculation):Press this button to keep
outside air from coming in the vehicle. It can be
used to prevent outside air and odors from entering
your vehicle or to help cool the air inside your
vehicle more quickly. Press this button to turn the
recirculation mode on or off. When the button is
pressed, an indicator light will come on.
188
Page 189 of 496
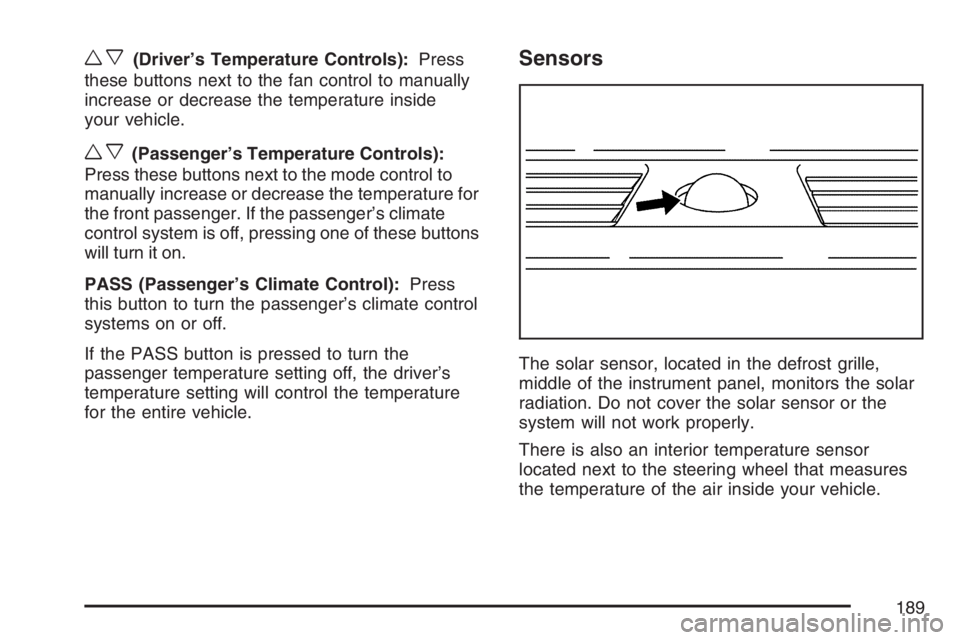
wx(Driver’s Temperature Controls):Press
these buttons next to the fan control to manually
increase or decrease the temperature inside
your vehicle.
wx(Passenger’s Temperature Controls):
Press these buttons next to the mode control to
manually increase or decrease the temperature for
the front passenger. If the passenger’s climate
control system is off, pressing one of these buttons
will turn it on.
PASS (Passenger’s Climate Control):Press
this button to turn the passenger’s climate control
systems on or off.
If the PASS button is pressed to turn the
passenger temperature setting off, the driver’s
temperature setting will control the temperature
for the entire vehicle.
Sensors
The solar sensor, located in the defrost grille,
middle of the instrument panel, monitors the solar
radiation. Do not cover the solar sensor or the
system will not work properly.
There is also an interior temperature sensor
located next to the steering wheel that measures
the temperature of the air inside your vehicle.
189
Page 190 of 496
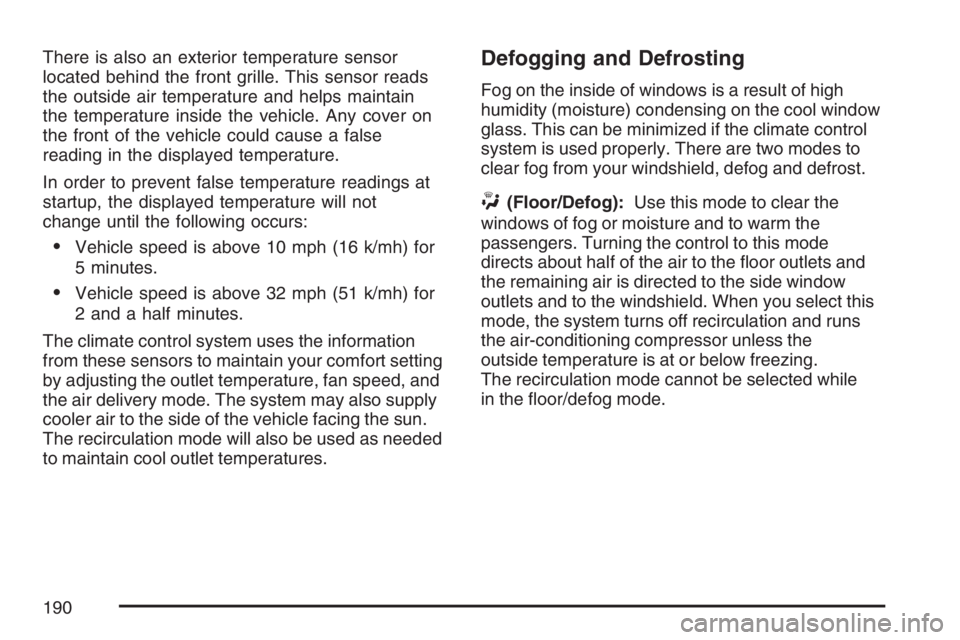
There is also an exterior temperature sensor
located behind the front grille. This sensor reads
the outside air temperature and helps maintain
the temperature inside the vehicle. Any cover on
the front of the vehicle could cause a false
reading in the displayed temperature.
In order to prevent false temperature readings at
startup, the displayed temperature will not
change until the following occurs:
Vehicle speed is above 10 mph (16 k/mh) for
5 minutes.
Vehicle speed is above 32 mph (51 k/mh) for
2 and a half minutes.
The climate control system uses the information
from these sensors to maintain your comfort setting
by adjusting the outlet temperature, fan speed, and
the air delivery mode. The system may also supply
cooler air to the side of the vehicle facing the sun.
The recirculation mode will also be used as needed
to maintain cool outlet temperatures.
Defogging and Defrosting
Fog on the inside of windows is a result of high
humidity (moisture) condensing on the cool window
glass. This can be minimized if the climate control
system is used properly. There are two modes to
clear fog from your windshield, defog and defrost.
W(Floor/Defog):Use this mode to clear the
windows of fog or moisture and to warm the
passengers. Turning the control to this mode
directs about half of the air to the �oor outlets and
the remaining air is directed to the side window
outlets and to the windshield. When you select this
mode, the system turns off recirculation and runs
the air-conditioning compressor unless the
outside temperature is at or below freezing.
The recirculation mode cannot be selected while
in the �oor/defog mode.
190